零基础入门python65:FastAPI 安全调用大模型API
一、上一篇课后练习讲解
上一篇练习围绕"依赖替换和AI假客户端"。参考做法是先运行上一篇的测试,再用一个成功请求和一个失败请求验证边界;本篇在同一项目上增加新能力。
上一篇课后练习完整答案
上一篇练习已经落实到完整文件,运行下面代码可以观察本篇要求的成功和失败状态;数据库写入全部放在明确事务边界内。
答案要点:dependency_overrides 将真实 AI 客户端替换为 FakeAI,测试无需网络;覆盖超时、结构化输出和错误响应。
完整答案文件:tests/conftest.py
完整参考答案文件
完整文件:tests/conftest.py
python
from app.main import app
from app.dependencies import get_ai_client
class FakeAI:
    def summarize(self, text):
        return {"summary": text[:20], "status": "ok"}
def override_ai():
    return FakeAI()
app.dependency_overrides[get_ai_client] = override_ai
验收:运行项目测试(FastAPI/Flask 使用 python -m pytest -q,Django 使用 python manage.py test),再按本文 curl 或 Docker 命令检查预期状态码。
完整参考答案文件
下面是交付项目中真实存在的完整文件 fastapi-blog/tests/conftest.py。它覆盖本篇新增逻辑以及前文已经完成的依赖代码;复制单个函数会丢失上下文,因此这里提供整份文件。
python
import pytest
from fastapi.testclient import TestClient
from sqlalchemy import create_engine
from sqlalchemy.orm import sessionmaker
from app.database import Base, get_db
from app.main import app

@pytest.fixture()
def client(tmp_path):
    engine = create_engine(f"sqlite:///{tmp_path/'test.db'}", connect_args={'check_same_thread': False})
    TestingSession = sessionmaker(bind=engine, expire_on_commit=False)
    Base.metadata.create_all(engine)
    def override_db():
        with TestingSession() as db: yield db
    app.dependency_overrides[get_db] = override_db
    with TestClient(app) as test_client: yield test_client
    app.dependency_overrides.clear()

@pytest.fixture()
def token(client):
    client.post('/api/auth/register', json={'email':'alice@example.com','password':'password123'})
    return client.post('/api/auth/login', data={'username':'alice@example.com','password':'password123'}).json()['access_token']

@pytest.fixture()
def headers(token): return {'Authorization': f'Bearer {token}'}
测试结束必须清空 dependency_overrides,否则后续测试可能继续使用假实现。Redis 也使用 FakeCache 验证命中、失效和降级路径。
二、本篇要解决的真实问题
API key 只从环境变量读取,设置请求超时和响应校验;失败时保留原文章,不把第三方错误直接暴露。
三、请求是怎样走完整条链路的
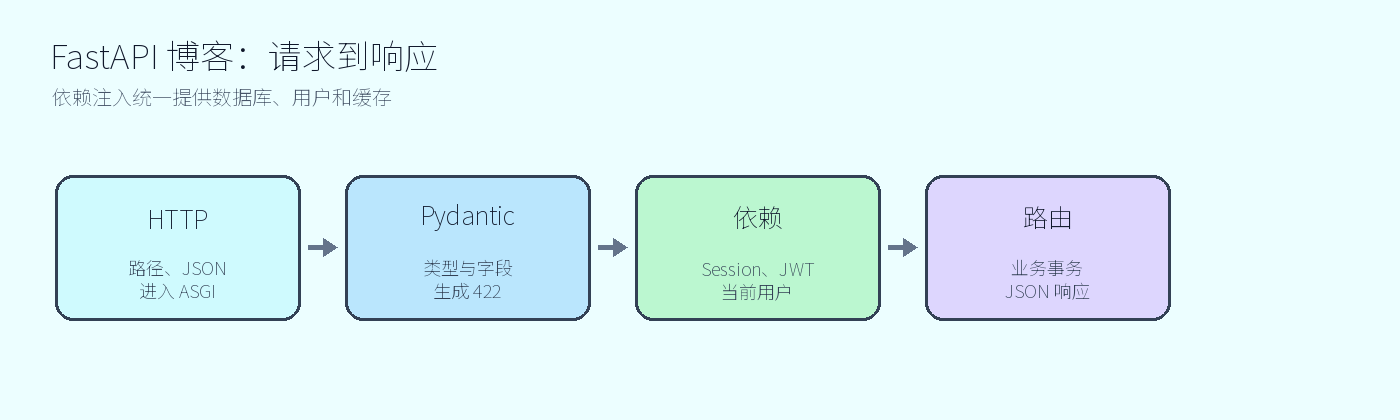
客户端请求 → 路由匹配 → Pydantic 校验 → Depends 注入用户/Session → SQLAlchemy 查询或业务服务 → 提交事务 → 响应模型序列化。每一步都有明确责任,排错时按这个顺序定位。
四、先看一个最小代码片段
python
@router.get("/api/health")
def health():
    return {"status": "ok"}
这里的注释不是装饰:它说明数据从哪里来、为什么不能相信客户端,以及失败时系统应保持什么状态。
五、完整文件代码
app/ai.py(当前阶段完整文件)
python
from typing import Protocol
from fastapi import APIRouter, Depends
from .dependencies import get_current_user
from .models import User
from .schemas import WritingRequest

class AIClient(Protocol):
    def suggest(self, content: str) -> dict: ...
class LocalAIClient:
    def suggest(self, content):
        return {'title': content[:20], 'summary': content[:80], 'tags': ['Python']}
def get_ai_client(): return LocalAIClient()
router = APIRouter(prefix='/api/ai', tags=['ai'])
@router.post('/writing-assistant')
def writing_assistant(body: WritingRequest, user: User = Depends(get_current_user), client: AIClient = Depends(get_ai_client)):
    return client.suggest(body.content)
阅读方法:先找路由函数,再找它的 Depends、输入 schema、数据库操作和 response_model;这五处合起来才是一个功能。
app/extras.py(当前阶段完整文件)
python
from pathlib import Path
from uuid import uuid4
from fastapi import APIRouter, BackgroundTasks, File, HTTPException, UploadFile
from fastapi.responses import StreamingResponse

router = APIRouter(prefix='/api/tools', tags=['tools'])
UPLOAD_DIR = Path('uploads')
ALLOWED_TYPES = {'image/png': '.png', 'image/jpeg': '.jpg'}

def write_audit_log(message: str):
    Path('audit.log').open('a', encoding='utf-8').write(message + '\n')

@router.post('/avatar')
async def upload_avatar(file: UploadFile = File(...)):
    suffix = ALLOWED_TYPES.get(file.content_type or '')
    if not suffix: raise HTTPException(415, '仅支持PNG和JPEG')
    content = await file.read(2 * 1024 * 1024 + 1)
    if len(content) > 2 * 1024 * 1024: raise HTTPException(413, '文件不能超过2MB')
    UPLOAD_DIR.mkdir(exist_ok=True)
    filename = f'{uuid4().hex}{suffix}'
    (UPLOAD_DIR / filename).write_bytes(content)
    return {'filename': filename, 'size': len(content)}

@router.post('/audit', status_code=202)
def create_audit(message: str, tasks: BackgroundTasks):
    tasks.add_task(write_audit_log, message)
    return {'queued': True}

async def event_stream():
    for text in ('正在分析', '正在生成标题', '生成完成'):
        yield f'event: message\ndata: {text}\n\n'
    yield 'event: done\ndata: [DONE]\n\n'

@router.get('/stream')
def stream():
    return StreamingResponse(event_stream(), media_type='text/event-stream')
阅读方法:先找路由函数,再找它的 Depends、输入 schema、数据库操作和 response_model;这五处合起来才是一个功能。
六、安装、启动与验收
powershell
..\..\.venv\Scripts\python.exe -m pip install -r requirements.txt
..\..\.venv\Scripts\python.exe -m pytest -q
..\..\.venv\Scripts\python.exe -m uvicorn app.main:app --reload
打开 /docs,按顺序完成注册、登录、创建文章、分页查询、修改删除、评论点赞。错误请求必须看到明确状态码:校验错误 422,未登录 401,无权限 403,重复点赞 409。测试应全部通过。
七、本篇验收清单
- 能指出输入校验发生在哪个 schema。
- 能解释 Session 何时提交、何时回滚。
- 能用第二个用户验证资源隔离。
- 能复现一个失败场景并说明原因。
八、课后练习
围绕"安全调用大模型API"新增一个测试用例,写出请求、预期响应和断言;下一篇开头会给出参考实现,并继续使用本项目。
五、安全调用大模型 API:提示词也是不可信输入
调用模型前限制正文长度、设置客户端超时、从环境变量读取密钥。模型返回 JSON 后再次用 Pydantic 校验,不能直接写库。
python
async def call_model(content: str) -> AISuggestion:
    api_key = os.environ["MODEL_API_KEY"]
    payload = {"input": content[:10000], "temperature": 0.2}
    async with httpx.AsyncClient(timeout=8.0) as client:
        response = await client.post("https://example.invalid/v1/generate",
                                     headers={"Authorization": f"Bearer {api_key}"},
                                     json=payload)
        response.raise_for_status()
    return AISuggestion.model_validate(response.json())
超时、429、5xx 都应转为可解释的降级或 503,不能透传供应商堆栈。给模型的正文要和系统指令分隔,防止提示词注入。验收时把密钥设为空、把地址改为不可达,确认响应没有泄露 key。
六、当前项目中的完整文件(对照阅读)
七、供应商调用的重试边界
只对网络超时和 502/503 做有限次数指数退避,收到 400 或内容违规时不要重试。每次重试都可能重复计费,必须结合供应商的幂等键。httpx 客户端设置连接、读取和总超时,不能只设置一个无限等待。
密钥轮换时旧进程可能仍使用旧环境变量,发布脚本应滚动重启并检查新请求的响应头或审计记录,绝不在日志打印密钥片段。
八、补充代码文件
九、把供应商 SDK 隔离在适配器
路由只依赖 AIClient,OpenAI、其他供应商或本地模型各实现一个适配器。适配器负责认证、超时、重试、响应解析和供应商错误映射;业务层只接收 AISuggestion。
python
class ProviderError(RuntimeError):
    pass

class RemoteAIClient:
    def __init__(self, http_client, api_key: str):
        self.http_client = http_client
        self.api_key = api_key

    async def suggest(self, content: str) -> AISuggestion:
        try:
            response = await self.http_client.post(...)
            response.raise_for_status()
            return AISuggestion.model_validate(response.json())
        except (httpx.TimeoutException, httpx.HTTPStatusError) as exc:
            raise ProviderError("model temporarily unavailable") from exc
这样供应商升级只影响一个文件;测试可以替换整个适配器,不必连接互联网。
本篇结束:完整模块文件
本节不是代码片段,而是本篇结束时该模块的完整版本。请先备份旧文件,再整体替换;替换后重新运行本篇命令和测试。阅读时重点看本篇新增的函数、事务边界和错误处理,未涉及的代码先不要自行删减。
app/ai.py
python
from typing import Protocol
from fastapi import APIRouter, Depends
from .dependencies import get_current_user
from .models import User
from .schemas import WritingRequest

class AIClient(Protocol):
    def suggest(self, content: str) -> dict: ...
class LocalAIClient:
    def suggest(self, content):
        return {'title': content[:20], 'summary': content[:80], 'tags': ['Python']}
def get_ai_client(): return LocalAIClient()
router = APIRouter(prefix='/api/ai', tags=['ai'])
@router.post('/writing-assistant')
def writing_assistant(body: WritingRequest, user: User = Depends(get_current_user), client: AIClient = Depends(get_ai_client)):
    return client.suggest(body.content)