一、前言
添加验证码大致可以分为三个步骤:根据随机数生成验证码图片;将验证码图片显示到登录页面;认证流程中加入验证码校验。Spring Security的认证校验是由UsernamePasswordAuthenticationFilter过滤器完成的,所以我们的验证码校验逻辑应该在这个过滤器之前。下面一起学习下如何在上一节Spring Security自定义用户认证的基础上加入验证码校验功能。
二、生成图形验证码
2.1 引入依赖
xml
        <dependency>
            <groupId>com.github.axet</groupId>
            <artifactId>kaptcha</artifactId>
            <version>0.0.9</version>
        </dependency>
2.2 kaptcha配置
增加kaptcha配置类
KaptchaConfig.java
java
@Configuration
public class KaptchaConfig {
    @Bean
    public DefaultKaptcha producer() {
        Properties properties = new Properties();
        properties.put("kaptcha.border", "no");
        properties.put("kaptcha.image.width","110");
        properties.put("kaptcha.image.height","45");
        properties.put("kaptcha.textproducer.font.size","35");
        properties.put("kaptcha.textproducer.font.color", "black");
        properties.put("kaptcha.textproducer.char.length", "5");
        Config config = new Config(properties);
        DefaultKaptcha defaultKaptcha = new DefaultKaptcha();
        defaultKaptcha.setConfig(config);
        return defaultKaptcha;
    }
}
kaptcha可配置项:
| 配置项 | 含义 | 默认值 |
|---|---|---|
| kaptcha.border | 是否有边框 | 默认为true 我们可以自己设置yes,no |
| kaptcha.border.color | 边框颜色 | 默认为Color.BLACK |
| kaptcha.border.thickness | 边框粗细度 | 默认为1 |
| kaptcha.producer.impl | 验证码生成器 | 默认为DefaultKaptcha |
| kaptcha.textproducer.impl | 验证码文本生成器 | 默认为DefaultTextCreator |
| kaptcha.textproducer.char.string | 验证码文本字符内容范围 | 默认为abcde2345678gfynmnpwx |
| kaptcha.textproducer.char.length | 验证码文本字符长度 | 默认为5 |
| kaptcha.textproducer.font.names | 验证码文本字体样式 | 默认为new Font("Arial", 1, fontSize), new Font("Courier", 1, fontSize) |
| kaptcha.textproducer.font.size | 验证码文本字符大小 | 默认为40 |
| kaptcha.textproducer.font.color | 验证码文本字符颜色 | 默认为Color.BLACK |
| kaptcha.textproducer.char.space | 验证码文本字符间距 | 默认为2 |
| kaptcha.noise.impl | 验证码噪点生成对象 | 默认为DefaultNoise |
| kaptcha.noise.color | 验证码噪点颜色 | 默认为Color.BLACK |
| kaptcha.obscurificator.impl | 验证码样式引擎 | 默认为WaterRipple |
| kaptcha.word.impl | 验证码文本字符渲染 | 默认为DefaultWordRenderer |
| kaptcha.background.impl | 验证码背景生成器 | 默认为DefaultBackground |
| kaptcha.background.clear.from | 验证码背景颜色渐进 | 默认为Color.LIGHT_GRAY |
| kaptcha.background.clear.to | 验证码背景颜色渐进 | 默认为Color.WHITE |
| kaptcha.image.width | 验证码图片宽度 | 默认为200 |
| kaptcha.image.height | 验证码图片高度 | 默认为50 |
2.3 定义验证码对象
java
@Getter
@Setter
public class ImageCode {

    private BufferedImage image;

    private String code;

    private LocalDateTime expireTime;

    public ImageCode(BufferedImage image, String code, int expireIn) {
        this.image = image;
        this.code = code;
        this.expireTime = LocalDateTime.now().plusSeconds(expireIn);
    }

    public ImageCode(BufferedImage image, String code, LocalDateTime expireTime) {
        this.image = image;
        this.code = code;
        this.expireTime = expireTime;
    }

    public boolean isExpire() {
        return LocalDateTime.now().isAfter(expireTime);
    }

}
2.4 生成验证码
接着定义一个ValidateCodeController,用于处理生成验证码请求:
java
@RestController
public class ValidateController {

    @Autowired
    private Producer captchaProducer;

    @GetMapping(value = {"/captcha","/captcha.do","/code/image"})
    public void getKaptchaImage(HttpServletResponse response, HttpSession session) throws Exception {
        response.setDateHeader("Expires", 0);
        response.setHeader("Pragma", "no-cache");
        response.setHeader("Cache-Control", "no-store, no-cache, must-revalidate");
        response.addHeader("Cache-Control", "post-check=0, pre-check=0");
        response.setContentType("image/jpeg");
        ImageCode imageCode = createImageCode();
        session.setAttribute(Constants.KAPTCHA_SESSION_KEY, imageCode.getCode());
        ServletOutputStream out = response.getOutputStream();
        ImageIO.write(imageCode.getImage(), "jpg", out);
    }

    private ImageCode createImageCode() {
        int expireIn = 60; // 验证码有效时间 60s
        //生成验证码
        String capText = captchaProducer.createText();
        BufferedImage image = captchaProducer.createImage(capText);
        return new ImageCode(image, capText, expireIn);
    }

}
createImageCode方法用于生成验证码对象,生成验证码的方法写好后,接下来开始改造登录页面。
三、改造登录
3.1 登录页改造
在登录页面加上如下代码:
html
        <span style="display: inline">
            <input type="text" name="imageCode" placeholder="验证码" style="width: 50%;"/>
            <img src="/code/image"/>
        </span>
标签的src属性对应ValidateController的createImageCode方法。
3.2 配置改造
要使生成验证码的请求不被拦截,需要在BrowserSecurityConfig的configure方法中配置免拦截:
java
    @Override
    protected void configure(HttpSecurity http) throws Exception {
        http.formLogin() // 表单登录
                // http.httpBasic() // HTTP Basic
                //.loginPage("/login.html")
                .loginPage("/authentication/require") // 登录跳转 URL
                .loginProcessingUrl("/login")
                .successHandler(authenticationSucessHandler) // 处理登录成功
                .failureHandler(authenticationFailureHandler) // 处理登录失败
                .and()
                .authorizeRequests() // 授权配置
                //.antMatchers("/login.html").permitAll()
                .antMatchers("/authentication/require", "/login.html", "/code/image").permitAll() // 登录跳转 URL 无需认证
                .anyRequest()  // 所有请求
                .authenticated() // 都需要认证
                .and().csrf().disable();
    }
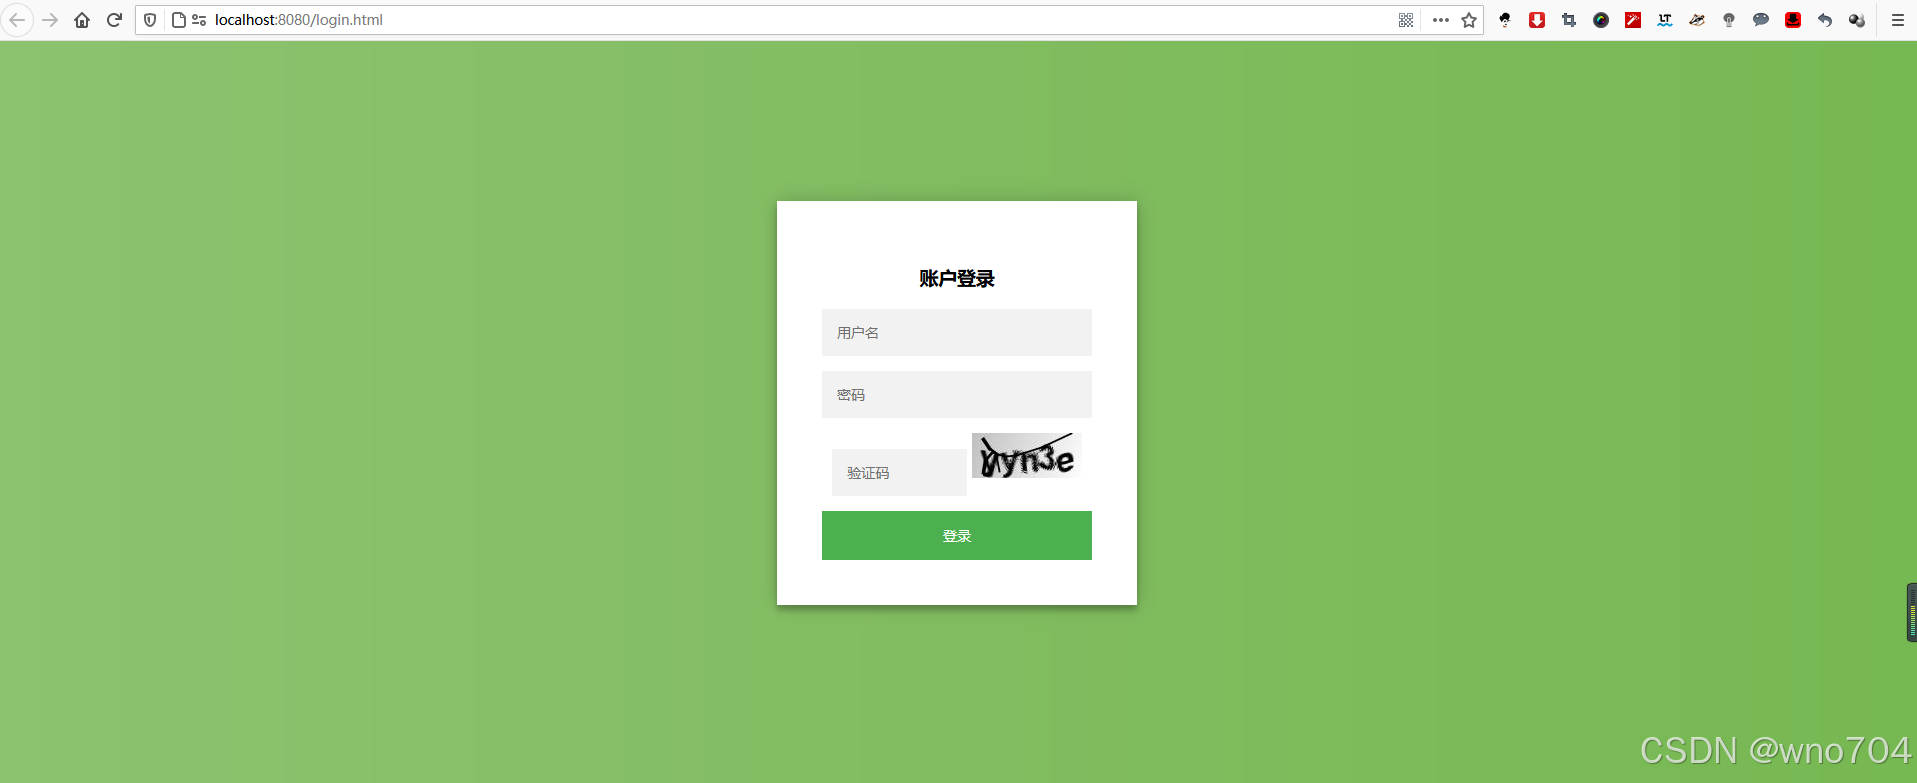
3.3 测试
重启项目,访问http://localhost:8080/login.html,效果如下:
四、认证流程添加验证码校验
4.1 定义异常类型
在校验验证码的过程中,可能会抛出各种验证码类型的异常,比如"验证码错误"、"验证码已过期"等,所以我们定义一个验证码类型的异常类:
java
public class ValidateCodeException extends AuthenticationException {

    private static final long serialVersionUID = 5022575393500654458L;

    public ValidateCodeException(String msg) {
        super(msg);
    }

}注意:这里继承的是AuthenticationException而不是Exception。
4.2 验证码校验过滤器
我们都知道,Spring Security实际上是由许多过滤器组成的过滤器链,处理用户登录逻辑的过滤器为UsernamePasswordAuthenticationFilter,而验证码校验过程应该是在这个过滤器之前的,即只有验证码校验通过后采去校验用户名和密码。由于Spring Security并没有直接提供验证码校验相关的过滤器接口,所以我们需要自己定义一个验证码校验的过滤器ValidateCodeFilter:
java
@Component
@Slf4j
public class ValidateCodeFilter extends OncePerRequestFilter {

    @Autowired
    private AuthenticationFailureHandler authenticationFailureHandler;

    @Override
    protected void doFilterInternal(HttpServletRequest request, HttpServletResponse response, FilterChain filterChain) throws ServletException, IOException {
        if(request.getRequestURI().equals("/login")&&request.getMethod().equalsIgnoreCase("post")){
            try {
                validate(request);
            } catch (ValidateCodeException e) {
                authenticationFailureHandler.onAuthenticationFailure(request,response,e);
                return;
            }
        }
        // 3. 校验通过,就放行
        filterChain.doFilter(request, response);
    }

    /* 验证保存在session的验证码和表单提交的验证码是否一致 */
    private void validate(HttpServletRequest request) throws ServletRequestBindingException {
        String captcha = ServletRequestUtils.getStringParameter(request, "imageCode");
        String code = (String) request.getSession().getAttribute(Constants.KAPTCHA_SESSION_KEY);
        ImageCode codeInSession = (ImageCode) request.getSession().getAttribute("imageCodeObj");
        log.info("获取提交的code:{}",captcha);
        log.info("获取保存的code:{}",code);
        if (StringUtils.isBlank(captcha)) {
            throw new ValidateCodeException("验证码不能为空!");
        }
        if (codeInSession == null) {
            throw new ValidateCodeException("验证码不存在!");
        }
        if (codeInSession.isExpire()) {
            request.getSession().removeAttribute(request.getParameter("imageCodeObj"));
            throw new ValidateCodeException("验证码已过期!");
        }
        if(!code.equalsIgnoreCase(captcha)){
            throw new ValidateCodeException("验证码不正确!");
        }
        request.getSession().removeAttribute(request.getParameter("imageCodeObj"));
        request.getSession().removeAttribute(request.getParameter(Constants.KAPTCHA_SESSION_KEY));
    }
}
ValidateCodeFilter继承了org.springframework.web.filter.OncePerRequestFilter,该过滤器只会执行一次。
在doFilterInternal方法中我们判断了请求URL是否为/login,该路径对应登录form表单的action路径,请求的方法是否为POST,是的话进行验证码校验逻辑,否则直接执行filterChain.doFilter让代码往下走。当在验证码校验的过程中捕获到异常时,调用Spring Security的校验失败处理器AuthenticationFailureHandler进行处理。
我们分别从Session中获取了ImageCode对象和请求参数imageCode(对应登录页面的验证码 <input> 框name属性),然后进行了各种判断并抛出相应的异常。当验证码过期或者验证码校验通过时,我们便可以删除Session中的ImageCode属性了。
4.3 配置改造
验证码校验过滤器定义好了,怎么才能将其添加到UsernamePasswordAuthenticationFilter前面呢?很简单,只需要在BrowserSecurityConfig的configure方法中添加些许配置即可:
java
@Configuration
@EnableWebSecurity
@EnableGlobalMethodSecurity(prePostEnabled = true) //开启security注解
public class BrowserSecurityConfig extends WebSecurityConfigurerAdapter {

    @Autowired
    private MyAuthenticationSucessHandler authenticationSucessHandler;

    @Autowired
    private MyAuthenticationFailureHandler authenticationFailureHandler;

    @Autowired
    private ValidateCodeFilter validateCodeFilter;

    @Bean
    public PasswordEncoder passwordEncoder() {
        return new BCryptPasswordEncoder();
    }

    @Override
    protected void configure(HttpSecurity http) throws Exception {
        http.addFilterBefore(validateCodeFilter, UsernamePasswordAuthenticationFilter.class) // 添加验证码校验过滤器
                .formLogin() // 表单登录
                // http.httpBasic() // HTTP Basic
                //.loginPage("/login.html")
                .loginPage("/authentication/require") // 登录跳转 URL
                .loginProcessingUrl("/login")
                .successHandler(authenticationSucessHandler) // 处理登录成功
                .failureHandler(authenticationFailureHandler) // 处理登录失败
                .and()
                .authorizeRequests() // 授权配置
                //.antMatchers("/login.html").permitAll()
                .antMatchers("/authentication/require", "/login.html", "/code/image").permitAll() // 登录跳转 URL 无需认证
                .anyRequest()  // 所有请求
                .authenticated() // 都需要认证
                .and().csrf().disable();
    }

    @Override
    public void configure(WebSecurity web) throws Exception {
        //解决静态资源被拦截的问题
        web.ignoring().antMatchers("/css/**");
    }

}
上面代码中,我们注入了ValidateCodeFilter,然后通过addFilterBefore方法将ValidateCodeFilter验证码校验过滤器添加到了UsernamePasswordAuthenticationFilter前面。
4.4 测试
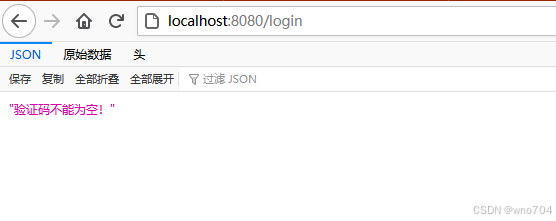
大功告成,重启项目,访问http://localhost:8080/login.html,当不输入验证码时点击登录,页面显示如下:
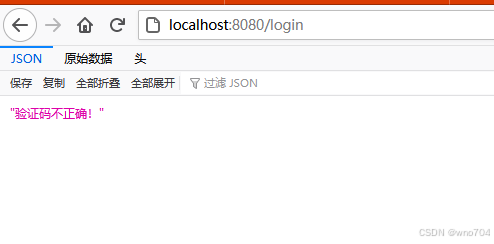
当输入错误的验证码时点击登录,页面显示如下:
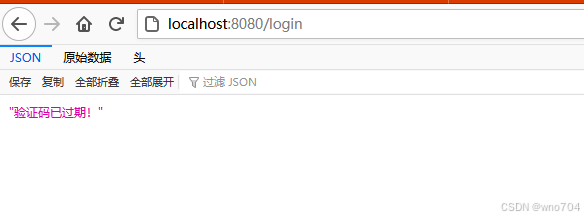
当页面加载60秒后再输入验证码点击登录,页面显示如下:
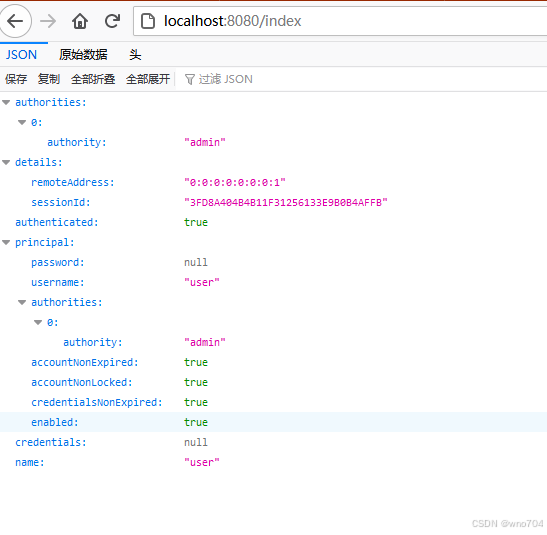
当验证码通过,并且用户名密码正确时,页面显示如下: