I2C 上那串芯片告一段落。今天换一根高低电平------人体感应。脚号不能猜,悬空会恒报有人。
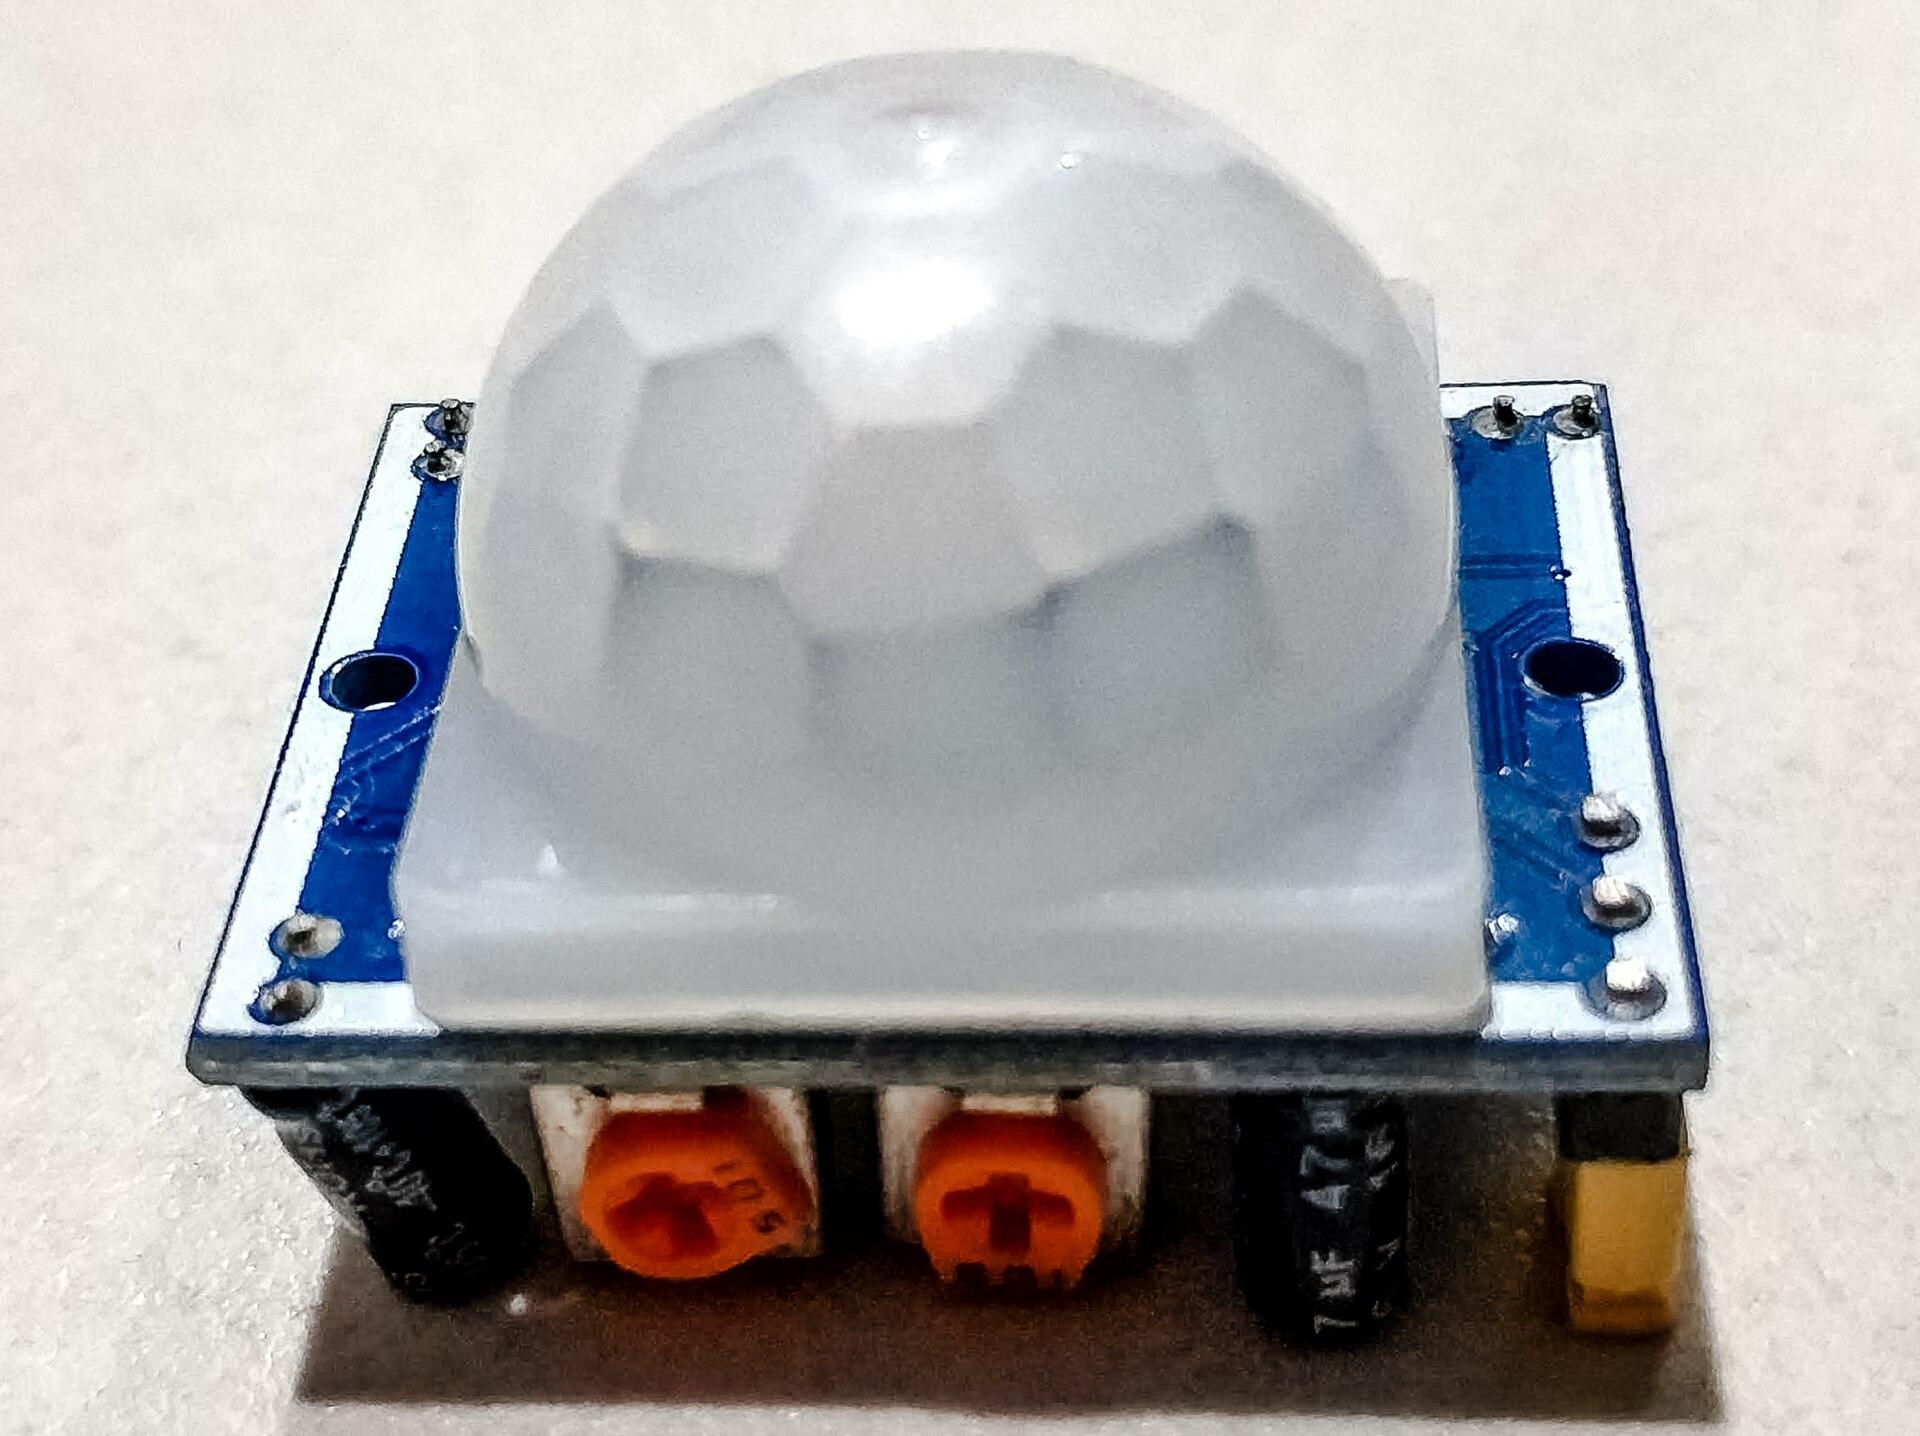
这一章不谈 I2C,也不谈 UART。人体感应模块对外就一根数字脚:有人经过,电平翻一下;没人,电平待在另一边。软件上它就是 Linux 的 sysfs GPIO。听起来简单,现场却最容易把脚号写错。
我第一次测这块模块的时候,应用默认读的是 GPIO74 。模块上的指示灯跟着挥手亮灭,屏幕上的数字却永远是 1。我以为极性反了,把「高=有人」改成「低=有人」,文字跟着反,数字还是 1。后来把模块拔掉,gpio74 仍然是 1。那一刻才明白:74 这根脚根本没接到 PIR 的 OUT 上,它只是一根被内部上拉的悬空脚。
真脚是 GPIO73 ,也就是 GPIO2_B1。挥手,0 和 1 立刻对翻。本章把这条排查链原样写下来,再给你完整的 C 和 ArkTS。不要再靠丝印和设备树注释猜脚号。
1. 通信怎么走
PIR 模块内部是热释电探头加比较器。人体红外变化超过阈值,比较器翻转,OUT 脚输出高或低。SoC 这边只要把对应 GPIO 配成输入,周期读 value。
人体经过
    │
    ▼
PIR 探头 + 比较器
    │  OUT(数字 0/1)
    ▼
底板扩展排针上的某根 GPIO
    │  本板实测:GPIO2_B1 = linux gpio 73
    ▼
内核 gpiochip  →  /sys/class/gpio/gpio73/value
    │
    ▼
用户态:C 工具 / NAPI gpioRead / ArkTS 页面它不是 I2C 设备。i2cdetect 扫不到它。同插槽上如果还坐着手势芯片 PAJ7620(第 38 章,地址 0x73),那是另一条总线、另一套代码。PIR 只认 GPIO。
同排针上往往还有别的 GPIO。有人把超声波、电机、PIR 画在同一组注释里,脚号就串台。记住:节点在设备树里,不在塑料外壳里。拔掉模块,sysfs 的数字不会自己变成「没接」。悬空脚被上拉,读出来就是恒 1。
2. Linux GPIO 编号,先会算
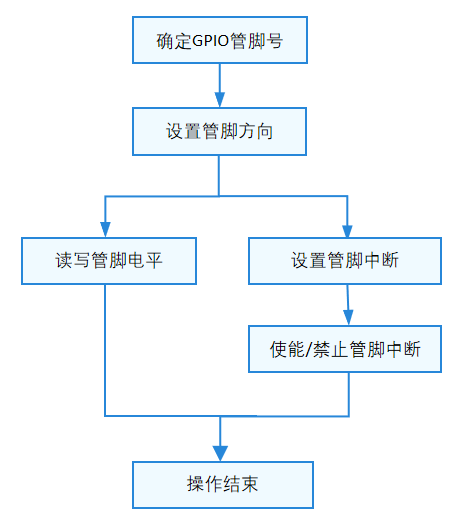
RK3568 的 GPIO 按 bank 切:GPIO0、GPIO1、GPIO2、GPIO3、GPIO4。每个 bank 32 个脚,组内再按 A/B/C/D 各 8 个。
linux 编号 = bank × 32 + 组内偏移 + 位号

组内偏移:A=0  B=8  C=16  D=24
位号:0~7
几个本章用得到的例子:
| 原理图名字 | 计算 | linux 编号 |
|---|---|---|
| GPIO2_B1 | 2×32 + 8 + 1 | **73** |
| GPIO2_B2 | 2×32 + 8 + 2 | **74** |
| GPIO0_B3 | 0×32 + 8 + 3 | **11**(第 40 章 MQ-2 会用到,也是 I2C1 SCL) |
| GPIO0_C1 | 0×32 + 16 + 1 | 17(uart0 TX,第 42 章) |
板上核对 bank 基址:
hdc shell "cat /sys/kernel/debug/gpio" | head -40你应当看到类似:
gpiochip0: GPIOs 0-31, parent: platform/fdd60000.gpio, GPIO0:
gpiochip1: GPIOs 32-63, parent: platform/fe760000.gpio, GPIO1:
gpiochip2: GPIOs 64-95, parent: platform/fe770000.gpio, GPIO2:
gpiochip3: GPIOs 96-127, parent: platform/fe780000.gpio, GPIO3:
GPIO2 从 64 起,B1 是 64+8+1=73。数字对不上,先别写应用,先把这张表抄到笔记本上。
3. 一次把 74 证伪、把 73 坐实
下面是现场原样。hdc 已经连上,当前用户是 root。模块插在扩展排针上,指示灯能跟着挥手亮。
3.1 先按「想当然的 74」读
hdc shell "echo 74 > /sys/class/gpio/export"
hdc shell "echo in > /sys/class/gpio/gpio74/direction"
hdc shell "cat /sys/class/gpio/gpio74/value"
输出:
1挥手,再 cat,还是 1。连续读十次:
hdc shell "for i in 1 2 3 4 5 6 7 8 9 10; do cat /sys/class/gpio/gpio74/value; sleep 0.3; done"

1
1
1
1
1
1
1
1
1
1
模块灯在闪,数字不闪。有人会说「极性反了」。极性反的意思是:有人时是 0,没人时是 1,总会有一边能翻。现在是完全不翻。
看 debugfs:
hdc shell "cat /sys/kernel/debug/gpio" | grep gpio-74

 gpio-74  (sysfs               ) in  hi
内核也认为它是输入、高电平。配置没有写错。脚上就是高。
3.2 拔掉模块
把 PIR 模块从排针上拔下来,再读:
hdc shell "cat /sys/class/gpio/gpio74/value"还是 1。
这一步是铁证。如果 74 真接到了 OUT,拔掉之后要么变高阻被内部上拉(也可能仍是 1),要么漂。但结合「插着时挥手灯亮、数字不翻」一起看:灯亮证明模块 OUT 在动,数字不动证明 OUT 没接到 74 这根 SoC 脚上。74 只是一根空脚,上拉后恒 1。
3.3 改试 73
hdc shell "echo 73 > /sys/class/gpio/export"
hdc shell "echo in > /sys/class/gpio/gpio73/direction"
hdc shell "cat /sys/class/gpio/gpio73/value"
空闲可能是 0 或 1,取决于模块极性和你人站的位置。关键是挥手:
hdc shell "for i in 1 2 3 4 5 6 7 8 9 10 11 12 13 14 15 16 17 18 19 20; do cat /sys/class/gpio/gpio73/value; sleep 0.25; done"对着探头挥手时,输出会变成类似:
0
0
1
1
1
0
0
1
1
0
0 和 1 对翻,和模块灯同步。73 才是真脚。
debugfs:
hdc shell "cat /sys/kernel/debug/gpio" | grep 'gpio-73\|gpio-74'

 gpio-73  (sysfs               ) in  lo
 gpio-74  (sysfs               ) in  hi
挥手时 gpio-73 的 lo/hi 会变,gpio-74 永远 hi。
3.4 脚号是怎么标错的
设备树里有一个「一堆 GPIO 列在一起」的节点,注释写着某号扩展口。列表去注释之后,索引大致是:
索引 0 → GPIO1_A0 → linux 32
索引 1 → GPIO1_A1 → linux 33
索引 2 → GPIO2_B2 → linux 74
索引 3 → GPIO2_B1 → linux 73
一份现成的人体感应例程用 of_get_gpio(np, 3),取的是索引 3,也就是 GPIO2_B1 = 73。应用和注释却一直把「第 2 项」的 74 当成 PIR。注释还把节点标到了另一个插槽号上。
教训只有一句:脚号以实测翻转为准,以驱动取 GPIO 的索引为准,不以注释和丝印为准。 原理图、连接器名、DTS 行尾注释,三份对不上是常态。
4. 上电 1~2 分钟,不要立刻判故障
PIR 探头内部有稳定时间。上电之后大约 1~2 分钟 ,有的模块会一直输出「有人」那一侧电平。模块灯可能常亮,sysfs 可能一直是 1。
这不是脚错。这是初始化。
正确测法:
- 插好模块,上电。
- 人走开,等满两分钟。看门狗那章如果没关,这段时间板子不该自己复位。
- 两分钟后再开监测循环。
- 在探头前方 1~3 米走动或挥手,看
value翻不翻。 - 人离开,电平应回到空闲值,并稳定。
两分钟内报「一直检测到人」,把这句话写进应用提示,不要写成缺陷。客户现场最常见的误报,就是上电 20 秒就下结论。
如果两分钟之后,人在探头正前方挥手,数字仍然恒定:
- 先确认读的是 73,不是 74;
- 再确认模块灯有没有跟着动(灯动、数字不动 = 脚错;灯也不动 = 模块没供电或坏了);
- 灯动且 73 仍不翻,换一根空闲 GPIO 扫(下面有扫描脚本思路);
- 73 能翻,但文字和动作反着,那是极性,改判定,不要改脚号。
5. 极性以模块为准
没有统一的「高电平=有人」。有的模块 OUT 上拉,有人拉低;有的相反。板上没有额外的极性电路,直进 SoC。
所以应用不要写死「1 就是有人」。正确姿势是:
- 先跑监测,看空闲值是 0 还是 1;
- 人走过,看它翻到另一边;
- 把「空闲值」记成无人,「翻转后的值」记成有人;
- 页面上给一个「对调极性」按钮,方便现场模块换货。
本章示例代码默认 高电平=有人,因为手头那块模块是这样。你的模块如果相反,把判定对调即可。监测循环能告诉你该不该对调:挥手时数字翻了,文字却说无人,就是极性反了。
6. sysfs 接口本身
内核 CONFIG_GPIO_SYSFS 打开时(本产品默认开着),节点是:
/sys/class/gpio/export
/sys/class/gpio/unexport
/sys/class/gpio/gpioN/direction
/sys/class/gpio/gpioN/value
/sys/class/gpio/gpioN/edge
/sys/class/gpio/gpioN/active_low
root 导出 73:
echo 73 > /sys/class/gpio/export
echo in > /sys/class/gpio/gpio73/direction
cat /sys/class/gpio/gpio73/value
direction 写成 in。写成 out 会把脚驱成输出,可能和模块 OUT 对顶,轻则读数乱,重则伤脚。PIR 只做输入。
active_low 保持 0。极性在应用里处理,不要和 sysfs 的 active_low 叠两层,排障时你会不知道是谁反的。
edge 可以设 rising / falling / both,然后 poll() value 做边沿等待。PIR 演示用 300 ms 轮询足够。人走过不是微秒级事件。
导出失败常见原因:
| 现象 | 原因 |
|---|---|
| `write error: Device or resource busy` | 这根脚已经被 pinctrl 或别的驱动要走 |
| `write error: Invalid argument` | 编号超出 gpiochip 范围 |
| `Permission denied` | 当前进程不是 root,HAP 就是这种情况 |
| 目录已经存在 | 已经 export 过,不必再写 export,直接设 direction |
已经被驱动占用的脚,不要跟它抢。PIR 用 73 时,确认没有别的节点把 GPIO2_B1 写进 pinctrl-0。
hdc shell "cat /sys/kernel/debug/pinctrl/pinctrl-rockchip/pinmux-pins" | grep -i 'gpio2-9\|2-b1\|gpio73'grep 的关键字按你内核 debugfs 格式改。看到这根脚已经标成别的功能(uart / i2c / pwm),先改设备树腾脚,再 export。
7. HAP 为什么自己 export 不了
ArkTS 应用跑在非 root 进程里。/sys/class/gpio/export 的权限通常是:
hdc shell "ls -l /sys/class/gpio/export"

--w------- 1 root root 4096 1970-01-01 08:00 /sys/class/gpio/export
只有 root 能写。HAP 里这段 C:
int ef = open("/sys/class/gpio/export", O_WRONLY);
if (ef >= 0) {
    write(ef, "73", 2);
    close(ef);
}
open 直接返回 -1,errno 是 EACCES。后面再 open("/sys/class/gpio/gpio73/value"),目录根本不存在,还是 -1。应用层看到的就是 gpioRead 返回 -1,「读取失败」。
有人在 hdc shell 里手动 export 一次,应用立刻能读------因为 shell 是 root。重启之后又失败。这不是应用偶发 bug,是权限模型。
解决办法只有一条:开机用 root 服务预导出,并把 value、direction 改成 0666 。HAP 只 open + read,不再碰 export。
SELinux 在本产品 bring-up 阶段是 permissive,挡你的是 DAC(文件 owner/mode),不是 seclabel。交付若改成 enforcing,还要给 HAP 补策略,那是后话。现在先把 mode 放到 0666。
8. 开机放权脚本(完整)
板级路径按教程代号:
device/board/rk/rk3568_evb/board_perm/board-perm.sh
device/board/rk/rk3568_evb/board_perm/etc/board-perm.cfg
device/board/rk/rk3568_evb/board_perm/BUILD.gn
脚本装到 /vendor/bin/board-perm.sh。init 配置装到 /vendor/etc/init/board-perm.cfg。开源鸿蒙的 init 会加载 vendor 下这批 cfg,不必改 init.rk30board.cfg 本体;你若更想写进 init.rk30board.cfg 的 services 数组,效果一样。两种挂法下面都给。
board-perm.sh 全文。PIR 用 73,下一章 MQ-2 用 11,一次导出两个,免得写两份服务:
#!/system/bin/sh
# 开机一次性:预导出数字输入脚,并放开 HAP 能读的节点。
# 以 root 跑。once=1,跑完退出。

TAG="BOARD_PERM"
log() { echo "[$TAG] $*"; }

log "gpio 预导出开始"

# 11 = MQ-2 DO(GPIO0_B3,与 i2c1 SCL 共球,导出失败见第 40 章)
# 73 = PIR OUT(GPIO2_B1,实测确认;74 是悬空脚,不要再导出 74 当 PIR)
for g in 11 73; do
    if [ ! -d /sys/class/gpio/gpio$g ]; then
        echo $g > /sys/class/gpio/export 2>/dev/null
    fi
    echo in > /sys/class/gpio/gpio$g/direction 2>/dev/null
    chmod 0666 /sys/class/gpio/gpio$g/value 2>/dev/null
    chmod 0666 /sys/class/gpio/gpio$g/direction 2>/dev/null
done

# 给串口留一行自检,现场一眼能看出导没导上
for g in 11 73; do
    if [ -d /sys/class/gpio/gpio$g ]; then
        log "gpio$g: direction=$(cat /sys/class/gpio/gpio$g/direction) value=$(cat /sys/class/gpio/gpio$g/value)"
    else
        log "gpio$g: 导出失败。73 查 pinctrl;11 查是否被 i2c1 占用"
    fi
done

log "gpio 预导出结束"etc/board-perm.cfg:
{
    "services" : [{
            "name" : "board-perm",
            "path" : ["/system/bin/sh", "/vendor/bin/board-perm.sh"],
            "uid" : "root",
            "gid" : ["root"],
            "once" : 1,
            "console" : 1,
            "sandbox" : 0,
            "start-mode" : "boot",
            "secon" : "u:r:su:s0"
        }
    ]
}
要点:
uid必须是 root,否则写不了export。once= 1,不要做成常驻守护。console= 1,日志进串口,开机搜[BOARD_PERM]。sandbox= 0,让它能碰到/sys。start-mode= boot,尽量早跑。gpiochip 一般在这之前已经注册。
如果 gpiochip 枚举偏晚,给脚本加几秒重试:
i=0
while [ $i -lt 8 ]; do
    [ -e /sys/class/gpio/export ] && break
    i=$((i + 1))
    sleep 1
done
BUILD.gn 骨架(产品 part 名按你的仓库改,教程写成 device_rk3568_evb):
import("//build/ohos.gni")

ohos_prebuilt_etc("board_perm_script") {
  source = "board-perm.sh"
  module_install_dir = "bin"
  part_name = "device_rk3568_evb"
  install_images = [ chipset_base_dir ]
  install_enable = true
}

ohos_prebuilt_etc("board_perm_init_cfg") {
  source = "etc/board-perm.cfg"
  relative_install_dir = "init"
  part_name = "device_rk3568_evb"
  install_images = [ chipset_base_dir ]
  install_enable = true
}

group("board_perm_group") {
  deps = [
    ":board_perm_init_cfg",
    ":board_perm_script",
  ]
}
chipset_base_dir 是 vendor,所以脚本进 vendor.img 。改完这组文件,重打 vendor,刷 mmcblk1p8(SD)或对应 eMMC 的 vendor 分区。只重装 HAP 不会让预导出生效。
另一种挂法,写进 device/board/rk/rk3568_evb/ 下实际生效的 init.rk30board.cfg(记住硬件名是 rk30board,改 init.rk3568.cfg 不会被加载):
{
    "name" : "board-perm",
    "path" : ["/system/bin/sh", "/vendor/bin/board-perm.sh"],
    "uid" : "root",
    "gid" : ["root"],
    "once" : 1,
    "console" : 1,
    "sandbox" : 0,
    "start-mode" : "boot"
}
塞进该 cfg 的 services 数组。cmds 里不要夹注释字符串,整份服务会解析失败。两种挂法选一种即可,不要挂两次。
临时验证、还没重打 vendor 时,root 手动跑一遍:
hdc shell "echo 73 > /sys/class/gpio/export"
hdc shell "echo in > /sys/class/gpio/gpio73/direction"
hdc shell "chmod 0666 /sys/class/gpio/gpio73/value /sys/class/gpio/gpio73/direction"
hdc shell "ls -l /sys/class/gpio/gpio73/value"
期望:
-rw-rw-rw- 1 root root 4096 ... /sys/class/gpio/gpio73/value然后非 root 的 HAP 才能 open 成功。
9. 完整 C:gpio_watch.c
这是给 root 或已经预导出之后用的命令行工具。它在还没导出时会尝试自己 export(失败就打印 errno,不再假装成功)。循环打印电平,方便你对着探头挥手。
/* gpio_watch.c
 * OpenHarmony 用户态 32 位 musl。
 * 用法:
 *   gpio_watch 73
 *   gpio_watch 73 300
 * 第二个参数是间隔毫秒,默认 300。
 */
#include <errno.h>
#include <fcntl.h>
#include <stdio.h>
#include <stdlib.h>
#include <string.h>
#include <unistd.h>

static int write_str(const char *path, const char *s)
{
    int fd = open(path, O_WRONLY);
    if (fd < 0)
        return -1;
    ssize_t n = write(fd, s, strlen(s));
    close(fd);
    return (n == (ssize_t)strlen(s)) ? 0 : -1;
}

static int gpio_export(int num)
{
    char dir[64];
    snprintf(dir, sizeof(dir), "/sys/class/gpio/gpio%d", num);
    if (access(dir, F_OK) == 0)
        return 0; /* 已经导出 */

    char buf[8];
    int len = snprintf(buf, sizeof(buf), "%d", num);
    int fd = open("/sys/class/gpio/export", O_WRONLY);
    if (fd < 0) {
        fprintf(stderr, "open export: %s(HAP 非 root 会在这里失败)\n",
                strerror(errno));
        return -1;
    }
    ssize_t n = write(fd, buf, (size_t)len);
    int err = errno;
    close(fd);
    if (n < 0) {
        fprintf(stderr, "write export %d: %s\n", num, strerror(err));
        return -1;
    }
    usleep(50000); /* 等内核建目录 */
    return 0;
}

static int gpio_set_in(int num)
{
    char path[64];
    snprintf(path, sizeof(path), "/sys/class/gpio/gpio%d/direction", num);
    if (write_str(path, "in") < 0) {
        fprintf(stderr, "direction: %s\n", strerror(errno));
        return -1;
    }
    return 0;
}

static int gpio_read(int num)
{
    char path[64];
    snprintf(path, sizeof(path), "/sys/class/gpio/gpio%d/value", num);
    int fd = open(path, O_RDONLY);
    if (fd < 0)
        return -1;
    char c = 0;
    ssize_t n = read(fd, &c, 1);
    close(fd);
    if (n <= 0)
        return -1;
    if (c == '0')
        return 0;
    if (c == '1')
        return 1;
    return -1;
}

int main(int argc, char **argv)
{
    if (argc < 2) {
        fprintf(stderr, "usage: %s <gpio> [interval_ms]\n", argv[0]);
        return 1;
    }
    int num = atoi(argv[1]);
    int interval = (argc >= 3) ? atoi(argv[2]) : 300;
    if (num < 0 || interval < 20) {
        fprintf(stderr, "bad args\n");
        return 1;
    }

    if (gpio_export(num) < 0)
        return 1;
    if (gpio_set_in(num) < 0)
        return 1;

    printf("watching gpio%d every %d ms, Ctrl-C to stop\n", num, interval);
    printf("PIR: 上电 1-2 分钟内恒值是初始化,不是故障\n");

    int last = -2;
    int flips = 0;
    int samples = 0;
    for (;;) {
        int v = gpio_read(num);
        samples++;
        if (v < 0) {
            printf("read gpio%d failed: %s\n", num, strerror(errno));
            return 1;
        }
        if (v != last && last >= 0)
            flips++;
        printf("gpio%d=%d  samples=%d flips=%d  %s\n",
               num, v, samples, flips,
               (v == 1) ? "HIGH" : "LOW");
        last = v;
        usleep((useconds_t)interval * 1000);
    }
    return 0;
}
编译必须走开源鸿蒙的 32 位 musl 工具链,不要用 aarch64-linux-gnu-gcc:
OHOS=$HOME/code/opcode/OpenHarmony   # 改成你的源码根
CLANG=$OHOS/prebuilts/clang/ohos/linux-x86_64/llvm/bin/clang
SYSROOT=$OHOS/prebuilts/ohos-sdk/linux/11/native/sysroot

$CLANG --target=arm-linux-ohos --sysroot=$SYSROOT \
  -O2 -Wall \
  -Wl,--dynamic-linker=/system/lib/ld-musl-arm.so.1 \
  -o gpio_watch gpio_watch.c

file gpio_watch
# 期望:ELF 32-bit LSB executable, ARM, ... interpreter /system/lib/ld-musl-arm.so.1
丢到板上:
hdc file send gpio_watch /data/local/tmp/gpio_watch
hdc shell chmod 0755 /data/local/tmp/gpio_watch
先对比 74 和 73:
hdc shell "/data/local/tmp/gpio_watch 74 200"挥手十秒,flips 应接近 0。Ctrl-C 停掉。
hdc shell "/data/local/tmp/gpio_watch 73 200"等过初始化,再挥手,flips 往上加。空闲时 flips 停住。这就是验收。
如果你在 HAP 里链了同样的 gpio_export(),没有预导出时它会打印 open export: Permission denied。这正是我们要的失败,不要把它吞掉改成返回 0。
10. NAPI:gpioRead 只读 value
应用侧 native 不要再写 export。开机服务做完脏活,HAP 只读:
/* napi 片段:gpioRead(num) → 0/1,失败 -1 */
static napi_value GpioRead(napi_env env, napi_callback_info info)
{
    size_t argc = 1;
    napi_value a[1];
    napi_get_cb_info(env, info, &argc, a, nullptr, nullptr);
    int num = -1;
    napi_get_value_int32(env, a[0], &num);

    int val = -1;
    if (num >= 0) {
        char p[64];
        snprintf(p, sizeof(p), "/sys/class/gpio/gpio%d/value", num);
        int fd = open(p, O_RDONLY);
        if (fd >= 0) {
            char c = 0;
            if (read(fd, &c, 1) > 0)
                val = (c == '1') ? 1 : 0;
            close(fd);
        }
    }
    napi_value ret;
    napi_create_int32(env, val, &ret);
    return ret;
}
对比「自作聪明」的版本:读失败就去写 export。在 HAP 里那一步永远失败 ,还会让你误以为「偶发权限」。两种进程、两套权限,不要混在一个函数里。命令行工具可以 export;libboard.so 不要 export。
index.d.ts:
export const gpioRead: (num: number) => number;11. ArkTS 页面
import board from 'libboard.so';

@Entry
@Component
struct PirPage {
  @State gpioNum: string = '73';
  @State live: string = '-';
  @State detect: string = '';
  @State hint: string = '上电满 2 分钟后再点监测。默认脚 73,不是 74。';
  @State watching: boolean = false;
  @State highIsPerson: boolean = true; /* 极性:true=高有效 */
  private timer: number = -1;

  aboutToDisappear() {
    this.stop();
  }

  detectText(v: number): string {
    if (v < 0) {
      return '';
    }
    let person: boolean = this.highIsPerson ? (v === 1) : (v === 0);
    return person ? '检测到人' : '无人';
  }

  readOnce() {
    let n: number = parseInt(this.gpioNum);
    if (Number.isNaN(n)) {
      this.hint = 'GPIO 号填数字';
      return;
    }
    let v: number = board.gpioRead(n);
    this.live = v < 0 ? 'ERR' : v.toString();
    this.detect = this.detectText(v);
    if (v < 0) {
      this.hint = 'gpio' + n + ' 读不到。HAP 不能 export,检查开机 board-perm 是否预导出 73,value 是否 0666。';
    } else {
      this.hint = '当前 ' + (v === 1 ? '高' : '低') + '。对着探头挥手,看监测是否 0/1 翻转。';
    }
  }

  toggle() {
    if (this.watching) {
      this.stop();
      return;
    }
    let n: number = parseInt(this.gpioNum);
    if (Number.isNaN(n)) {
      this.hint = 'GPIO 号填数字';
      return;
    }
    let probe: number = board.gpioRead(n);
    if (probe < 0) {
      this.hint = 'gpio' + n + ' 读不到,先查放权脚本。';
      return;
    }
    this.watching = true;
    this.hint = '监测中:人走开看空闲值,再挥手看翻转。翻了但文字反了,点「对调极性」。';
    this.live = probe.toString();
    this.detect = this.detectText(probe);
    this.timer = setInterval(() => {
      let v: number = board.gpioRead(n);
      this.live = (v < 0) ? 'ERR' : v.toString();
      this.detect = this.detectText(v);
    }, 300);
  }

  stop() {
    if (this.timer >= 0) {
      clearInterval(this.timer);
      this.timer = -1;
    }
    this.watching = false;
  }

  build() {
    Column({ space: 10 }) {
      Text('人体感应 PIR').fontSize(20).fontWeight(FontWeight.Bold)
      Text('真脚是 GPIO73(GPIO2_B1)。74 悬空恒 1,不要再用。')
        .fontSize(13)
      Text('上电 1~2 分钟初始化期内恒「有人」是正常的。')
        .fontSize(13)
      Row() {
        Text('GPIO').margin({ right: 8 })
        TextInput({ text: this.gpioNum })
          .width(80)
          .onChange((v: string) => { this.gpioNum = v; })
        Button('读一次').onClick(() => { this.readOnce(); }).margin({ left: 8 })
        Button(this.watching ? '停止监测' : '监测 PIR')
          .onClick(() => { this.toggle(); })
          .margin({ left: 8 })
      }
      Button(this.highIsPerson ? '极性:高=有人(点此对调)'
                               : '极性:低=有人(点此对调)')
        .onClick(() => { this.highIsPerson = !this.highIsPerson; })
      Text('实时电平: ' + this.live).fontSize(18)
      Text(this.detect).fontSize(22).fontWeight(FontWeight.Bold)
      Text(this.hint).fontSize(14)
    }
    .padding(16)
    .width('100%')
  }
}
横屏页面不要给 Column 写死 height: '100%' 再往里塞按钮,末尾条目会被导航栏挡住。第 67 章细讲。这里控件少,先保证监测循环跑在 UI 线程 300 ms 一次只读一个字节,不会卡。
12. 不需要专用内核驱动
有的 Linux 例程会写一个 misc 字符设备,compatible 绑那串 GPIO 列表,of_get_gpio 取索引,再 gpio_direction_input,用户态 ioctl 读电平。开源鸿蒙侧完全可以不跟这条路。sysfs 已经把脚交给用户态了。
不写驱动的好处:
- 改脚号不用重编内核;
- 没有
compatible抢绑; - 排障用
cat value,和应用读的是同一条路径。
坏处是 HAP 权限要靠放权脚本。这是一笔划得来的账。超声波、电机那种要精确时序的,才值得进内核。PIR 的时序是「人走过去」,毫秒级轮询足够。
如果设备树里已经有一个占着 GPIO2_B1 的节点且 status = "okay",而它的驱动会申请这根脚,sysfs export 会 busy。把那个节点 disabled,或者别让它申请 B1。PIR 和那个节点不能同时要同一根脚。
13. 排障过程,按这个顺序走
把下面当成检查单。每一步都有命令,不要跳。
第一步:确认读的是哪根脚。
hdc shell "ls -d /sys/class/gpio/gpio7*"看到 gpio73 而不是只有 gpio74。
第二步:root 读 73 和 74,拔插对比。
插着模块读两根;拔掉再读两根。74 两遍都是 1,73 插着能翻、拔掉可能恒定------73 才是候选。
第三步:看 debugfs 有没有被别的名字占住。
hdc shell "cat /sys/kernel/debug/gpio" | grep 'gpio-73'sysfs 表示当前是你在用。若名字是某个驱动,先解决冲突。
第四步:权限。
hdc shell "ls -l /sys/class/gpio/gpio73/value"
hdc shell "ls -l /sys/class/gpio/export"
value 必须 rw-rw-rw-,否则 HAP 读 -1。export 保持 root 可写即可,不要 0666 给所有人 export,没必要。
第五步:等两分钟。
秒表看着。初始化期内不要改代码。
第六步:监测翻转,再谈极性。
gpio_watch 73 的 flips 增加,功能就通了。文字反了只改 highIsPerson。
第七步:应用仍 -1。
hdc shell "ps -A | grep board-perm"
hdc shell "grep BOARD_PERM /dev/kmsg"
# 或串口回看开机 [BOARD_PERM] gpio73: 已导出
服务没起来,查 vendor 里有没有 /vendor/bin/board-perm.sh、/vendor/etc/init/board-perm.cfg。没有就是没打进 vendor,不是应用写错。
hdc shell "ls -l /vendor/bin/board-perm.sh /vendor/etc/init/board-perm.cfg"第八步:脚仍然恒定,灯也不亮。
量模块 VCC、GND。探头窗口不要贴胶带。有的模块背面有灵敏度电位器,拧到极端会永远触发或永远不触发。
14. 验收
同时满足才算过:
gpio73已导出,direction=in,value权限 0666。- 上电满 2 分钟后,人离开,电平稳定在空闲值(连续 10 秒
flips不再增加)。 - 在探头前 1~3 米走动或挥手,
gpio_watch 73看到0↔1,flips明显增加。 - 人离开,回到空闲值。
- HAP 页面监测同样翻转。HAP 没有 自己写
export也能读。 gpio_watch 74在插着和拔掉模块时都几乎不翻。74 不作为 PIR 脚写进任何默认值。
不要用「灯亮了」当软件验收。灯可以只接在模块本地,和 SoC 脚无关------本章开头那个坑就是这样。
路径清单
| 路径 | 干什么 |
|---|---|
| `device/board/rk/rk3568_evb/kernel/*.dts` | 不要把 GPIO2_B1 交给别的 okay 节点 |
| `device/board/rk/rk3568_evb/board_perm/board-perm.sh` | 预导出 11、73,chmod 0666 |
| `device/board/rk/rk3568_evb/board_perm/etc/board-perm.cfg` | init 一次性 root 服务 |
| `/sys/class/gpio/gpio73/value` | 用户态读电平 |
| `/sys/kernel/debug/gpio` | 核对编号和占用者 |
| `/vendor/bin/board-perm.sh` | 板上实际跑的脚本 |
| `libboard.so` 的 `gpioRead` | HAP 只读,不 export |
系列第 39 篇 · 芯片:瑞芯微 RK3568 · OpenHarmony 4.1(API 11) · Linux 5.10