路由器的基本配置
实验目的
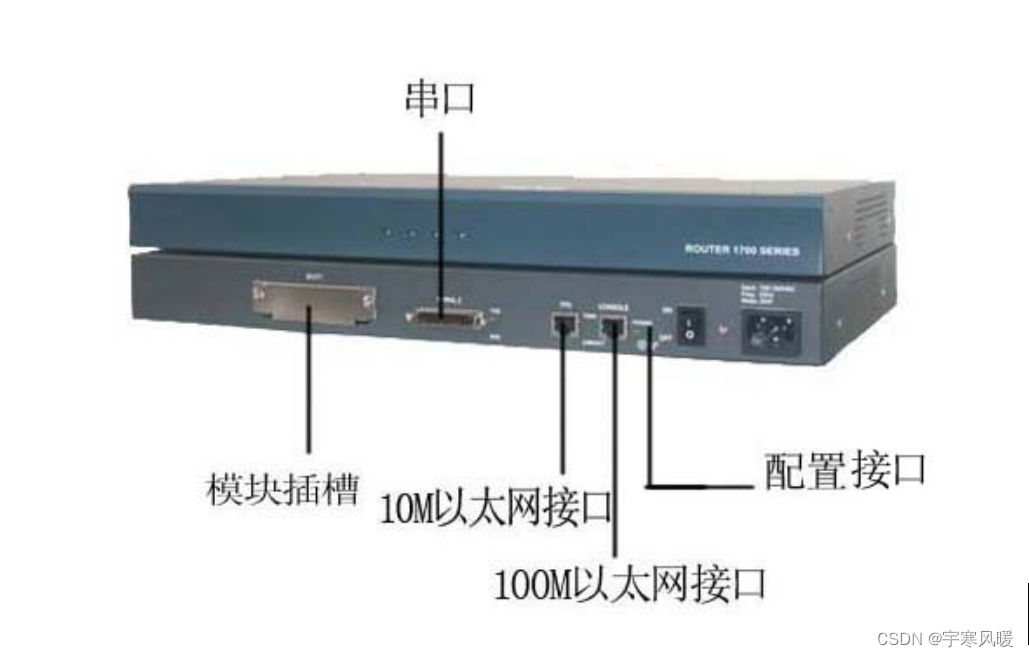
- 熟悉路由各接口的外观、接口的功能、接口的表示方法;
- 掌握带外的管理方法:通过接口console配置;
- 掌握带内的管理方法:通过方式telnet配置;
- 掌握带内的管理方法:通过方式web配置;
路由器接口功能:
以太网接口(Ethernet Interface):用于连接到局域网或广域网,传输数据包。
串口接口(Serial Interface):通常用于连接到宽带(如DSL、T1/E1线路)或连接到其他路由器。
无线接口(Wireless Interface):用于无线网络连接,如Wi-Fi。
虚拟接口(Virtual Interface):用于创建逻辑接口,如虚拟局域网(VLAN)、隧道接口(Tunnel Interface)等。
带外管理方法:
通过控制台(Console)配置:通过物理串口连接路由器,使用控制台命令行界面(CLI)进行设备配置和管理。
带内管理方法:
通过Telnet配置:通过网络连接到路由器,使用Telnet协议远程登录设备,并在命令行界面进行设备配置和管理。
通过Web配置:通过Web浏览器连接到路由器的管理界面,使用图形用户界面(GUI)进行设备配置和管理。通常需要先通过Telnet或Console配置一些基本网络参数和管理权限,然后才能通过Web配置。
应用环境
路由器是三层设备,主要功能是进行路径选择和广域网的连接。与交换机相比,接口数量要少很多,但功能要强大的多,这些功能在外观上就是接口、模块的类型比较多,当然价格有很大的差异,通常高端的设备都是模块化的,支持的模块类型也很丰富。
实验设备
(1)DCR 路由器1
(2) PC机1台、console线揽、网线各1条
实验拓扑
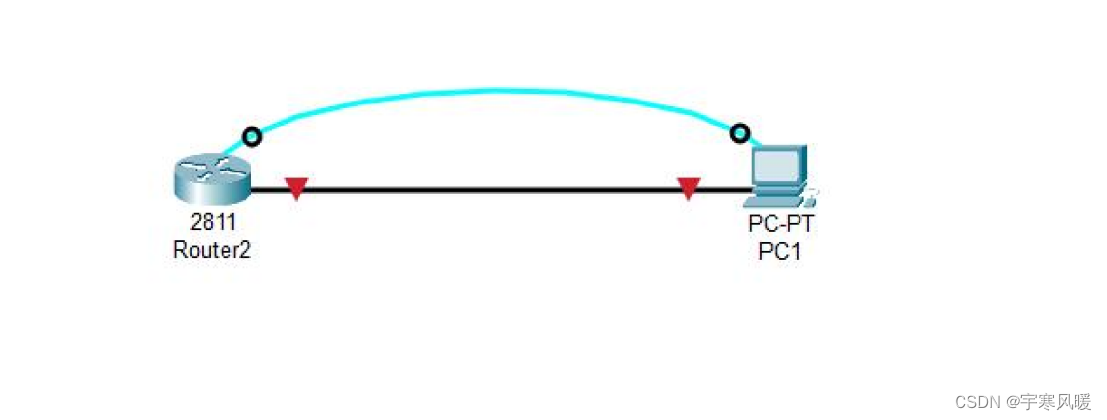
实验要求
(1)以太网接口有100M和10M之分
(2)注意观察接口和模块上的标志
(3)注意插槽上标号,从靠近电源开始,依次是0、1、2、3
(4)各接口也从0开始的
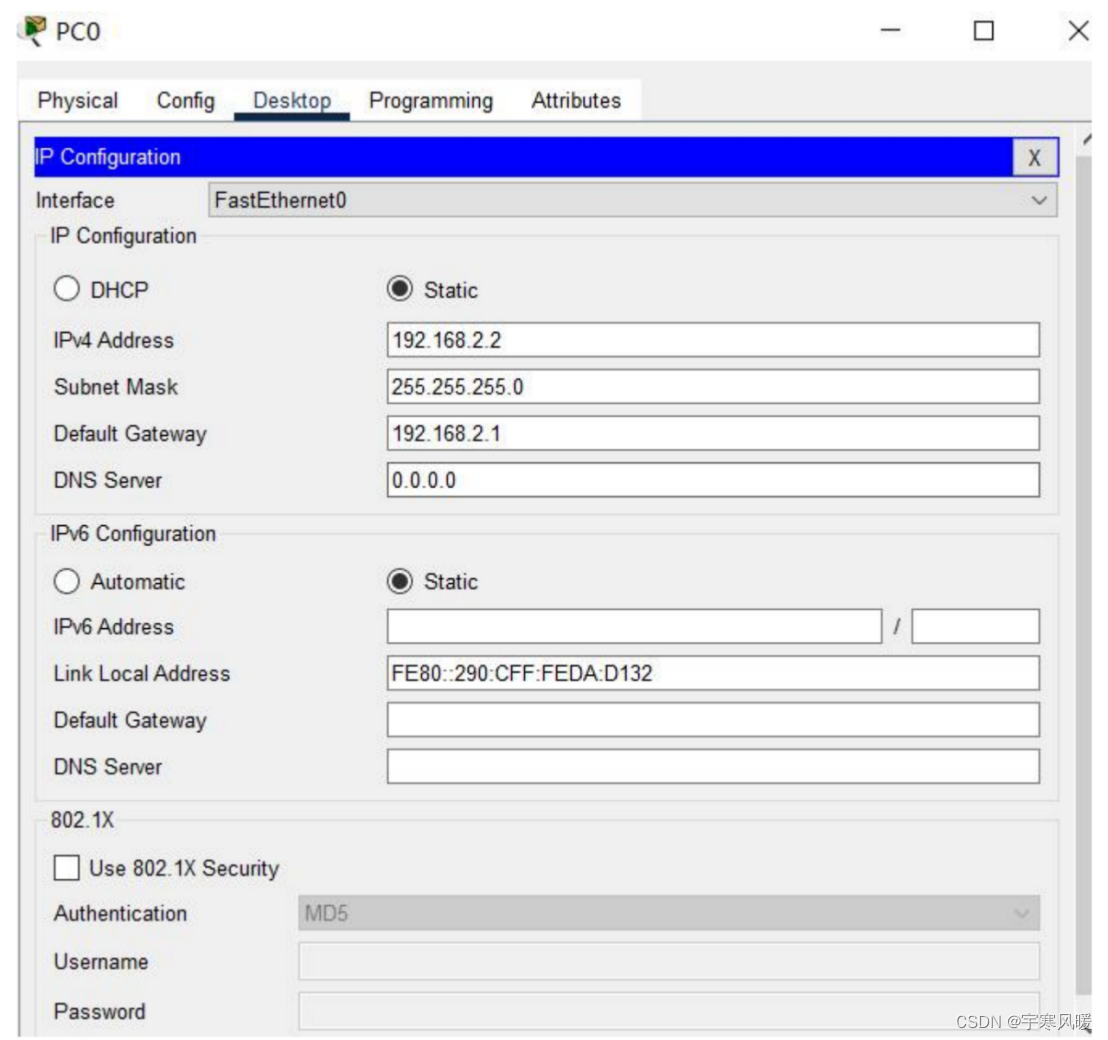
(5)DCR-170的console口与PC的COM口使用console线连接;F0/0与PC的网卡使用交叉双胶线连接,并分别配置192.168.2.1和192.168.2.2的C类地址。
路由接口标准配置和作用:(以DCR1700系列为例)
- 一个固定的Console接口,用于本地配置路由器或路由器的软件升级。
- 分别有10/100M自适应的RJ45以太网接口,主要用来连接以太网。
- DCR-1751有一个模块扩展插槽,DCR1750有三个模块扩展插槽,可以选用下表中的各种模块(部分)
|----|---------------|-------------------|-------|-------|-------|
| 序号 | 模块名称 | 模块描述 | Slot1 | Slot2 | Slot3 |
| 1 | MR-WIC-1ETH | 单路10M以网接口卡 | yes | yes | / |
| 2 | MR-WIC-2ETH | 双路10M以太网接口卡 | yes | yes | / |
| 3 | MR-WIC-1T | 单路同步/异步串口卡 | yes | yes | / |
| 4 | MR-WIC-2T | 双路同步/异步串口卡 | yes | yes | / |
| 5 | MR-WIC-1E1T | 单路10M以太网+单同步异步串口卡 | yes | yes | / |
| 6 | MR-WIC-1CE1 | 单路E1接口卡 | / | yes | / |
| 7 | MR-WIC-1B-S/T | 单路ISDNBRIS/T接口卡 | / | yes | / |
| 8 | MR-VIC-2FXS | 双口FXS语音接口卡 | yes | yes | yes |
| 9 | MR-VIC-2FXO | 双口FXO语音接口卡 | yes | yes | yes |
| 10 | MR-VIC-2E&M | 双口E&M语音接口卡 | yes | yes | yes |
| 11 | MR-EIC-8A | 8路异步通信卡 | yes | yes | yes |
注意事项和排错
(1)加装和拆卸模块一定要先关闭电源
(2)串口不要带电插拨
实验步骤 :( 本地管理 )
第一步:将配置线的一端与路由器的console口连接,另一端与PC口的串口相连。
第二步:在PC上运行终端防震程序.点击"开始",找到"程序",选择"附件"下的"通讯",运行"超级终端"程序,同时需要设置终端的硬件系数(包括串口号);
波特率:9600
数据位:8
奇偶校验:无
停止位:1
流倥:无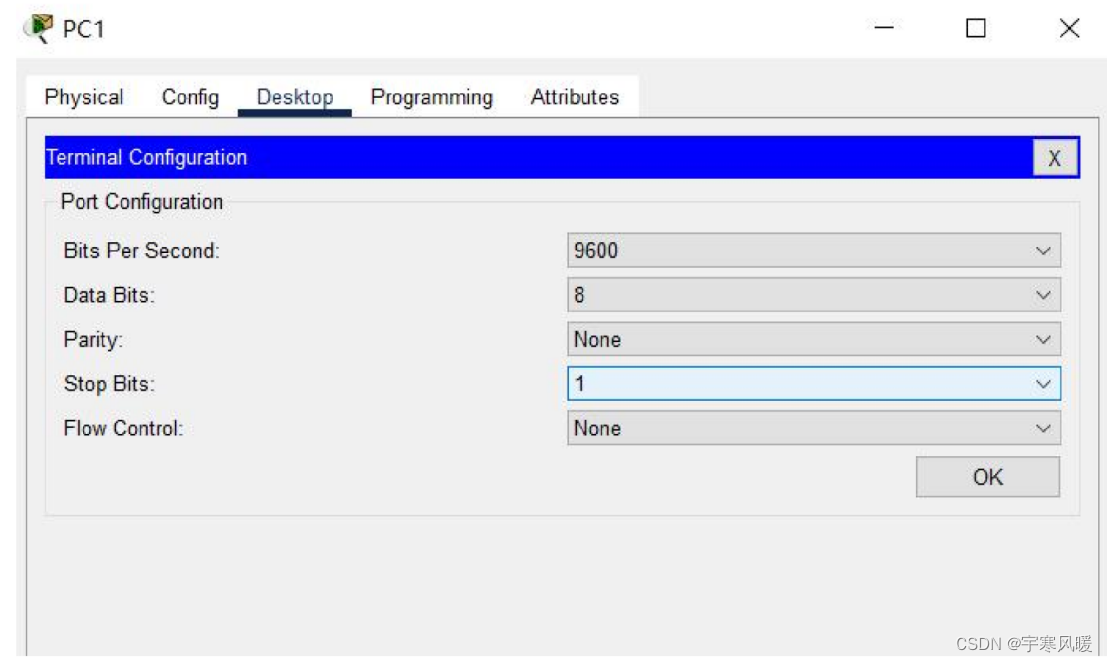
第三步:路由器加电,超级终端会显示路由器信息,自检结束后会出现命令提示"Press RETURN to get started".
System Bootstrap,version 0.1.8
Serial num:(C)1996-2000by China DigitalChinaCO.LTD
DCR-1700 Processor MPC860T@50Mhz
The current time :2067-9-12 6:31:30
Loading DCR-1700.bin......
Start Decompress DCR-1702.bin
###############################################################################################################################################################################################################################################################################################################Decompress 3587414
byte,Please wait systemup..
DigtalChina Internetwork Oprating Software
DCR-1700 Series Software ,Version 1.3.2E,RELEASE SOFTWARE
System start up OK
Router console 0 is now available
press RETURN to get started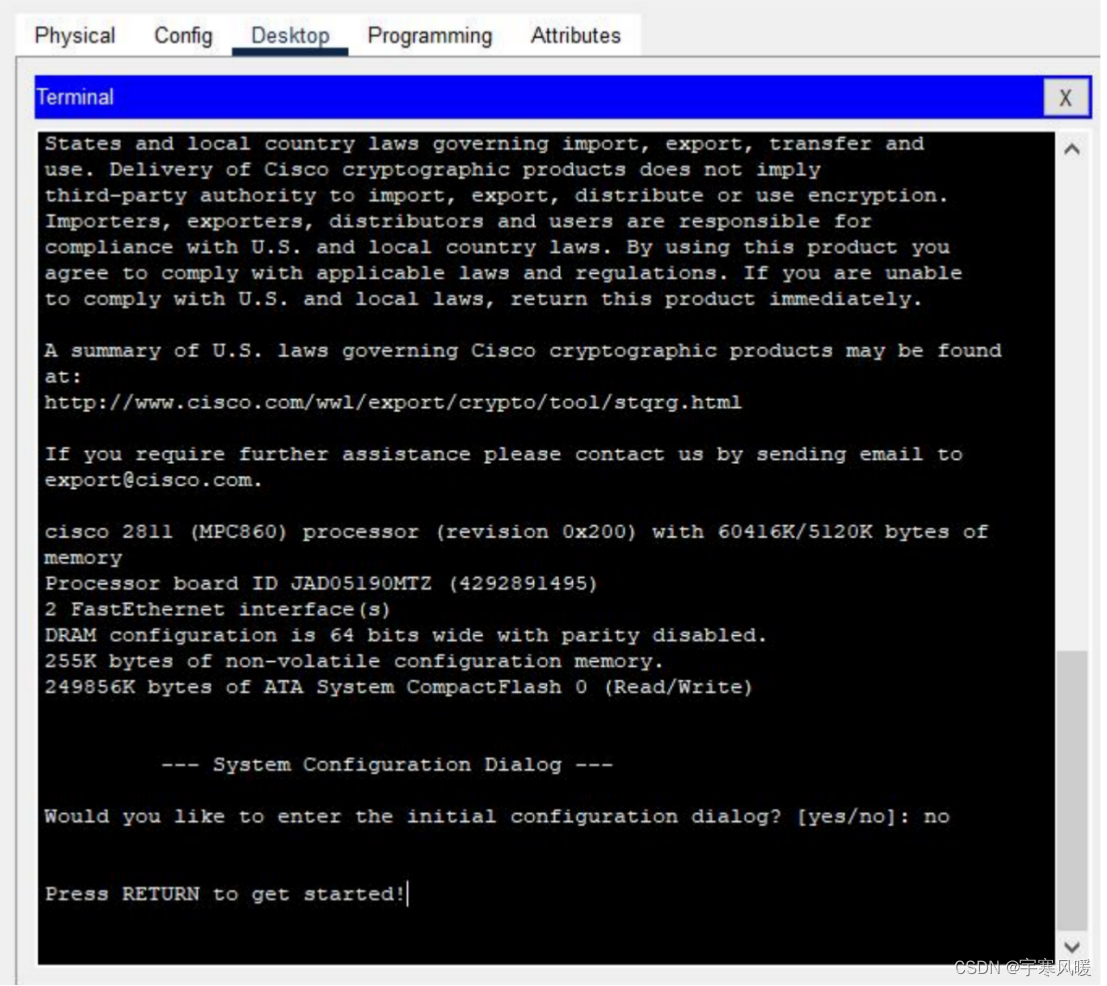
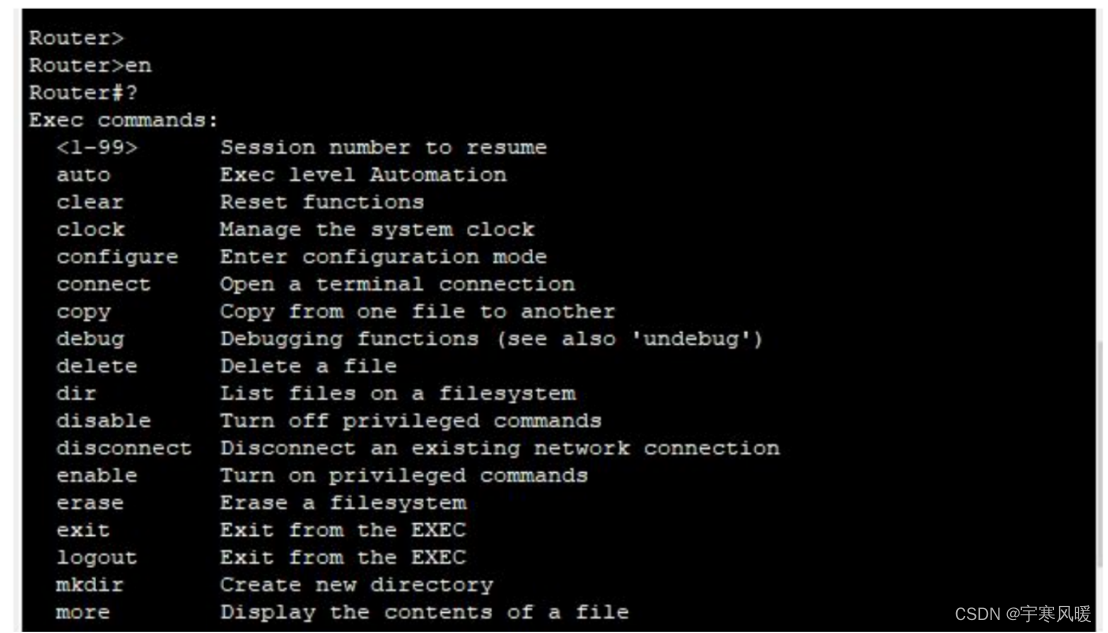
第四步:按回车键进入用户配置模式.DCR路由器出厂时没有定义密码,用户按回车键直接进入普通模式,可以使用权限允许范围内的命令,需要帮助可以随时键入"?",输入enable,敲回车则进入超级用户模式,这时候用户拥有最大权限,可以任务配置,需要帮助可以随时键入"?"
Rout-A>enable //进入特权模式
Rouer-A#2004-1-1 00:04:39 User DEFFAULT enter privilege mode from console 0,level=15
Rouer-A#? //查看用户的命令
cd --Change directory
chinese --help message in Chinese
chmem --Change memeory of System
cham --Change memory
clear --clear something
config --ENter configurative mode
connect --open a outgoing connection
copy --Copy configuration or image data
data --Set system data
debug --Debugging function
delete --delete a file
dir --list files in flash memory
disconnect --disconnect an exiting outgoing network connection
download --Download with ZMODEM
enable --Turn on privileged commands
english --Help messege in English
enter -Turn on privileged commands
exec-scrip --EXecute a script on a port or line
exit --Exit/quit
format --Format files system
help --DEscription of the interractive help system
histoy --Look up history
Rouer-A#? // 使用?帮助
chinese --Help message in Chinese
chmem --CHange memory of system
chram --Change memory
Rouer-A#chinese //设置中文帮助
Rouer-A#? //再次查看可用命令
cd --改变当前目录
chinese --中文帮助信息
chmem --修改系统内存数据
chram --修改内存数据
clear --清除
config --进入配置态
connect --打开一个向外的连接
copy --拷贝配置方案或内存映像
date --设置系统时间
debug --分析功能
delete --删除一个文件
dir --显示闪存中的文件
disconnect --断开活跃的网络连接
download --通过ZMODEM协议下载文件
enable --进入特权方式
english --英文帮助信息
enter --进入特权方式
exec-script --在指定端口运行指定的脚本
exit --退回或退出
format --格式化文件系统
help --交互式帮助系统描述
history --查看历史
keepalive --保活探测
--More---
带内远程的管理方法:(Telnet方式)
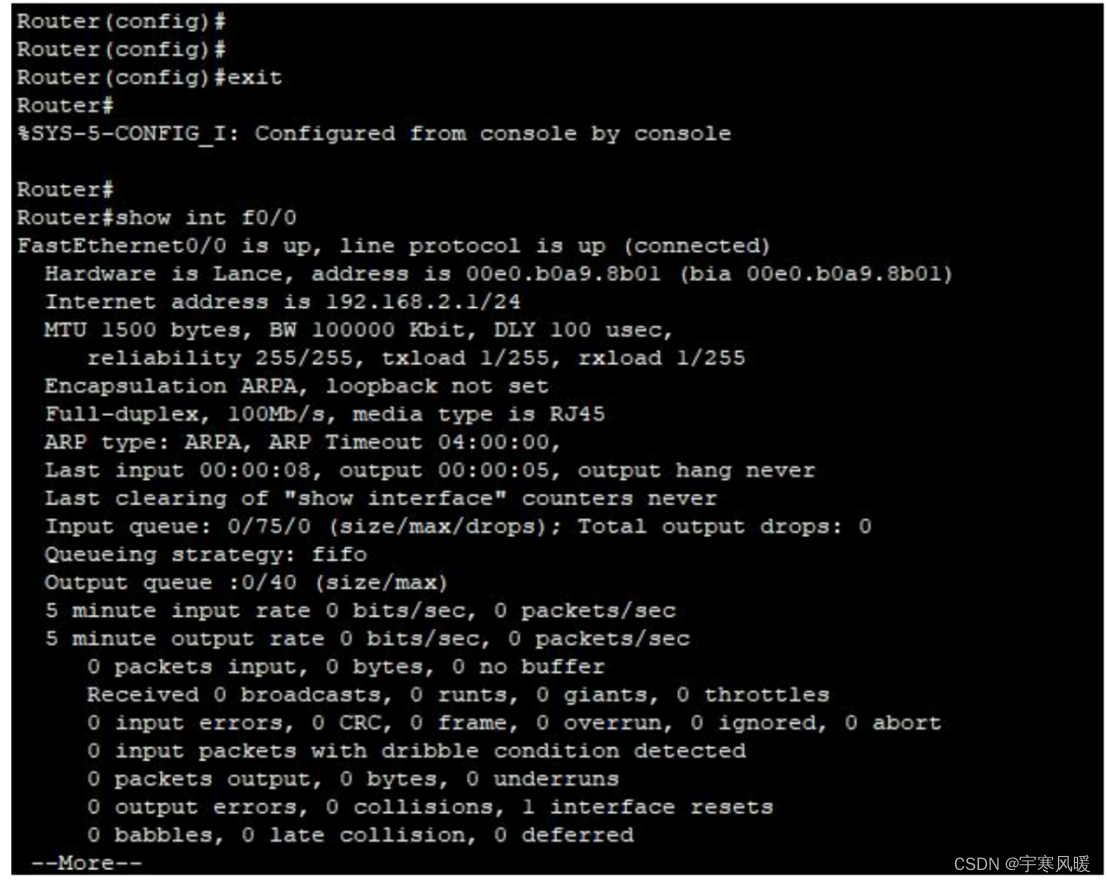
第五步:设置路由器以太网接口地址并验证连通性。
Router>enable //进入特权模式
Router****#config**** //进入全局配置模式
Router-A_config_#interface f0/0 //进入接口模式
Router-A_config_f0/0****#ip address 192.168.2.1 255.255.255.0**** //设置IP地址
Router-A_config_f0/0****#no shutdown****
Router-A_config_f0/0****#^Z****
Router-A****#show interface f0/0**** //验证
FastEhernet0/0 is up,line protocol isup //接口和协议都必须up
address is00e0.0f18.1a70
Interface address is 192.168.2.1/24
MTU 1500 bytes,BW 100000 kbit,DLY 10 usec
Encapsulation ARPA,loopback not set
Keepalive not set
ARP type:ARPA,ARP timeout 04:00:00
60 second input rate 0 bits/sec,0 packets/sec!
60 second output rate 6 bits/sec,0 packets/sec!
Full-duplex,100Mb/s,100BaseTX,1 Interrput
0packets input,0bytes,200 rx_freebuf
Received 0 unicasts,0 lowmark,0 ri,0 throttles
0 input errors,0 CRC,0 framing,0 overrun,0 long
1 packets output,46 bytes,50 tx_freebd,0 underruns
0 putput errors,0 collisions,0 interface resets
0 babbles,0 late collisions,0 deferred,0 err600
0 lost carrier,0 no carrier 0grace stop 0 bus error
0 output buffer failures,0 output buffers swapped out
第六步:设置PC机的IP地址并测试连通性
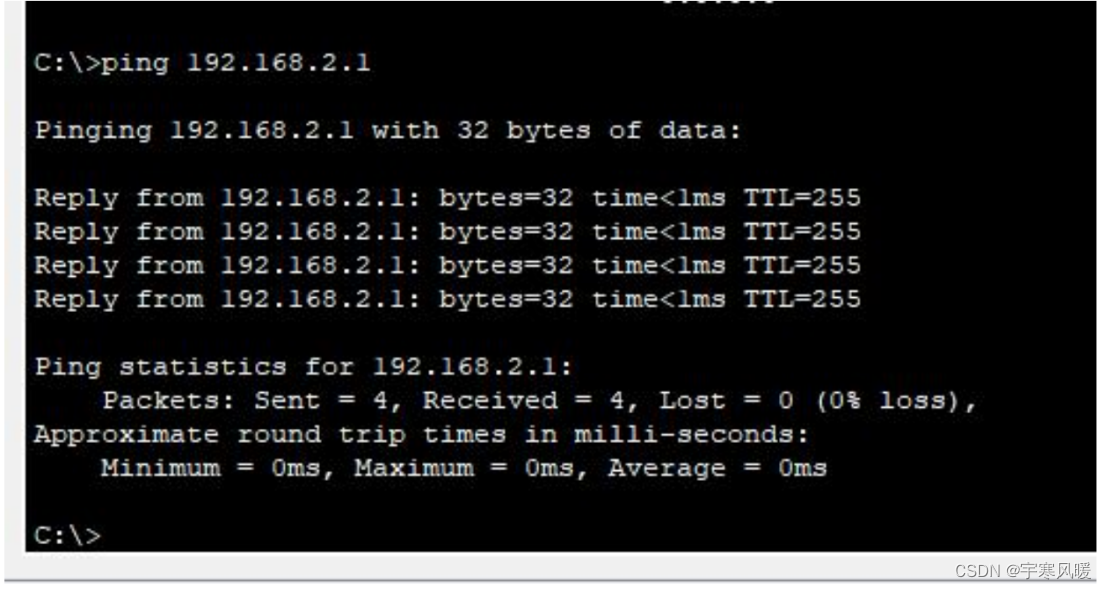
使用PING测试连通性
第七步:在PC机上telnet到路由器
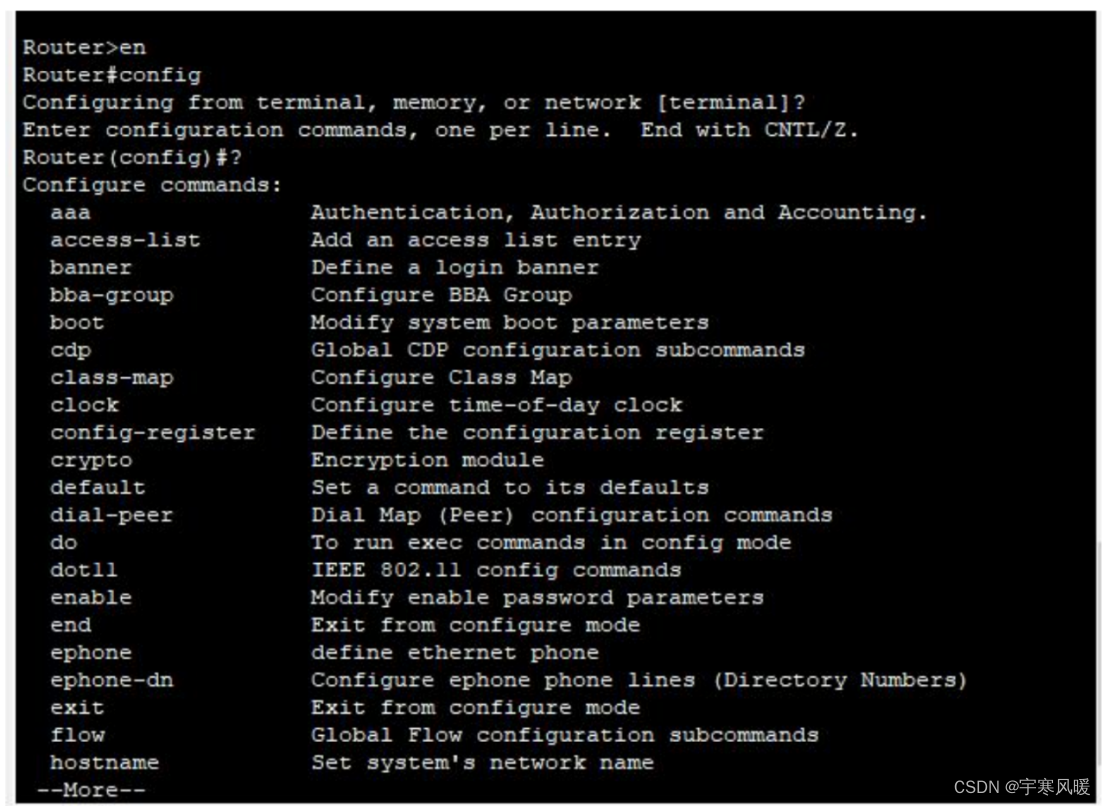
运行telnet 192.168.2.1,出现如下结果:
- 设置本地数据库中的用户名,本例使用dcnu和密码dcnu。
Router1700_config#username dcnu password dcnu
Router1700_config#
- 创建一个新的登录验证方法,名为login_fortelnet,此方法将使用本地数据库验证。
Router1700_config#aaa authentication login login_fortelnet local
Router1700_config#
- 进入telnet进程管理配置模式,配置登录用户使用login_fortelnet的验证方法进行验证。
Router1700_config#line vty 0 4
Router1700_config_line#login authentication login_fortelnet
Router1700_config_line#
经过这样的配置,telnet登录路由器时的过程将如下所示:
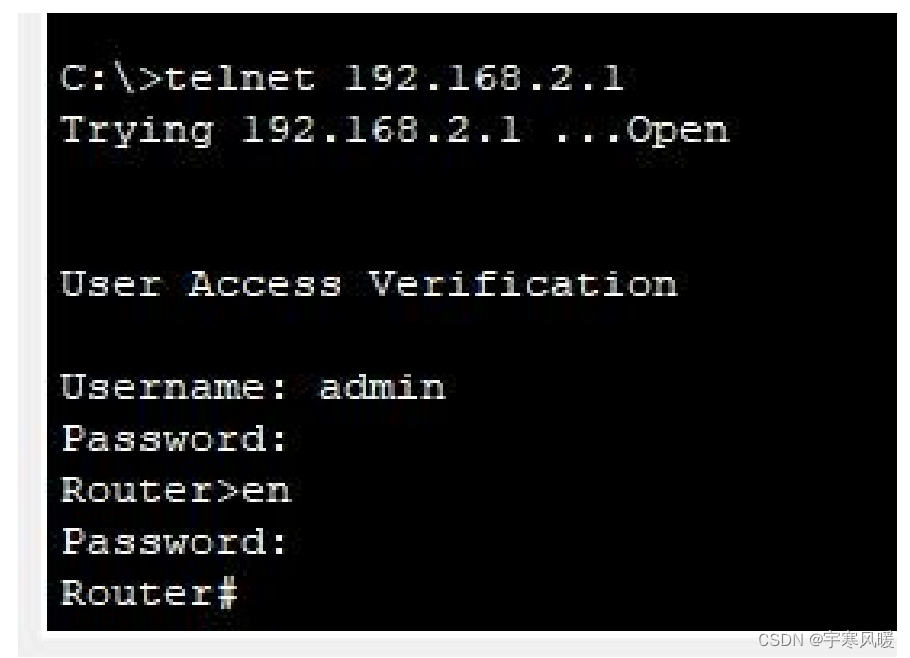
C:\>telnet192.168.2.1
Connecting to remote host...
Press 'q' or 'Q ' to quit connection.
User Access Verification
Username:dcnu
Password:
2004-1-1- 04:21:34 User dcnu logged in from 192.168.2.1 on vty 1
Welcome to DCR Multi-Protocol 1700 Series Router
Router1700>
带内远程的管理方法:(Web方式)
第八步:由于1702不支持WEB管理方式,以下配置以DCR-2611为例
同前配置,将以太网接口地址配置为 192.168.2.2/24
Router-C#config
Router-C_config#interface f0/0
Router-C_config_f0/0#ip address 192.168.2.2 255.255.255.0
Router-C_config_f0/0#no shutdown
Router-C_config_f0/0#exit //开启HTTP服务
Router-C_config#ip http server
Router-C_config#^Z
Router-C#2089-2-22 01:22:06 Configured from console 0 by DEFAULT
Router-C#show running-config //验证
Building configuration...
Current configuration:
!
!version 1.3.1S
service timestamps log date
service timestamps debug date
no service password-encryption
!
hostname Router-C
!
!
username abc password 0 digital
!
interface FastEthernet0/0
ip address 192.168.2.2 255.255.255.0 //F0/0的IP地址
no ip directed-broadcast
!
interface Async0/0
no ip address
no ip directed-broadcast
!
gateway-cfg
Gateway keepAlive 60
shutdown
!
ivr-cfg
!
ip http server //HTTP服务开启状态
以上内容均为未加验证的状态,也可使用前述方式对设备的http登录过程进行验证,此处不再赘述。