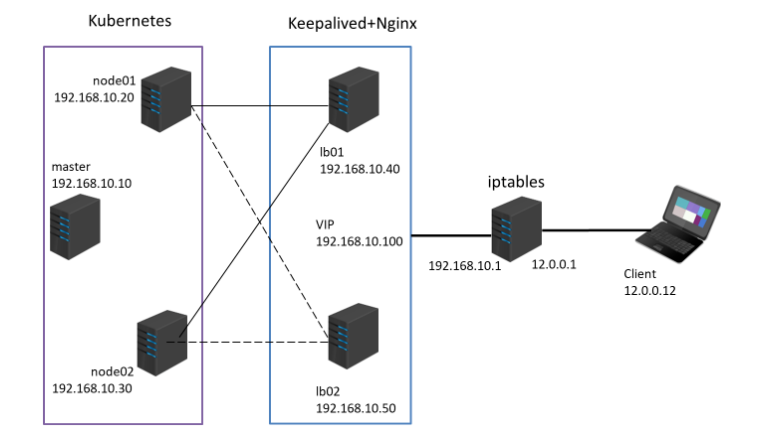
项目架构图
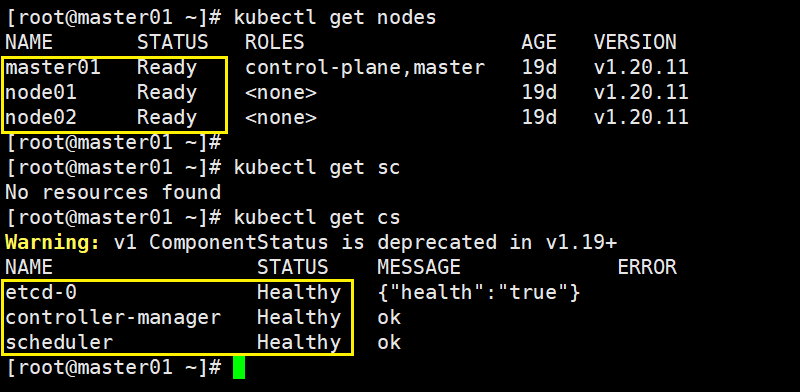
(1)部署 kubernetes 集群
(2)
在 Kubernetes 环境中,通过yaml文件的方式,创建2个Nginx Pod分别放置在两个不同的节点上;
Pod使用hostPath类型的存储卷挂载,两个节点本地目录共享使用 /data,2个Pod副本测试页面自定义,但要不同,以做区分
编辑nginx.yaml 文件
bash
mkdir /opt/k8s-shiyan
cd /opt/k8s-shiyan/
vim nginx.yaml

apiVersion: v1
kind: Pod
metadata:
  name: nginx01
  labels:
    app: nginx
spec:
  #调度到指定的节点
  nodeName: node01
  #容器名和镜像
  containers:
  - name: nginx-container01
    image: nginx:latest
    #将指定的卷挂载到指定的目录
    volumeMounts:
    - name: data-volume
      mountPath: /usr/share/nginx/html
  #创建并定义挂载卷的卷名和路径,类型为目录
  volumes:
  - name: data-volume
    hostPath:
      path: /data
      type: Directory
---
apiVersion: v1
kind: Pod
metadata:
  name: nginx02
  labels:
    app: nginx
spec:
  nodeName: node02
  containers:
  - name: nginx-container02
    image: nginx:latest
    volumeMounts:
    - name: data-volume
      mountPath: /usr/share/nginx/html
  volumes:
  - name: data-volume
    hostPath:
      path: /data
      type: Directory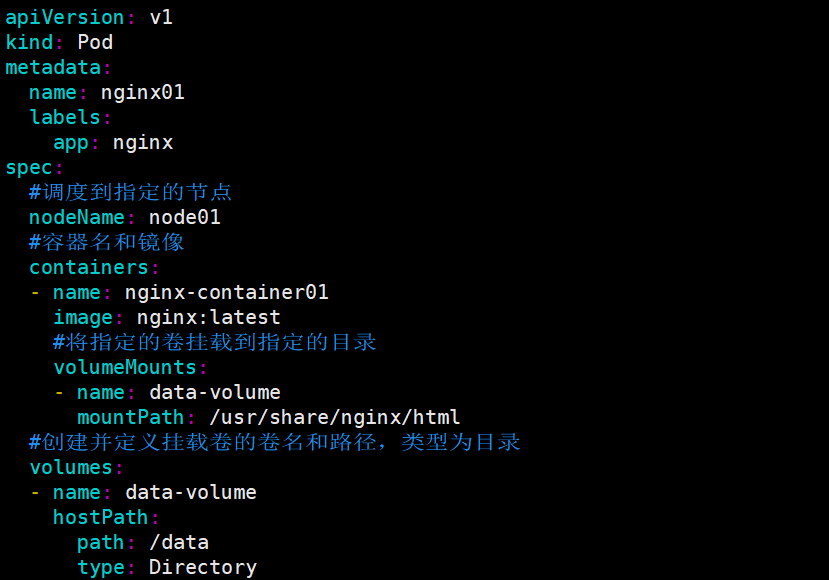

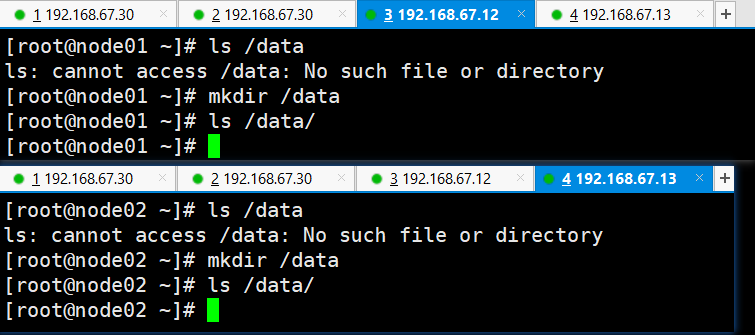
node节点创建/data 目录
执行nginx.yaml 创建资源
bash
kubectl apply -f nginx.yaml
kubectl get pod -o wide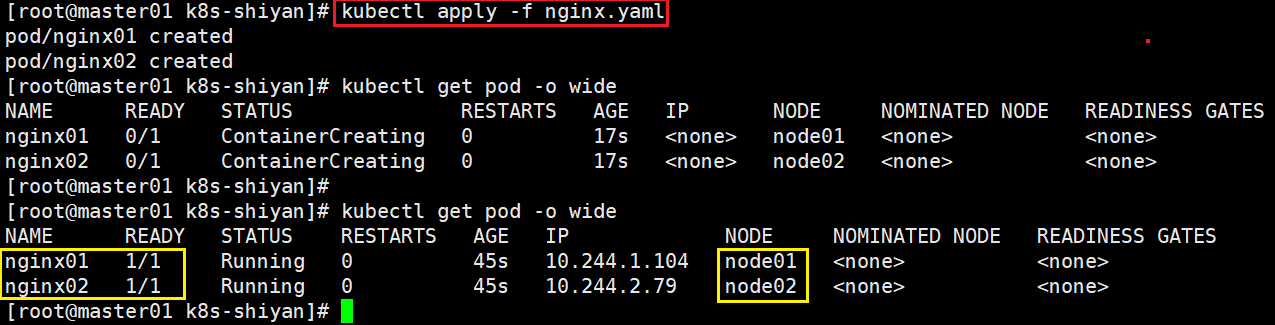
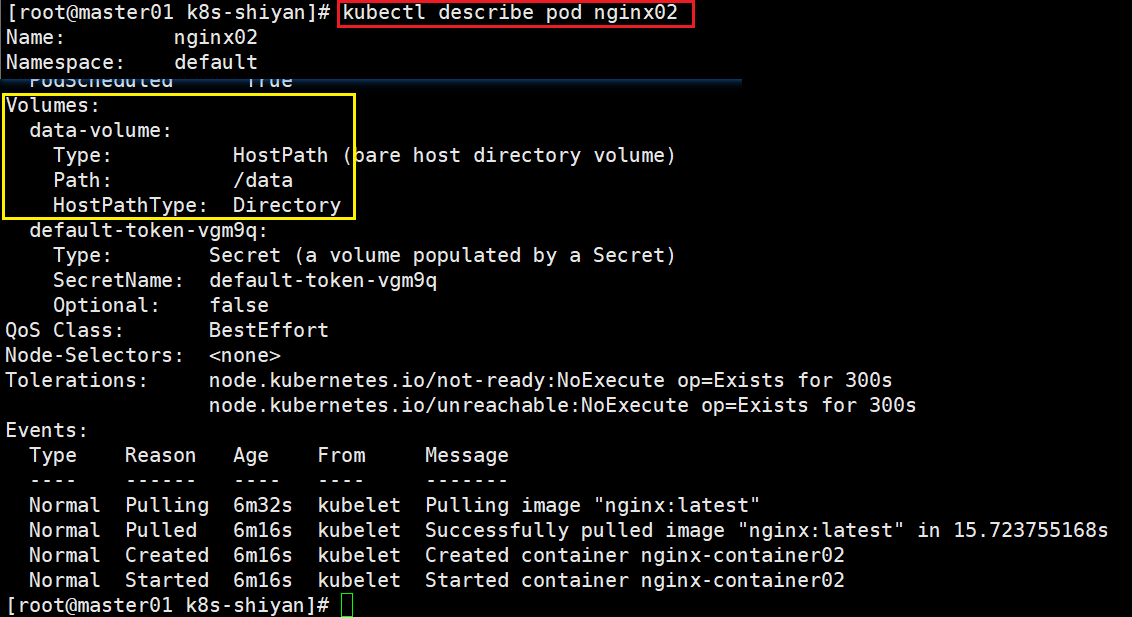
检验测试挂载情况
bash
kubectl describe pod nginx01
kubectl describe pod nginx02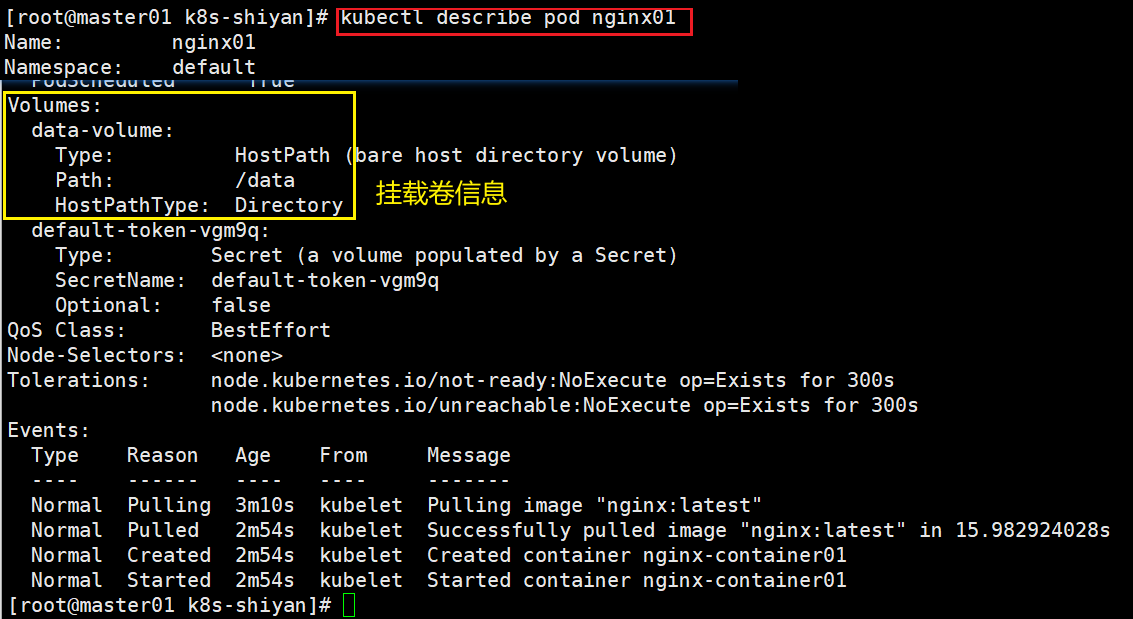
bash
#在两个pod中添加文件
kubectl get pod
kubectl exec -it nginx01 /bin/bash
echo "web01" > /usr/share/nginx/html/index.html
exit

kubectl exec -it nginx02 /bin/bash
echo "web02" > /usr/share/nginx/html/index.html
exit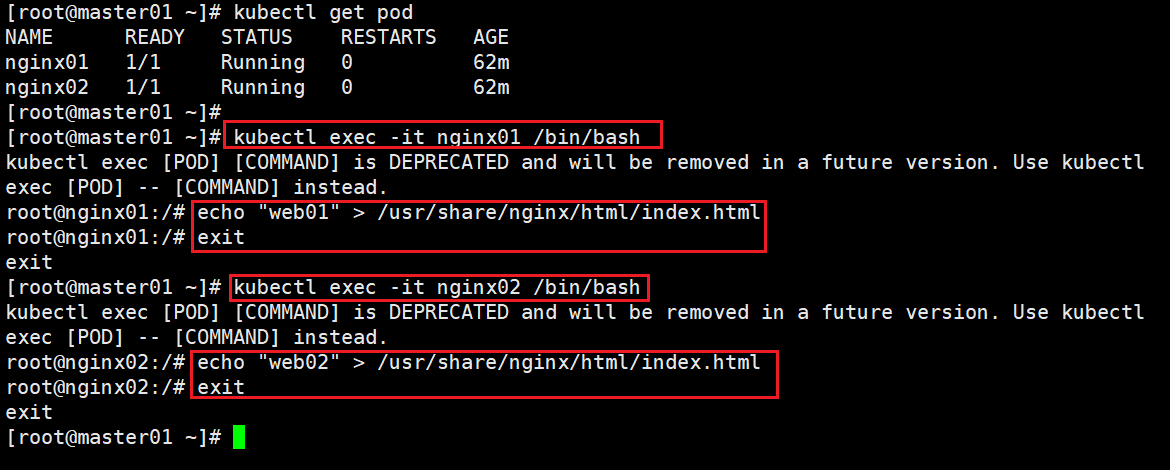
#到两个node节点查看
bash
ls /data/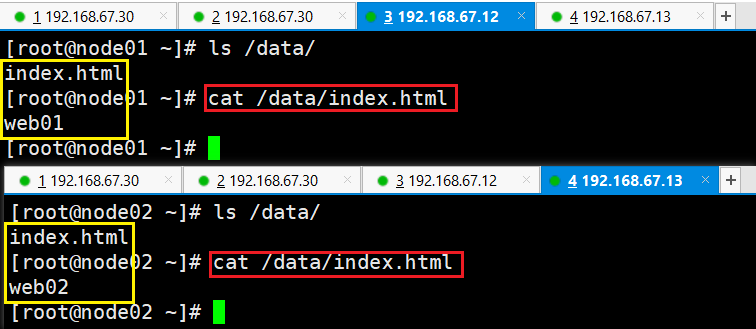
(3)
编写service对应的yaml文件,使用NodePort类型和TCP 30000端口将Nginx服务发布出去
编辑nginx-svc.yaml
bash
vim nginx-svc.yaml

apiVersion: v1
kind: Service
metadata:
  name: nginx-svc
spec:
  #允许外部流量通过该 NodePort 访问 Service
  type: NodePort
  ports:
      #端口协议
    - protocol: TCP
      #Service 暴露的端口为 80
      port: 80
      #将流量转发到 Pod 的端口 80
      targetPort: 80
      #将外部流量映射到节点的 30000 端口
      nodePort: 30000
  #将该 Service 与具有标签 app: nginx 的 Pod 进行关联
  selector:
    app: nginx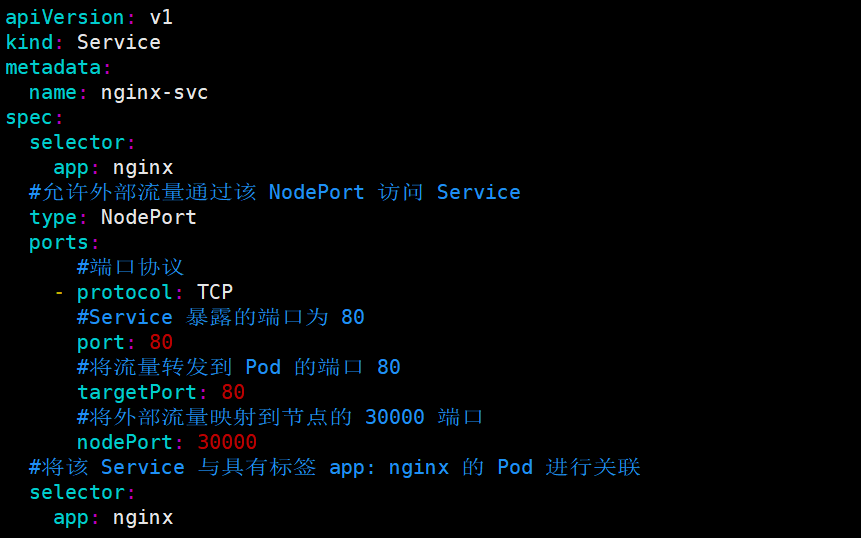
创建service资源
bash
#创建service资源
kubectl apply -f nginx-svc.yaml
kubectl get svc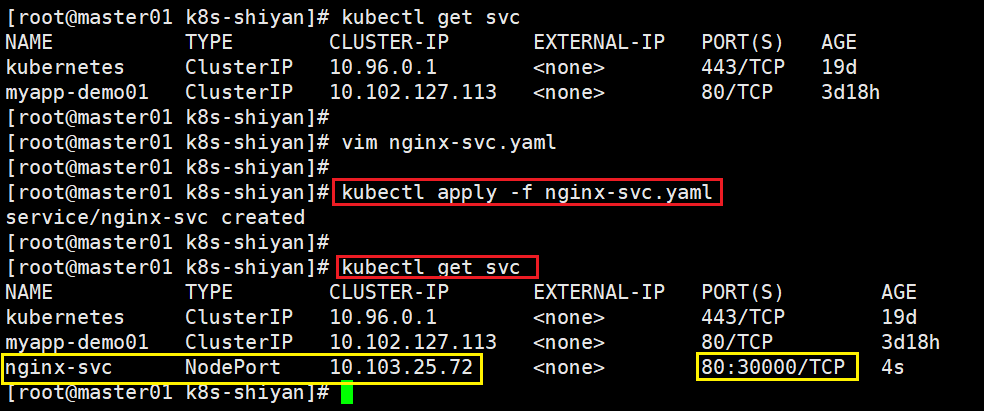
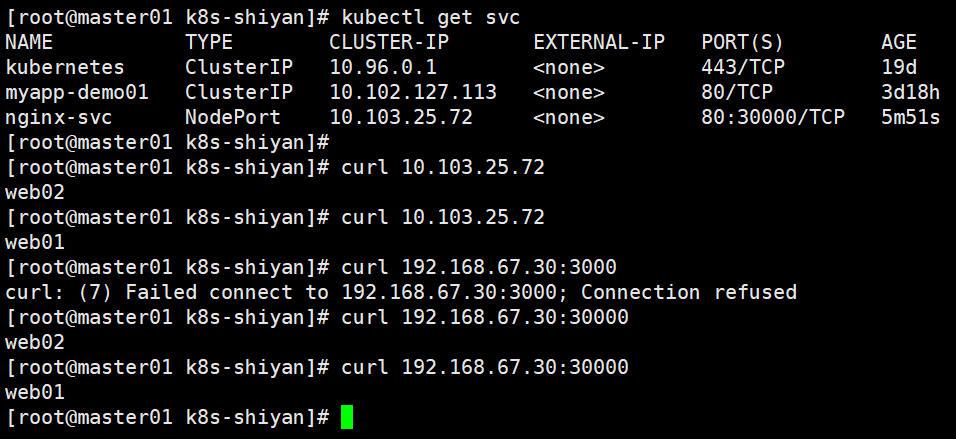
访问测试
bash
curl 10.103.25.72
curl 192.168.67.30:30000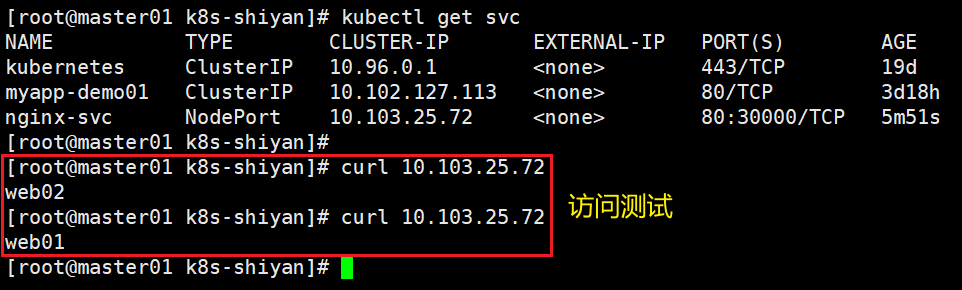
(4)
负载均衡区域配置Keepalived+Nginx,实现负载均衡高可用,通过VIP 192.168.10.100和自定义的端口号即可访问K8S发布出来的服务
bash
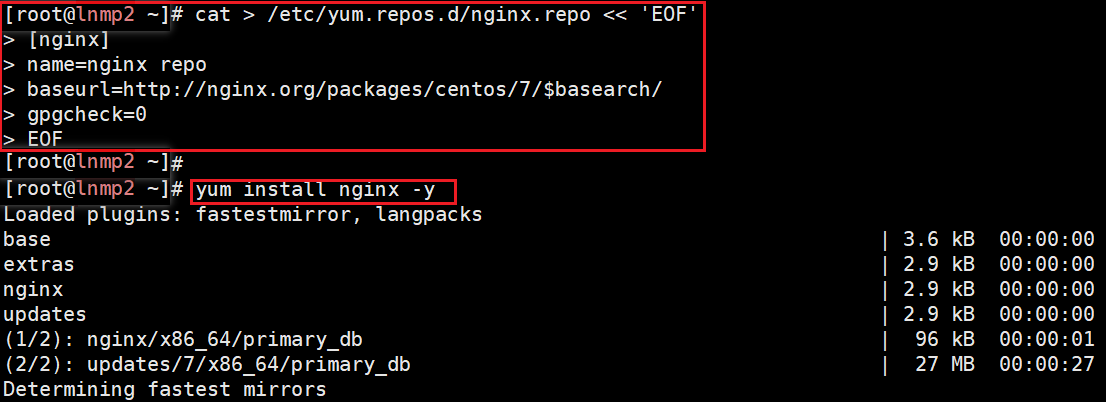
cat > /etc/yum.repos.d/nginx.repo << 'EOF'
[nginx]
name=nginx repo
baseurl=http://nginx.org/packages/centos/7/$basearch/
gpgcheck=0
EOF

yum -y install nginx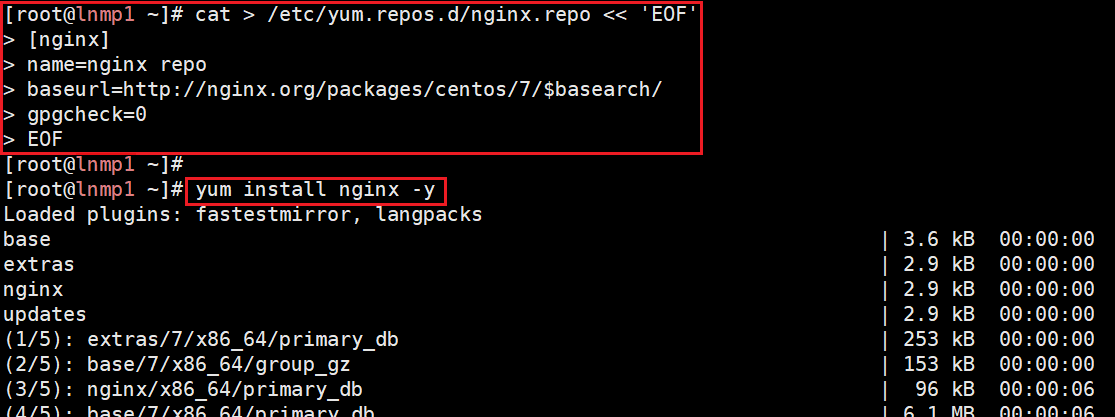
配置负载均衡和高可用服务器
bash
systemctl stop firewalld.service
setenforce 0
配置nginx.conf文件
bash
user  nginx;
worker_processes  auto;

error_log  /var/log/nginx/error.log notice;
pid        /var/run/nginx.pid;


events {
    worker_connections  1024;
}


http {

    #在http模块中添加upstream和server模块
    upstream k8s {
      server 192.168.67.12:30000;
      server 192.168.67.13:30000;
    }

    server {
      #监听30000,当访问30000端口时,去调用下面的location
      listen 30000;
      location / {
        proxy_pass http://k8s;
      }
    }

    include       /etc/nginx/mime.types;
    default_type  application/octet-stream;

    log_format  main  '$remote_addr - $remote_user [$time_local] "$request" '
                      '$status $body_bytes_sent "$http_referer" '
                      '"$http_user_agent" "$http_x_forwarded_for"';

    access_log  /var/log/nginx/access.log  main;

    sendfile        on;
    #tcp_nopush     on;

    keepalive_timeout  65;

    #gzip  on;

    include /etc/nginx/conf.d/*.conf;
}
bash
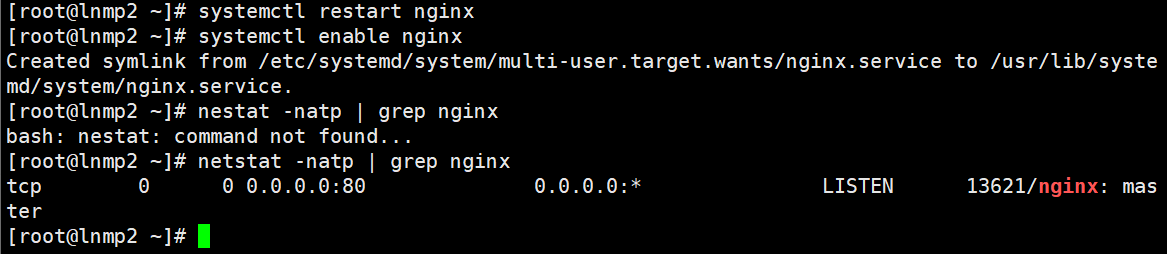
#检查、启动nginx,设置开机自启并过滤查看
nginx -t
systemctl restart nginx
systemctl enable nginx
netstat -natp | grep nginx 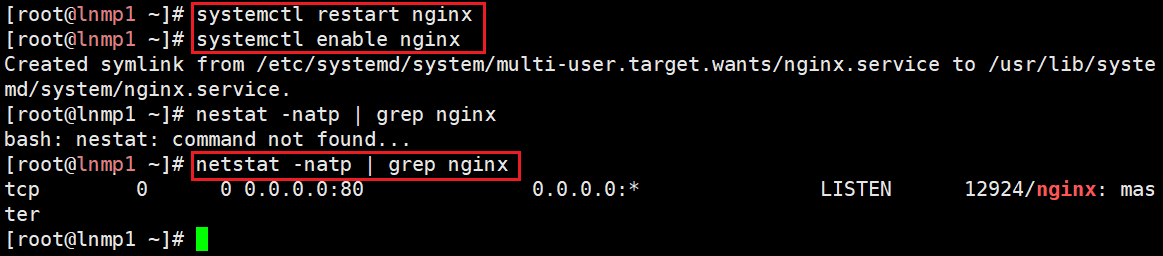
配置keepalived.conf文件
bash
vim /etc/keepalived/keepalived.conf
! Configuration File for keepalived
global_defs {
notification_email {
acassen@firewall.loc
}
notification_email_from
smtp_server 127.0.0.1
smtp_connect_timeout 30
router_id 192.168.67.21
}
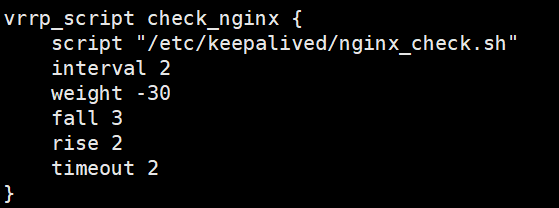
vrrp_script check_nginx {
script "/etc/keepalived/nginx_check.sh"
interval 2
weight -30
fall 3
rise 2
timeout 2
}
vrrp_instance NGINX {
state MASTER
interface ens33
virtual_router_id 10
priority 100
advert_int 1
authentication {
auth_type PASS
auth_pass 123
}
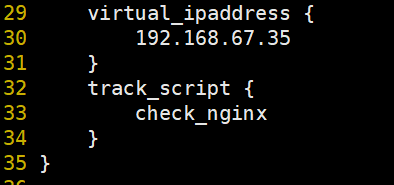
virtual_ipaddress {
192.168.67.100
}
track_script {
check_nginx
}
}interval 2 表示检查的间隔为 2 秒;
weight -30 表示权重为 -30;
fall 3 表示在连续 3 次检查失败后认为服务不可用;
rise 2 表示在连续 2 次检查成功后认为服务恢复正常;
timeout 2 表示脚本执行的超时时间为 2 秒


bash
#监控Nginx服务,确保在Nginx服务出现问题时,Keepalived不会将流量路由到这个不健康的节点上
vim /etc/keepalived/nginx_check.sh

killall -0 nginx
#该命令实际上并不会杀死任何进程,而是用来检查是否存在名为 nginx 的进程,并验证进程是否仍在运行
#如果命令成功执行并且没有报错,说明存在名为 nginx 的进程在运行;如果命令执行失败或者没有找到对应的进程,那么可能 nginx 进程并未在运行
#使用信号0来检查进程的存在性是一种常见的技巧,因为它不会对进程产生影响,只是用来做检查
bash② #!/bin/bash # used to realise the keepalived detection to nginx NUM=`ps -ef| grep nginx | grep -v "grep"| grep -v "check"|wc -l` echo $NUM if [ $NUM -ne 2 ];then systemctl stop keepalived fi
bash
systemctl restart keepalived.service
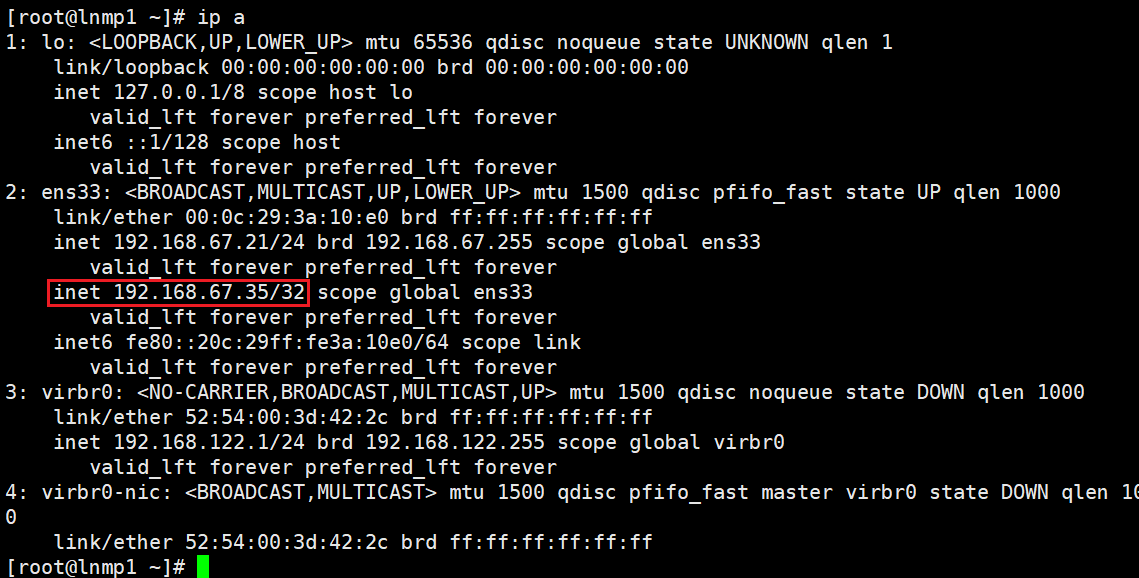
浏览器访问虚拟IP
bash
http://192.168.67.100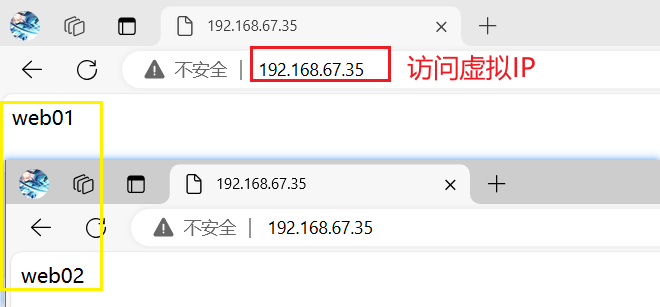
模拟故障
bash
systemctl stop nginx
hostname -I
故障恢复
bash
systemctl start nginx
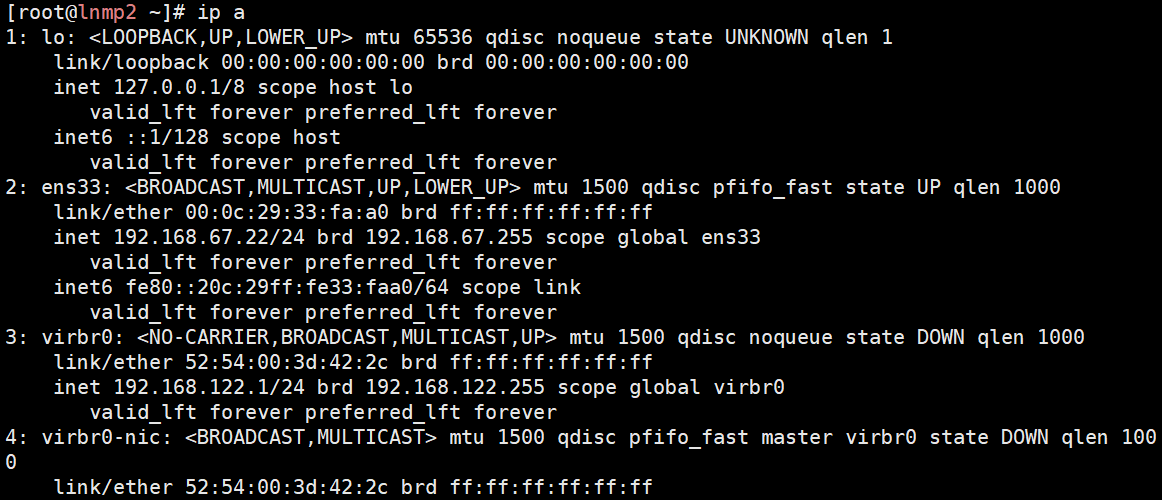
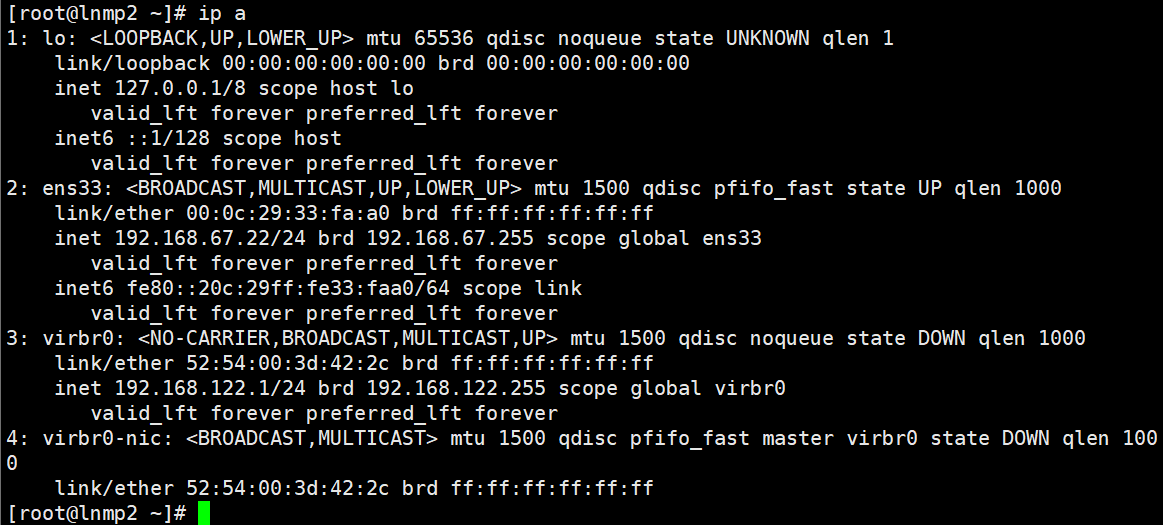
ip a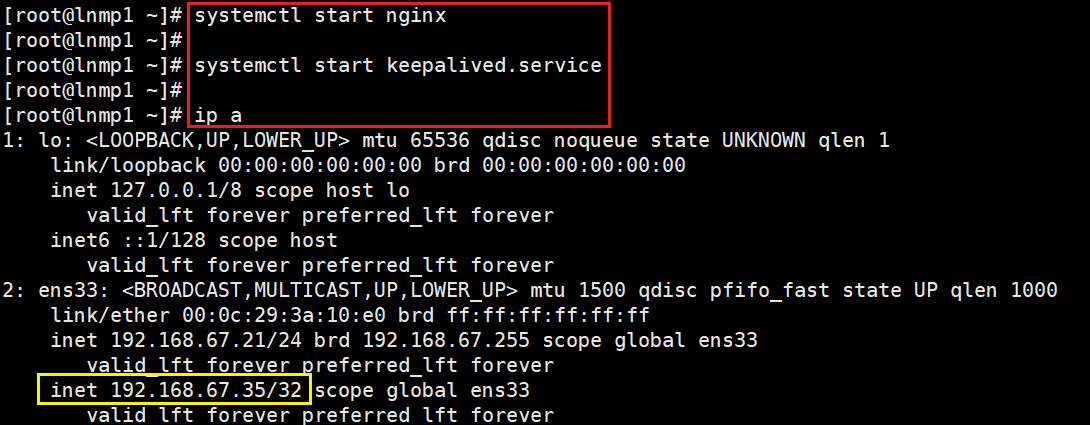
(5)
iptables防火墙服务器,设置双网卡,并且配置SNAT和DNAT转换实现外网客户端可以通过12.0.0.1访问内网的Web服务
添加网卡
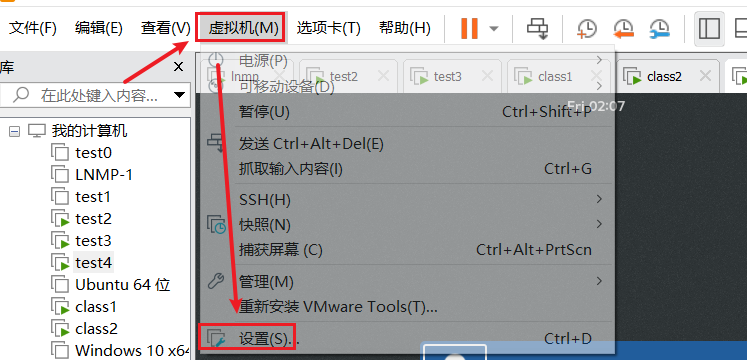
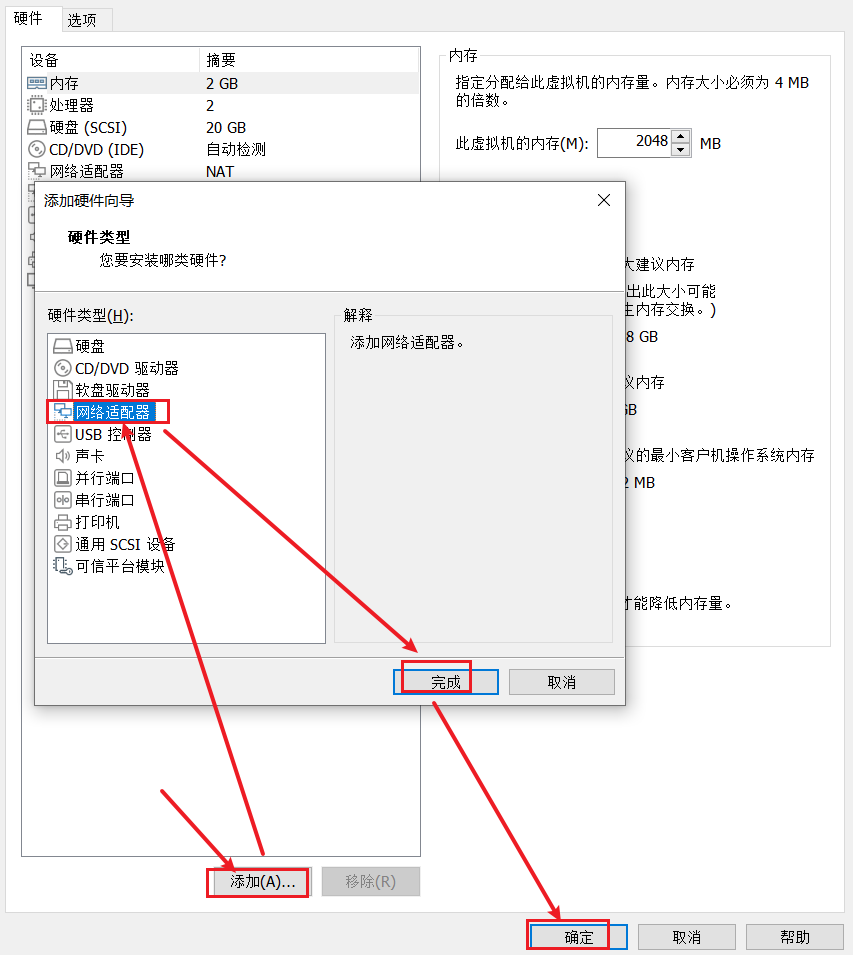
点击【虚拟机】,选择【设置】;
点击【添加】,选择【网络适配器】,点击【完成】;
点击【确定】;
启动虚拟机
bash
#修改主机名
hostnamectl set-hostname iptables
su
#关闭防火墙
systemctl stop firewalld.service
systemctl enable firewalld.service
setenforce 0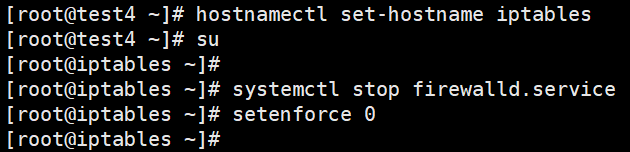
bash
ifconfig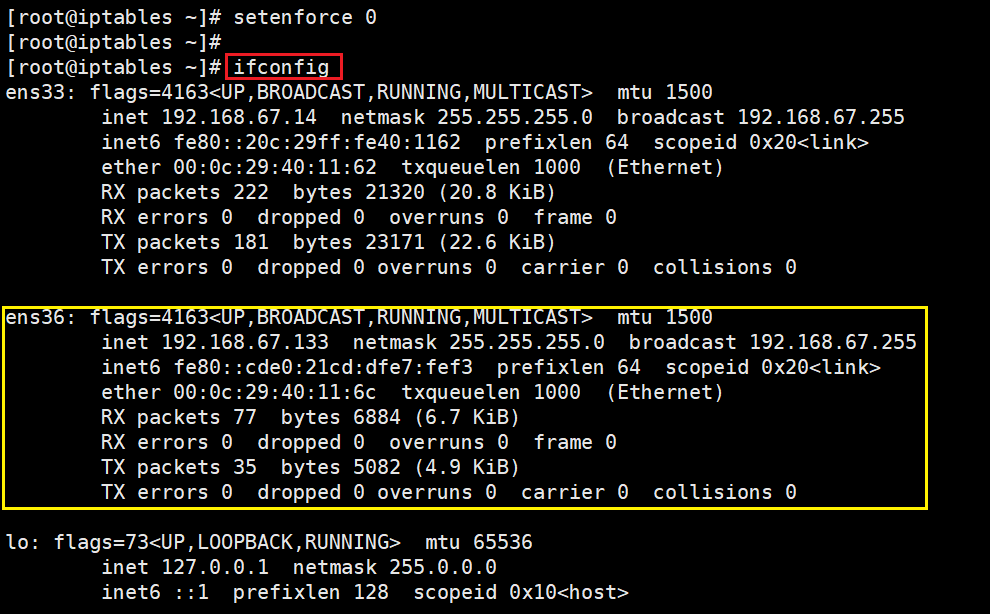
添加ens36网卡
bash
cd /etc/sysconfig/network-scripts/
ls
cp ifcfg-ens33 ifcfg-ens36
vim ifcfg-ens36
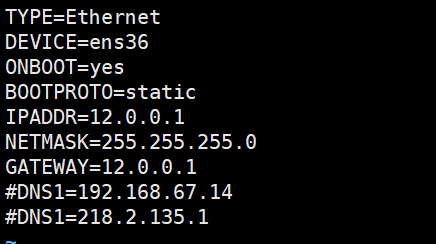
#修改为如下内容
TYPE=Ethernet
DEVICE=ens36
ONBOOT=yes
BOOTPROTO=static
IPADDR=12.0.0.1
NETMASK=255.255.255.0
GATEWAY=12.0.0.1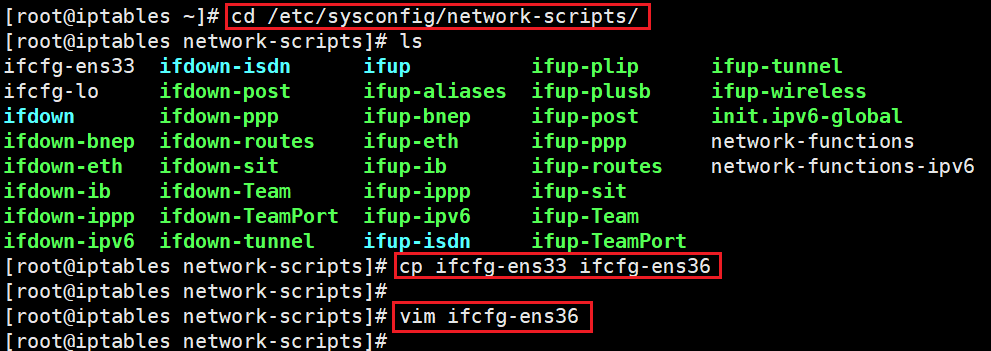
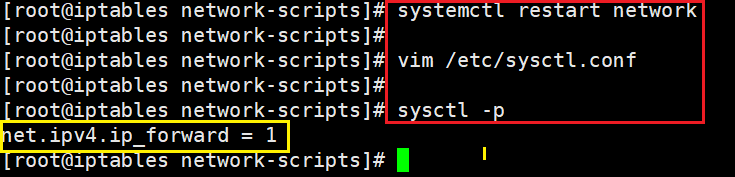
重启网络
bash
systemctl restart network
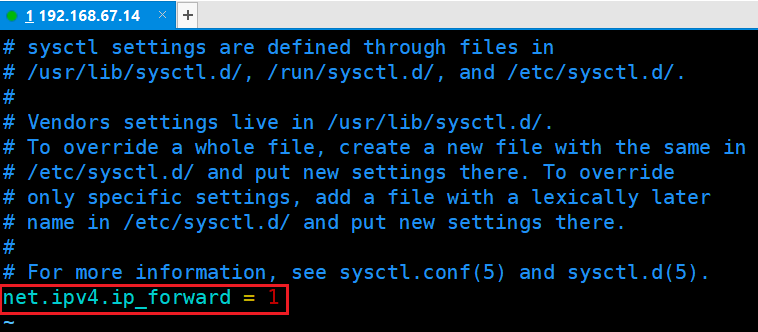
vim /etc/sysctl.conf
#末尾添加
net.ipv4.ip_forward = 1
sysctl -p