系列文章目录
HarmonyOS Next 系列之省市区弹窗选择器实现(一)
HarmonyOS Next 系列之验证码输入组件实现(二)
HarmonyOS Next 系列之底部标签栏TabBar实现(三)
HarmonyOS Next 系列之HTTP请求封装和Token持久化存储(四)
HarmonyOS Next 系列之从手机选择图片或拍照上传功能实现(五)
HarmonyOS Next 系列之可移动悬浮按钮实现(六)
HarmonyOS Next 系列之沉浸式状态实现的多种方式(七)
前言
HarmonyOS Next(基于API11)沉浸式状态实现的多种方式

一、方法一
1、实现讲解
(1)首先设置setWindowLayoutFullScreen(true)(设置全屏布局)。
布局将从屏幕最顶部开始到最底部结束,此时状态栏和底部规避区域还在,且与页面重叠,所以还需要设置页面根容器顶部内边距为状态栏高度,底部内边距为规避区域高度,这样页面就不会重叠。
(2)页面隐藏(或销毁)周期函数内恢复非全屏布局设置setWindowLayoutFullScreen(false)
全屏布局设置是全局生效的,一旦设置跳转到其他页面同样生效,对于其他页面不需要沉浸式状态栏需要恢复原样。
ps:全屏布局非全屏显示,区别在于状态栏、规避区域还在,页面布局从屏幕最顶端开始
2、代码实现
Index.ets(页面)
javascript
import { window } from '@kit.ArkUI'
@Entry
@Component
struct Index {
@State statusHeight: number = 0 //状态栏高度
@State bottomAvoidAreaHeight: number = 0 //手机底部规避区域高度
@State windowClass: window.Window | null = null //窗口管理器
aboutToAppear() {
this.init()
}
onPageShow(): void {
//设置全屏布局
this.windowClass?.setWindowLayoutFullScreen(true)
}
onPageHide(): void {
//取消全屏布局
this.windowClass?.setWindowLayoutFullScreen(false)
}
//初始化
init() {
window.getLastWindow(getContext(this), (err, windowClass) => {
if (!err.code) {
//保存窗口管理器
this.windowClass = windowClass
//获取状态栏高度
this.statusHeight = px2vp(windowClass.getWindowAvoidArea(window.AvoidAreaType.TYPE_SYSTEM).topRect.height)
//获取手机底部规避区域高度
this.bottomAvoidAreaHeight = px2vp(windowClass.getWindowAvoidArea(window.AvoidAreaType.TYPE_NAVIGATION_INDICATOR)
.bottomRect
.height)
windowClass.setWindowLayoutFullScreen(true)
}
})
}
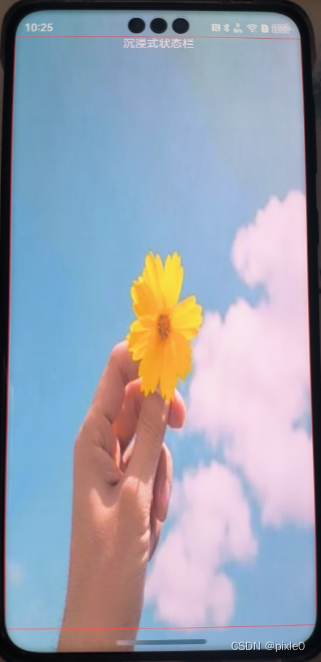
build() {
Column() {
//页面区域
Column() {
Text('沉浸式状态栏').fontColor('#fff')
}
.height('100%')
.width('100%')
.border({
width: 1,
color: 'red'
})
}
.height('100%')
.width('100%')
.backgroundImage(`https://img1.baidu.com/it/u=3138942692,3007703896&fm=253&fmt=auto&app=138&f=JPEG?w=500&h=500`)
.backgroundImageSize({ height: '100%', width: '100%' })
.padding({ top: this.statusHeight, bottom: this.bottomAvoidAreaHeight })
}
}运行效果:

ps:为了肉眼好区分,给页面区域加了红色边框
3、全局缓存窗口管理器
当项目内多个页面需要设置全屏布局时,每个页面要重新获取窗口管理器、状态栏高度、底部规避区域高度就比较麻烦,可以在entryabili内获取到上述属性值(对象)并存储在全局对象globalThis上
EntryAbility.ets
javascript
import { AbilityConstant, UIAbility, Want } from '@kit.AbilityKit';
import { window } from '@kit.ArkUI';

export default class EntryAbility extends UIAbility {
  onCreate(want: Want, launchParam: AbilityConstant.LaunchParam): void {

  }


  onWindowStageCreate(windowStage: window.WindowStage): void {

    //添加如下代码
    windowStage.getMainWindow((err, data) => {
      if (!err.code) {
        //全局变量添加窗口对象
        globalThis.windowClass = data;
        //全局变量添加状态栏高度单位vp
        globalThis.statusHeight = px2vp(data.getWindowAvoidArea(window.AvoidAreaType.TYPE_SYSTEM).topRect.height)
        //全局添加底部规避区域高度单位vp
        globalThis.bottomAvoidAreaHeight = px2vp(data.getWindowAvoidArea(window.AvoidAreaType.TYPE_NAVIGATION_INDICATOR)
          .bottomRect
          .height)
      }
    })
    //
    windowStage.loadContent('pages/Index', (err) => {
      if (err.code) {
        return;
      }
    });
  }


}
Index.ets(页面)
javascript
import { window } from '@kit.ArkUI'

@Entry
@Component
struct Index {


  onPageShow(): void {
  //设置全屏布局
    globalThis.windowClass.setWindowLayoutFullScreen(true)
  }

  onPageHide(): void {
    //取消全屏布局
      globalThis.windowClass.setWindowLayoutFullScreen(false)
  }


  build() {
    Column() {
      //页面区域
      Column() {
        Text('沉浸式状态栏').fontColor('#fff')
      }
      .height('100%')
      .width('100%')
      .border({
        width: 1,
        color: 'red'
      })
    }
    .height('100%')
    .width('100%')
    .backgroundImage(`https://img1.baidu.com/it/u=3138942692,3007703896&fm=253&fmt=auto&app=138&f=JPEG?w=500&h=500`)
    .backgroundImageSize({ height: '100%', width: '100%' })
    .padding({ top: globalThis.statusHeight, bottom: globalThis.bottomAvoidAreaHeight })
  }
}
二、方法二
1、实现讲解
通过NavDestination作为页面根容器,并隐藏标题栏即可快速实现沉浸式状态,NavDestination从api 11开始默认支持安全区避让特性,所以关于页面重叠问题就不需要解决
2、代码实现
Index.ets(页面)
javascript
@Entry
@Component
struct Index{
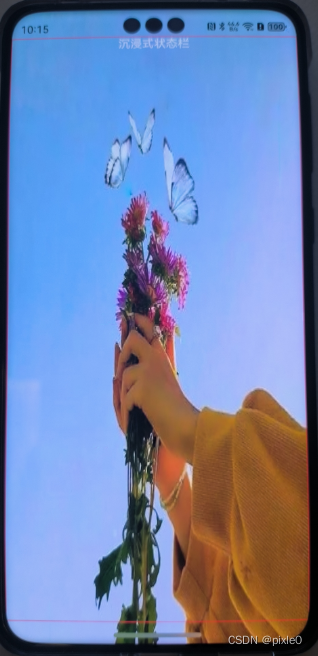
build() {
NavDestination(){
//页面区域
Column(){
Text('沉浸式状态栏').fontColor('#fff')
}.width('100%')
.height('100%')
.border({
width:1,
color:'red'
})
}
.hideTitleBar(true)
.backgroundImage(`https://img0.baidu.com/it/u=2299333132,3832906774&fm=253&fmt=auto&app=138&f=JPEG?w=500&h=500`)
.backgroundImageSize({height:'100%',width:'100%'})
}
}运行效果:
最后补充
如果想修改状态栏文字颜色可通过:setWindowSystemBarProperties实现
javascript
   window.getLastWindow(getContext(this), (err, windowClass) => {
      if (!err.code) {
        windowClass.setWindowSystemBarProperties({
          statusBarContentColor:"#ffffff"
        })
      }
    })