
目录
[1.1 磁盘分区概念](#1.1 磁盘分区概念)
[1.2 LVM概念](#1.2 LVM概念)
一、概述
1.1 磁盘分区概念
在 Linux 中,每一个硬件设备都映射到一个系统的文件,对于硬盘、光驱等 IDE 或 SCSI 设备也不例外。Linux把各种 IDE 设备分配了一个由 hd 前缀组成的文件;而对于各种 SCSI 设备,则分配了一个由 sd 前缀组成的文件。
磁盘分区是将物理磁盘划分为独立的逻辑区域,每个区域可以作为一个独立的文件系统挂载到系统中。通过磁盘分区,我们可以更好地组织和管理磁盘空间。
逻辑卷管理(LVM)
1.2 LVM概念
逻辑卷管理器(LogicalVolumeManager)本质上是一个虚拟设备驱动, 也是一种在Linux中管理逻辑卷的技术。它允许我们在不改变物理磁盘配置的情况下,动态调整逻辑卷的大小。通过使用LVM,我们可以更灵活地管理磁盘空间,满足不断增长的数据需求。
二、扩容步骤
登录Wmare ESXI web,我们从 400G 扩充到 700G
查看目前磁盘状态
df -h
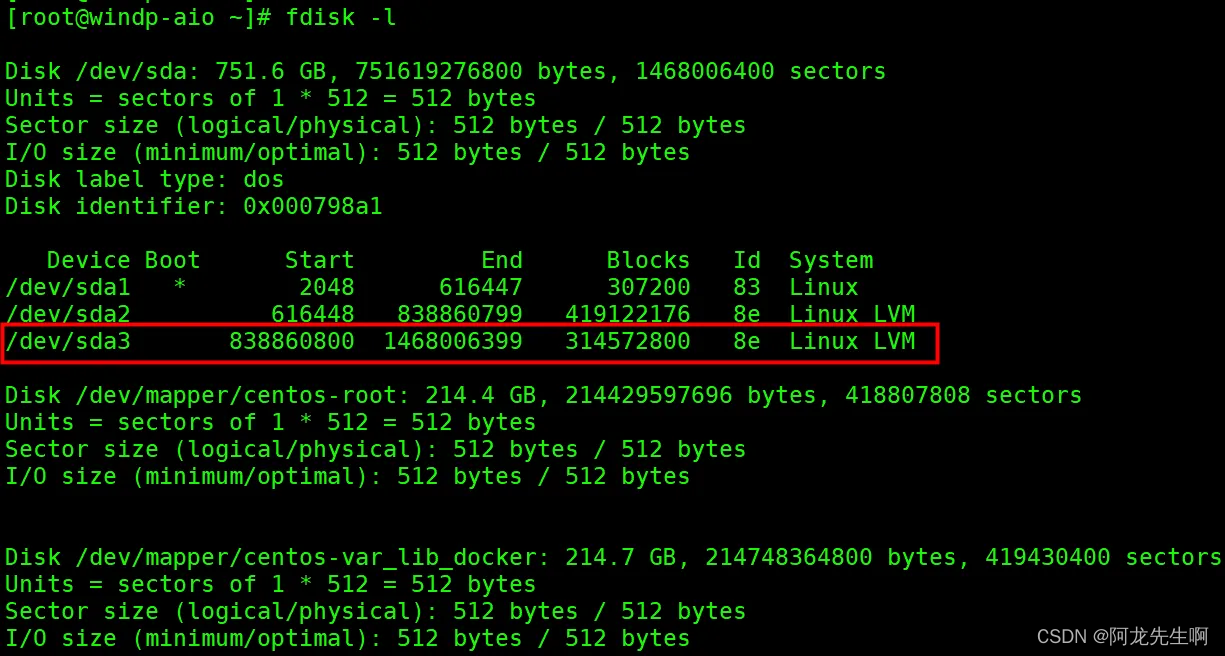
fdisk -l开始扩容
fdisk /dev/sda
Welcome to fdisk (util-linux 2.23.2).

Changes will remain in memory only, until you decide to write them.
Be careful before using the write command.

Command (m for help): p

Disk /dev/sda: 751.6 GB, 751619276800 bytes, 1468006400 sectors
Units = sectors of 1 * 512 = 512 bytes
Sector size (logical/physical): 512 bytes / 512 bytes
I/O size (minimum/optimal): 512 bytes / 512 bytes
Disk label type: dos
Disk identifier: 0x000798a1

   Device Boot      Start         End      Blocks   Id  System
/dev/sda1   *        2048      616447      307200   83  Linux
/dev/sda2          616448   838860799   419122176   8e  Linux LVM

Command (m for help): n
Partition type:
   p   primary (2 primary, 0 extended, 2 free)
   e   extended
Select (default p): p
Partition number (3,4, default 3):
First sector (838860800-1468006399, default 838860800):
Using default value 838860800
Last sector, +sectors or +size{K,M,G} (838860800-1468006399, default 1468006399):
Using default value 1468006399
Partition 3 of type Linux and of size 300 GiB is set

Command (m for help): t
Partition number (1-3, default 3): 3
Hex code (type L to list all codes): 8e
Changed type of partition 'Linux' to 'Linux LVM'

Command (m for help): wq
The partition table has been altered!

Calling ioctl() to re-read partition table.

WARNING: Re-reading the partition table failed with error 16: Device or resource busy.
The kernel still uses the old table. The new table will be used at
the next reboot or after you run partprobe(8) or kpartx(8)
Syncing disks.
再次查看磁盘状态,可见新的sda3,表示为可用状态
用partprobe重新读取分区信息
ps:使用fdisk工具只是将分区信息写到磁盘,如果需要mkfs磁盘分区则需要重启系统,而使用partprobe则可以使kernel重新读取分区信息,从而避免重启系统.
partprobe /dev/sda3创建物理卷及加入组
 pvcreate /dev/sda3
 vgextend centos /dev/sda3
查看物理卷情况
扩容
lvresize -L +300G /dev/mapper/centos-root
同步文件系统
xfs_growfs /dev/mapper/centos-root成功扩容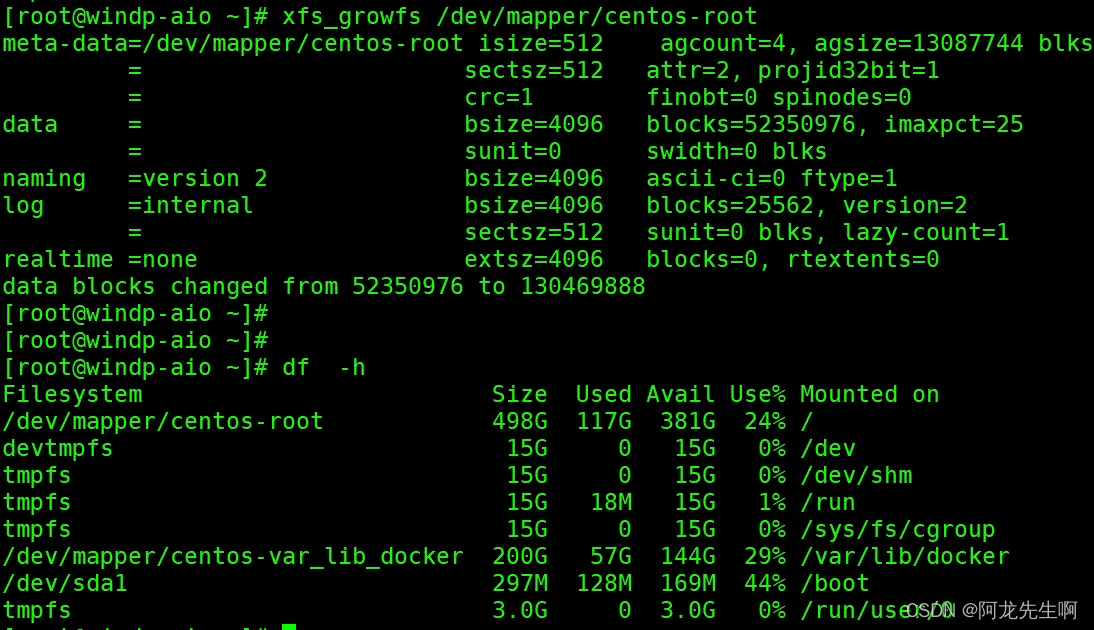
二、报错
检查后得知,之前按照常规流程创建过LVM:/dev/centos/sda3,而没有卸载掉。然后根据提示执行vgreduce 完成移除后 顺利 完成 初始化。
[root@windp-aio ~]# pvcreate /dev/sda3
  Can't initialize physical volume "/dev/sda3" of volume group "centos" without -ff
  /dev/sda3: physical volume not initialized.
[root@windp-aio ~]#
[root@windp-aio ~]#
[root@windp-aio ~]# pv
pvchange   pvck       pvcreate   pvdisplay  pvmove     pvremove   pvresize   pvs        pvscan
[root@windp-aio ~]# pvremove /dev/sda3
  PV /dev/sda3 is used by VG centos so please use vgreduce first.
  (If you are certain you need pvremove, then confirm by using --force twice.)
  /dev/sda3: physical volume label not removed.
[root@windp-aio ~]#
[root@windp-aio ~]#
[root@windp-aio ~]#
[root@windp-aio ~]#
[root@windp-aio ~]# vgreduce centos /dev/sda3
  Removed "/dev/sda3" from volume group "centos"
[root@windp-aio ~]#