本教程中的说明向你展示了如何使用推理 API 使用 Cohere 计算嵌入并将其存储起来,以便在 Elasticsearch 中进行高效的向量或混合搜索。本教程将使用 Python Elasticsearch 客户端执行操作。
你将学习如何:
- 使用 Cohere 服务为文本嵌入创建推理端点,
- 为 Elasticsearch 索引创建必要的索引映射,
- 构建推理管道以将文档与嵌入一起提取到索引中,
- 对数据执行混合搜索,
- 使用 Cohere 的重新排名模型对搜索结果进行重新排名,
- 使用 Cohere 的 Chat API 设计 RAG 系统。
本教程使用 SciFact 数据集。
请参阅 Cohere 的教程,了解使用不同数据集的示例。
要求
- 一个 Cohere 帐户。你可以在地址申请一个 API key
- 一个本地安装的集群。安装指令如下
- Python 3.7 或更高版本
安装
Elasticsearch 及 Kibana
如果你还没有安装好自己的 Elasticsearch 及 Kibana,请参考如下的链接来进行安装:
- 如何在 Linux,MacOS 及 Windows 上进行安装 Elasticsearch
- Kibana:如何在 Linux,MacOS 及 Windows上安装 Elastic 栈中的 Kibana
在安装的时候,我们选择 Elastic Stack 8.x 来进行安装。特别值得指出的是:ES|QL 只在 Elastic Stack 8.11 及以后得版本中才有。你需要下载 Elastic Stack 8.11 及以后得版本来进行安装。
在首次启动 Elasticsearch 的时候,我们可以看到如下的输出:
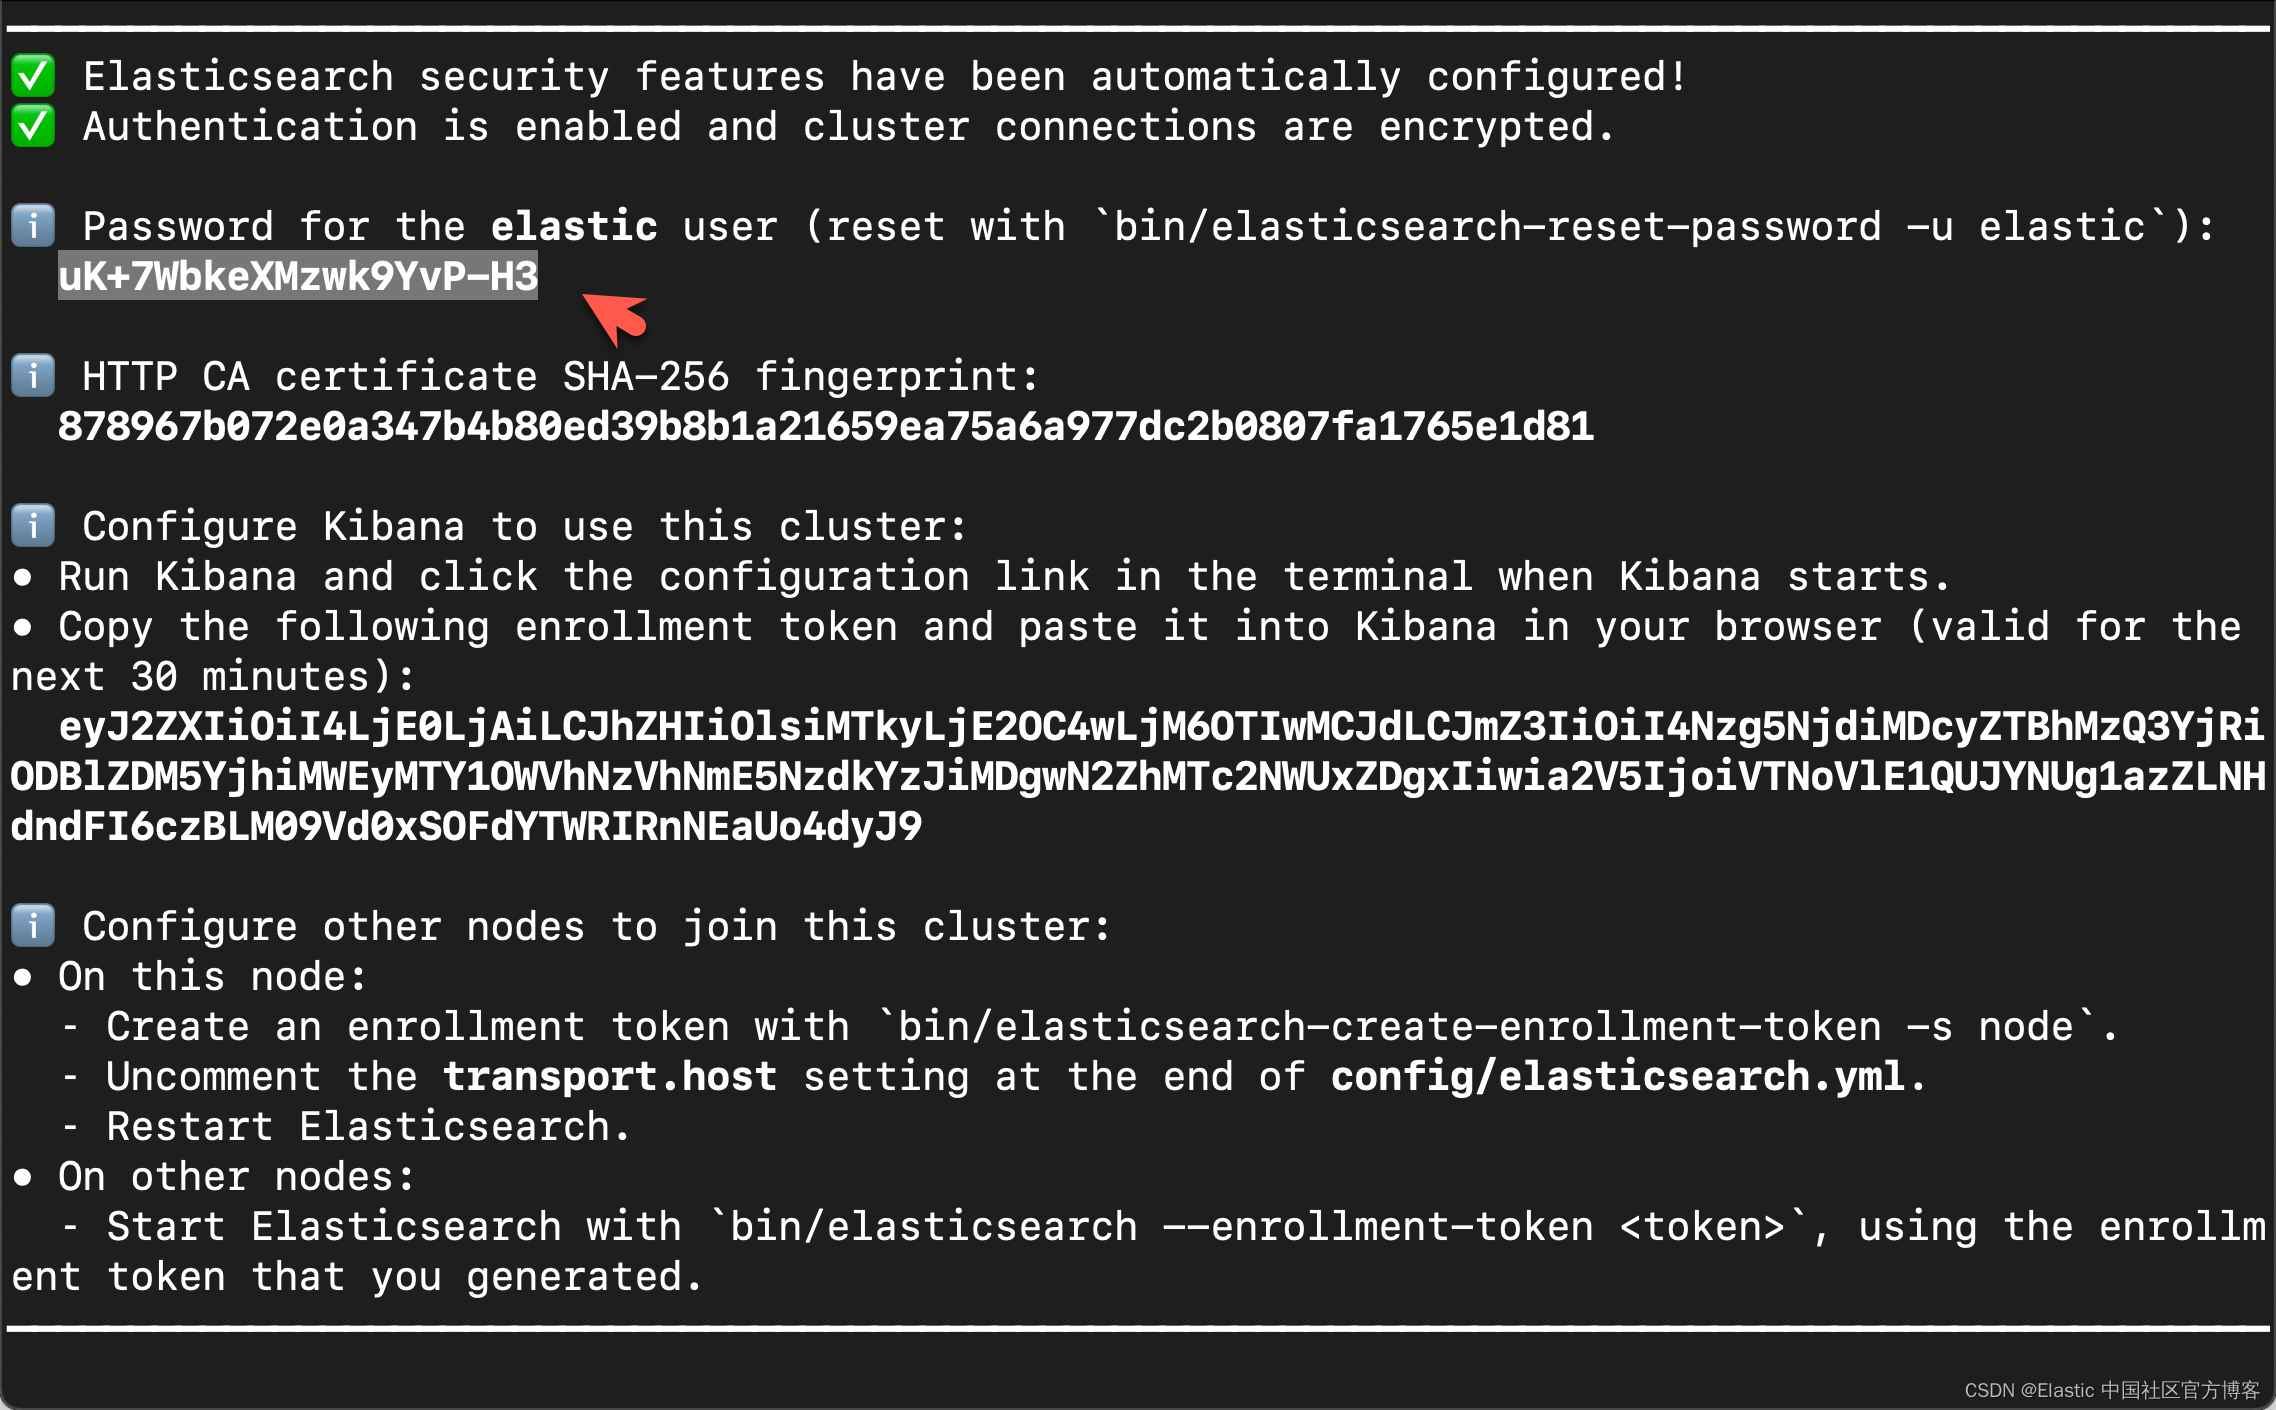
在上面,我们可以看到 elastic 超级用户的密码。我们记下它,并将在下面的代码中进行使用。
我们还可以在安装 Elasticsearch 目录中找到 Elasticsearch 的访问证书:
$ pwd
/Users/liuxg/elastic/elasticsearch-8.14.1/config/certs
$ ls
http.p12      http_ca.crt   transport.p12
在上面,http_ca.crt 是我们需要用来访问 Elasticsearch 的证书。
我们首先克隆已经写好的代码:
git clone https://github.com/liu-xiao-guo/elasticsearch-labs我们然后进入到该项目的根目录下:
$ pwd
/Users/liuxg/python/elasticsearch-labs/notebooks/cohere
$ ls
cohere-elasticsearch.ipynb inference-cohere.ipynb
如上所示,cohere-elasticsearch.ipynb 就是我们今天想要工作的 notebook。
我们通过如下的命令来拷贝所需要的证书:
$ pwd
/Users/liuxg/python/elasticsearch-labs/notebooks/cohere
$ ls
cohere-elasticsearch.ipynb inference-cohere.ipynb
$ cp ~/elastic/elasticsearch-8.14.1/config/certs/http_ca.crt .
$ ls http_ca.crt
http_ca.crt
安装所需要的 python 依赖包
pip3 install elasticsearch python-dotenv cohere我们通过如下的命令来查看 Elasticsearch 客户端的版本:
$ pip3 list | grep cohere
cohere                      5.5.8
$ pip3 list | grep elasticsearch
elasticsearch               8.14.0
启动白金试用
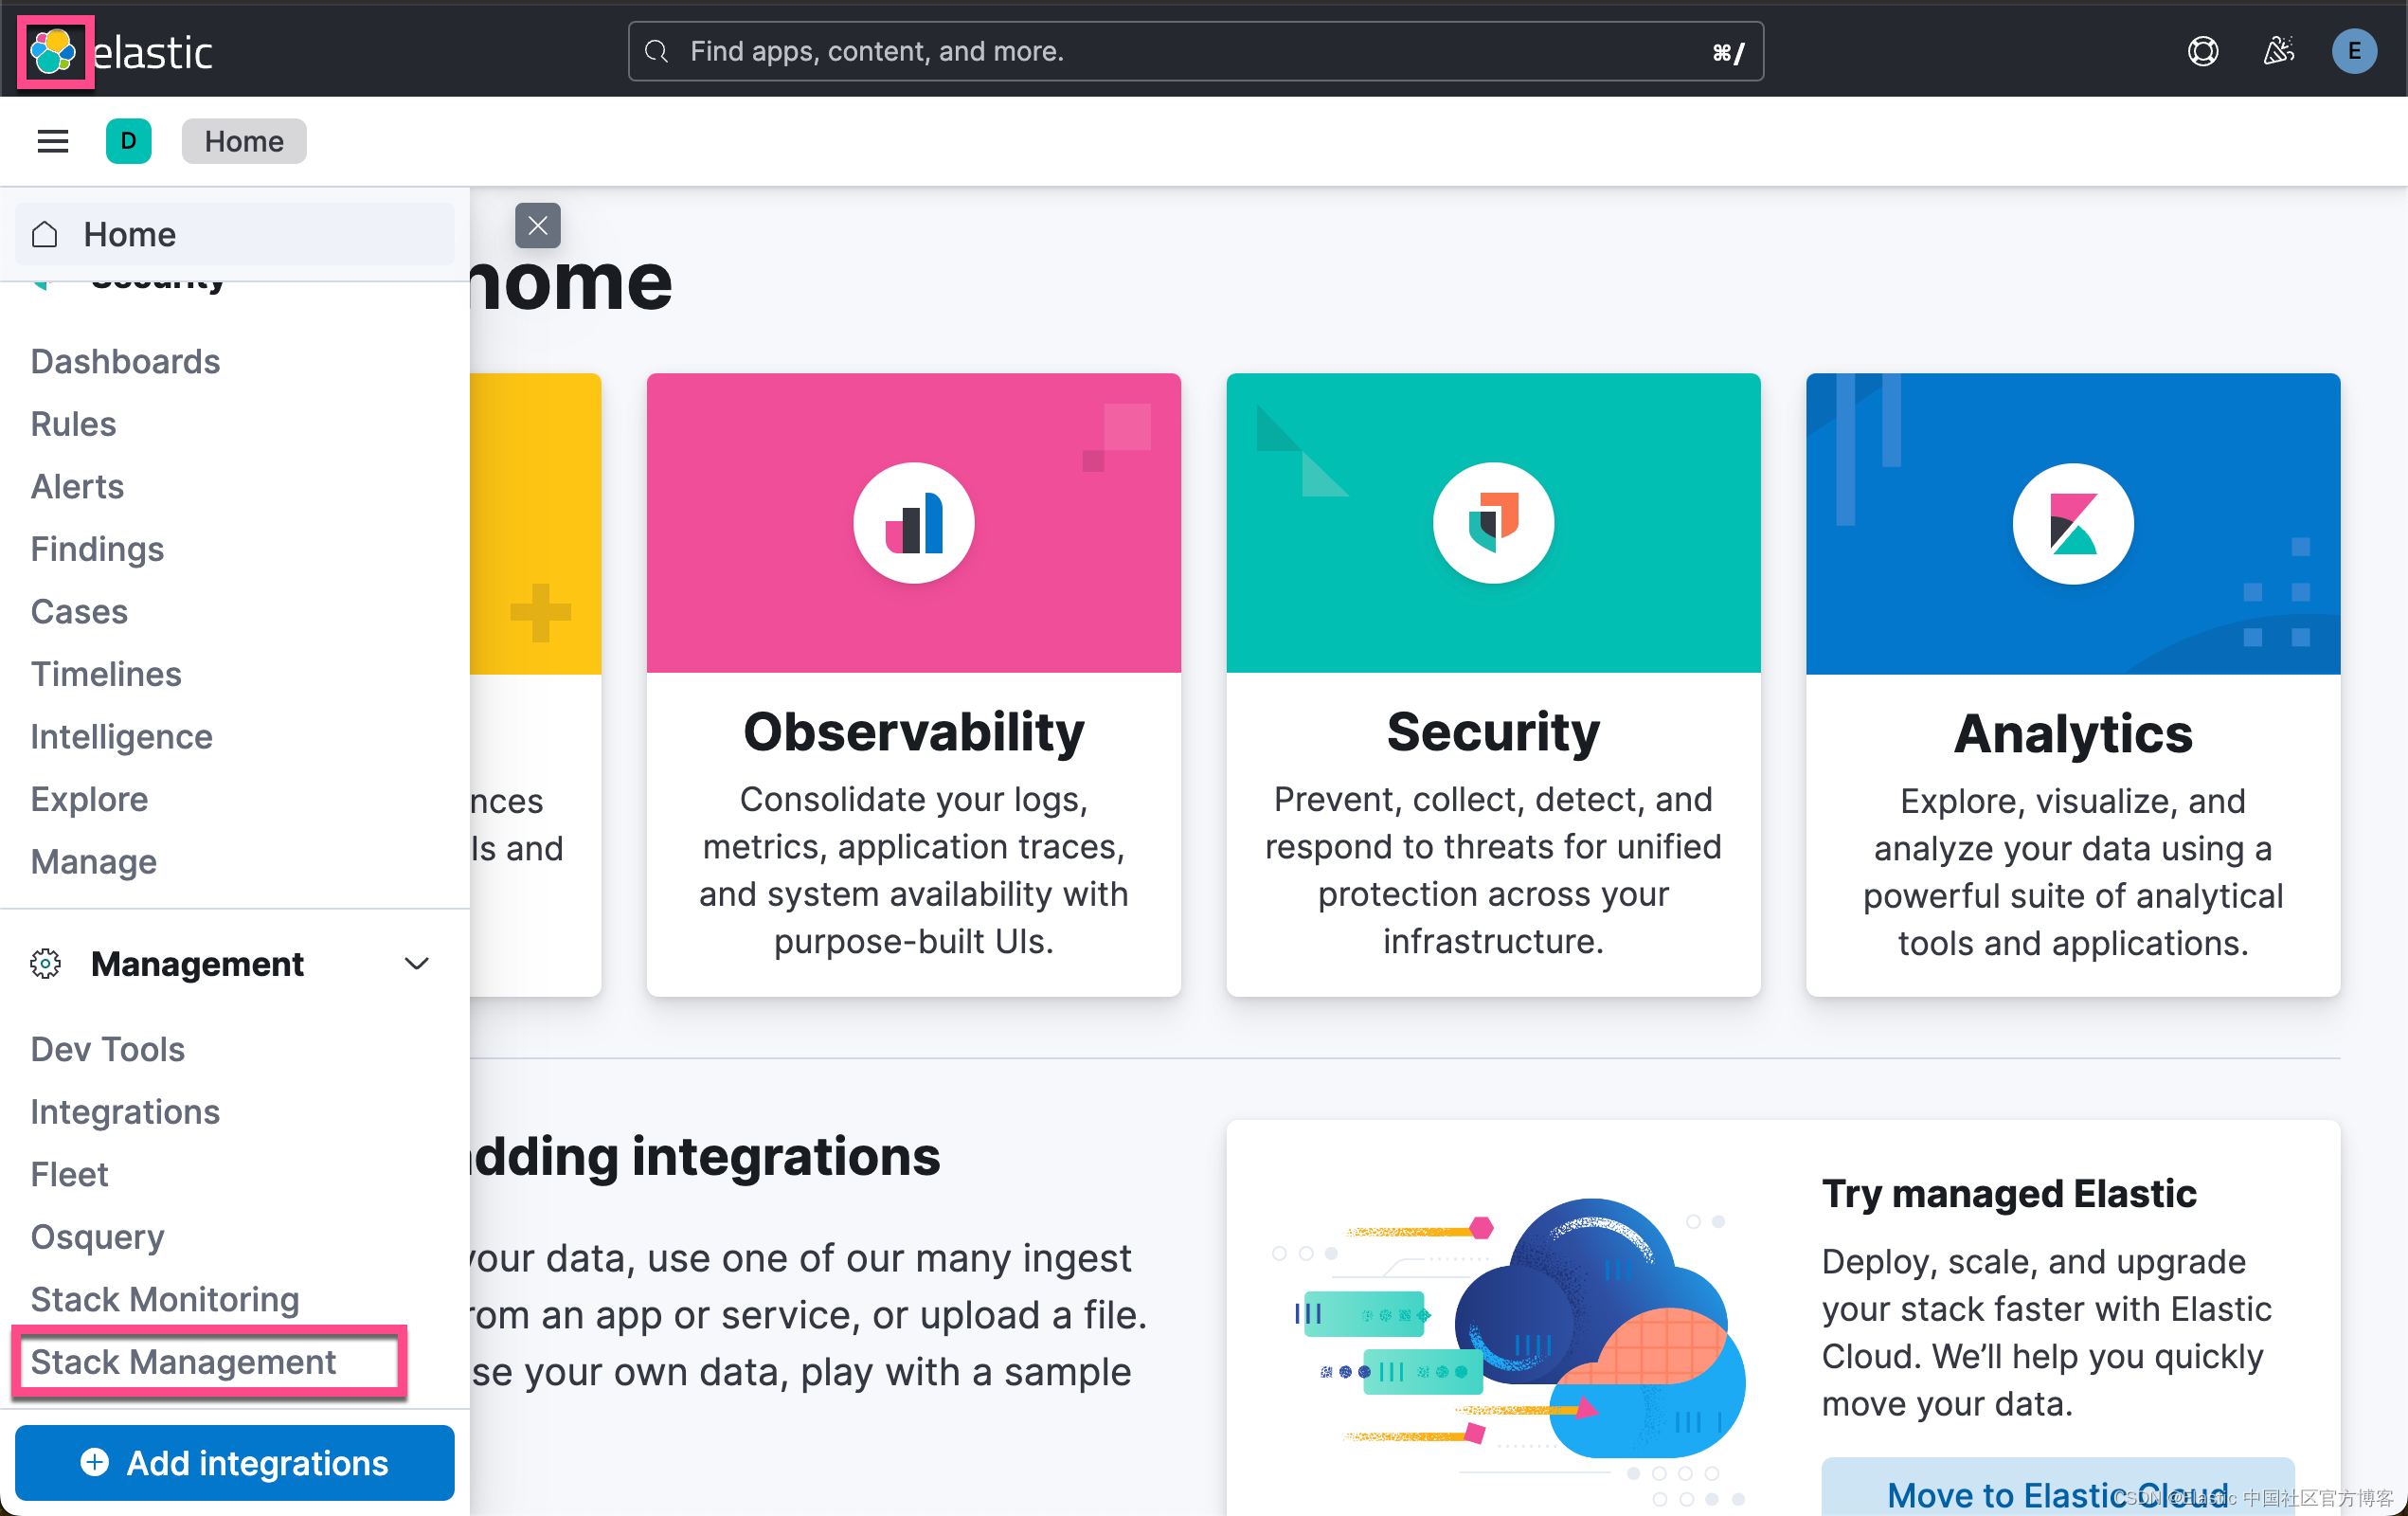
在下面,我们需要使用 ELSER。这是一个白金试用的功能。我们按照如下的步骤来启动白金试用:
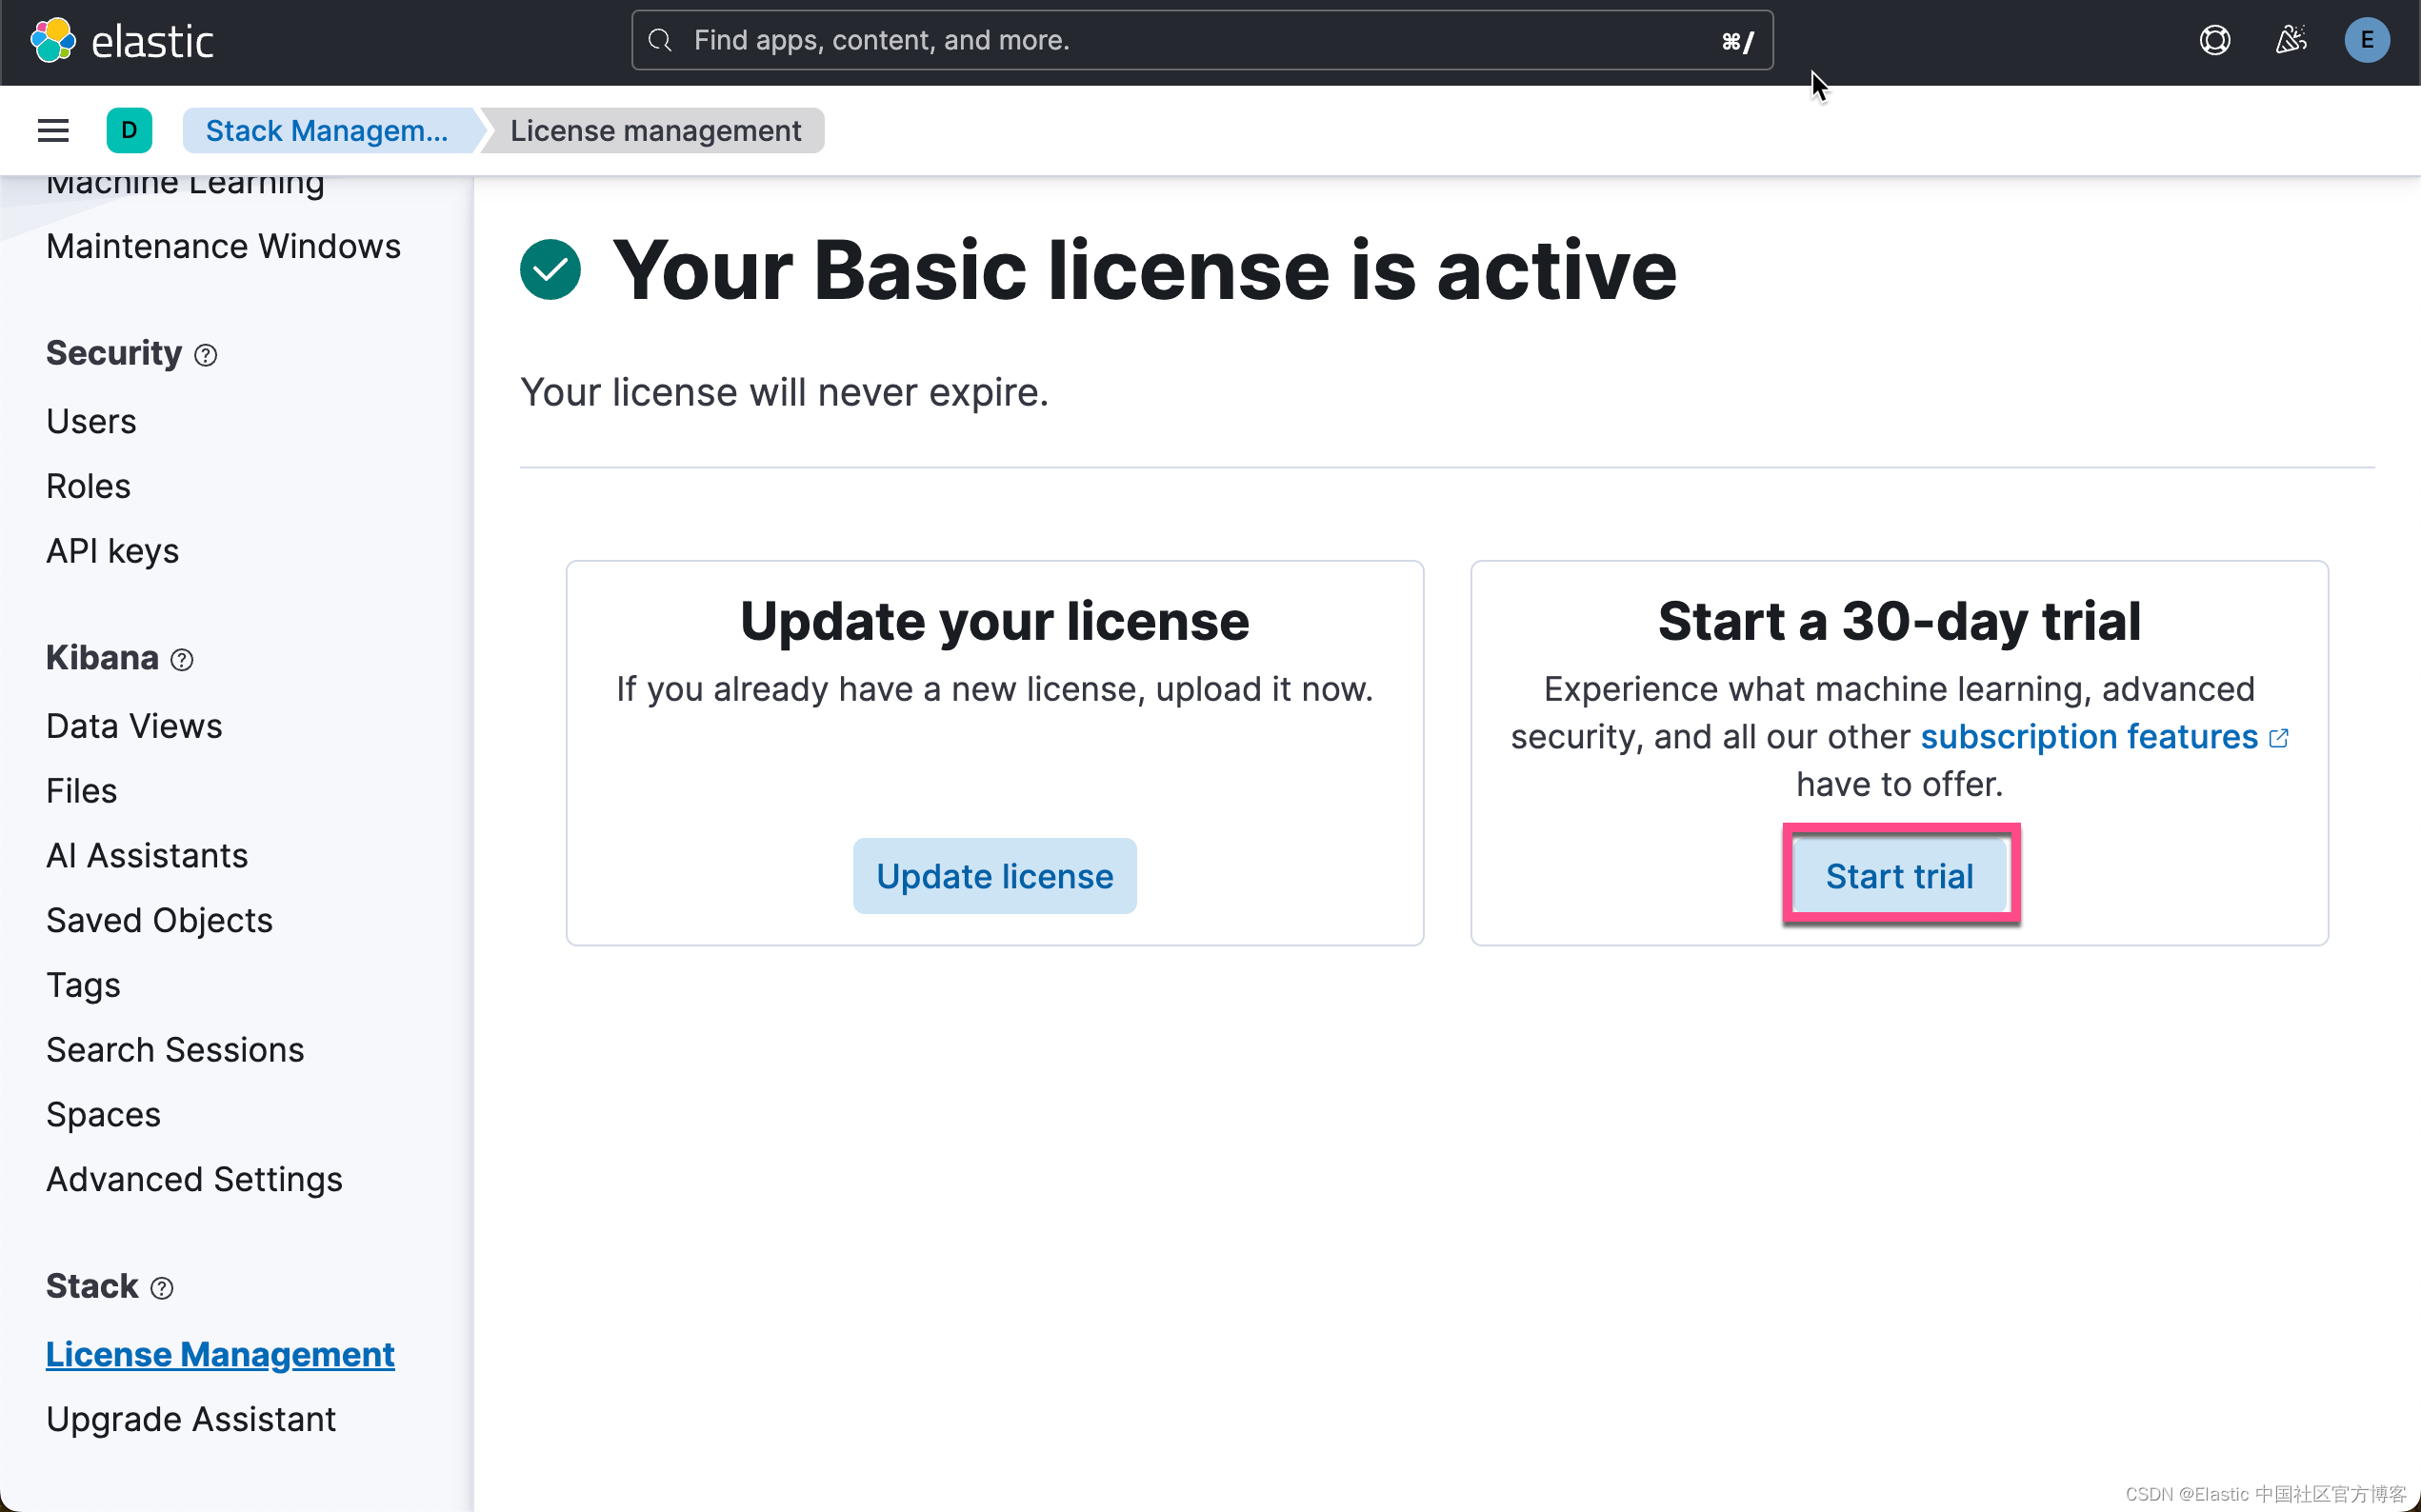
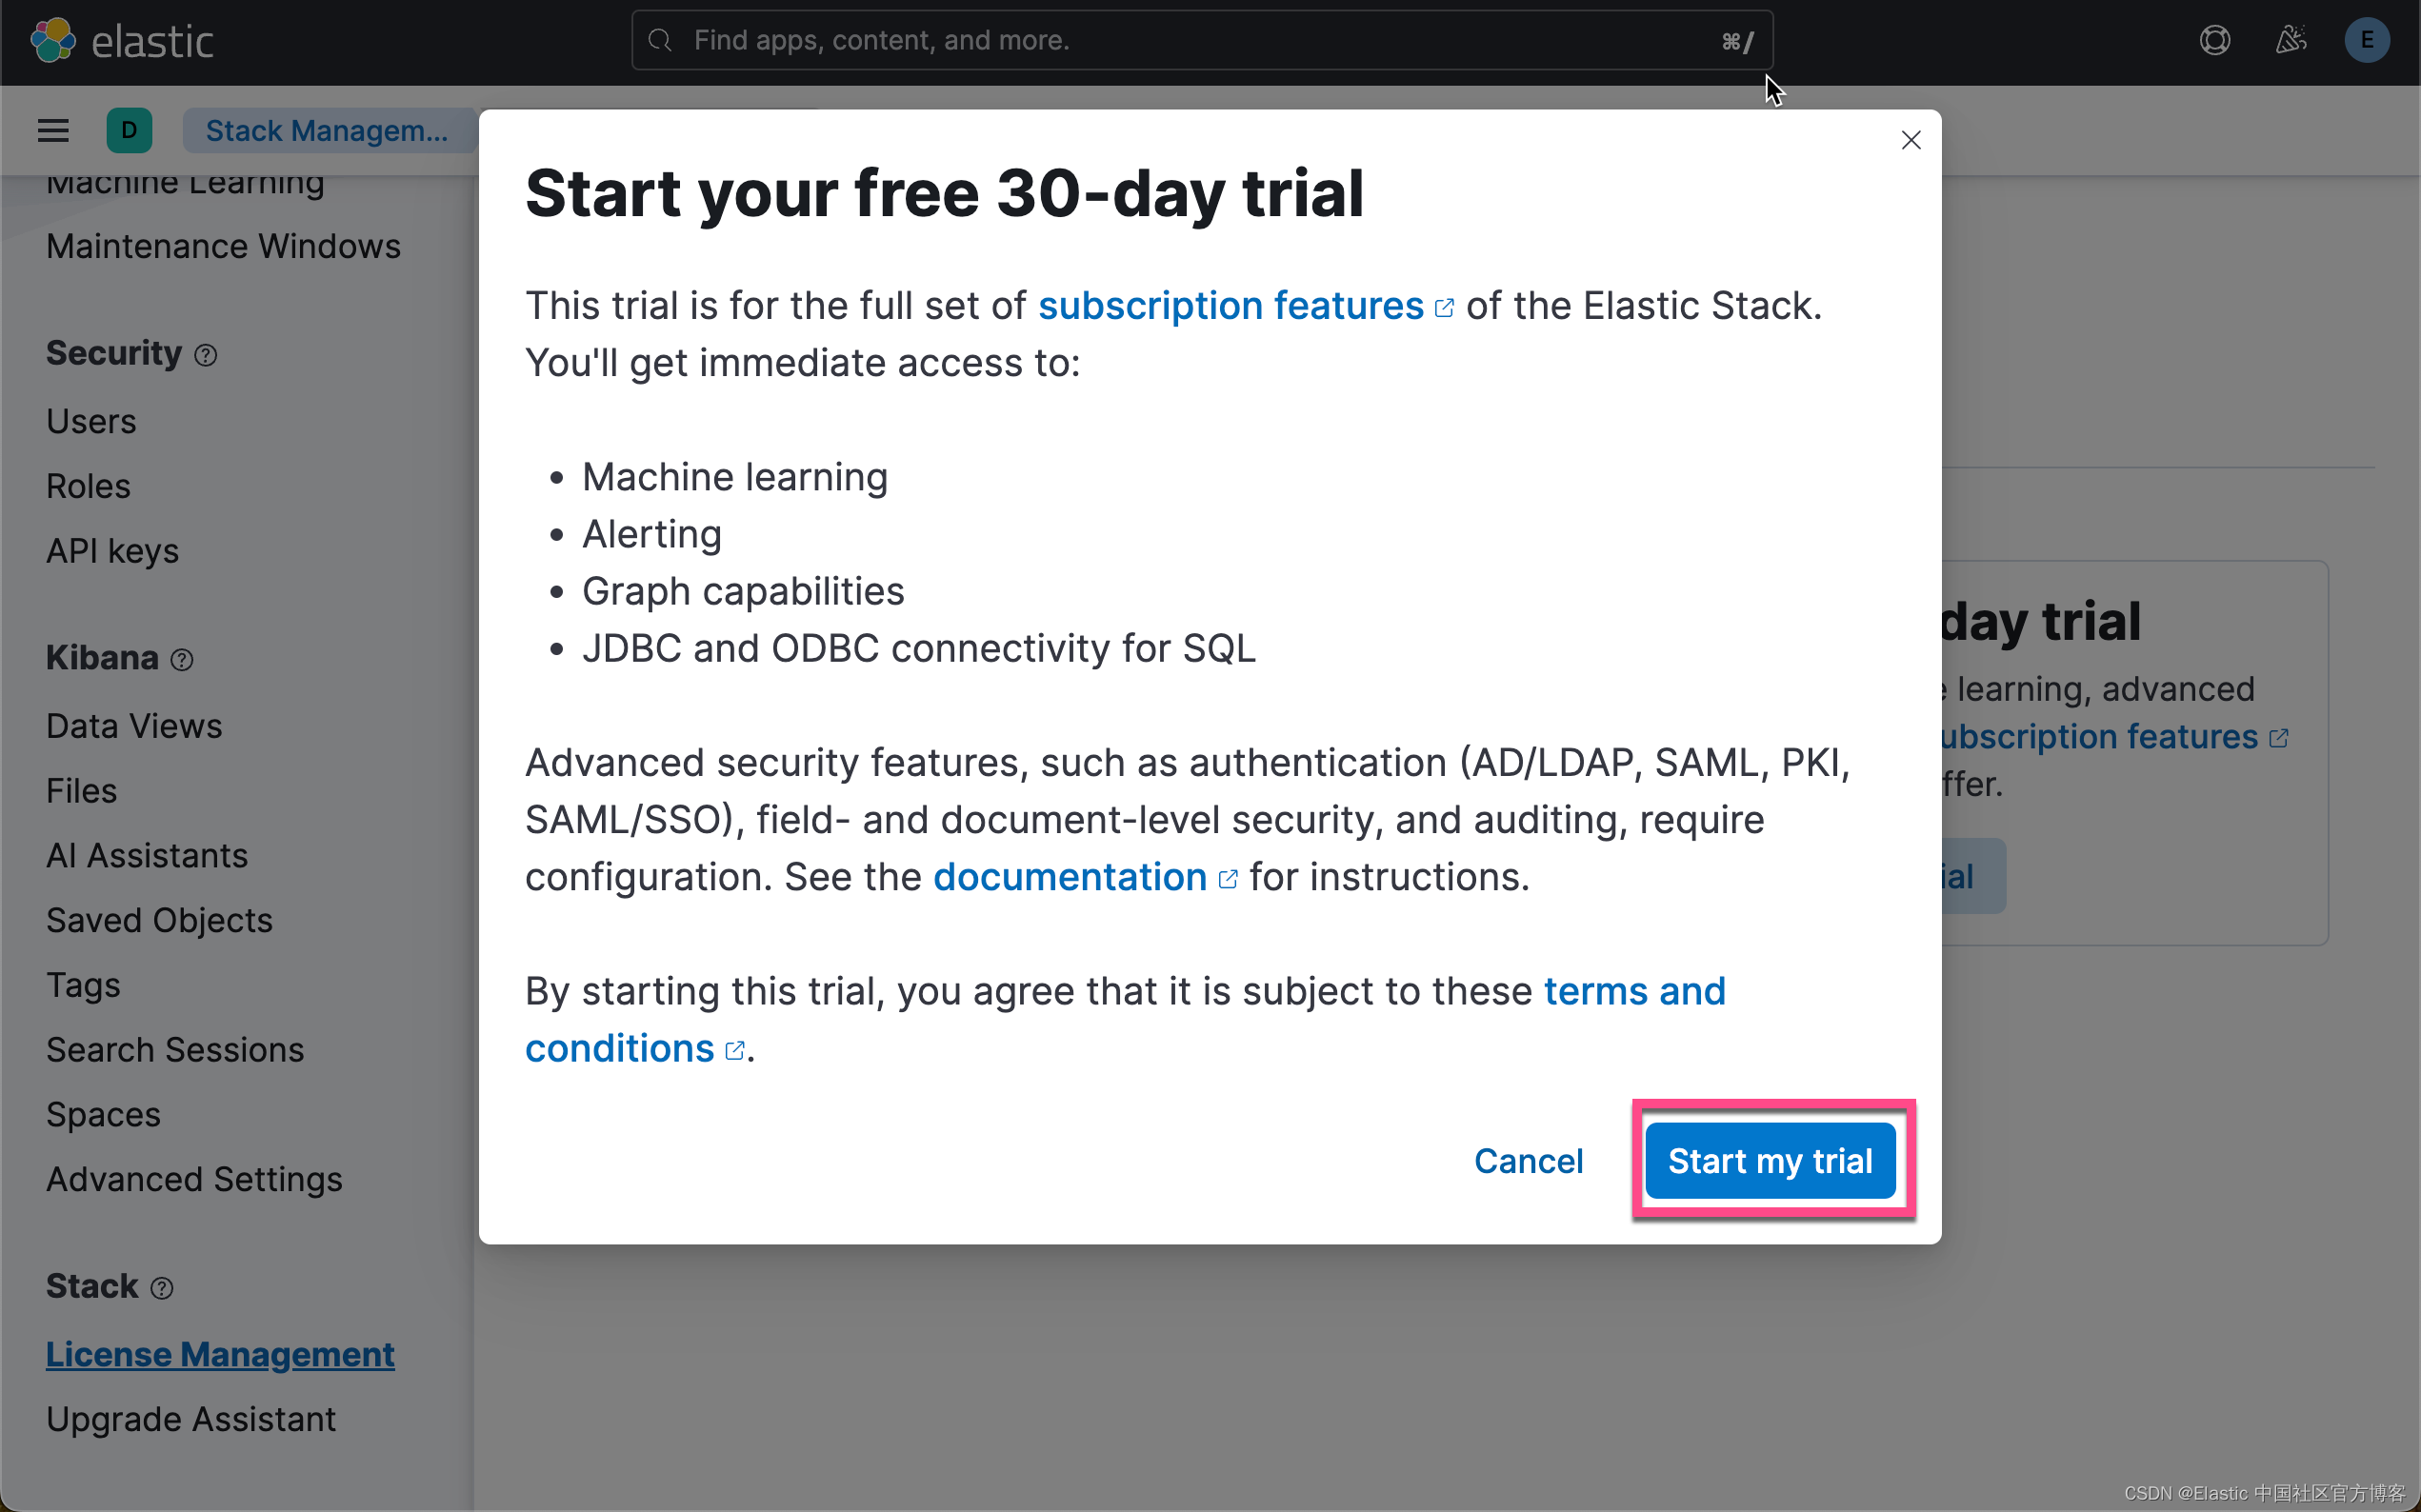
这样我们就完成了白金试用功能。
创建环境变量
为了能够使得下面的应用顺利执行,在项目当前的目录下运行如下的命令:
export ES_ENDPOINT="localhost"
export ES_USER="elastic"
export ES_PASSWORD="uK+7WbkeXMzwk9YvP-H3"
export COHERE_API_KEY="YourCohereAPIkey"
然后,我们在运行上面命令的 terminal 中打入如下的命令:
$ pwd
/Users/liuxg/python/elasticsearch-labs/notebooks/cohere
$ ls
cohere-elasticsearch.ipynb http_ca.crt                inference-cohere.ipynb
$ jupyter notebook cohere-elasticsearch.ipynb
准备数据
我们通过如下的命令来下载数据集:
wget https://huggingface.co/datasets/mteb/scifact/raw/main/corpus.jsonl
$ wget https://huggingface.co/datasets/mteb/scifact/raw/main/corpus.jsonl
--2024-06-24 09:50:46-- https://huggingface.co/datasets/mteb/scifact/raw/main/corpus.jsonl
Resolving huggingface.co (huggingface.co)... 3.163.189.90
Connecting to huggingface.co (huggingface.co)|3.163.189.90|:443... connected.
HTTP request sent, awaiting response... 200 OK
Length: 8023638 (7.7M) [text/plain]
Saving to: 'corpus.jsonl'
corpus.jsonl 100%[=============================>] 7.65M 5.48MB/s in 1.4s
2024-06-24 09:50:48 (5.48 MB/s) - 'corpus.jsonl' saved [8023638/8023638]
$ ls
cohere-elasticsearch.ipynb http_ca.crt
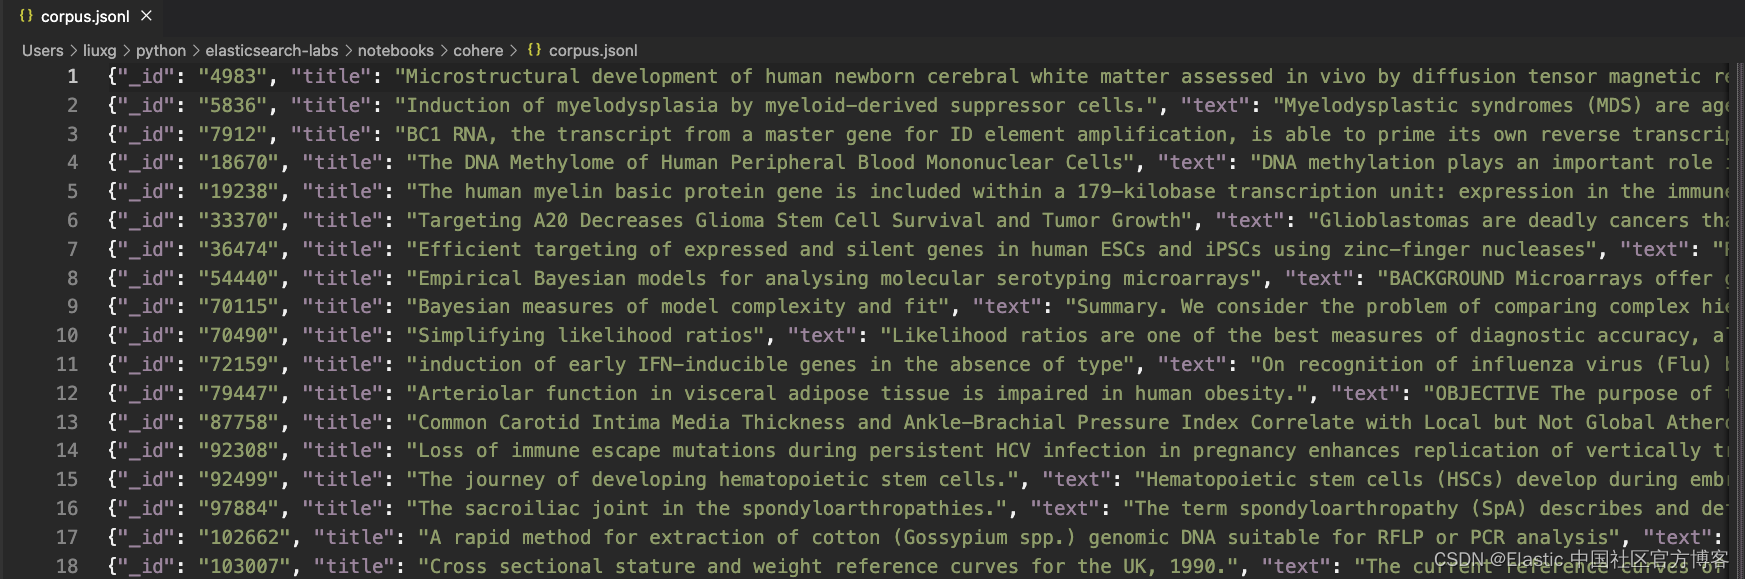
corpus.jsonl inference-cohere.ipynb上面的 corpus.jsonl 就是我们想要工作的数据集。它的格式如下:
展示
读入变量并连接到 Elasticsearch
from elasticsearch import Elasticsearch, helpers
import cohere
import json
import requests
from dotenv import load_dotenv
import os

load_dotenv()

ES_USER = os.getenv("ES_USER")
ES_PASSWORD = os.getenv("ES_PASSWORD")
ES_ENDPOINT = os.getenv("ES_ENDPOINT")
COHERE_API_KEY = os.getenv("COHERE_API_KEY")

url = f"https://{ES_USER}:{ES_PASSWORD}@{ES_ENDPOINT}:9200"
print(url)

client = Elasticsearch(url, ca_certs = "./http_ca.crt", verify_certs = True)
print(client.info())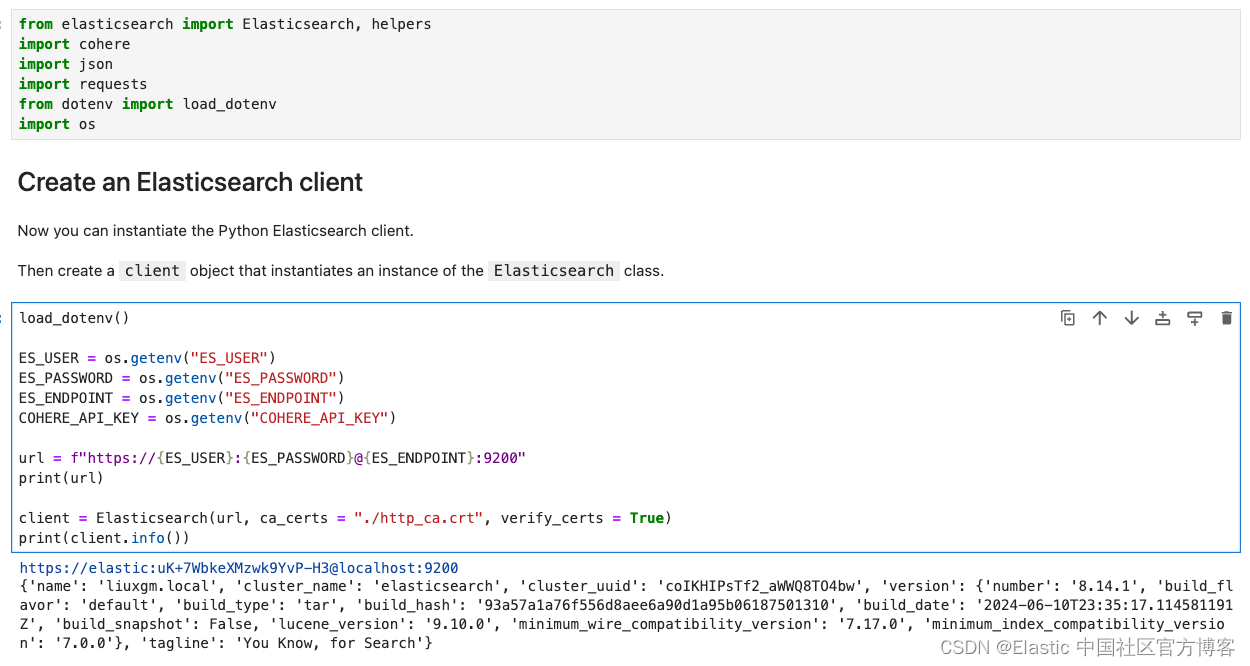
创建推理端点
首先创建推理端点。在此示例中,推理端点使用 Cohere 的 embed-english-v3.0 模型,并将 embedding_type 设置为 byte。
from elasticsearch import BadRequestError

try:
    client.inference.delete_model(inference_id="cohere_embeddings")
except:
    ;

try:
    client.inference.put_model(
        task_type="text_embedding",
        inference_id="cohere_embeddings",
        body={
            "service": "cohere",
            "service_settings": {
                "api_key": COHERE_API_KEY,
                "model_id": "embed-english-v3.0",
                "embedding_type": "byte",
            },
        },
    )
except BadRequestError as e:
    print(e)
我们可以在 Kibana 中进行查看:
GET /_inference/_all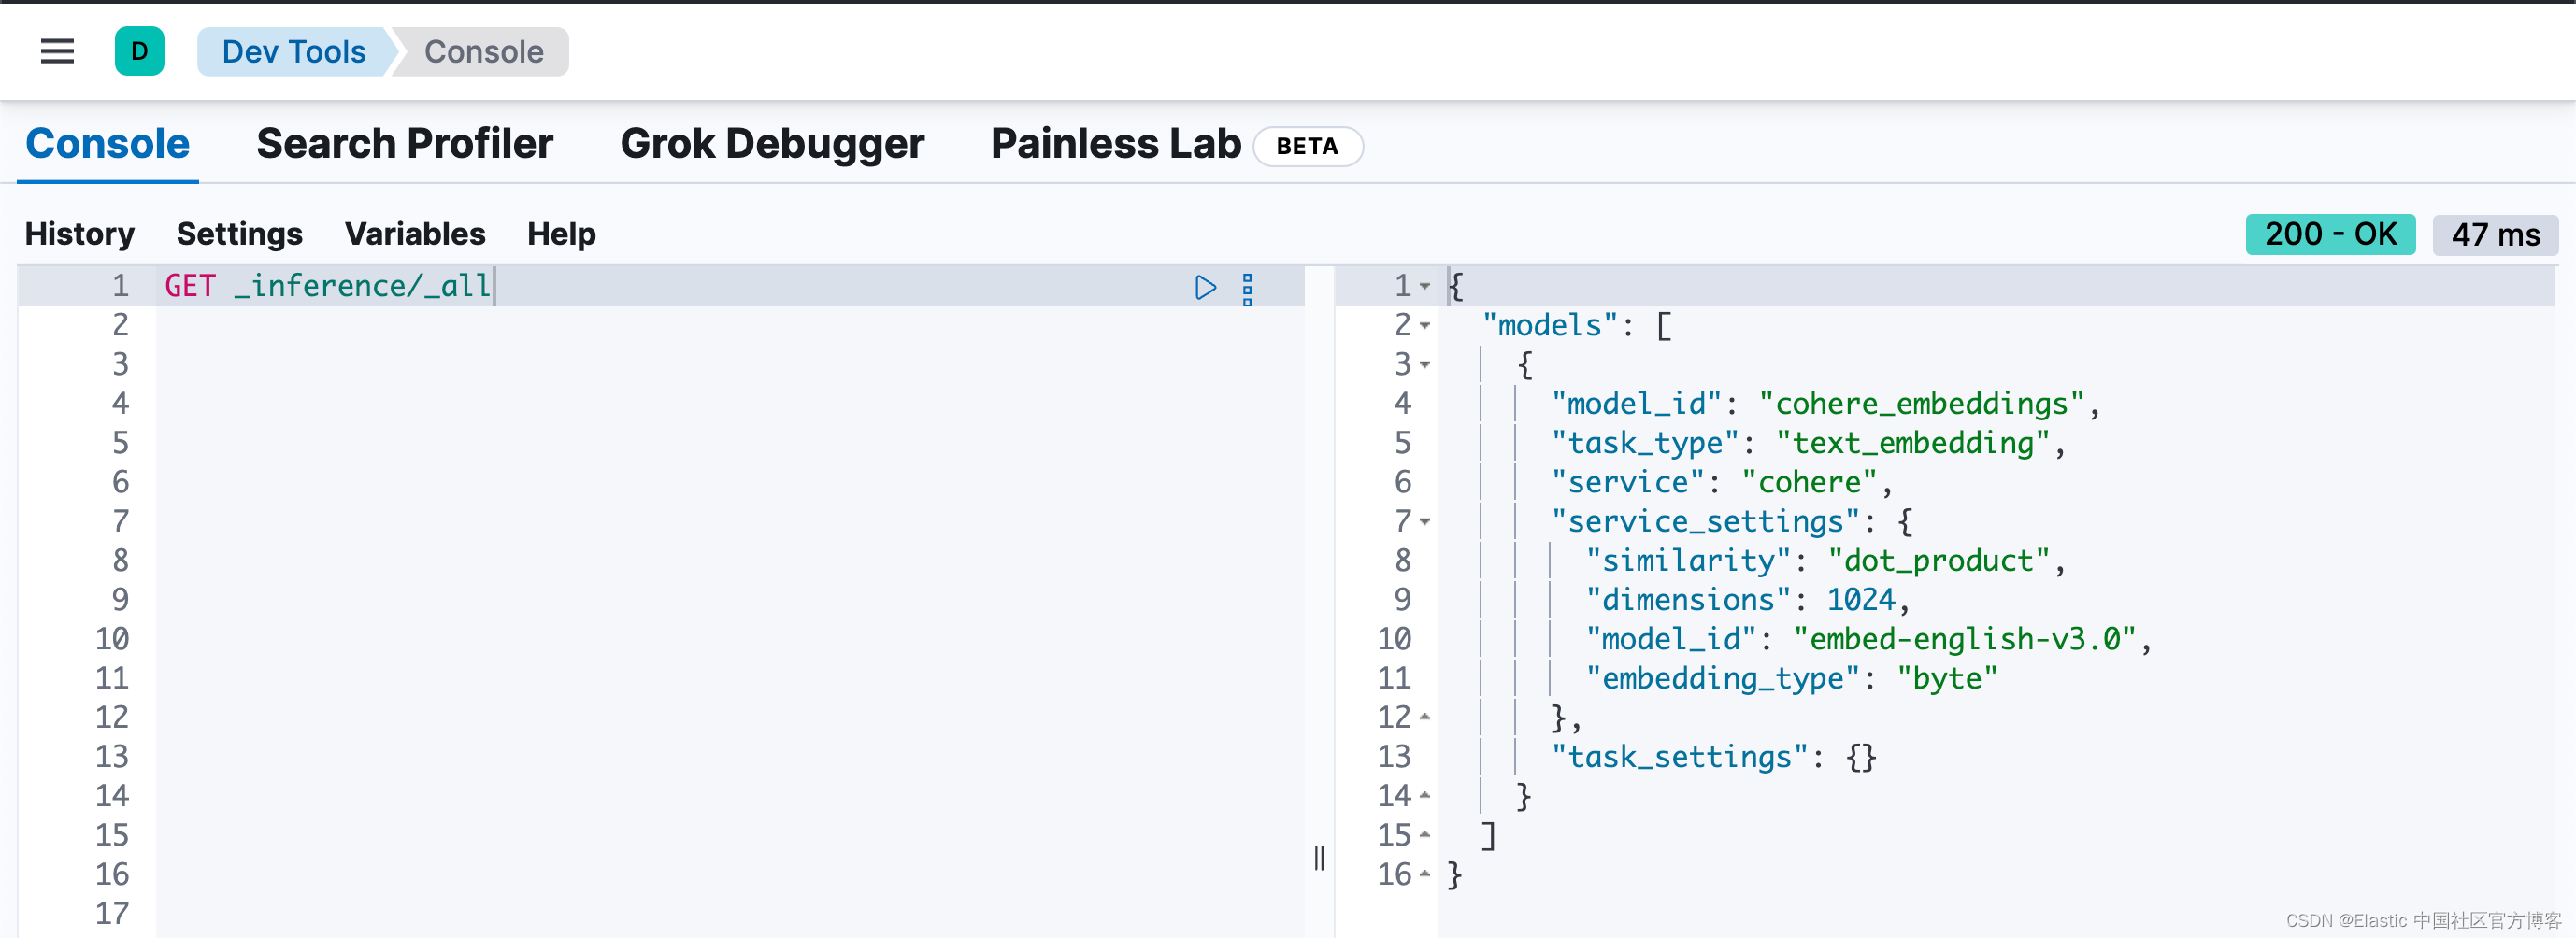
或者:
GET /_inference/cohere_embeddings创建索引映射
为包含嵌入的索引创建索引映射。
index_name="cohere-embeddings"

try:
    client.indices.delete(index=index_name)
except:
    ;

if not client.indices.exists(index=index_name):
    client.indices.create(
        index=index_name,
        settings={"index": {"default_pipeline": "cohere_embeddings"}},
        mappings={
            "properties": {
                "text_embedding": {
                    "type": "dense_vector",
                    "dims": 1024,
                    "element_type": "byte",
                },
                "text": {"type": "text"},
                "id": {"type": "integer"},
                "title": {"type": "text"},
            }
        },
    )
在运行完上面的代码后,我们可以在 Kibana 中进行查看:
GET cohere-embeddings/_mapping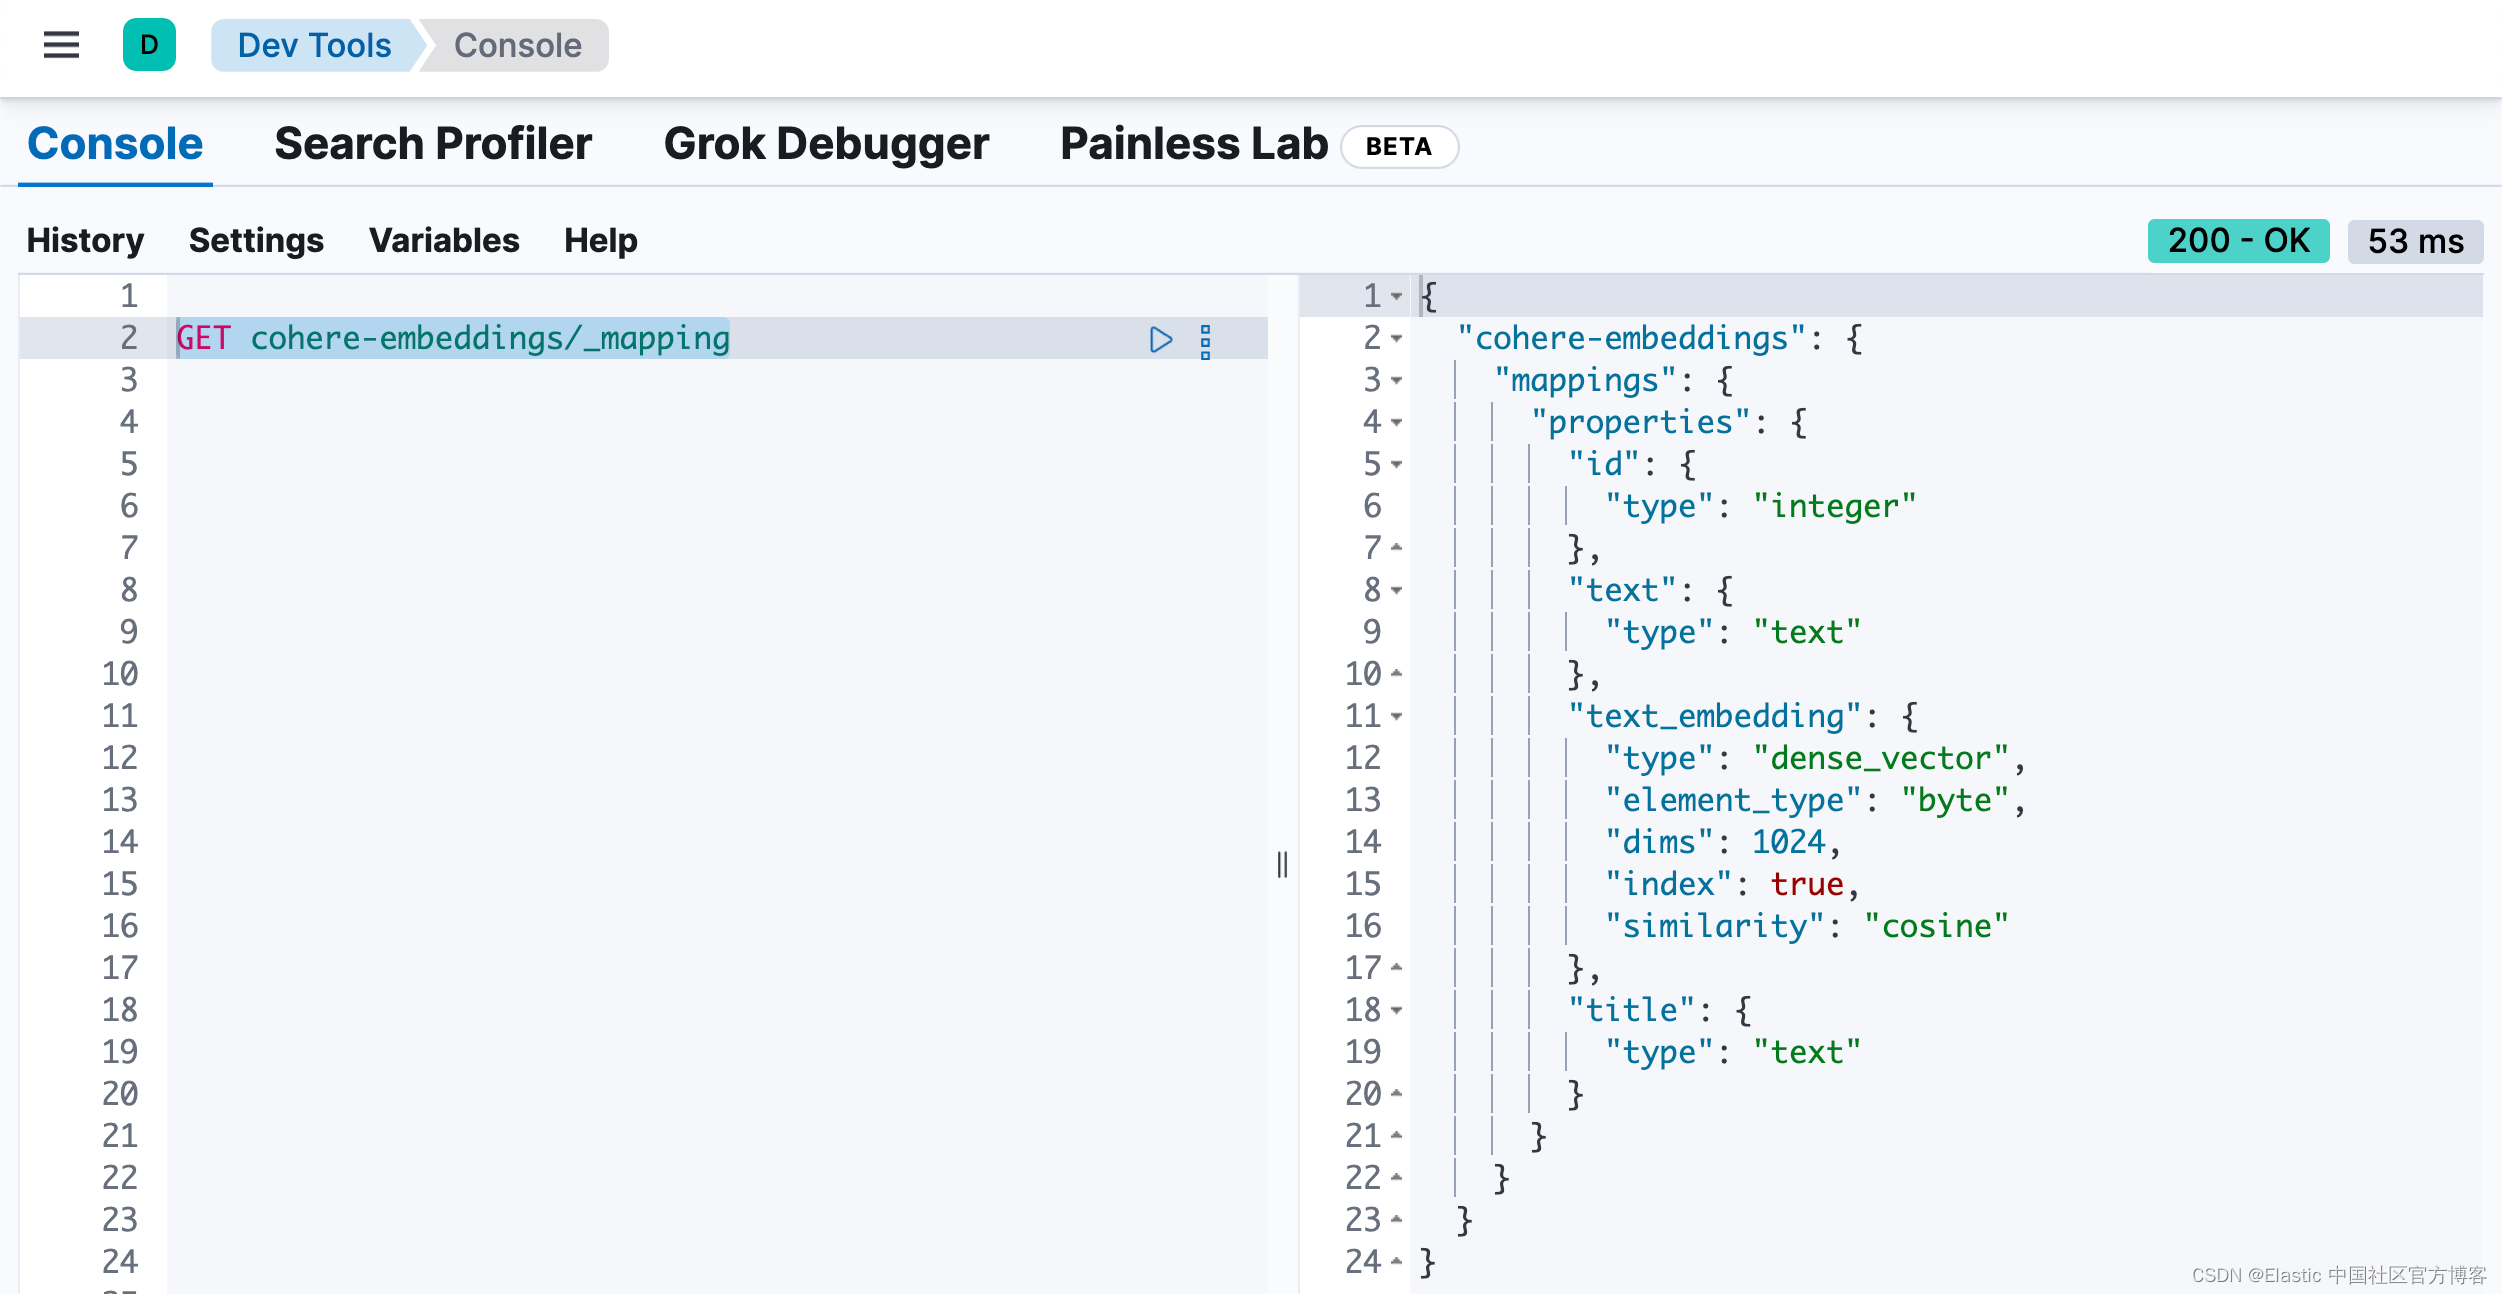
创建摄入管道
现在,你已拥有一个推理端点和一个可用于存储嵌入的索引。下一步是创建一个摄取管道,该管道使用推理端点创建嵌入并将其存储在索引中。
client.ingest.put_pipeline(
id="cohere_embeddings",
description="Ingest pipeline for Cohere inference.",
processors=[
{
"inference": {
"model_id": "cohere_embeddings",
"input_output": {
"input_field": "text",
"output_field": "text_embedding",
},
}
}
],
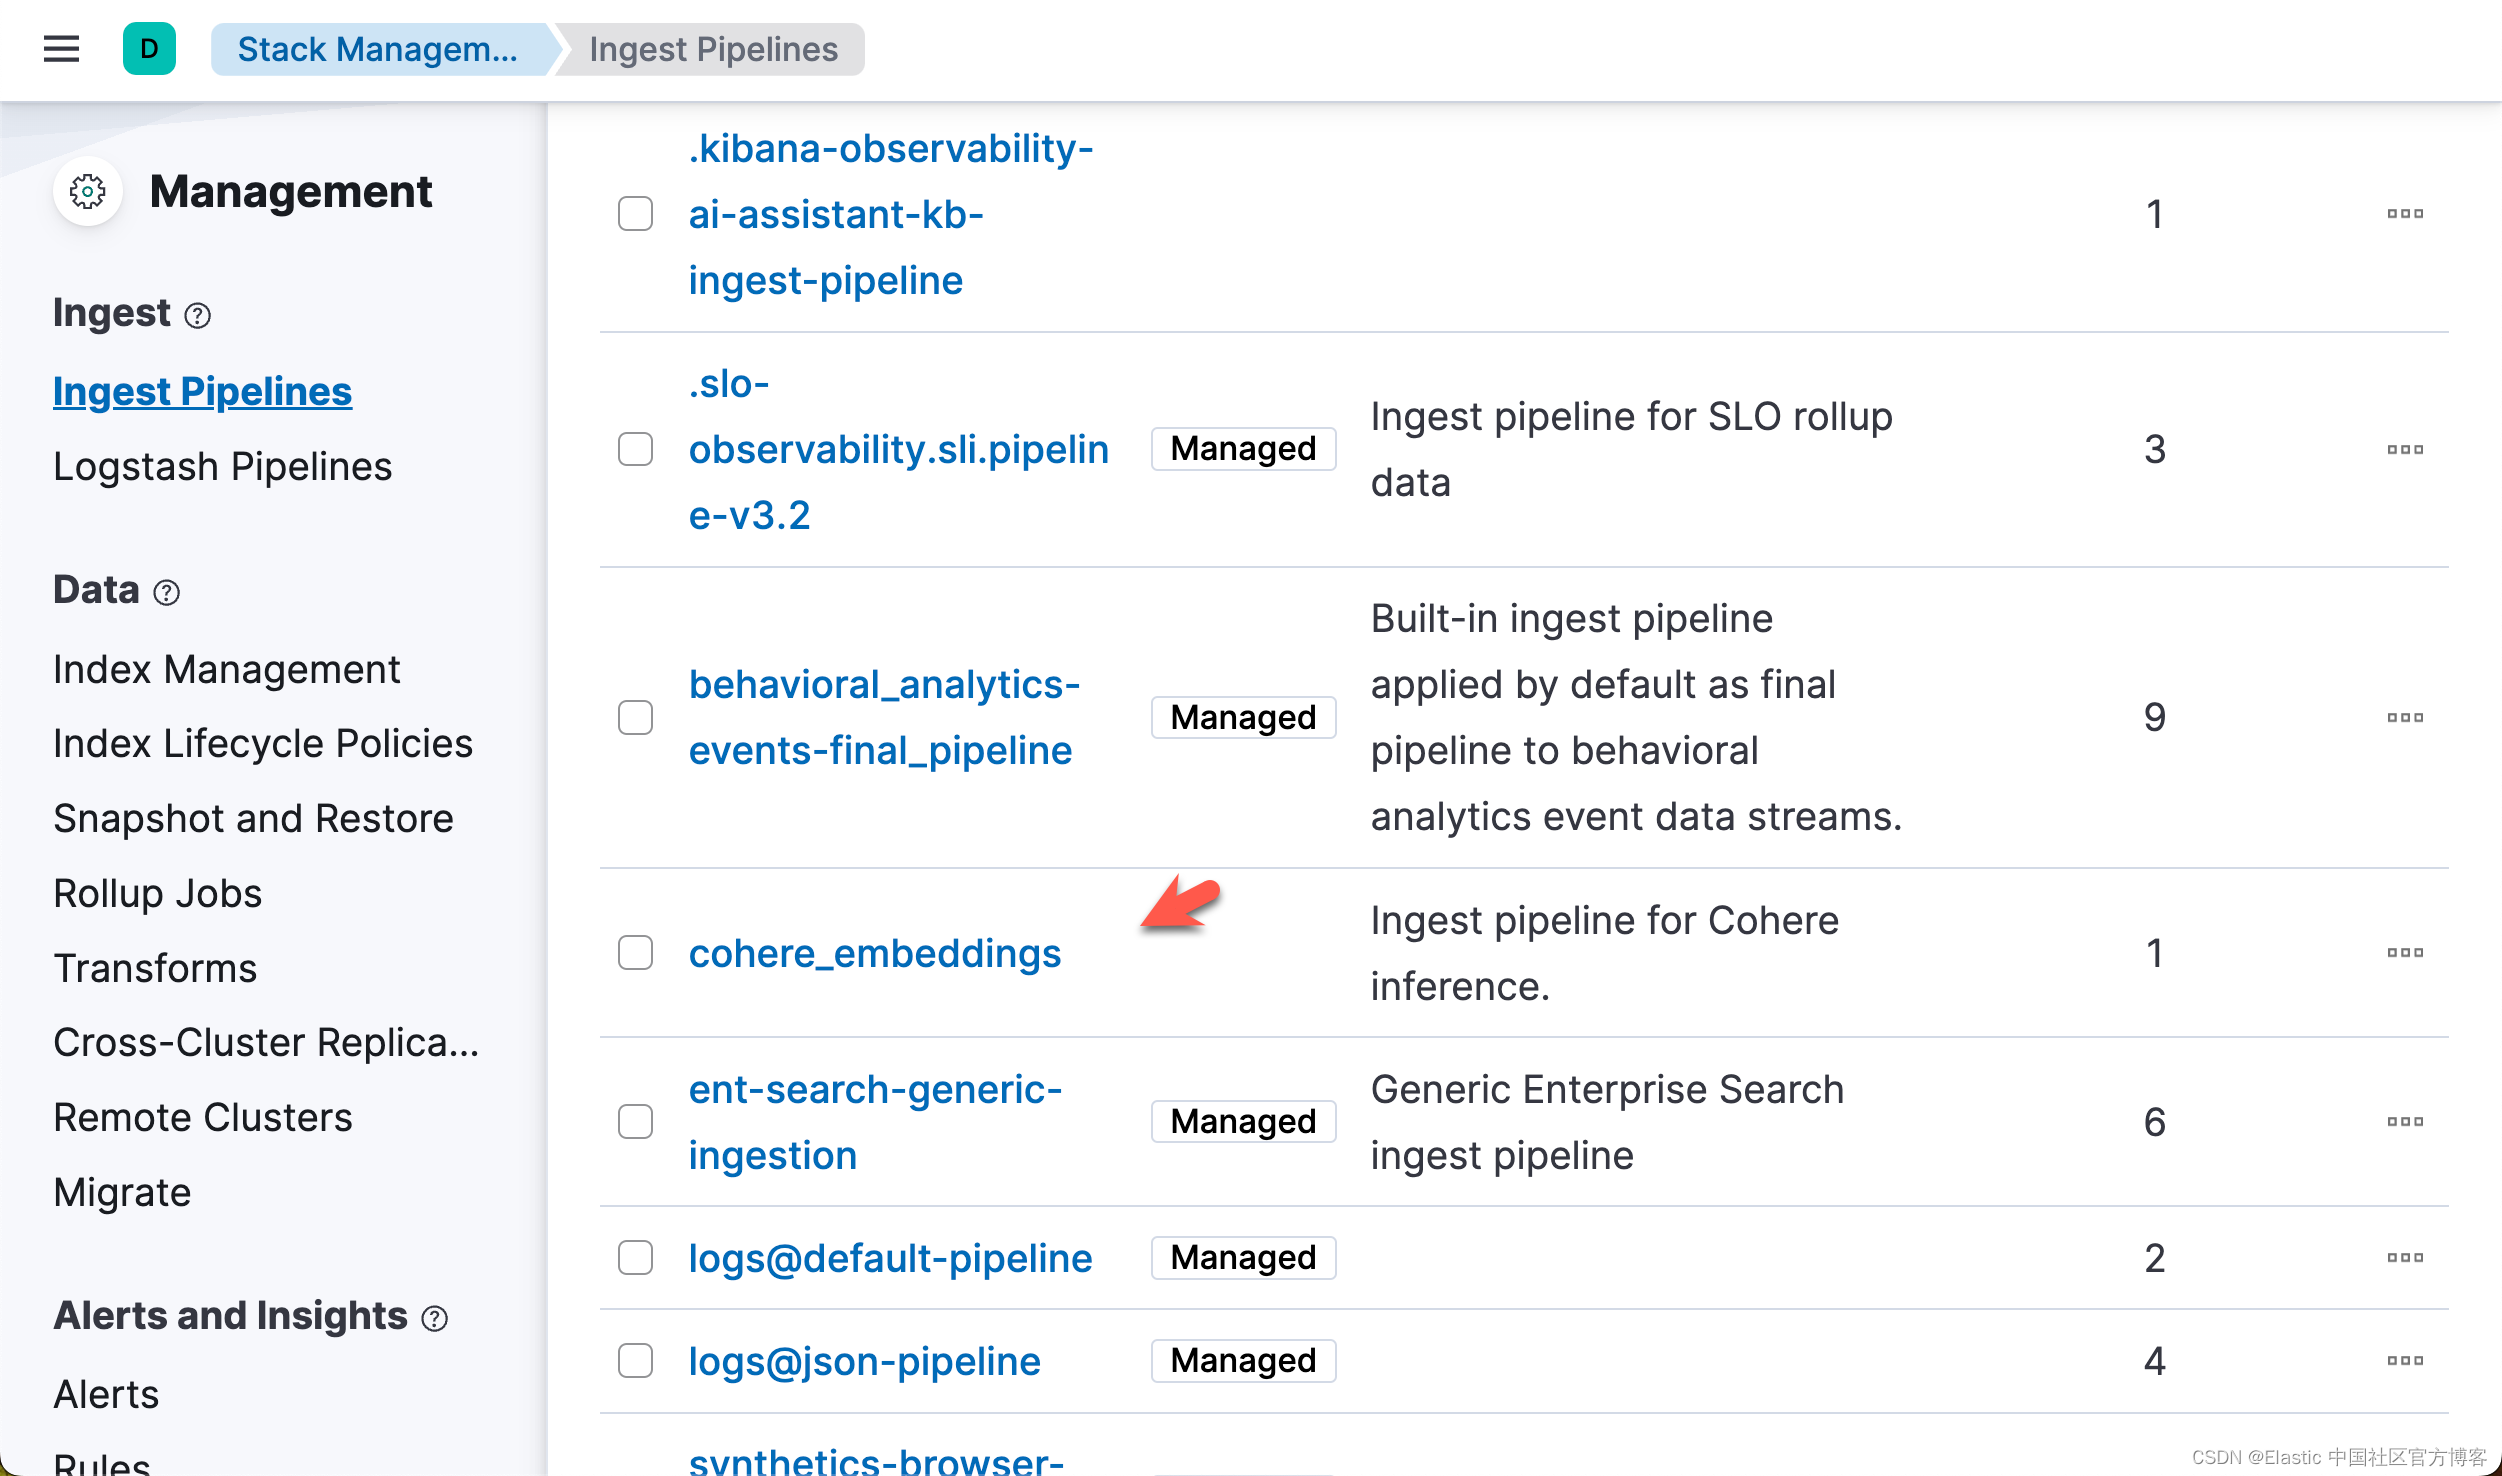
)在运行完上面的命令后,我们可以在 Kibana 中进行查看:
准备数据并写入数据
此示例使用你可以在 HuggingFace 上找到的 SciFact 数据集。
#url = "https://huggingface.co/datasets/mteb/scifact/raw/main/corpus.jsonl"

# Fetch the JSONL data from the URL
#response = requests.get(url)
#response.raise_for_status()  # Ensure we notice bad responses

import json

with open('./corpus.jsonl', 'r') as file:
    content = file.read()

# Split the content by new lines and parse each line as JSON
data = [json.loads(line) for line in content.strip().split("\n") if line]

data = data[:10]
print(f"Successfully loaded {len(data)} documents")

# Change `_id` key to `id` as `_id` is a reserved key in Elasticsearch.
for item in data:
    if "_id" in item:
        item["id"] = item.pop("_id")

# Prepare the documents to be indexed
documents = []
for line in data:
    data_dict = line
    documents.append(
        {
            "_index": "cohere-embeddings",
            "_source": data_dict,
        }
    )

print(documents)

# Use the bulk endpoint to index
helpers.bulk(client, documents)

print("Data ingestion completed, text embeddings generated!")
在我们的练习中,由于我们使用的是 trial 的 Cohere API key。它的使用是有一定的限制的。在上面,我们只取了前面的 20 个文档来进行向量化。

我们可以在 Kibana 中进行查看:
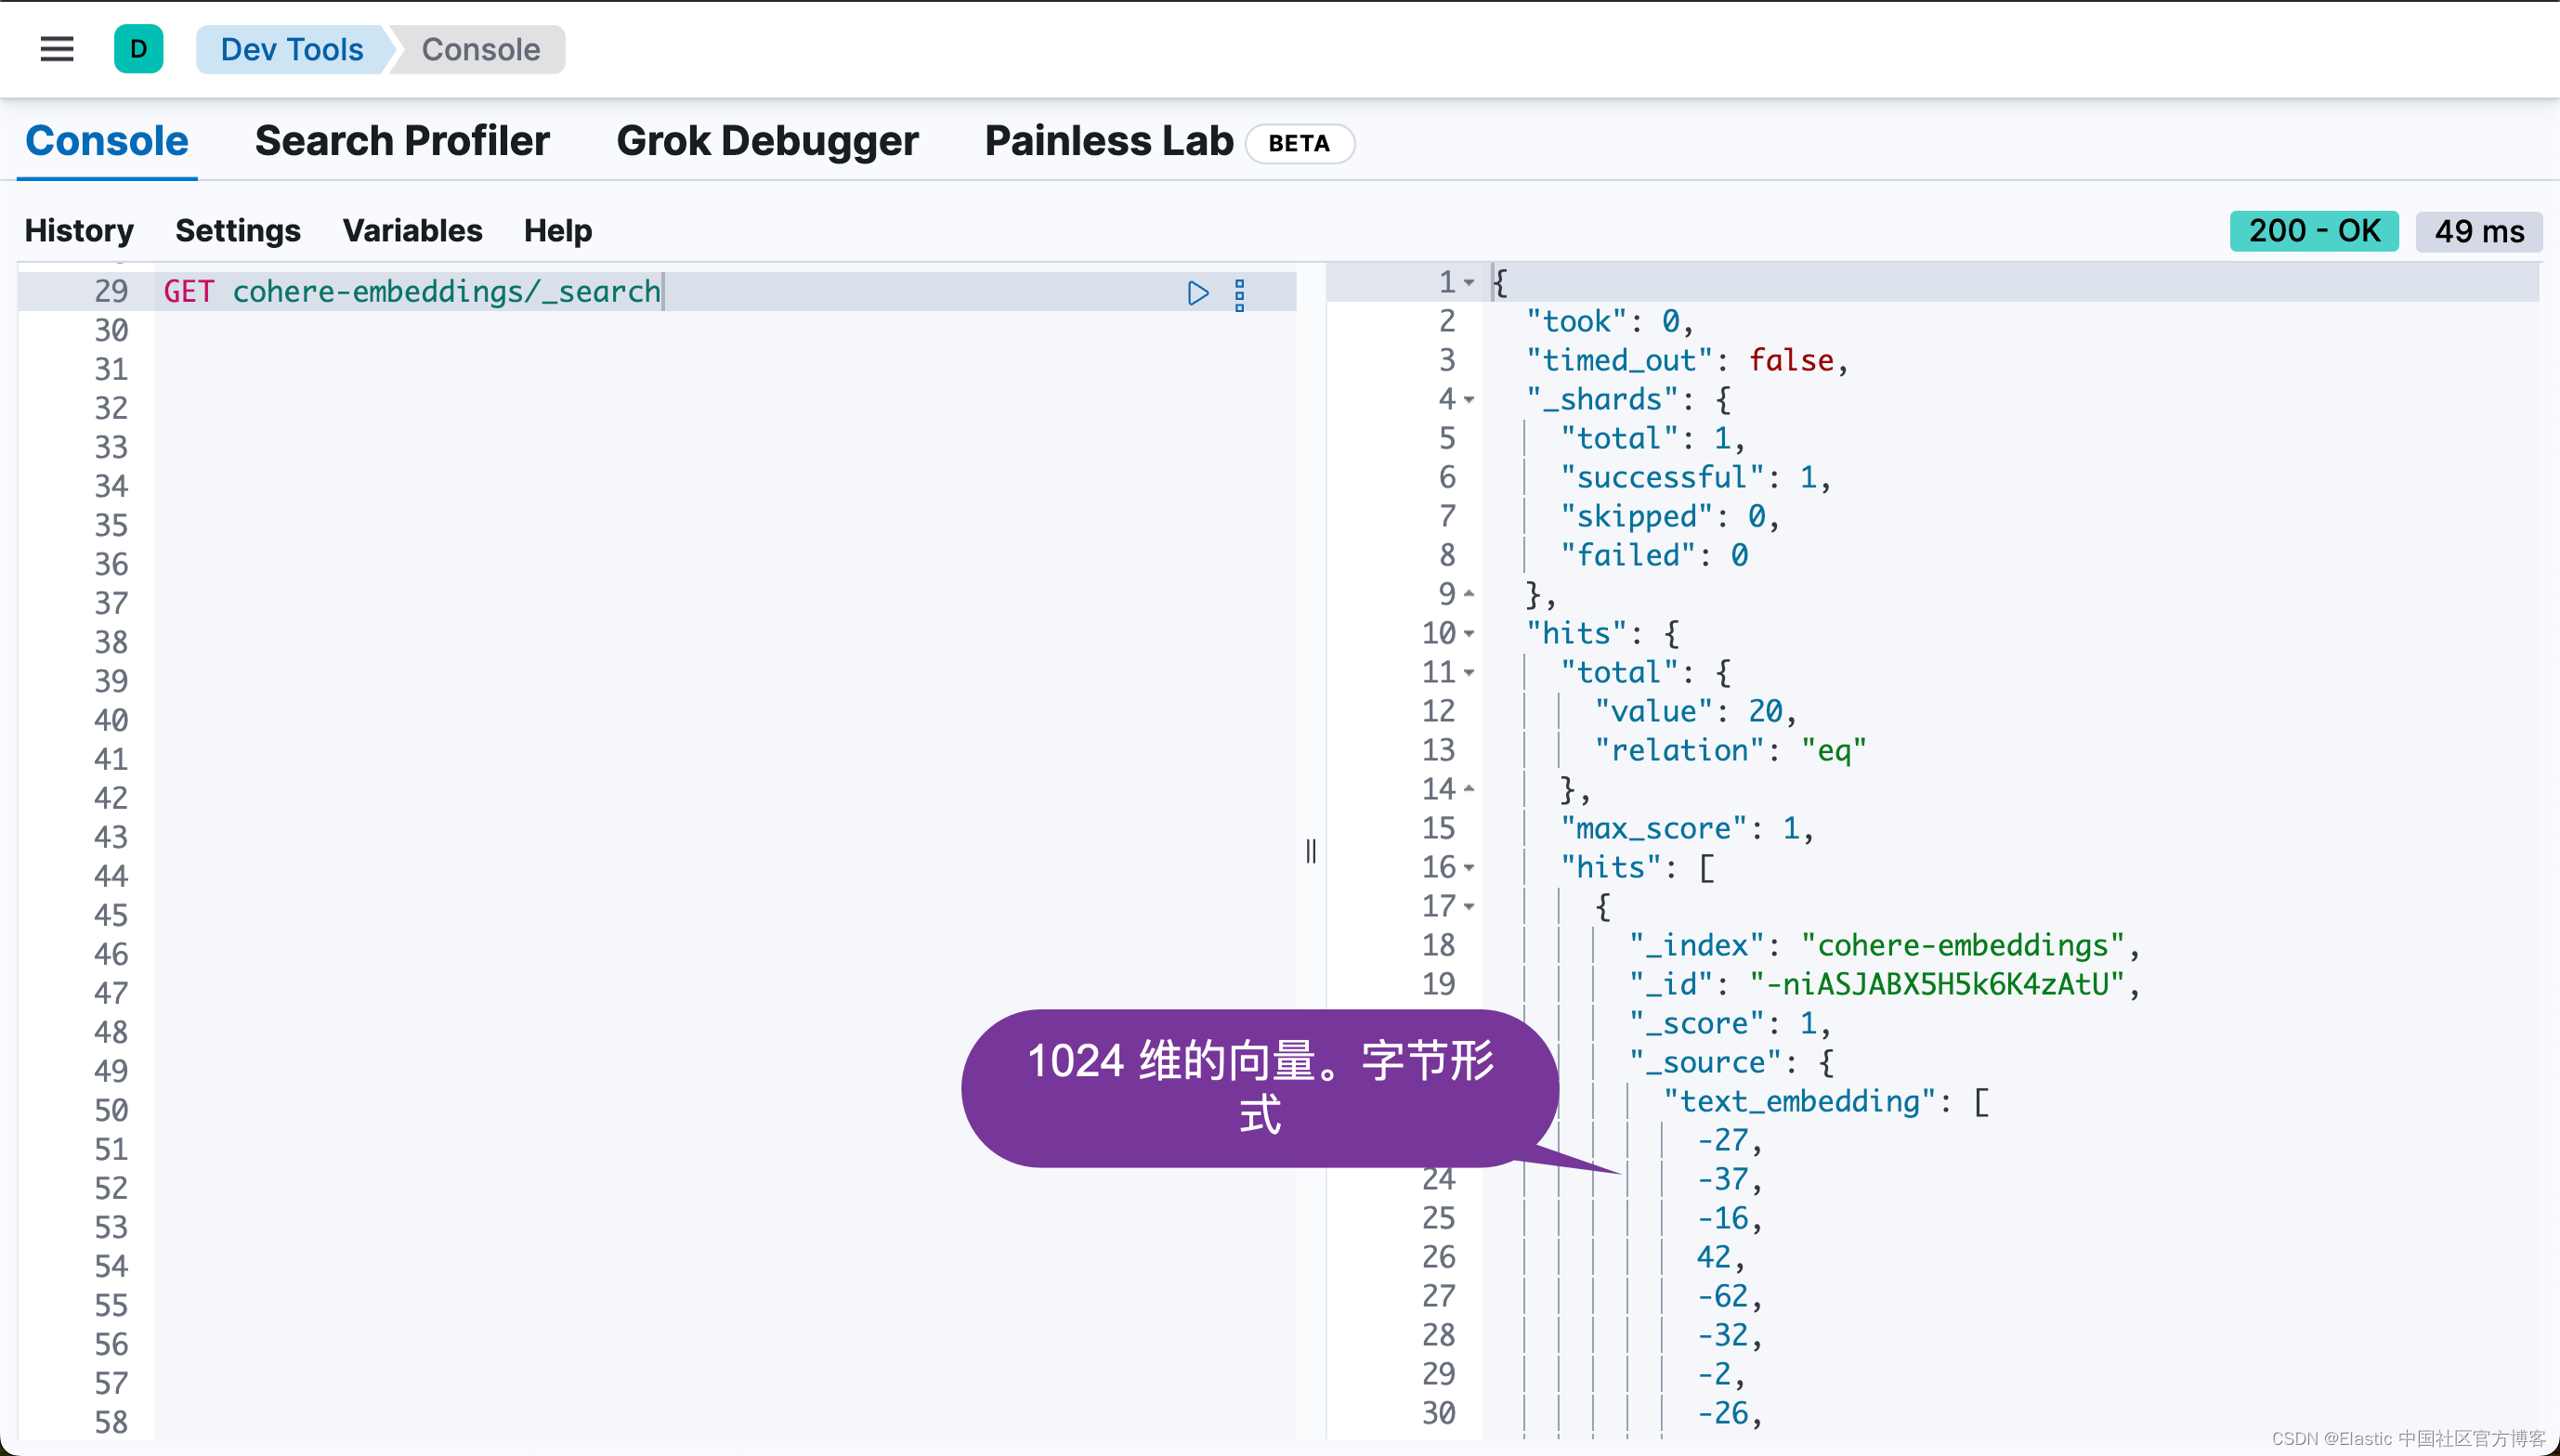
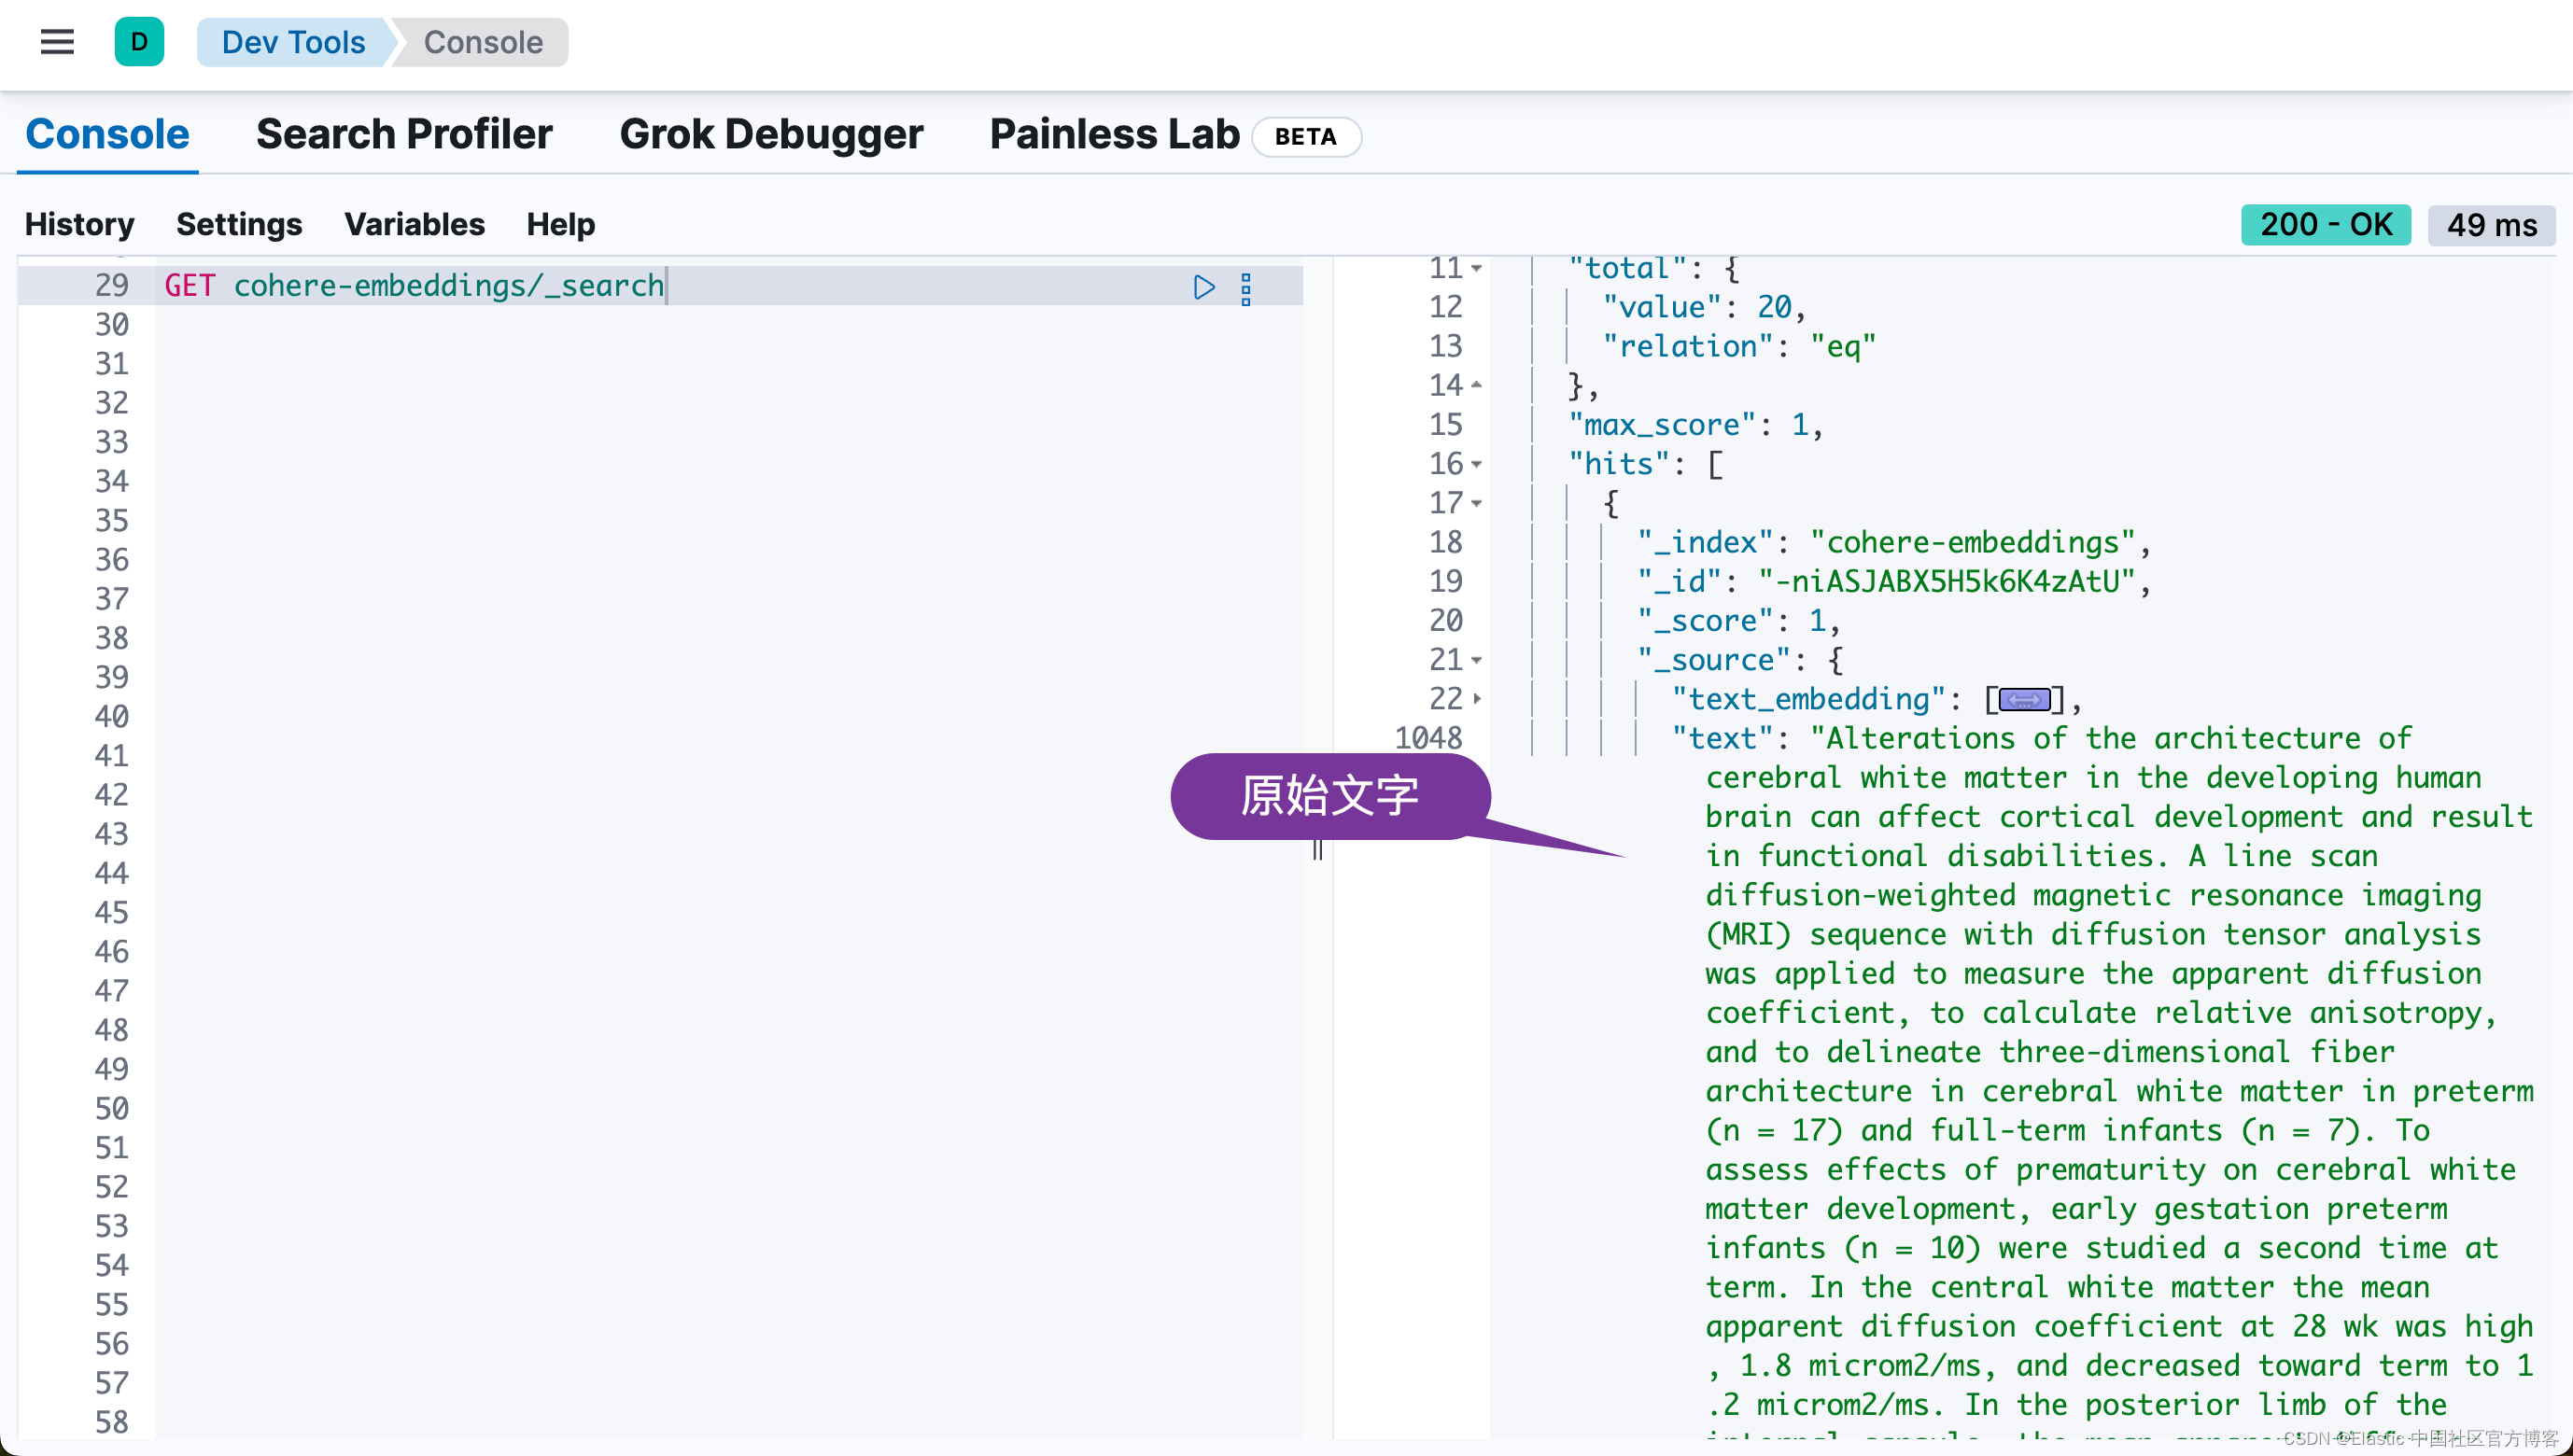
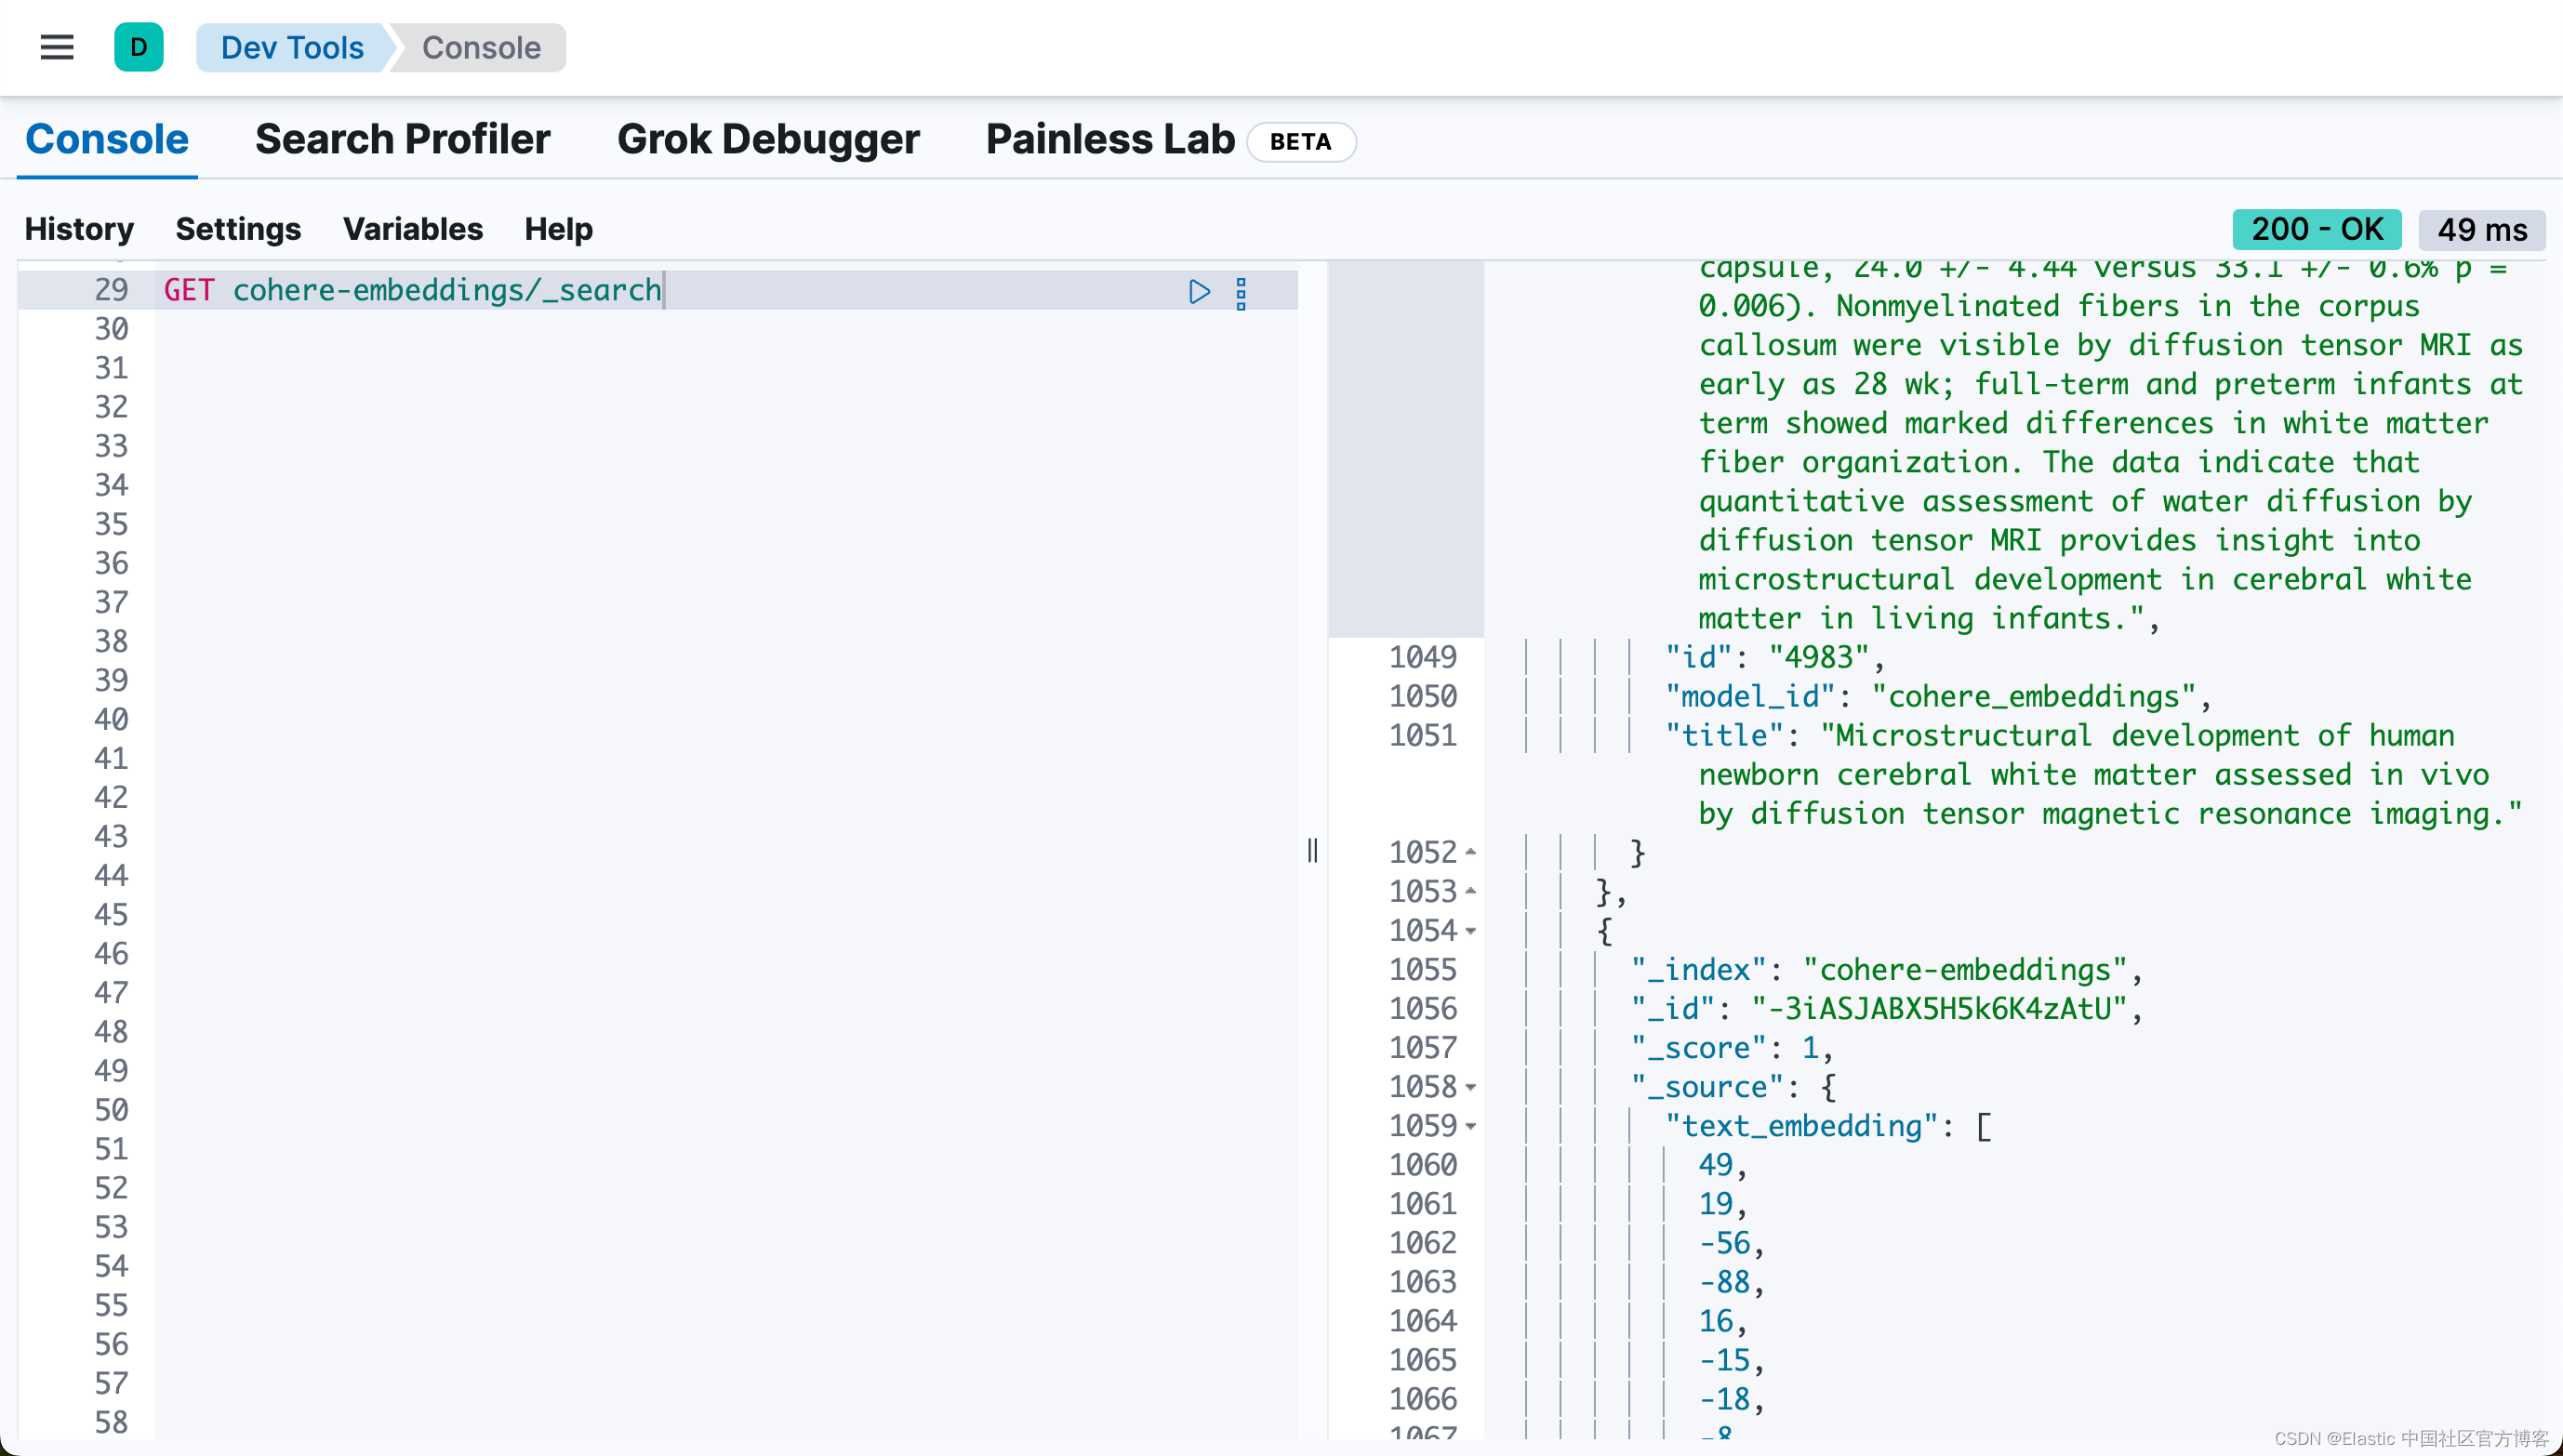
从上面,我们可以看出来有 20 个文档被写入到 Elasticsearch 中。
混合搜索
让我们开始查询索引吧!
下面的代码执行混合搜索。kNN 查询使用 text_embedding 字段根据向量相似度计算搜索结果的相关性。词汇搜索查询使用 BM25 检索来计算 title 和 text 字段的关键字相似度。
query = "What is biosimilarity?"

response = client.search(
    index="cohere-embeddings",
    size=100,
    knn={
        "field": "text_embedding",
        "query_vector_builder": {
            "text_embedding": {
                "model_id": "cohere_embeddings",
                "model_text": query,
            }
        },
        "k": 10,
        "num_candidates": 50,
    },
    query={"multi_match": {"query": query, "fields": ["text", "title"]}},
)

raw_documents = response["hits"]["hits"]

# Display the first 10 results
for document in raw_documents[0:10]:
    print(
        f'Title: {document["_source"]["title"]}\nText: {document["_source"]["text"]}\n'
    )

# Format the documents for ranking
documents = []
for hit in response["hits"]["hits"]:
    documents.append(hit["_source"]["text"])
重新排序搜索结果
为了更有效地组合结果,请通过 inference API 使用 Cohere 的 Rerank v3 模型,以提供更精确的结果语义重新排序。
使用你的 Cohere API 密钥和使用的模型名称作为 model_id(本例中为 rerank-english-v3.0)创建推理端点。
try:
    client.inference.delete_model(inference_id="cohere_embeddings")
except:
    ;

try:
    client.inference.put_model(
        task_type="rerank",
        inference_id="cohere_rerank",
        body={
            "service": "cohere",
            "service_settings": {
                "api_key": COHERE_API_KEY,
                "model_id": "rerank-english-v3.0",
            },
            "task_settings": {
                "top_n": 10,
            },
        },
    )
except BadRequestError as e:
    print(e)
使用新的推理端点对结果重新排序。
response = client.inference.inference(
    inference_id="cohere_rerank",
    body={
        "query": query,
        "input": documents,
        "task_settings": {"return_documents": False},
    },
)

# Reconstruct the input documents based on the index provided in the rereank response
ranked_documents = []
for document in response.body["rerank"]:
    ranked_documents.append(
        {
            "title": raw_documents[int(document["index"])]["_source"]["title"],
            "text": raw_documents[int(document["index"])]["_source"]["text"],
        }
    )

# Print the top 10 results
for document in ranked_documents[0:10]:
    print(f"Title: {document['title']}\nText: {document['text']}\n")
使用 Cohere 和 Elasticsearch 进行检索增强生成 (RAG)
RAG 是一种使用从外部数据源获取的附加信息生成文本的方法。借助排名结果,你可以在使用 Cohere 的 Chat API 创建的内容的基础上构建 RAG 系统。
传入检索到的文档和查询,以使用 Cohere 最新的生成模型 Command R+ 接收有根据的响应。
然后将查询和文档传入 Chat API,并打印出响应。
response = co.chat(message=query, documents=ranked_documents, model="command-r-plus")

#source_documents = []
#for citation in response.citations:
#    for document_id in citation.document_ids:
#        if document_id not in source_documents:
#            source_documents.append(document_id)

print(f"Query: {query}")
print(f"Response: {response.text}")
#print("Sources:")
#for document in response.documents:
#    if document["id"] in source_documents:
#        print(f"{document['title']}: {document['text']}")
由于我们的数据量是很有限的,我们没有得到相应的回答。如果我们把所有的数据都写入,那么你可能会得到一个比较满意的结果,比如:
Query: What is biosimilarity?
Response: Biosimilarity is based on the comparability concept, which has been used successfully for several decades to ensure close similarity of a biological product before and after a manufacturing change. Over the last 10 years, experience with biosimilars has shown that even complex biotechnology-derived proteins can be copied successfully.
Sources:
Interchangeability of Biosimilars: A European Perspective: Many of the best-selling 'blockbuster' biological medicinal products are, or will soon be, facing competition from similar biological medicinal products (biosimilars) in the EU. Biosimilarity is based on the comparability concept, which has been used successfully for several decades to ensure close similarity of a biological product before and after a manufacturing change. Over the last 10 years, experience with biosimilars has shown that even complex biotechnology-derived proteins can be copied successfully. Most best-selling biologicals are used for chronic treatment. This has triggered intensive discussion on the interchangeability of a biosimilar with its reference product, with the main concern being immunogenicity. We explore the theoretical basis of the presumed risks of switching between a biosimilar and its reference product and the available data on switches. Our conclusion is that a switch between comparable versions of the same active substance approved in accordance with EU legislation is not expected to trigger or enhance immunogenicity. On the basis of current knowledge, it is unlikely and very difficult to substantiate that two products, comparable on a population level, would have different safety or efficacy in individual patients upon a switch. Our conclusion is that biosimilars licensed in the EU are interchangeable.最终的代码在地址可以下载:elasticsearch-labs/notebooks/cohere/cohere-elasticsearch.ipynb at main · liu-xiao-guo/elasticsearch-labs · GitHub