本实验结合了之前写过的两篇文章Python调用摄像头,实时显示视频在Tkinter界面以及ESP32 S3搭载OV2640摄像头释放热点(AP)工作模式--Arduino程序,当然如果手头有其他可以获得网络摄像头的URL即用于访问摄像头视频流的网络地址,也是一样的换掉网址即可。话不多说,上程序效果。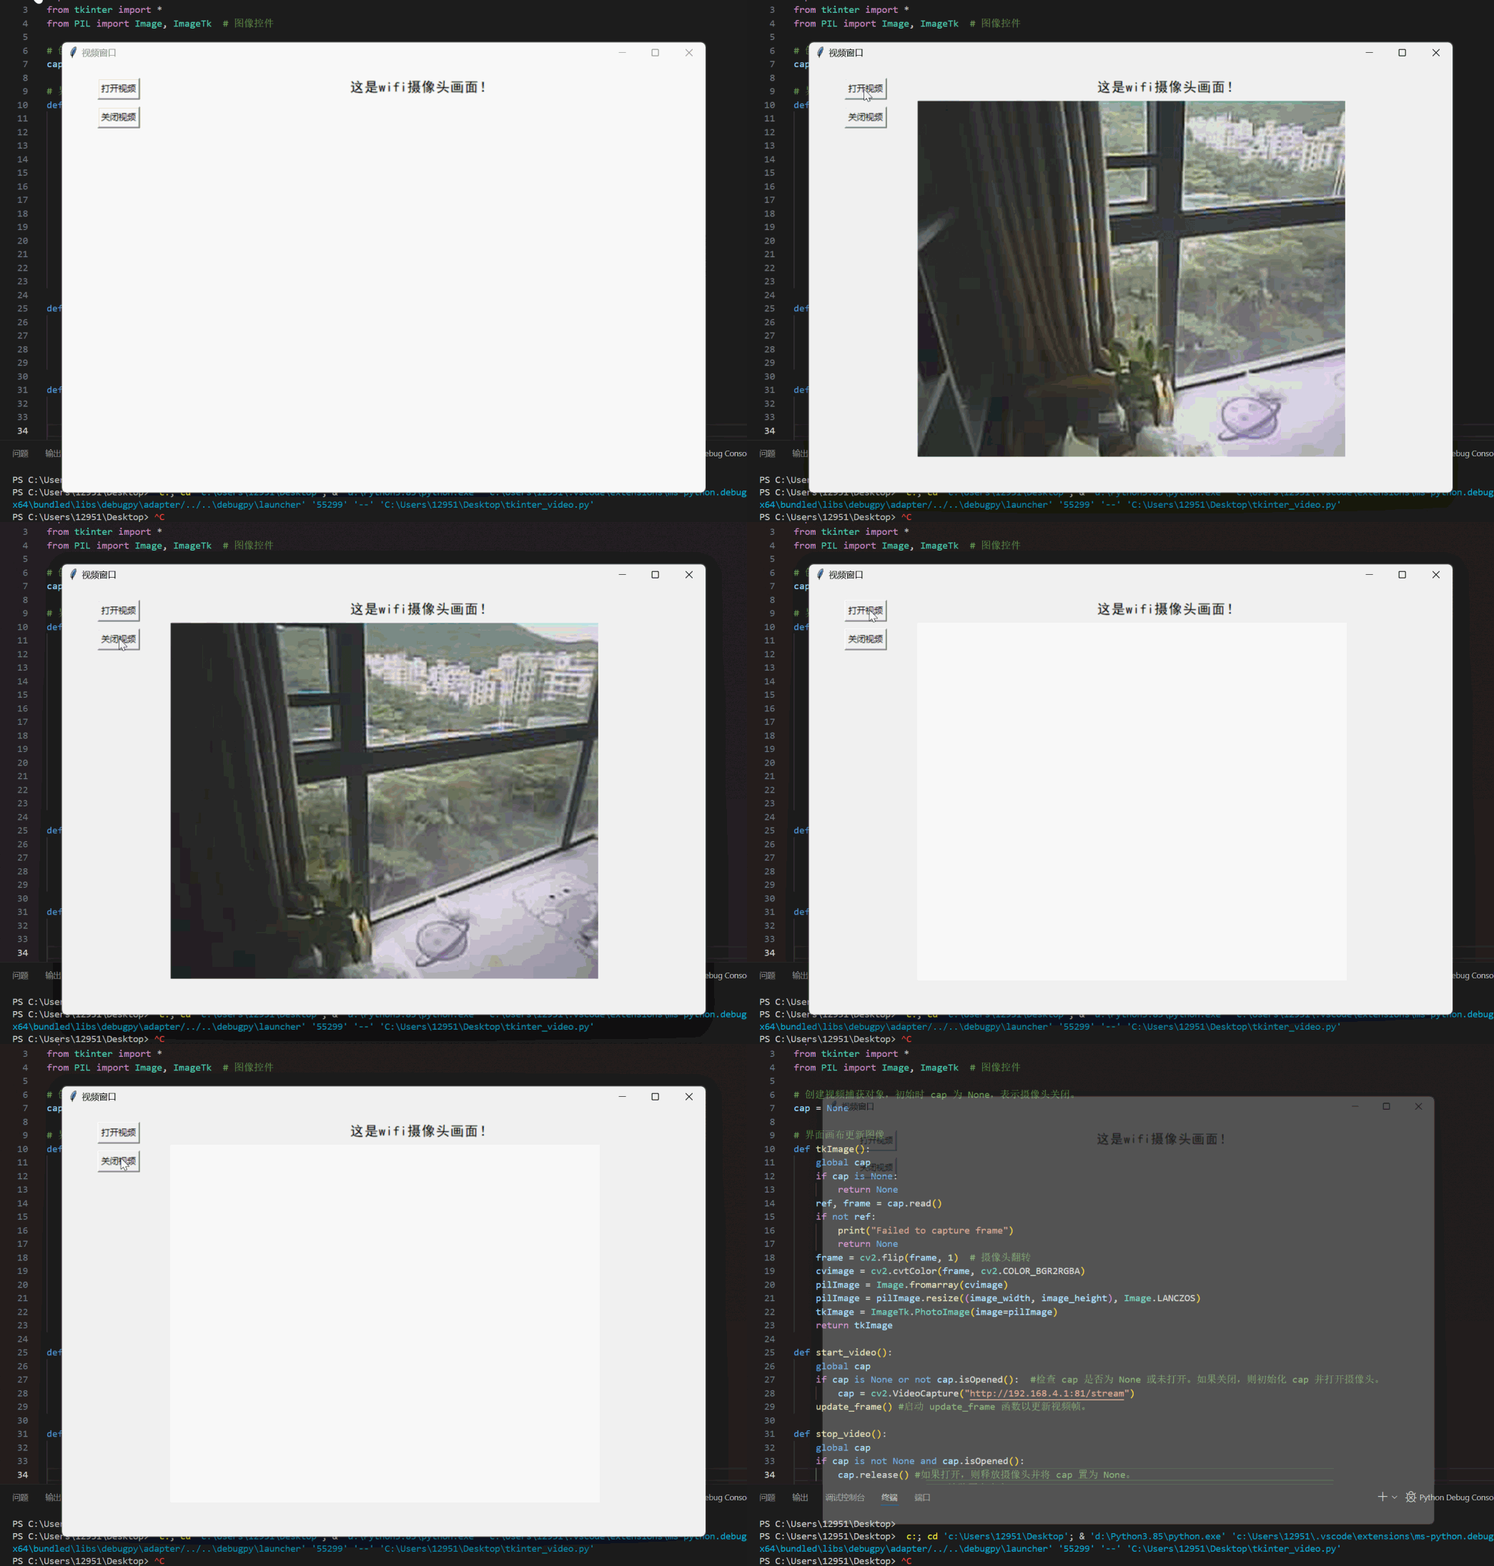
我是添加了两个按钮,通过点击"打开视频"按钮,可以开始捕获和显示视频流;点击"关闭视频"按钮,可以停止视频流并清除画布内容。
程序如下:
python
import cv2
import tkinter as tk
from tkinter import *
from PIL import Image, ImageTk  # 图像控件

# 创建视频捕获对象,初始时 cap 为 None,表示摄像头关闭。
cap = None

# 界面画布更新图像
def tkImage():
    global cap
    if cap is None:
        return None
    ref, frame = cap.read()
    if not ref:
        print("Failed to capture frame")
        return None
    frame = cv2.flip(frame, 1)  # 摄像头翻转
    cvimage = cv2.cvtColor(frame, cv2.COLOR_BGR2RGBA)
    pilImage = Image.fromarray(cvimage)
    pilImage = pilImage.resize((image_width, image_height), Image.LANCZOS)
    tkImage = ImageTk.PhotoImage(image=pilImage)
    return tkImage

def start_video():
    global cap
    if cap is None or not cap.isOpened():  #检查 cap 是否为 None 或未打开。如果关闭,则初始化 cap 并打开摄像头。
        cap = cv2.VideoCapture("http://192.168.4.1:81/stream")#这个是ESP32S3摄像头,我才用的是摄像头开热点的模式,这个网址可以更改,看摄像头的URL决定
    update_frame() #启动 update_frame 函数以更新视频帧。

def stop_video():
    global cap
    if cap is not None and cap.isOpened():
        cap.release() #如果打开,则释放摄像头并将 cap 置为 None。
    canvas.delete("all")  # 清除画布内容

def update_frame():
    global image_container, cap
    if cap is None or not cap.isOpened():
        return
    pic = tkImage()
    if pic:
        canvas.create_image(0, 0, anchor='nw', image=pic)
        image_container = pic  # 保存引用
    else:
        print("No image to display")
    top.after(10, update_frame)  # 每10毫秒更新一次图像

top = tk.Tk()
top.title('视频窗口')
top.geometry('900x600')
image_width = 600
image_height = 500
canvas = Canvas(top, bg='white', width=image_width, height=image_height)  # 绘制画布
Label(top, text='这是wifi摄像头画面!', font=("黑体", 14), width=20, height=1).place(x=400, y=20, anchor='nw')
Button(top, text="打开视频", command=start_video).place(x=50, y=20)
Button(top, text="关闭视频", command=stop_video).place(x=50, y=60)
canvas.place(x=150, y=50)

# 保存图像对象,以防止被垃圾回收
image_container = None

top.mainloop()

# 释放摄像头
if cap is not None:
    cap.release()