- Dot:指代点对象或者表示点的符号。
- Arrow:指代箭头对象,包括直线上的箭头或者向量箭头等。
- NumberPlane:指代数轴平面对象,在Manim中用来创建包含坐标轴的数学坐标系平面。
- Text:指代文本对象,用来显示文字信息。
1.Dot对象的使用。
python
class Dot(point=array([0., 0., 0.]), radius=0.08,
stroke_width=0, fill_opacity=1.0,
color=ManimColor('#FFFFFF'), **kwargs)- point(Point3D)- 点的位置。
- radius(float)- 点的半径。
- stroke_width(float)- 点边缘的厚度。
- fill_opacity(float)- 点的填充颜色的不透明度。
- color(ParsableManimColor)- 点的颜色。
- kwargs - 要传递给圆形对象的其他参数。
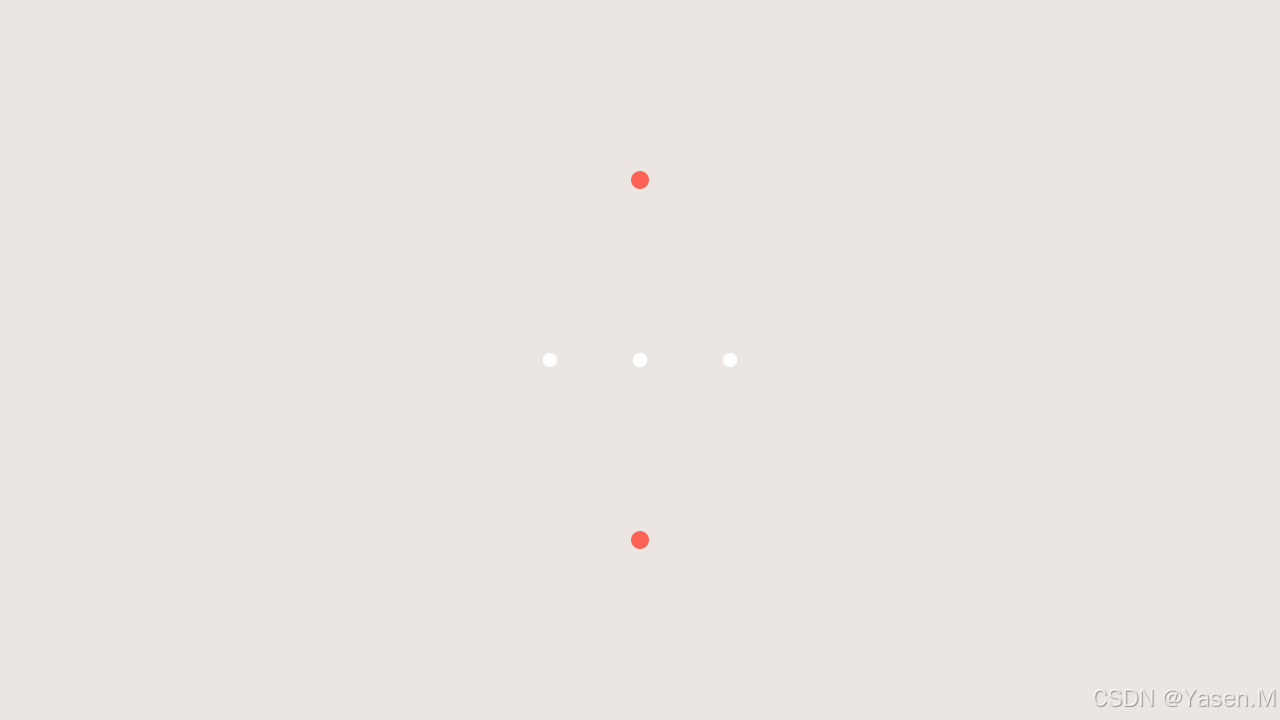
所以我们现在用两种方式进行编写代码:
python
from manim import *

class DotExample01(Scene):
    def construct(self):
         #背景颜色的调试
        self.camera.background_color = "#ece6e2"

        dot1 = Dot(point=LEFT, radius=0.08)
        dot2 = Dot(point=ORIGIN)
        dot3 = Dot(point=RIGHT)

        dot4=Dot(point=([0, 2, 0]), radius=0.1, stroke_width=0,
    fill_opacity=1.0, color=ManimColor('red'))
        dot5=Dot(point=([0, -2, 0]), radius=0.1, stroke_width=0,
    fill_opacity=1.0, color=ManimColor('red'))
        self.add(dot1,dot2,dot3,dot4,dot5)
运行结果如下:
2.Arrow对象的使用
python
class Arrow(*args, stroke_width=6, buff=0.25,
 max_tip_length_to_length_ratio=0.25,
 max_stroke_width_to_length_ratio=5, **kwargs)
参数:
- args -- 要传递给Line的参数。
- stroke_width(float)-- 箭头的粗细。受max_stroke_width_to_length_ratio影响。
- buff(float)-- 箭头从起点和终点的距离。
- max_tip_length_to_length_ratio(float)-- tip_length与箭头长度成比例。增加此比率会提高tip_length的最大值。
- max_stroke_width_to_length_ratio(float)-- stroke_width与箭头长度成比例。增加此比率会使stroke_width的最大值提高。
- kwargs -- 要传递给Line的其他参数。
接下来我们实际使用一下代码:
python
from manim import *

# 定义ArrowExample类,用于展示箭头的不同效果
class ArrowExample(Scene):

    # 构建场景
    def construct(self):
        # 创建箭头对象
        arrow_1 = Arrow(start=RIGHT, end=LEFT, color=GOLD)
        arrow_2 = Arrow(start=RIGHT, end=LEFT, color=GOLD, tip_shape=ArrowSquareTip(), buff=0.2).shift(DOWN)

        # 将箭头对象放入Group中
        g1 = Group(arrow_1, arrow_2)

        # 创建正方形对象和箭头对象
        square = Square()
        arrow_3 = Arrow(start=LEFT, end=RIGHT)
        arrow_4 = Arrow(start=LEFT, end=RIGHT, buff=0)

        # 将正方形对象和箭头对象放入Group中
        g2 = Group(square, arrow_3, arrow_4)

        # 创建箭头对象
        arrow_5 = Arrow(ORIGIN, config.top).shift(LEFT * 4)
        arrow_6 = Arrow(UP + config.top, config.top).shift(LEFT * 3)

        # 将箭头对象放入Group中
        g3 = Group(arrow_5, arrow_6)

        # 将所有Group对象放入另一个Group中,并排列
        group_all = Group(g1, g2, g3).arrange(buff=2)

        # 将整个Group对象添加到场景中展示
        self.add(group_all)
结果如下:
3.NumberPlane对象的使用
python
class NumberPlane(x_range=(-7.111111111111111, 7.111111111111111, 1),
y_range=(-4.0, 4.0, 1), x_length=None, y_length=None,
background_line_style=None, faded_line_style=None,
faded_line_ratio=1, make_smooth_after_applying_functions=True, **kwargs)
参数:
x_range(Sequencefloat | None):水平方向平面上的x_min、x_max、x_step值。y_range(Sequencefloat | None):垂直方向平面上的y_min、y_max、y_step值。x_length(float | None):平面的宽度。y_length(float | None):平面的高度。background_line_style(dictstr, Any | None):影响平面背景线构造的参数。faded_line_style(dictstr, Any | None):类似于background_line_style,影响场景背景线的构造。faded_line_ratio(int):确定背景线中的方块数:2 = 4个方块,3 = 9个方块。make_smooth_after_applying_functions(bool):目前无效。kwargs(dictstr, Any):要传递给Axes的其他参数。
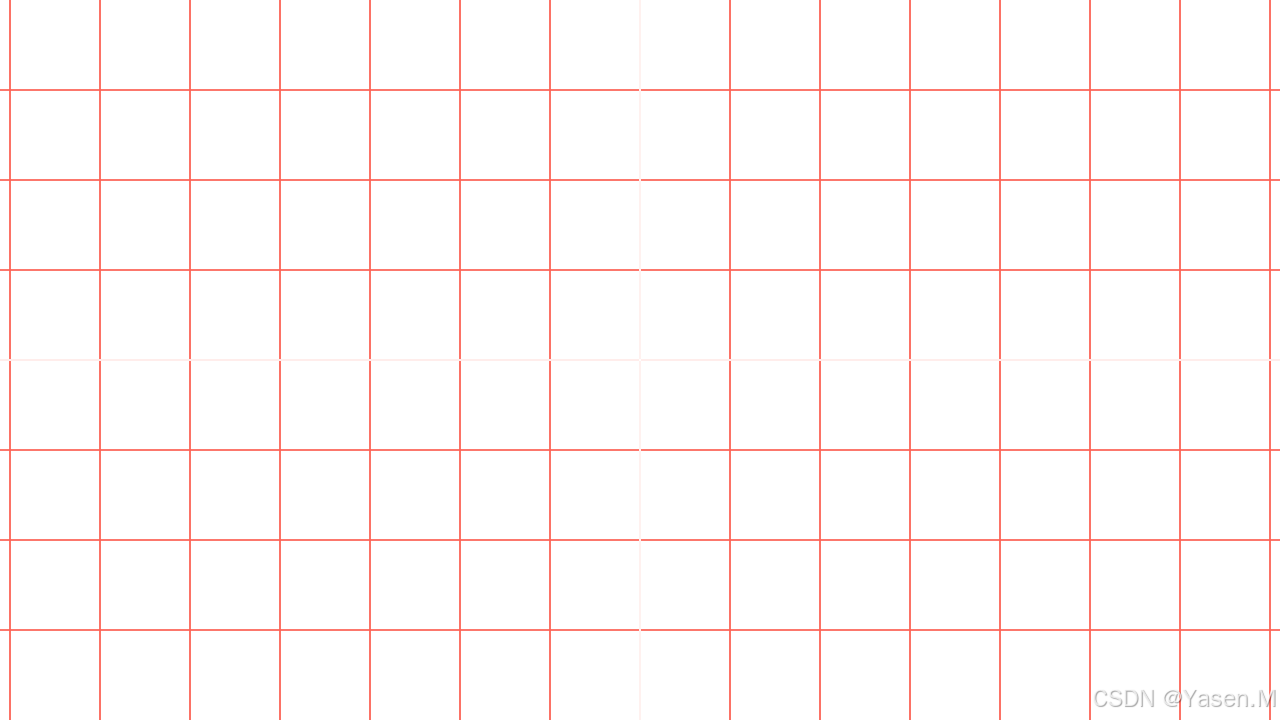
接下来实际操作:
python
from manim import *
class NumberPlaneExample(Scene):
    def construct(self):
         #背景颜色的调试
        self.camera.background_color = WHITE
        #调试网格线的颜色,宽带和透明度
        number_plane = NumberPlane(
            background_line_style={
                "stroke_color": RED,
                "stroke_width":2,
                "stroke_opacity": 1
                                    }
        )
        self.add(number_plane)
结果如下:
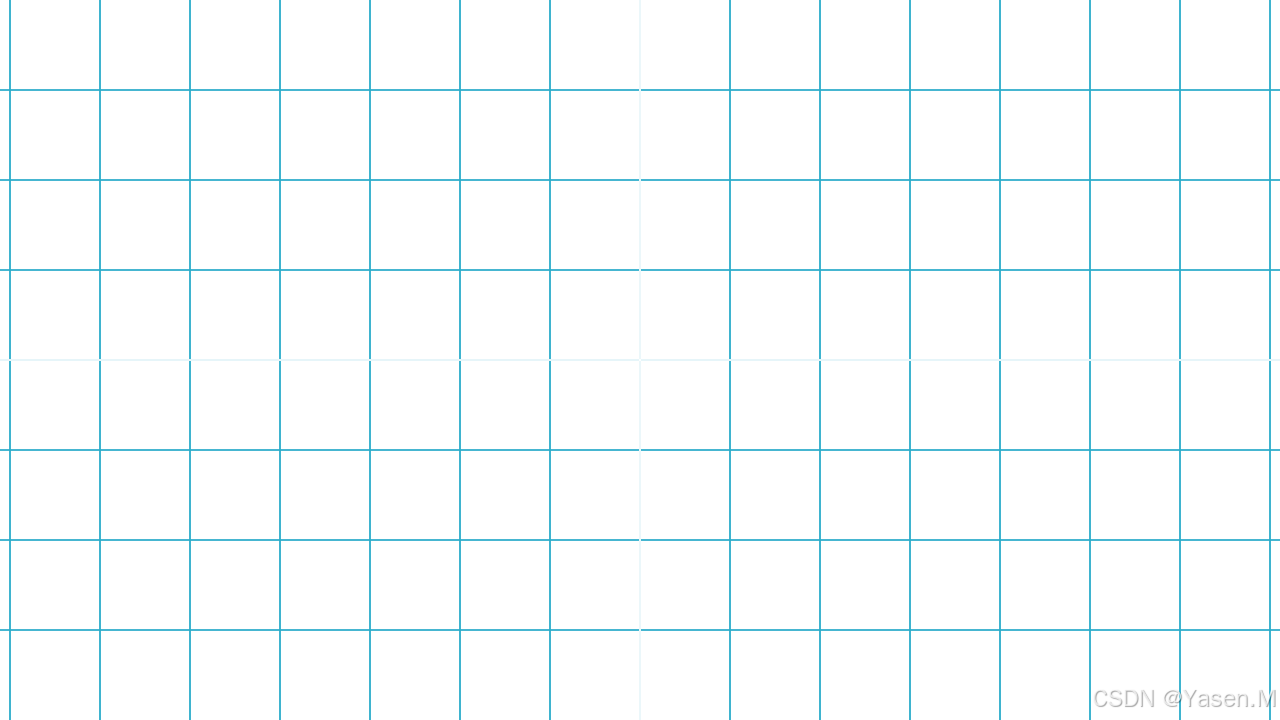
再试一下:
python
from manim import *
class NumberPlaneExample(Scene):
    def construct(self):
         #背景颜色的调试
        self.camera.background_color = WHITE
        #调试网格线的颜色,宽带和透明度
        number_plane=NumberPlane(x_range=(-7.111111111111111, 7.111111111111111, 1), y_range=(-4.0, 4.0, 1),
                    x_length=None, y_length=None, background_line_style=None, faded_line_style=None,
                    faded_line_ratio=1, make_smooth_after_applying_functions=True)

        self.add(number_plane)
运行结果如下: