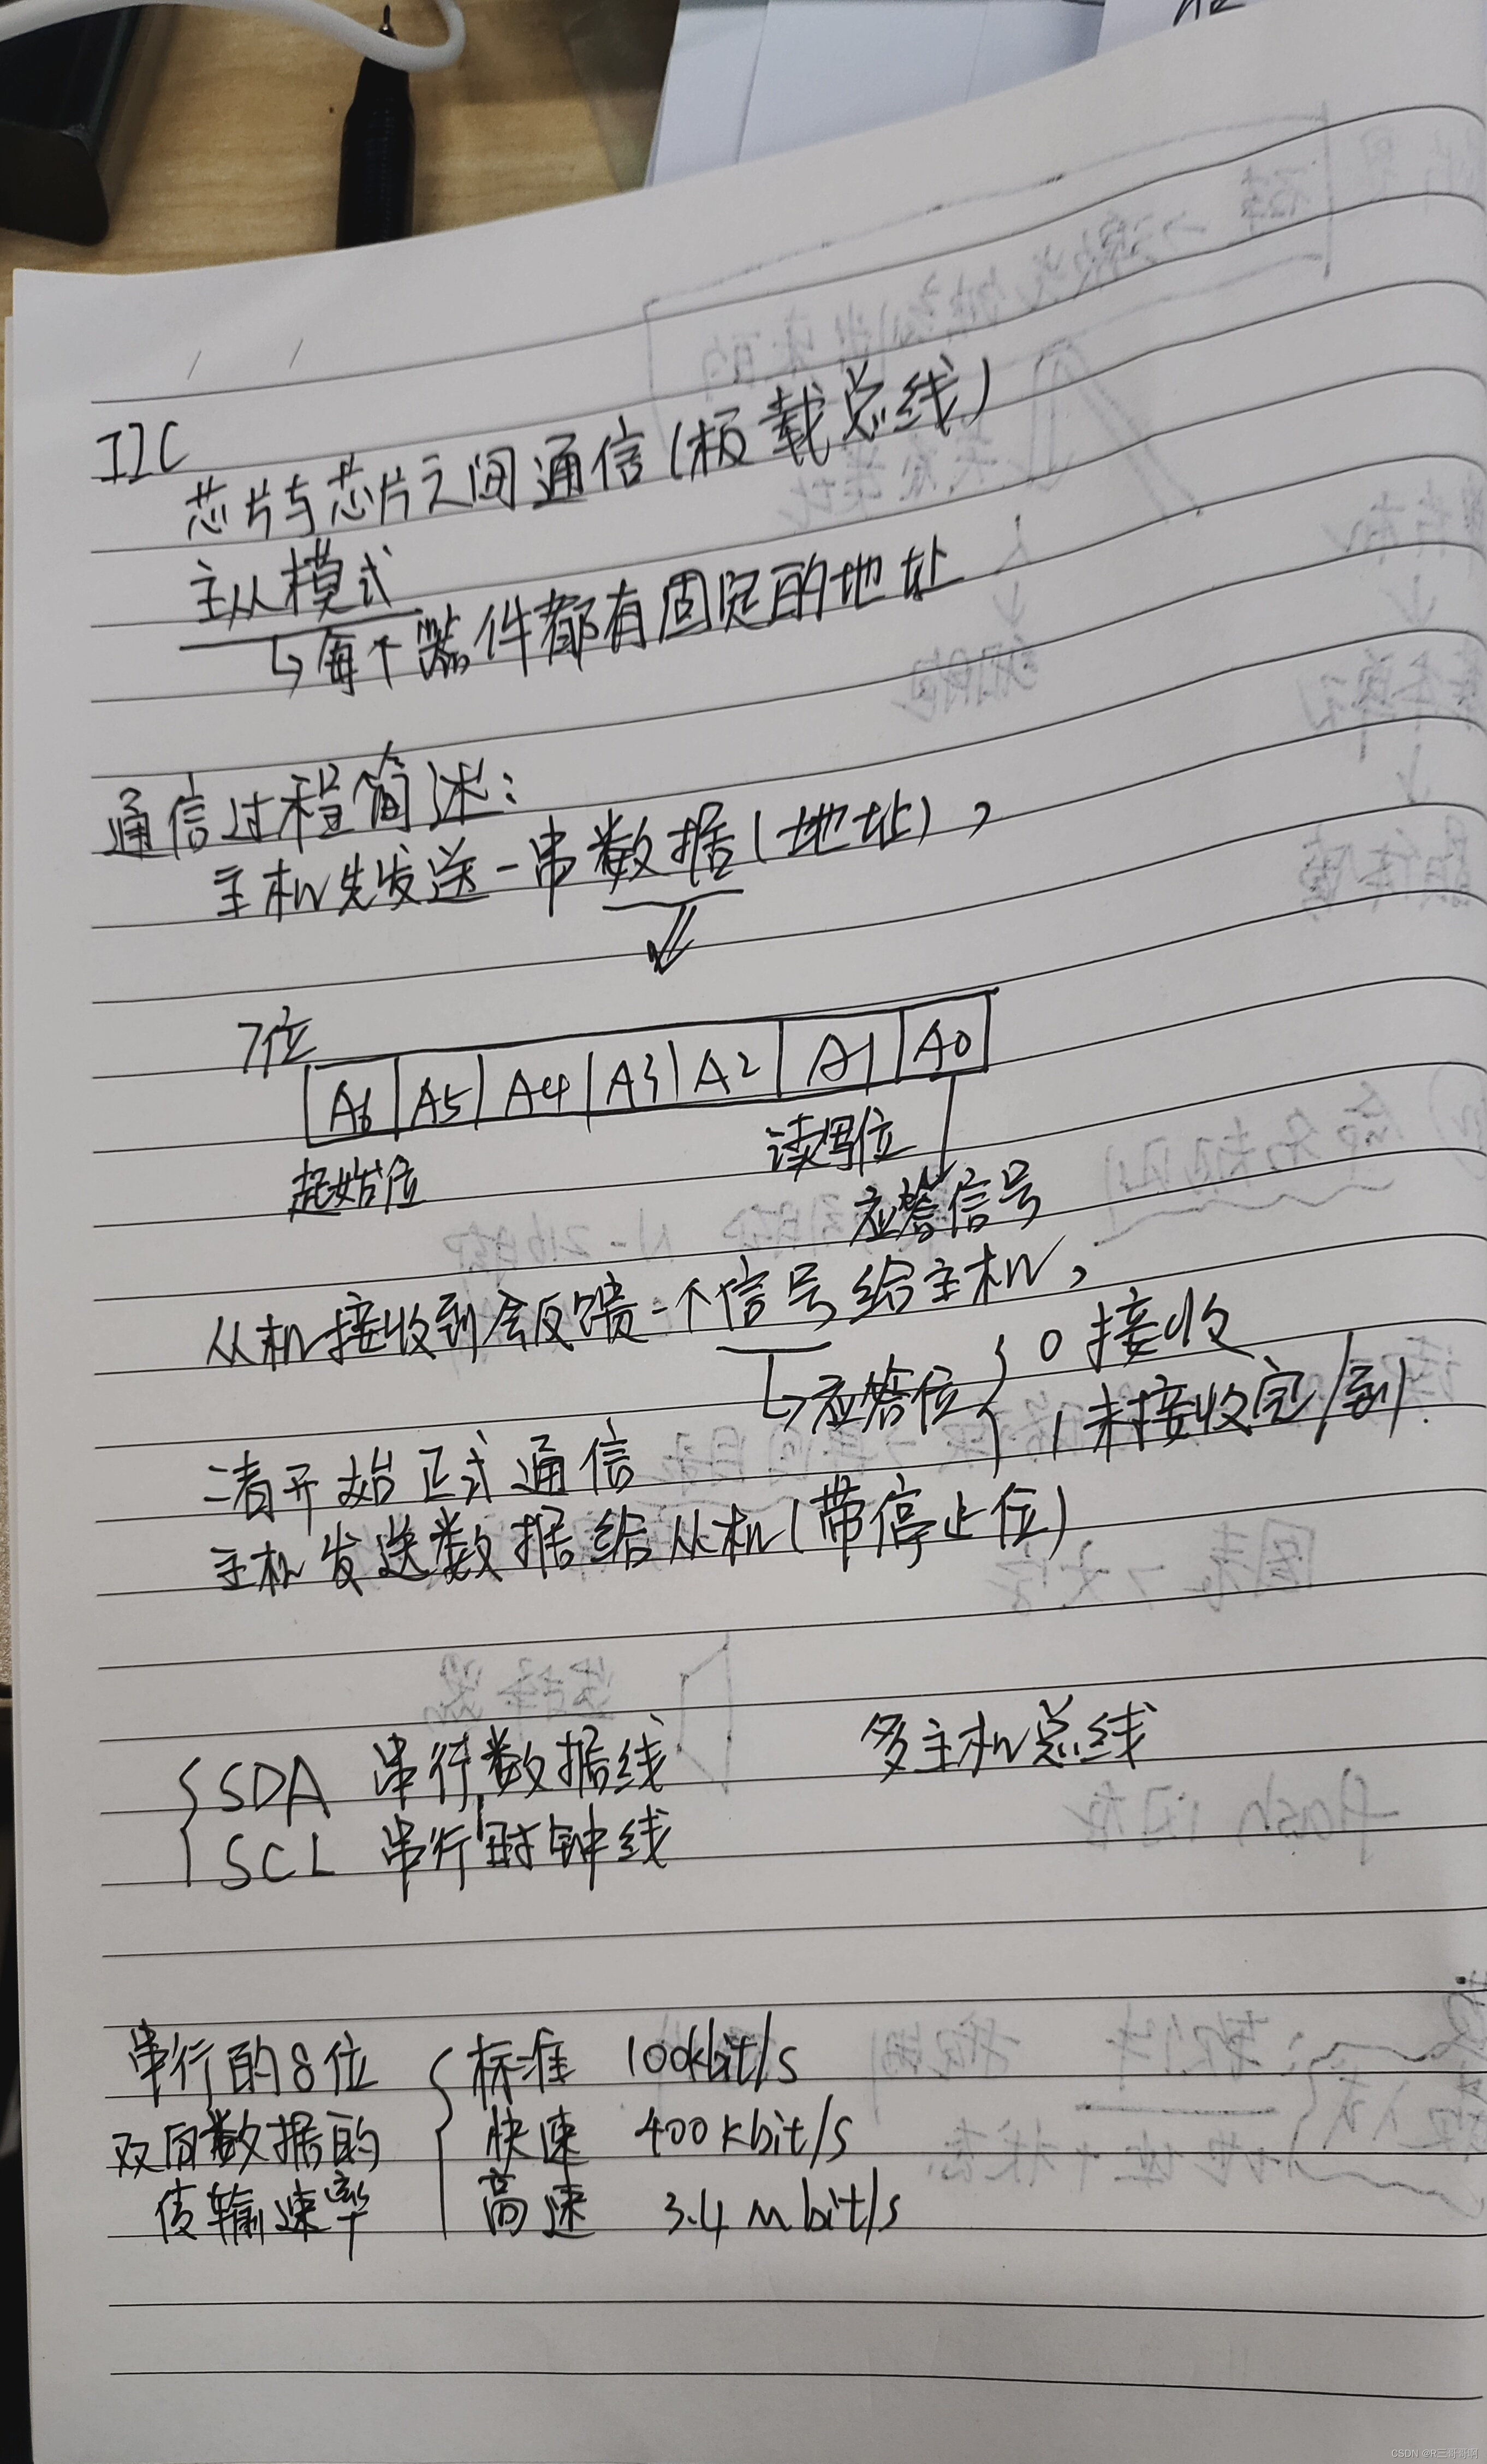
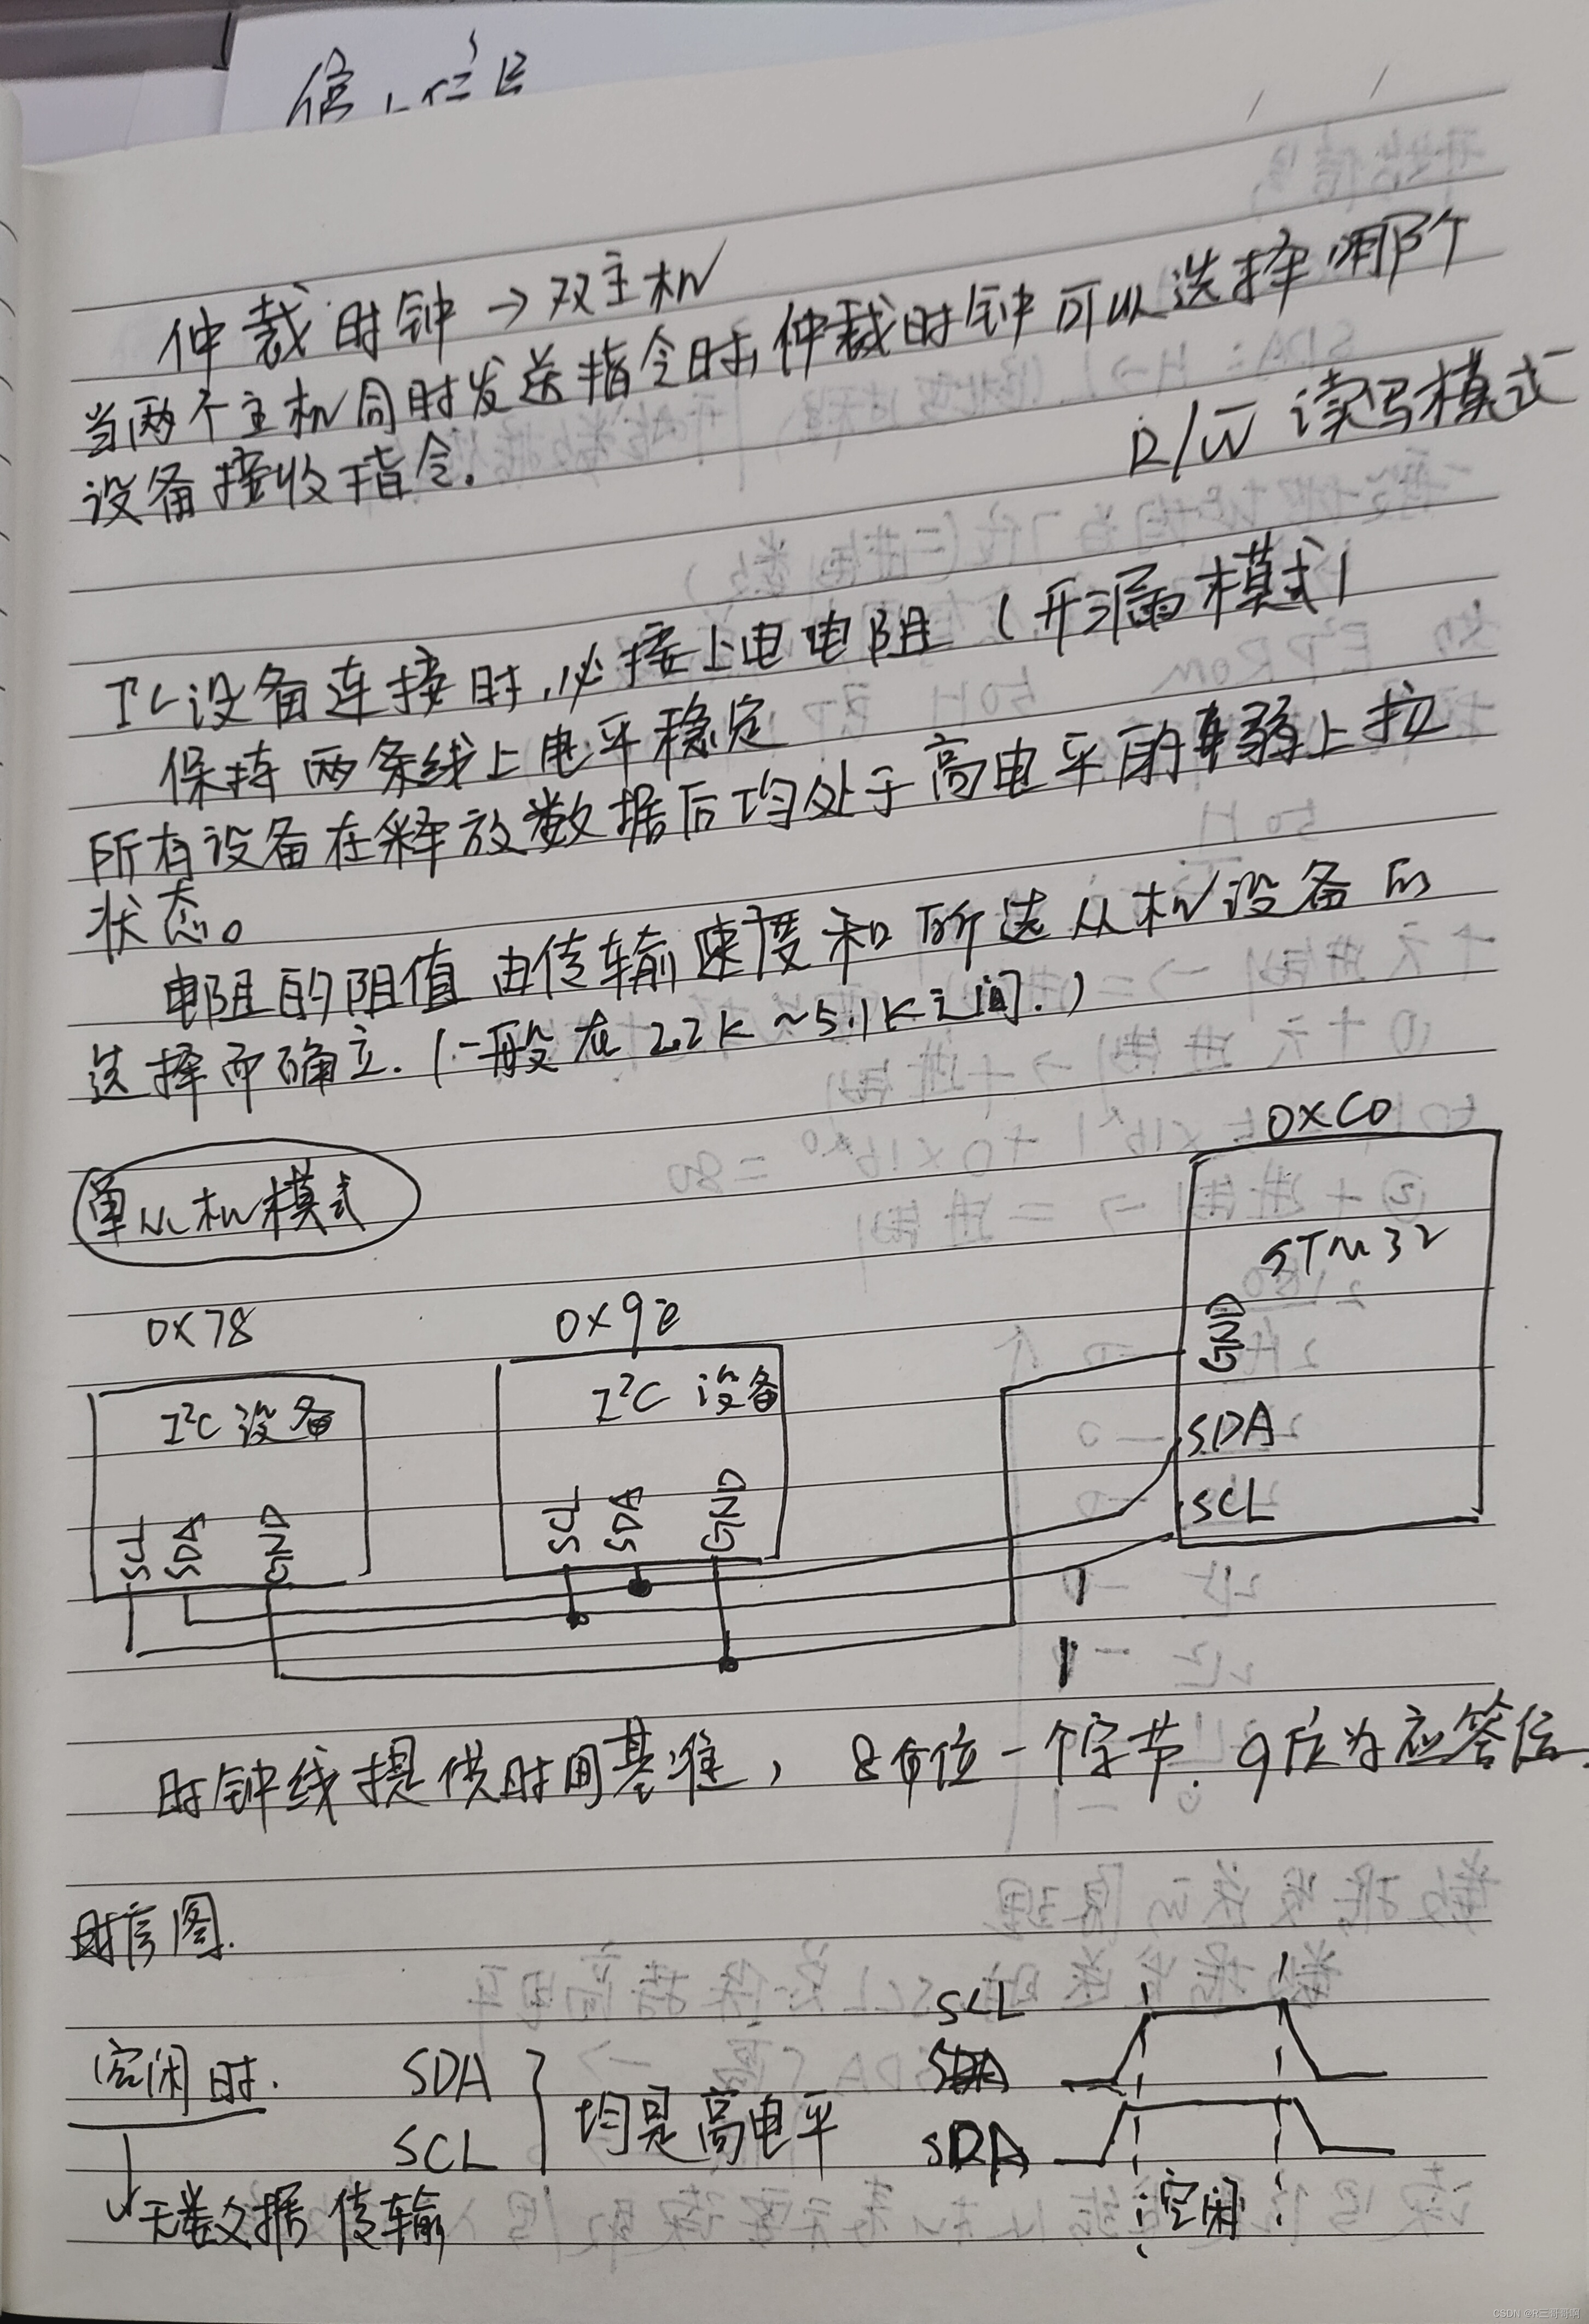
学习IIC
前言
最近沉迷手写笔记~
尝试解读江科大的IIC程序,结合笔记更理解IIC
一、基础知识


GPIO_WriteBit 写入高低电平

二、放代码
这个是江科大的软件IIC的设置部分
bash
#include "stm32f10x.h"                  // Device header
#include "Delay.h"

void MyI2C_W_SCL(uint8_t BitValue)	//IIC_SCL写入
{
	GPIO_WriteBit(GPIOB, GPIO_Pin_10, (BitAction)BitValue);
	Delay_us(10);
}

void MyI2C_W_SDA(uint8_t BitValue)	//IIC_SDA写入
{
	GPIO_WriteBit(GPIOB, GPIO_Pin_11, (BitAction)BitValue);
	Delay_us(10);
}

uint8_t MyI2C_R_SDA(void)			//IIC_SDA读取
{
	uint8_t BitValue;
	BitValue = GPIO_ReadInputDataBit(GPIOB, GPIO_Pin_11);
	Delay_us(10);
	return BitValue;
}

void MyI2C_Init(void)
{
	RCC_APB2PeriphClockCmd(RCC_APB2Periph_GPIOB, ENABLE);

	GPIO_InitTypeDef GPIO_InitStructure;
	GPIO_InitStructure.GPIO_Mode = GPIO_Mode_Out_OD;			//开漏
	GPIO_InitStructure.GPIO_Pin = GPIO_Pin_10 | GPIO_Pin_11;
	GPIO_InitStructure.GPIO_Speed = GPIO_Speed_50MHz;
	GPIO_Init(GPIOB, &GPIO_InitStructure);

	GPIO_SetBits(GPIOB, GPIO_Pin_10 | GPIO_Pin_11);
}

void MyI2C_Start(void)
{
	MyI2C_W_SDA(1);
	MyI2C_W_SCL(1);
	MyI2C_W_SDA(0);
	MyI2C_W_SCL(0);
}

void MyI2C_Stop(void)
{
	MyI2C_W_SDA(0);
	MyI2C_W_SCL(1);
	MyI2C_W_SDA(1);
}

void MyI2C_SendByte(uint8_t Byte)
{
	uint8_t i;
	for (i = 0; i < 8; i ++)
	{
		MyI2C_W_SDA(Byte & (0x80 >> i));		//右移操作逐渐得到 Byte 的每一位
		MyI2C_W_SCL(1);							//驱动数据传输,SXL保持高电平才能发送数据
		MyI2C_W_SCL(0);
	}
}

uint8_t MyI2C_ReceiveByte(void)
{
	uint8_t i, Byte = 0x00;
	MyI2C_W_SDA(1);
	for (i = 0; i < 8; i ++)
	{
		MyI2C_W_SCL(1);
		if (MyI2C_R_SDA() == 1) // 读取数据线的状态
		{
			Byte |= (0x80 >> i);
		}
		MyI2C_W_SCL(0);
	}
	return Byte;
}

void MyI2C_SendAck(uint8_t AckBit)
{
	MyI2C_W_SDA(AckBit);
	MyI2C_W_SCL(1);
	MyI2C_W_SCL(0);
}

uint8_t MyI2C_ReceiveAck(void)
{
	uint8_t AckBit;
	MyI2C_W_SDA(1);
	MyI2C_W_SCL(1);
	AckBit = MyI2C_R_SDA();
	MyI2C_W_SCL(0);
	return AckBit;
}
三、逐行细读
开始
SCL高电平,SDA由低电平向高电平跳变

停止

其他的部分在注释里面体现了。
总结
这篇文章依旧没有总结