「iOS」自定义Modal转场------抽屉视图的实现
文章目录
前言
在仿写网易云的过程之中,看到学长之前仿写时实现的抽屉视图,不明觉厉,于是在仿写完3Gshared之后选择沉淀一下,来对网易云设置界面之中的抽屉视图以及圆角cell进行仿写以及学习,本来是想将这两个内容一起发为一篇博客的,但是在实现的过程之中发现,就单单让控制器从左边弹出就费了一番功夫,因此将如何实现自定义模态视图的推出,先整理为一篇笔记为先。
我是想要实现网易云那样的抽屉视图推出,即推出界面之后,右侧空白处显示的是原先控制器右侧的内容,我看到网上大部分使用transform进行平移,这样就使得空白处显示的原先视图控制器的左侧内容,于是就绕了很多弯子。
错误尝试
对于抽屉视图,我开始是想要使用UINavigationController实现(即pop和push的方法)从左到右推出和从右到左淡出的效果,即从JCThird跳转至JCSecond之中
objc
//前一个视图推出控制器
-(void)pushToJCSecond {
CATransition *transition = [CATransition animation];
transition.duration = 0.3;
transition.type = kCATransitionPush;
transition.subtype = kCATransitionFromLeft; [self.navigationController.view.layer addAnimation:transition forKey:kCATransition]; JCSecond *second = [[JCSecond alloc] init];
second.view.backgroundColor = [UIColor clearColor]; [self.navigationController pushViewController:second animated:YES];
}
//后一个控制器的内容
(void)viewDidLoad {
[super viewDidLoad];
// Do any additional setup after loading the view.
self.view.backgroundColor = [UIColor clearColor];
UIBarButtonItem *backButton = [[UIBarButtonItem alloc] initWithTitle:@"返回" style:UIBarButtonItemStylePlain target:self action:@selector(backButtonTapped)];
CGFloat width = [UIScreen mainScreen].bounds.size.width; UIView *view = [[UIView alloc] initWithFrame:CGRectMake(0, 0, width * 5 / 6, [UIScreen mainScreen].bounds.size.height)];
view.backgroundColor = [UIColor redColor];
[self.view addSubview:view];
self.navigationItem.leftBarButtonItem = backButton;
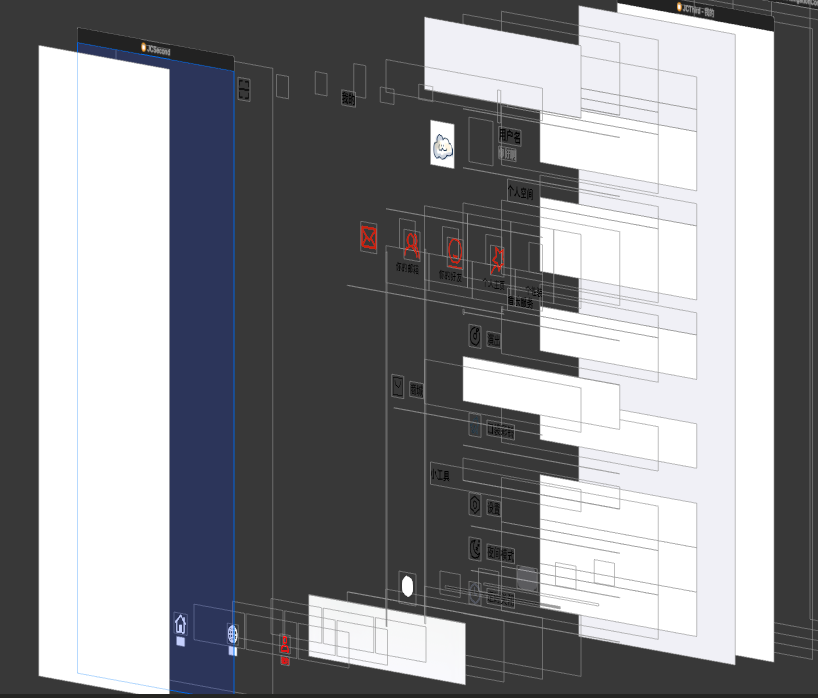
}但是发现,当视图顺利的从我的设想的动画之中弹出的时候,出现了问题,我即使将控制器的背景右侧六分之一设置为透明,但是透明一侧透露的最多多只是UITabBarController的一角,情况如下,是在是解决不了这个问题,于是选择放弃。初步推出是与推出视图的负责视图即父视图有关。如有解决方法请,请看到的大佬不吝赐教。
自定义Modal转场
那既然push/pop的方法不能做到,我就想着使用present/dismiss模态视图的方式,能不能实现呢?我们在使用present/dismiss的时候,一般来说能够控制present/dismiss出来控制器的高低,能在空白处看到上一个视图的部分内容。通过学习了解,我知道了和模态视图推出相关的一个属性,是在控制器之中的modalPresentationStyle,这个属性可以控制模态视图推出的时的形态,比如UIModalPresentationFullScreen可以让模态视图充满整一个屏幕。但可惜的是在可选的style并不能直接实现让视图从左到右推出的功能,于是我就接着了解到了如何自定义Modal转场的转场动画。
这个过程之中需要的内容其实自我感觉称得上复杂,大致有五个内容:
1.UIViewControllerAnimatedTransitioning 一个协议,这个接口负责切换的具体内容,也即"切换中发生了什么动画",动画实现只需要实现其两个代理方法就行
2.UIViewControllerTransitioningDelegate 一个协议,需要控制器切换的时候系统会向实现了这个接口的对象询问是否需要使用自定义的切换效果,也就是选择自定义的动画
3.UIPresentationController 控制控制器跳转的类,是 iOS8 新增的一个 API,用来控制 controller 之间的跳转特效可以用它实现自定义的弹窗,以及弹出的控制器的大小都可以根据这个来进行设置
4.modalPresentationStyle 这是UIViewController 的一个属性,就是字面意思,modal的样式,自定义的话,需要设置为Custom
5.transitioningDelegate 就是谁去实现 UIViewControllerTransitioningDelegate 这个协议的代理方法,一般用一个专门的类管理
实现流程
一开始看起来东西好像很多,我们可以慢慢来,一点一点的进行学习,首先我们要知道我们自定义一个Modal转场需要什么东西,一个遵循协议UIViewControllerAnimatedTransitioning自定义的动画类来实现从左到右弹出的动画,以及从右到左收回的动画,我们还需要重写UIPresentationController来控制弹出控制器的大小范围,以及添加半透明的黑色视图实现相关效果,这个可能听起来有点难理解,不过到后面就都了解了
自定义动画类
objc
@protocol UIViewControllerAnimatedTransitioning <NSObject>

// This is used for percent driven interactive transitions, as well as for
// container controllers that have companion animations that might need to
// synchronize with the main animation.
- (NSTimeInterval)transitionDuration:(nullable id <UIViewControllerContextTransitioning>)transitionContext;
// This method can only be a no-op if the transition is interactive and not a percentDriven interactive transition.
- (void)animateTransition:(id <UIViewControllerContextTransitioning>)transitionContext;

@end这是我们点进UIViewControllerAnimatedTransitioning可以看到的内容,可以看到一共可以实现两个方法,第一个方法我们通过返回值不难看出与时间相关,进而猜测这个方法其实与动画时间相关。
我们在这两个方法之中都能够看到一个协议名字,名为UIViewControllerContextTransitioning,这个名字含有Context协议其实就是转场动画的核心,遵循这个协议的transitionContext 即包含了转场动画的上下文(即前一个控制器和后一个控制器)。
objc
@protocol UIViewControllerContextTransitioning <NSObject>
//转场动画的容器
@property(nonatomic, readonly) UIView *containerView;

@property(nonatomic, readonly, getter=isAnimated) BOOL animated;

// The next two values can change if the animating transition is interruptible.
@property(nonatomic, readonly, getter=isInteractive) BOOL interactive; // This indicates whether the transition is currently interactive.
@property(nonatomic, readonly) BOOL transitionWasCancelled;

@property(nonatomic, readonly) UIModalPresentationStyle presentationStyle;

- (void)completeTransition:(BOOL)didComplete;


//通过两个to和from的枚举量,能在上下文之中获得相应的控制器
- (nullable __kindof UIViewController *)viewControllerForKey:(UITransitionContextViewControllerKey)key;

//获取上下文视图大小
- (CGRect)initialFrameForViewController:(UIViewController *)vc;
- (CGRect)finalFrameForViewController:(UIViewController *)vc;
@end
了解了这些我们就可以先写一个,一个自定义的动画类了,首先这个类的父类是NSOject,且需要遵循 UIViewControllerAnimatedTransitioning协议,头文件如下:
objc
#import <Foundation/Foundation.h>
#import <UIKit/UIKit.h>
NS_ASSUME_NONNULL_BEGIN

@interface slide : NSObject <UIViewControllerAnimatedTransitioning>

@property (nonatomic, assign) BOOL isPresentation;

@end

NS_ASSUME_NONNULL_END有细心的读者就会发现了,这个头文件之中还定义了布尔的属性,这个属性有什么用呢,前面我们说过,这个协议就只有两种方法,一个关于动画时间,一个关于模态视图的上下文以及动画,由于没有对present/dismiss进行明确的划分,所以我们要在属性之中添加一个属性来判断是对视图进行present/dismiss。
接下来就是.m文件 ------ 事先声明JCSecond以及JCThird为两个控制器的名称
objc
#import "slide.h"

@implementation slide


- (NSTimeInterval)transitionDuration:(id<UIViewControllerContextTransitioning>)transitionContext {
    return 0.3;
}

- (void)animateTransition:(id<UIViewControllerContextTransitioning>)transitionContext {
    UIView *containerView = [transitionContext containerView];
  //to是指变化的下文,from是指变化的上文
    UIViewController *toViewController = [transitionContext viewControllerForKey:UITransitionContextToViewControllerKey];
    UIViewController *fromViewController = [transitionContext viewControllerForKey:UITransitionContextFromViewControllerKey];

    UIView *toView = toViewController.view;
    UIView *fromView = fromViewController.view;

    //用于获取源视图控制器(fromViewController)在转场开始前的位置信息。
    CGRect initialFrame = [transitionContext initialFrameForViewController:fromViewController];
  	//用于获取目标视图控制器(toViewController)在转场结束后的位置信息。
    CGRect finalFrame = [transitionContext finalFrameForViewController:toViewController];

  //如果决定是将视图present则将toView加入containerView之中,并将 toView.frame先置于视图最后位置的左边,这样当动画变化的时候就会实现从左到右滑滑出
    if (self.isPresentation) {
        toView.frame = CGRectOffset(finalFrame, -finalFrame.size.width, 0);
        [containerView addSubview:toView];
    }

    UIView *animatingView = self.isPresentation ? toView : fromView;//确保拿到的都是JCSecond这个控制器以便进行动画
  //如果为dismiss那么就将最后的位置置于JCSecond的左边
    CGRect targetFrame = self.isPresentation ? finalFrame : CGRectOffset(initialFrame, -initialFrame.size.width, 0);

    [UIView animateWithDuration:[self transitionDuration:transitionContext] animations:^{
        animatingView.frame = targetFrame;
    } completion:^(BOOL finished) {
        if (!self.isPresentation) {
            [fromView removeFromSuperview];//如果为dismiss就将JCSecond全部移除
        }
        [transitionContext completeTransition:YES];
    }];
}


@end在这个.m文件的第二个方法之中,我们看到了很多,之前我们在UIViewControllerContextTransitioning之中看到的东西,首先是获得上下文的控制器,但是注意一点 在present和dismiss的上下文并不相同,也就是说在present之中,toView是指JCSecond,fromVIew是指JCThird,在dismiss之中toVIew指的是JCSecond,fromView指的是JCThird。
实现了自定义类之中我们就要,控制器之中的JCThird,去告诉编译器我们自己实现了一个动画,并将其运用至了present/dismiss的模态视图变化之中,我们就要先让该视图控制器实现协议 UIViewControllerTransitioningDelegate之中的方法了,这个协议之中的方法就是告诉编译器我们想要使用何种动画方式进行'push/dismiss'。引入我们刚刚写的自定义动画类slide,告诉编译器需要用slide这个动画实例进行变化,以下就是JCThird的代码
- (void)pushToJCSecond {
    JCSecond *second = [[JCSecond alloc] init];

    second.view.backgroundColor = [UIColor colorWithPatternImage:[UIImage imageNamed:@"back3.jpeg"]];
    //记得将modal改为自定义
    second.modalPresentationStyle = UIModalPresentationCustom;
    //实现协议的代理对象
    second.transitioningDelegate = self;
    [self presentViewController:second animated:YES completion:nil];
}
//管理present动画的
- (id<UIViewControllerAnimatedTransitioning>)animationControllerForPresentedController:(UIViewController *)presented presentingController:(UIViewController *)presenting sourceController:(UIViewController *)source {
    slide *animationController = [[slide alloc] init];
    animationController.isPresentation = YES;
    return animationController;
}
//管理dismiss动画的
- (id<UIViewControllerAnimatedTransitioning>)animationControllerForDismissedController:(UIViewController *)dismissed {
    slide *animationController = [[slide alloc] init];
    animationController.isPresentation = NO;
    return animationController;
}
我们运行一下试试看:
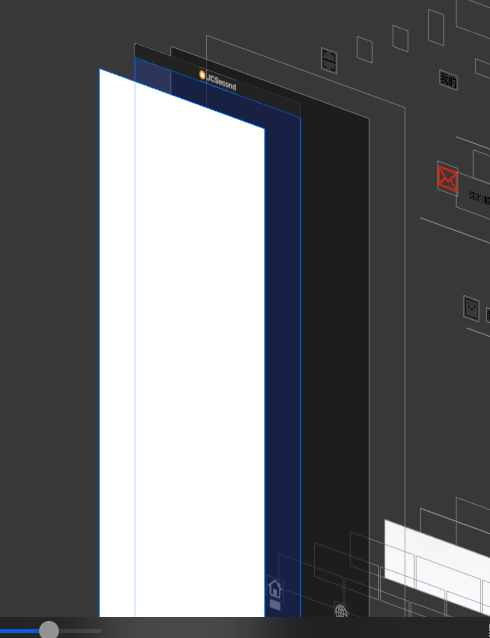
不难发现,有点像了是不是,但是好像还是缺了什么,就是右边空白视图需要从亮到灰,而不是和弹出来的抽屉视图的亮度相同,笔者先前试过在viewWillDisappear之中加入一个半透明的灰色视图,结果发现由于覆盖的半透明视图是覆盖在JCThird之中,本身的UITabBarController并不会发生覆盖,而且present出来的视图控制器,界面仍然占据整个屏幕,这对于后面添加手势去dismiss视图也是一个难度。于是根据相关知识,我发现UIPresentationController似乎能够实现我想要完成的效果。
JCSecond占据了整个屏幕
UIPresentationController
当我们使用presnt方法的时候控制器的presentationController就会提前创建好了,它负责管理视图控制器之间的呈现(presentation)和解散(dismissal)过程。
-
presentationTransitionWillBegin:- 作用:在呈现过渡即将开始时调用。
- 用法:在此方法中执行呈现过渡的准备工作,如设置背景视图、添加自定义动画等。
-
presentationTransitionDidEnd::- 作用:在呈现过渡结束时调用。
- 用法:在此方法中执行呈现过渡完成后的清理工作,如处理用户交互、设置最终状态等。
-
dismissalTransitionWillBegin:- 作用:在解散过渡即将开始时调用。
- 用法:在此方法中执行解散过渡的准备工作,如添加解散动画效果、隐藏视图等。
-
dismissalTransitionDidEnd::- 作用:在解散过渡结束时调用。
- 用法:在此方法中执行解散过渡完成后的清理工作,如移除视图、恢复状态等。
-
frameOfPresentedViewInContainerView:- 作用:返回呈现视图在容器视图中的位置和大小。
- 用法:用于指定呈现视图在容器视图中的布局,可以自定义呈现视图的位置和大小。
我们可以根据重写视图控制器之中这些类似的方法一样,自己自定义 UIPresentationController 的行为已实现自己的需求。
OK了解完了原理,那我们就开始重写方法吧
#import <UIKit/UIKit.h>

NS_ASSUME_NONNULL_BEGIN

@interface present : UIPresentationController

@end

NS_ASSUME_NONNULL_END
------------------------------------------------------------------------------------------------------------------------------------------------------------------------------------------------------------------------------------------------------------------------------------------------------------------------------------------------------------------------------------------
#import "present.h"

@implementation present
- (CGRect)frameOfPresentedViewInContainerView {
    CGFloat width = self.containerView.bounds.size.width * 5 / 6;
    return CGRectMake(0, 0, width, self.containerView.bounds.size.height);
}

- (void)presentationTransitionWillBegin {
    UIView *dimmingView = [[UIView alloc] initWithFrame:self.containerView.bounds];
    dimmingView.backgroundColor = [[UIColor blackColor] colorWithAlphaComponent:0.5];
    dimmingView.alpha = 0.0;
    dimmingView.tag = 1001;

    [self.containerView addSubview:dimmingView];

    [UIView animateWithDuration:0.3 animations:^{
        dimmingView.alpha = 1.0;
    }];
    UITapGestureRecognizer *tapGesture = [[UITapGestureRecognizer alloc] initWithTarget:self action:@selector(tap:)];

    [dimmingView addGestureRecognizer:tapGesture];
}

- (void)tap:(UITapGestureRecognizer *)gesture {

        [self.presentingViewController dismissViewControllerAnimated:YES completion:nil];
}

- (void)dismissalTransitionWillBegin {
    UIView *dimmingView = [self.containerView viewWithTag:1001];

    [UIView animateWithDuration:0.3 animations:^{
        dimmingView.alpha = 0.0;
    } completion:^(BOOL finished) {
        [dimmingView removeFromSuperview];
    }];
}
@end我重写了frameOfPresentedViewInContainerView presentationTransitionWillBegin 以及 dismissalTransitionWillBegin这三个方法,其中frameOfPresentedViewInContainerView 就是限制了JCSecond的范围宽度为六分之五。
presentationTransitionWillBegin 是在视图被present之前添加了一个黑色半透明的背景颜色,而在视图被present到屏幕上的时候,做一个动画渐变将半透明的黑色背景颜色逐渐显示(即alpha从0到1的过程),然后就是手势的添加,我们将其添加至背景视图的dimmingView,由于我们前面frameOfPresentedViewInContainerView 设定了JCSecond的具体大小,所以dimmingView会被JCSecond覆盖,所以只有我们点击到灰色的背景部分,这个抽屉视图才会执行手势的内容
dismissalTransitionWillBegin其实内容大同小异,只是将背景视图通过动画取消了而已,然后在动画结束的时候将背景视图移除,没有其他的内容。
成果展示
完整内容如下:
好了我们这样终于完成了我们想要的抽屉视图,没想到一个看似简单的内容,自己学习以及整理笔记整理了快有两天之多,果然还是学习的内容太少了,没想到实现这个简单的内容还需要了解这么多东西,果然学习之路还是茫茫啊😭