Web服务介绍
Apache
Apache起初由美国的伊利诺伊大学香槟分校的国家超级计算机应用中心开发。目前经历了两大版本分别是1.X和2.X ,其可以通过编译安装实现特定的功能。
Apache prefork 模型
1.预派生模式,有一个主控制进程,然后生成多个子进程,使用select模型,最大并发1024
2.每个子进程有一个独立的线程响应用户请求
3.相对比较占用内存,但是比较稳定,可以设置最大和最小进程数
4.是最古老的一种模式,也是最稳定的模式,适用于访问量不是很大的场景
优点:稳定
缺点:每个用户请求需要对应开启一个进程,占用资源较多,并发性差,不适用于高并发场景
Apache worker 模型
1.一种多进程和多线程混合的模型
2.有一个控制进程,启动多个子进程
3.每个子进程里面包含固定的线程
4.使用线程程来处理请求
5.当线程不够使用的时候会再启动一个新的子进程,然后在进程里面再启动线程处理请求
6.由于其使用了线程处理请求,因此可以承受更高的并发
优点:相比prefork 占用的内存较少,可以同时处理更多的请求
缺点:使用keepalive的长连接方式,某个线程会一直被占据,即使没有传输数据,也需要一直等待到超 时才会被释放。如果过多的线程,被这样占据,也会导致在高并发场景下的无服务线程可用(该问题在 prefork模式下,同样会发生)
Apache event 模型
1.Apache中最新的模式,2012年发布的apache 2.4.X系列正式支持event 模型,属于事件驱动模型(epoll)
2.每个进程响应多个请求,在现在版本里的已经是稳定可用的模式
3.它和worker模式很像,最大的区别在于,它解决了keepalive场景下长期被占用的线程的资源浪费问题 (某些线程因为被keepalive,空挂在哪里等待,中间几乎没有请求过来,甚至等到超时)
4.event MPM中,会有一个专门的线程来管理这些keepalive类型的线程
5.当有真实请求过来的时候,将请求传递给服务线程,执行完毕后,又允许它释放。这样增强了高并发场 景下的请求处理能力
优点:单线程响应多请求,占据更少的内存,高并发下表现更优秀,会有一个专门的线程来管理keepalive类型的线程,当有真实请求过来的时候,将请求传递给服务线程,执行完毕后,又允许它释放
缺点:没有线程安全控制
Nginx
Nginx是由1994年毕业于俄罗斯国立莫斯科鲍曼科技大学的同学为俄罗斯rambler.ru公司开发的,开发 工作最早从2002年开始,第一次公开发布时间是2004年10月4日,版本号是0.1.0
功能
1.静态的web资源服务器html,图片,js,css,txt等静态资源
2.http/https协议的反向代理
3.结合FastCGI/uWSGI/SCGI等协议反向代理动态资源请求
4.tcp/udp协议的请求转发(反向代理)
5.imap4/pop3协议的反向代理
基础特性
1.模块化设计,较好的扩展性
2.高可靠性
3.支持热部署:不停机更新配置文件,升级版本,更换日志文件
4.低内存消耗:10000个keep-alive连接模式下的非活动连接,仅需2.5M内存
5.event-driven,aio,mmap,sendfile
Web服务相关的功能
虚拟主机(server)
支持 keep-alive 和管道连接(利用一个连接做多次请求)
访问日志(支持基于日志缓冲提高其性能)
url rewirte
路径别名
基于IP及用户的访问控制
支持速率限制及并发数限制
重新配置和在线升级而无须中断客户的工作进
Nginx实战
源码编译
官方源码包下载地址:nginx: download
安装
[root@nginx ~]# dnf install gcc pcre-devel zlib-devel openssl-devel -y
[root@nginx]# tar zxf nginx-1.24.0.tar.gz
[root@nginx-1.24.0]# useradd -s /sbin/nologin -M nginx
[root@nginx-1.24.0]# ./configure --prefix=/usr/local/nginx \
--user=nginx \  #指定nginx运行用户
--group=nginx \ # 指定nginx运行组
--with-http_ssl_module \ # 支持https://
--with-http_v2_module \ # 支持http版本2
--with-http_realip_module \ # 支持ip透传
--with-http_stub_status_module \ # 支持状态页面
--with-http_gzip_static_module \ # 支持压缩
--with-pcre \ # 支持正则
--with-stream \ # 支持tcp反向代理
--with-stream_ssl_module \ # 支持tcp的ssl加密
--with-stream_realip_module # 支持tcp的透传ip
[root@nginx-1.24.0]# make && make install
关闭debug功能
root@nginx nginx-1.24.0# vim auto/cc/gcc

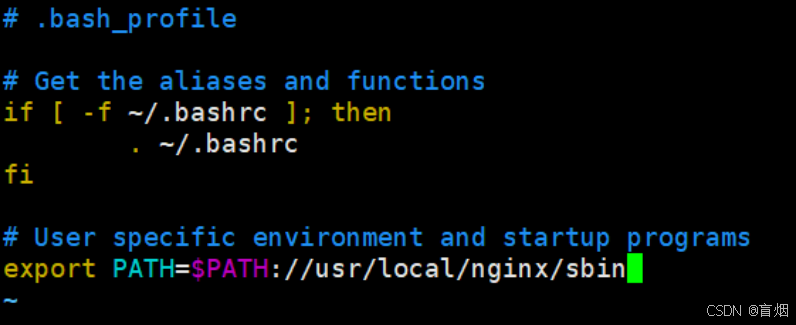
编译参数
root@nginx nginx-1.24.0# vim ~/.bash_profile
root@nginx nginx-1.24.0# source ~/.bash_profile
验证版本
root@nginx nginx-1.24.0# nginx -V

平滑升级
#解压新版本
[root@nginx]# tar zxf nginx-1.26.1.tar.gz
[root@Nginx nginx]# cd nginx-1.26.1/
#开始编译新版本
[root@Nginx nginx-1.26.1]# ./configure --with-http_ssl_module --withhttp_v2_module --with-http_realip_module --with-http_stub_status_module --with-http_gzip_static_module --with-pcre --with-stream --with-stream_ssl_module -- with-stream_realip_module #只[root@nginx-1.26.1]# make
查看两个版本

#把之前的旧版的nginx命令备份
[root@nginx nginx-1.26.1]# cd /usr/local/nginx/sbin/
[root@nginx sbin]# cp nginx nginx.24
[root@nginx sbin]# ls
nginx  nginx.24
#把新版本的nginx命令复制过去
[root@nginx sbin]# \cp -f /root/nginx-1.26.1/objs/nginx  /usr/local/nginx/sbin
检测

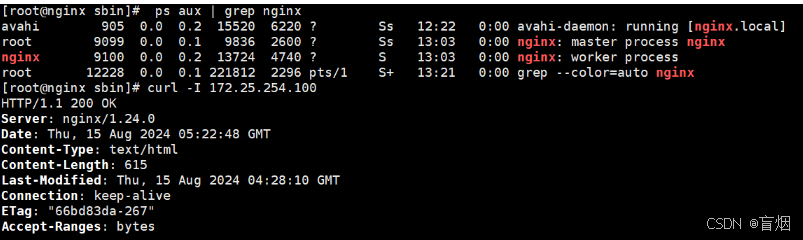
查看进程
root@nginx sbin# ps aux | grep nginx
依旧是旧版本生效
回收旧版本
root@nginx sbin# kill -99099

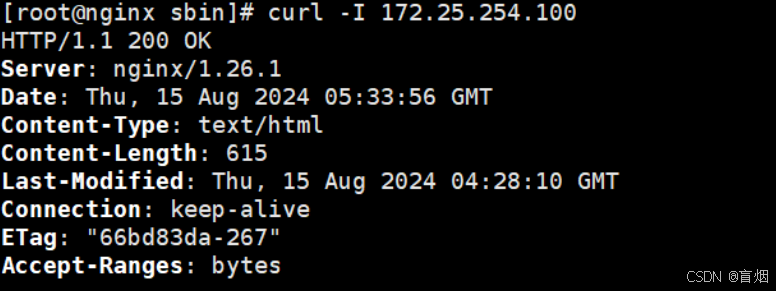
新版本生效
回滚
#如果升级的版本发现问题需要回滚,可以重新拉起旧版本的worker
[root@nginx sbin]# cp nginx nginx.26
[root@nginx sbin]# ls
nginx  nginx.24  nginx.26
[root@nginx sbin]# mv nginx.24 nginx
[root@nginx sbin]# kill -9 15341
回滚完成
命令参数
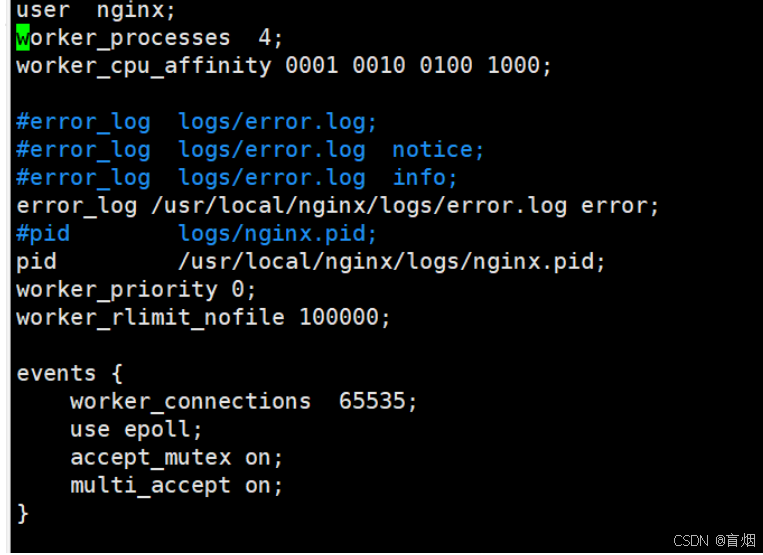
root@nginx \~# vim /usr/local/nginx/conf/nginx.conf
#启动nginx工作进程的用户和组
#启动nginx工作进程的数量
#错误日志记录配置
#pid文件保存路径
 #修改pam限制
root@nginx \~# vim /etc/security/limits.conf

#应用
root@nginx \~# nginx -g "worker_processes 4;"
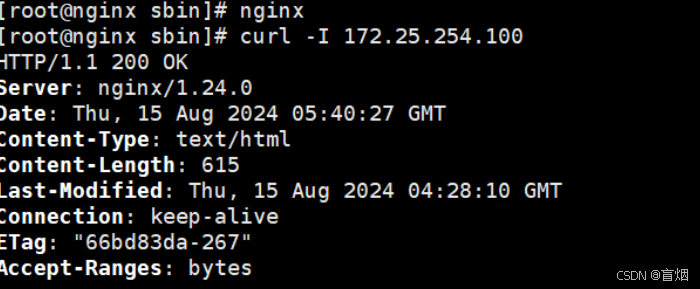
 root@nginx \~# lsof -i :80 查看80端口所占进程
文件编写
root@nginx \~# vim /lib/systemd/system/nginx.service
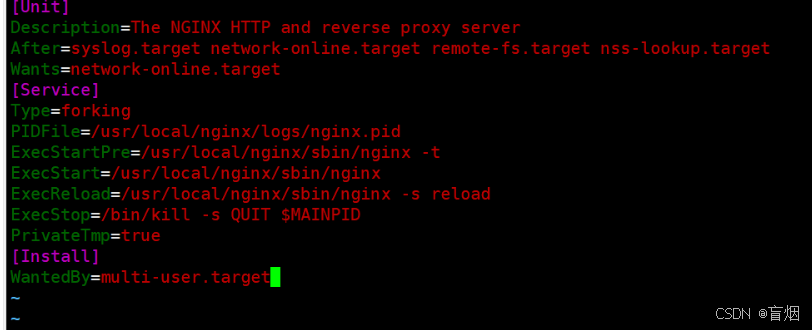
root@nginx \~# systemctl daemon-reload
root@nginx \~# systemctl start nginx

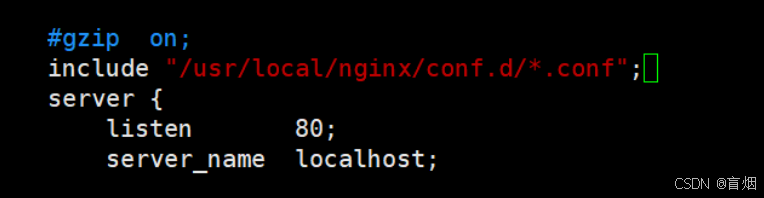
全局参数优化
#导入其他路径的配置文件
root@nginx \~# vim /usr/local/nginx/conf/nginx.conf
创建目录,编辑目录
root@nginx \~# mkdir -p /usr/local/nginx/conf.d
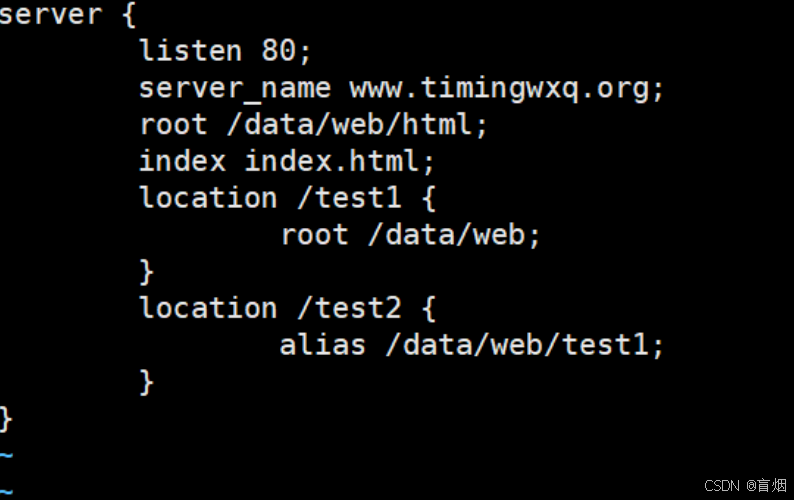
root@nginx \~# vim /usr/local/nginx/conf.d/vhost.conf
root@nginx \~# mkdir /data/web/test1 -p
root@nginx \~# echo /data/web/test1 > /data/web/test1/index.html
root@nginx conf.d# nginx -s reload
浏览器访问
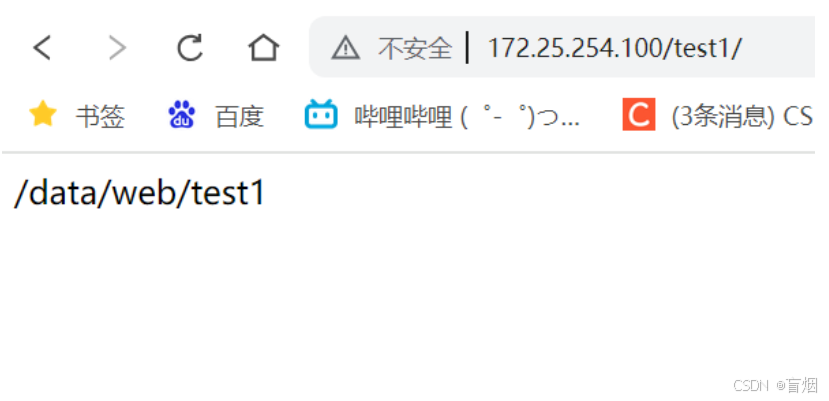
location用法
创建目录,写入文件
root@nginx \~# mkdir -p /data/web{1..5}
root@nginx \~# mkdir -p /data/web{1..5}/test
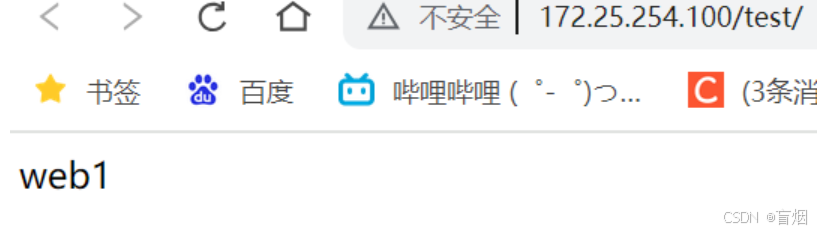
root@nginx \~# echo web1 > /data/web1/test/index.html
root@nginx \~# echo web2 > /data/web2/test/index.html
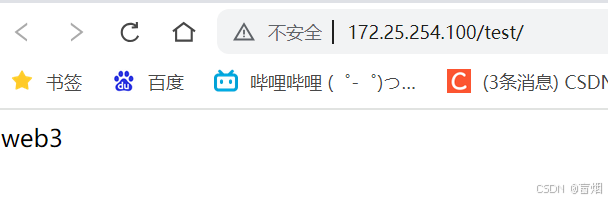
root@nginx \~# echo web3 > /data/web3/test/index.html
root@nginx \~# echo web4 > /data/web4/test/index.html
root@nginx \~# echo web5 > /data/web5/test/index.html
root@nginx \~# vim /usr/local/nginx/conf.d/vhost.conf

root@nginx \~# nginx -s reload
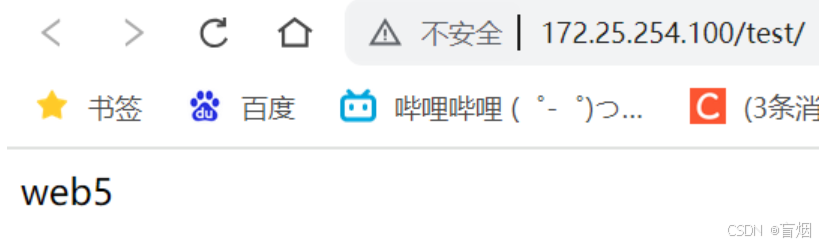
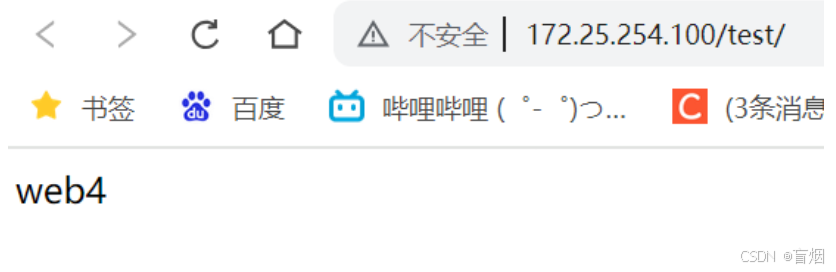
浏览器访问,出现了web5和web4,所以 ~*优先级和 ~ 相等
注释掉后两行,访问到的是web1
注释掉后三行,访问到的是web3
由此可知,对目录匹配优先级从高到低:
1.~* 和 ~ 优先级相等
2.不带符号
- ^~
对文件匹配优先级从高到低:
- = (不支持目录)
2.~* 和 ~ 优先级相等
3.不带符号
- ^~
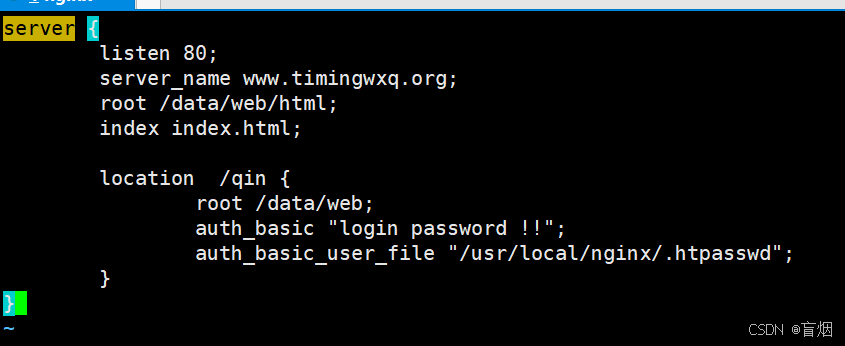
账户认证
创建默认认证文件
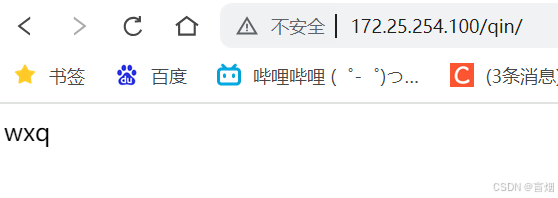
root@nginx \~# htpasswd -m /usr/local/nginx/.htpasswd wxq
root@nginx \~# mkdir /data/web/qin
root@nginx \~# echo wxq > /data/web/qin/index.html
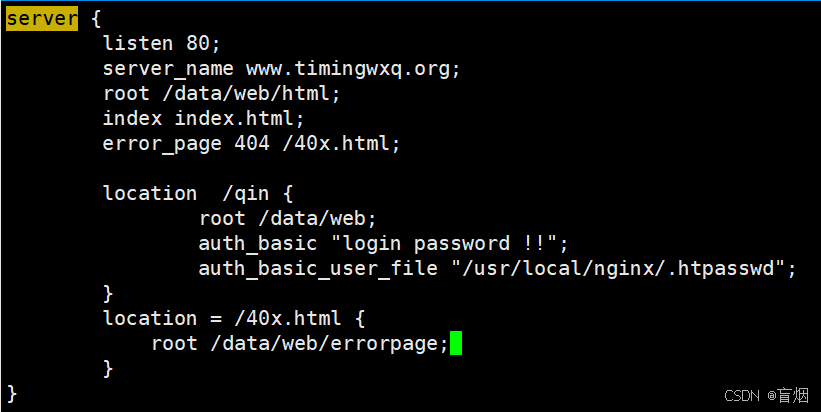
root@nginx \~# vim /usr/local/nginx/conf.d/vhost.conf
root@nginx \~# nginx -s reload
浏览器访问
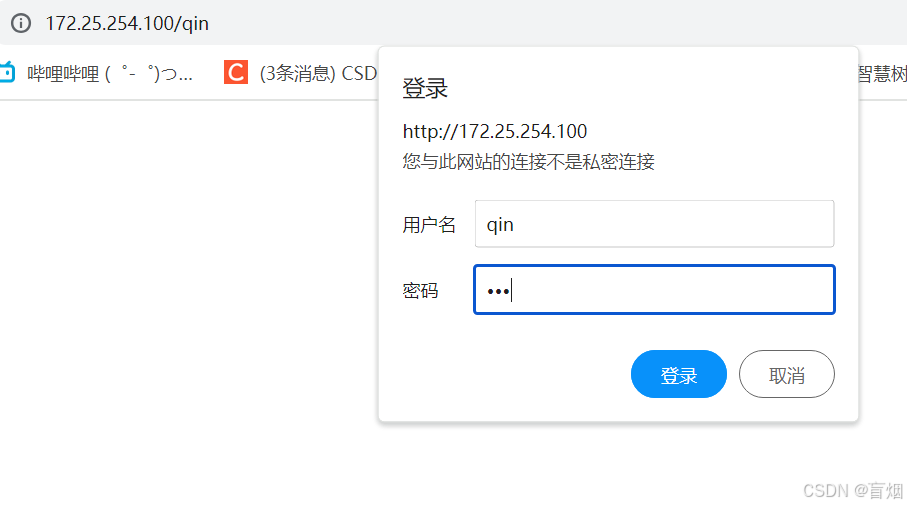
登录成功
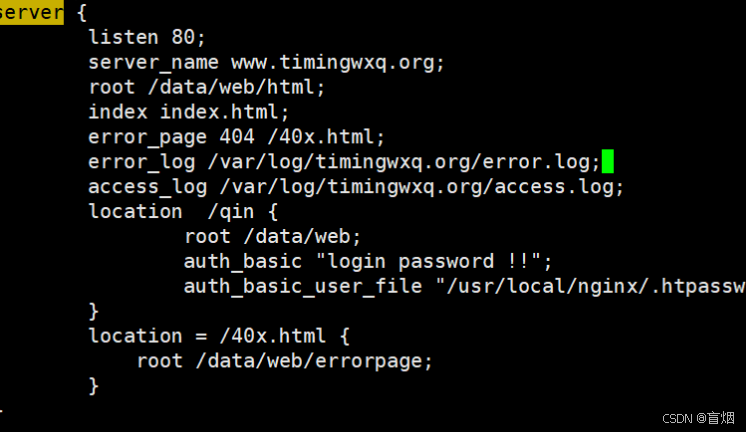
自定义日志
自定义错误页面
root@nginx \~# vim /usr/local/nginx/conf.d/vhost.conf
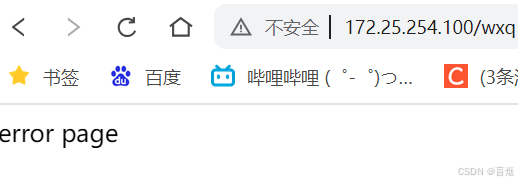
root@nginx \~# mkdir -p /data/web/errorpage
root@nginx \~# echo error page > /data/web/errorpage/40x.html
root@nginx \~# nginx -s reload
访问不存在的目录,出现自定义错误信息
自定义错误日志
查看日志目录 ll /usr/local/nginx/logs/
root@nginx \~# nginx -s reload
root@nginx \~# mkdir /var/log/timingwxq.org
root@nginx \~# cat /var/log/timingwxq.org/access.log
root@nginx \~# cat /var/log/timingwxq.org/error.log

文件检测
root@nginx \~# vim /usr/local/nginx/conf.d/vhost.conf

root@nginx \~# mkdir /data/web/html/error
root@nginx \~# echo error default > /data/web/html/error/default.html

长链接控制
编辑主配置文件 vim /usr/local/nginx/conf/nginx.conf

#长链接保持时间 5s结束
#长链接请求次数 请求2次
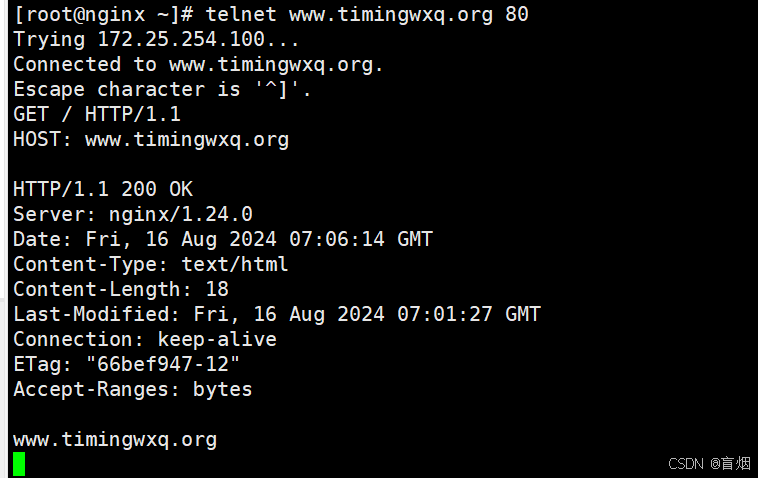
下载测试工具
root@nginx \~# dnf install telnet -y
root@nginx \~# echo <www.timingwxq.org> > /data/web/html/error/default.html
下载服务器设置
root@nginx \~# mkdir /data/web/download
root@nginx \~# dd if=/dev/zero of=/data/web/download/leefile bs=1M count=100

root@nginx \~# vim /usr/local/nginx/conf.d/vhost.conf
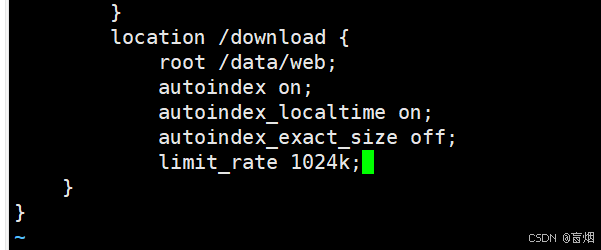
root@nginx \~# nginx -s reload
浏览器访问,弹出下载地址
 Nginx高级配置
状态页
注意,要在本地计算机和linux主机中完成域名解析
root@nginx \~# vim /usr/local/nginx/conf.d/status.conf
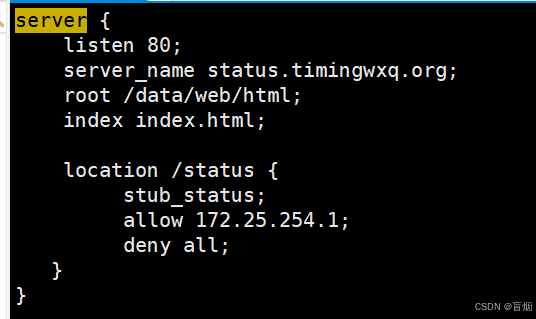
root@nginx \~# nginx -s reload
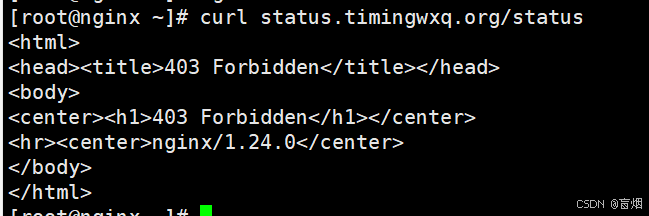
浏览器访问status.timingwxq.org/status ,出现状态页
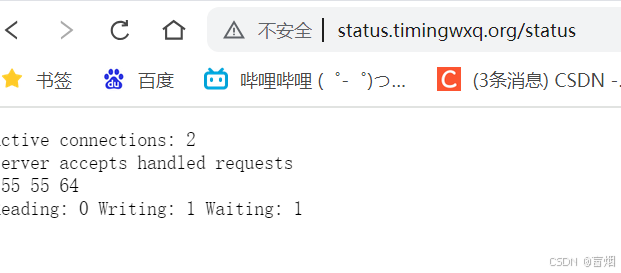
由于只允许172.25.254.1通过,所以本地访问会报错
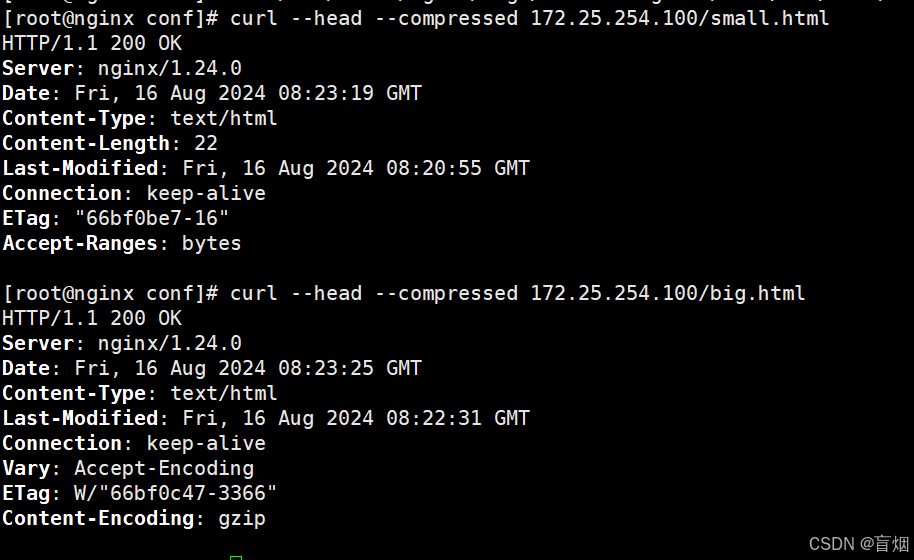
压缩功能
编辑配置文件 root@nginx \~# cd /usr/local/nginx/conf/nginx.conf

root@nginx conf# nginx -s reload
root@nginx conf# echo Tomorrow will be fine > /data/web/html/small.html
root@nginx conf# du -sh /usr/local/nginx/logs/access.log
16K /usr/local/nginx/logs/access.log
root@nginx conf# cat /usr/local/nginx/logs/access.log > /data/web/html/big.html
查看文件
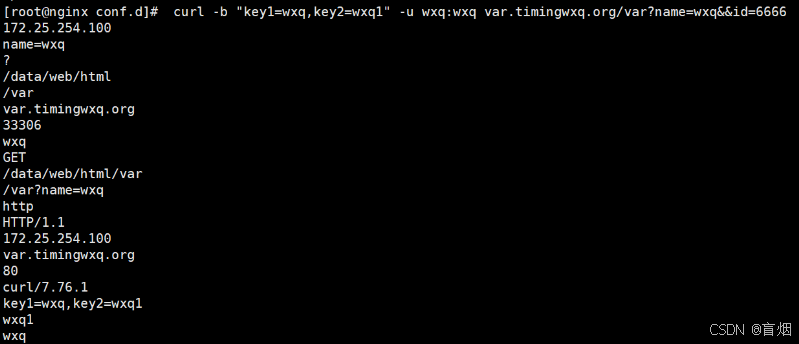
变量使用
#nginx的内置变量
root@nginx \~# vim /usr/local/nginx/conf.d/vars.conf
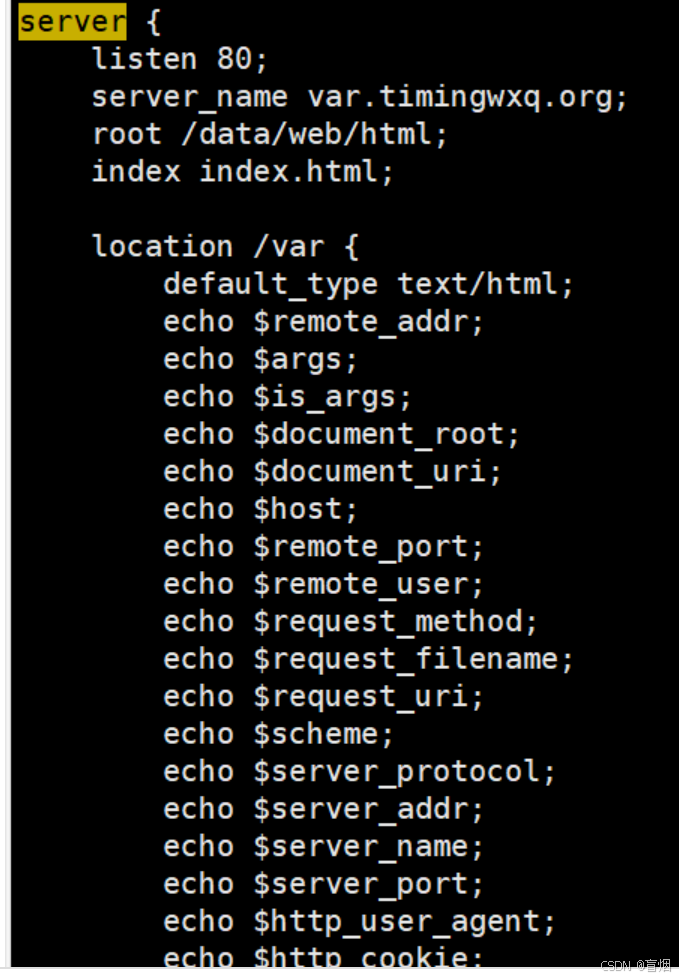
#nginx自定义变量
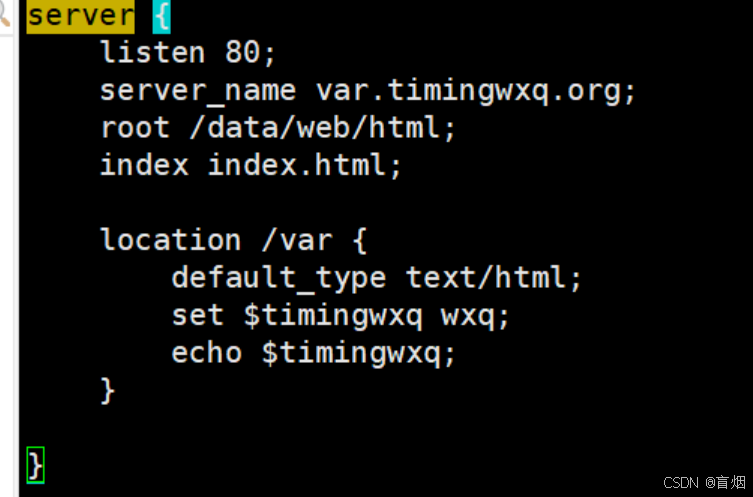
测试
root@nginx \~# curl -b "key1=wxq,key2=wxq1" -u wxq:wxq var.timingwxq.org/var?name=wxq&&id=6666
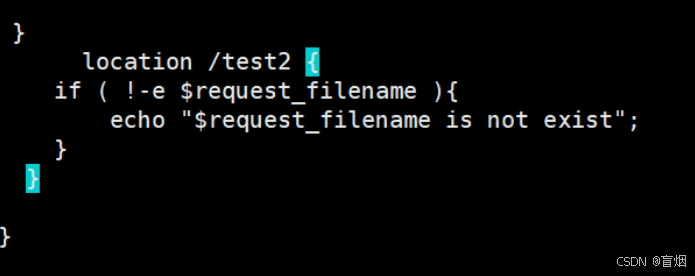
Rewrite相关功能
1.if
root@nginx conf.d# vim vars.conf
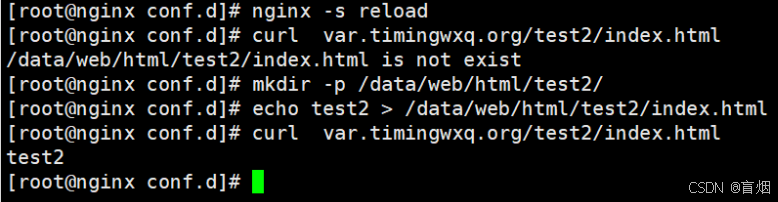
测试
root@nginx conf.d# curl var.timingwxq.org/test2/index.html
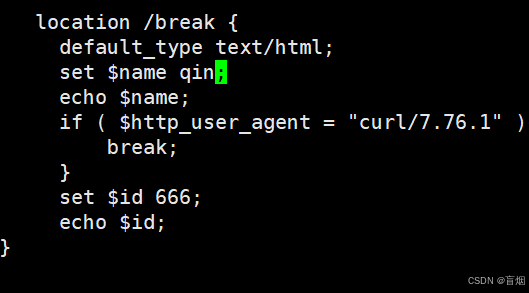
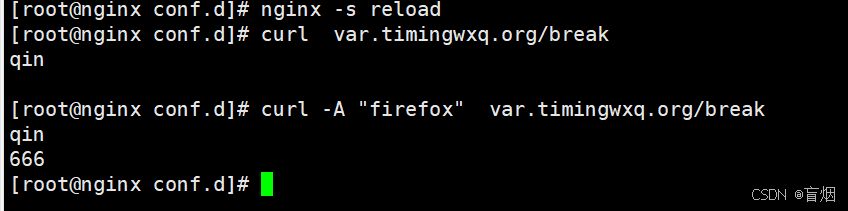
2.break
root@nginx conf.d# vim vars.conf
测试
root@nginx conf.d# curl var.timingwxq.org/break
root@nginx conf.d# curl -A "firefox" var.timingwxq.org/break
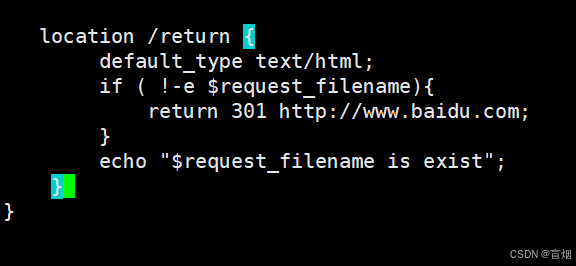
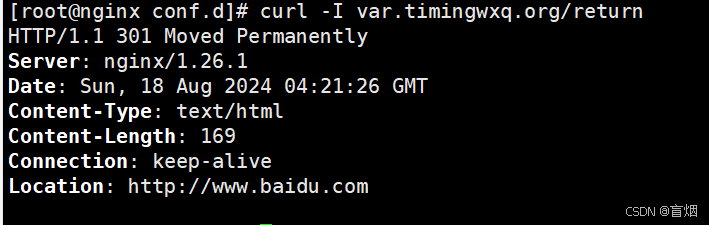
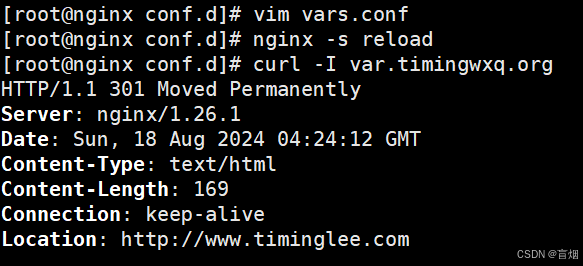
3.return
root@nginx conf.d# vim vars.conf
测试

4.rewirte
root@nginx conf.d# vim vars.conf
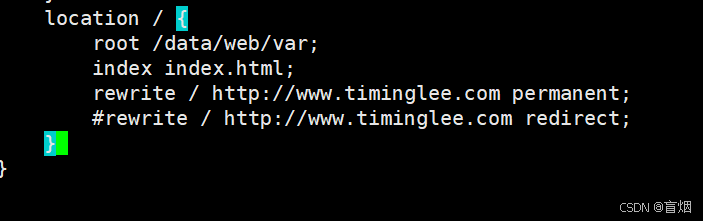
测试
5.break和last
root@nginx \~# mkdir -p /data/web/html/{test1,test2,break,last}
root@nginx \~# echo test1 > /data/web/html/test1/index.html
root@nginx \~# echo test2 > /data/web/html/test2/index.html
root@nginx \~# echo last > /data/web/html/last/index.html
root@nginx \~# echo break > /data/web/html/break/index.html
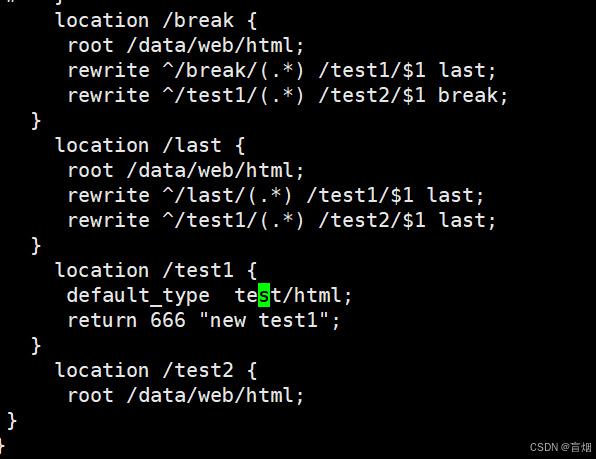
测试

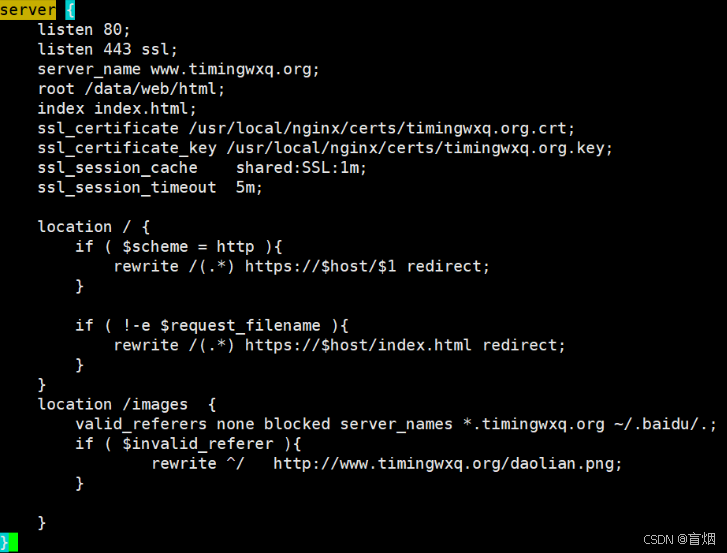
防盗链
nginx主机上:
root@nginx \~# cd /usr/local/nginx/
root@nginx nginx# mkdir certs
root@nginx nginx# cd certs/
root@nginx certs# openssl req -newkey rsa:2048 -nodes -sha256 -keyout /usr/local/nginx/certs/timingwxq.org.key \ -x509 -days 365 -out /usr/local/nginx/certs/timingwxq.org.crt
root@nginx certs# vim /usr/local/nginx/conf.d/vhosts.conf
另一台主机 172.25.254.132
root@node \~# yum install httpd -y
root@node \~# vim /var/www/html/index.html

root@node \~# systemctl enable --now httpd
root@node \~# systemctl start httpd
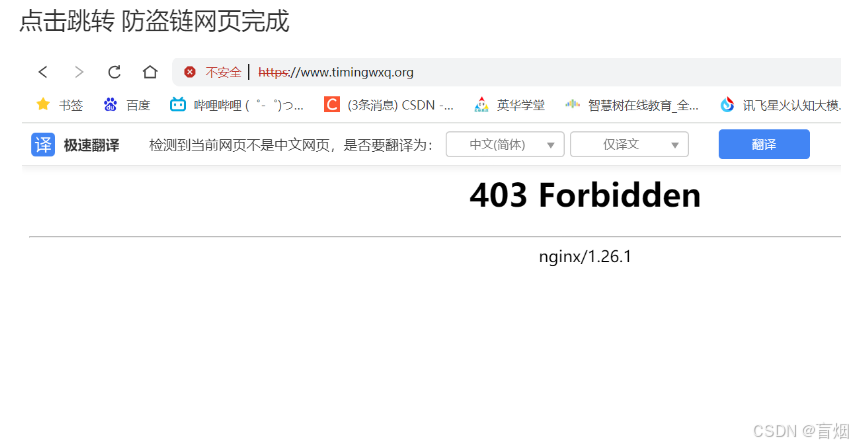
测试
网址输入 http://172.25.254.132

点击跳转 防盗链网页完成
http反向代理
实验需要三台主机
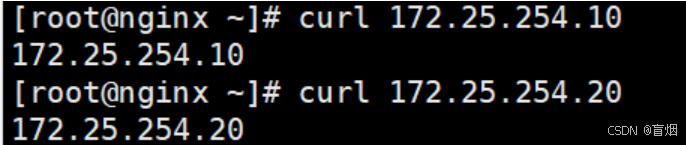
nginx:172.25.254.100
web1:172.25.254.10
web2:172.25.254.20
在两台web主机上下载httpd服务
在nginx上测试
root@nginx \~# vim /usr/local/nginx/conf.d/vhosts.conf
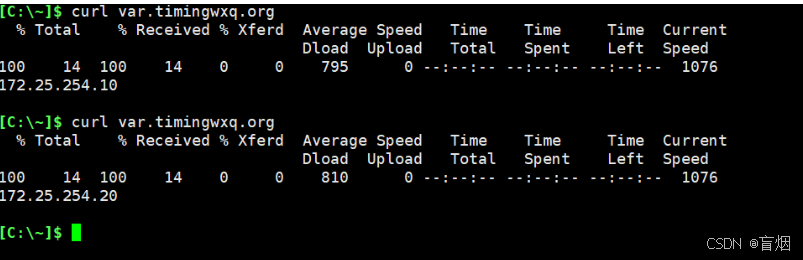
注意 proxy只能代理一个
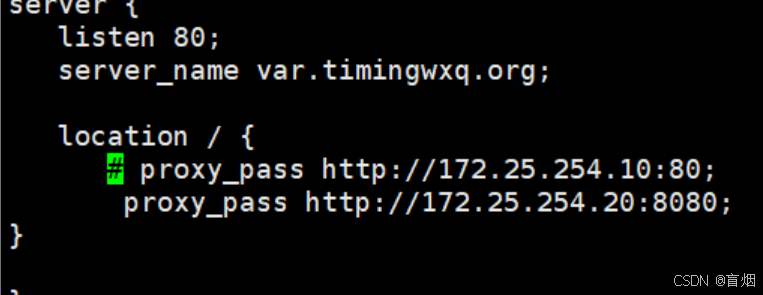
root@nginx \~# nginx -s reload
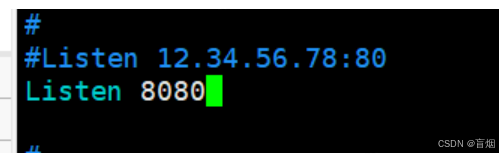
web2主机
root@web20 \~# vim /etc/httpd//conf/httpd.conf
root@web20 \~# systemctl restart httpd
端口改为8080
测试
若想代理两个服务,开启static
在nginx主机
vim /usr/local/nginx/conf.d/vhosts.conf
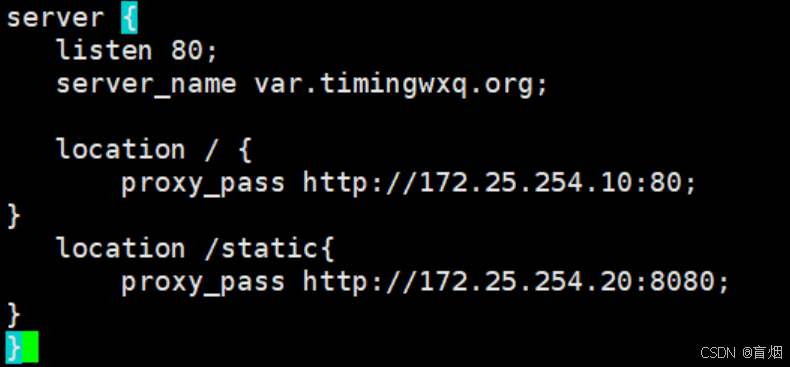
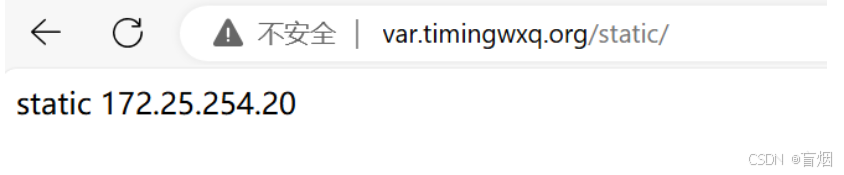
在web2主机创建static目录
root@web20 \~# mkdir -p /var/www/html/static root@web20 \~# echo static 172.25.254.20 > /var/www/html/static/index.html
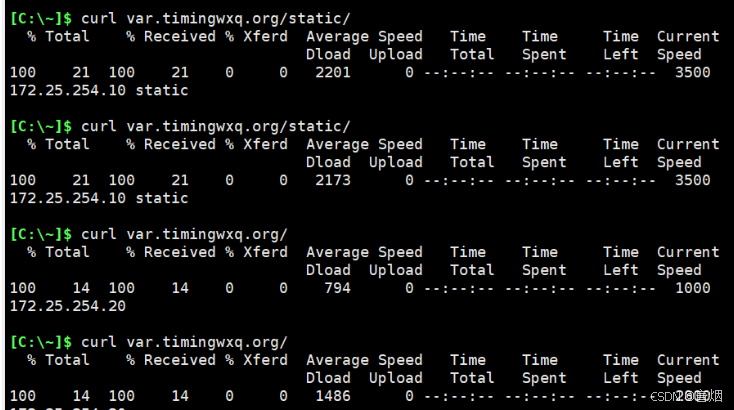
测试

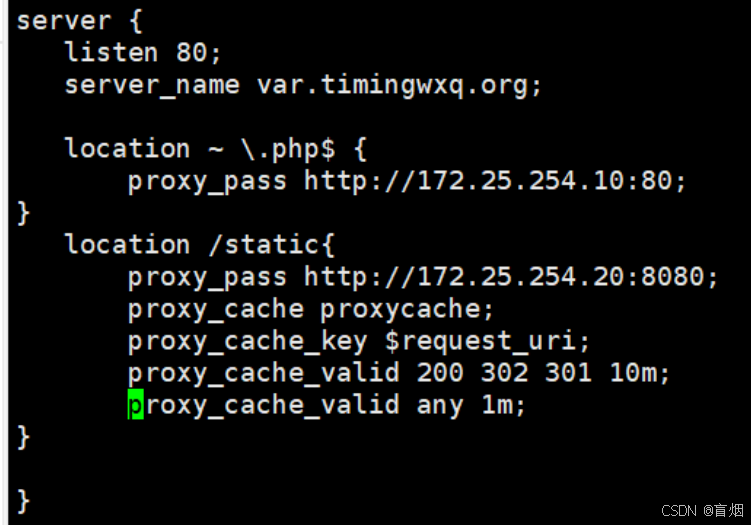
实现动静分离
nginx主机
vim /usr/local/nginx/conf.d/vhosts.conf
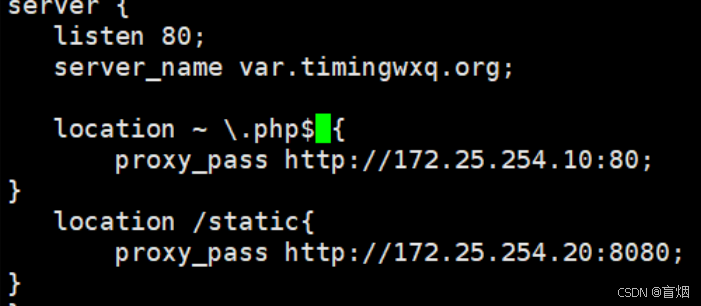
web1主机
root@web10 \~# dnf install php -y
root@web10 \~# systemctl restart httpd root@web10 \~# vim /var/www/html/index.php

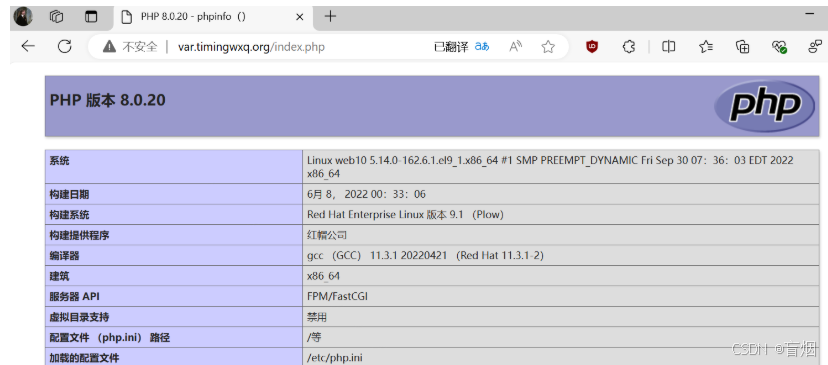
测试
浏览器访问 实现动静分离
缓存功能
准备缓存配置
root@nginx-node1 conf.d# vim /usr/local/nginx/conf/nginx.conf

root@nginx-node1 conf.d# vim /usr/local/nginx/conf.d/vhosts.conf
目录会自动生成

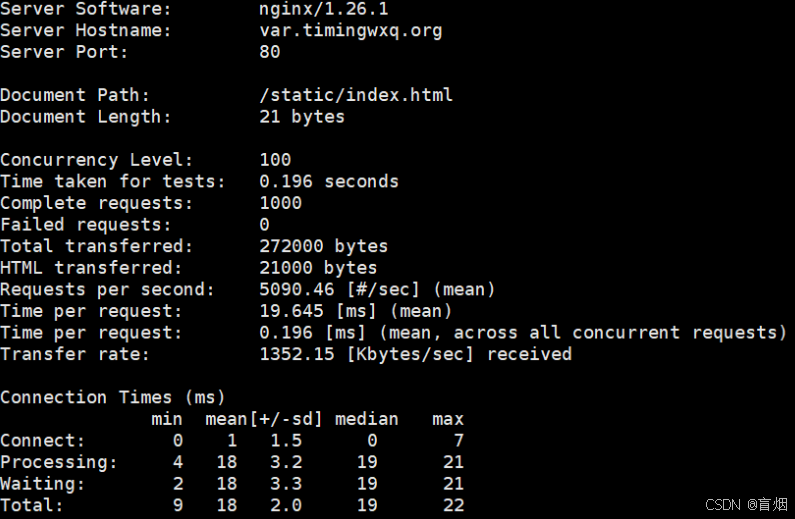
访问并验证缓存文件
root@web10 \~# ab -n1000 -c100 http://var.timingwxq.org/static/index.html
负载均衡
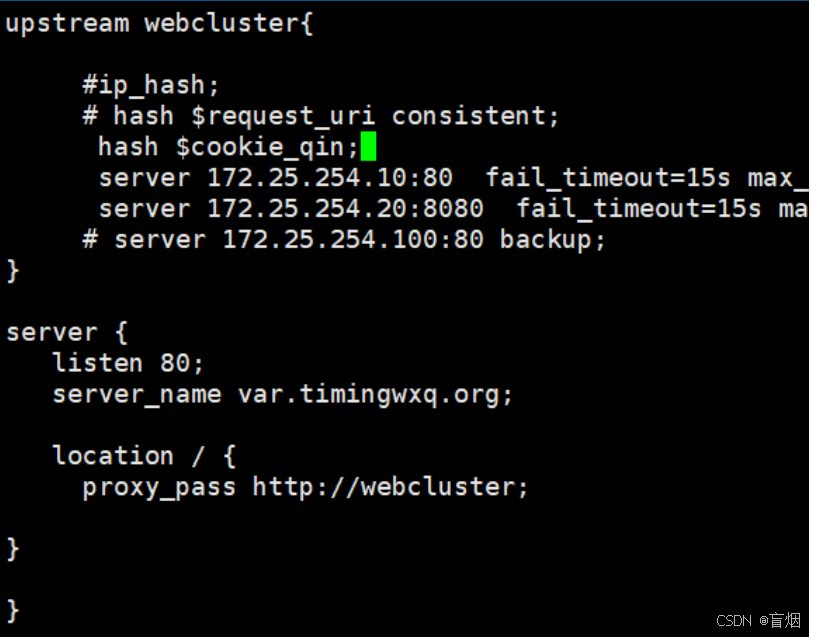
root@nginx-node1 conf.d# vim /usr/local/nginx/conf.d/vhosts.conf
测试,轮询

[root@nginx-node1 conf.d]# vim /usr/local/nginx/conf.d/vhosts.conf
upstream webcluster{
\#ip_hash;
#hash $ request_uri consistent;
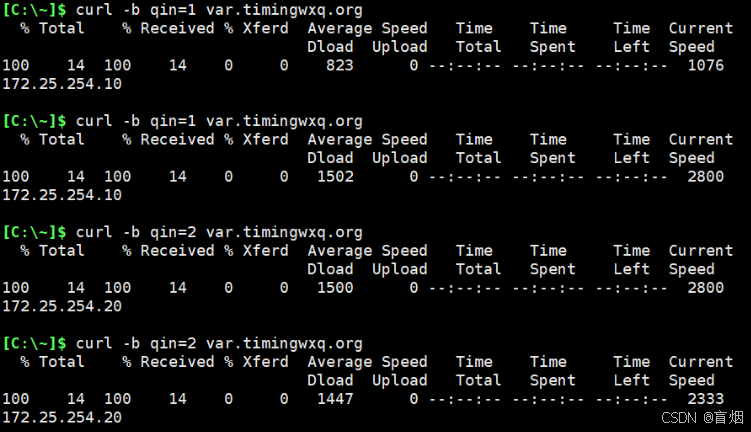
$cookie_qin; #least_conn;
server 172.25.254.10:80 fail_timeout=15s max_fails=3;
server 172.25.254.20:8080 fail_timeout=15s max_fails=3;
server 172.25.254.100:80 backup;
}
server {
listen 80;
server_name var.timingwxq.org;
location / {
proxy_pass http://webcluster;
}
}web1主机
root@web10 \~# mkdir -p /var/www/html/static root@web10 \~# echo 172.25.254.10 static > /var/www/html/static/index.html

测试,实现负载均衡
基于Cookie 实现会话绑定
测试
php源码编译
nginx升级
root@nginx-node1 \~# tar zxf nginx-1.26.1.tar.gz
root@nginx-node1 \~# cd nginx-1.26.1/
root@nginx-node1 nginx-1.26.1# ./configure --prefix=/usr/local/nginx --user=nginx --group=nginx --add-module=/root/echo-nginx-module-0.63 --add-module=/root/memc-nginx-module-0.20 --add-module=/root/srcache-nginx-module-0.33 --with-http_ssl_module --with-http_v2_module --with-http_realip_module --with-http_stub_status_module --with-http_gzip_static_module --with-pcre --with-stream --with-stream_ssl_module --with-stream_realip_module
root@nginx-node1 nginx-1.26.1 make&&make install
php源码编译
#利用yum解决php依赖
[root@nginx-node1 ~]# yum install -y bzip2 systemd-devel libxml2-devel sqlite-devel
libpng-devel libcurl-devel
#下载oniguruma-devel包
[root@nginx-node1 ~]# cd /mnt
[root@nginx-node1 ~]# wget https://mirrors.aliyun.com/rockylinux/9.4/devel/x86_64/kickstart/Packages/o/oniguruma-devel-6.9.6-1.el9.5.x86_64.rpm
[root@nginx-node1 ~]# yum localinstall oniguruma-devel-6.9.6-1.el9.5.x86_64.rpm
#解压源码并安装
[root@nginx-node1 ~]# tar zxf php-8.3.9.tar.gz
[root@nginx-node1 ~]# cd php-8.3.9/
[root@nginx-node1 php-8.3.9]# ./configure \
--prefix=/usr/local/php \
--with-config-file-path=/usr/local/php/etc \
--enable-fpm \
--with-fpm-user=nginx \
--with-fpm-group=nginx \
--with-curl \
--with-iconv \
--with-mhash \
--with-zlib \
--with-openssl \
--enable-mysqlnd \
--with-mysqli \
--with-pdo-mysql \
--disable-debug \
--enable-sockets \
--enable-soap \
--enable-xml \
--enable-ftp \
--enable-gd \
--enable-exif \
--enable-mbstring \
--enable-bcmath \
--with-fpm-systemd\
[root@nginx-node1 php-8.3.9]# make && make install
nginx和php整合
php配置优化
root@nginx php-8.3.9# cd /usr/local/php/etc/
root@nginx etc# cp -p php-fpm.conf.default php-fpm.conf
#去掉pid注释
root@nginx etc# vim php-fpm.conf
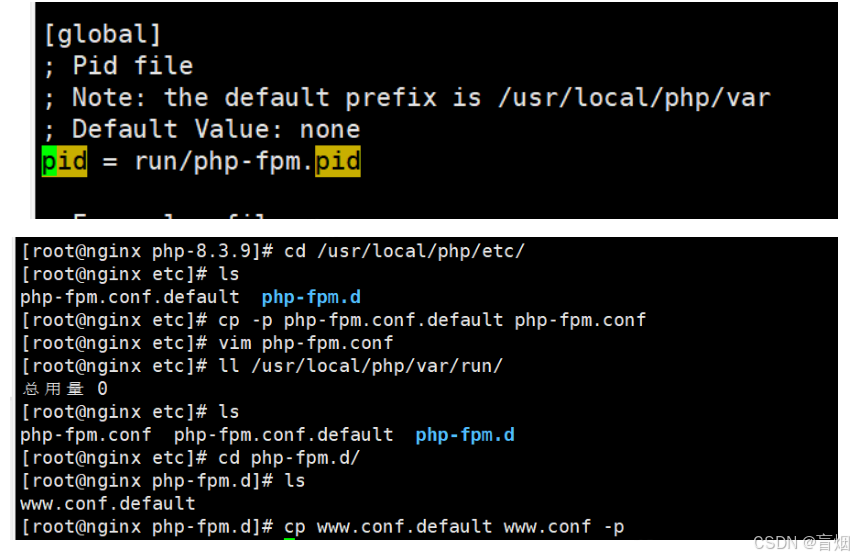
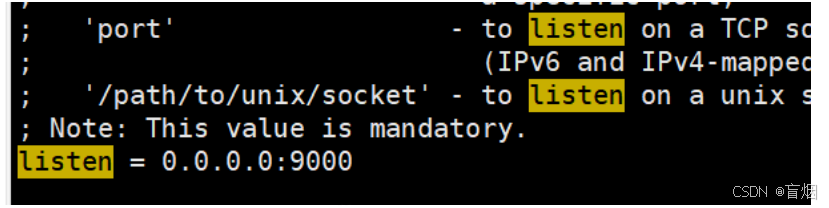
root@nginx php-fpm.d# vim www.conf
#修改端口号
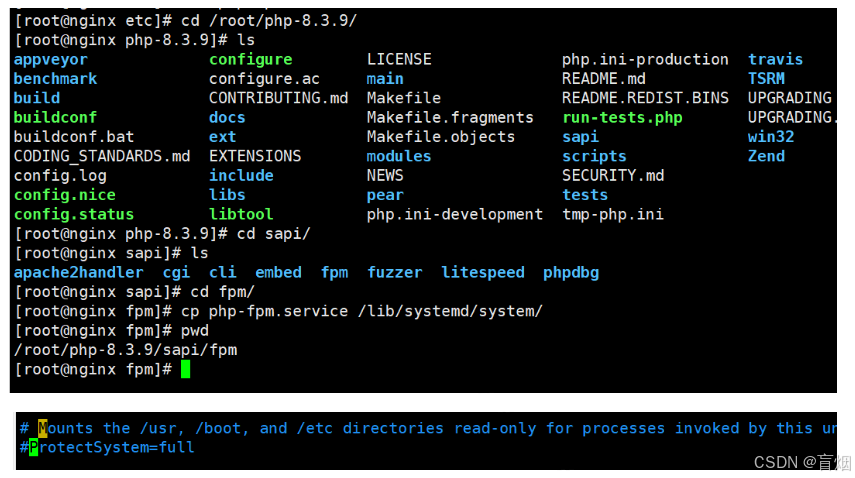
 root@nginx-node1 php-fpm.d# cd /root/php-8.3.9/
root@nginx-node1 php-8.3.9# cp php.ini-production /usr/local/php/etc/php.ini
root@nginx-node1 php-8.3.9# vim /usr/local/php/etc/php.ini
#修改时区

#生成启动文件,注释该内容
启动服务
root@nginx system# systemctl start php-fpm.service
root@nginx system# netstat -antlupe | grep php

root@nginx fpm# cd /usr/local/php/bin/
#添加php环境变量
root@nginx bin# vim ~/.bash_profile
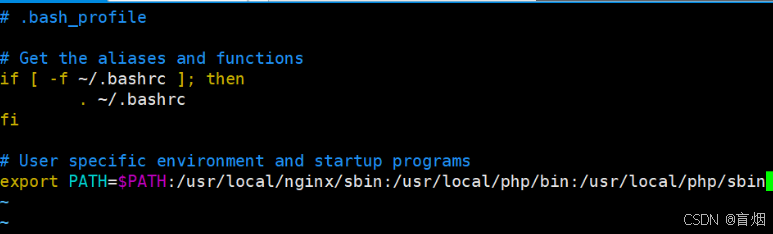
root@nginx bin# source ~/.bash_profile
php测试页面
root@nginx-node1 fpm# mkdir /data/web/php -p
root@nginx-node1 fpm# vim /data/web/php/index.php

nginx配置转发
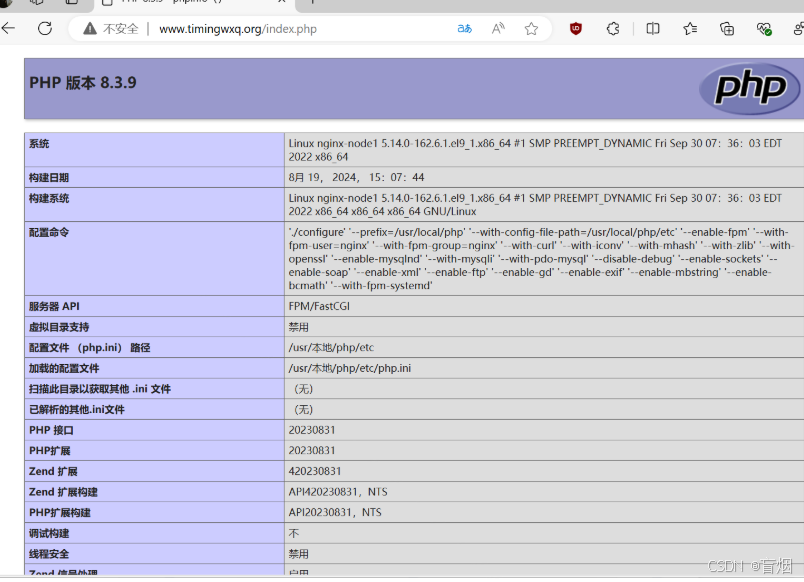
测试
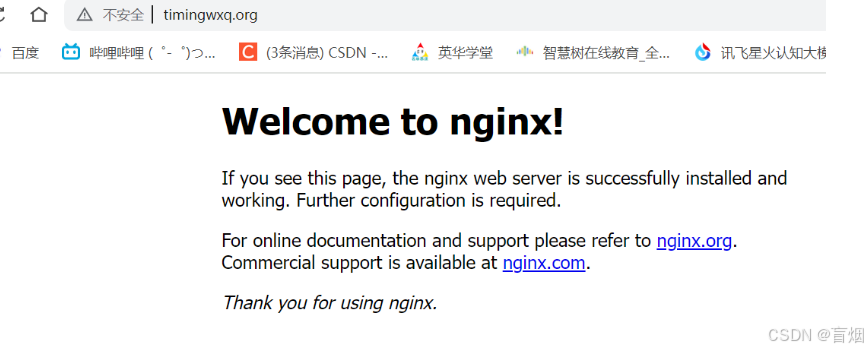
访问php测试页面
memcache模块
安装memcache模块
root@nginx-node1 \~# tar zxf memcache-8.2.tgz
root@nginx-node1 \~# cd memcache-8.2/
root@nginx-node1 memcache-8.2# yum install autoconf
root@nginx-node1 memcache-8.2# phpize
root@nginx-node1 memcache-8.2# ./configure && make && make install
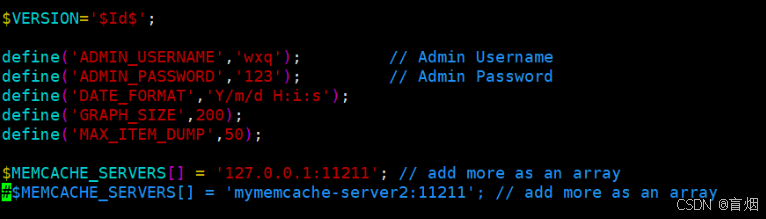
复制测试文件到nginx发布目录中
root@nginx-node1 extensions# cd /root/memcache-8.2/
root@nginx-node1 memcache-8.2# cp example.php memcache.php /data/web/php/ root@nginx-node1 memcache-8.2# vim /data/web/php/memcache.php
配置php加载memcache模块
root@nginx-node1 memcache-8.2# vim /usr/local/php/etc/php.ini
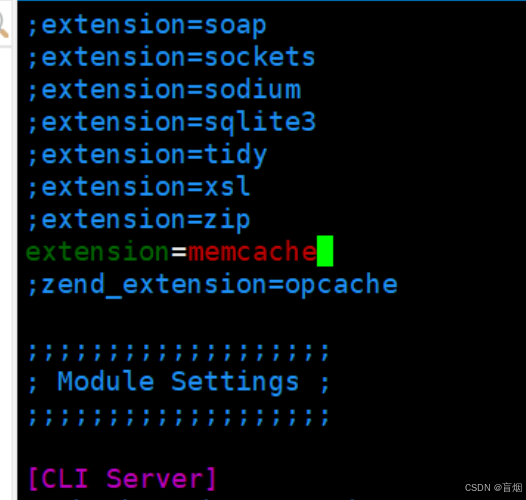
root@nginx-node1\~# systemctl reload php-fpm
root@nginx-node1\~# php -m | grep mem
部署memcached
root@nginx-node1\~# yum install memcached -y
root@nginx-node1\~# systemctl enable --now memcached.service
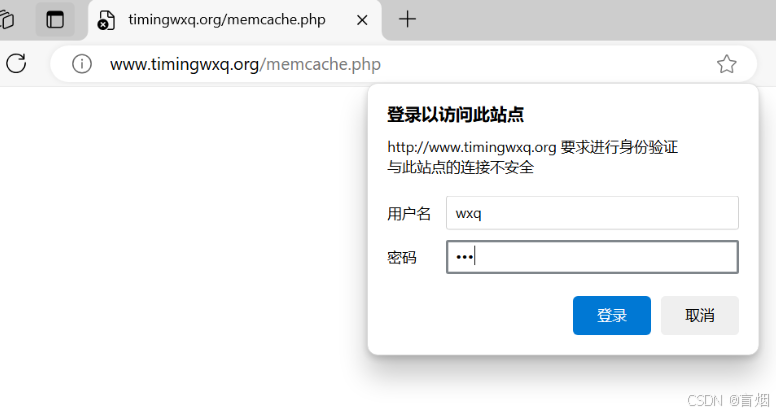
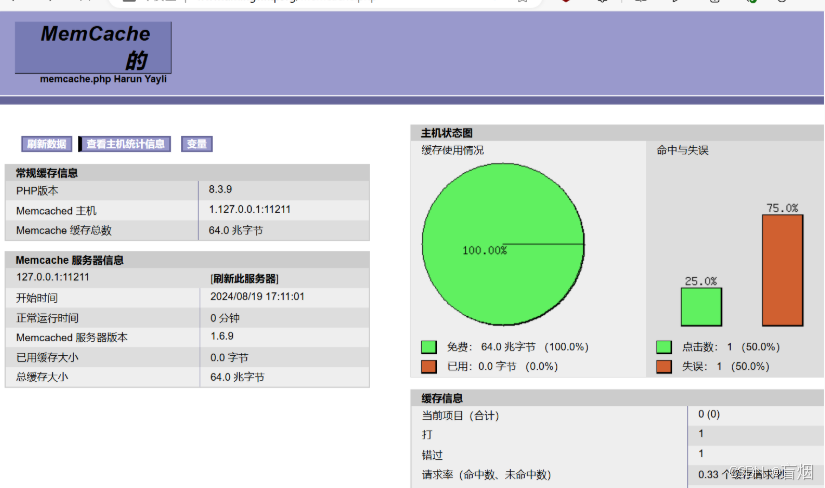
测试
访问 http://www.timingwxq.org/memcache.php 查看命中效果
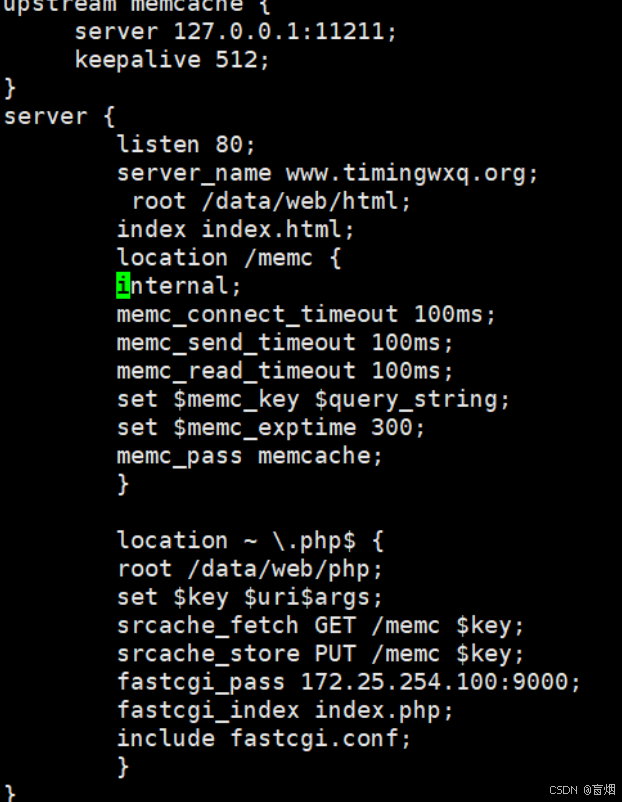
高速缓存
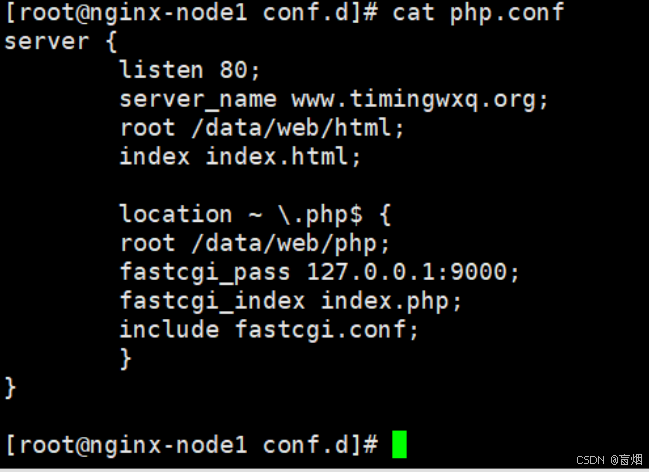
root@nginx-node1 conf.d# vim php.conf
#使用内置变量$query_string来作为key
#缓存失效时间300秒
#设定key的值
#检测mem中是否有要访问的php
#缓存为加载的php数据
root@nginx-node1 conf.d# nginx -s reload
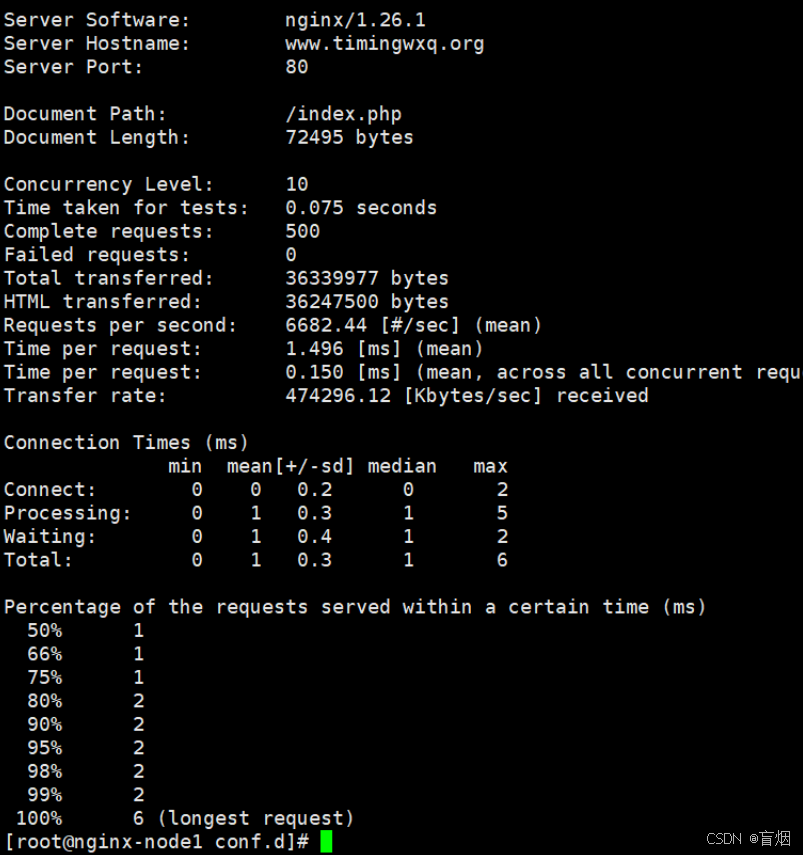
测试结果
root@nginx-node1 conf.d# ab -n500 -c10 http://www.timingwxq.org/index.php
编译安装openresty
解压
root@nginx-node1 \~# tar zxf openresty-1.25.3.1.tar.gz
root@nginx-node1 \~# cd openresty-1.25.3.1/
编译
root@nginx-node1 openresty-1.25.3.1# ./configure --prefix=/usr/local/openresty \
> --with-http_realip_module \
> --with-http_sub_module \
> --with-http_gzip_static_module \
> --with-http_stub_status_module \
> --without-http_memcached_module \
> --with-stream \
> --with-stream_ssl_module \
> --with-stream_realip_module \
> --with-pcre \
> --with-http_ssl_module
root@nginx-node1 openresty-1.25.3.1# gmake -j2 && gmake install
root@nginx-node1 openresty-1.25.3.1# cd /usr/local/openresty/
配置环境变量
root@nginx-node1 bin# vim ~/.bash_profile

root@nginx-node1 bin# source ~/.bash_profile
查看80端口

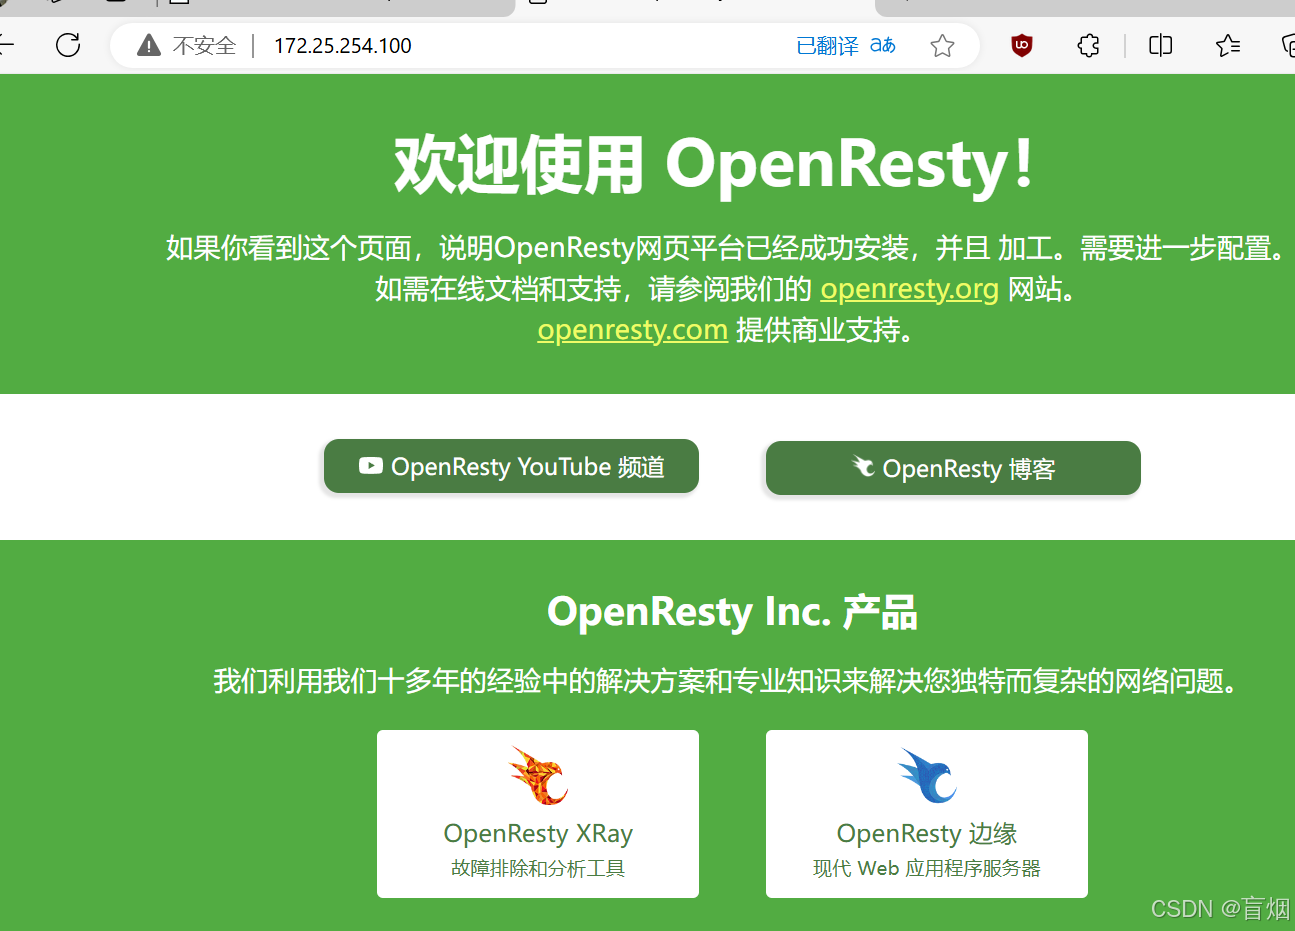
测试 浏览器访问172.25.254.100