环境准备:
vm 17 pro 有些功能必须pro版本才会提供(https://download.csdn.net/download/weixin_40663313/89677277?spm=1001.2014.3001.5501)夸克下载链接
centos 7.9
docker:1.26
k8s:1.21.14
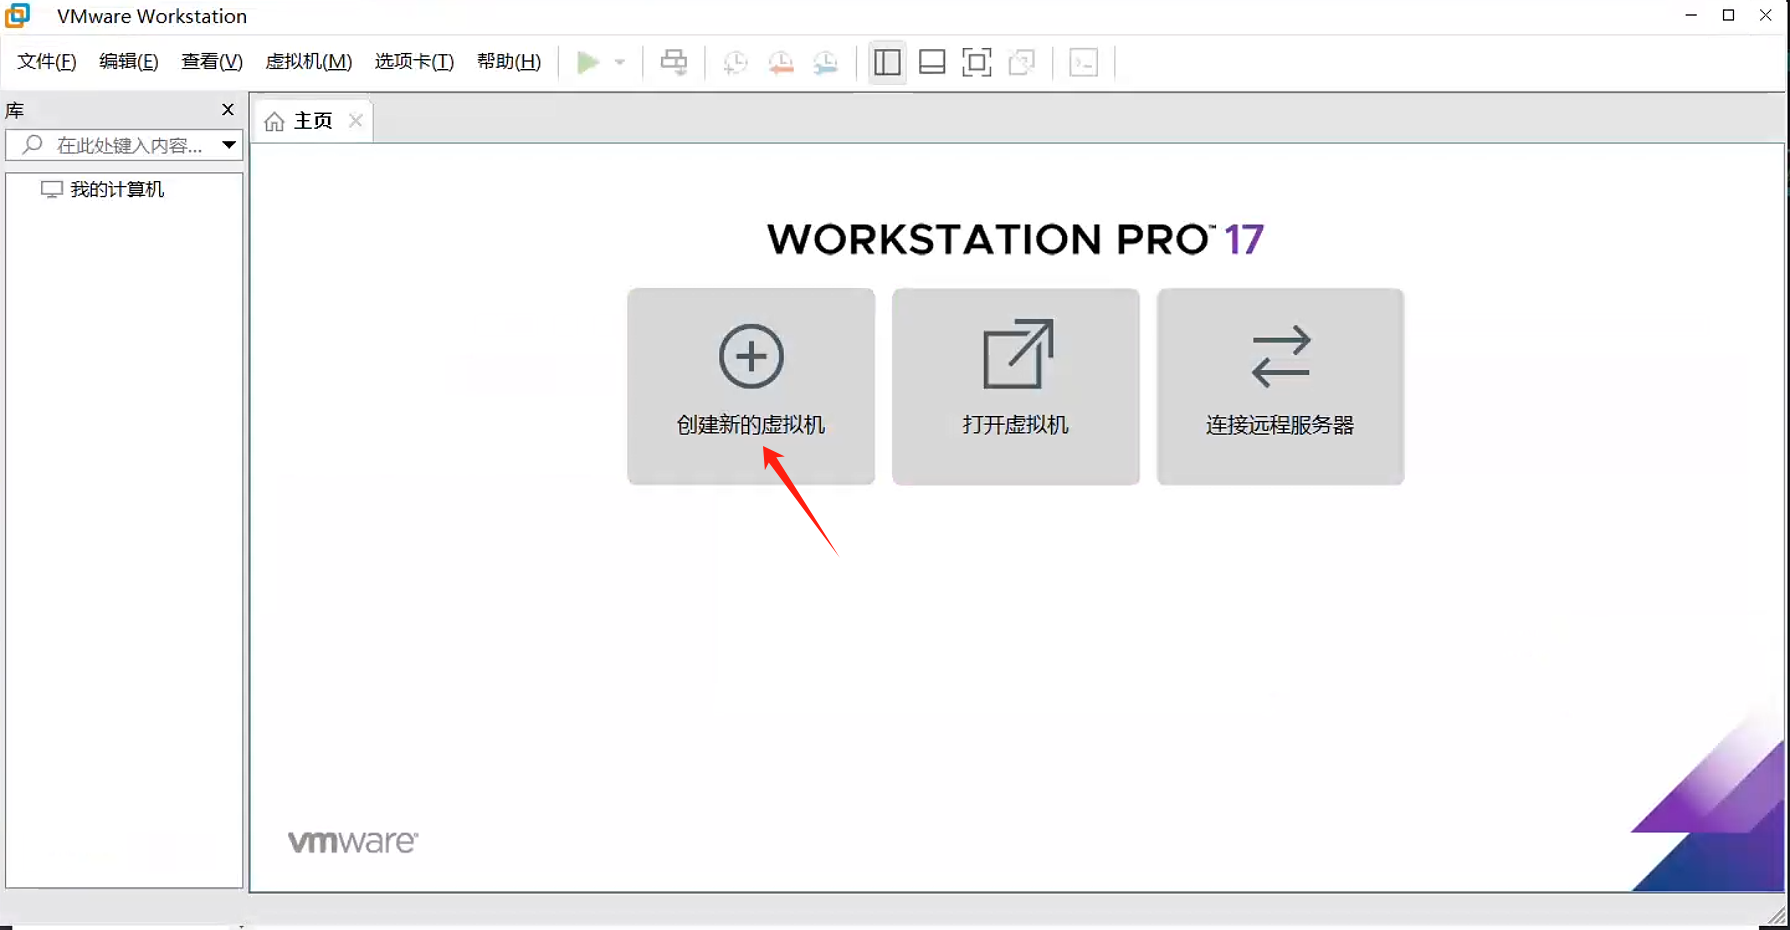
1. 创建虚拟机
参考:VM部署CentOS并且设置网络_vmware安装contos设置主机名和网卡信息-CSDN博客
vm 17 pro 注册码 4A4RR-813DK-M81A9-4U35H-06KND
1.1. 创建自定义虚拟机
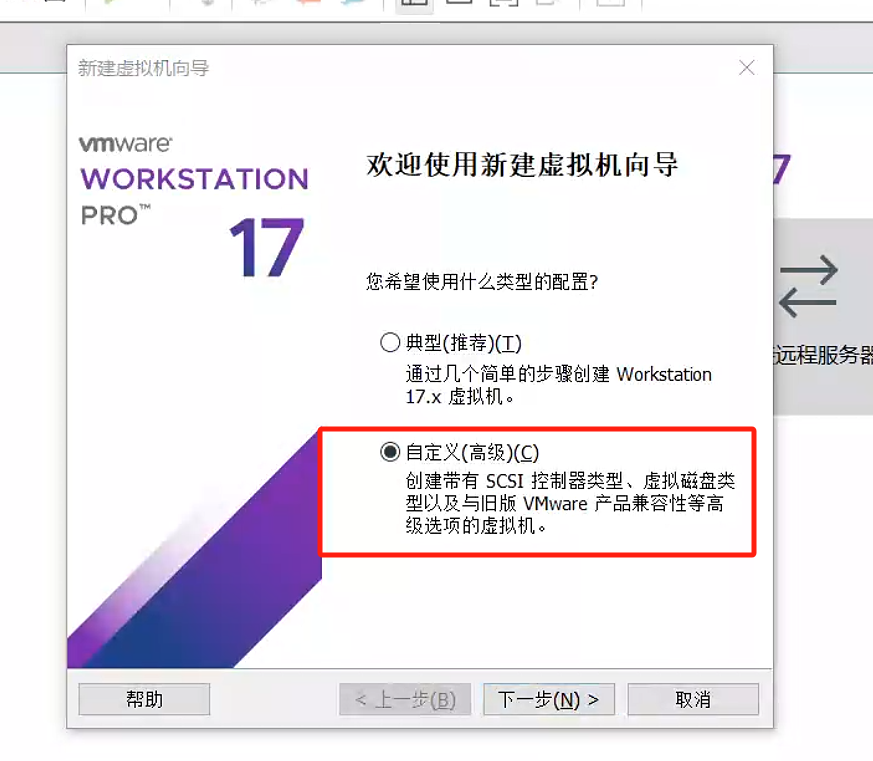
选择自定义配置
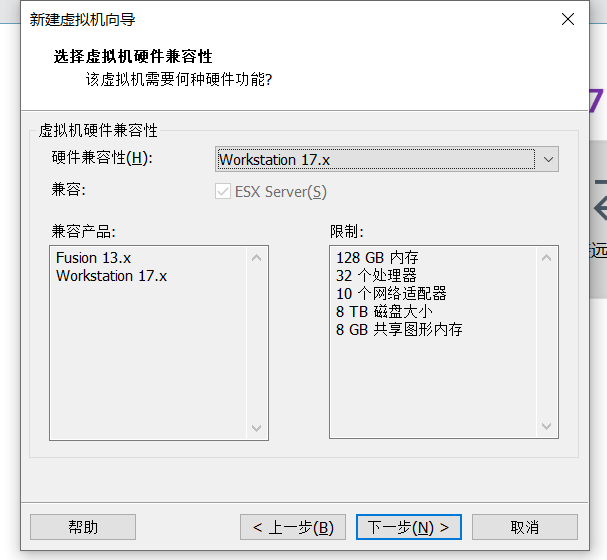
我这里安装的是vm17 直接选择最新的
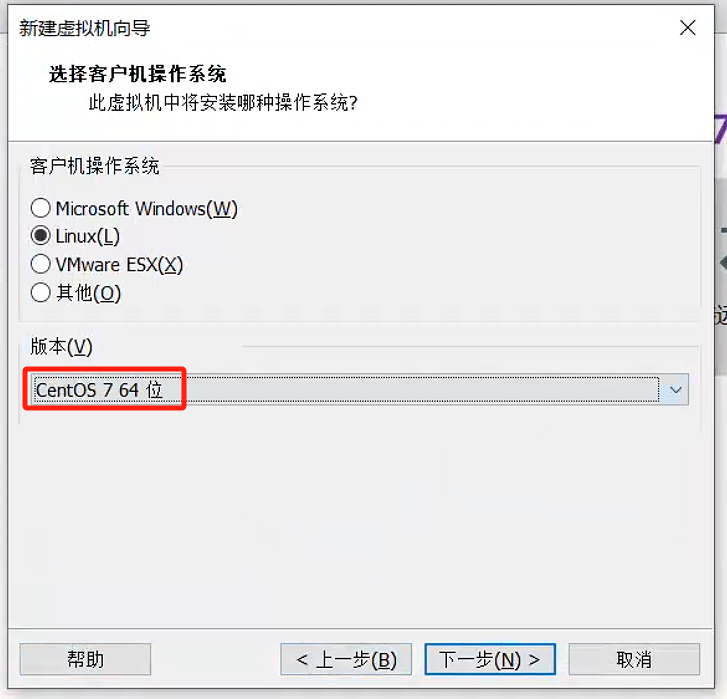
选择centos系统
设置虚拟机名称和路径
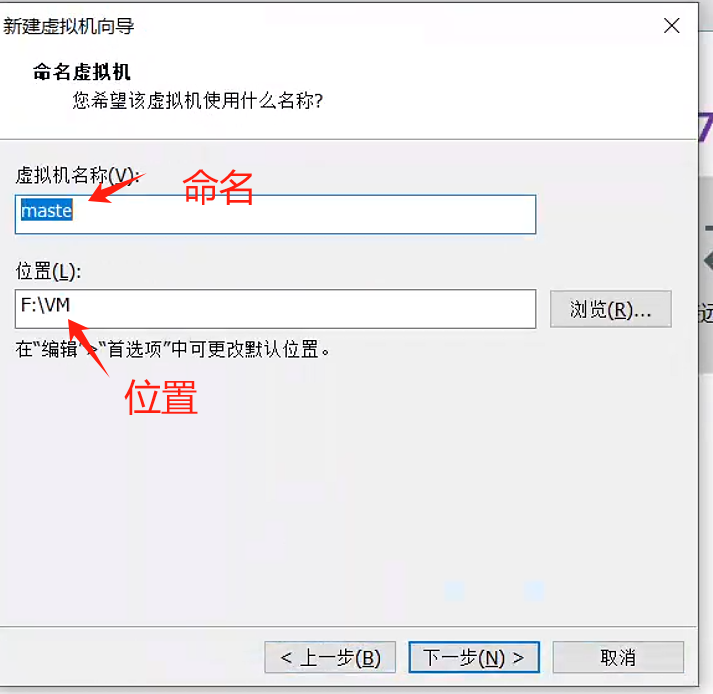
分配cpu
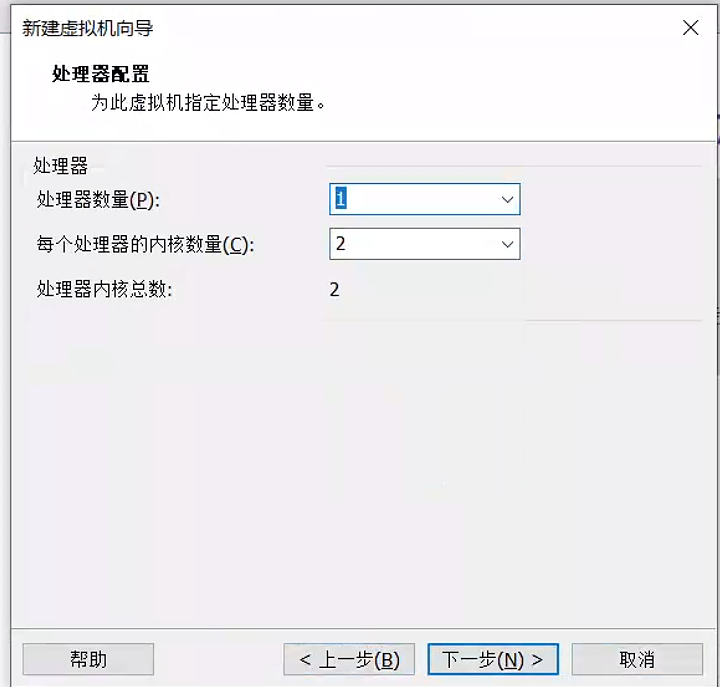
分配内存
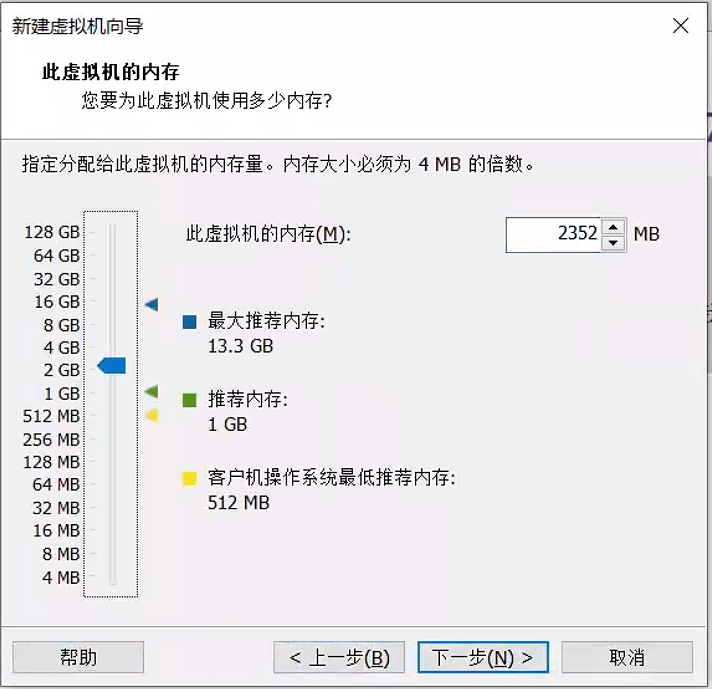
选择nat 网络配置后续在修改
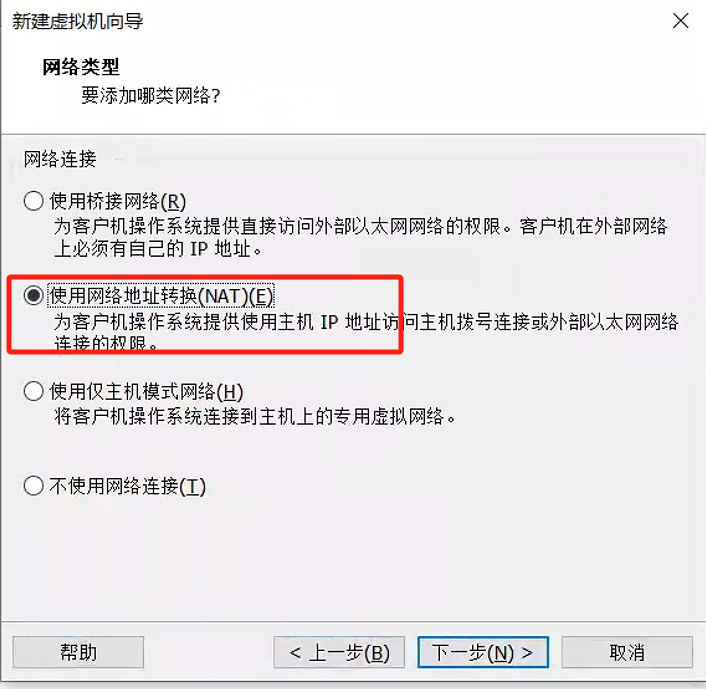
选择默认即可
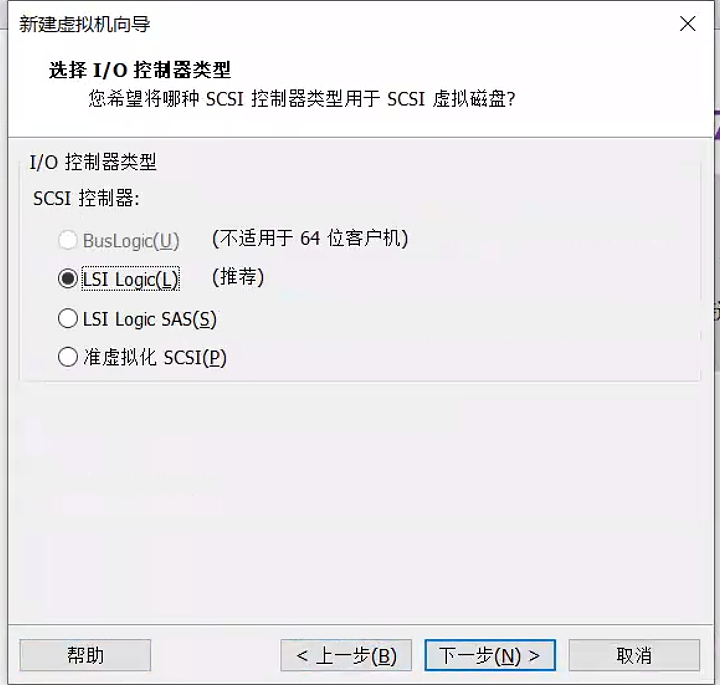
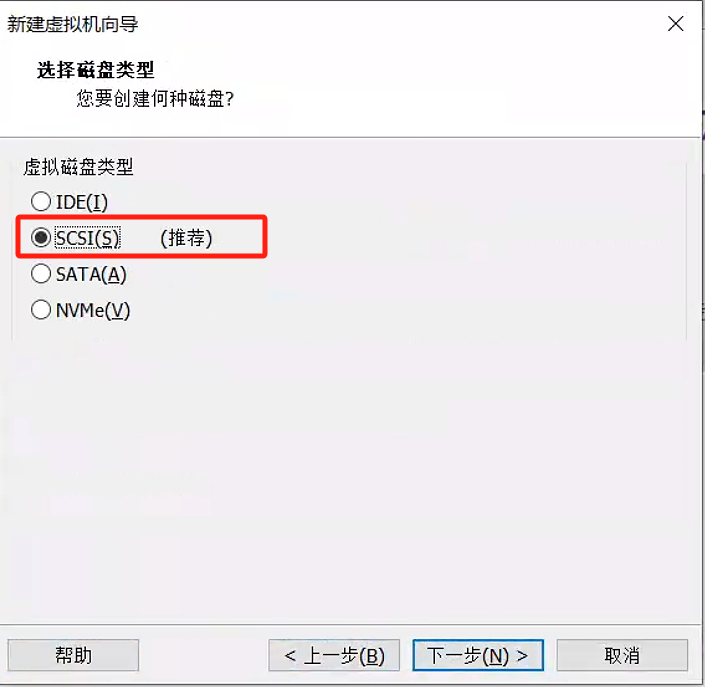
创建新的磁盘 大小按需选择
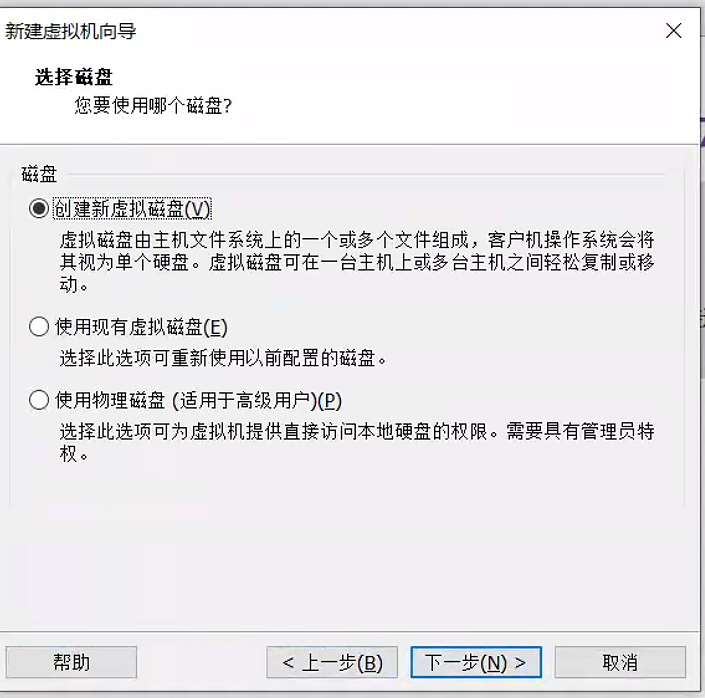
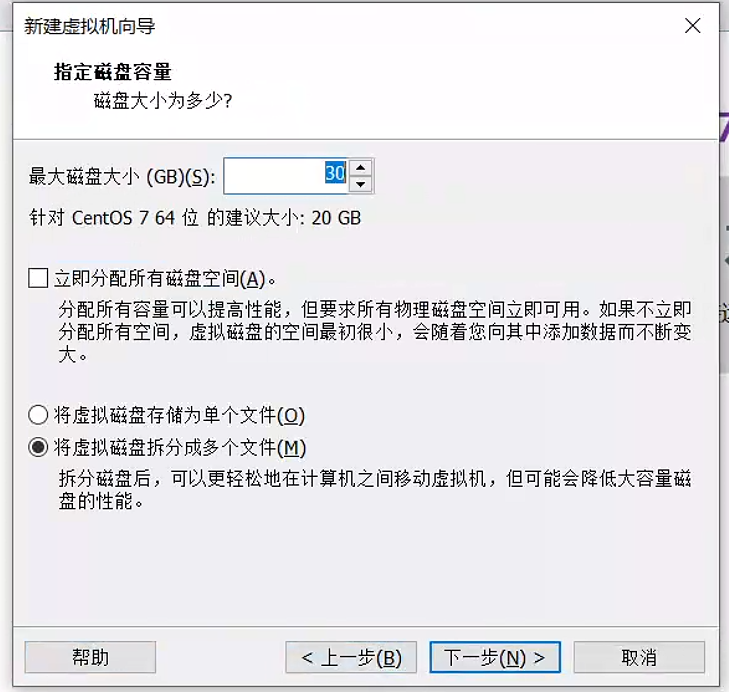
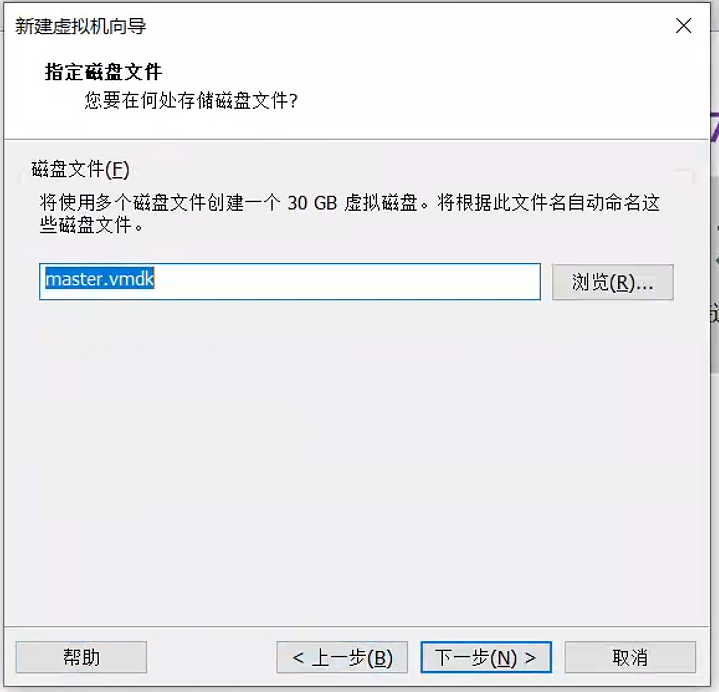
1.2. 选择镜像
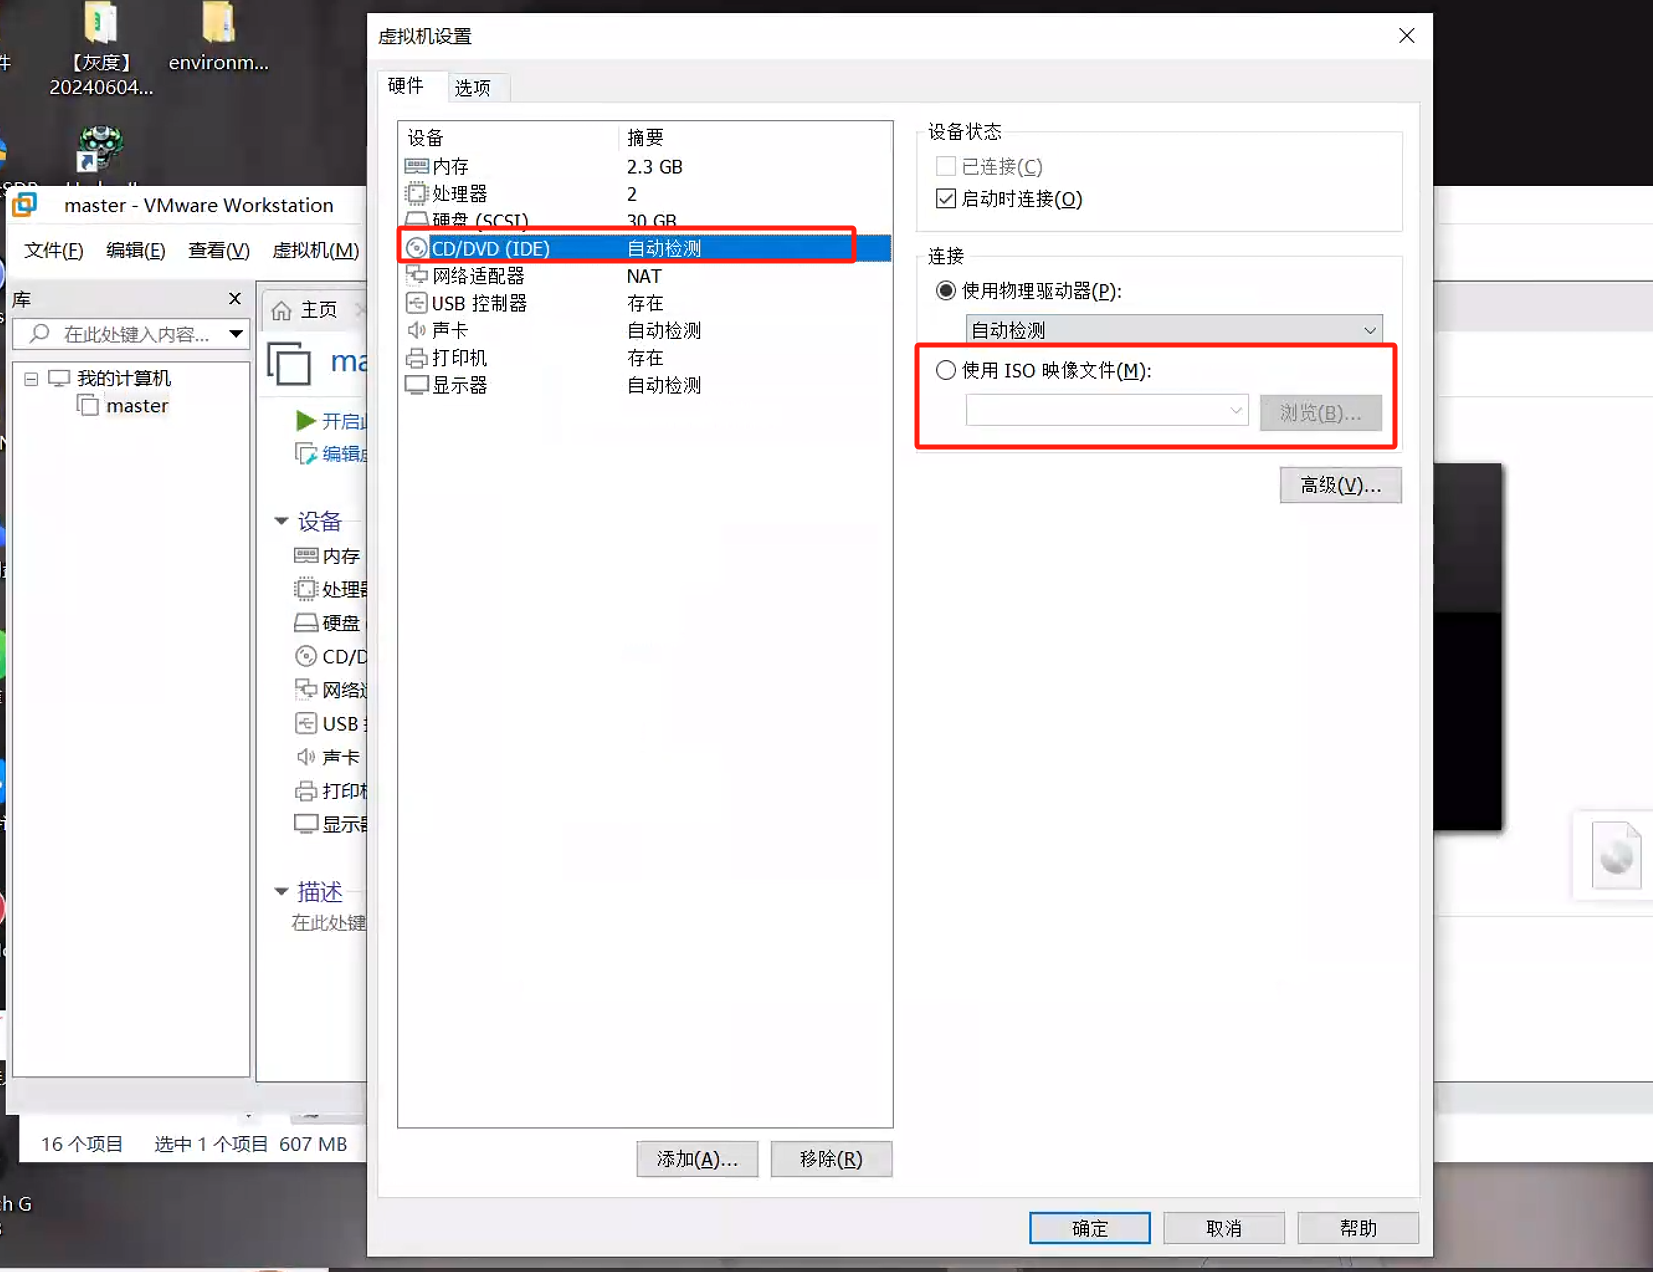
刚创建的时候并未选择镜像 可以在设置中设置镜像位置
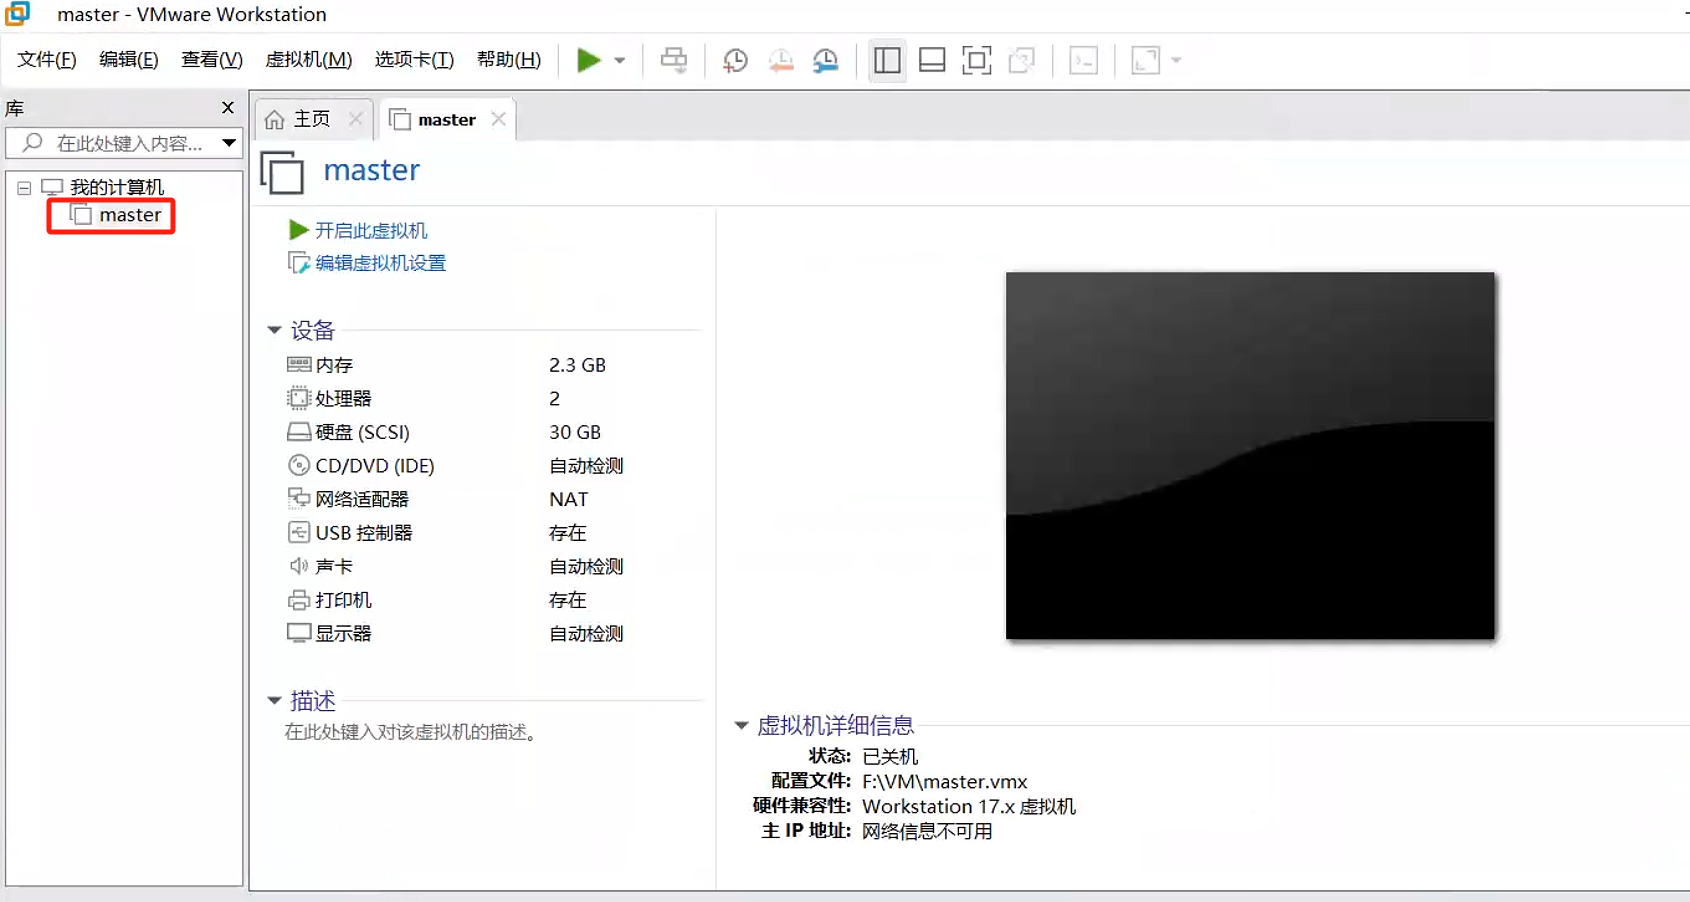
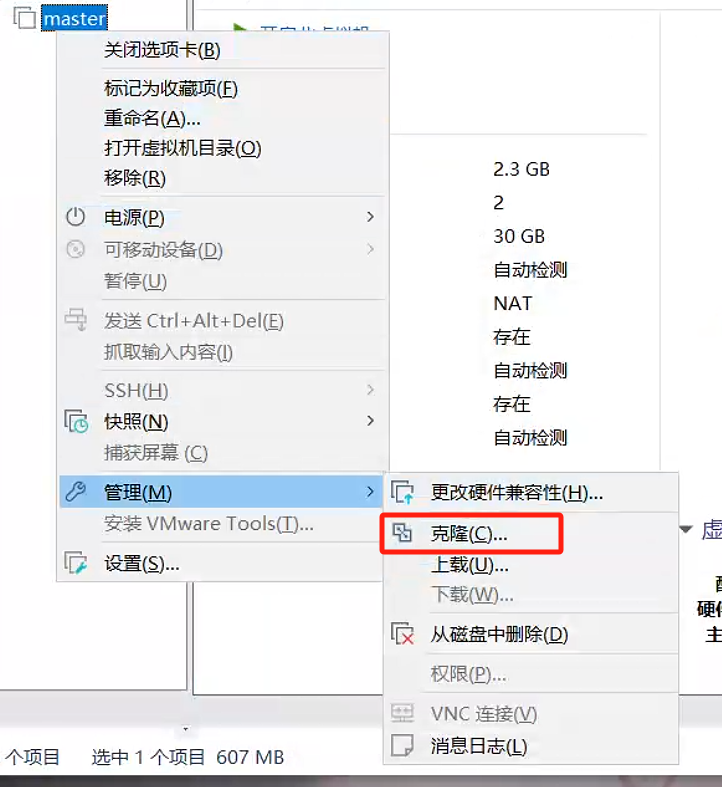
1.3. 克隆
vm提供了快速创建相同虚拟机的操作
2. 安装centos
选择iso镜像后 安装centos
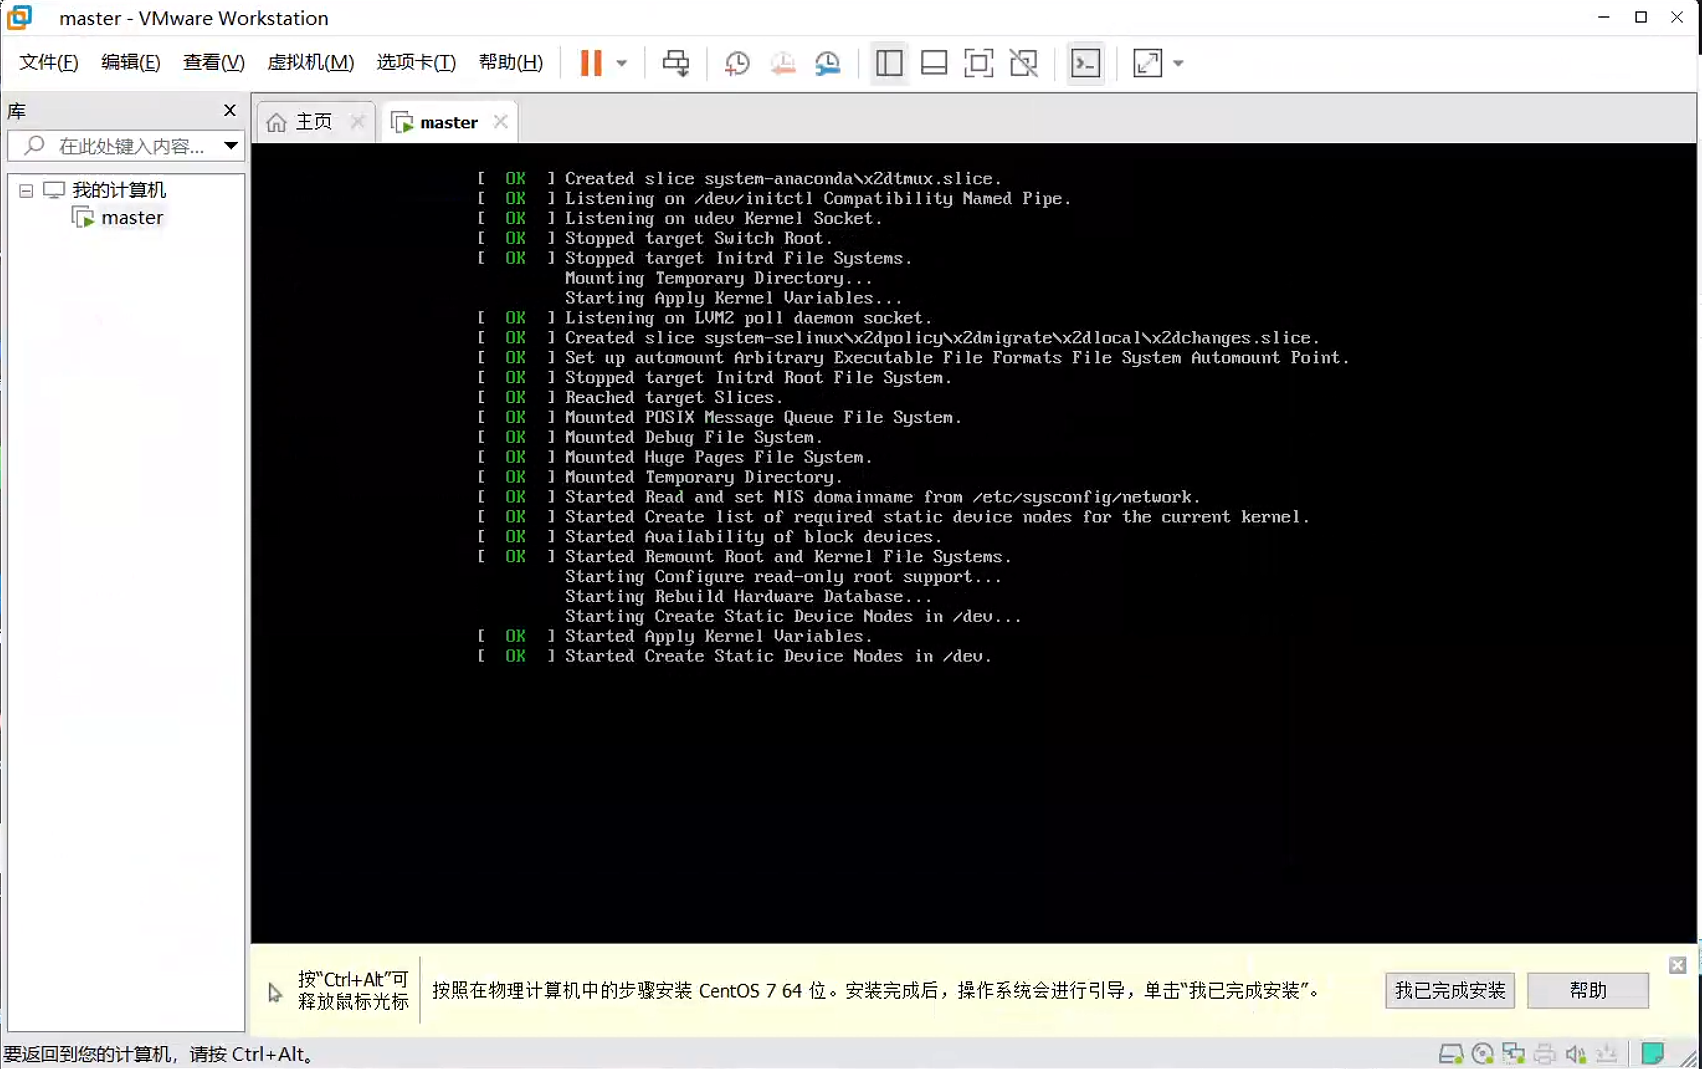
选择语言
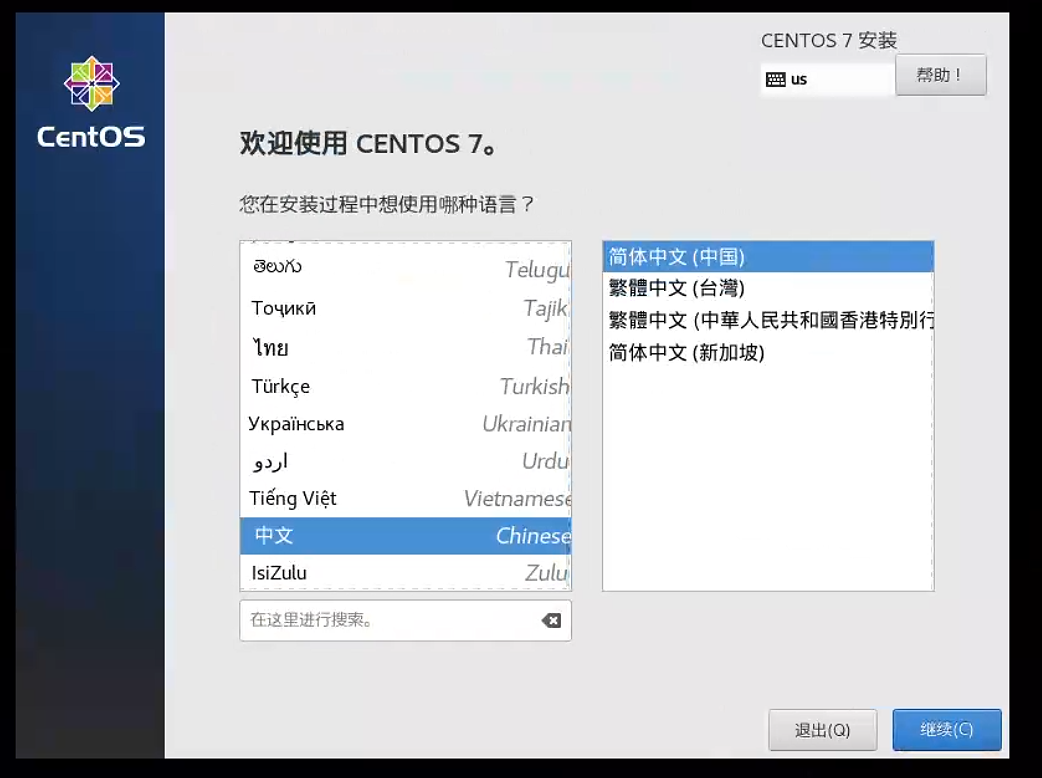
时间
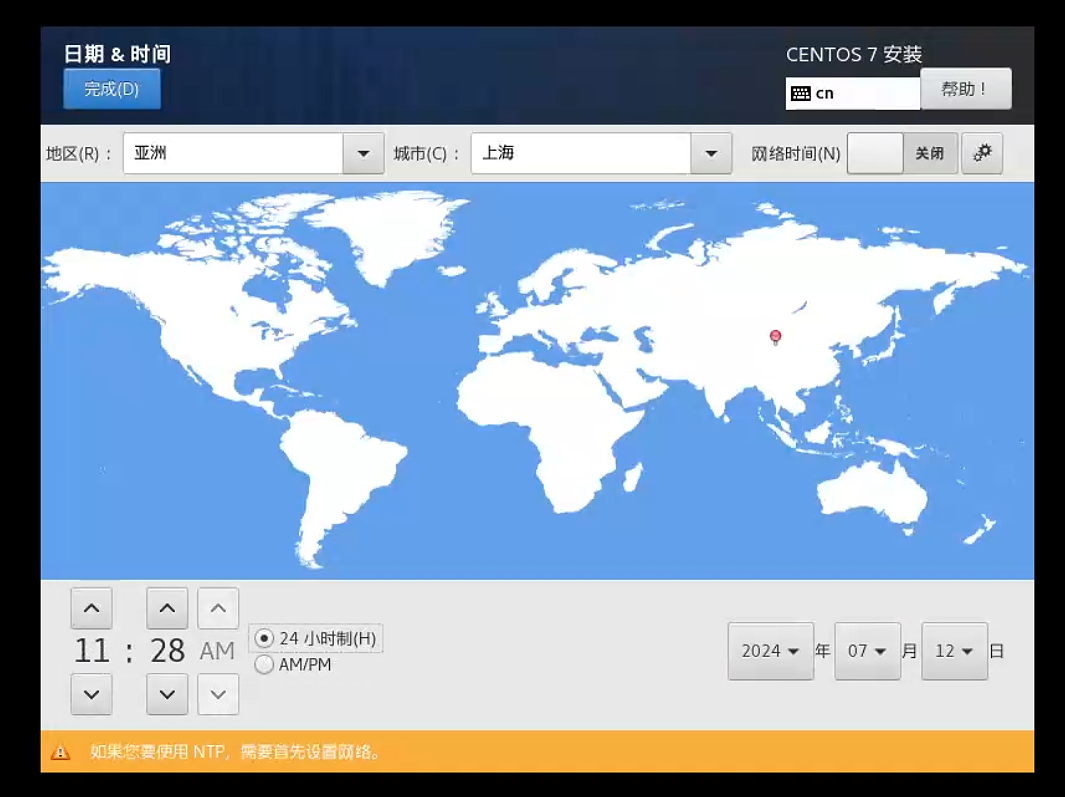
设置密码(中间会有一些其他设置包括 存储位置 网络等 建议默认就行)有些出现三角形感叹号的是需要我们进去配置并点击完成 可以进去选择默认即可
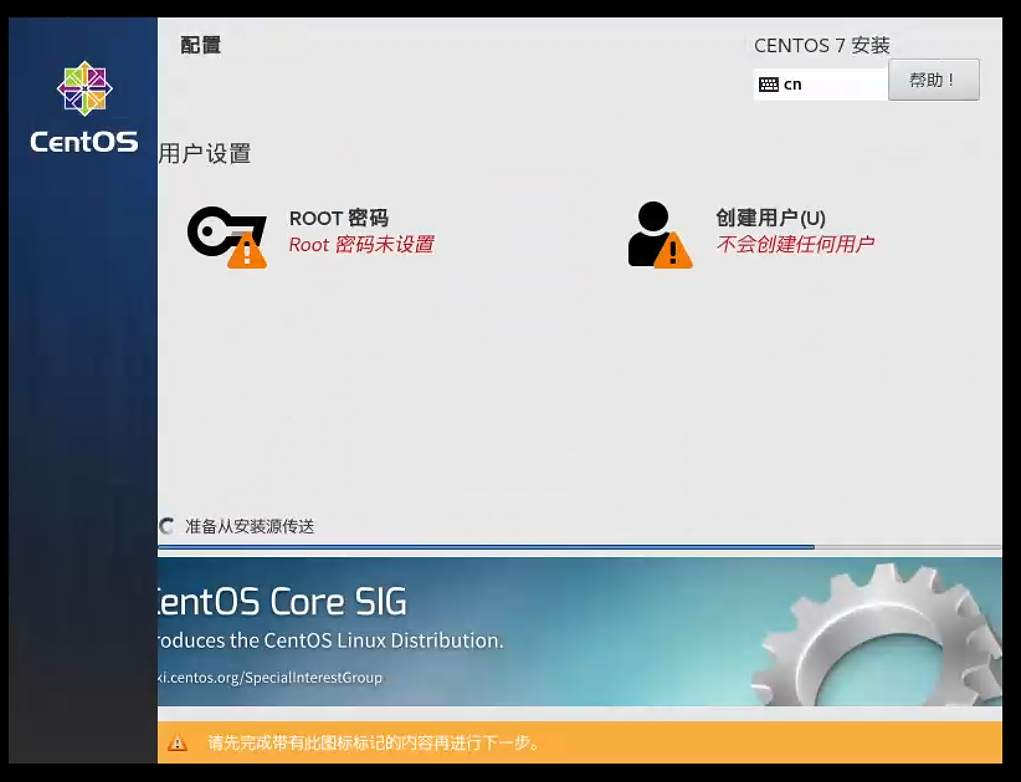
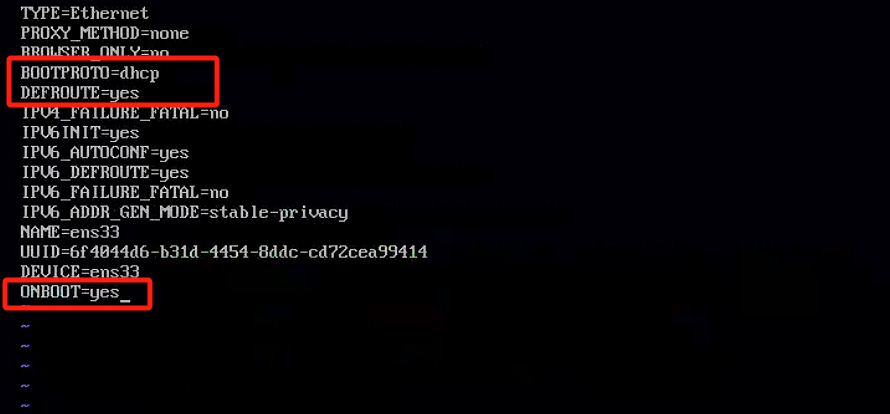
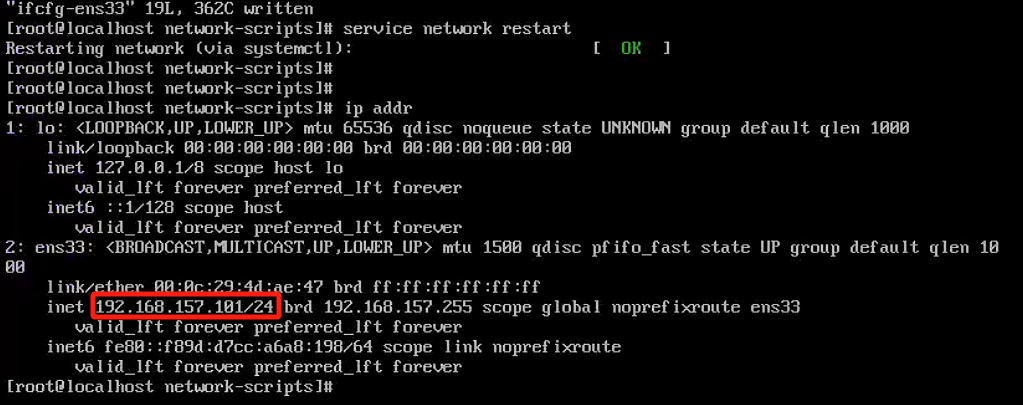
2.1. 网络设置(DHCP)
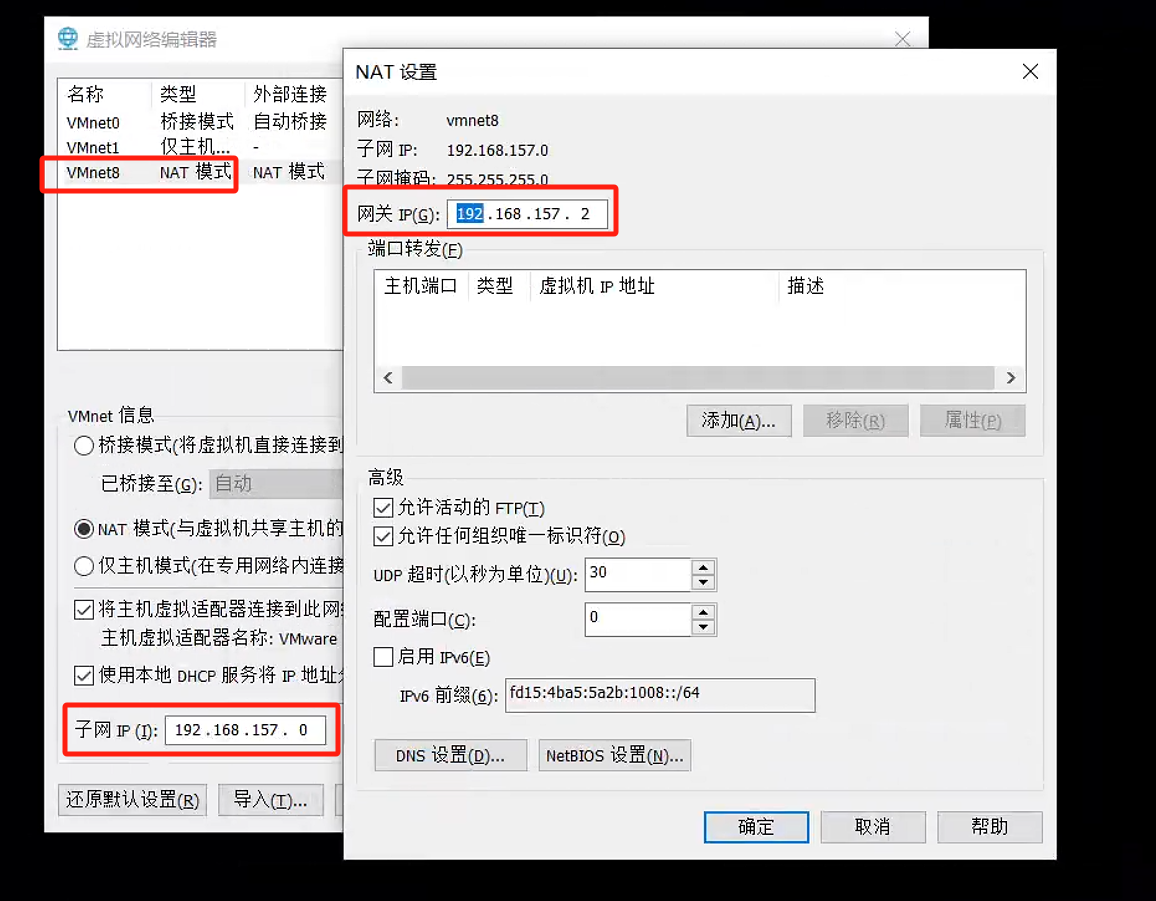
cd /etc/sysconfig/network-scripts/


2.2. 手动获取
固定ip 方便远程连接
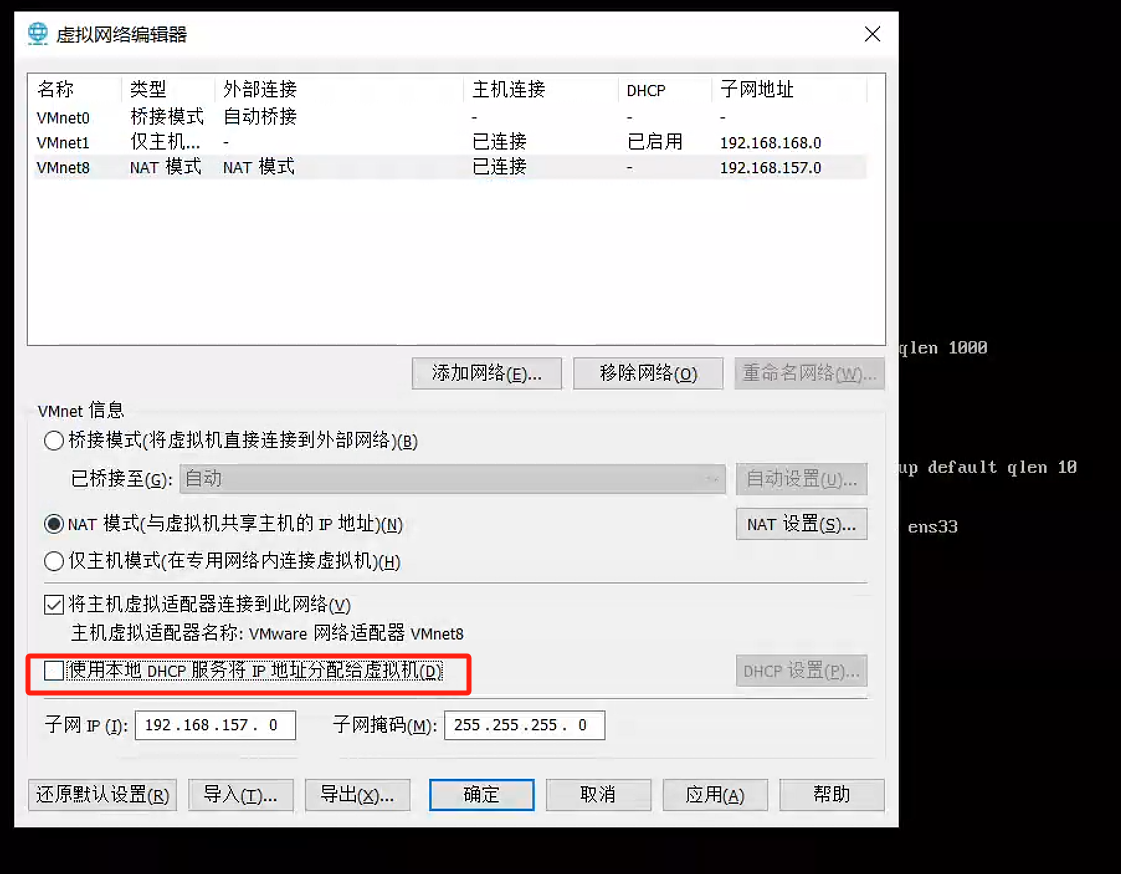
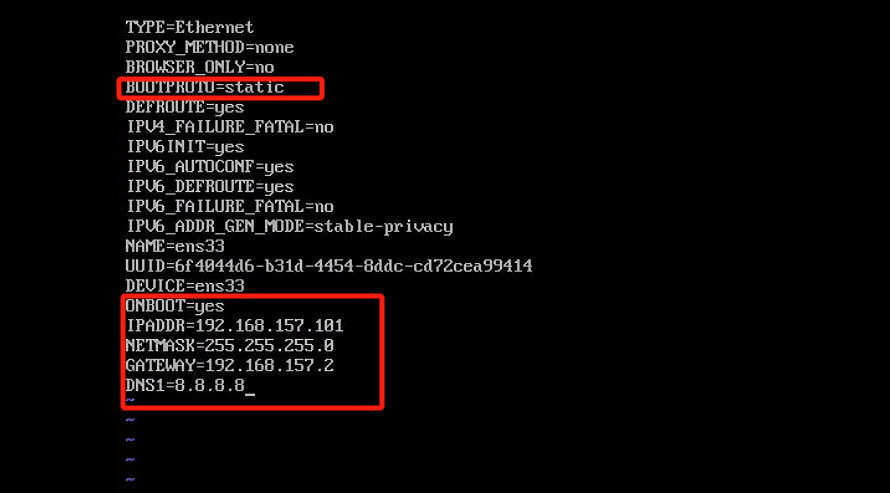
3. 部署前置准备
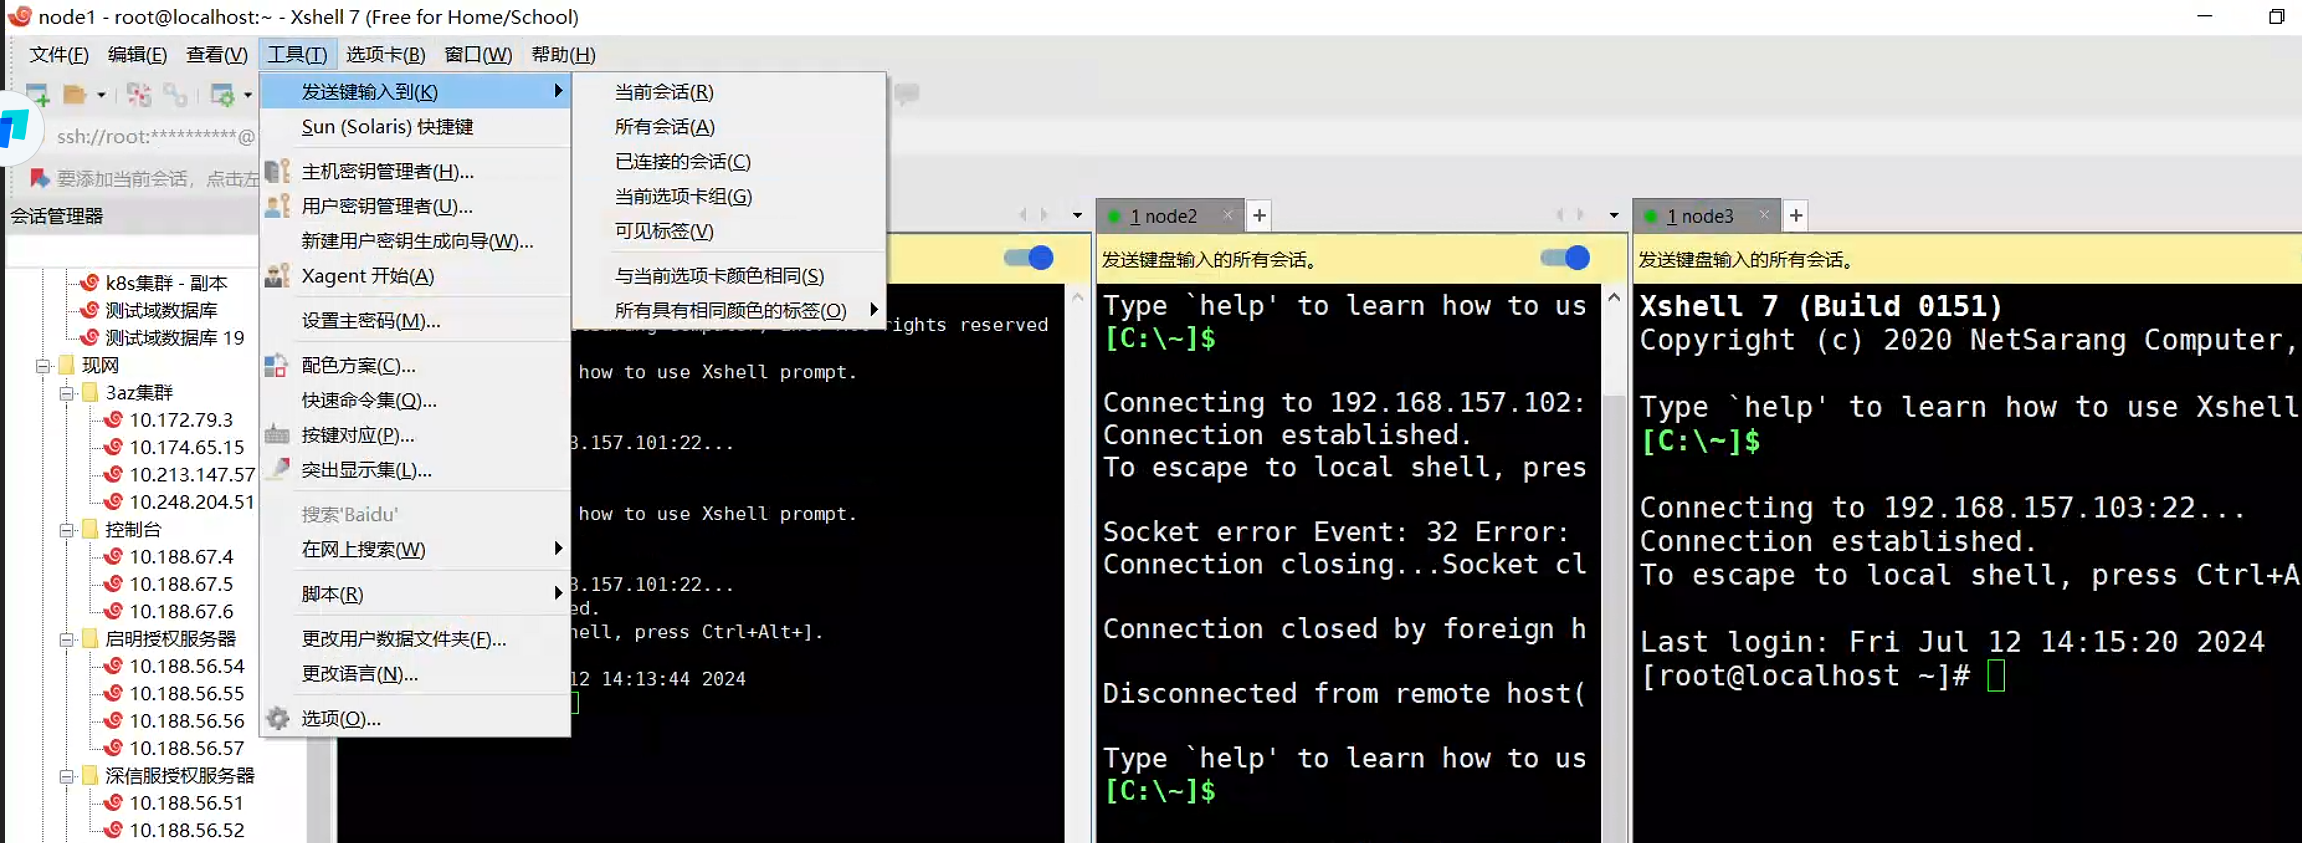
vi /etc/hosts
192.168.157.129 master
192.168.157.130 node1
192.168.157.131 node2

3.1. 时间同步
kubernetes要求集群中的节点时间必须精确一致, 这里直接使用chronyd服务从网络同步时间。
bash
# 启动chronyd服务

systemctl start chronyd


#设置chronyd服务开机自启

systemctl enable chronyd


# chronyd服务启动稍等几秒钟,就可以使用date命令验证时间了

date
3.2. 关闭相关服务
bash
# 1关闭firewalld服务

systemctl stop firewalld

systemctl disable firewalld


# 2关闭iptables服务

systemctl stop iptables

systemctl disable iptables


# a. 临时关闭swap,防止 执行 kubeadm 命令爆错。

swapoff -a

# b. 临时关闭 selinux,减少不必要的配置。

setenforce 0
设置网桥信息
cat << EOF > /etc/sysctl.d/k8s.conf
net.bridge.bridge-nf-call-ip6tables = 1
net.bridge.bridge-nf-call-iptables = 1
net.ipv4.ip_forward = 1
EOF
3.3. 更换yum源
装的时候遇到了奇葩问题 不发解析host的问题curl#6 - "Could not resolve host: mirrorlist.centos.org; 未知的错误"
尝试修改vim /etc/resolv.conf文件 为解决问题
更换yum源
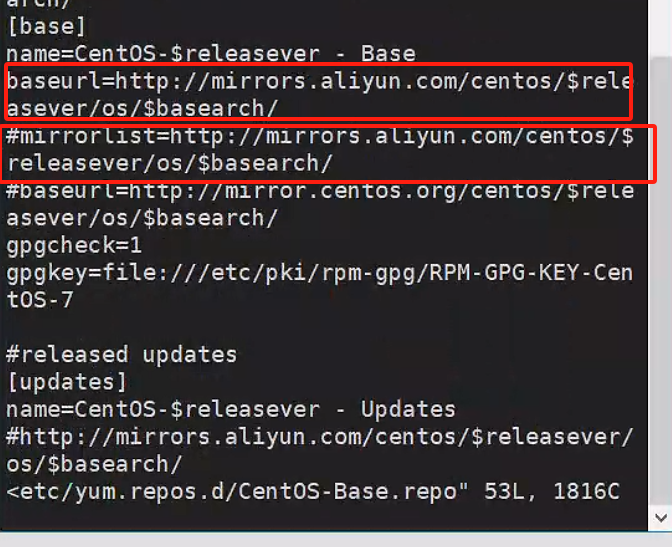
vi /etc/yum.repos.d/CentOS-Base.repo
将这个地方的baseurl注释去掉 链接换成mirrors.aliyun.com
同时把下面的mirrorlist注释掉
更换后执行
bash
yum clean all

yum makecache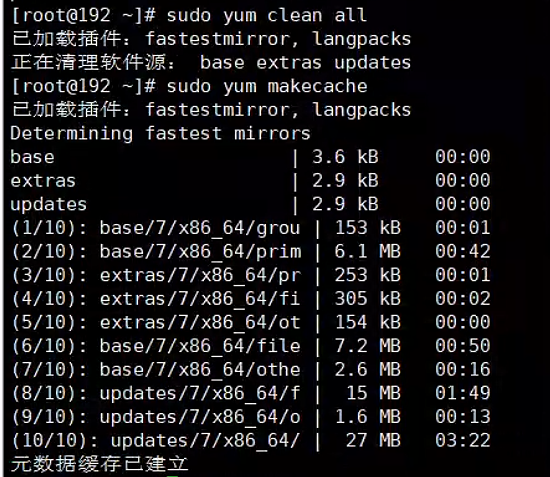
3.4. 配置ipvs功能
bash
# 1安装ipset和ipvsadm

yum install ipset ipvsadmin -y


# 2添加需要加载的模块写入脚本文件

cat <<EOF > /etc/sysconfig/modules/ipvs.modules

#! /bin/bash

modprobe -- ip_vs

modprobe -- ip_vs_rr

modprobe -- ip_vs_wrr

modprobe -- ip_vs_sh

modprobe -- nf_conntrack_ipv4

EOF


# 3为脚本文件添加执行权限

chmod +x /etc/sysconfig/modules/ipvs.modules


# 4执行脚本文件

/bin/bash /etc/sysconfig/modules/ipvs.modules


# 5查看对应的模块是否加载成功

lsmod | grep -e ip_vs -e nf_conntrack_ipv4
3.5. 重启
4. 安装docker
bash
yum install -y yum-utils device-mapper-persistent-data lvm2

yum-config-manager --add-repo https://mirrors.aliyun.com/docker-ce/linux/centos/docker-ce.repo

# 2查看当前镜像源中支持的docker版本

yum list docker-ce --showduplicates


# 3安装特定版本的docker-ce

# 必须指定--setopt=obsoletes=0,否则yum会自动安装更高版本

yum install --setopt=obsoletes=0 docker-ce-20.10.24-3.el7 -y

# 4添加一个配置文件

# Docker在默认情况下使用的Cgroup Driver为cgroupfs, 而kubernetes推荐使用systemd来代替cgroupfs

mkdir /etc/docker

cat <<EOF > /etc/docker/daemon.json

{

"exec-opts": ["native.cgroupdriver=systemd"],

"registry-mirrors": ["https://o36meer8.mirror.aliyuncs.com"]

}

EOF


# 5启动docker

systemctl restart docker

systemctl enable docker


# 6检查docker状态和版本

docker version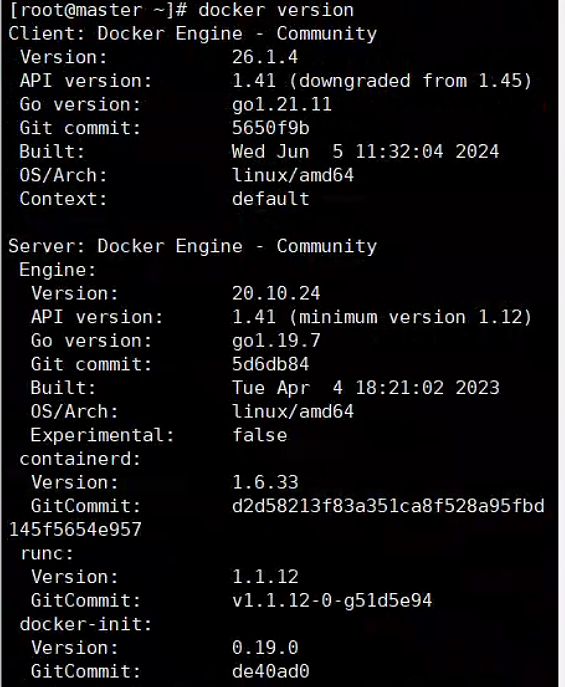
5. 安装k8s
bash
cat <<EOF > /etc/yum.repos.d/kubernetes.repo
[kubernetes]
name=Kubernetes
baseurl=kubernetes-yum-repos-kubernetes-el7-x86_64安装包下载_开源镜像站-阿里云
enabled=1
gpgcheck=1
repo_gpgcheck=1
gpgkey=https://mirrors.aliyun.com/kubernetes/yum/doc/yum-key.gpg https://mirrors.aliyun.com/kubernetes/yum/doc/rpm-package-key.gpg
EOF
yum install -y --nogpgcheck kubelet-1.21.14 kubeadm-1.21.14 kubectl-1.21.14
在安装kubernetes集群之前,必须要提前准备好集群需要的镜像,所需镜像可以通过下面命令查看
kubeadm config images list

下载镜像 有些镜像需要翻墙 也可以尝试下面方案
部分镜像已导出
镜像![]() https://pan.quark.cn/s/4c63051ec9ed
https://pan.quark.cn/s/4c63051ec9ed
bash
# 此镜像在kubernetes的仓库中,由于网络原因,无法连接,下面提供了一种替代方案

images=(

kube-apiserver:v1.21.14

kube-controller-manager:v1.21.14

kube-scheduler:v1.21.14

kube-proxy:v1.21.14

pause:3.4.1

etcd:3.4.13-0

coredns:1.8.0

)


for imageName in ${images[@]} ; do

docker pull registry.cn-hangzhou.aliyuncs.com/google_containers/$imageName

docker tag registry.cn-hangzhou.aliyuncs.com/google_containers/$imageName k8s.gcr.io/$imageName

docker rmi registry.cn-hangzhou.aliyuncs.com/google_containers/$imageName

done
5.1. 初始化集群
查看安装结果
kubelet --version
kubectl version
kubeadm version
启动 kubelet 服务
systemctl daemon-reload
systemctl start kubelet
下面操作在master节点上进行
创建集群
kubeadm init --kubernetes-version=v1.21.5 --pod-network-cidr=10.244.0.0/16 --service-cidr=10.96.0.0/12 --apiserver-advertise-address=192.168.157.129 --image-repository registry.aliyuncs.com/google_containers
(还可以以配置的方式执行)参考云服务器安装k8s和kubesphere踩坑_kubekey拉取镜像失败-CSDN博客
初始化成功注意这两个地方 一个创建必要文件 一个为了后续node加入master
bash
# 创建必要文件

mkdir -p $HOME/.kube

sudo cp -i /etc/kubernetes/admin.conf $HOME/.kube/config

sudo chown $(id -u):$(id -g) $HOME/.kube/config
bash
kubeadm join 192.168.157.129:6443 --token 16mn6b.cfcaejq8zyq0j6zt \

--discovery-token-ca-cert-hash sha256:d82b289f4f3d4c6342e1b2c012c186ba83dbfc062eadc2982a8519a2b24fcb9b

# 如果忘记 kubeadm token create --print-join-command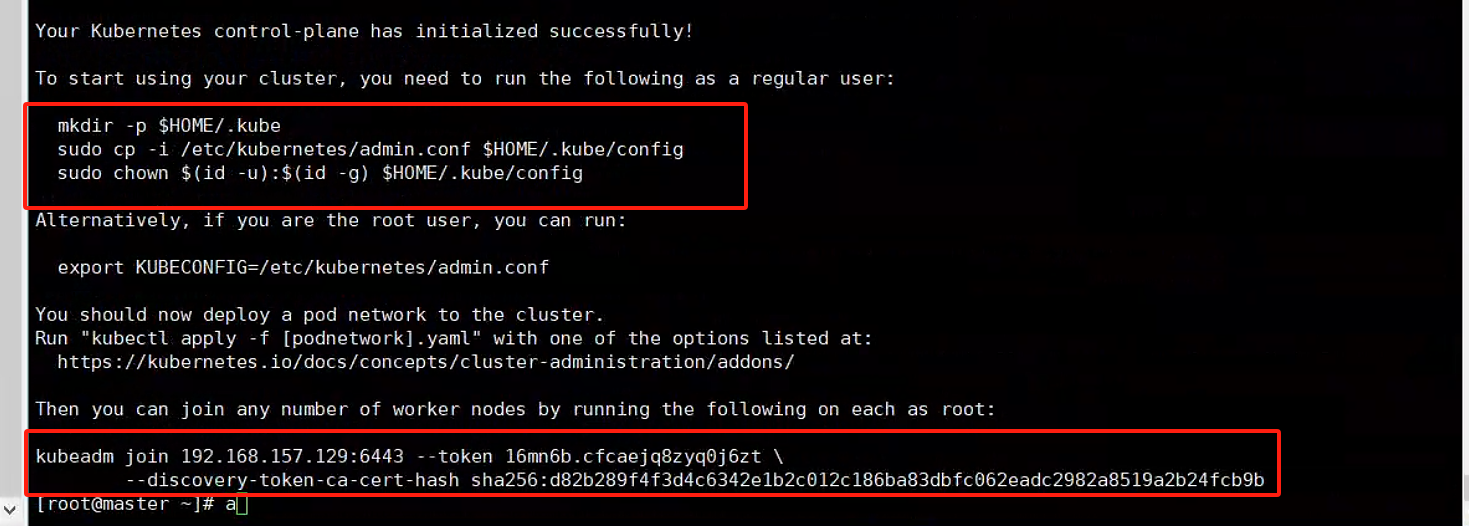

同时在node1 node2执行join操作

发现已经有node 接下来安装网络插件
5.2. 安装网络插件
bash
# 获取fanne1的配置文件
wget https://raw.githubusercontent.com/coreos/flannel/master/Documentation/kube-flannel.yml
如果下载不了 可以用网上找的
# 使用配置文件启动fannel
kubectl apply -f kube-flannel.yml
# 稍等片刻,再次查看集群节点的状态
kubectl get nodes
如果下载失败 可以使用下面的文件
---
kind: Namespace
apiVersion: v1
metadata:
  name: kube-flannel
  labels:
    pod-security.kubernetes.io/enforce: privileged
---
kind: ClusterRole
apiVersion: rbac.authorization.k8s.io/v1
metadata:
  name: flannel
rules:
  - apiGroups:
      - ""
    resources:
      - pods
    verbs:
      - get
  - apiGroups:
      - ""
    resources:
      - nodes
    verbs:
      - list
      - watch
  - apiGroups:
      - ""
    resources:
      - nodes/status
    verbs:
      - patch
---
kind: ClusterRoleBinding
apiVersion: rbac.authorization.k8s.io/v1
metadata:
  name: flannel
roleRef:
  apiGroup: rbac.authorization.k8s.io
  kind: ClusterRole
  name: flannel
subjects:
  - kind: ServiceAccount
    name: flannel
    namespace: kube-flannel
---
apiVersion: v1
kind: ServiceAccount
metadata:
  name: flannel
  namespace: kube-flannel
---
kind: ConfigMap
apiVersion: v1
metadata:
  name: kube-flannel-cfg
  namespace: kube-flannel
  labels:
    tier: node
    app: flannel
data:
  cni-conf.json: |
    {
      "name": "cbr0",
      "cniVersion": "0.3.1",
      "plugins": [
        {
          "type": "flannel",
          "delegate": {
            "hairpinMode": true,
            "isDefaultGateway": true
          }
        },
        {
          "type": "portmap",
          "capabilities": {
            "portMappings": true
          }
        }
      ]
    }
  net-conf.json: |
    {
      "Network": "10.244.0.0/16",
      "Backend": {
        "Type": "vxlan"
      }
    }
---
apiVersion: apps/v1
kind: DaemonSet
metadata:
  name: kube-flannel-ds
  namespace: kube-flannel
  labels:
    tier: node
    app: flannel
spec:
  selector:
    matchLabels:
      app: flannel
  template:
    metadata:
      labels:
        tier: node
        app: flannel
    spec:
      affinity:
        nodeAffinity:
          requiredDuringSchedulingIgnoredDuringExecution:
            nodeSelectorTerms:
              - matchExpressions:
                  - key: kubernetes.io/os
                    operator: In
                    values:
                      - linux
      hostNetwork: true
      priorityClassName: system-node-critical
      tolerations:
        - operator: Exists
          effect: NoSchedule
      serviceAccountName: flannel
      initContainers:
        - name: install-cni-plugin
          #image: flannelcni/flannel-cni-plugin:v1.1.0 for ppc64le and mips64le (dockerhub limitations may apply)
          image: docker.io/rancher/mirrored-flannelcni-flannel-cni-plugin:v1.1.0
          command:
            - cp
          args:
            - -f
            - /flannel
            - /opt/cni/bin/flannel
          volumeMounts:
            - name: cni-plugin
              mountPath: /opt/cni/bin
        - name: install-cni
          #image: flannelcni/flannel:v0.20.0 for ppc64le and mips64le (dockerhub limitations may apply)
          image: docker.io/rancher/mirrored-flannelcni-flannel:v0.20.0
          command:
            - cp
          args:
            - -f
            - /etc/kube-flannel/cni-conf.json
            - /etc/cni/net.d/10-flannel.conflist
          volumeMounts:
            - name: cni
              mountPath: /etc/cni/net.d
            - name: flannel-cfg
              mountPath: /etc/kube-flannel/
      containers:
        - name: kube-flannel
          #image: flannelcni/flannel:v0.20.0 for ppc64le and mips64le (dockerhub limitations may apply)
          image: docker.io/rancher/mirrored-flannelcni-flannel:v0.20.0
          command:
            - /opt/bin/flanneld
          args:
            - --ip-masq
            - --kube-subnet-mgr
          resources:
            requests:
              cpu: "100m"
              memory: "50Mi"
            limits:
              cpu: "100m"
              memory: "50Mi"
          securityContext:
            privileged: false
            capabilities:
              add: ["NET_ADMIN", "NET_RAW"]
          env:
            - name: POD_NAME
              valueFrom:
                fieldRef:
                  fieldPath: metadata.name
            - name: POD_NAMESPACE
              valueFrom:
                fieldRef:
                  fieldPath: metadata.namespace
            - name: EVENT_QUEUE_DEPTH
              value: "5000"
          volumeMounts:
            - name: run
              mountPath: /run/flannel
            - name: flannel-cfg
              mountPath: /etc/kube-flannel/
            - name: xtables-lock
              mountPath: /run/xtables.lock
      volumes:
        - name: run
          hostPath:
            path: /run/flannel
        - name: cni-plugin
          hostPath:
            path: /opt/cni/bin
        - name: cni
          hostPath:
            path: /etc/cni/net.d
        - name: flannel-cfg
          configMap:
            name: kube-flannel-cfg
        - name: xtables-lock
          hostPath:
            path: /run/xtables.lock
            type: FileOrCreate