<Window x:Class="grid面板的使用.MainWindow"
        xmlns="http://schemas.microsoft.com/winfx/2006/xaml/presentation"
        xmlns:x="http://schemas.microsoft.com/winfx/2006/xaml"
        xmlns:d="http://schemas.microsoft.com/expression/blend/2008"
        xmlns:mc="http://schemas.openxmlformats.org/markup-compatibility/2006"
        xmlns:local="clr-namespace:grid面板的使用"
        mc:Ignorable="d"
        Title="MainWindow" Height="450" Width="800">
    <Grid ShowGridLines="True">
        <Grid.RowDefinitions>
            <RowDefinition Height="100"/>
            <RowDefinition Height="auto"/>
            <RowDefinition Height="100*"/>
        </Grid.RowDefinitions>
        <Grid.ColumnDefinitions>
            <ColumnDefinition Width="33*"/>
            <ColumnDefinition Width="auto"/>
            <ColumnDefinition Width="67*"/>
        </Grid.ColumnDefinitions>
        <Button Content="no1" Grid.Row="0" Grid.Column="0"/>
        <Button Content="no2" Grid.Row="1" Grid.Column="0"/>
        <Button Content="no3" Grid.Row="2" Grid.Column="0"/>
        <GridSplitter HorizontalAlignment="Center" Width="6" Grid.Row="0" Grid.Column="1" Grid.RowSpan="3"/>
        <Button Content="no4" Grid.Row="0" Grid.Column="2"/>
        <Button Content="no4" Grid.Row="1" Grid.Column="2"/>
        <Button Content="no4" Grid.Row="2" Grid.Column="2"/>
    </Grid>
</Window>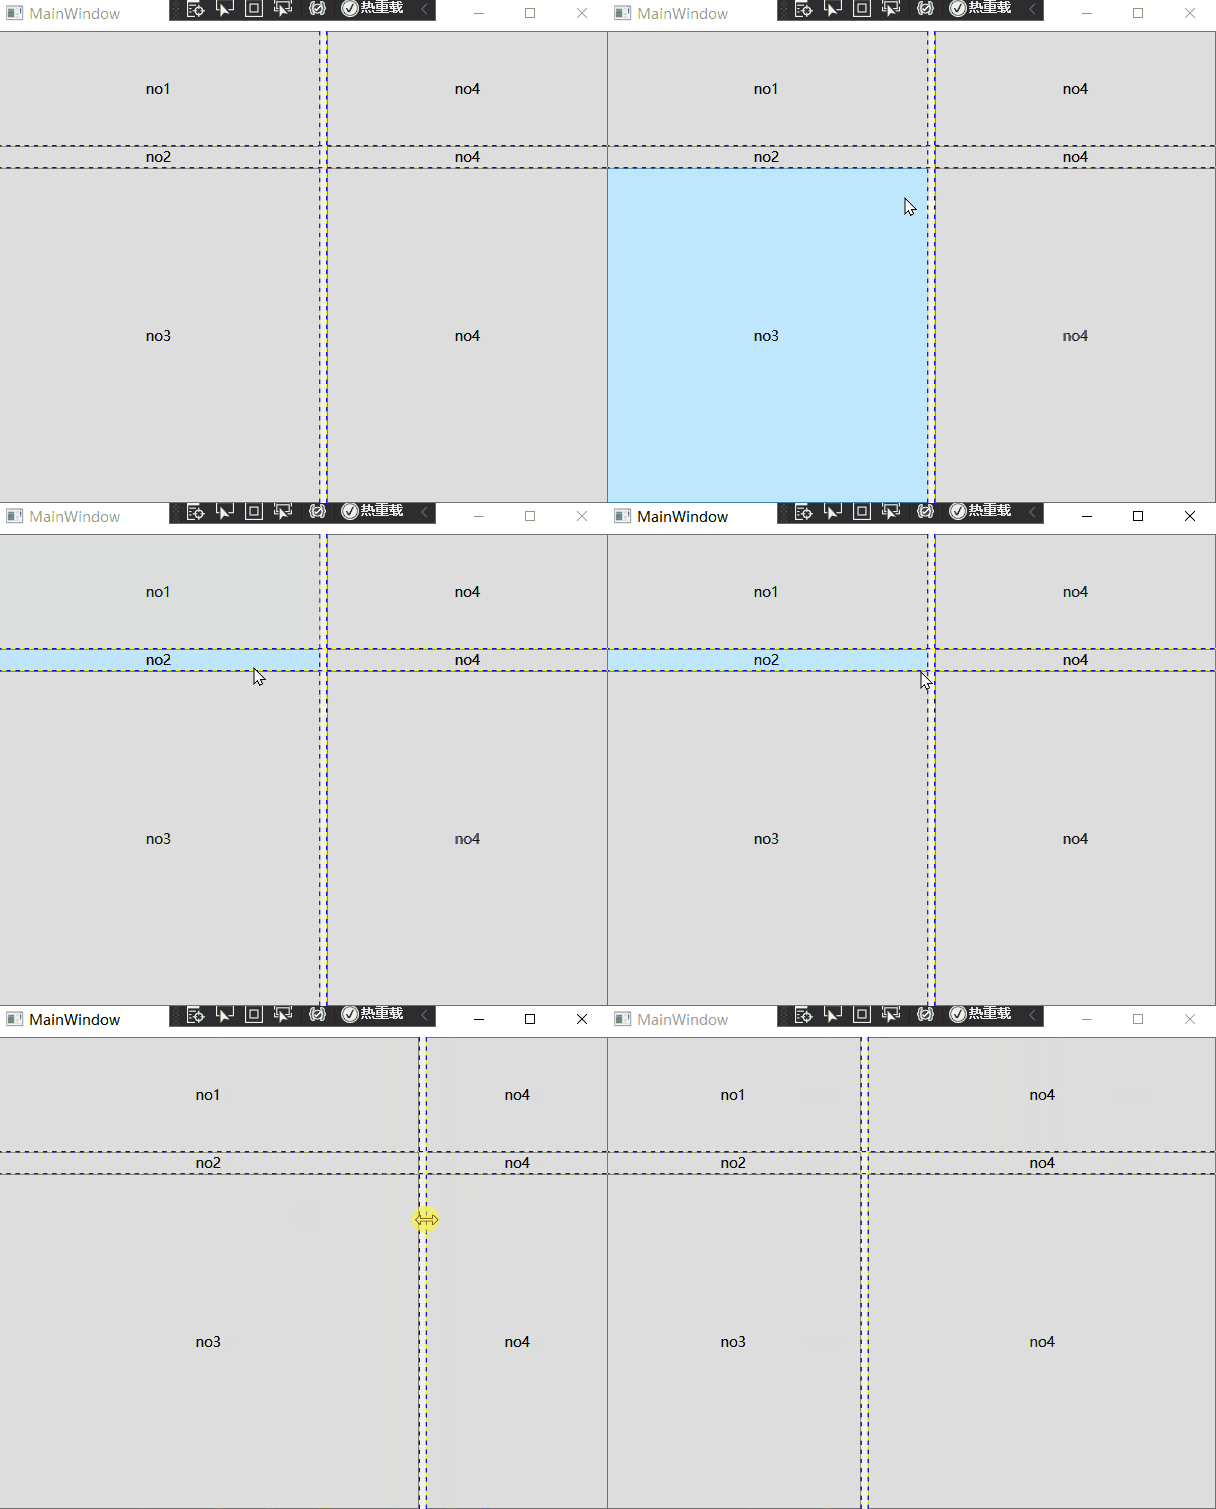
cs
using System.Windows;
using System.Windows.Controls;

namespace grid面板的使用
{
    public partial class MainWindow : Window
    {
        public MainWindow()
        {
            InitializeComponent();

            // 创建grid面板
            Grid grid = new Grid();
            grid.ShowGridLines = true;//显示布局线

            // 定义行
            grid.RowDefinitions.Add(new RowDefinition { Height = new GridLength(100) });
            grid.RowDefinitions.Add(new RowDefinition { Height = GridLength.Auto });
            grid.RowDefinitions.Add(new RowDefinition { Height = new GridLength(100, GridUnitType.Star) });

            // 定义列
            grid.ColumnDefinitions.Add(new ColumnDefinition { Width = new GridLength(33, GridUnitType.Star) });
            grid.ColumnDefinitions.Add(new ColumnDefinition { Width = GridLength.Auto });
            grid.ColumnDefinitions.Add(new ColumnDefinition { Width = new GridLength(67, GridUnitType.Star) });


            Button button1 = new Button { Content = "no1" };//新建button对象
            Grid.SetRow(button1, 0);                        //设置button所在的行
            Grid.SetColumn(button1, 0);                    //设置button 所在的列
            grid.Children.Add(button1);                    //加入集合中

            Button button2 = new Button { Content = "no2" };
            Grid.SetRow(button2, 1);
            Grid.SetColumn(button2, 0);
            grid.Children.Add(button2);

            Button button3 = new Button { Content = "no3" };
            Grid.SetRow(button3, 2);
            Grid.SetColumn(button3, 0);
            grid.Children.Add(button3);

            // 创建分割栏
            GridSplitter gridSplitter = new GridSplitter
            {
                HorizontalAlignment = HorizontalAlignment.Center,
                Width = 6
            };
            Grid.SetRow(gridSplitter, 0);
            Grid.SetColumn(gridSplitter, 1);
            Grid.SetRowSpan(gridSplitter, 3);//设置分割栏 的跨行
            grid.Children.Add(gridSplitter);

            // Create more Buttons and add them to Grid
            Button button4 = new Button { Content = "no4" };
            Grid.SetRow(button4, 0);
            Grid.SetColumn(button4, 2);
            grid.Children.Add(button4);

            Button button5 = new Button { Content = "no4" };
            Grid.SetRow(button5, 1);
            Grid.SetColumn(button5, 2);
            grid.Children.Add(button5);

            Button button6 = new Button { Content = "no4" };
            Grid.SetRow(button6, 2);
            Grid.SetColumn(button6, 2);
            grid.Children.Add(button6);

            // Set the Grid as the Content of the Window
            this.Content = grid;
        }
    }
}
直观体验 依赖属性
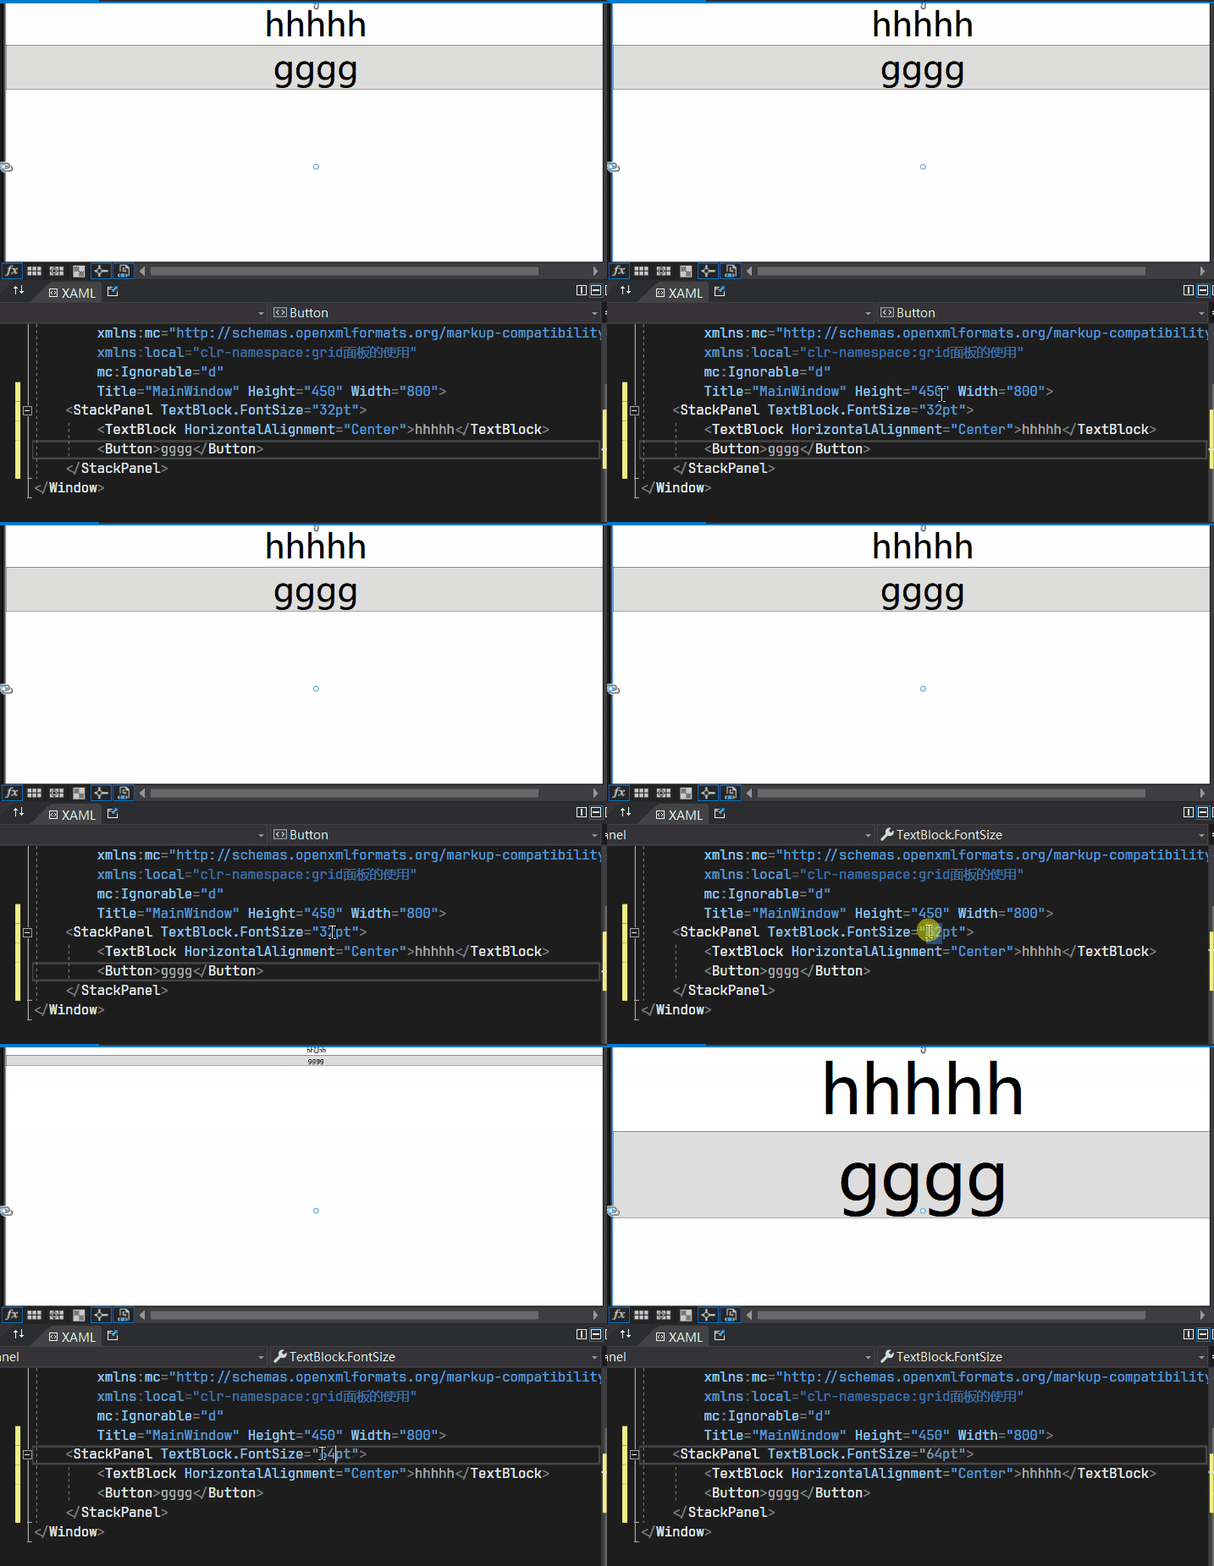
c#代码
cs
namespace YourNamespace
{
    public partial class MainWindow : Window
    {
        public MainWindow()
        {
            InitializeComponent();

            // 创建 StackPanel
            StackPanel stackPanel = new StackPanel();

            // 创建 TextBlock,并将 FontSize 设置为 32pt(32pt = 32 * 96 / 72 像素)
            TextBlock textBlock = new TextBlock
            {
                FontSize = 32 * 96.0 / 72.0, // 将 32 点转换为像素
                Text = "hhhhh"
            };

            // 将 TextBlock 添加到 StackPanel
            stackPanel.Children.Add(textBlock);

            // 创建 Button,它会继承 StackPanel 的 FontSize
            Button button = new Button
            {
                Content = "gggg"
            };

            // 将 Button 添加到 StackPanel
            stackPanel.Children.Add(button);

            // 将 StackPanel 设置为 Window 的内容
            this.Content = stackPanel;
        }
    }
}
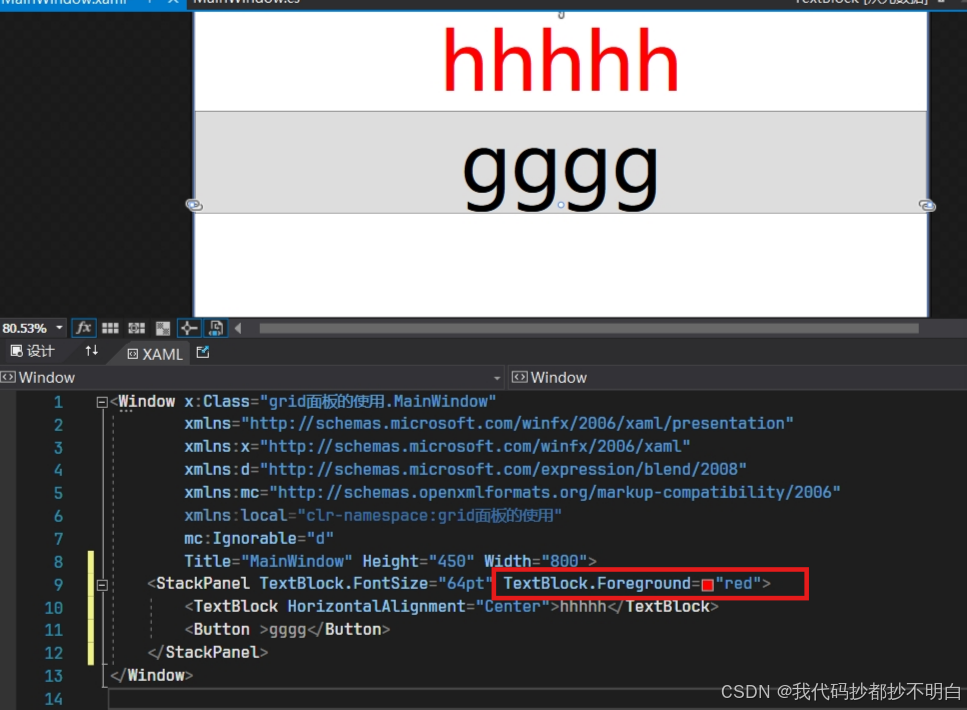
我觉得还是先看懂依赖属性再来总结 ,因为图片中, Foreground同样是 依赖属性,为什么button没有沿袭这个属性???
未完,待续............................519页