postman入门到精通
- 一、postman下载安装与更换主题
- 二、页面详解
- 三、管理用例
- 四、设置环境变量和全局变量
- 五、发送请求
- 六、接口关联
- 七、postman动态参数
- 八、postman断言
- 九、Postman+newman+jenkins实现自动生成报告并持续集成
一、postman下载安装与更换主题
1、下载与安装
下载地址:https://www.postman.com/downloads/
下载适合自己的版本

下载后图标

2、更换主题(Themes)
打开后页面:

更换主题:选择自己喜欢的明色或者暗色系


二、页面详解
1、顶部工具栏

-
搜索

-
同步数据(Sync)

-
【invite】邀请加入团队
-
抓取API请求

-
【Sign In】登录
-
【Runner】运行用例

2、左侧栏
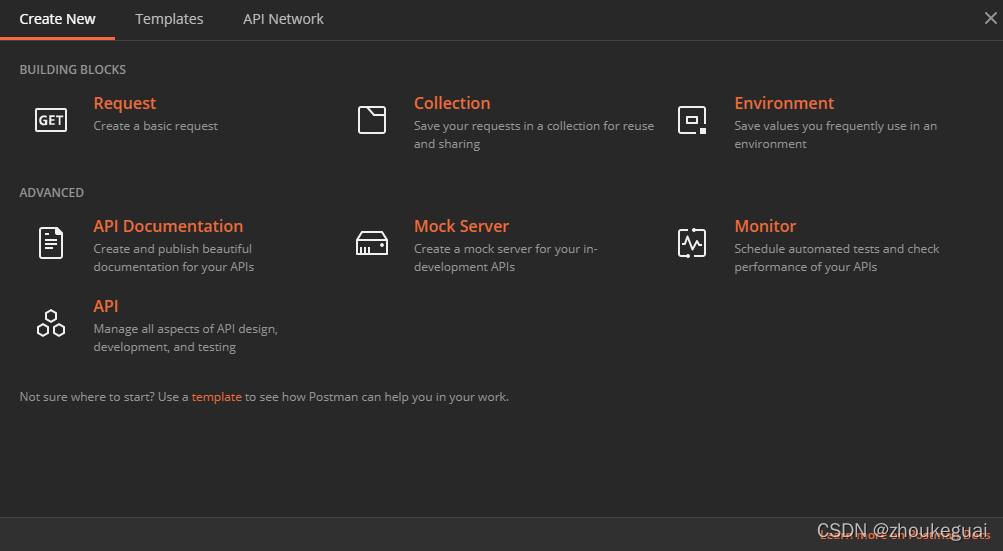
- 【New】新建
-
【import】导入

-
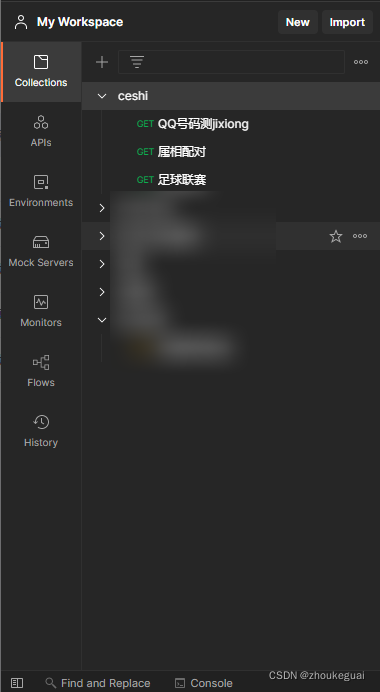
【Collections】集合:用来管理用例
3、中部栏
3.1 请求部分页签介绍
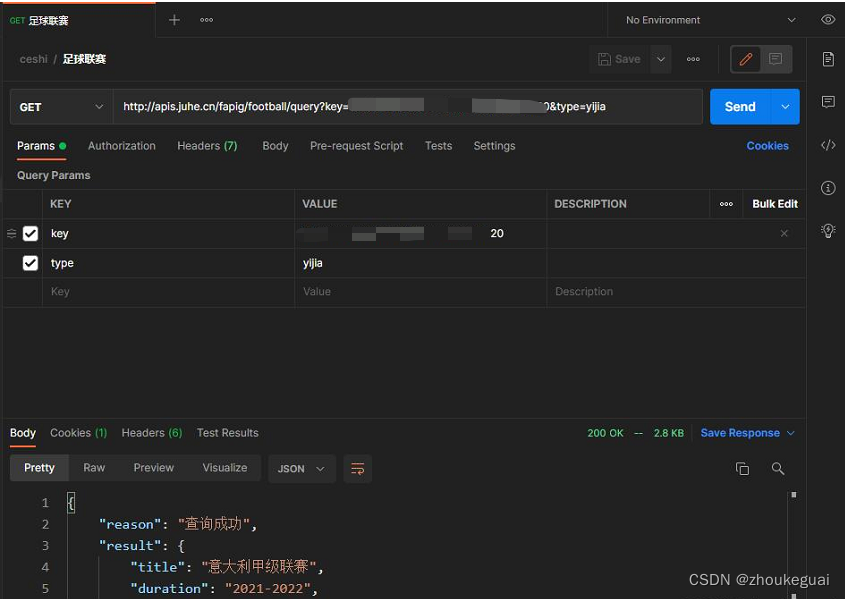
接口来源于聚合数据,点击此处查看
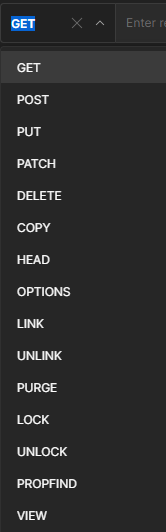
- 请求方式
-
接口地址

-
send: 发送请求
-
Params:get请求传参

注:Bulk Edit 批量编辑

-
Authorization:认证鉴权

-
Headers:请求头

注:如使用post请求方式,请求头(Headers)要加入content-type参数
-
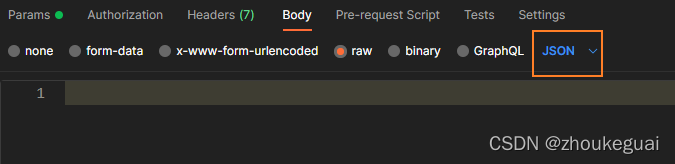
Body:post请求传参
1、none:没有参数

2、form-data:传文件和键值对

注:Content-Type与请求参数的格式之间的关联
当选择某一参数方式后,postman会自动帮我们设置对应的Content-Type,不需要自行设置,而如果是使用jmeter还是需要自行设置Content-Type。
所以,当选择form-data的参数方式后,postman会自动的帮我们设置了Content-Type:multipart/form-data
3、x-www-form-urlencoded :传键值对

当选择x-www-form-urlencoded的参数方式后,postman会自动的帮我们设置了Content-Type:application/x-www-form-urlencoded
4、raw:可以上传任意格式的文本,可以上传text、json、xml等

当我们选择了text时,postman同样帮我们自动设置了Content-Type:text/plain,可自行查看Headers
当我们选择了JSON时,postman同样帮我们自动设置了Content-Type:application/json,可自行查看Headers

当我们选择了XML时,postman同样帮我们自动设置了Content-Type:text/xml,可自行查看Headers
5、binary:只可以上传二进制数据,通常用来上传文件,一次只能上传一个文件

6、GraphQL:发送GraphQL查询

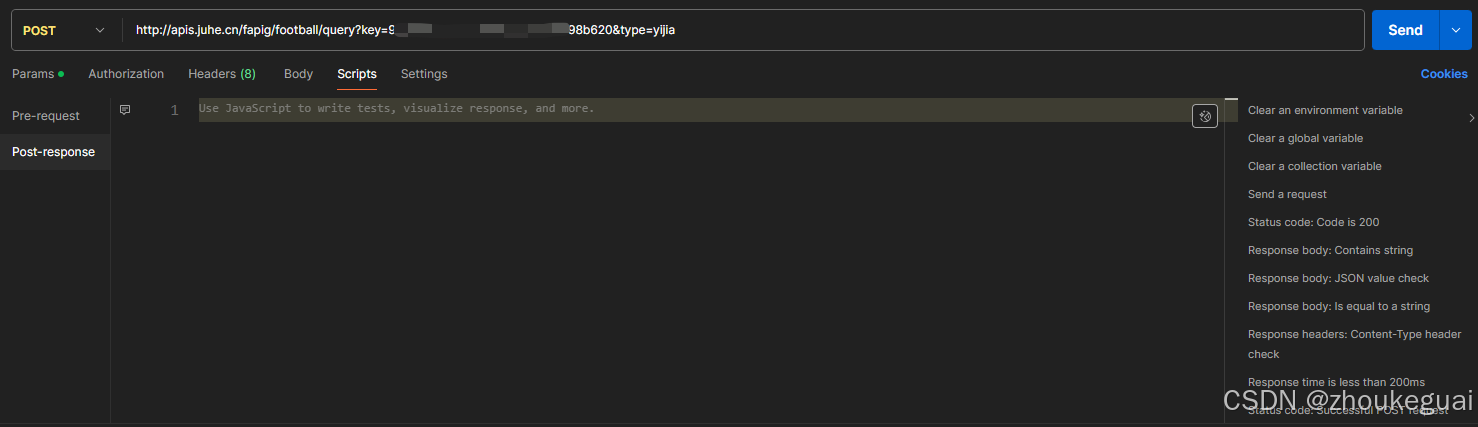
- Scripts
Pre-request :预请求脚本
Post-response:请求后置脚本/请求后的脚本处理/断言
- Setting:设置
- Cookies:Postman的cookie的管理器

3.2 响应部分页签介绍
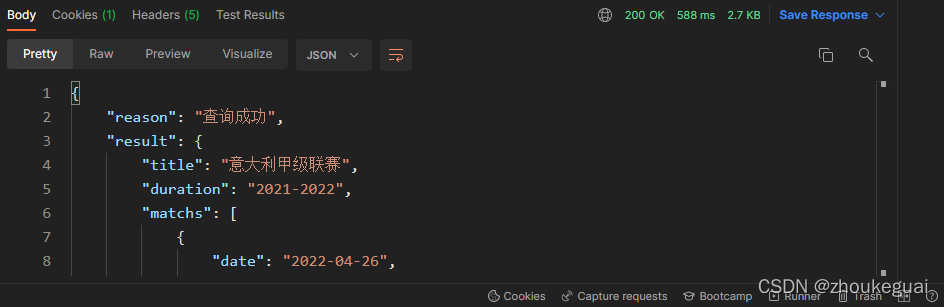
Body:响应的数据(Pretty:json格式,Raw:文本格式,Preview:网页格式)
Cookies:缓存
Headers:响应头
Test Results:断言的结果
Status:200返回码
OK:返回信息
Time:响应时间 588ms(毫秒)
Size:2.7KB
三、管理用例
四、设置环境变量和全局变量
全局变量:就是在所有接口请求里面都可以访问的变量
环境变量:就是全局变量。(开发环境,测试环境,线上环境)
1、添加环境变量


例如:
开发环境:ip:略
测试环境:ip:略
生产环境:ip:http://apis.juhe.cn/fapig/football/query
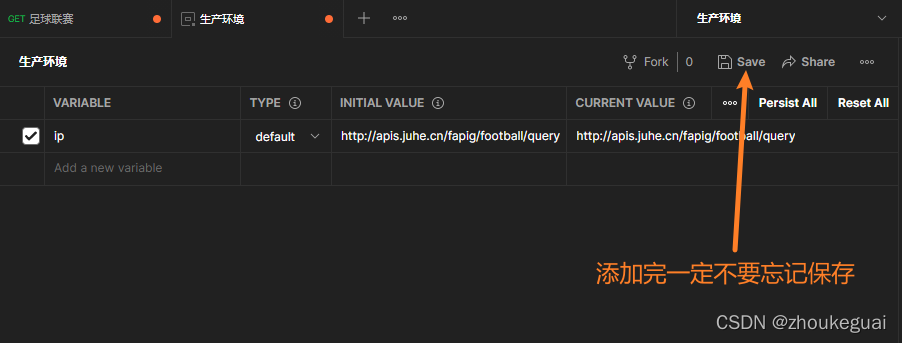
引用方式为:{{变量名}}

在运行时:选择相应的环境变量

2、添加全局变量
步骤同环境变量,不再赘述

五、发送请求
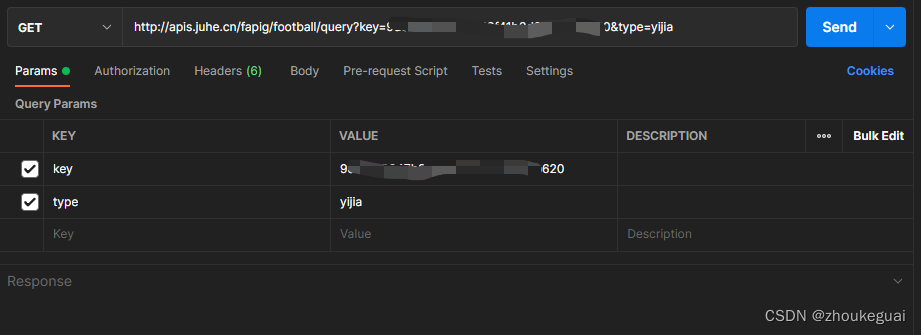
1、发送一个get请求
接口文档:
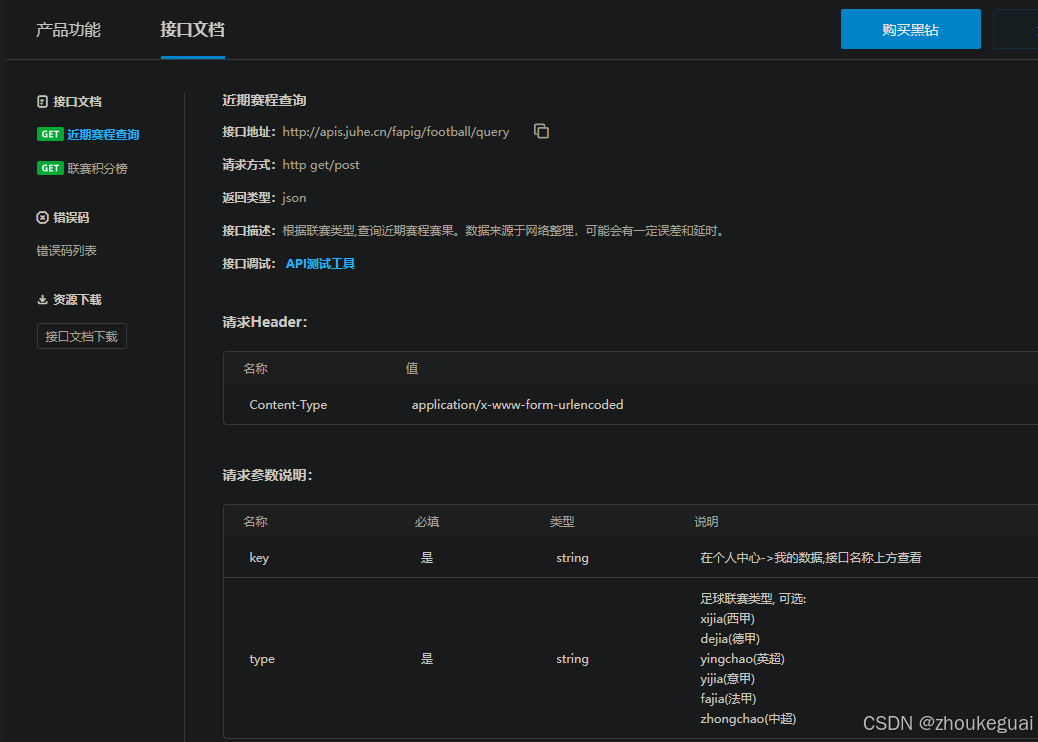
根据接口文档,我们可以看到,请求方式为get或post,这里使用get方法,填写url并把参数填写到Params中,点击Send后成功发送请求
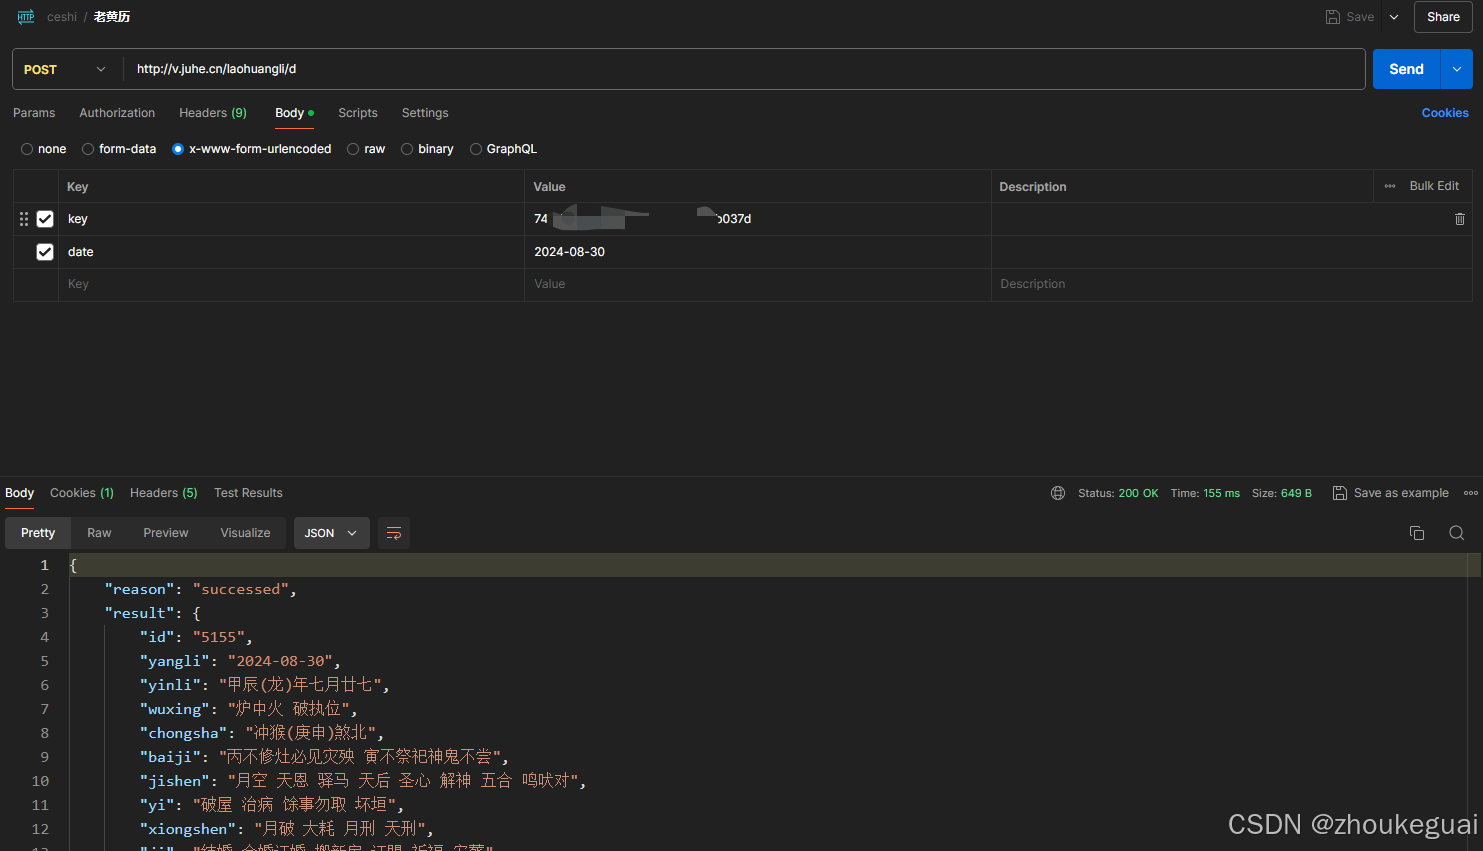
2、发送一个post请求
接口文档:

六、接口关联
场景:下一个接口的参数是使用的上一个接口的返回值
接口示例:用的是聚合数据的接口,可自行申请

脚本输入位置

1、JSON提取器(响应body中提取)
javascript
//javascript脚本,var定义变量
// 将响应body里的内容解析为一个json对象(字典),存到变量res中
var res=pm.response.json() ;
//提取响应body中的date值存到全局变量date中
pm.globals.set("date", res.result.matchs[0].date);
执行后,可以看到全局变量中存上了变量date和它的值

获取全局变量:{{变量名}},如其它接口把date作为入参只需要:{{date}}
接口示例:

2、正则表达式提取器(响应body中提取)
javascript
var dateone = pm.response.text().match(new RegExp('"date":"(.*?)"'));
console.log(dateone[1]);
pm.globals.set("dateone", dateone[1]);
执行后,也可以看到全局变量中存上了变量dateone和它的值

3、从响应头中去提取
响应头示例:

javascript
// 获取响应头中参数Etag的值
var Etag=pm.response.headers.get("Etag")
// 在控制台输出
console.log(Etag)
控制台可以看到,成功获取Etag的值

4、从响应Cookie中去提取
响应Cookie示例

javascript
//响应Cookie中提取
var aliyungf_tc=pm.cookies.get("aliyungf_tc")
// 在控制台输出
console.log(aliyungf_tc)
控制台可以看到,成功获取aliyungf_tc的值

七、postman动态参数
接口测试中常常会出现接口的参数不能写死,必须使用随机数来实现。
1、内置动态参数
javascript
{{$timestamp}} 时间戳
{{$randomInt}} 随机的0-1000的整数
{{$guid}} 随机的很长的字符串
2、自定义动态参数
javascript
//自定义的时间戳
var times = Date.now();
pm.globals.set("times",times);
//让接口请求停留3秒(3秒灌水机制),time.sleep(3)
const sleep = (milliseconds) => {
const start = Date.now();
while (Date.now() <= start + milliseconds) {}
 };
sleep(3000);
八、postman断言
八种断言方式
1、断言返回码为200 用于状态断言
pm.test("Status code is 200", function () {
    pm.response.to.have.status(200);
});
示例:

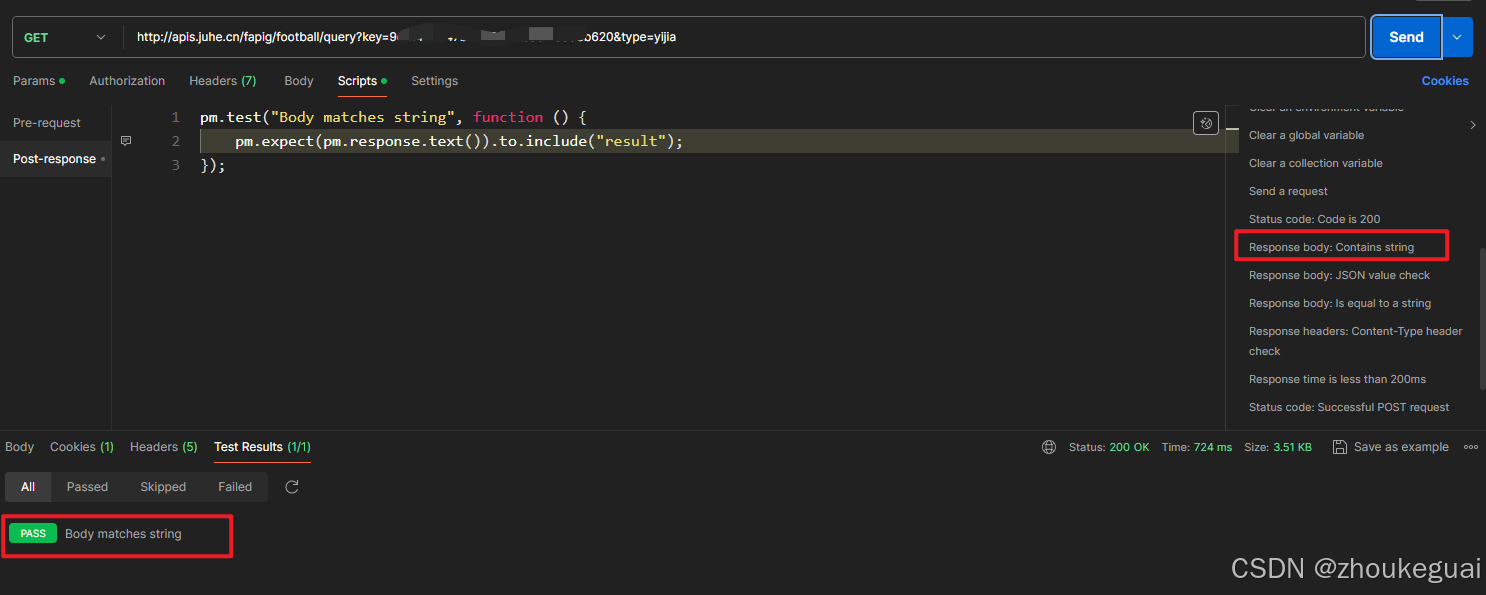
2、断言返回的结果中包含一个指定的字符串 用于业务断言
pm.test("Body matches string", function () {
    pm.expect(pm.response.text()).to.include("string_you_want_to_search");
});
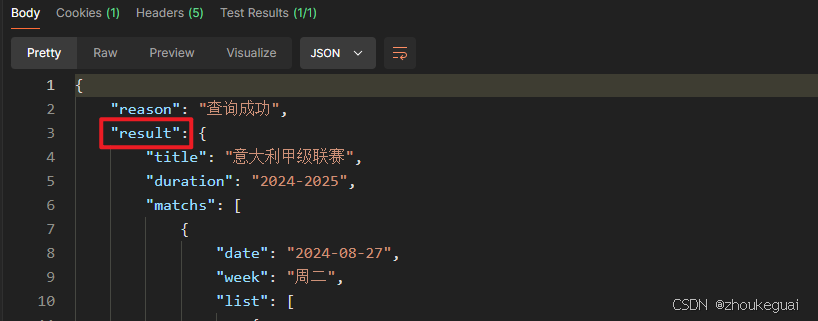
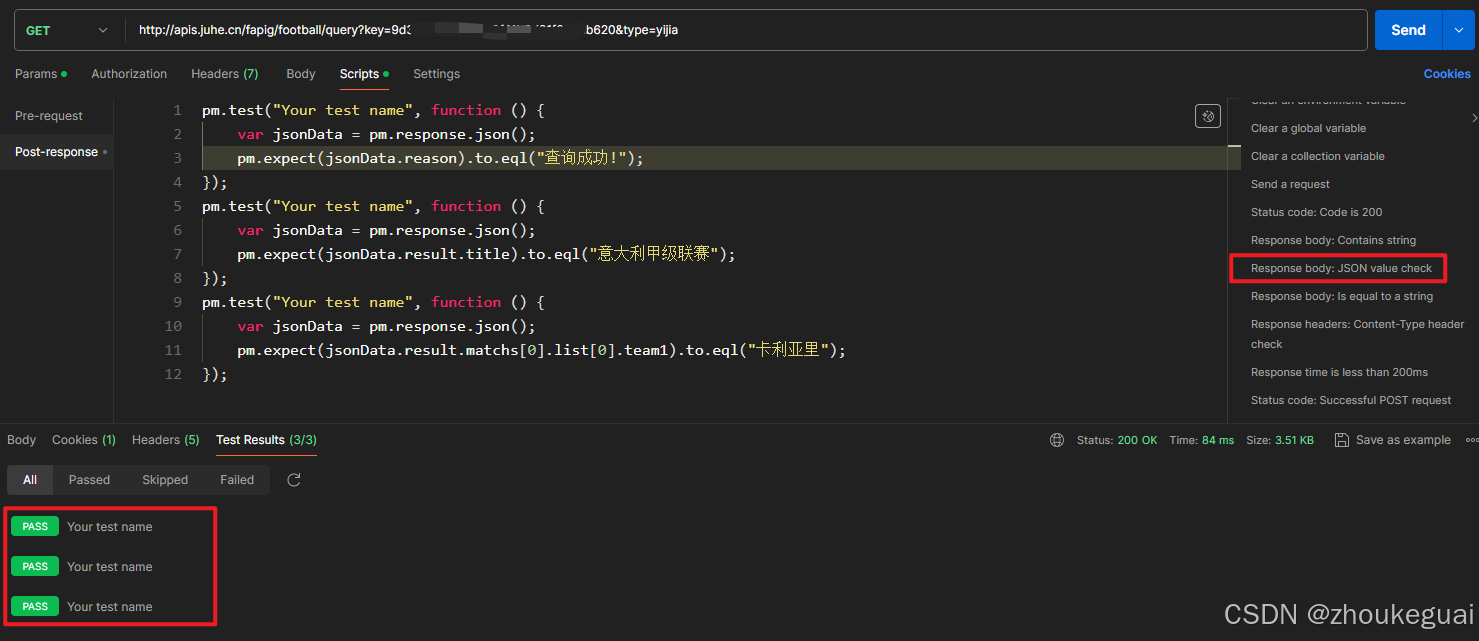
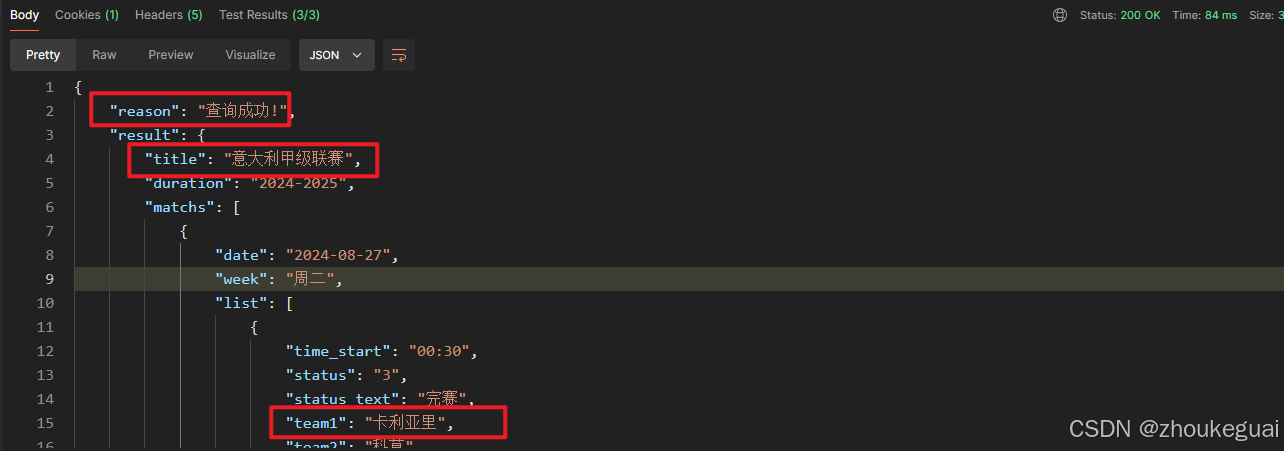
3、检查返回结果的json字符串的值 用于业务断言
pm.test("Your test name", function () {
    var jsonData = pm.response.json();
    pm.expect(jsonData.value).to.eql(100);
});
4、断言返回的结果等于一个字符串 用于业务断言
pm.test("Body is correct", function () {
pm.response.to.have.body("response_body_string");
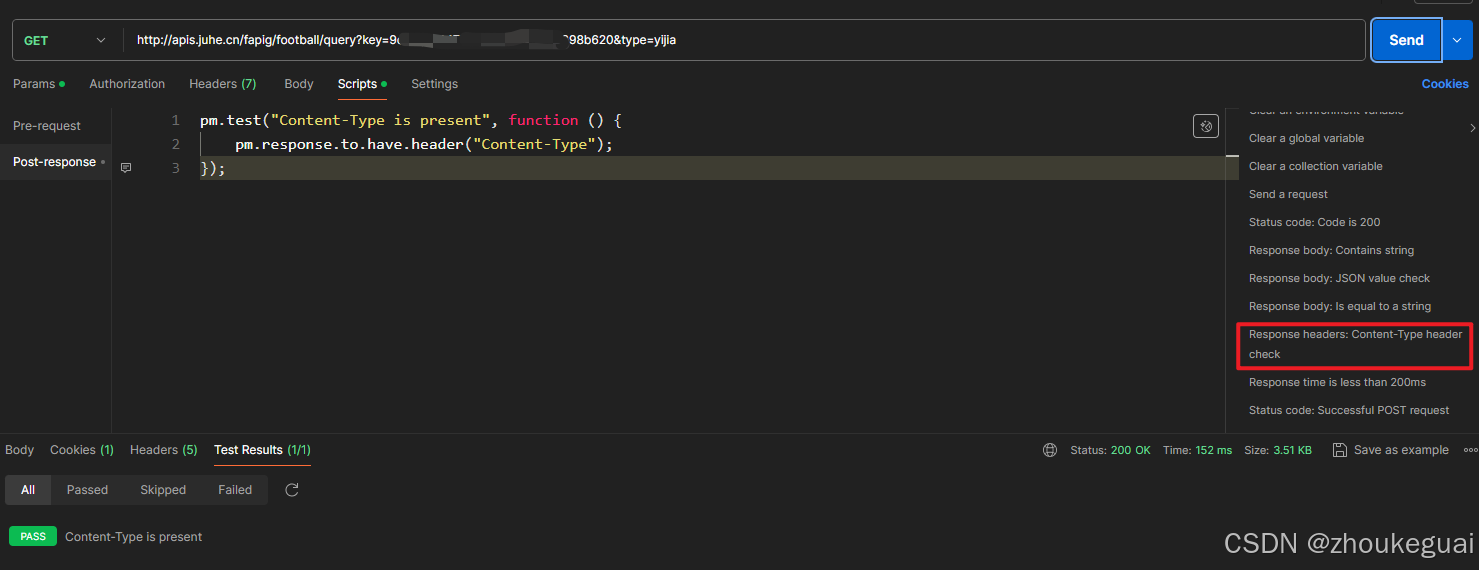
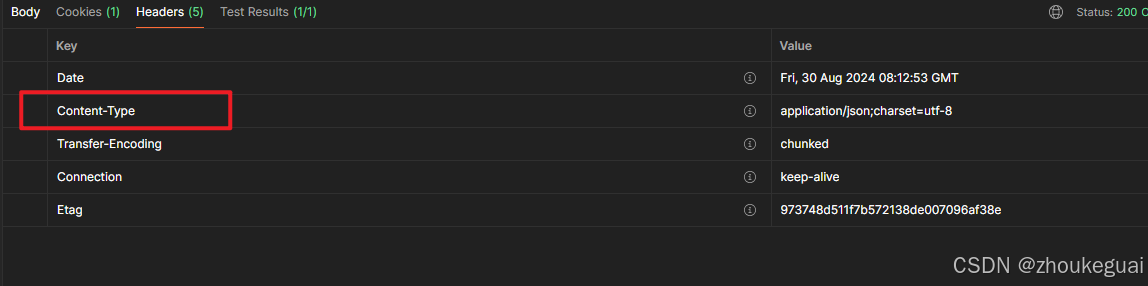
});5、断言响应头中包含有指定的响应头
pm.test("Content-Type is present", function () {
    pm.response.to.have.header("Content-Type");
});
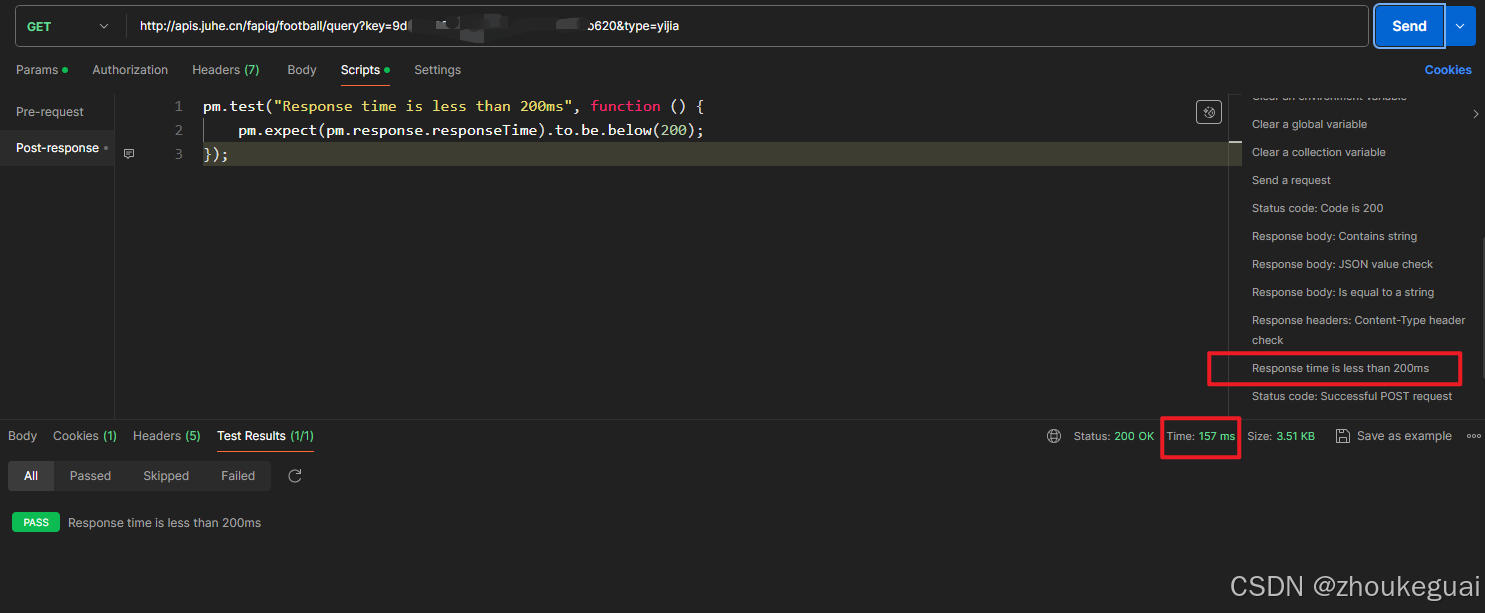
6、断言请求接口的时间小于200ms 用于性能断言
pm.test("Response time is less than 200ms", function () {
    pm.expect(pm.response.responseTime).to.be.below(200);
});
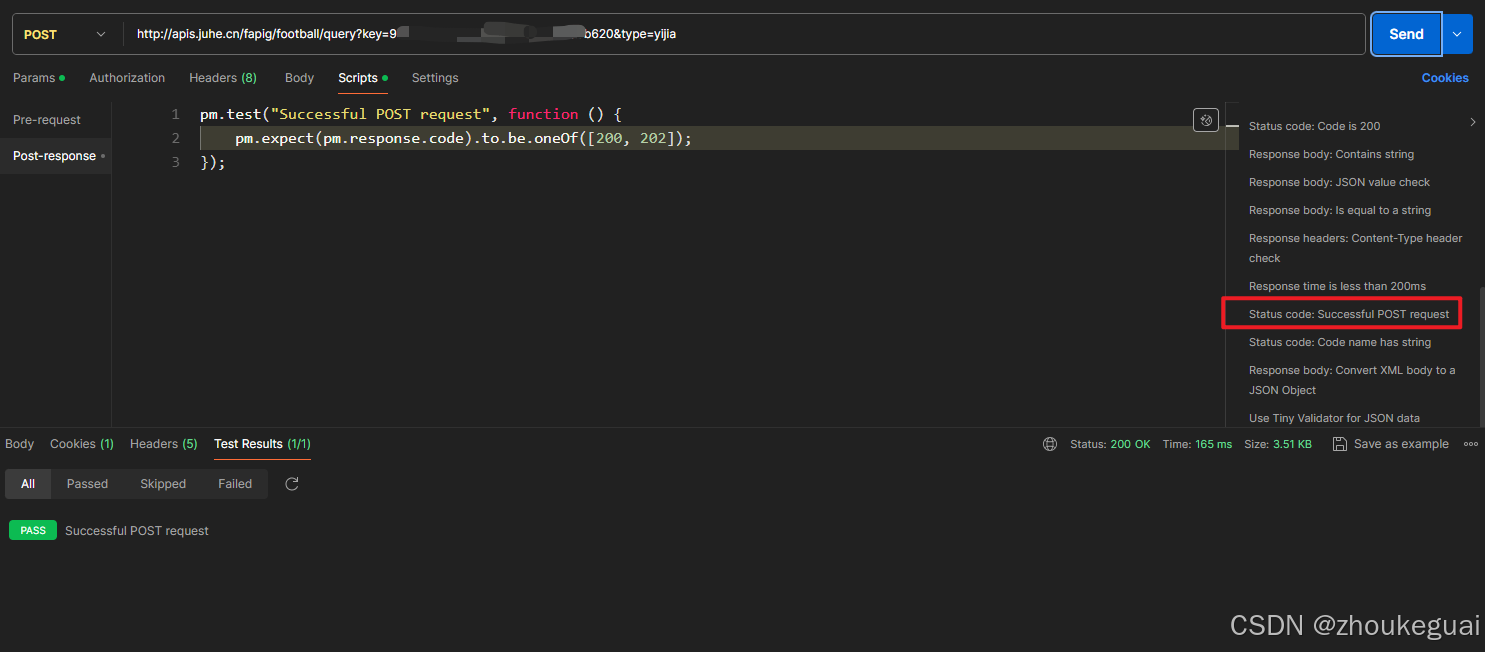
7、断言一个post请求的返回的状态码是否在指定的范围中
pm.test("Successful POST request", function () {
    pm.expect(pm.response.code).to.be.oneOf([201, 202]);
});
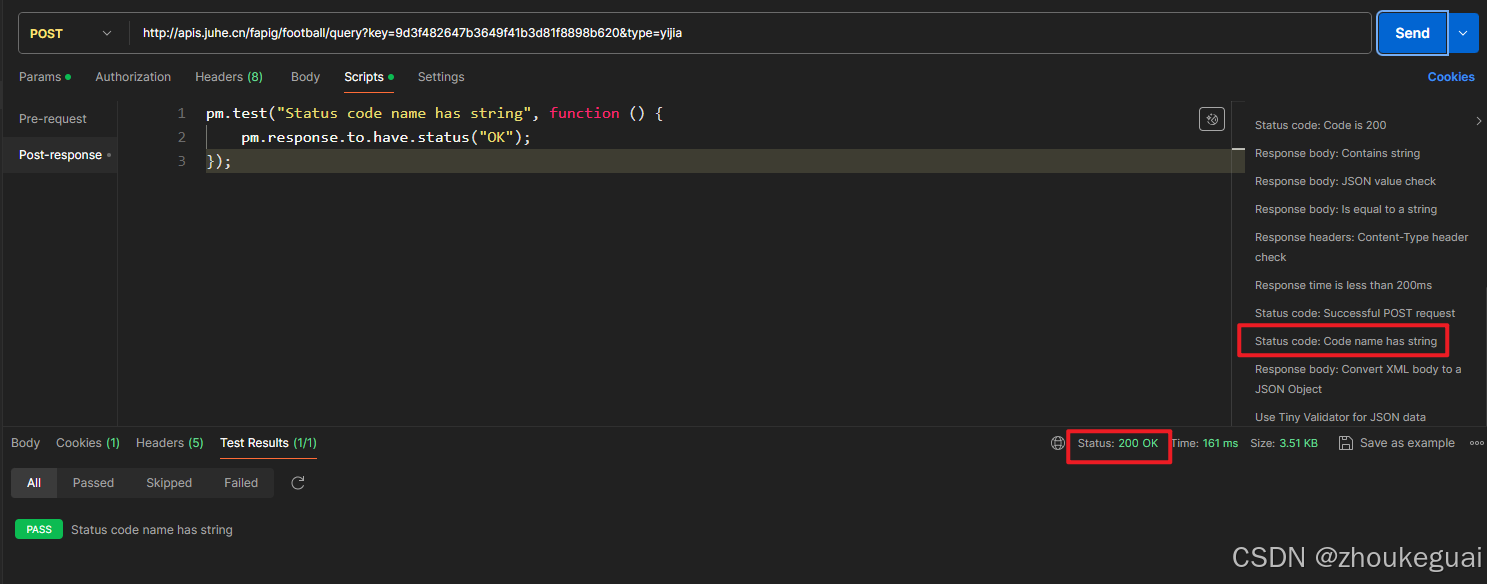
8、断言返回的状态码信息中包含指定的字符串
pm.test("Status code name has string", function () {
    pm.response.to.have.status("Created");
});
每个接口写2个断言,一个状态断言一个业务断言
特别注意:
1.postman内置的动态参数无法做断言。所以必须使用自定义的动态参数。
2.在tests里面不能使用{{}}的方法取全局变量,必须使用以下方式:
pm.globals.get("times1")
globals'times1'
globals.times1
精确断言:
先写预置脚本,保存全局变量

参数中使用全局变量

断言中使用全局变量

全局断言 :状态断言放到全局断言中,用例里只写业务断言即可


九、Postman+newman+jenkins实现自动生成报告并持续集成
未完待续。。。