
引出
4核12G-100G-3M规格的Flexus X实例使用测评第一弹:初识Flexus云服务X实例和参数配置,finalShell远程连接,安装MySQL并配置和远程访问
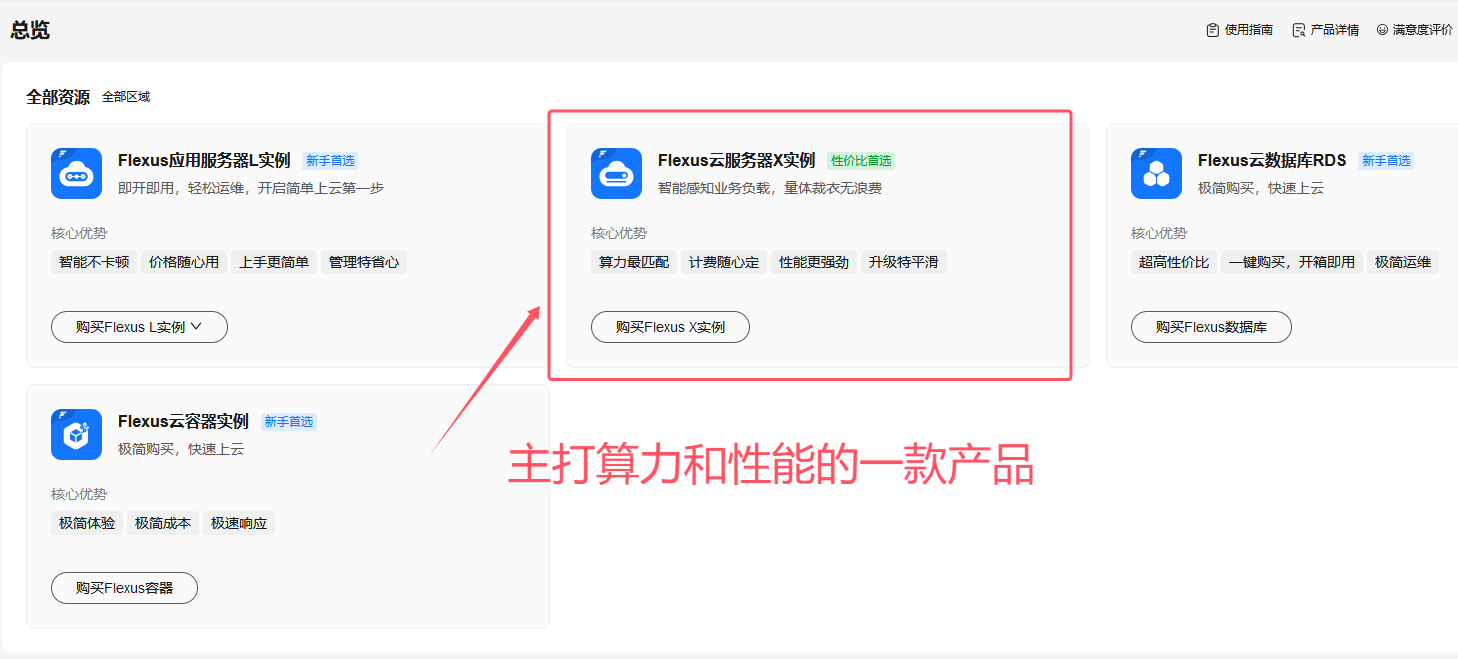
初识Flexus云服务X实例和参数配置
什么是Flexus云服务器X实例
官方解释:
Flexus云服务器X实例是新一代面向中小企业和开发者打造的柔性算力云服务器,可智能感知业务负载,适用于电商直播、企业建站、开发测试环境、游戏服务器、音视频服务等中低负载场景。相较于Flexus应用服务器L实例,Flexus云服务器X实例的优势包含:提供丰富的公共镜像、可灵活自定义vCPU内存配比、智能感知业务动态升降配,负载范围更高等。
个人理解:
1.服务器支持灵活自定义:可以自定义cpu,内存;计费模式也可以设置;
2.通过套餐的方式提供整体的服务,负载范围更佳;
服务器参数配置
Flexus云服务器X实例焕彩出新,已经迫不及待进行使用了,接下来是服务器的参数设置
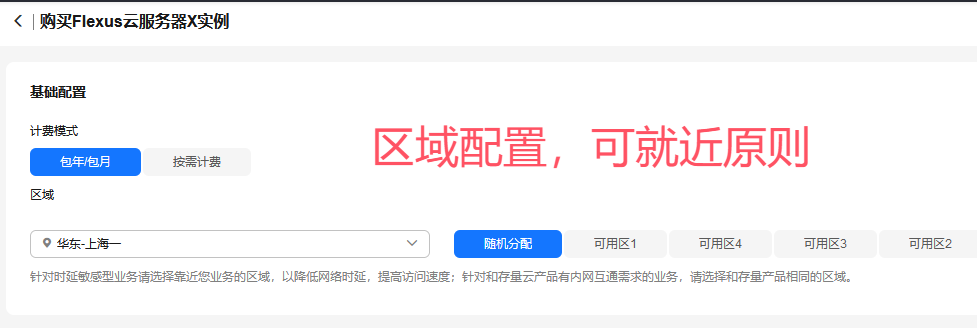
1.基础配置
可以设置服务器的计费模式,提供包年/包月 和 按需计费的模式,更加灵活,有助于企业降低成本;
另外就是区域的设置:可以按照就近原则,我离上海较近,因此选择上海的服务器,这样可以降低网络的延迟;
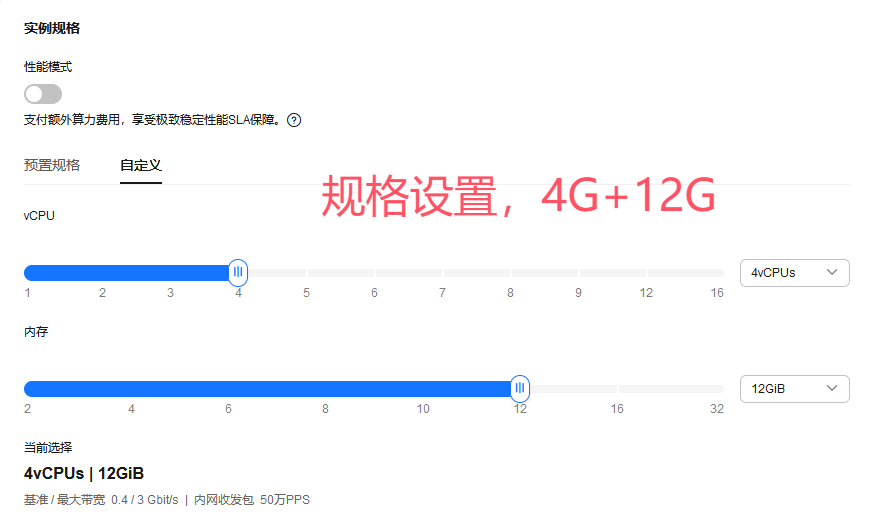
2.规格自定义
服务器支持灵活设置vCPU和内存,我这里设置4G+12G,对于Linux系统,这个配置已经非常不错了
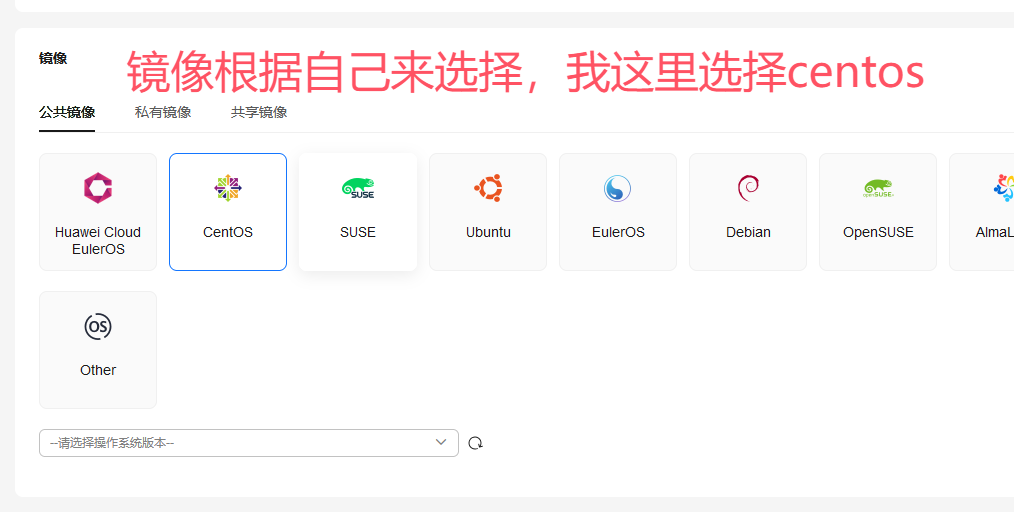
3.镜像设置
可以看出这里镜像支持3种类型,公共镜像,私有镜像,共享镜像,方便不同用户进行选择配置;
我这里选择公共镜像,CentOS版本的镜像,操作系统版本选了7.9
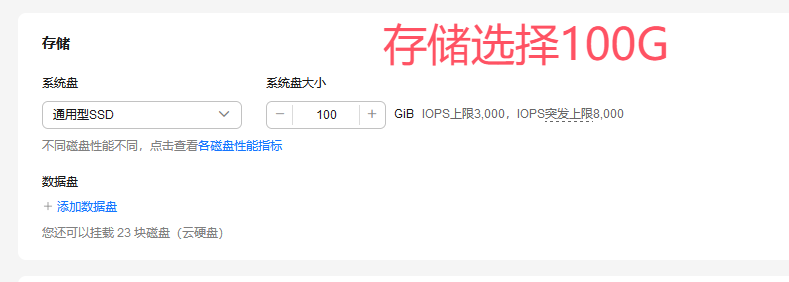
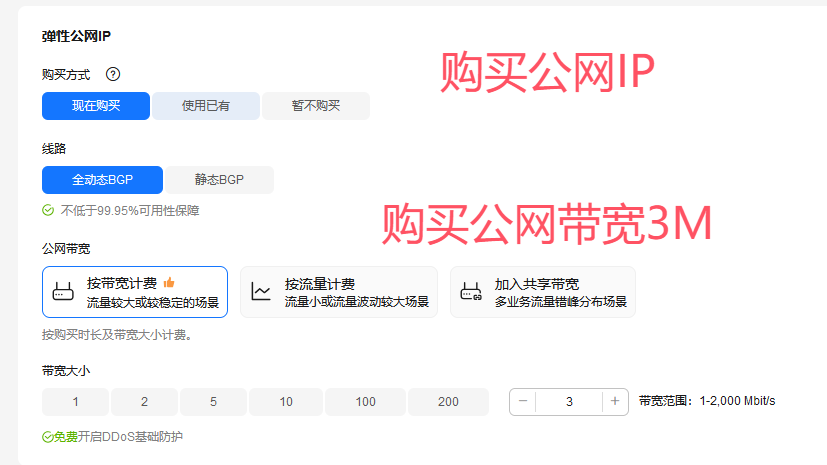
4.存储和其他设置
存储选择100G,容量满满,妈妈再也不担心我云服务存储内存不足了
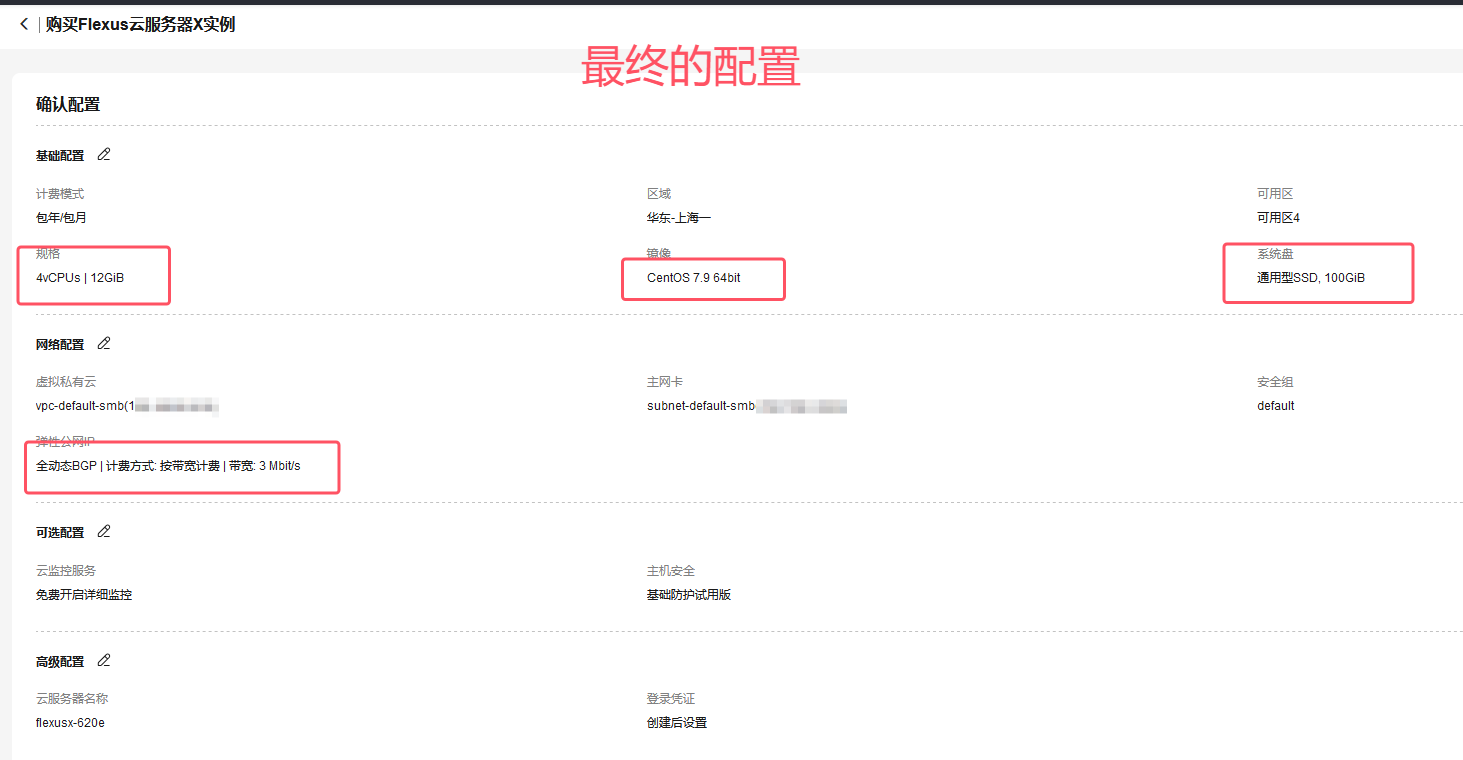
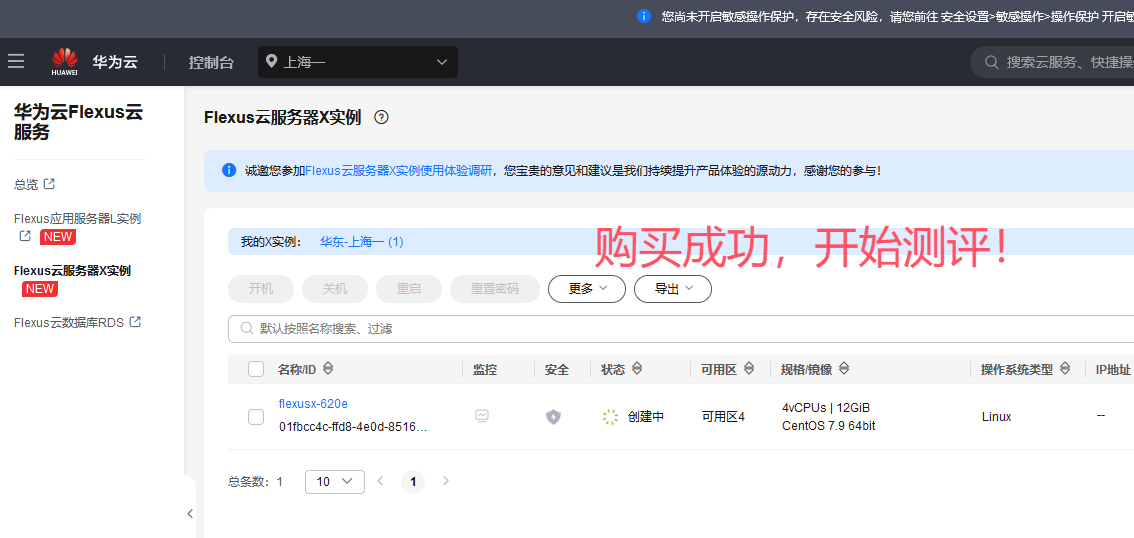
最终配置参数一览
经过一番折腾,我的最终配置如下,4vCPU+12G+100G+3M,这波配置直接拉满!
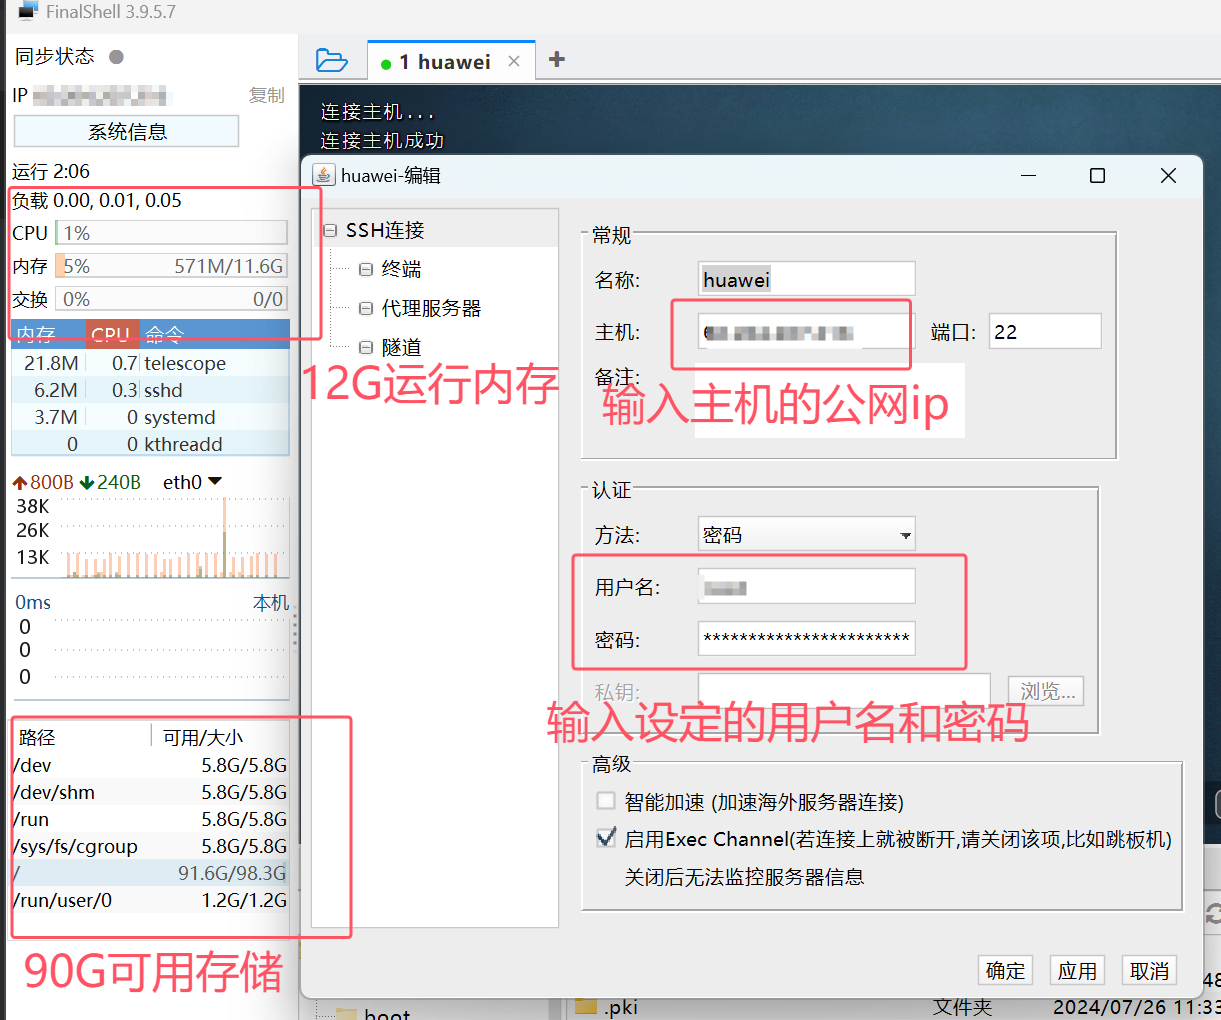
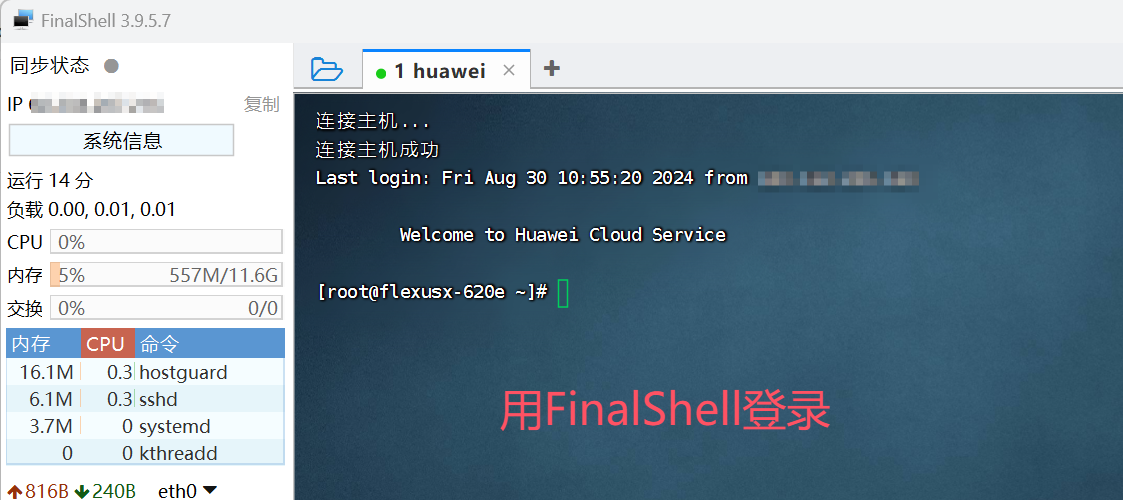
FinalShell连接
用finalshell远程登录,可以看到内存11.6G可用,存储空间90G+可用;输入用户名+密码就可以愉快地操作服务器了
查看一下系统的相关信息
cat /etc/redhat-releas
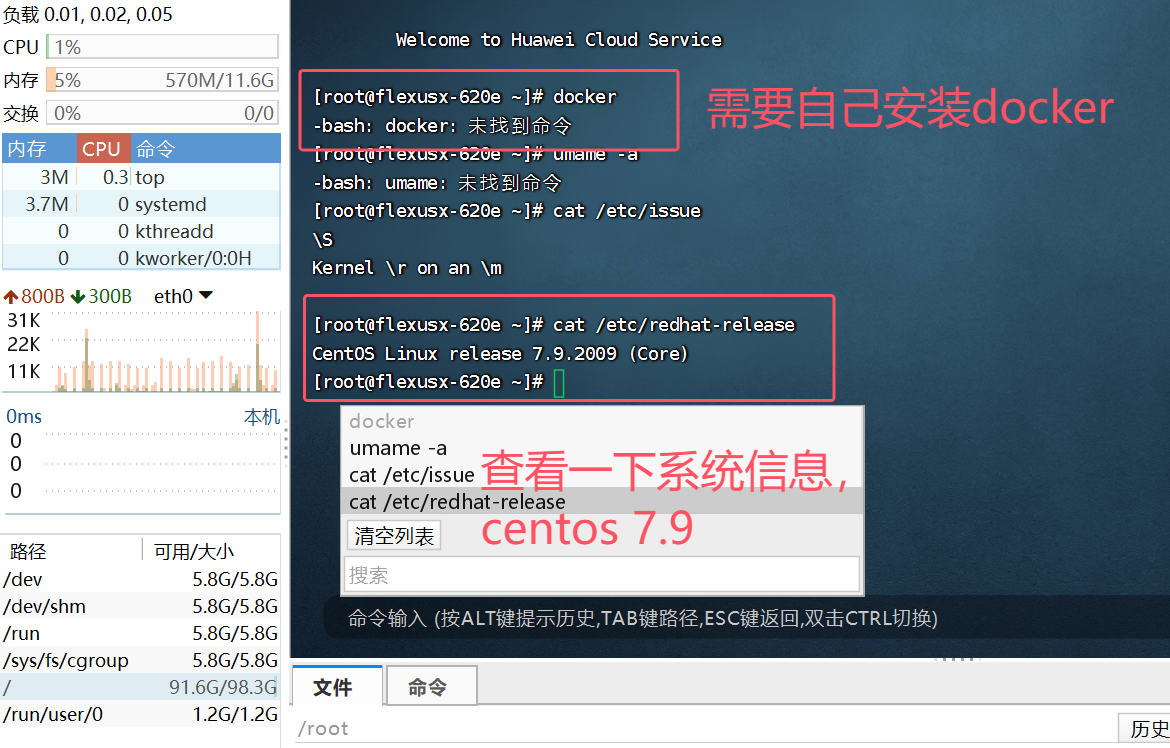
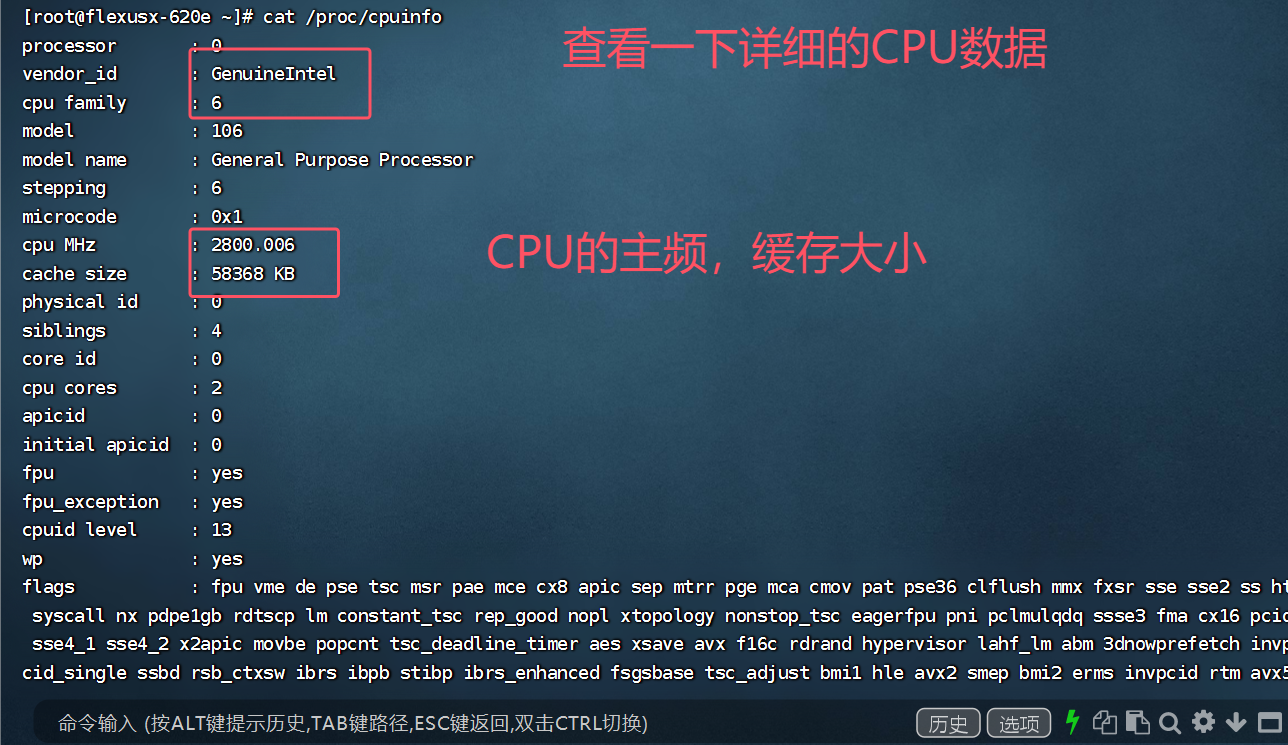
查看CPU的数据信息
cat /proc/cpuinfo
安装MySQL
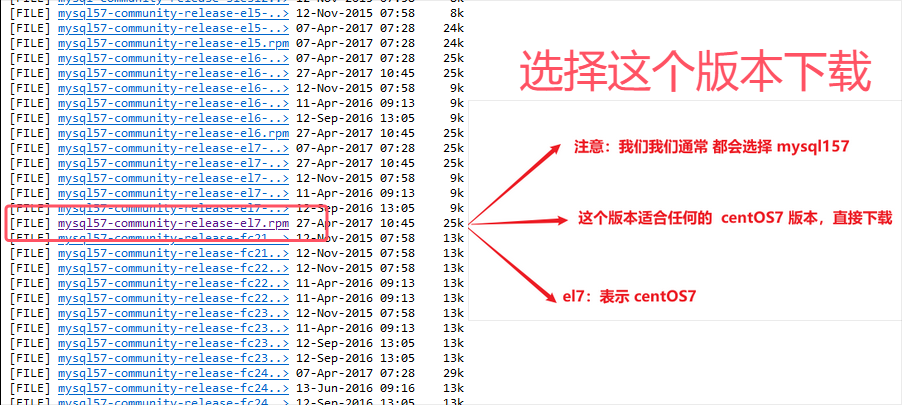
1.根据版本下载MySQL
之前都是用docker进行安装,但是现在不太好用,所以我直接安装Linux版本的mysql,进入官方网站,根据自己的系统版本下载合适的MySQL安装文件

2.解压和GPG秘钥
将下载好的安装包,上传到服务器的文件夹中,然后通过下面命令进行解压,并验证是否解压成功
java
rpm -ivh mysql57-community-release-el7.rpm
java
ls /etc/yum.repos.d/ -l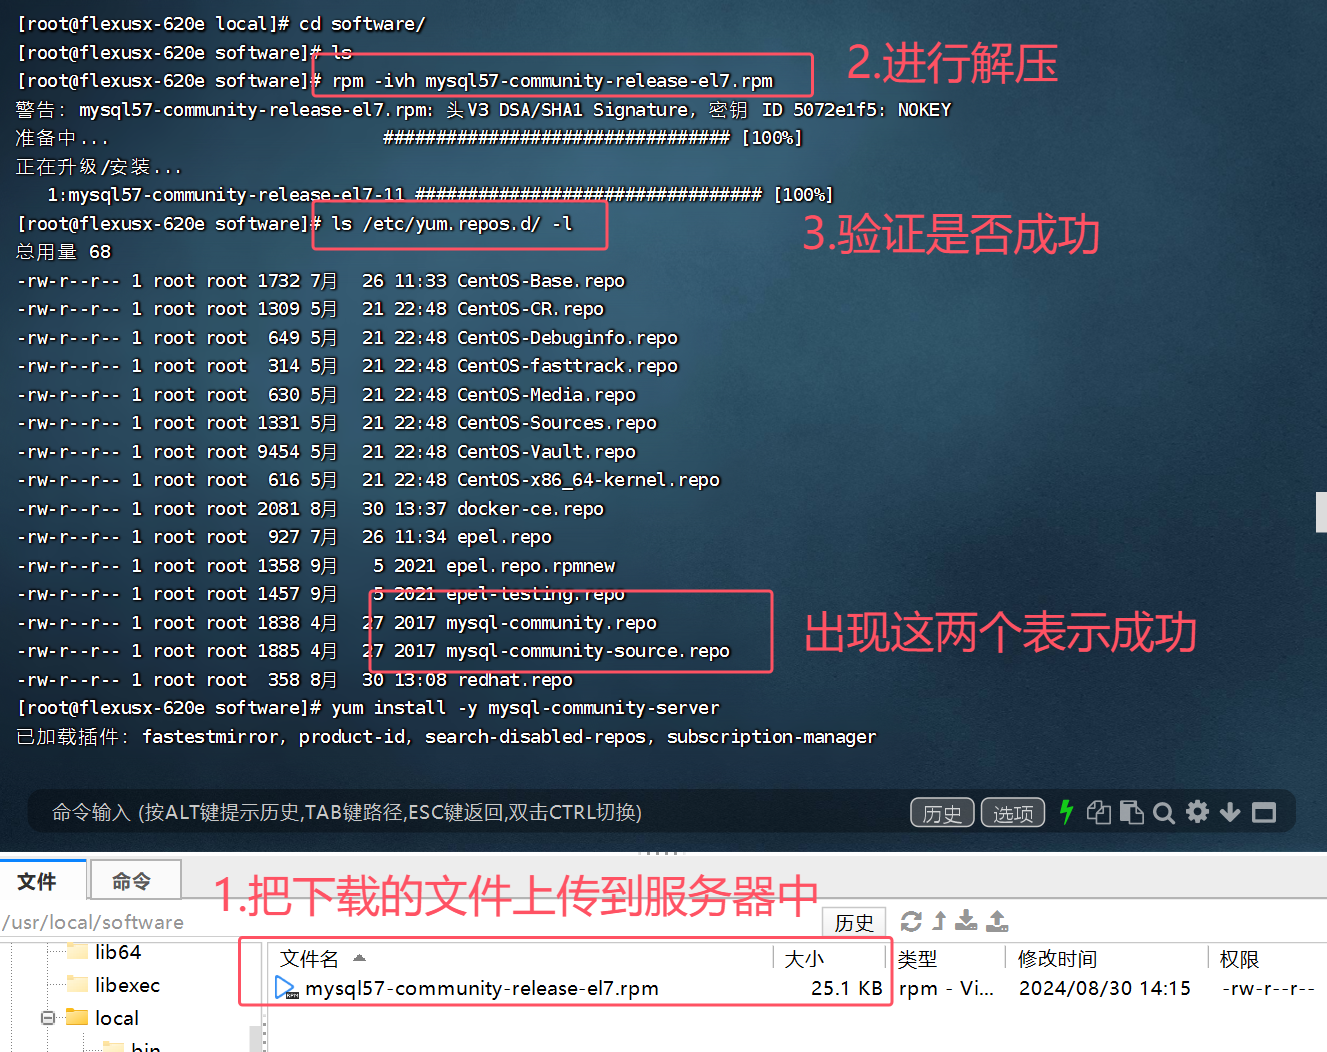
插曲:GPG秘钥过期问题
在安装的过程出现了秘钥过期导致失败的情况,可以用下面代码进行处理
java
rpm --import https://repo.mysql.com/RPM-GPG-KEY-mysql-2022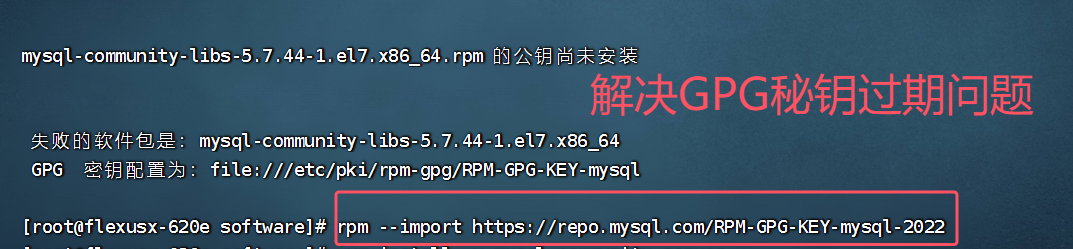
3.进行安装
接下来就可以愉快地进行安装了
java
yum install -y mysql-community-server
java
[root@flexusx-620e software]# ls /etc/my.cnf
/etc/my.cnf
[root@flexusx-620e software]# which mysqld
/usr/sbin/mysqld
[root@flexusx-620e software]# which mysql
/usr/bin/mysql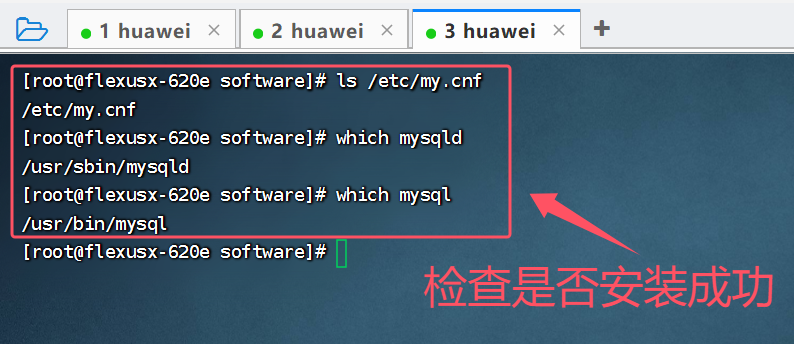
4.启动mysql
安装完成后就可以启动mysql,通过一下命令进行启动,并查看启动是否成功
java
systemctl start mysqld
java
ps ajx | grep mysqld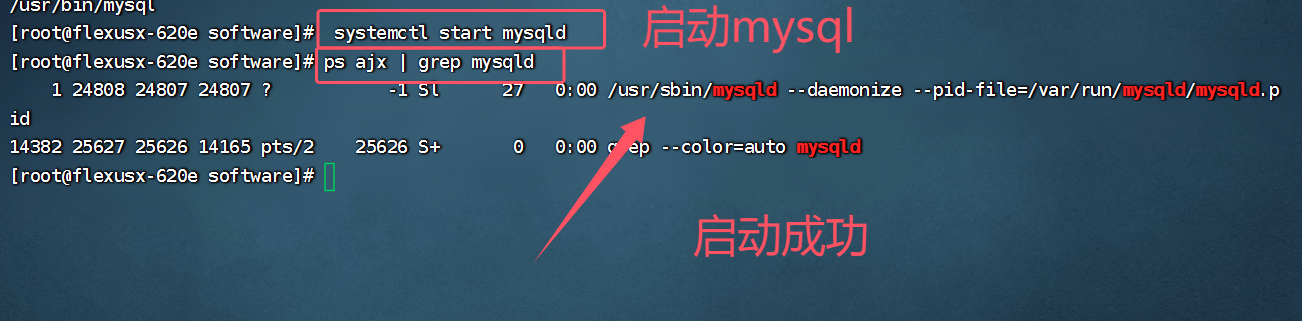
插曲:自动生成密码查看
在mysql安装时,自动生成了密码,可以通过以下命令进行查看
java
grep "password" /var/log/mysqld.log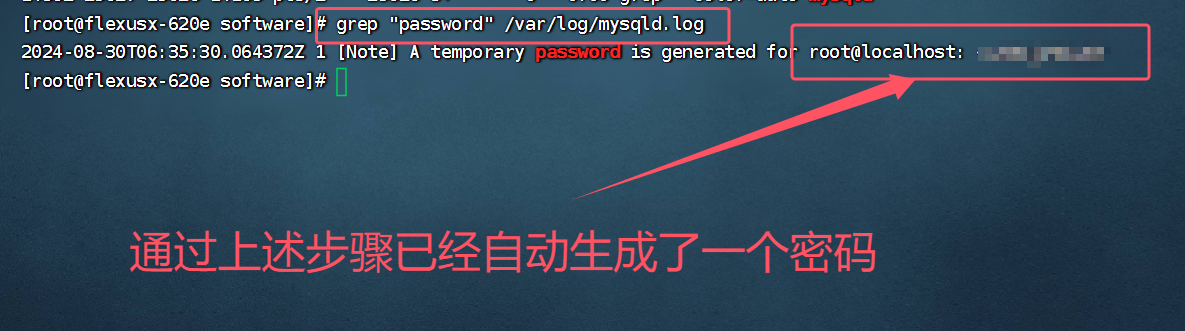
java
ALTER USER USER() IDENTIFIED BY '密码';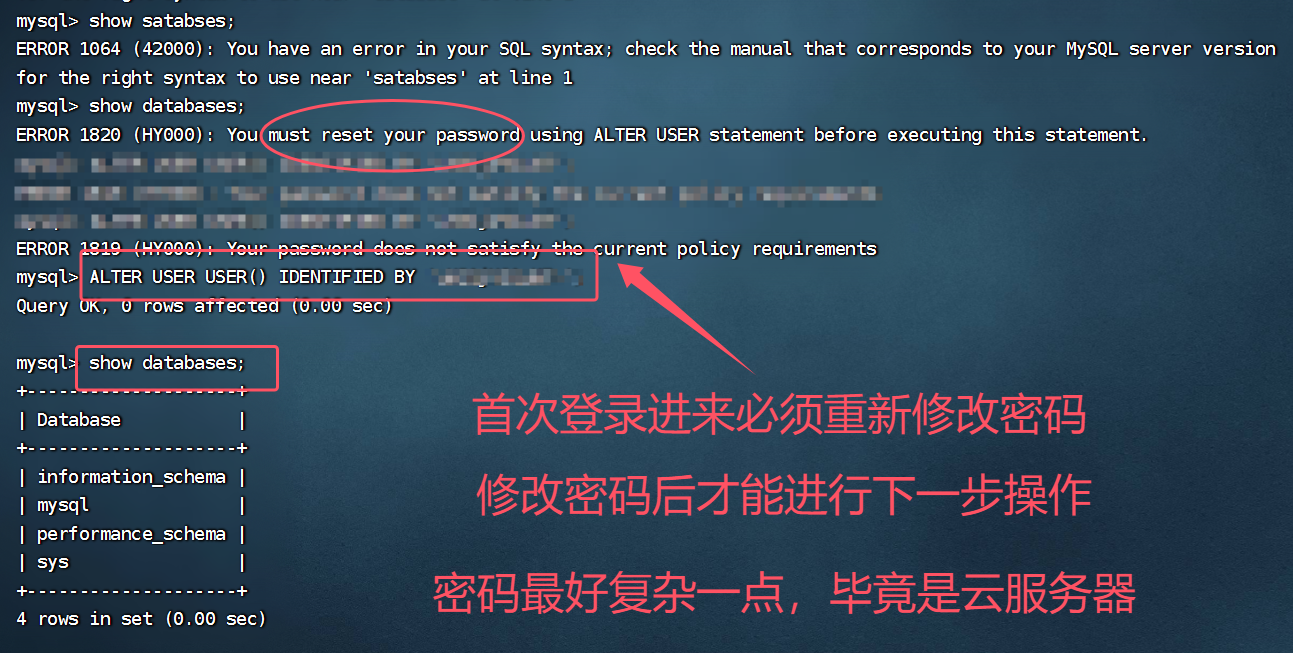
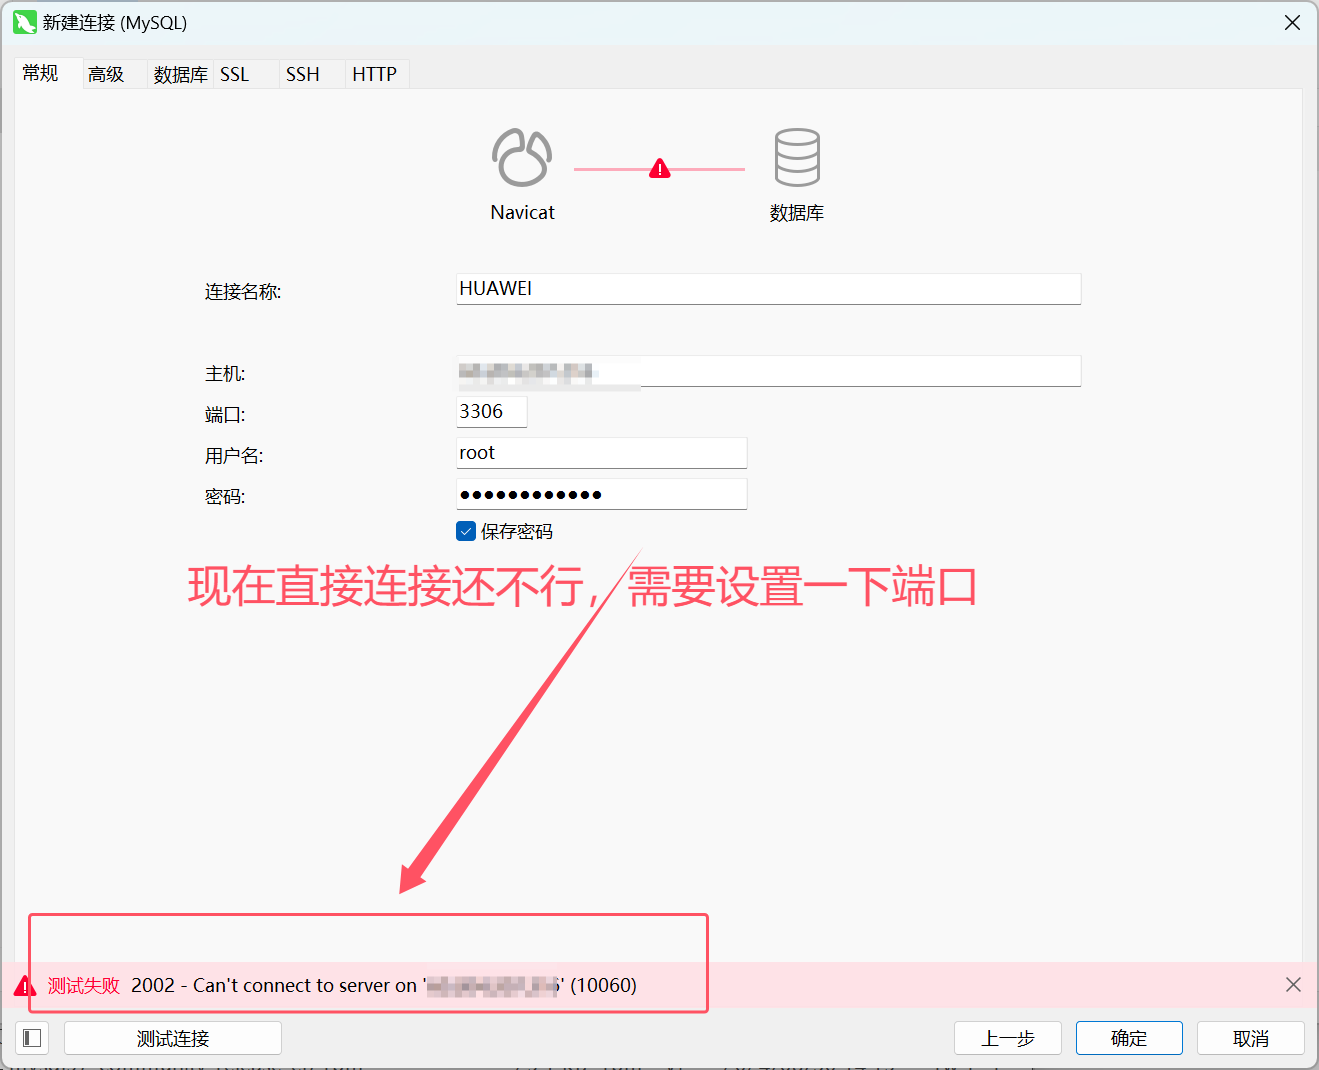
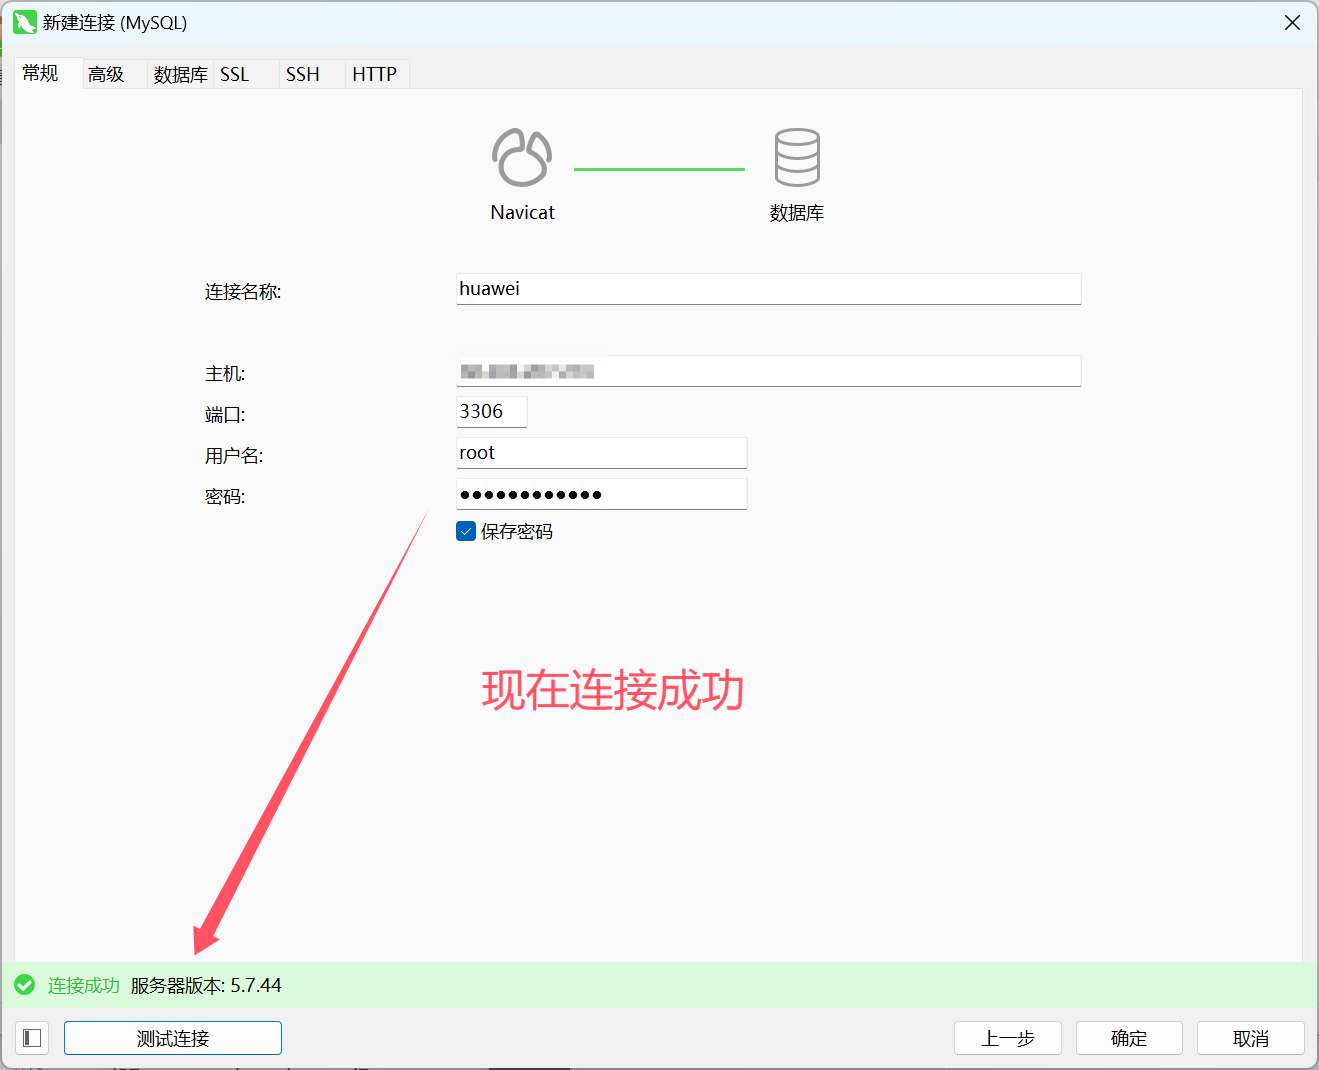
5.Navicat连接
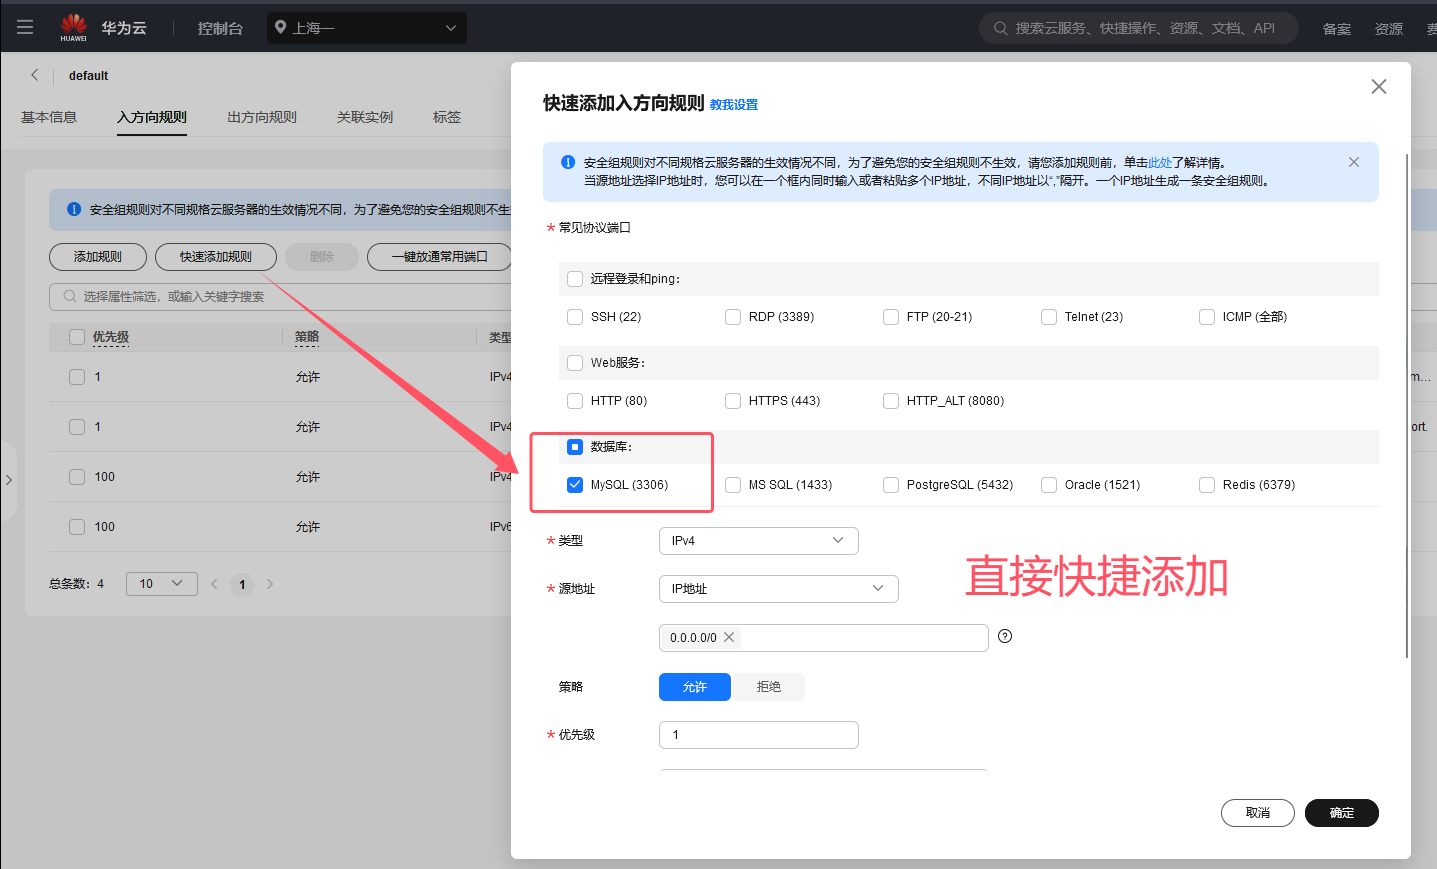
最后当然是用navicat进行远程连接了,需要设置访问端口的权限,并在服务器入口规则中开放端口
这里可以快速添加,方便快捷

需要修改一下访问权限的规则
java
use mysql;
update user set host = '%' where user = 'root';
flush privileges;
exit;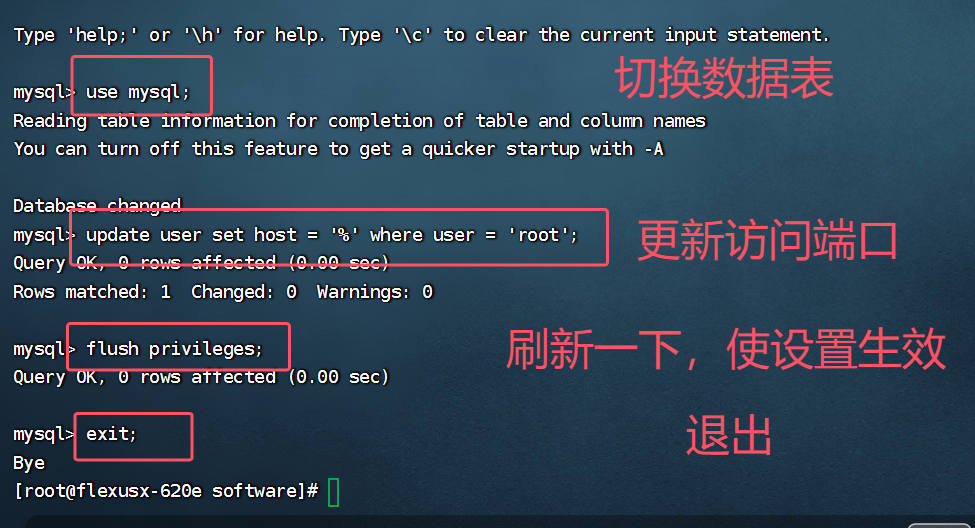
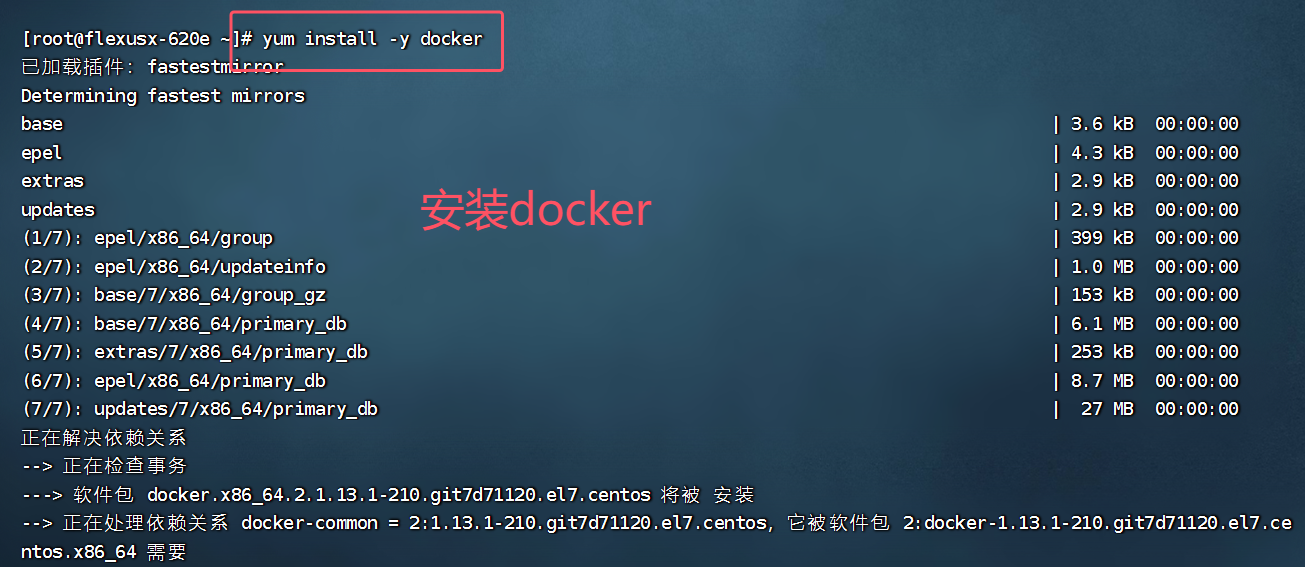
docker安装
注意:不能用yum install -y docker 了
java
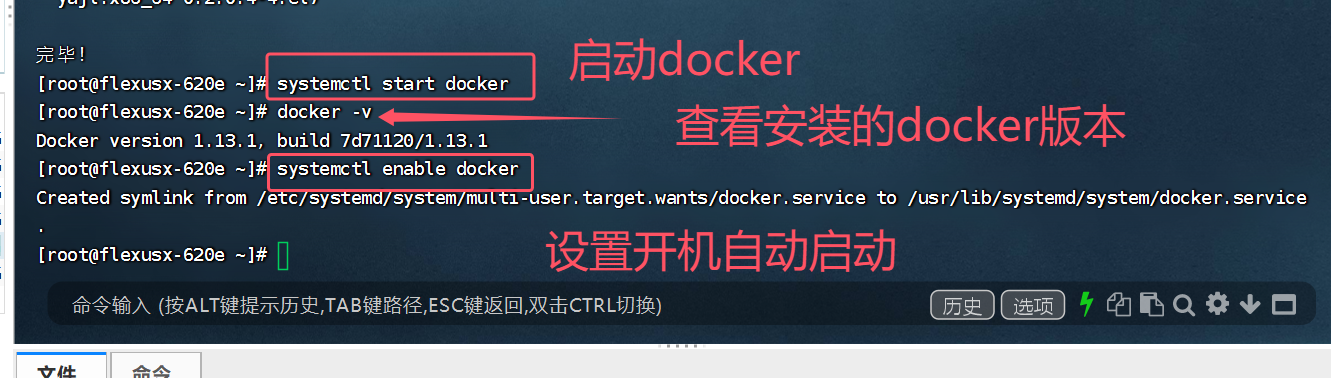
[root@flexusx-620e ~]# systemctl start docker
[root@flexusx-620e ~]# docker -v
Docker version 1.13.1, build 7d71120/1.13.1
[root@flexusx-620e ~]# systemctl enable docker
Created symlink from /etc/systemd/system/multi-user.target.wants/docker.service to /usr/lib/systemd/system/docker.service.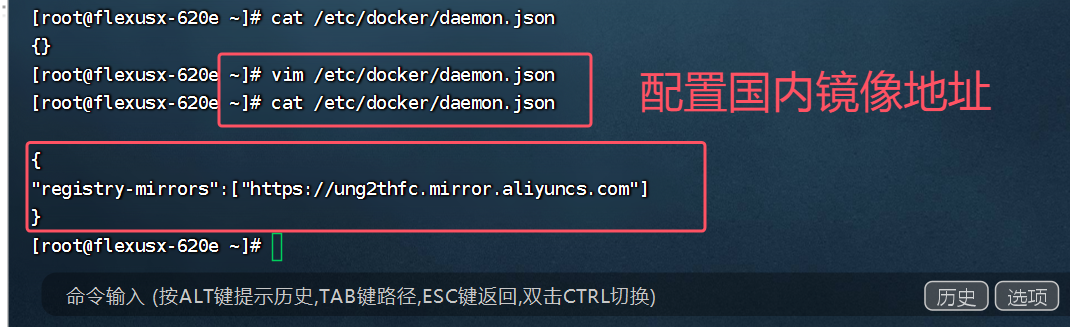
java
[root@flexusx-620e ~]# vim /etc/docker/daemon.json
[root@flexusx-620e ~]# cat /etc/docker/daemon.json

{
"registry-mirrors":["https://ung2thfc.mirror.aliyuncs.com"]
}
[root@flexusx-620e ~]# 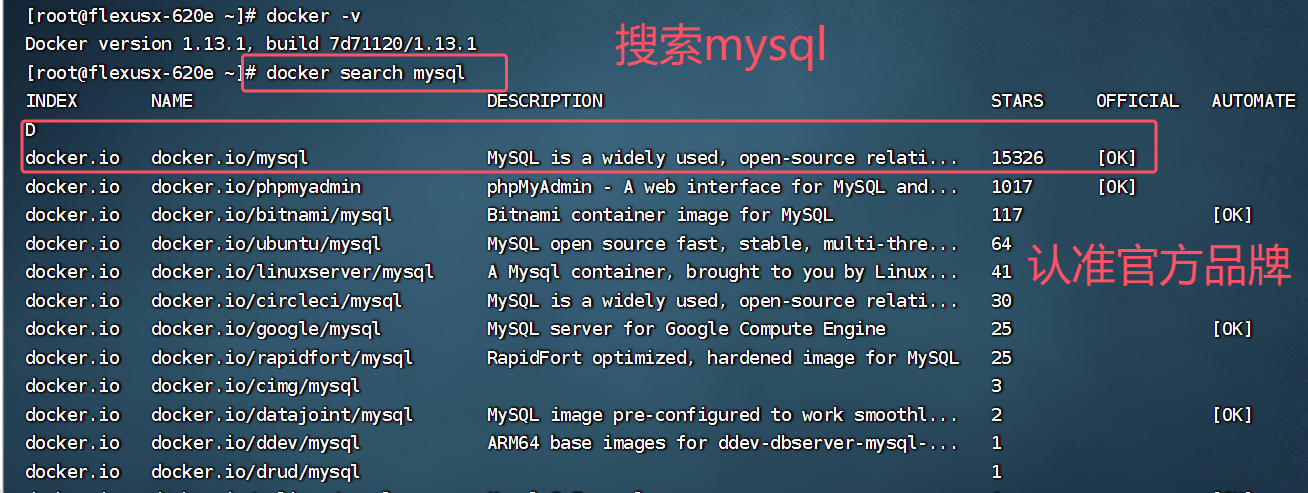
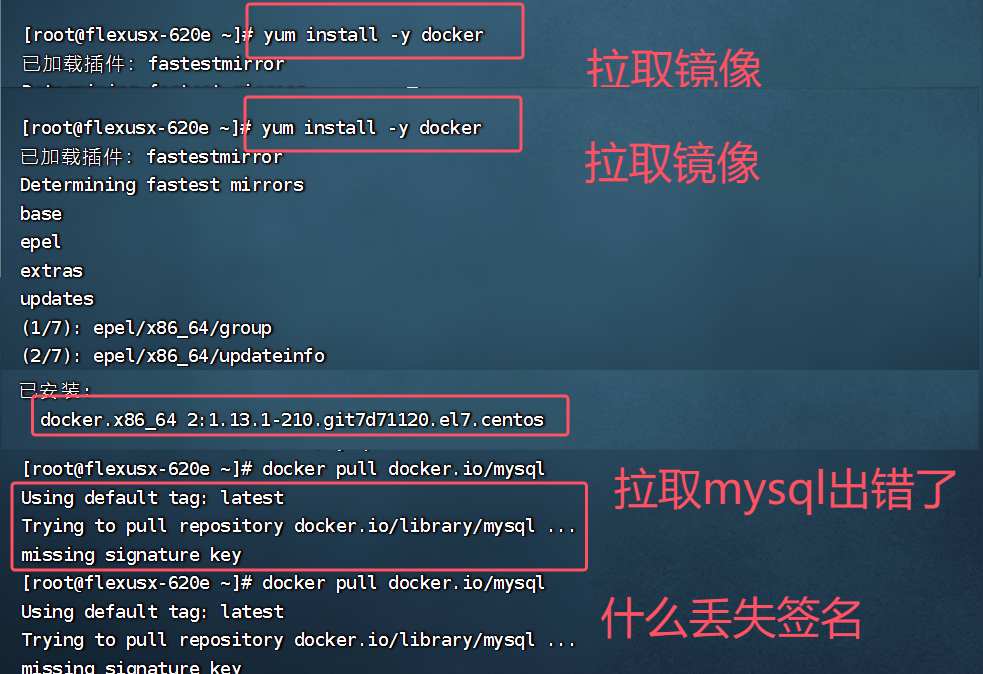
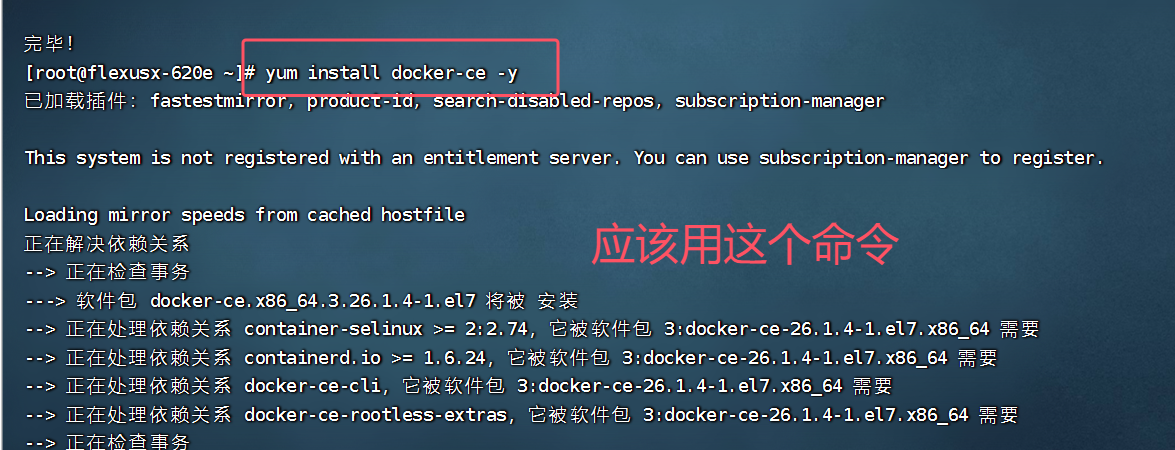
命令:yum install docker-ce -y
总结
4核12G-100G-3M规格的Flexus X实例使用测评第一弹:初识Flexus云服务X实例和参数配置,finalShell远程连接,安装MySQL并配置和远程访问