Java制作可执行jar
方式一:mainClass与lib分离
1)将Java程序依赖的所有jar都拷贝在lib目录下,并添加到classpath中
2)运行时指定MainClass
pom.xml
这个pom.xml生成的jar可双击直接运行,但是因为没有将其依赖的jar都打包在一起,因此用到其他jar的时候会报错,可通过脚本将其他jar添加到环境变量,以脚本启动。
bash
<project xmlns="http://maven.apache.org/POM/4.0.0" xmlns:xsi="http://www.w3.org/2001/XMLSchema-instance" xsi:schemaLocation="http://maven.apache.org/POM/4.0.0 https://maven.apache.org/xsd/maven-4.0.0.xsd">
  <modelVersion>4.0.0</modelVersion>
  <groupId>com.studio</groupId>
  <artifactId>GenLicense</artifactId>
  <version>1.0</version>
  <properties>
        <java.version>1.8</java.version>
        <!-- 工具类相关 -->
        <hutool.version>5.8.23</hutool.version>

         <!-- Maven 相关 -->
        <maven.compiler.source>${java.version}</maven.compiler.source>
        <maven.compiler.target>${java.version}</maven.compiler.target>
        <maven-surefire-plugin.version>3.0.0-M5</maven-surefire-plugin.version>
        <maven-compiler-plugin.version>3.8.1</maven-compiler-plugin.version>
        <git-build-hook-maven-plugin.version>3.4.1</git-build-hook-maven-plugin.version>
        <!-- 项目编码相关 -->
        <project.build.sourceEncoding>UTF-8</project.build.sourceEncoding>
        <project.reporting.outputEncoding>UTF-8</project.reporting.outputEncoding>
    </properties>
    <dependencies>
         <dependency>
            <groupId>cn.com.infosec</groupId>
            <artifactId>licence</artifactId>
            <scope>system</scope>
            <version>1.0</version>
            <systemPath>${basedir}/lib/licence.jar</systemPath>
        </dependency>
         <dependency>
            <groupId>com.formdev</groupId>
            <artifactId>flatlaf</artifactId>
            <version>3.4.1</version>
        </dependency>
    </dependencies>
   <build>
        <plugins>
            <!-- 打包时跳过测试 -->
            <plugin>
                <groupId>org.apache.maven.plugins</groupId>
                <artifactId>maven-surefire-plugin</artifactId>
                <version>${maven-surefire-plugin.version}</version>
                <configuration>
                    <skip>true</skip>
                </configuration>
            </plugin>
            <plugin>
                <groupId>org.apache.maven.plugins</groupId>
                <artifactId>maven-compiler-plugin</artifactId>
                <version>${maven-compiler-plugin.version}</version>
                <configuration>
                    <source>${java.version}</source>
                    <target>${java.version}</target>
                    <encoding>${project.build.sourceEncoding}</encoding>
                </configuration>
            </plugin>
            <plugin>
                <groupId>org.apache.maven.plugins</groupId>
                <artifactId>maven-jar-plugin</artifactId>
                <version>3.2.0</version>
                <configuration>
                  <archive>
                    <manifest>
                      <addClasspath>true</addClasspath>
                      <mainClass>com.studio.MainFrame</mainClass>
                    </manifest>
                  </archive>
                </configuration>
              </plugin>
        </plugins>
        <resources>
        <resource>
            <directory>src/main/resources</directory>
                <includes>
                    <include>**/*</include>
                </includes>
            </resource>
        </resources>
    </build>
</project>

bat脚本
bash
@echo off
title GenLicense

SetLocal EnableDelayedExpansion
set JAVA_HOME="./jdk1.8.0_144"

set PATH=%JAVA_HOME%\bin;%PATH%

set CLASSPATH="%CLASSPATH%;.;./lib/*;"

echo %CLASSPATH%

rem 启动Java服务

%JAVA_HOME%\bin\java com.studio.MainFrame

EndLocal
pause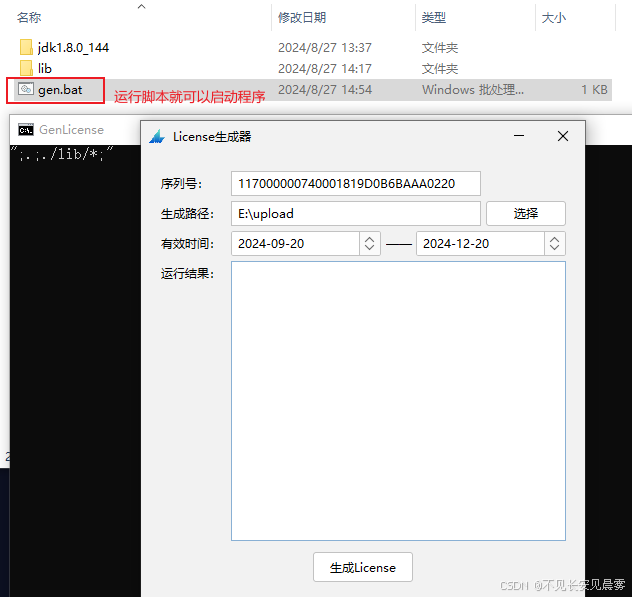
方法二:使用SpringBoot插件将所有依赖都打入同一个jar包
pom.xml
bash
 <plugin>
     <groupId>org.springframework.boot</groupId>
     <artifactId>spring-boot-maven-plugin</artifactId>
     <version>2.7.18</version>
     <executions>
         <execution>
             <goals>
                 <goal>repackage</goal>
             </goals>
         </execution>
     </executions>
     <configuration>
         <mainClass>com.studio.MainFrame</mainClass>
         <includeSystemScope>true</includeSystemScope>
     </configuration>
 </plugin>

exe4j生成EXE
注:需要先将exe4j激活,否则生成的exe运行时会多弹出一个框。
bash
https://exe4j.apponic.com/


注:
1)上述生成exe并运行,本质原理是<Java制作可执行jar的方法一>,方法二不行,因为SpringBoot打出来的jar没有指定mainClass的地方。
2)使用exe4j生成的exe可以直接运行,但需要依赖JDK环境,在search sequence步骤,jdk要以相对路径填入,exe4j并不会将jdk打包,我们借助inno setup将jdk打包到相对路径的位置。
Inno Setup将JDK打入安装包


Inno打包脚本.iss
bash
; 脚本由 Inno Setup 脚本向导 生成!
; 有关创建 Inno Setup 脚本文件的详细资料请查阅帮助文档!

#define MyAppName "License生成器"
#define MyAppVersion "1.0"
#define MyAppPublisher "我的公司"
#define MyAppURL "http://www.example.com/"
#define MyAppExeName "GenLicense.exe"

[Setup]
; 注: AppId的值为单独标识该应用程序。
; 不要为其他安装程序使用相同的AppId值。
; (若要生成新的 GUID,可在菜单中点击 "工具|生成 GUID"。)
AppId={{C6B0667C-0C65-49E7-BEC4-30458967D645}
AppName={#MyAppName}
AppVersion={#MyAppVersion}
;AppVerName={#MyAppName} {#MyAppVersion}
AppPublisher={#MyAppPublisher}
AppPublisherURL={#MyAppURL}
AppSupportURL={#MyAppURL}
AppUpdatesURL={#MyAppURL}
DefaultDirName={autopf}\{#MyAppName}
DisableProgramGroupPage=yes
; 以下行取消注释,以在非管理安装模式下运行(仅为当前用户安装)。
;PrivilegesRequired=lowest
OutputDir=./output2
OutputBaseFilename=GenLicense
SetupIconFile=./icon.ico
Compression=lzma
SolidCompression=yes
WizardStyle=modern

[Languages]
Name: "chinesesimp"; MessagesFile: "compiler:Default.isl"

[Tasks]
Name: "desktopicon"; Description: "{cm:CreateDesktopIcon}"; GroupDescription: "{cm:AdditionalIcons}"; Flags: unchecked

[Files]
Source: "E:\Exe4j\output\GenLicense.exe"; DestDir: "{app}"; Flags: ignoreversion
Source: "C:\Users\user\Desktop\GenLicense\多jar包运行\jdk1.8.0_144\*"; DestDir: "{app}\jdk"; Flags: ignoreversion recursesubdirs createallsubdirs
; 注意: 不要在任何共享系统文件上使用"Flags: ignoreversion"

[Icons]
Name: "{autoprograms}\{#MyAppName}"; Filename: "{app}\{#MyAppExeName}"
Name: "{autodesktop}\{#MyAppName}"; Filename: "{app}\{#MyAppExeName}"; Tasks: desktopicon

[Run]
Filename: "{app}\{#MyAppExeName}"; Description: "{cm:LaunchProgram,{#StringChange(MyAppName, '&', '&&')}}"; Flags: nowait postinstall skipifsilent
注意
1)exe4j生成可执行exe时,需要指定EXE运行时JDK的相对路径
2)inno打包时,JDK需要拷贝到相对路径的位置