如何使用 Gradio 自定义组件,Gradio 前端使用 Svelte,后端使用的 Python。如何自定义一个组件呢?Gadio 提供了类似于脚手架的命令,可以生成需要开发组件的前后和后端代码。
创建组件
运行如下命令,gradio 会自动生成 MyComponent 目录。
gradio cc create MyComponent --template SimpleTextbox
重要的是两个目录,frontend(前端) 和 backend(后端)。打开 mycomponent.py,包括两个主要的方法,preprocess、postprocess,preprocess 处理前端发送到后端时的数据进行处理,postprocess 处理返回到前端的数据。

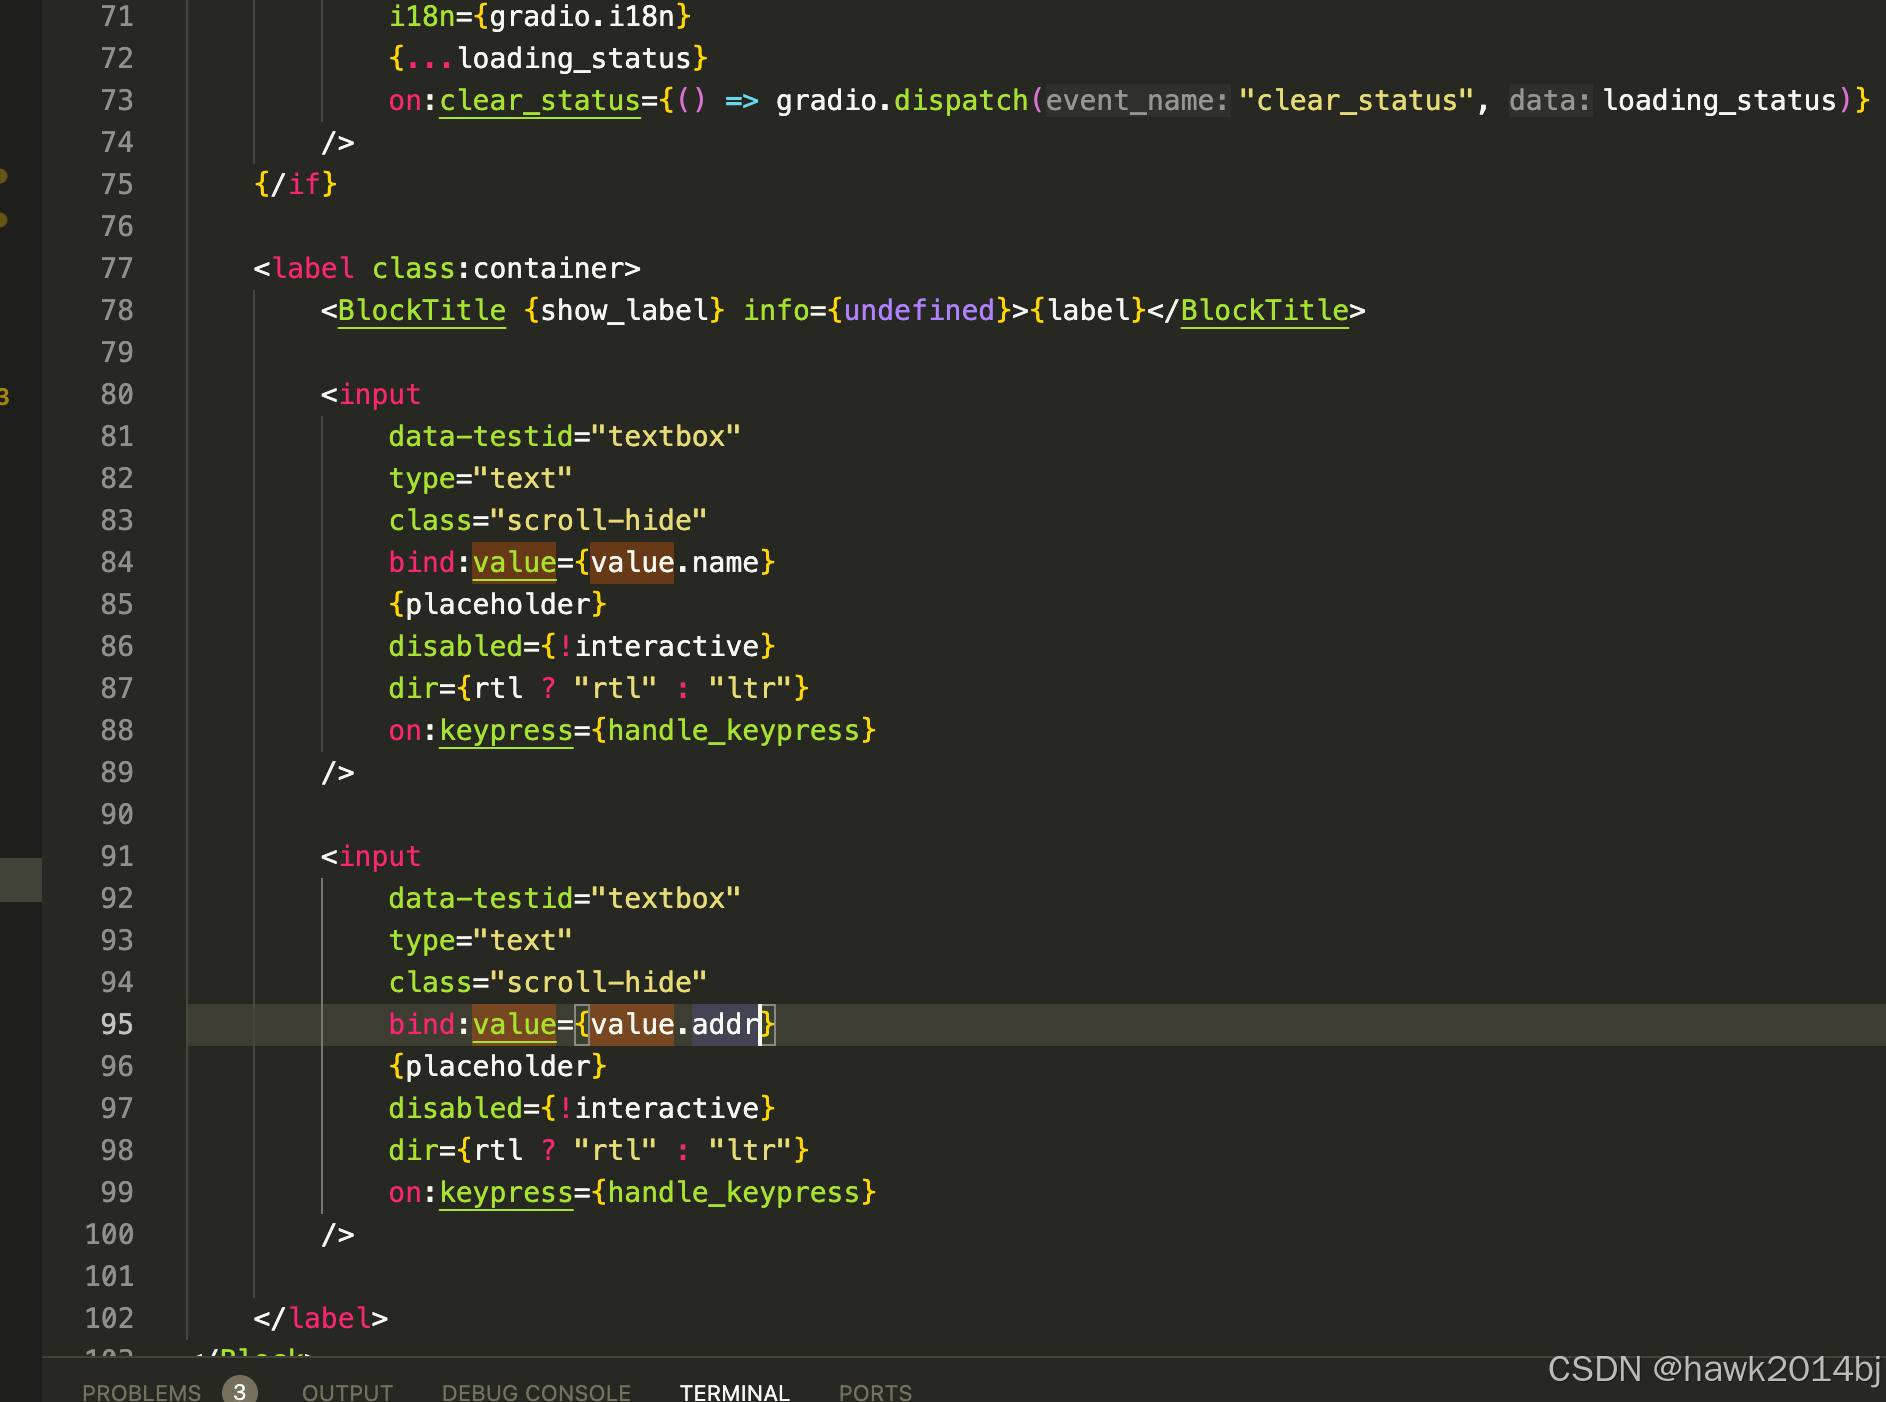
前端包括两个文件,Index.svelte 和 Example.svelte,Index 是组件内容,Example 是显示示例数据的 UI,Example 分为两种,包括 table 和 gallery,Table 用于显示多个数据,Gallery 用于显示单个数据。例如我们在页面加两个Input,在 index.svelte 中添加新加一个 input,数据结构从字符串改为字典。
<svelte:options accessors={true} />

<script lang="ts">
	import type { Gradio } from "@gradio/utils";
	import { BlockTitle } from "@gradio/atoms";
	import { Block } from "@gradio/atoms";
	import { StatusTracker } from "@gradio/statustracker";
	import type { LoadingStatus } from "@gradio/statustracker";
	import { tick } from "svelte";

	export let gradio: Gradio<{
		change: never;
		submit: never;
		input: never;
		clear_status: LoadingStatus;
	}>;
	export let label = "Textbox";
	export let elem_id = "";
	export let elem_classes: string[] = [];
	export let visible = true;
	export let value = {"name":"a1", "addr":"bj"};
	export let value1 = "";
	export let placeholder = "";
	export let show_label: boolean;
	export let scale: number | null = null;
	export let min_width: number | undefined = undefined;
	export let loading_status: LoadingStatus | undefined = undefined;
	export let value_is_output = false;
	export let interactive: boolean;
	export let rtl = false;

	let el: HTMLTextAreaElement | HTMLInputElement;
	const container = true;

	function handle_change(): void {
		gradio.dispatch("change");
		if (!value_is_output) {
			gradio.dispatch("input");
		}
	}

	async function handle_keypress(e: KeyboardEvent): Promise<void> {
		await tick();
		if (e.key === "Enter") {
			e.preventDefault();
			gradio.dispatch("submit");
		}
	}

	$: if (value === null) value = {"name":"a1", "addr":"bj"};

	$: if (value1 === null) value1 = "";

	// When the value changes, dispatch the change event via handle_change()
	// See the docs for an explanation: https://svelte.dev/docs/svelte-components#script-3-$-marks-a-statement-as-reactive
	$: value, handle_change();
</script>

<Block
	{visible}
	{elem_id}
	{elem_classes}
	{scale}
	{min_width}
	allow_overflow={false}
	padding={true}
>
	{#if loading_status}
		<StatusTracker
			autoscroll={gradio.autoscroll}
			i18n={gradio.i18n}
			{...loading_status}
			on:clear_status={() => gradio.dispatch("clear_status", loading_status)}
		/>
	{/if}

	<label class:container>
		<BlockTitle {show_label} info={undefined}>{label}</BlockTitle>

		<input
			data-testid="textbox"
			type="text"
			class="scroll-hide"
			bind:value={value.name}
			{placeholder}
			disabled={!interactive}
			dir={rtl ? "rtl" : "ltr"}
			on:keypress={handle_keypress}
		/>

		<input
			data-testid="textbox"
			type="text"
			class="scroll-hide"
			bind:value={value.addr}
			{placeholder}
			disabled={!interactive}
			dir={rtl ? "rtl" : "ltr"}
			on:keypress={handle_keypress}
		/>

	</label>
</Block>

<style>
	label {
		display: block;
		width: 100%;
	}

	input {
		display: block;
		position: relative;
		outline: none !important;
		box-shadow: var(--input-shadow);
		background: var(--input-background-fill);
		padding: var(--input-padding);
		width: 100%;
		color: var(--body-text-color);
		font-weight: var(--input-text-weight);
		font-size: var(--input-text-size);
		line-height: var(--line-sm);
		border: none;
	}
	.container > input {
		border: var(--input-border-width) solid var(--input-border-color);
		border-radius: var(--input-radius);
	}
	input:disabled {
		-webkit-text-fill-color: var(--body-text-color);
		-webkit-opacity: 1;
		opacity: 1;
	}

	input:focus {
		box-shadow: var(--input-shadow-focus);
		border-color: var(--input-border-color-focus);
		background-color: red;
	}

	input::placeholder {
		color: var(--input-placeholder-color);
	}
</style>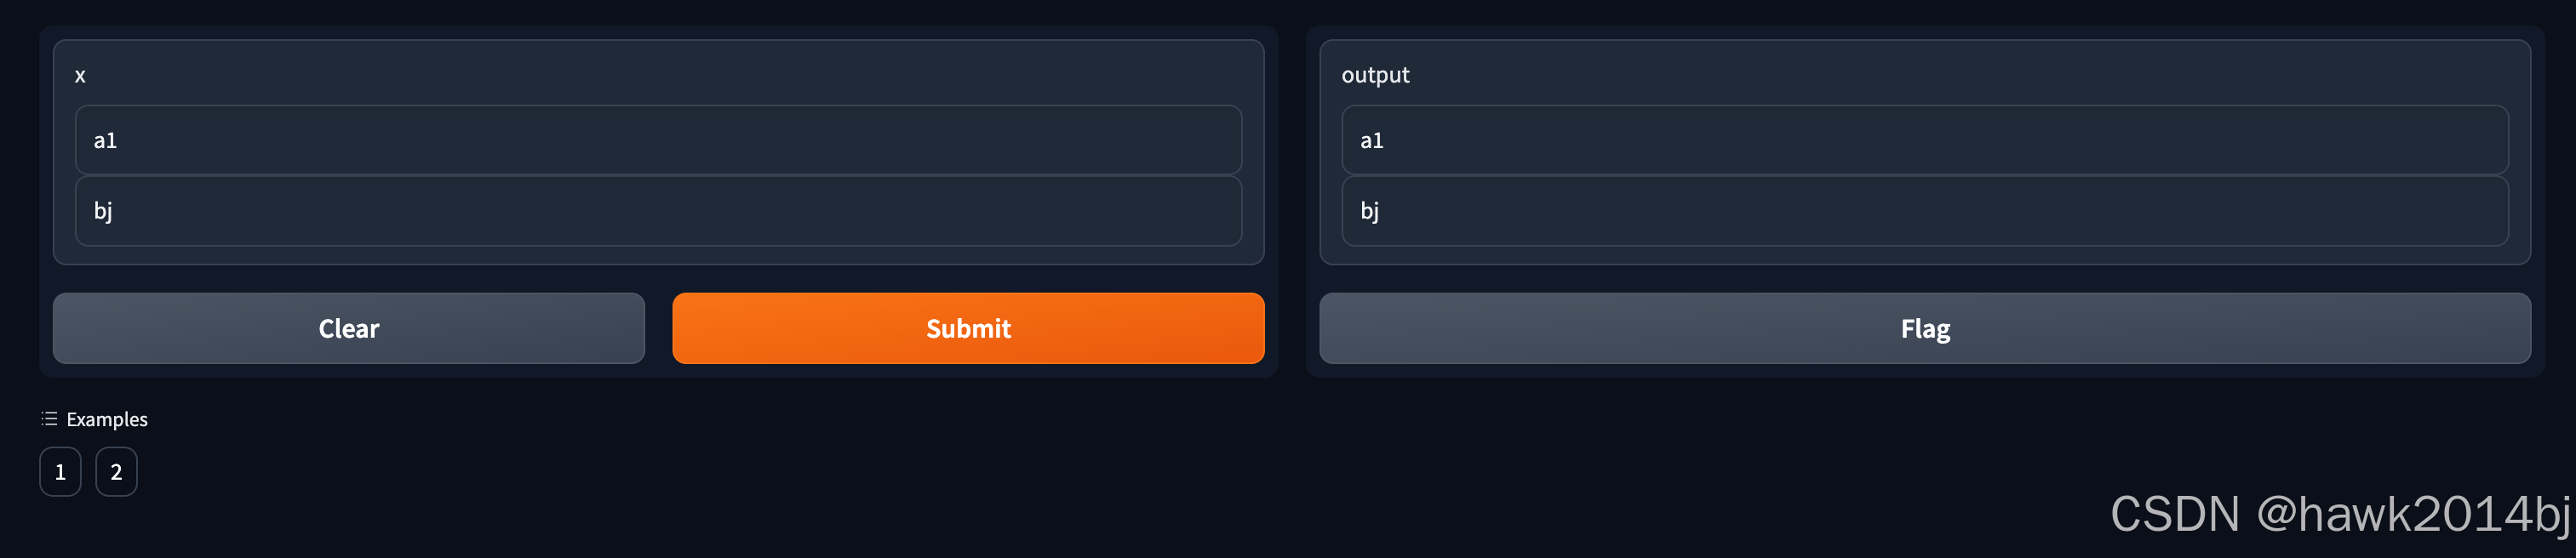
编译 & 发布
## 编译
gradio cc build
## 组件会发布到 Pypi,通过 Pip 进行安装
gradio cc publish
总结
Gradio 组件使用起来很方便,前端使用的是 Svelte,和 Vue 很像,入门的门槛也不高。同时,也可以引入其他三方类库,例如 tailwindcss 等等。