本篇展示hrnet的人体关键点识别的简单前向推理,假设每张图只有一个人的情况下做出的检测推理。可以保存其关键点信息或直接在图中画出关键点可视化查看检测结果。
我是使用openmmlab框架来训练hrnet的,所以以下推理代码中也会调用相关库。若创建环境有问腿可以直接使用我配好的环境直接创建,下载我上传的环境配置文件,直接使用命令conda env create -f environment.yml即可使用这个文件来创建相同的环境。
有的可能包含特定的通道(如conda-forge),确保在你的电脑中也配置了这些通道,或者单独pip install某个包。
python
import os
import json
import numpy as np
from mmpose.apis import init_model, inference_topdown
import cv2

# 配置文件路径和模型路径
config_file = '/home/.../pose_td-hm_hrnet-w48_8xb32-210e_Squat.py'
checkpoint_file = '/home/.../best_coco_AP_epoch_290.pth'

# 初始化姿态估计模型
pose_model = init_model(config_file, checkpoint_file, device='cuda:0')

# 图像文件夹路径
image_folder = ''
output_path = ''

# 处理每一张图像
for image_file in os.listdir(image_folder):
    if os.path.splitext(image_file)[-1] != ".jpg":
        continue
    result = []
    image_path = os.path.join(image_folder, image_file)

    image = cv2.imread(image_path)

    # 确保图像加载成功
    if image is None:
        print(f"Failed to load image {image_file}")
        continue

    # 获取图像宽高
    height, width = image.shape[:2]

    # 假设每张图像中只有一个人,设置边界框为整张图像大小
    person_results = np.array([[0, 0, width, height]])

    # 打印 person_results 确认内容
    print(f"Processing image: {image_file}")
    print(f"Person results: {person_results}")

    # 推理得到关键点坐标
    try:
        pose_results = inference_topdown(pose_model, image, person_results, bbox_format='xyxy')
    except KeyError as e:
        print(f"Error processing image {image_file}: {e}")
        print(f"Person results: {person_results}")
        continue

    # # 打印 pose_results 确认内容
    # print(f"Pose results: {pose_results}")

    # 提取关键点坐标并检查是否检测出17个关键点
    if len(pose_results) > 0 and pose_results[0].pred_instances.keypoints.shape[1] == 17:
        keypoints = pose_results[0].pred_instances.keypoints
        result = {
            'image': image_file,
            'scaleratio': 1,
            'keypoints': keypoints.tolist()
        }
        # results.append(result)
    else:
        print(f"No valid pose results for image {image_file}")

    for key in range(len(result["keypoints"][0])):
        result["keypoints"][0][key].append(1.0)
    # 将结果保存为 JSON 文件
    output_file = os.path.join(output_path, os.path.splitext(image_file)[0] + ".json")
    with open(output_file, 'w') as f:
        json.dump(result, f, indent=4)
    print(f"Results saved to {output_file}")
以上是将检测结果保存为关键点信息,json内容如图:

分为3部分:imagepath为图片的绝对路径;scaleratio为标注时在标注工具的放大倍数(标注工具后面会写);keypoints则为17个关键点的信息,每3个值为一个点,分别是点的xy值及是否被遮挡,若为1则该点没被遮挡,若为2则被遮挡(比如手放膝盖上则膝盖的点被遮挡)。关键点的顺序从鼻子开始到脚踝,从左到右,如图:

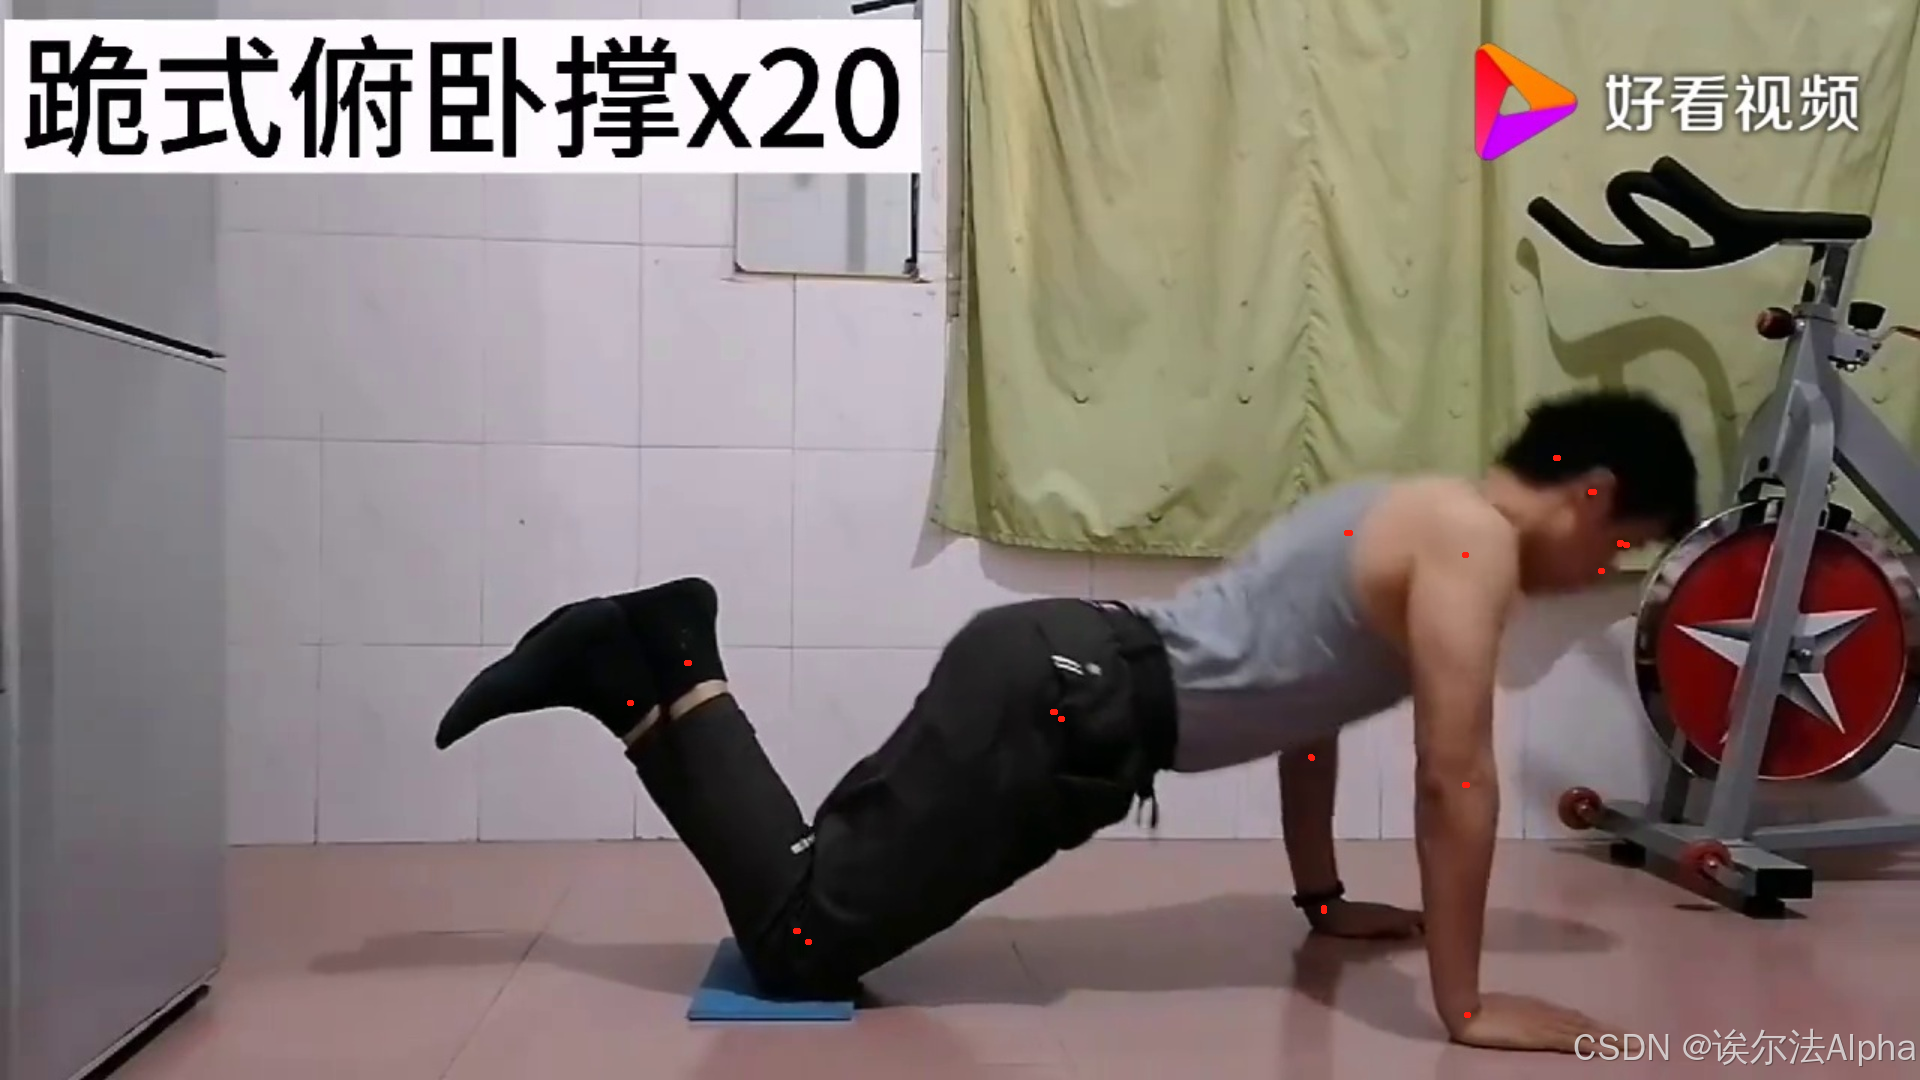
如果想要直接可视化检测结果,可以直接在图上画点,将上面代码的最后一段保存为json的代码替换为以下代码:
python
for point in result["keypoints"][0]:
    cv2.circle(image, (int(point[0]), int(point[1])), 5, (0, 0, 255), -1)
save_path = os.path.join(output_path, os.path.splitext(image_file)[0] + "_point.jpg")
cv2.imwrite(save_path, image)
print(save_path)