我们在上一节介绍了SoftEther的安装,这一节我们介绍它的配置,配置完后,就可以工作啦。接下来我们配置DNS服务器。配置的目的是,拨号连接上的客户端通过这台SoftEtherVPN服务器来访问互连网,当然你也可以设置成访问专网时访问这台SoftEtherVPN服务器,其他流量通过工作站本地互联网访问。如果是后一种则无需要此配置DNS服务器。
一:在SoftEtherVPN服务器安装DNS服务
上一节我们将 VPN 服务器指定为客户端的 DNS 服务器,因此我们需要在 VPN 服务器上运行 DNS 解析器。我们可以安装 bind9 DNS 服务器。
sudo apt install -y bind9安装后,BIND 将自动启动。您可以通过以下方式检查其状态:
systemctl status named使用以下命令启动它:
sudo systemctl start named编辑 BIND DNS 服务器的配置文件。
sudo vim /etc/bind/named.conf.options

#添加以下行以允许 VPN 客户端发送递归 DNS 查询。
allow-recursion { 127.0.0.1; 192.168.30.0/24; };
然后编辑named文件
sudo vim /etc/default/named添加到 以确保 BIND 可以查询根 DNS 服务器。
OPTIONS="-u bind -4"默认情况下,BIND 启用 DNSSEC,我们可以使用以下命令重建托管密钥数据库。
sudo rndc managed-keys destroy
sudo rndc reconfig
重新启动 BIND9 以使更改生效。
sudo systemctl restart named打开 VPN 客户端连接端口 53。
二:Cerbot获取信任TLS证书
使用 Let's Encrypt 证书的优势在于它是免费的、更易于设置并且受到 VPN 客户端软件的信任。
从默认 Ubuntu 存储库安装 Let's Encrypt 客户端 (certbot)
sudo apt install -y certbot要检查版本号,请运行
certbot --version输出:
certbot 2.9.0如果您的 Ubuntu 24.04 VPS 上没有运行 Web 服务器,并且您希望 SoftEther VPN 服务器使用端口 443,那么您可以使用独立插件从 Let's Encrypt 获取 TLS 证书。
sudo certbot certonly --standalone --preferred-challenges http --key-type rsa --agree-tos --email you@example.com -d vpn.example.com参数解释:
certonly:获取证书但不安装它。
--standalone:使用独立插件获取证书
--preferred-challenges http:执行 http-01 质询以验证我们的域,该域将使用端口 80。
--key-type rsa:Let's Encrypt 默认使用 ECDSA 密钥,但 SoftEther 目前支持 RSA 密钥。
--agree-tos:同意 Let's Encrypt 服务条款。
--email:电子邮件地址用于帐户注册和恢复。
-d:指定域名。
成功后的信息如下:
Successfully received certificate.
Certificate is saved at: /etc/letsencrypt/live/vpn.example.com/fullchain.pem
Key is saved at:         /etc/letsencrypt/live/vpn.example.com/privkey.pem
This certificate expires on 2024-09-26.
These files will be updated when the certificate renews.
Certbot has set up a scheduled task to automatically renew this certificate in the background.
- - - - - - - - - - - - - - - - - - - - - - - - - - - - - - - - - - - - - - - -
If you like Certbot, please consider supporting our work by:
 * Donating to ISRG / Let's Encrypt:   https://letsencrypt.org/donate
 * Donating to EFF:                    https://eff.org/donate-le
执行此指令前,请确保域名已正确解析,目前国内的VPS有报错,尚未查明原因,但国外主机都可以一次性成功。
三:Nginx浏览器设置
使用的是 Nginx
sudo vim /etc/nginx/conf.d/vpn.example.com.conf编辑内容如下:
server {
      listen 80;
      server_name vpn.example.com;

      root /var/www/html/;

      location ~ /.well-known/acme-challenge {
         allow all;
      }
}
创建 Web 根目录
sudo mkdir -p /var/www/html

#设置访问权限
sudo chown -R www-data:www-data /var/www/html
重新加载 Nginx 以使更改生效
sudo systemctl reload nginx创建并启用虚拟主机后,运行以下命令以使用 webroot 插件获取 Let's Encrypt 证书。
sudo certbot certonly --webroot --agree-tos --key-type rsa --email you@exmaple.com -d vpn.example.com -w /var/www/html
提示选项,因为前面使用过,所以这里选了2,进行Renew。
四:登录控制台
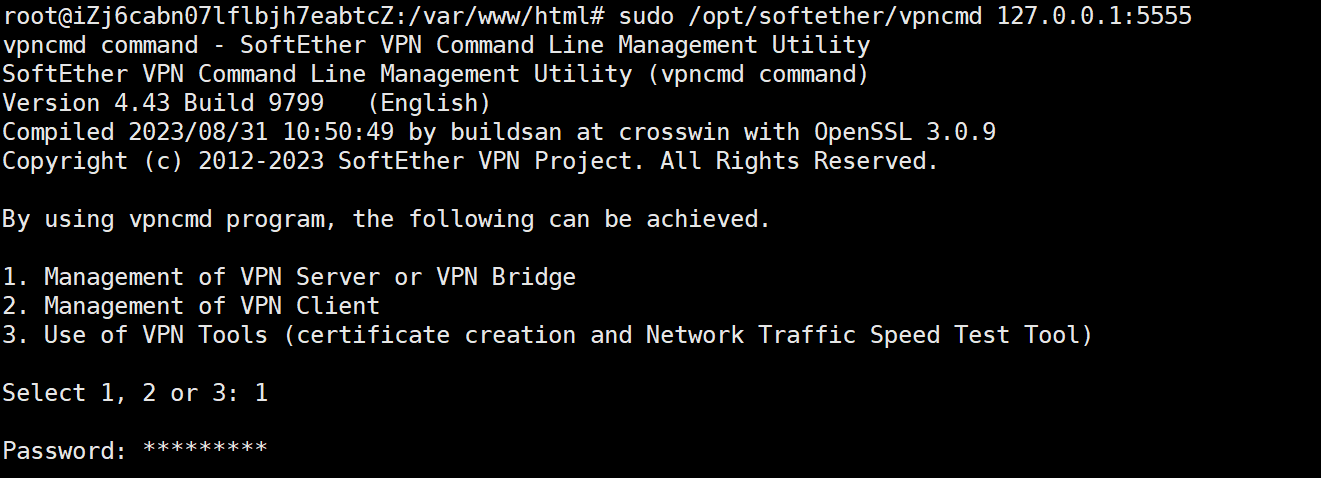
以 root 身份登录 VPN 管理控制台。
sudo /opt/softether/vpncmd 127.0.0.1:5555选择管理 VPN 服务器。您需要输入管理员密码
然后执行以下命令,设置 TLS 证书和 VPN 服务器的私钥。

然后执行以下命令,设置 TLS 证书和 VPN 服务器的私钥。
VPN Server>ServerCertSet输入证书的以下路径。

此信息为前面申请证书时生成证书的路径。
最后,退出管理
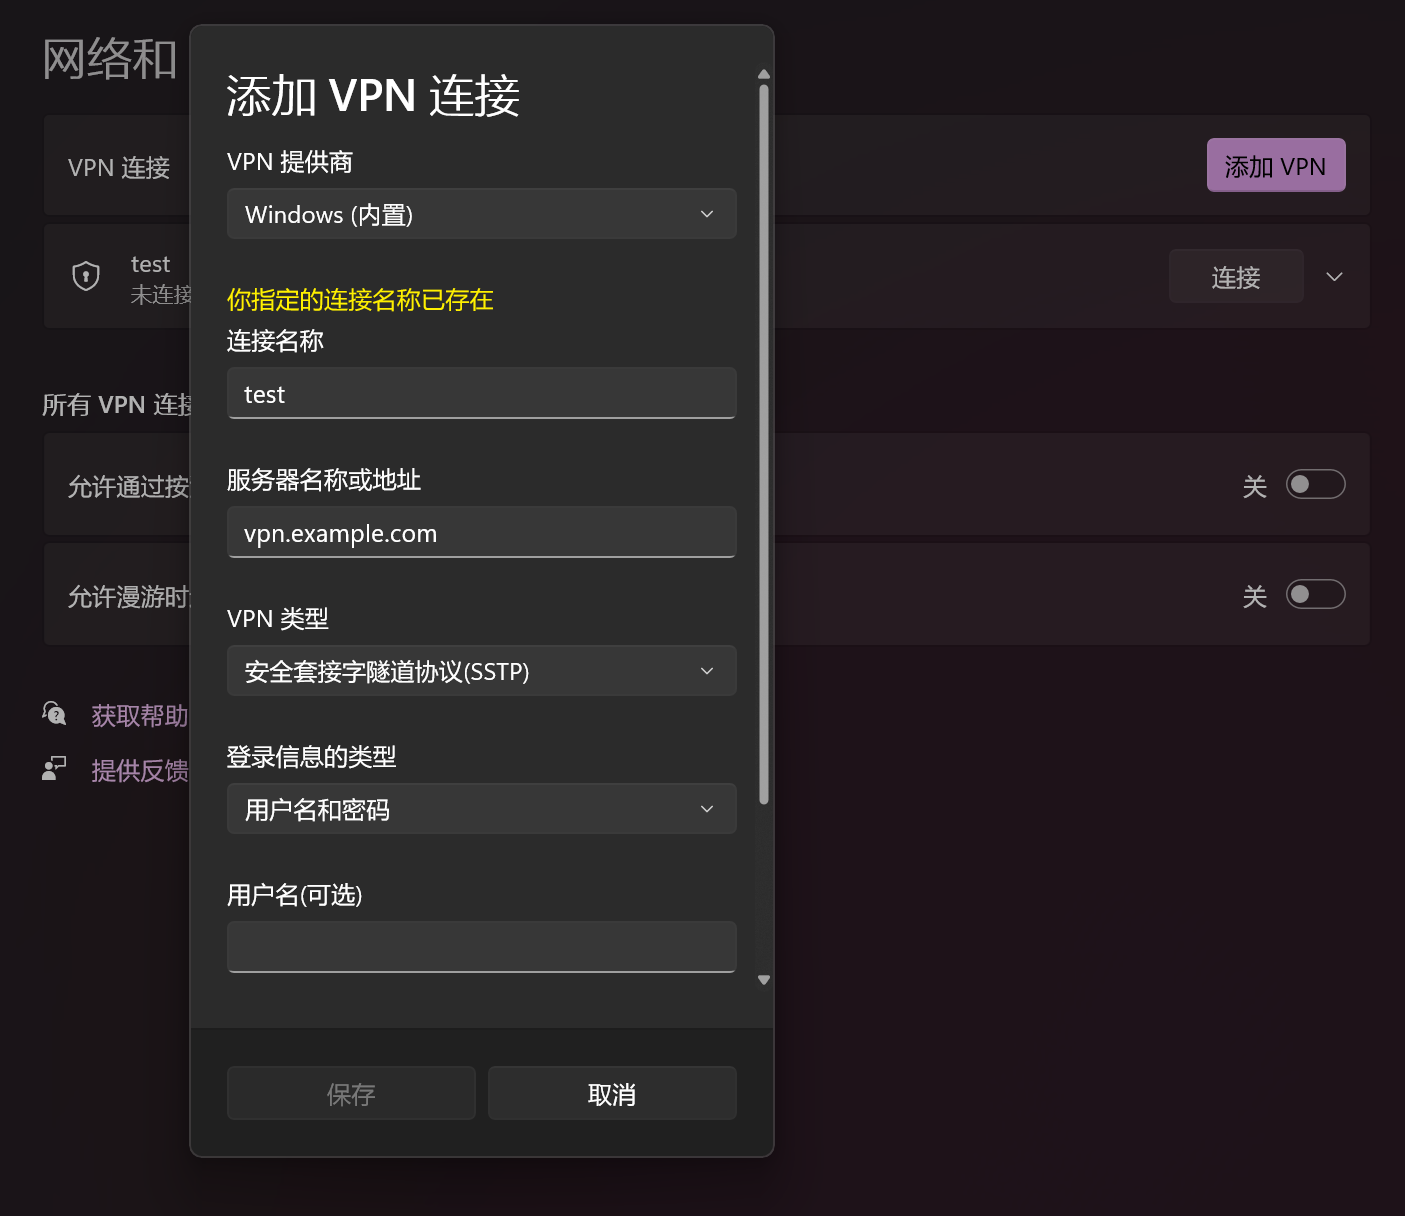
exit五:Win11拨号设置

参数解读:
VPN 提供商:Windows (Built-in)
连接名称:SoftEther
服务器名称或地址:(请不要添加https://前缀)vpn.example.com
VPN 类型:Secure Socket Tunneling Protocol (SSTP)
登录信息类型:username and password
用户名:您的 SoftEther VPN 用户名
Password:您的 SoftEther VPN 密码
六:Ubuntu Linux 安装 SSTP VPN 客户端
1、安装客户端
sudo apt install sstp-client network-manager-sstp2、建立VPN连接
sudo sstpc --cert-warn --save-server-route --user vpn_username --password vpn_password vpn.example.com:443 usepeerdns require-mschap-v2 noauth noipdefault nobsdcomp nodeflate3、设置开机启动
sudo vim /etc/systemd/system/softether-vpnclient.service内容如下:
[Unit]
  Description=SoftEther VPN Client
  After=network-online.target systemd-resolved.service
  Wants=network-online.target

[Service]
  Type=simple
  ExecStart=/usr/sbin/sstpc --cert-warn --save-server-route --user vpn_username --password vpn_password vpn.example.com:443 usepeerdns require-mschap-v2 noauth noipdefault nobsdcomp nodeflate
  ExecStartPost=/bin/bash -c 'sleep 7; route add default ppp0'
  ExecStop=pkill sstpc
  Restart=Always

[Install]
  WantedBy=multi-user.target
其他操作:
#使生效
sudo systemctl enable softether-vpnclient.service

#要停止此 Systemd 服务,请运行
sudo systemctl stop softether-vpnclient.service
非常好用的一个软件,有兴趣的小伙伴可以试试吧。