前言
需求:利用Open3D 开发一款用于点云标注的工具,即按照点云类别赋予不同颜色
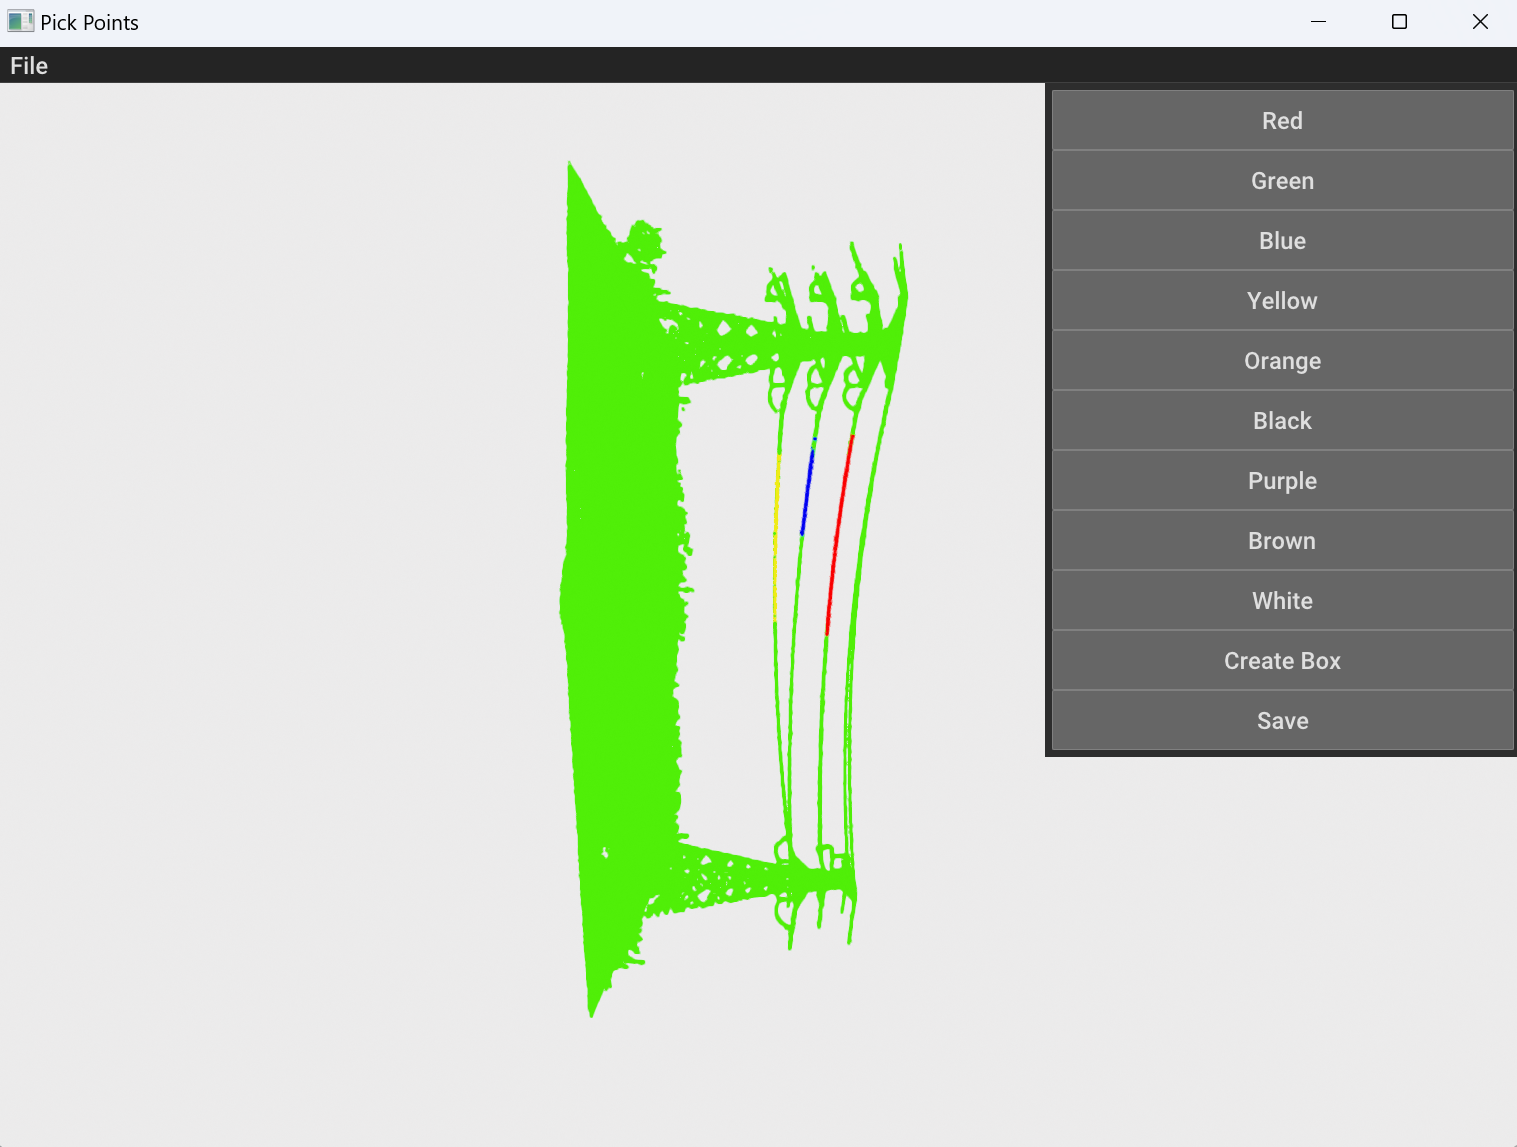
实现效果如下:通过点击颜色面板的不同颜色可以进行颜色切换,在我们选择两个点后,点击Create Box可以创建一个轴对称框体,从而将该框体内的点云设置为对应颜色,点击Save后则可以保存结果。
需求并不复杂,但对于我这个半路出家的门外汉而言,还是有些难度的,这篇博文主要记录一下实现思路与在设计过程中遇到的问题。
窗体创建
我们首先要做的便是创建窗体,这里我们使用的便是Open3D 的GUI接口。
Open3d提供了很多种可视化方案,同时也提供了一个open3d.visualization.gui模块和open3d.visualization.rendering模块用来快速构建小应用。
python
#导入相应模块
import open3d as o3d
import open3d.visualization.gui as gui
import open3d.visualization.rendering as renderingo3d提供所有的Open3d模块,包括常用的模型加载(o3d.io),几何和数据结构(o3d.geometry)等。
gui提供了应用的全局实例(gui.Application.instance),和全部可用的控件。
rendering提供了场景模型渲染的相关部分。
python
class App:
def __init__(self):
# 初始化实例
gui.Application.instance.initialize()
# 创建主窗口
self.window = gui.Application.instance.create_window('My First Window', 800, 600)
# 创建显示场景
self.scene = gui.SceneWidget()
self.scene.scene = rendering.Open3DScene(self.window.renderer)
# 将场景添加到窗口中
self.window.add_child(self.scene)
# 创建一个球
pcd = o3d.io.read_point_cloud("../../data/data.pcd")
material = rendering.MaterialRecord()
material.shader = 'defaultLit'
# 将球加入场景中渲染
self.scene.scene.add_geometry("Sphere", pcd, material)
# 设置相机属性
bounds = pcd.get_axis_aligned_bounding_box()
self.scene.setup_camera(60, bounds, bounds.get_center())
def run(self):
gui.Application.instance.run()
if __name__ == "__main__":
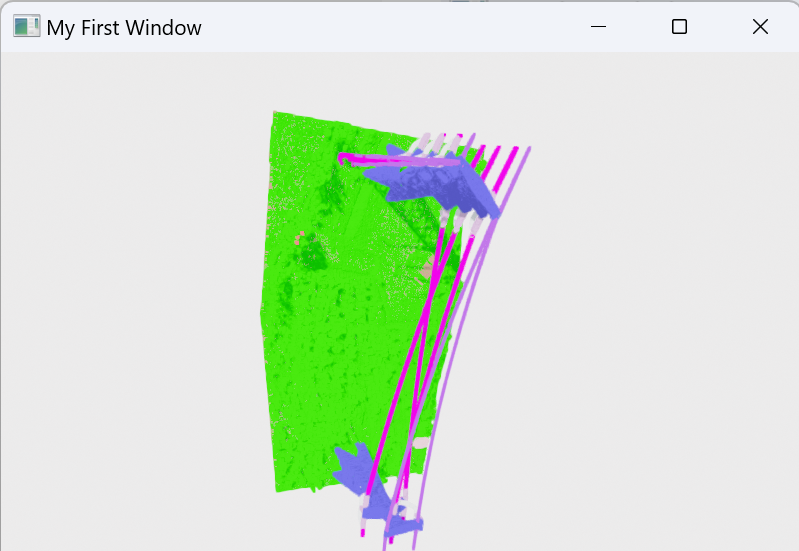
app = App()
app.run()效果如下:
在这里,需要介绍几个用法:
场景渲染
在创建完成窗体后,由于Open3d本身的可视化多采用o3d.visualization.draw_geometries([pcd])的方式,而这种方式会直接弹框,这与我们的需求不符,因此我们采用GUI里面的场景来实现。
可以向窗口里添加一个组件gui.SceneWidget,这个控件是用来展示3D模型的场景。
python
self.scene = gui.SceneWidget()
self.scene.scene = rendering.Open3DScene(self.window.renderer)gui.SceneWidget()返回一个空的组件,所以我们必须为组件添加一个渲染器。这个渲染器可以直接用主窗口的渲染器(即self.window.renderer)来初始化。
之后,我们将创建的控件作为主窗口的子控件添加到应用中。通过调用窗口的add_child()完成。
python
self.window.add_child(self.scene)模型加载
模型加载即将点云文件读取处理,这里我们先随便读入一个文件,这里也可以类比Unity3D的模型,其有材质属性
python
pcd = o3d.io.read_point_cloud("../../data/data.pcd")
material = rendering.MaterialRecord()
material.shader = 'defaultLit'
material.shader= 'defaultLit'表示使用默认的光照模型进行着色。由于光照模型需要法向量信息,所以我们需要计算球顶点的法向量。
之后,便需要将模型加载到场景中
python
self.scene.scene.add_geometry("Sphere", sphere, material)第一个参数是模型的名字,之后可以用这个唯一的名字操作相应的模型(如隐藏该模型)这个很重要。
第二个参数是模型,类型是o3d.geometry.Geometry3D或o3d.geometry.Geometry,
第三个参数是模型材质。
这里关于这个场景,大家可以类比Unity3D中的场景,同时,这里还需要设置相机,这与Unity3D也是相同的,如果没有设置相机,那么就无法显示点云。
设置相机处理标注偏差问题
在加载模型时,为了方便标注,我们首先将所有的点云设置默认色,随后便可以将其渲染到场景中,最后重绘即可。
其代码如下:
python
def load(self, file):
        # 读取模型文件
        filename=file.split("/")
        self.file_name=filename[-1]
        pcd=o3d.io.read_point_cloud(file)
        #设置默认色
        colors=np.asarray(pcd.colors)
        colors[:,:]=[0,1,0]
        self.pcd = o3d.geometry.PointCloud()
        self.pcd.colors = o3d.utility.Vector3dVector(colors)
        material = rendering.MaterialRecord()
        material.shader = 'defaultLit'
        # 将点云加入场景中渲染
        self._scene.scene.add_geometry(self.file_name, self.pcd, material)
		#设置相机
        bounds = self.pcd.get_axis_aligned_bounding_box()
        self._scene.setup_camera(80,bounds,bounds.get_center())
        # 重绘
self._scene.force_redraw()但在我们执行时,博主发现当我们点击后,其标注的点并不是我们点击的地方,然而,当我们自己创建一个模型时,其标注点却是正确的,后来,博主发现,这是由于我们的相机设置的中心点是模型的质心,而我们加载的模型的坐标却并不是规范的,即没有从(0,0,0)原点开始,那么,我们便需要将模型的坐标进行移动,即将其绝对坐标转换为相对坐标,让模型的质心在原点上。
对模型进行规范化即可,代码如下:
python
center=pcd.get_center()
center[2]=0.0
points1=np.asarray(pcd.points)
point3=points1-center
self.pcd.points = o3d.utility.Vector3dVector(np.asarray(point3))
鼠标点击事件
Open3D GUI主要是用于展示3D图像,因此在图像化界面的设计上并不完善,比如,其没有颜色面板、鼠标点击事件的实现也有问题,因此,我们就需要自己来进行事件判断。
首先是对场景添加鼠标事件:
python
self._scene.set_on_mouse(self._on_mouse_widget3d)事件定义如下:
其首先是判断我们的鼠标事件类型,在这里,采用Ctrl+鼠标左键的形式绘制标注点,采用Ctrl+鼠标右键的形式取消标注点
python
def _on_mouse_widget3d(self, event):
        if event.type == gui.MouseEvent.Type.BUTTON_DOWN and event.is_button_down(gui.MouseButton.LEFT) and event.is_modifier_down(gui.KeyModifier.CTRL):

            def depth_callback(depth_image):

                x = event.x - self._scene.frame.x
                y = event.y - self._scene.frame.y

                depth = np.asarray(depth_image)[y, x]

                if depth==1.0:
                    # 远平面(没有几何体)
                    text = ""
                else:
                    #相机视角点云坐标(x,y,z)解投影
                    world = self._scene.scene.camera.unproject(x, y, depth, self._scene.frame.width, self._scene.frame.height)

                    text = "({:.3f}, {:.3f}, {:.3f})".format(world[0],world[1],world[2])

                    idx = self._cacl_prefer_indicate(world)

                    #真实点云坐标(x,y,z)
                    true_point = np.asarray(self.pcd.points)[idx]
                    self._pick_num += 1
                    self._picked_indicates.append(idx)
                    self._picked_points.append(world)

                    print(f"Pick point #{idx} at ({true_point[0]}, {true_point[1]}, {true_point[2]})")
                #画标记点
                def draw_point():
                    self.window.set_needs_layout()

                    if depth != 1.0:
                        colors=np.asarray(self.pcd.colors)
                        colors[idx]=self.color
                        self.pcd.colors=o3d.utility.Vector3dVector(colors)
                        # 标记球
                        sphere = o3d.geometry.TriangleMesh.create_sphere(self.radius)#球半径
                        sphere.paint_uniform_color(self.color)
                        print(self.color)
                        sphere.translate(world)
                        material = rendering.MaterialRecord()
                        material.shader = 'defaultUnlit'
                        self._scene.scene.add_geometry("sphere"+str(self._pick_num),sphere,material)
                        self._scene.force_redraw()

                gui.Application.instance.post_to_main_thread(self.window, draw_point)

            self._scene.scene.scene.render_to_depth_image(depth_callback)
            return gui.Widget.EventCallbackResult.HANDLED
        #取消选择
        elif event.type == gui.MouseEvent.Type.BUTTON_DOWN and event.is_button_down(gui.MouseButton.RIGHT) and event.is_modifier_down(gui.KeyModifier.CTRL):
            if self._pick_num > 0:
                idx = self._picked_indicates.pop()
                point = self._picked_points.pop()
                #切换颜色,将颜色改为原始颜色,即恢复,完成后再恢复颜色
                current_color=self.color
                self.color=[0.0,1.0,0.0]
                self._cacl_prefer_indicate(point)
                self.color=current_color
                print(f"Undo pick: #{idx} at ({point[0]}, {point[1]}, {point[2]})")

                self._scene.scene.remove_geometry('sphere'+str(self._pick_num))
                self._pick_num -= 1
                #self._scene.remove_3d_label(self._label3d_list.pop())
                self._scene.force_redraw()
            else:
                print("Undo no point!")
            return gui.Widget.EventCallbackResult.HANDLED
        return gui.Widget.EventCallbackResult.IGNORED
绘制球体做标注点(球体标注法)
在博主刚开始设计时,受 PS 中橡皮擦的启发,博主想要采用绘制一个球体的形式进行标注,即在球体内部的作为一个类别,但这种方式过于粗暴,效果并不理想,但这种方式也可以用于显示我们的点击位置,因此便保留了下来。
具体,先创建一个 KD 树,随后在创建一个固定半径的球体,将在该球体内的点云设置为对应颜色,代码如下
python
def _cacl_prefer_indicate(self, point):
pcd = copy.deepcopy(self.pcd)
#point是点击的坐标
pcd.points.append(np.asarray(point))
#采用加点的方式来获取周围点,所加入的点在最后一位
pcd_tree = o3d.geometry.KDTreeFlann(pcd)
[k, idx, _]=pcd_tree.search_radius_vector_3d(pcd.points[-1], self.radius)
#设置颜色
colors=np.asarray(self.pcd.colors)
colors[idx[1:], :]=self.color
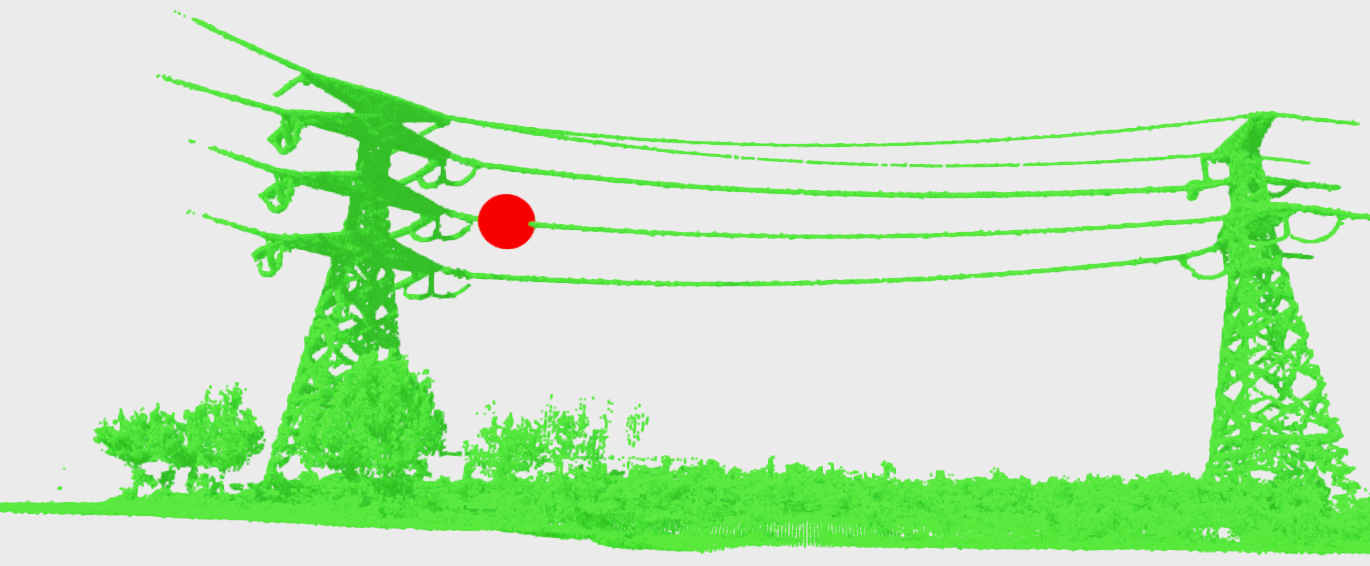
self.pcd.colors = o3d.utility.Vector3dVector(colors)效果如下,这里博主为了展示,球体半径设置的很大
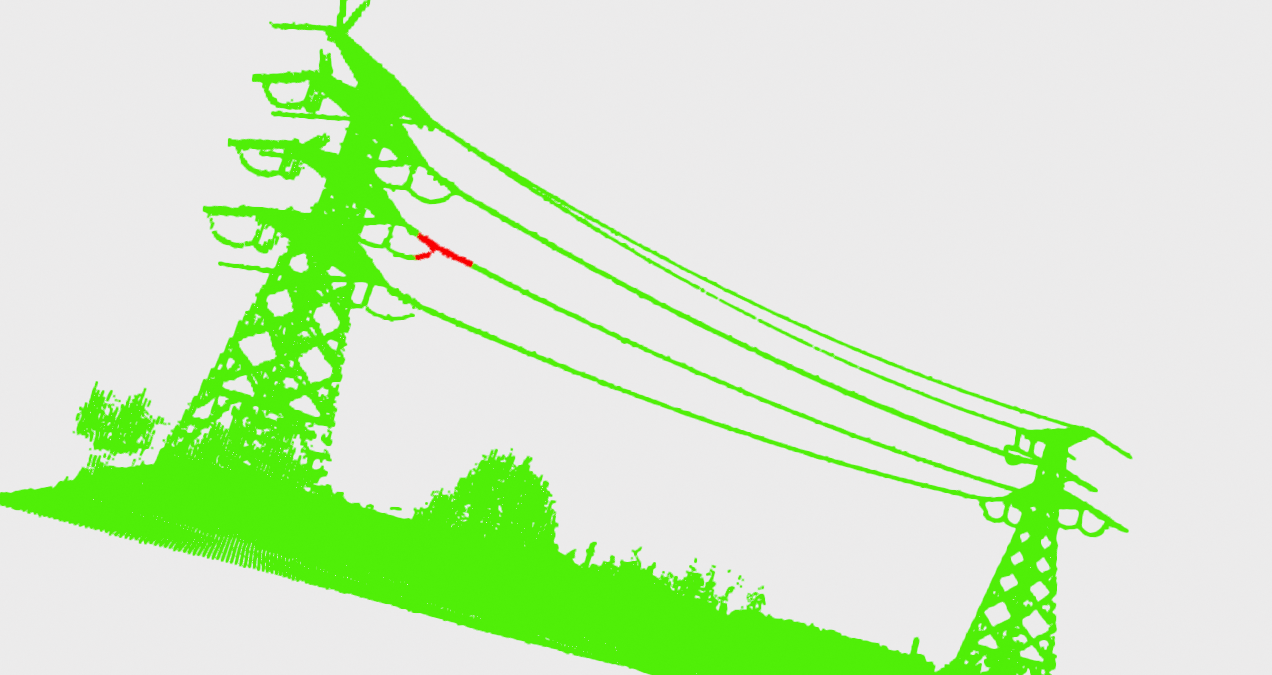
其标注后的效果如下,当然如果我们需要精确标注的话,可以将球体半径调小。
AABB框选标注法
前面已经说到,这种球体标注的形式在需要标注很多数据时,不能达到较好的效果,因此,我们可以采用框体标注的形式,这里,我们使用Open3D中的AABB框选来进行标注。
效果如下:
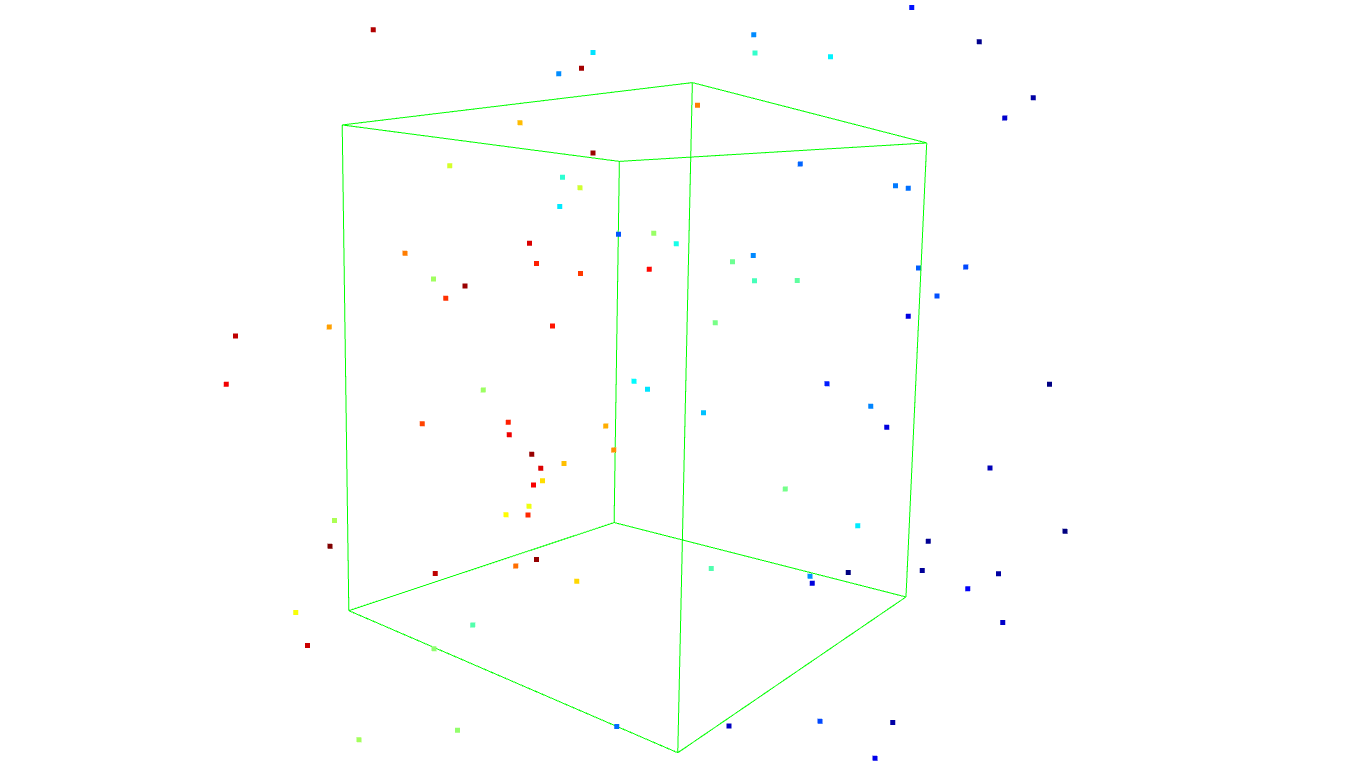
那么,该如何实现呢,其实很简单,只需要获取到两个点云坐标点即可,将其输入,便可以绘制一个轴对称框体。
我们给Create_box按钮绑定一个事件,当点击后,执行如下操作:
- 获取两个点击点,并绘制轴对称框体
- 获取在该框体内的点云坐标点,并将其设置为对应颜色
- 删除球体(标注点),重新加载点云图像
python
def on_button_box(self):
        min_bound = np.array(self._picked_points[-1])
        max_bound = np.array(self._picked_points[-2])
        aabb = o3d.geometry.AxisAlignedBoundingBox(min_bound, max_bound)
        # 初始化一个空列表来存储位于AABB内的点的索引
        # 遍历点云中的每个点,并检查它是否在AABB内
        indices_inside=aabb.get_point_indices_within_bounding_box(self.pcd.points)
        colors=np.asarray(self.pcd.colors)
        colors[indices_inside[:], :]=self.color
        self.pcd.colors = o3d.utility.Vector3dVector(colors)
        material = rendering.MaterialRecord()
        material.shader = 'defaultUnlit'
        self._scene.scene.remove_geometry(self.file_name)
        self._scene.scene.remove_geometry("sphere"+str(self._pick_num))
        self._scene.scene.remove_geometry("sphere"+str(self._pick_num-1))
        self._scene.scene.remove_geometry(self.file_name)
        self._scene.scene.add_geometry(self.file_name, self.pcd, material)
        self._scene.force_redraw()
文件打包
当我们利用python完成开发后,为了使其具有更好的跨平台性,我们一般需要将其转换exe文件。
在这里,我们可以借助一些工具来实现,其中最常用的是 PyInstaller。PyInstaller 是一个流行的 Python 打包工具,它能够将 Python 脚本及其依赖项打包成一个独立的可执行文件。
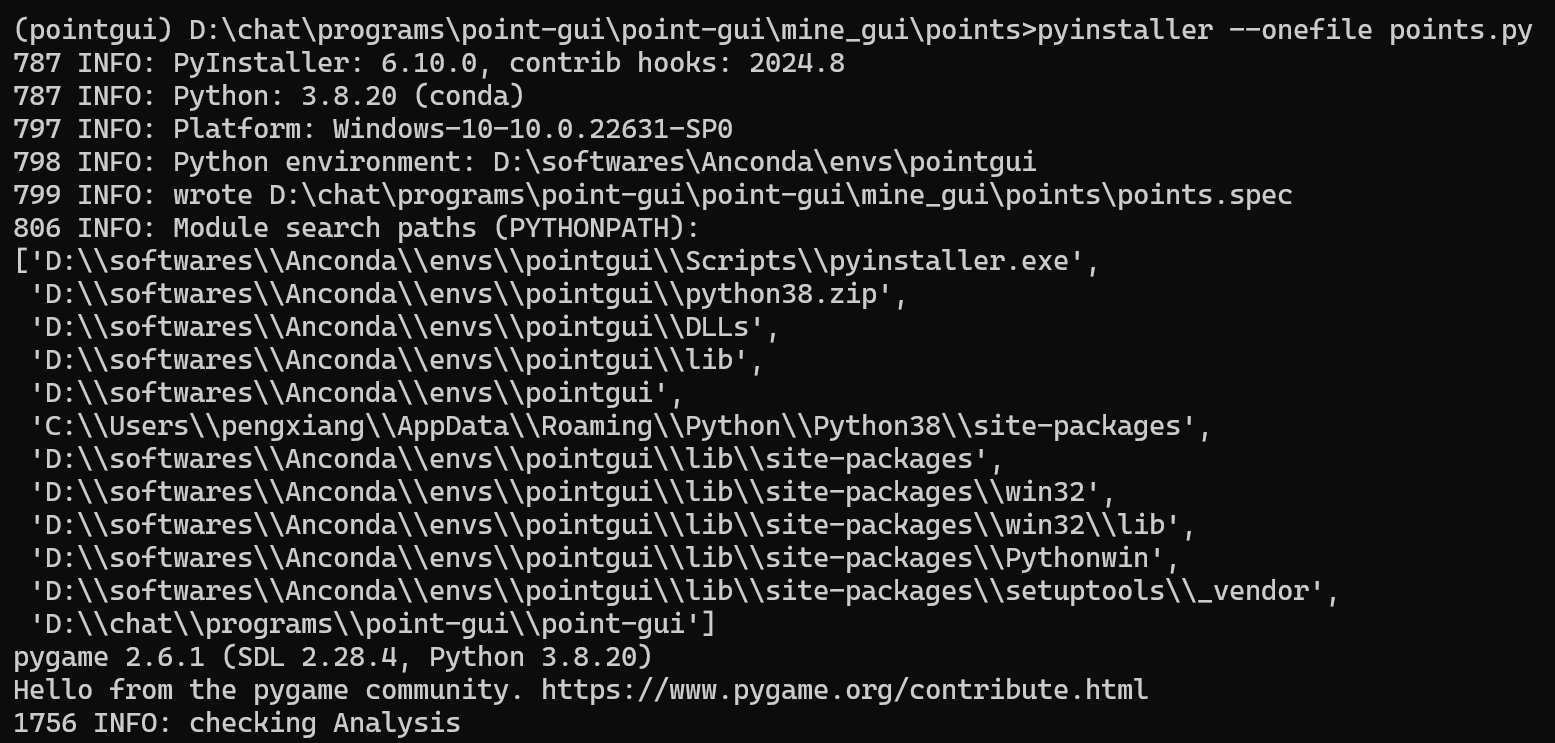
生成的可执行文件如下:
