MySQL数据库
P1 数据库的作用 2022/6/19
1.简介
MySQL是一个**关系型数据库管理系统** ,由瑞典MySQL AB(https://baike.baidu.com/item/MySQL AB/2620844) 公司开发,属于 Oracle 旗下产品。MySQL 是最流行的关系型数据库管理系统之一,在 WEB 应用方面,MySQL是最好的 RDBMS (Relational Database Management System,关系数据库管理系统) 应用软件之一。
MySQL是一种关系型数据库管理系统,关系数据库将数据保存在不同的表中,而不是将所有数据放在一个大仓库内,这样就增加了速度并提高了灵活性。
2.简单原理图
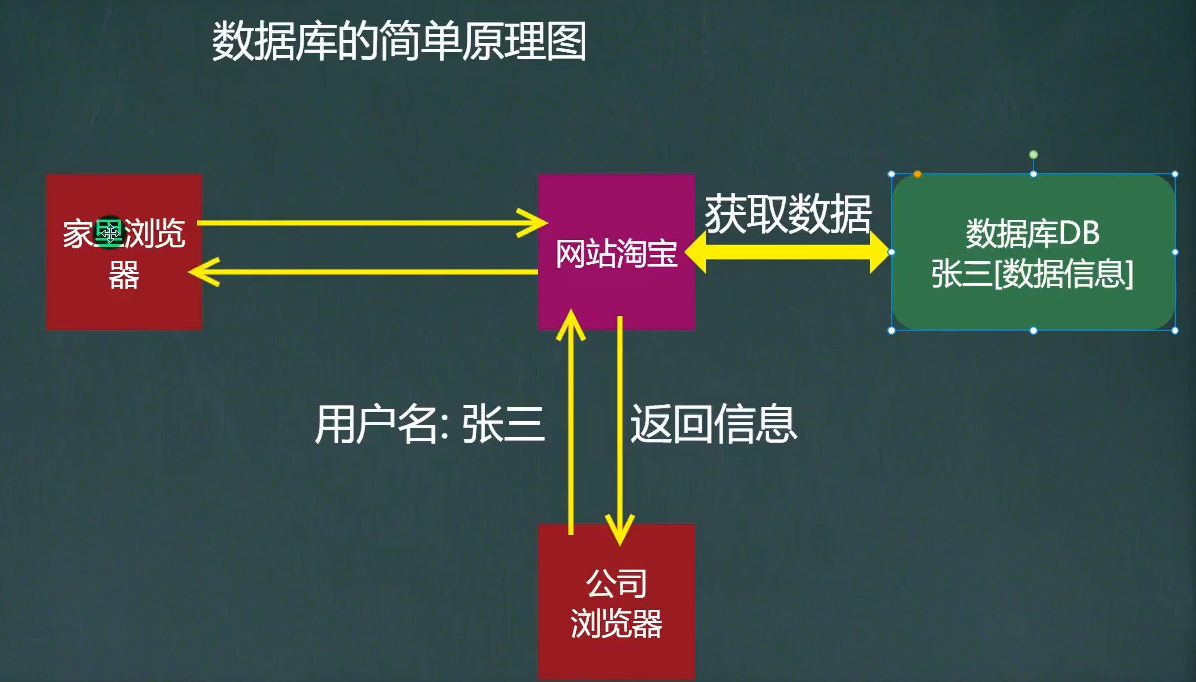
P2 MySQL5.7 的安装配置 2022/6/19
1.下载链接
MySQL 5.7:https://dev.mysql.com/get/Downloads/MySQL-5.7/mysql-5.7.19-winx64.zip
注意 :如果安装过程中出现错误,需要删除则需要执行此命令sc delete mysql
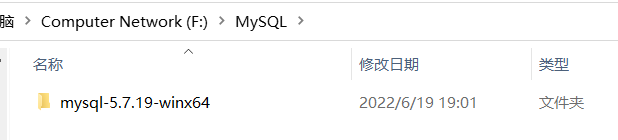
2.解压到文件夹
(1)不可以有中文目录或者空格
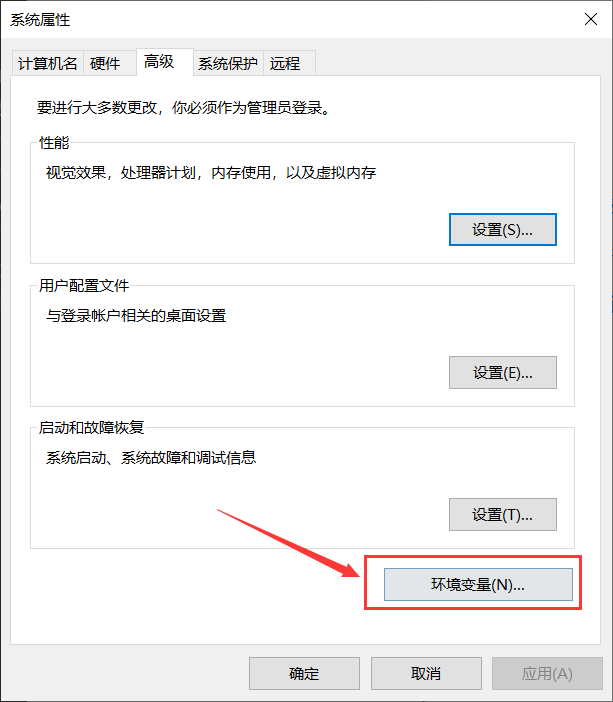
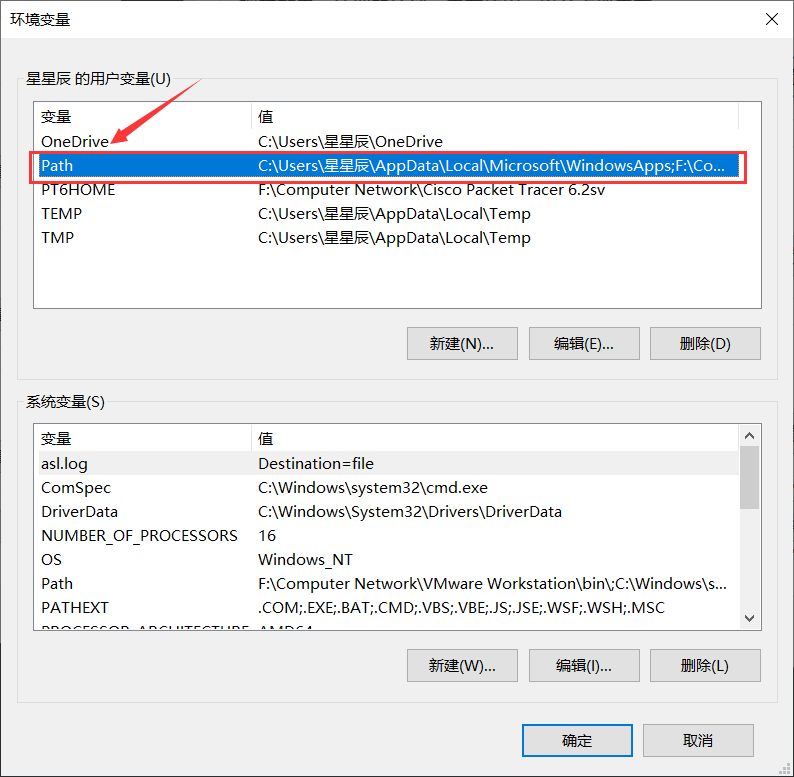
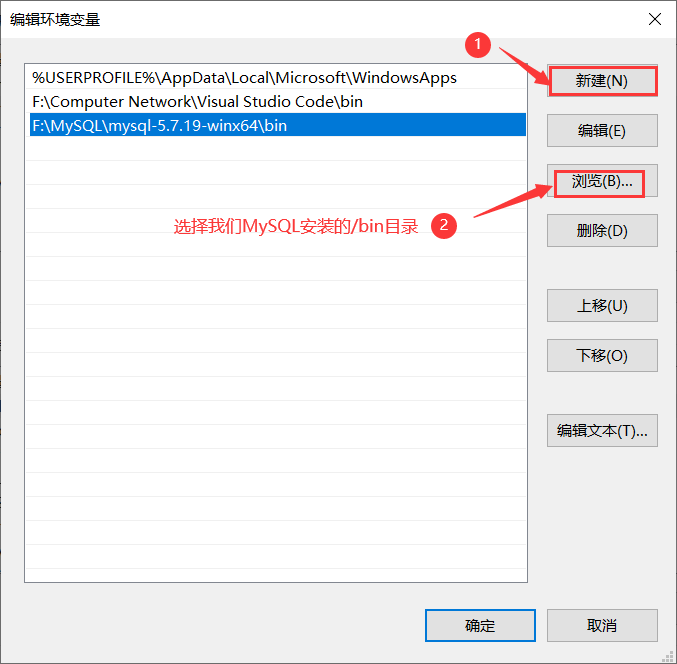
3.添加环境变量
添加目的:让我们更方便的在任意一个目录下都可以操作我们MySQL的相关指令
步骤:

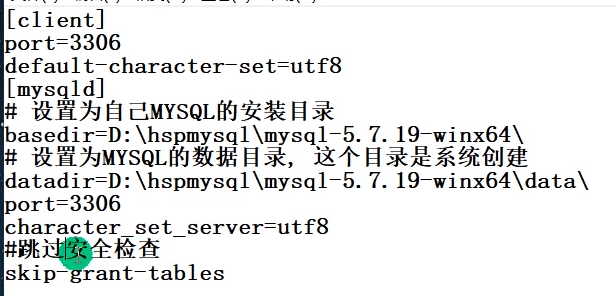
4.在安装目录中创建文件my.ini
- 添加如下内容
bash
[ client ]
# 设置mysql客户端连接服务端时默认使用的端口
port=3306
default-character-set=utf8
[ mysqld ]
# 设置为自己MySQL的安装目录
basedir=F:\MySQL\mysql-5.7.19-winx64\
# 设置为MySQL的数据目录,这个目录是系统创建
datadir=F:\MySQL\mysql-5.7.19-winx64\data\
# 设置3306端口
port=3306
# 服务端使用的字符集默认为UTF8
default-character-set=utf8
# 跳过安全检查
skip-grant-tables
5.CMD执行安装
- 需要管理员运行cmd,使用cd切换到安装\bin目录下,

- 提示安装成功

部分系统进入目录指令不同

6.初始化数据库
bash
F:\MySQL\mysql-5.7.19-winx64\bin>mysqld --initialize-insecure --user=mysql
# 执行此条命令,然后会生成一个data文件夹,里面需要有文件和文件夹才算初始化成功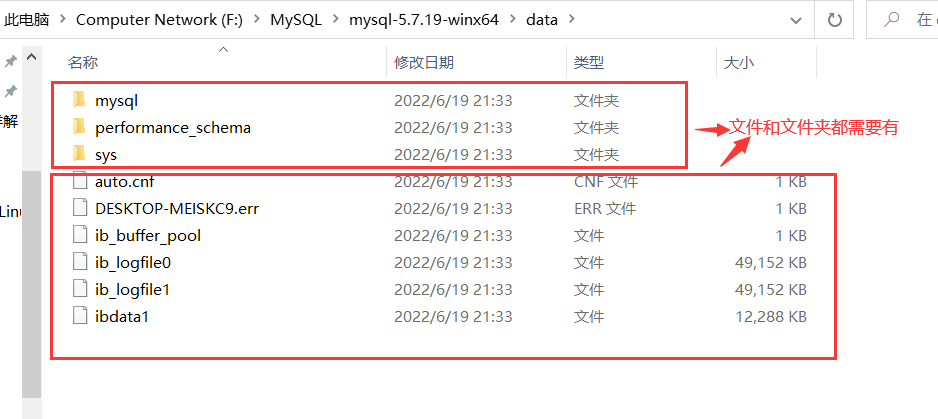
7.启动服务
bash
F:\MySQL\mysql-5.7.19-winx64\bin>net start mysql  # 启动服务
MySQL 服务正在启动 .
MySQL 服务已经启动成功。

# 如需要停止服务输入命令
F:\MySQL\mysql-5.7.19-winx64\bin>net stop mysql  # 停止服务
8.进入MySQL管理终端
bash
F:\MySQL\mysql-5.7.19-winx64\bin>mysql -u root -p   # 用户为root,密码暂时不设置
Enter password:                  # 先不设置密码,直接回车
Welcome to the MySQL monitor.  Commands end with ; or \g.
Your MySQL connection id is 3
Server version: 5.7.19 MySQL Community Server (GPL)

Copyright (c) 2000, 2017, Oracle and/or its affiliates. All rights reserved.

Oracle is a registered trademark of Oracle Corporation and/or its
affiliates. Other names may be trademarks of their respective
owners.

Type 'help;' or '\h' for help. Type '\c' to clear the current input statement.

mysql>        # 已进入
9.修改用户密码
bash
mysql> use mysql;  # 使用MySQL数据库
Database changed   # 数据库已更改

mysql> update user set authentication_string=password('zjc') where user='root' and Host='localhost';
# 上面命令为设置当前用户的密码为zjc
Query OK, 1 row affected, 1 warning (0.00 sec)
Rows matched: 1  Changed: 1  Warnings: 1

mysql> flush privileges;  # 刷新权限
Query OK, 0 rows affected (0.00 sec)
10.修改my.ini
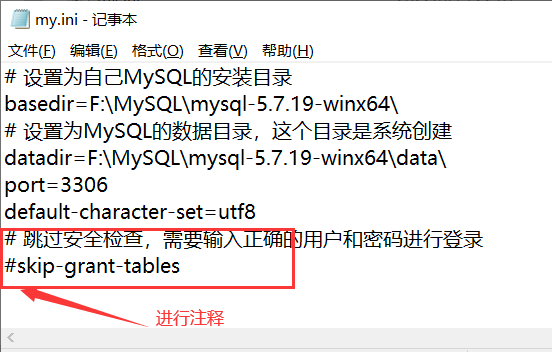
11.登录测试
bash
# 修改完成后,需要进行重启服务
F:\MySQL\mysql-5.7.19-winx64\bin>net stop mysql
MySQL 服务正在停止.
MySQL 服务已成功停止。


F:\MySQL\mysql-5.7.19-winx64\bin>net start mysql
MySQL 服务正在启动 .
MySQL 服务已经启动成功。

F:\MySQL\mysql-5.7.19-winx64\bin>mysql -u root -p
Enter password:     # 不输入密码很显然已拒绝登录
ERROR 1045 (28000): Access denied for user 'root'@'localhost' (using password: NO)

F:\MySQL\mysql-5.7.19-winx64\bin>mysql -u root -p
Enter password: ***        # 输入正确密码可以成功登录
Welcome to the MySQL monitor.  Commands end with ; or \g.
Your MySQL connection id is 4
Server version: 5.7.19 MySQL Community Server (GPL)

Copyright (c) 2000, 2017, Oracle and/or its affiliates. All rights reserved.

Oracle is a registered trademark of Oracle Corporation and/or its
affiliates. Other names may be trademarks of their respective
owners.

Type 'help;' or '\h' for help. Type '\c' to clear the current input statement.

mysql>
P3 命令行连接到MySQL 2022/6/20
1.连接指令

bash
C:\Windows\system32>mysql -h 127.0.0.1 -P 3306 -u root -pzjc
mysql: [Warning] Using a password on the command line interface can be insecure.
Welcome to the MySQL monitor.  Commands end with ; or \g.
Your MySQL connection id is 4
Server version: 5.7.19 MySQL Community Server (GPL)

Copyright (c) 2000, 2017, Oracle and/or its affiliates. All rights reserved.

Oracle is a registered trademark of Oracle Corporation and/or its
affiliates. Other names may be trademarks of their respective
owners.

Type 'help;' or '\h' for help. Type '\c' to clear the current input statement.

mysql>
# 如果没有主机IP,默认为本机IP,如果没有输入端口,则就是默认3306(在实际工作中一般会修改)
P4 navicat 的安装和使用 2022/6/20
1.下载链接
https://www.downkr.com/ruanjian/166750.html#download-all
P5 SQLyog的安装和使用 2022/6/20
1.下载链接
试用版本:https://sqlyog.en.softonic.com/download
社区版本:https://github.com/webyog/sqlyog-community/wiki/Downloads
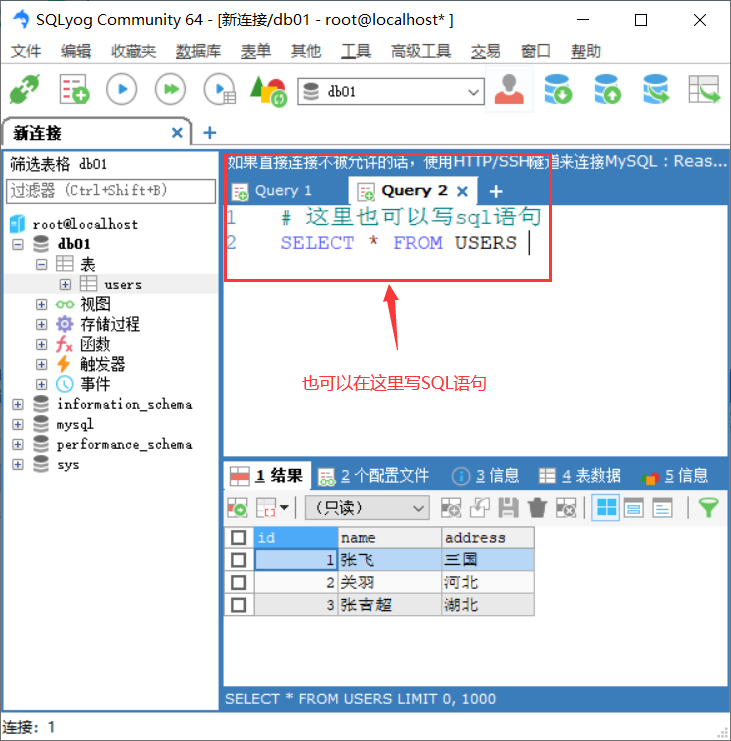
2.使用方法
- 既可以使用sql语句进行,也可以使用图形化操作,推荐使用sqlyog
P6 MySQL的三层结构 2022/6/26
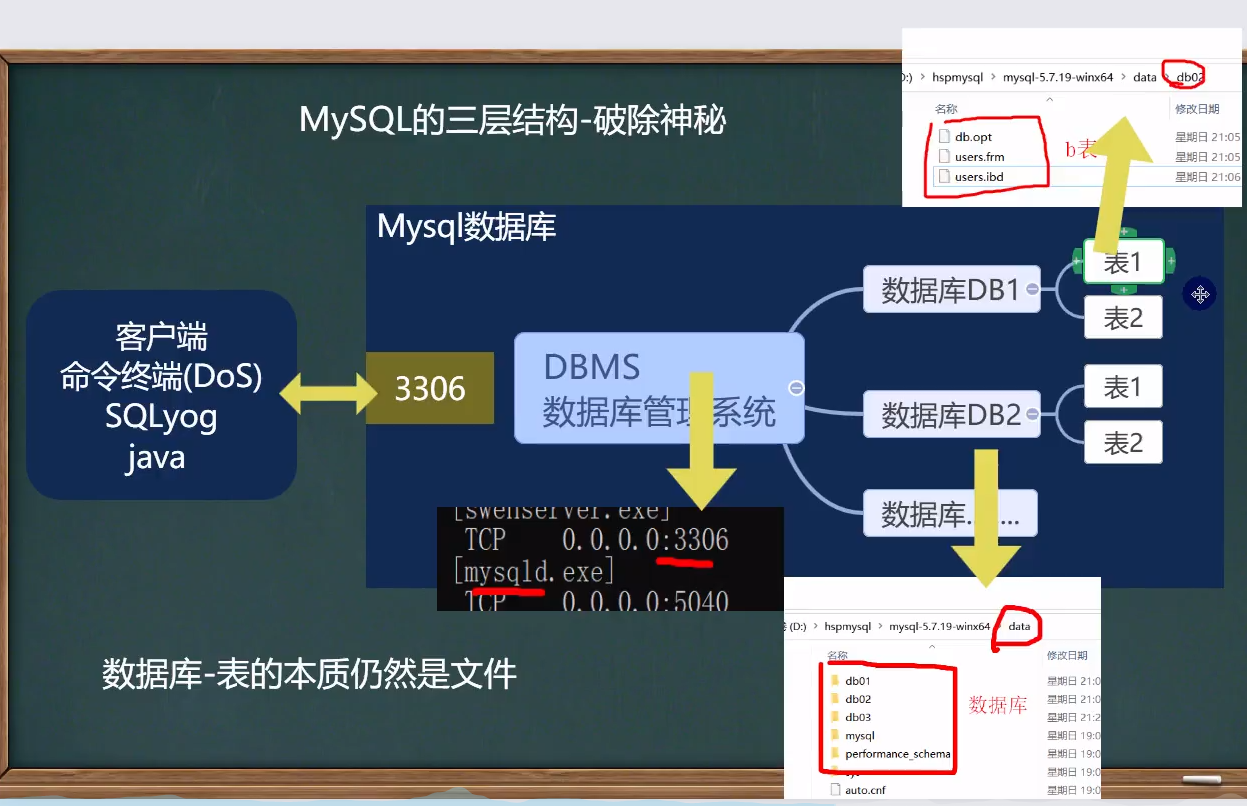
1.数据库的三层结构
- 所谓安装的MySQL数据库,就是在主机安装一个数据库管理系统(DBMS),这个管理程序可以管理多个数据库。(database manager system)
- 一个数据库中了可以创建多个表,以保存数据(信息)
- 数据库管理系统(DBMS),数据库和表的关系:示意图
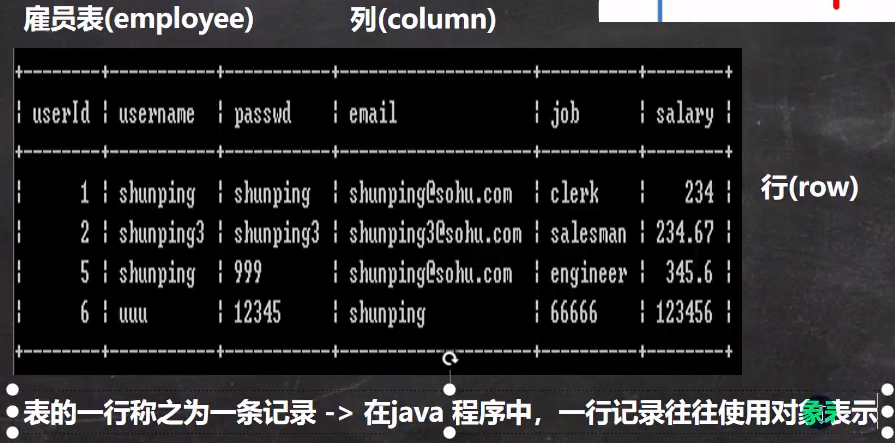
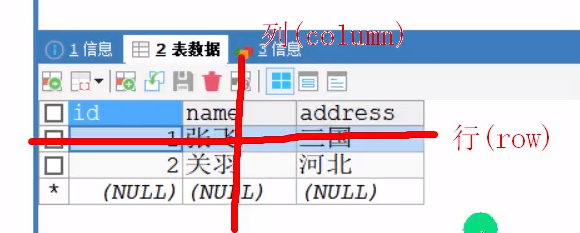
2.数据在数据库中的存储方式
列(colum),行(row)
3.sql语句分类
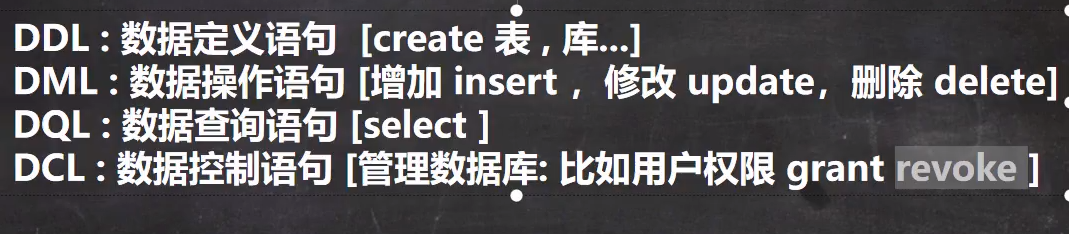
例如:添加数据
sql
SELECT * FROM users     #  查询
INSERT INTO users VALUES(4,'马超','天津');   # 添加表内容
P 7 java操作MySQL 2022/6/27
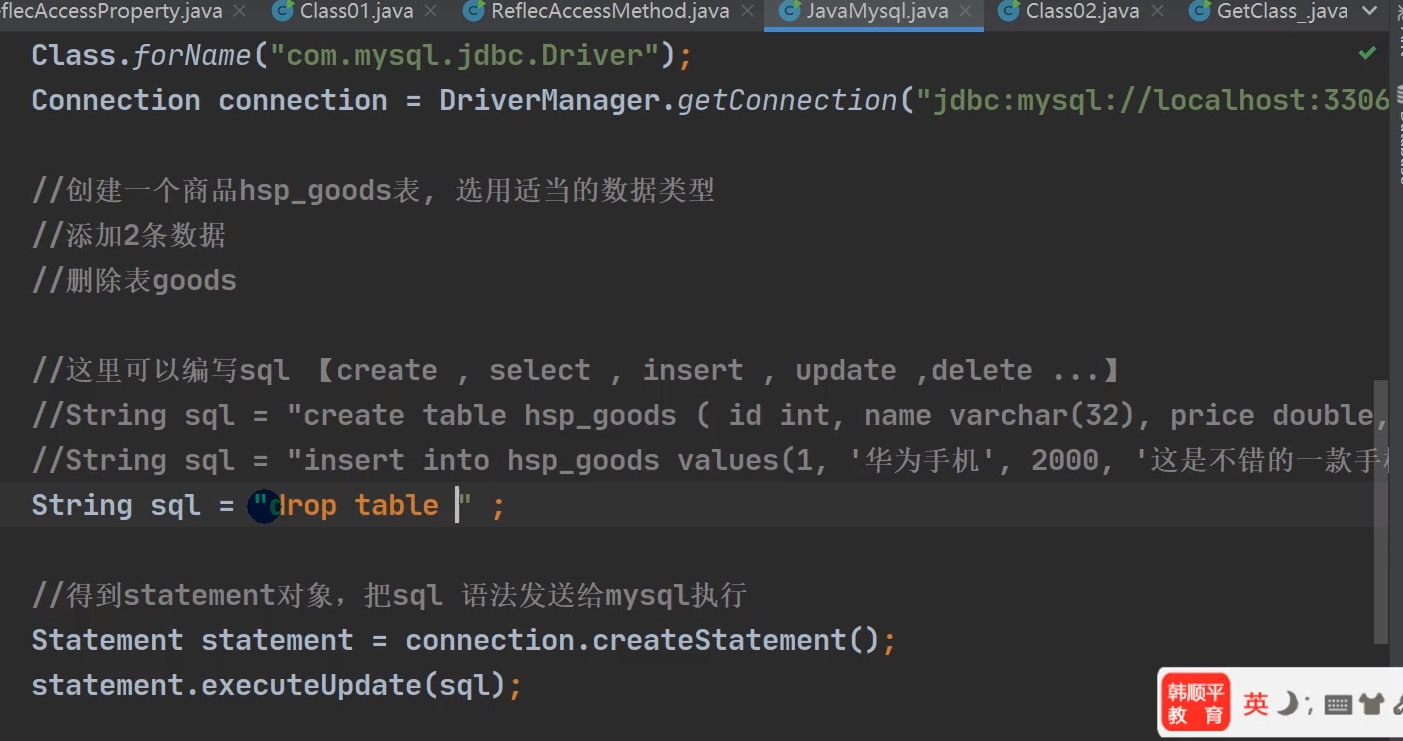
1.java操作数据库
P 8 创建数据库 2022/6/27
1.创建
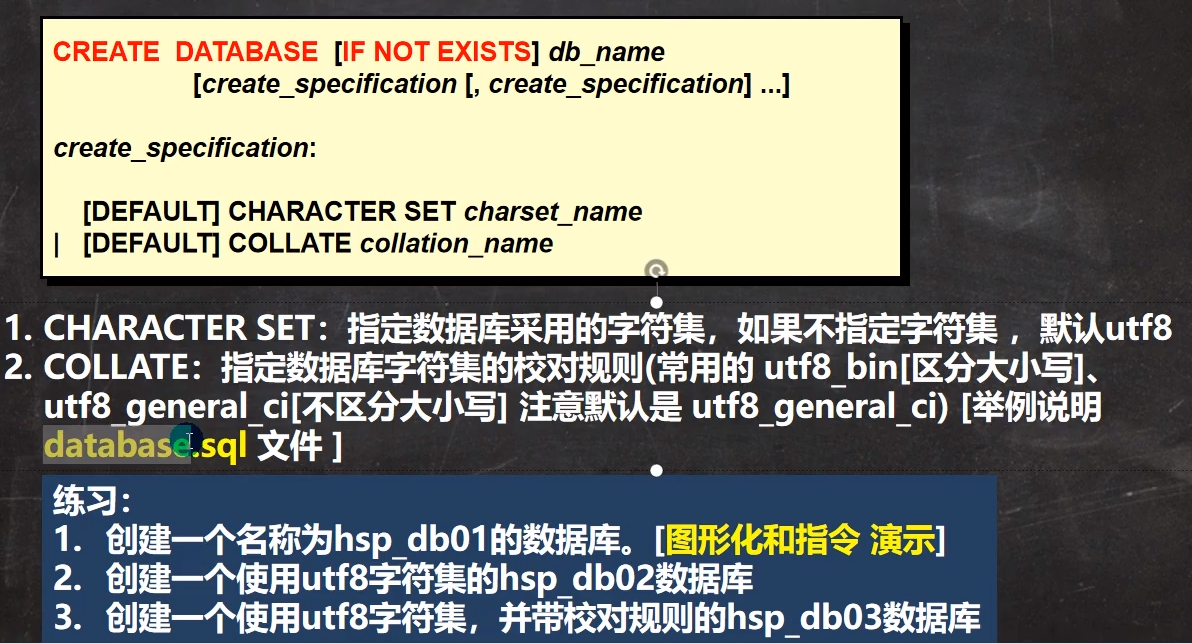
命令操作:
mysql
# 数据库的操作
# 创建一个名称为zjc_db01的数据库
# 使用指令创建数据库,如果不指定字符集默认utf8,
# 字符校验规则默认utf8_general_ci
CREATE DATABASE zjc_01;
# 删除数据库指令
DROP DATABASE db01;
# 创建一个使用utf8字符集的zjc_db02数据库
CREATE DATABASE zjc_02 CHARACTER SET utf8
# 创建一个使用utf8字符集,并带校对规则zjc_db03数据库
CREATE DATABASE zjc_03 CHARACTER SET utf8 COLLATE utf8_bin
注意事项:
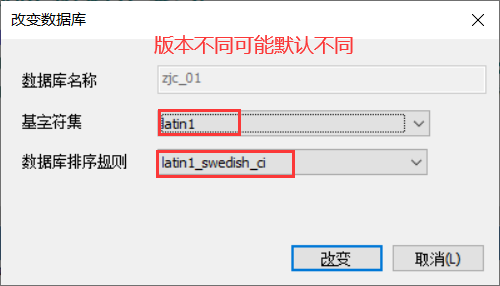
2.校对规则
mysql
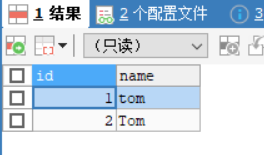
# 校对规则 utf8_bin 区分大小写,默认utf8_general_ci 不区分大小写,不指定就是数据库默认的。

# 区别演示
# 这是一条查询sql,select 查询,* 表示所有字段,from表示从那个表查询,
# where 从那个字段进行查询,name='tom',查询的名字是tom
SELECT *
	FROM t1
	WHERE NAME = 'tom '
# 因为db03是区分大小写的,所以应该是不同结果
区分大小写则只会查询出一条记录;不区分大小写,则会查询出两条记录。如下图所示:
P 9 查询数据库 2022/6/27
1.查看、删除数据库
MYSQL
# 演示删除和查询数据库
# 查看当前数据库服务器中所有数据库
SHOW DATABASES
# 查看当前创建的zjc_db01数据库的定义信息
SHOW CREATE DATABASE `zjc_01`
# 在创建数据库、表的时候,为了规避关键字,可以使用反引号``(tab健上面这个)解决
CREATE DATABASE `CREATE`
DROP DATABASE `CREATE`
# 删除前面创建的zjc_db01数据库
DROP DATABASE `ZJC_01`
P 10 备份恢复数据库 2022/6/27
1.备份与恢复数据库
-
备份:命令行(注意:在DOS执行)> mysqldump -u 用户名 -p 密码 -B 数据库1,数据库2,数据库3 >文件名.sql
-
恢复:(注意:进入MySQL命令行执行) Source 文件名.sql
-
练习:database03.sql 备份zjc_01,zjc_02 库中的数据,并恢复
mysql
# 备份
C:\Windows\system32>mysqldump -u root -p -B zjc_02 zjc_03 > d:\\mysqlbak\mysqlbak1.sql
Enter password: ***
# 不备份多个数据库,只备份数据库里面的表,不加-B选项
C:\Windows\system32>mysql -u root -p zjc_02 t2 > d:\\mysqlbak\bak1.sql

C:\Windows\system32>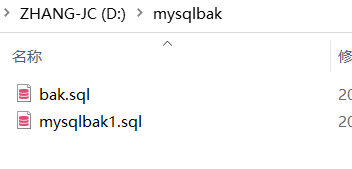
mysql
# 恢复
# 第一种方法:通过命令行进行恢复
mysql> source d:\\mysqlbak\bak.sql
Query OK, 0 rows affected (0.00 sec)

Query OK, 0 rows affected (0.00 sec)

Query OK, 0 rows affected (0.00 sec)

Query OK, 0 rows affected (0.00 sec)

Query OK, 0 rows affected (0.00 sec)

Query OK, 0 rows affected (0.00 sec)

# 第二种方法:通过复制bak.sql备份文件内容到查询编辑器执行
mysql> show databases;     # 重新查询发现数据库zjc_01,zjc_02已经恢复完成
+--------------------+
| Database           |
+--------------------+
| information_schema |
| mysql              |
| performance_schema |
| sys                |
| zjc_02             |
| zjc_03             |
+--------------------+
6 rows in set (0.00 sec)
2.总结命令
mysql
# 练习 :database03.sql 备份zjc_01,zjc_02 库中的数据,并恢复

# 备份,要在Dos下执行mysqldump指令其实在安装目录\bin
# 这个备份的文件就是对应的sql语句
mysqldump -u root -p -B zjc_02 zjc_03 > d:\\bak.sql
DROP DATABASE zjc_03;
# 恢复数据库 (注意:进入MySQL命令行执行)
source d:\\mysqlbak\bak.sql
# 第二个恢复方法:把备份文件bak.sql中的语句进行复制到查询编辑器里面执行
# 只需要备份一个数据库里面的一张表,mysqldump -u root -p [数据库] [表] >d:\\mysqlbak\bak1.sql  DOS下执行