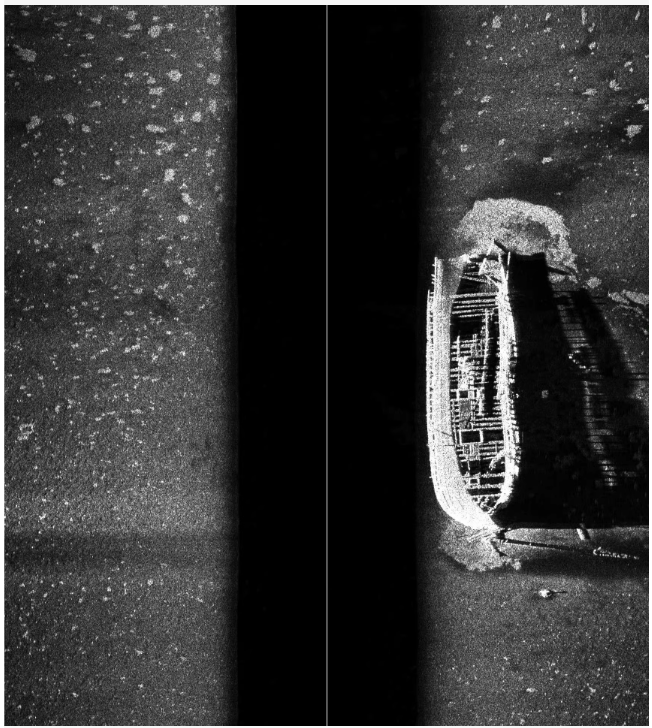
水下侧扫声呐图像数据集,沉船,1.13G。声纳数据集 水下声纳数据集 水下图像声纳数据集

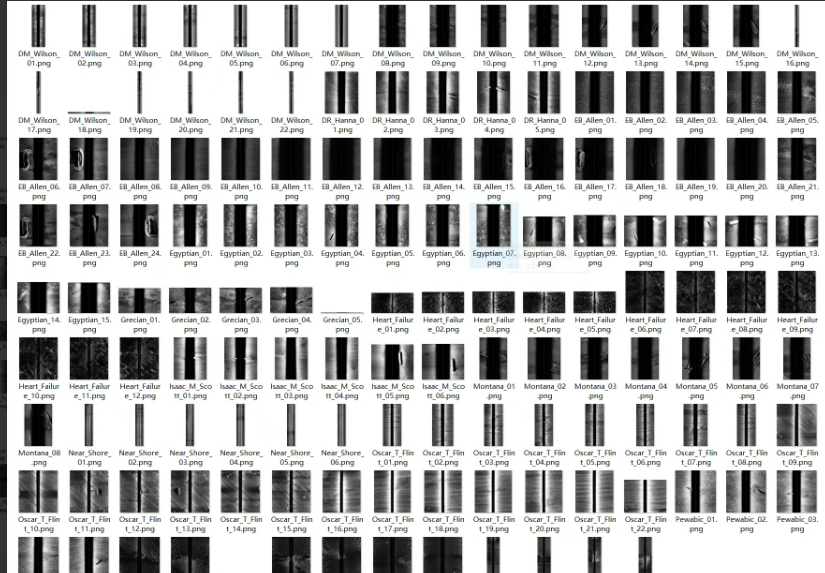
水下侧扫声呐图像数据集
类别 :海洋探测、水下考古、计算机视觉
用途:该数据集专为训练和评估用于检测和分类水下沉船及其他水下物体的机器学习模型而设计。通过这些数据,可以开发出高效且准确的目标检测系统,帮助研究人员进行水下考古、沉船探测以及海洋环境监测。
项目特点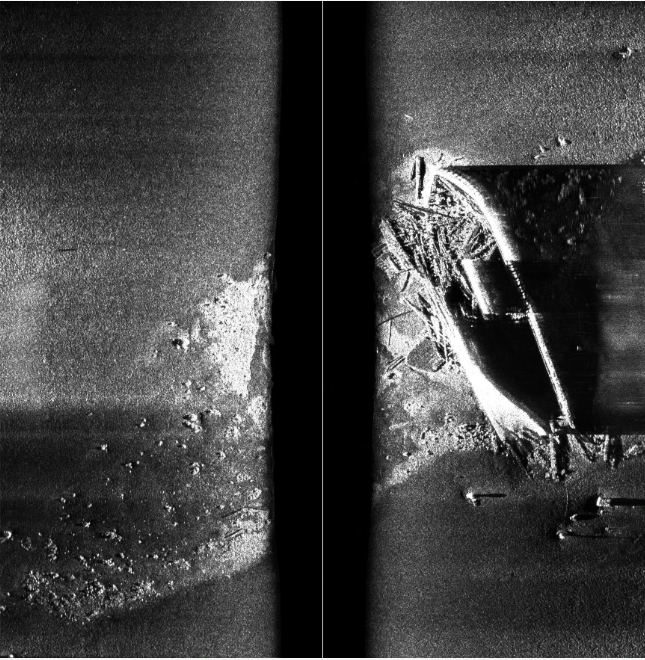
- 真实场景:图像采集自实际的水下环境,确保了数据集的实用性和代表性。
- 详细标注:每张图像都附有详细的边界框标注(Bounding Box),包括目标的位置和尺寸。
- 多样性:数据集中包含了不同光照条件、水质清晰度、深度变化下的声呐图像,有助于提高模型的泛化能力。
- 多类别支持:涵盖多种水下物体类型,特别是沉船及其相关结构。
- 实用性:专注于水下探测的实际问题,具有较高的应用价值。
项目结构
underwater_sonar_dataset/
├── images/  # 图像文件夹
│   ├── sonar_0001.png  # 水下侧扫声呐图像
│   ├── sonar_0002.png
│   └── ...
├── annotations/  # 标注文件夹
│   ├── sonar_0001.txt  # 对应图像的YOLO格式标注
│   ├── sonar_0002.txt
│   └── ...
└── README.md # 项目说明文档- images/:存放所有的水下侧扫声呐图像。
- annotations/:存放每个图像对应的YOLO格式边界框标注。
- README.md:项目说明文档,包含数据集的详细介绍、使用方法和注意事项。
数据集内容
- 图像数量:约1.13GB的数据量
- 图像格式:PNG
- 标注格式:YOLO(文本文件)
- 目标类别 :
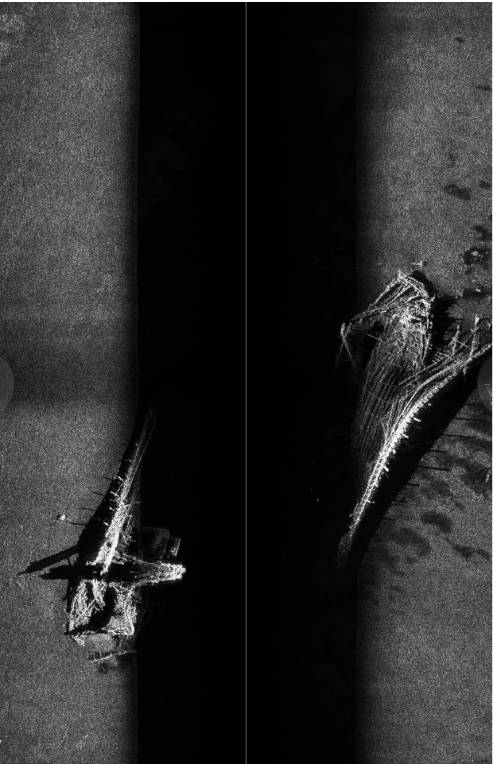
shipwreck:沉船
标注信息
-
边界框:每个目标在图像中的位置,用中心点坐标(x, y)以及宽度w和高度h表示。
-
类别ID:每个类别的唯一标识符,通常在YOLO格式中标注为整数。
-
标注格式示例:
class_id x_center y_center width height其中,
x_center,y_center,width,height都是相对于图像尺寸的归一化值,范围在0到1之间。
使用场景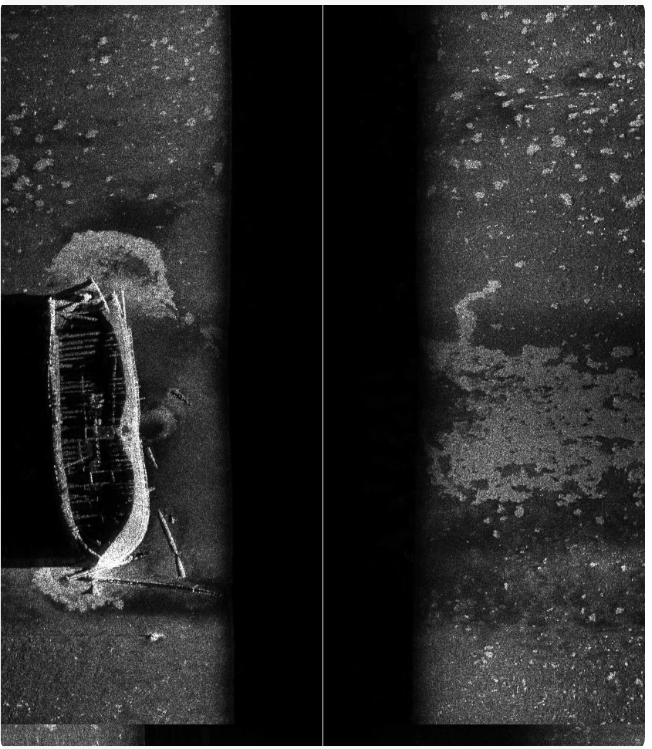
- 水下考古:自动检测和分类水下沉船及其相关结构,辅助考古学家进行研究。
- 沉船探测:帮助海洋探测团队快速定位和识别水下沉船。
- 海洋环境监测:通过定期检测,监测海洋环境的变化和潜在的生态问题。
- 科学研究:帮助研究人员分析水下地形和物体分布情况。
数据集统计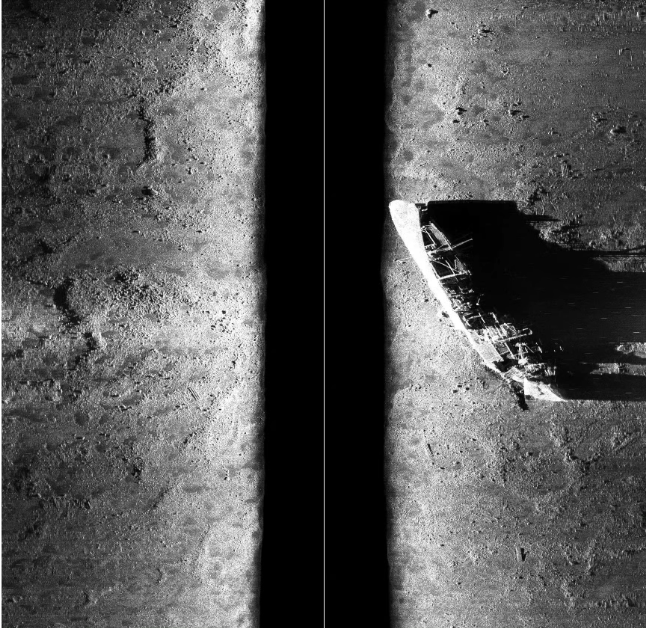
假设数据集的具体统计如下(具体数字需根据实际数据集确定):
| 类别名称 | 图像数量 (pic_num) | 边界框数量 (box_num) |
|---|---|---|
| shipwreck | 1000 | 1200 |
| anchor | 500 | 600 |
| propeller | 200 | 250 |
| cannon | 300 | 350 |
| other_debris | 800 | 900 |
| natural_formation | 400 | 500 |
| artificial_structure | 600 | 700 |
| 总计 | 3800 | 4500 |
如何使用数据集
1. 数据加载
使用Python中的os模块遍历图像和标注文件,并读取YOLO格式的标注信息。
import os
import cv2

def load_data(data_dir):
    image_dir = os.path.join(data_dir, 'images')
    annotation_dir = os.path.join(data_dir, 'annotations')

    images = []
    labels = []

    for img_file in os.listdir(image_dir):
        if img_file.endswith('.png'):
            img_path = os.path.join(image_dir, img_file)
            ann_path = os.path.join(annotation_dir, img_file.replace('.png', '.txt'))

            # 读取图像
            image = cv2.imread(img_path, cv2.IMREAD_GRAYSCALE)
            images.append(image)

            # 读取标注
            with open(ann_path, 'r') as f:
                lines = f.readlines()
                boxes = [list(map(float, line.strip().split())) for line in lines]
                labels.append(boxes)

    return images, labels

# 示例调用
data_dir = 'underwater_sonar_dataset'
images, labels = load_data(data_dir)

# 显示示例图像和标注
for i in range(5):  # 显示前5张图像
    image = images[i]
    h, w = image.shape
    boxes = labels[i]

    for box in boxes:
        class_id, x_center, y_center, box_width, box_height = box
        x1 = int((x_center - box_width / 2) * w)
        y1 = int((y_center - box_height / 2) * h)
        x2 = int((x_center + box_width / 2) * w)
        y2 = int((y_center + box_height / 2) * h)

        # 绘制边界框
        cv2.rectangle(image, (x1, y1), (x2, y2), (255, 0, 0), 2)

    cv2.imshow('Image with Bounding Boxes', image)
    cv2.waitKey(0)
cv2.destroyAllWindows()
2. 数据预处理
-
图像缩放:将图像和标注边界框缩放到统一尺寸。
-
数据增强:进行随机裁剪、旋转、翻转等操作以增加模型的鲁棒性。
-
归一化:对图像进行归一化处理,使其适合输入到深度学习模型中
from torchvision import transforms
import torch
import numpy as np定义数据预处理变换
transform = transforms.Compose([
transforms.ToTensor(),
transforms.Resize((416, 416)), # YOLO常用的输入尺寸
transforms.Normalize(mean=[0.485], std=[0.229]) # 灰度图像只需一个通道
])应用预处理变换
def preprocess_data(images, labels):
preprocessed_images = [transform(image) for image in images]
preprocessed_labels = []for label in labels: new_boxes = [] for box in label: class_id, x_center, y_center, box_width, box_height = box new_boxes.append([class_id, x_center, y_center, box_width, box_height]) preprocessed_labels.append(new_boxes) return preprocessed_images, preprocessed_labels示例调用
preprocessed_images, preprocessed_labels = preprocess_data(images, labels)
3. 模型训练
选择合适的物体检测模型(如YOLOv5、Faster R-CNN等),并使用深度学习框架(如PyTorch)进行训练。
示例:使用PyTorch和YOLOv5进行训练
首先,安装必要的库:
pip install torch torchvision
pip install -U git+https://github.com/ultralytics/yolov5
然后,编写训练代码:
import torch
from yolov5.models.yolo import Model
from yolov5.utils.datasets import LoadImagesAndLabels
from yolov5.utils.general import non_max_suppression, scale_coords
from yolov5.utils.torch_utils import select_device

# 加载预训练模型
model = Model('yolov5s.yaml').cuda()  # 假设使用CUDA设备
weights = 'yolov5s.pt'  # 下载YOLOv5预训练权重
model.load_state_dict(torch.load(weights, map_location=device)['model'].state_dict())

# 修改输出层以适应7类检测
model.model[-1].nc = 7  # 设置类别数为7
model.model[-1].anchors = model.model[-1].anchors[:7]  # 只保留7个anchor

# 设备
device = select_device('')
model.to(device).train()

# 优化器
optimizer = torch.optim.Adam(model.parameters(), lr=0.001)

# 训练数据加载
dataset = LoadImagesAndLabels(path='underwater_sonar_dataset/images', label_dir='underwater_sonar_dataset/annotations', img_size=416, batch_size=4, augment=True)
dataloader = torch.utils.data.DataLoader(dataset, batch_size=4, num_workers=4, pin_memory=True, collate_fn=LoadImagesAndLabels.collate_fn)

# 损失函数
criterion = model.loss

# 训练循环
num_epochs = 10
for epoch in range(num_epochs):
    running_loss = 0.0
    for i, (imgs, targets, paths, _) in enumerate(dataloader):
        imgs = imgs.to(device).float() / 255.0  # 归一化
        targets = targets.to(device)

        optimizer.zero_grad()

        outputs = model(imgs)
        loss, loss_items = criterion(outputs, targets)

        loss.backward()
        optimizer.step()

        running_loss += loss.item()

    print(f"Epoch {epoch+1}/{num_epochs}, Loss: {running_loss / len(dataloader)}")

print("Training complete.")
4. 模型评估
-
在验证集上评估模型的性能。
-
计算mAP(平均精度均值)、IoU(交并比)等指标。
-
可视化检测结果以直观地检查模型的表现
评估函数
def evaluate_model(model, dataloader, device):
model.eval()
all_detections = []
all_ground_truths = []with torch.no_grad(): for imgs, targets, _, _ in dataloader: imgs = imgs.to(device).float() / 255.0 targets = targets.to(device) outputs = model(imgs) predictions = non_max_suppression(outputs, conf_thres=0.4, iou_thres=0.5) for pred, target in zip(predictions, targets): if pred is not None and len(pred) > 0: all_detections.append(pred.cpu().numpy()) else: all_detections.append([]) all_ground_truths.append(target.cpu().numpy()) # 计算mAP和其他指标 # 这里需要根据实际情况实现计算逻辑 # 例如使用COCO API或Pascal VOC评价工具示例调用
evaluate_model(model, dataloader, device)
5. 部署与应用
- 将训练好的模型部署到实际应用中。
- 通过实时处理水下侧扫声呐图像,提供即时的目标检测结果。
注意事项
- 数据平衡:确保数据集中各类别的样本分布相对均衡。
- 数据增强:考虑使用数据增强技术来增加模型的鲁棒性。
- 超参数调整:根据实际情况调整学习率、批次大小等超参数以获得最佳性能。
- 模型选择:根据硬件资源和实际需求选择合适的模型架构。
项目总结
这个水下侧扫声呐图像数据集提供了丰富的资源,支持各种检测任务。通过高质量的图像和详细的边界框标注,研究人员可以开发出高效且准确的目标检测模型,应用于多个领域。希望这个数据集能促进更多创新性的研究和技术进步。