一、启用Hyper-V和容器特性
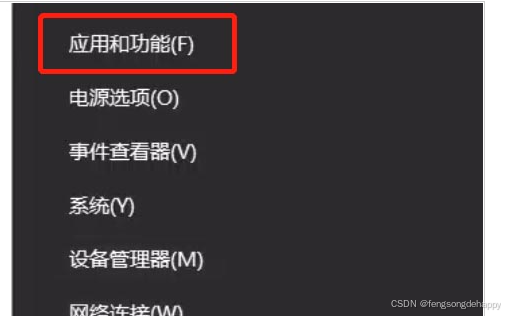
1.应用和功能
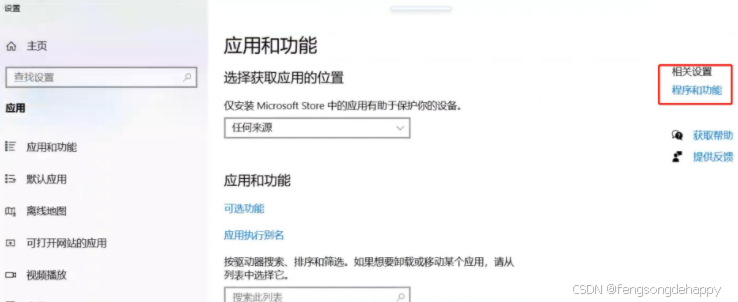
2.点击程序和功能
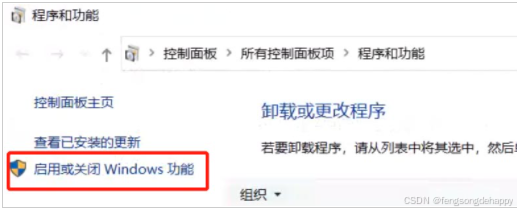
3.启用或关闭Windows功能
4.开启Hyper-V 和 容器特性
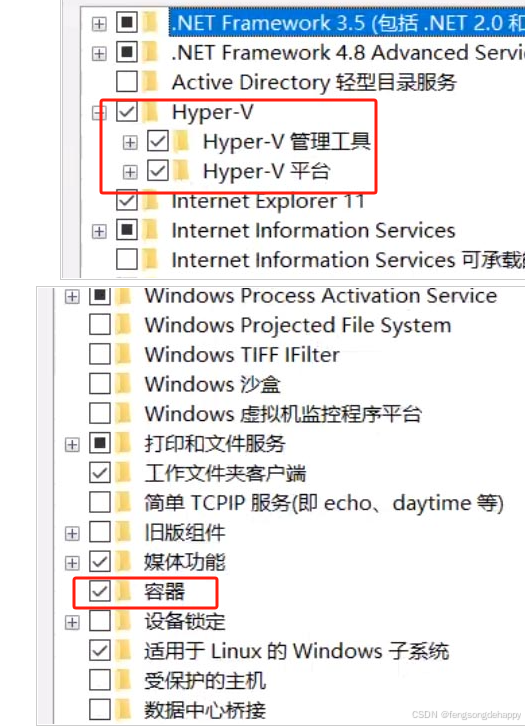
记得重启生效!!!
二、安装WSL2:
写文章-CSDN创作中心![]() https://mp.csdn.net/mp_blog/creation/editor/143057041
https://mp.csdn.net/mp_blog/creation/editor/143057041
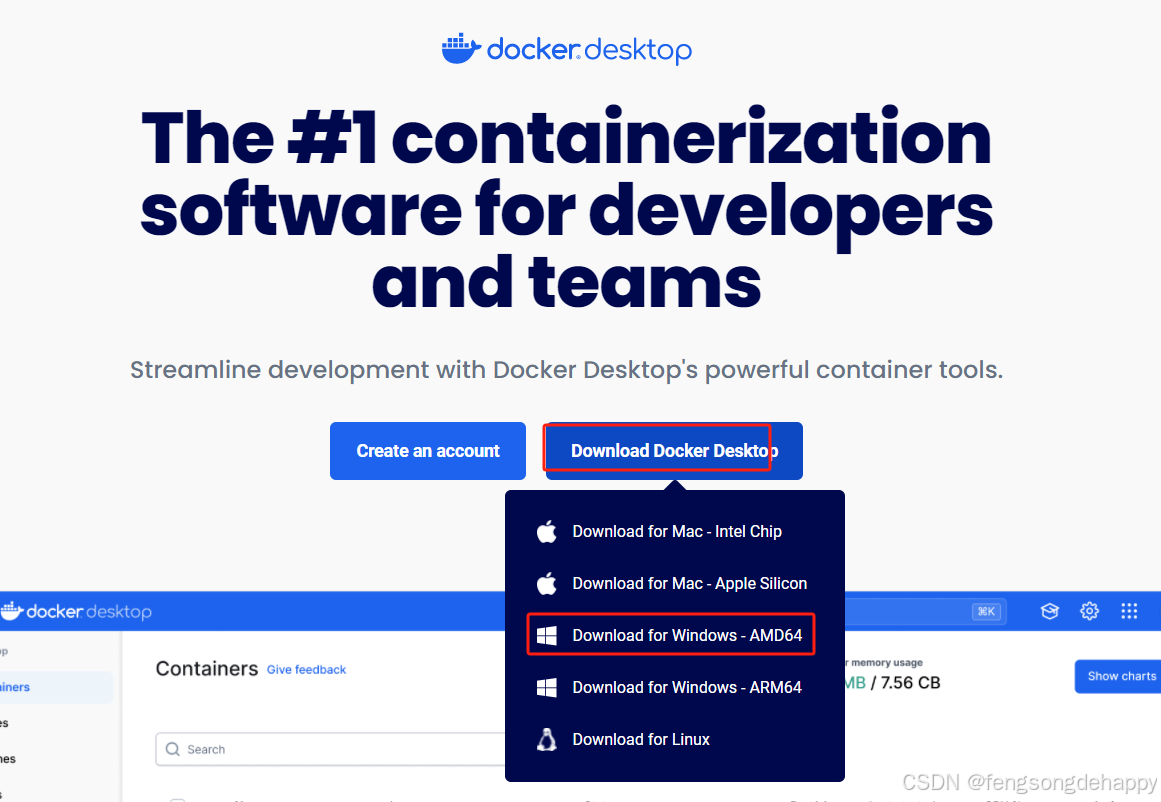
三、安装Docker Desktop:
2.下载安装:
2.下载好包后, 一直下一步安装:
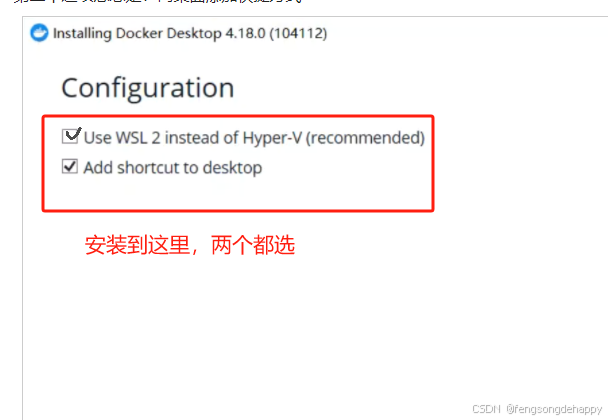
第一个选项意思是:使用WSL 2
第二个选项意思是:向桌面添加快捷方式
三、打包项目:
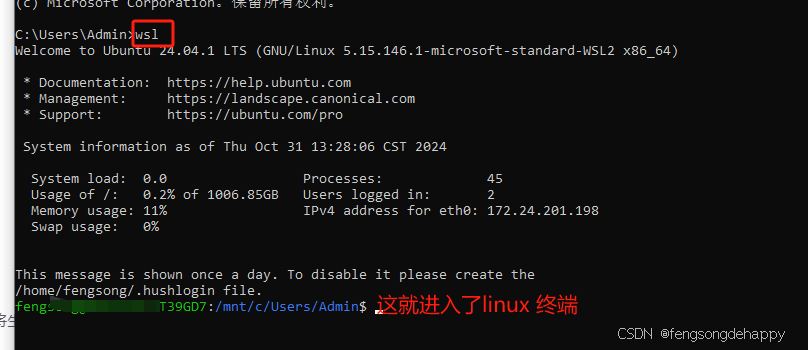
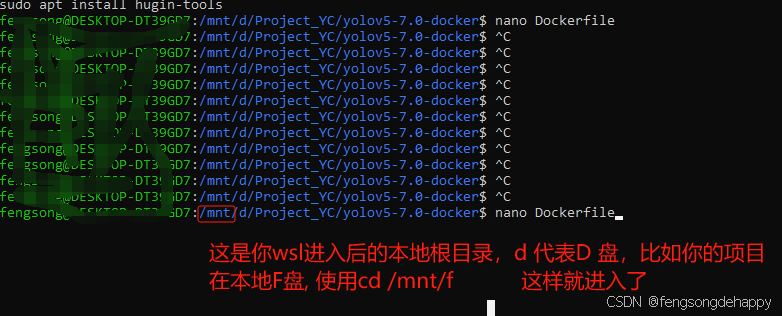
1.win+r 输入cmd 打开终端,输入wsl 进入linux终端
2.导航到本地项目目录下并在项目目录下创建Dockerfile:
(如这里,我的项目名称是yolov5-7.0-docker, 我就进如到这个项目里并创建Dockerfile)
Dockerfile的内容参考:
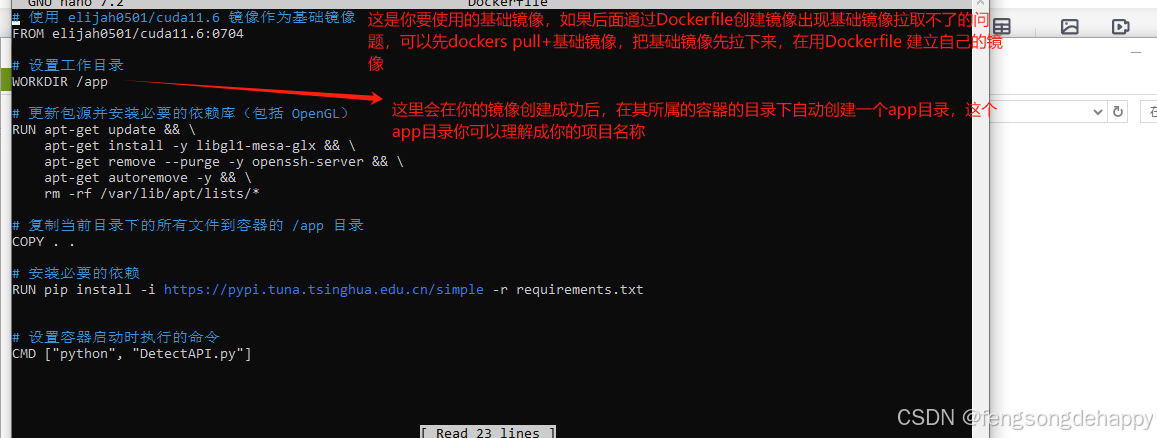
关于Dockerfile 里的 CMD "python", "DetectAPI.py"。 指的是:容器启动时自动执行的命令。
既,你把镜像创建成功后,你只要启动容器,容器就会自动执行 python DetectAPI.py (py文件改成自己要执行的)
比如你的镜像叫 xdd,那么当你用docker run xdd 或者 docker run -it xdd 启动一个容器的时候,就会自动执行python DetectAPI.py, 如果你想手动执行,就在启动容器的时候进入容器shell :
docker run -it xdd /bin/bash, 这样你就进入容器的交互式终端里,这个时候你在手动执行:
python DetectAPI.py
具体如下:(前提你已经构建Dockerfile 并 成功创建了镜像。使用以下命令构建镜像,假设你要将其命名为 xdd:
docker build -t xdd .
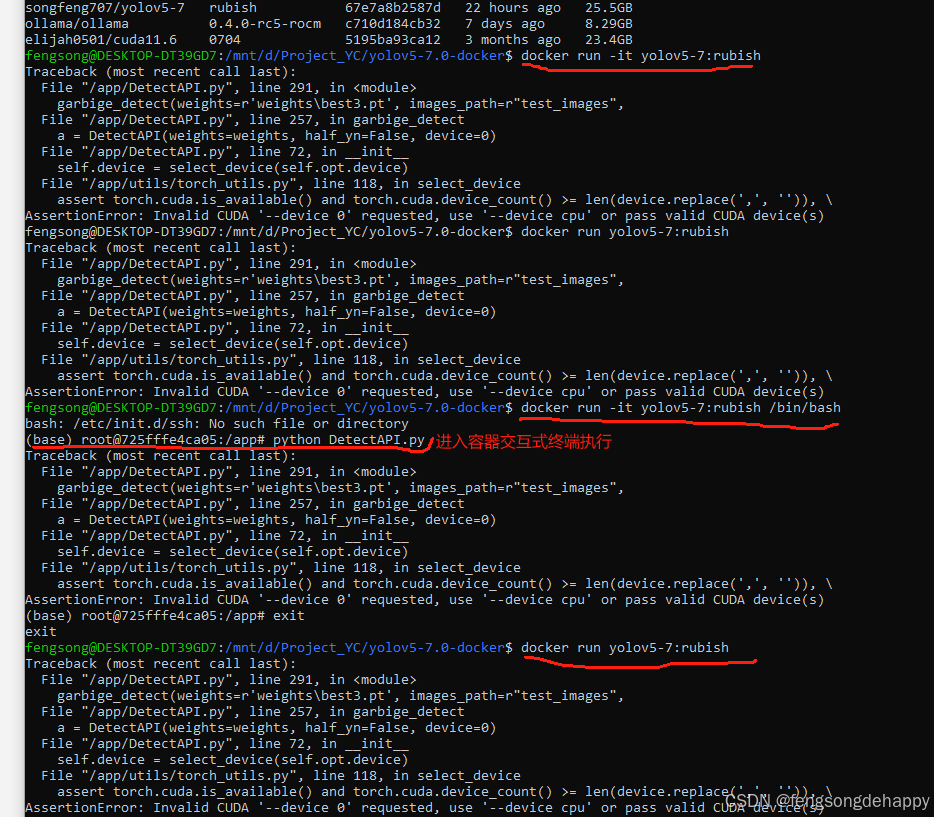
如果你的项目里的Detect是用gpu 则加一个 --gpus all 命令:
docker run --gpus all -it yolov5-7:rubish /bin/bash
3. 把镜像推到hub
3.1 登录hub
docker login
3.2 更改镜像标签:
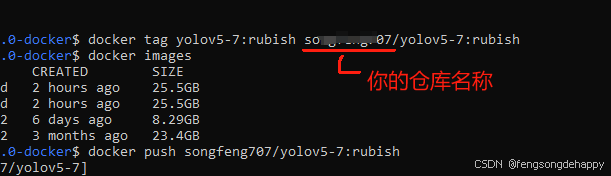
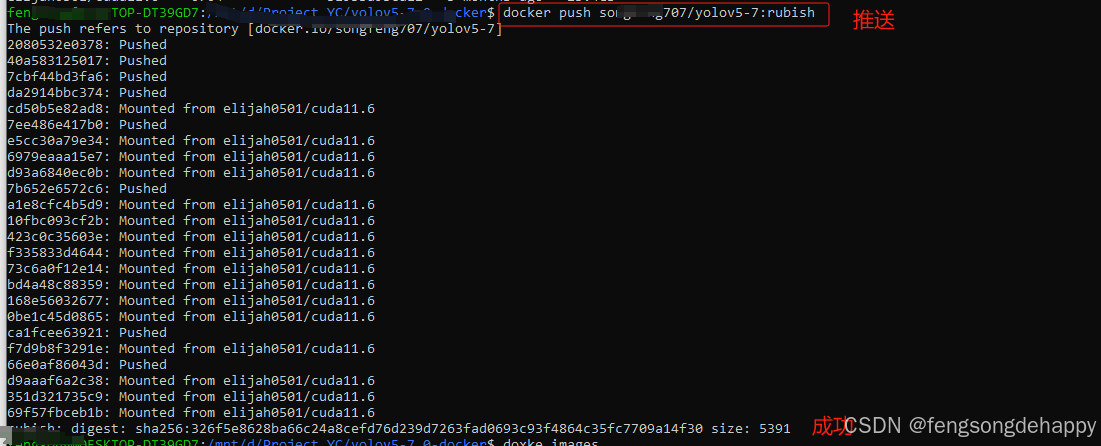
3.3 推送
现在在docker hub 可以搜索到你的镜像