1.使用pytesseract+pillow实现验证码处理
python
import cv2 as cv
import pytesseract
from PIL import Image
def recognize_text(image):
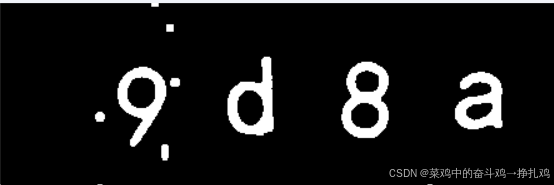
# 调整图像大小,使其变大,便于后续处理
scale_percent = 400 # 将图像放大到原来的400%
width = int(image.shape[1] * scale_percent / 100)
height = int(image.shape[0] * scale_percent / 100)
dim = (width, height)
resized_image = cv.resize(image, dim, interpolation=cv.INTER_CUBIC)
# 边缘保留滤波去噪
dst = cv.pyrMeanShiftFiltering(resized_image, sp=20, sr=60)
# 转换为灰度图像
gray = cv.cvtColor(dst, cv.COLOR_BGR2GRAY)
# 二值化处理
ret, binary = cv.threshold(gray, 0, 255, cv.THRESH_BINARY_INV | cv.THRESH_OTSU)
# 形态学操作,腐蚀后膨胀
erode = cv.erode(binary, None, iterations=1)
dilate = cv.dilate(erode, None, iterations=1) # 精细调整,避免过度膨胀
# 显示二值处理后的图像
cv.imshow('Dilated Image', dilate)
# 反色,使背景变为白色,文字变为黑色便于识别
cv.bitwise_not(dilate, dilate)
cv.imshow('Binary Image', dilate)
# 将图像转换为 PIL 图像以供 pytesseract 使用
test_message = Image.fromarray(dilate)
# 使用 pytesseract 识别文字
text = pytesseract.image_to_string(test_message, config='--psm 7') # psm 7:处理单行文本
# 去除空格
text = text.replace(" ", "")
print(f'识别结果:{text}')
# 读取输入图像
src = cv.imread('D:\\yzm.png')
cv.imshow('Input Image', src)
# 调用识别函数
recognize_text(src)
# 等待用户按键操作
cv.waitKey(0)
cv.destroyAllWindows()
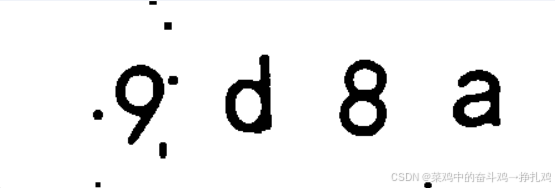

上面代码可以直接作为一个模板进行验证码处理使用,我这些给出,并在下面应用到实战:
python
import cv2 as cv
import pytesseract
from PIL import Image

def process_captcha_image(image_path):
    # 读取输入图像
    image = cv.imread(image_path)
    if image is None:
        raise FileNotFoundError(f"The image at path {image_path} could not be found.")

    # 调整图像大小,使其变大,便于后续处理
    scale_percent = 400  # 将图像放大到原来的400%
    width = int(image.shape[1] * scale_percent / 100)
    height = int(image.shape[0] * scale_percent / 100)
    dim = (width, height)
    resized_image = cv.resize(image, dim, interpolation=cv.INTER_CUBIC)

    # 边缘保留滤波去噪
    dst = cv.pyrMeanShiftFiltering(resized_image, sp=20, sr=60)
    # 转换为灰度图像
    gray = cv.cvtColor(dst, cv.COLOR_BGR2GRAY)
    # 二值化处理
    ret, binary = cv.threshold(gray, 0, 255, cv.THRESH_BINARY_INV | cv.THRESH_OTSU)
    # 形态学操作,腐蚀后膨胀
    erode = cv.erode(binary, None, iterations=1)
    dilate = cv.dilate(erode, None, iterations=1)  # 精细调整,避免过度膨胀
    # 反色,使背景变为白色,文字变为黑色便于识别
    cv.bitwise_not(dilate, dilate)
    # 将图像转换为 PIL 图像以供 pytesseract 使用
    test_message = Image.fromarray(dilate)
    # 使用 pytesseract 识别文字
    text = pytesseract.image_to_string(test_message, config='--psm 7')  # psm 7:处理单行文本
    # 去除空格
    text = text.replace(" ", "")
    return text

def recognize_text_from_image_path(image_path):
    try:
        text = process_captcha_image(image_path)
        print(f'识别结果:{text}')
    except FileNotFoundError as e:
        print(e)

# 调用函数,传入验证码图片路径
recognize_text_from_image_path('D:\\yzm.png')

# 等待用户按键操作(测试环境中可以选择是否保留)
cv.waitKey(0)
cv.destroyAllWindows()
2.实战练习,pytesseract实用
python
from selenium import webdriver
from selenium.webdriver.common.by import By
import pytesseract
from PIL import Image
import time

driver = webdriver.Chrome()

driver.get('https://captcha7.scrape.center/')
time.sleep(3)

search_name = driver.find_element(By.XPATH,'//*[@id="app"]/div[2]/div/div/div/div/div/form/div[1]/div/div/input')
search_password = driver.find_element(By.XPATH,'//*[@id="app"]/div[2]/div/div/div/div/div/form/div[2]/div/div/input')
search_name.send_keys('admin')
search_password.send_keys('admin')
yzm_img = driver.find_element(By.XPATH,'//*[@id="captcha"]')
time.sleep(2)
# 验证码操作
yzm_path = 'D:\\yzm.png'
yzm_img.screenshot(yzm_path)
im = Image.open('D:\\yzm.png')


text = pytesseract.image_to_string(Image.open(r'D:\\yzm.png'))
search_yzm = driver.find_element(By.XPATH,'//*[@id="app"]/div[2]/div/div/div/div/div/form/div[3]/div/div/div[1]/div/input')
search_yzm.send_keys(text)

search_button = driver.find_element(By.XPATH,'//*[@id="app"]/div[2]/div/div/div/div/div/form/div[4]/div/button/span')
search_button.click()
time.sleep(5)

driver.quit()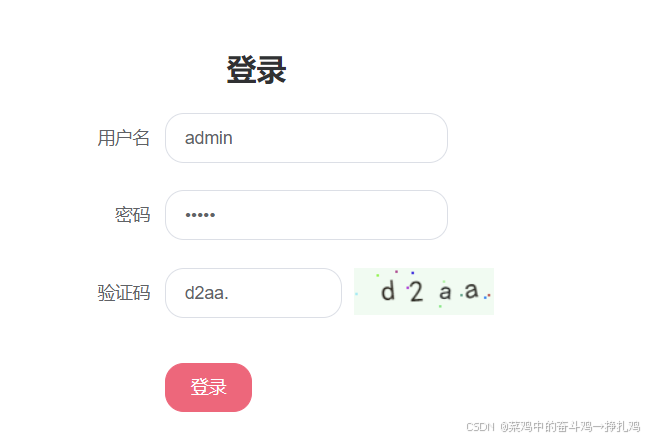
发现结果并不是很准确,于是进行 使用pytesseract+pillow实现验证码处理
3. pytesseract进阶处理
python
from selenium import webdriver
from selenium.webdriver.common.by import By
import pytesseract
from PIL import Image
import time
import cv2 as cv

def process_captcha_image(image_path):
    # 读取输入图像
    image = cv.imread(image_path)
    if image is None:
        raise FileNotFoundError(f"The image at path {image_path} could not be found.")

    # 调整图像大小,使其变大,便于后续处理
    scale_percent = 400  # 将图像放大到原来的400%
    width = int(image.shape[1] * scale_percent / 100)
    height = int(image.shape[0] * scale_percent / 100)
    dim = (width, height)
    resized_image = cv.resize(image, dim, interpolation=cv.INTER_CUBIC)

    # 边缘保留滤波去噪
    dst = cv.pyrMeanShiftFiltering(resized_image, sp=20, sr=60)
    # 转换为灰度图像
    gray = cv.cvtColor(dst, cv.COLOR_BGR2GRAY)
    # 二值化处理
    ret, binary = cv.threshold(gray, 0, 255, cv.THRESH_BINARY_INV | cv.THRESH_OTSU)
    # 形态学操作,腐蚀后膨胀
    erode = cv.erode(binary, None, iterations=1)
    dilate = cv.dilate(erode, None, iterations=1)  # 精细调整,避免过度膨胀
    # 反色,使背景变为白色,文字变为黑色便于识别
    cv.bitwise_not(dilate, dilate)
    # 将图像转换为 PIL 图像以供 pytesseract 使用
    test_message = Image.fromarray(dilate)
    # 使用 pytesseract 识别文字
    text = pytesseract.image_to_string(test_message, config='--psm 7')  # psm 7:处理单行文本
    # 去除空格
    text = text.replace(" ", "")
    return text

def recognize_text_from_image_path(image_path):
    try:
        text = process_captcha_image(image_path)
        return text
    except FileNotFoundError as e:
        print(e)
        return ""

driver = webdriver.Chrome()

driver.get('https://captcha7.scrape.center/')
time.sleep(3)

search_name = driver.find_element(By.XPATH,'//*[@id="app"]/div[2]/div/div/div/div/div/form/div[1]/div/div/input')
search_password = driver.find_element(By.XPATH,'//*[@id="app"]/div[2]/div/div/div/div/div/form/div[2]/div/div/input')
search_name.send_keys('admin')
search_password.send_keys('admin')
yzm_img = driver.find_element(By.XPATH,'//*[@id="captcha"]')
time.sleep(2)

# 验证码操作
yzm_path = 'D:\\yzm.png'
yzm_img.screenshot(yzm_path)
captcha_text = recognize_text_from_image_path(yzm_path)

search_yzm = driver.find_element(By.XPATH,'//*[@id="app"]/div[2]/div/div/div/div/div/form/div[3]/div/div/div[1]/div/input')
search_yzm.send_keys(captcha_text)

search_button = driver.find_element(By.XPATH,'//*[@id="app"]/div[2]/div/div/div/div/div/form/div[4]/div/button/span')
search_button.click()
time.sleep(5)

driver.quit()
4.复杂情况,超级进阶版识别

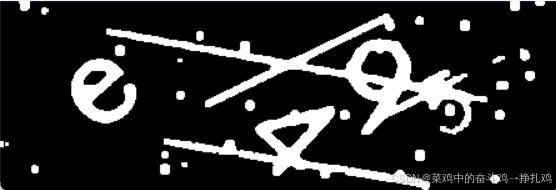
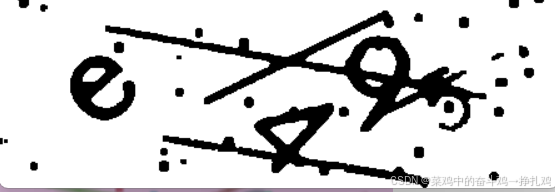
经过此时pytesseract+pillow进阶处理仍然无法识别到验证码,需要进行深度学习模型和模拟训练模型,或者使用打码平台处理
python
from selenium import webdriver
from selenium.webdriver.common.by import By
import time
import ddddocr

driver = webdriver.Chrome()

driver.get('https://captcha8.scrape.center/')
time.sleep(3)

search_name = driver.find_element(By.XPATH,'//*[@id="app"]/div[2]/div/div/div/div/div/form/div[1]/div/div/input')
search_password = driver.find_element(By.XPATH,'//*[@id="app"]/div[2]/div/div/div/div/div/form/div[2]/div/div/input')
search_name.send_keys('admin')
search_password.send_keys('admin')
yzm_img = driver.find_element(By.XPATH,'//*[@id="captcha"]')
time.sleep(5)
# 验证码操作
yzm_path = 'D:\\yzm.png'
yzm_img.screenshot(yzm_path)
time.sleep(3)

# ocr = ddddocr.DdddOcr()
ocr = ddddocr.DdddOcr(beta=True)
# 读取图像
with open("D:\\yzm.png", "rb") as image_file:
    image = image_file.read()

result = ocr.classification(image)


search_yzm = driver.find_element(By.XPATH,'//*[@id="app"]/div[2]/div/div/div/div/div/form/div[3]/div/div/div[1]/div/input')
search_yzm.send_keys(result)

search_button = driver.find_element(By.XPATH,'//*[@id="app"]/div[2]/div/div/div/div/div/form/div[4]/div/button/span')
search_button.click()
time.sleep(5)

driver.quit()