使用阿里云快速搭建 DataLight 平台
本篇文章由用户 "闫哥大数据" 分享,B 站账号:https://space.bilibili.com/357944741?spm_id_from=333.999.0.0
注意:因每个人操作顺序可能略有区别,整个部署流程如果出现出入,以官方文档为准。
DataLight 相关资源
🌐 DataLight 开源项目官网:
http://datalight.boundivore.cn
🌐 后端开源地址:
https://gitee.com/boundivore/boundivore-datalight
🌐 前端开源地址:
https://gitee.com/boundivore/boundivore-datalight-web
🌐 百度网盘:-开源资源包下载地址:
链接:https://pan.baidu.com/s/1342bIcEBDQHdFA35KUTjbQ
提取码:data
🌐 123网盘-开源资源包下载地址:
链接:https://www.123pan.com/s/7j3rTd-iFzKd?
提取码:6666
🌐 视频教程:
https://space.bilibili.com/3546708503955571/channel/seriesdetail?sid=4187881\&ctype=0
一、概述
部署 DataLight 平台过程中,需要遵循按需分配原则,本教程旨在帮助用户快速预览 DataLight 大数据平台,用户可根据需要,自行调整配置。如果需要部署的服务较多,则需要更多的资源,用户可按需部署自己需要的服务,并在配置文件管理功能中,自行调整各个服务对于资源的占用情况。
二、购买阿里云抢占式资源服务器
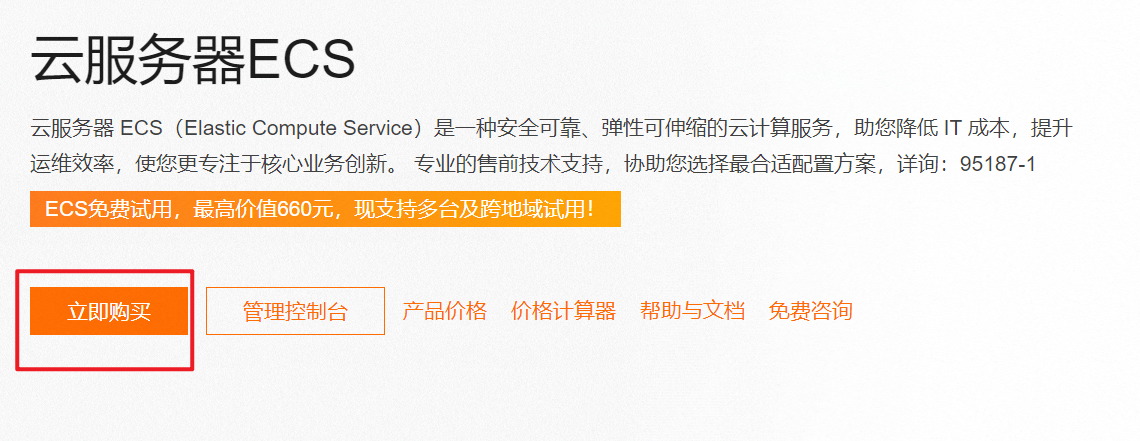
2.1 登录阿里云页面
登录阿里云页面,找到 ECS 服务器购买页面。
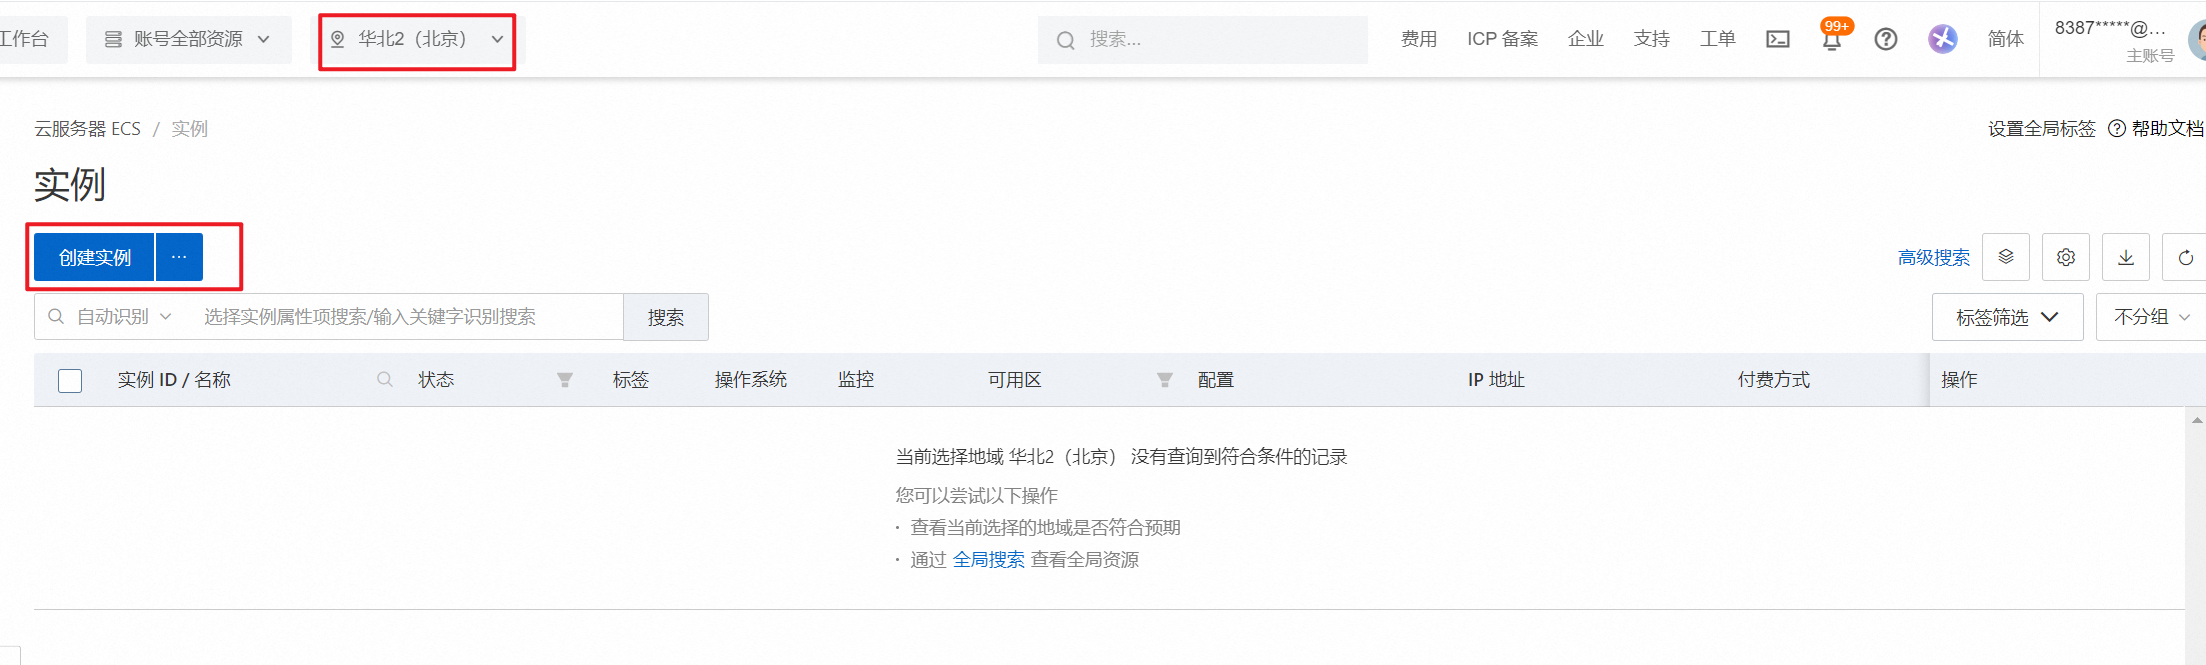
2.2 创建 ECS 实例
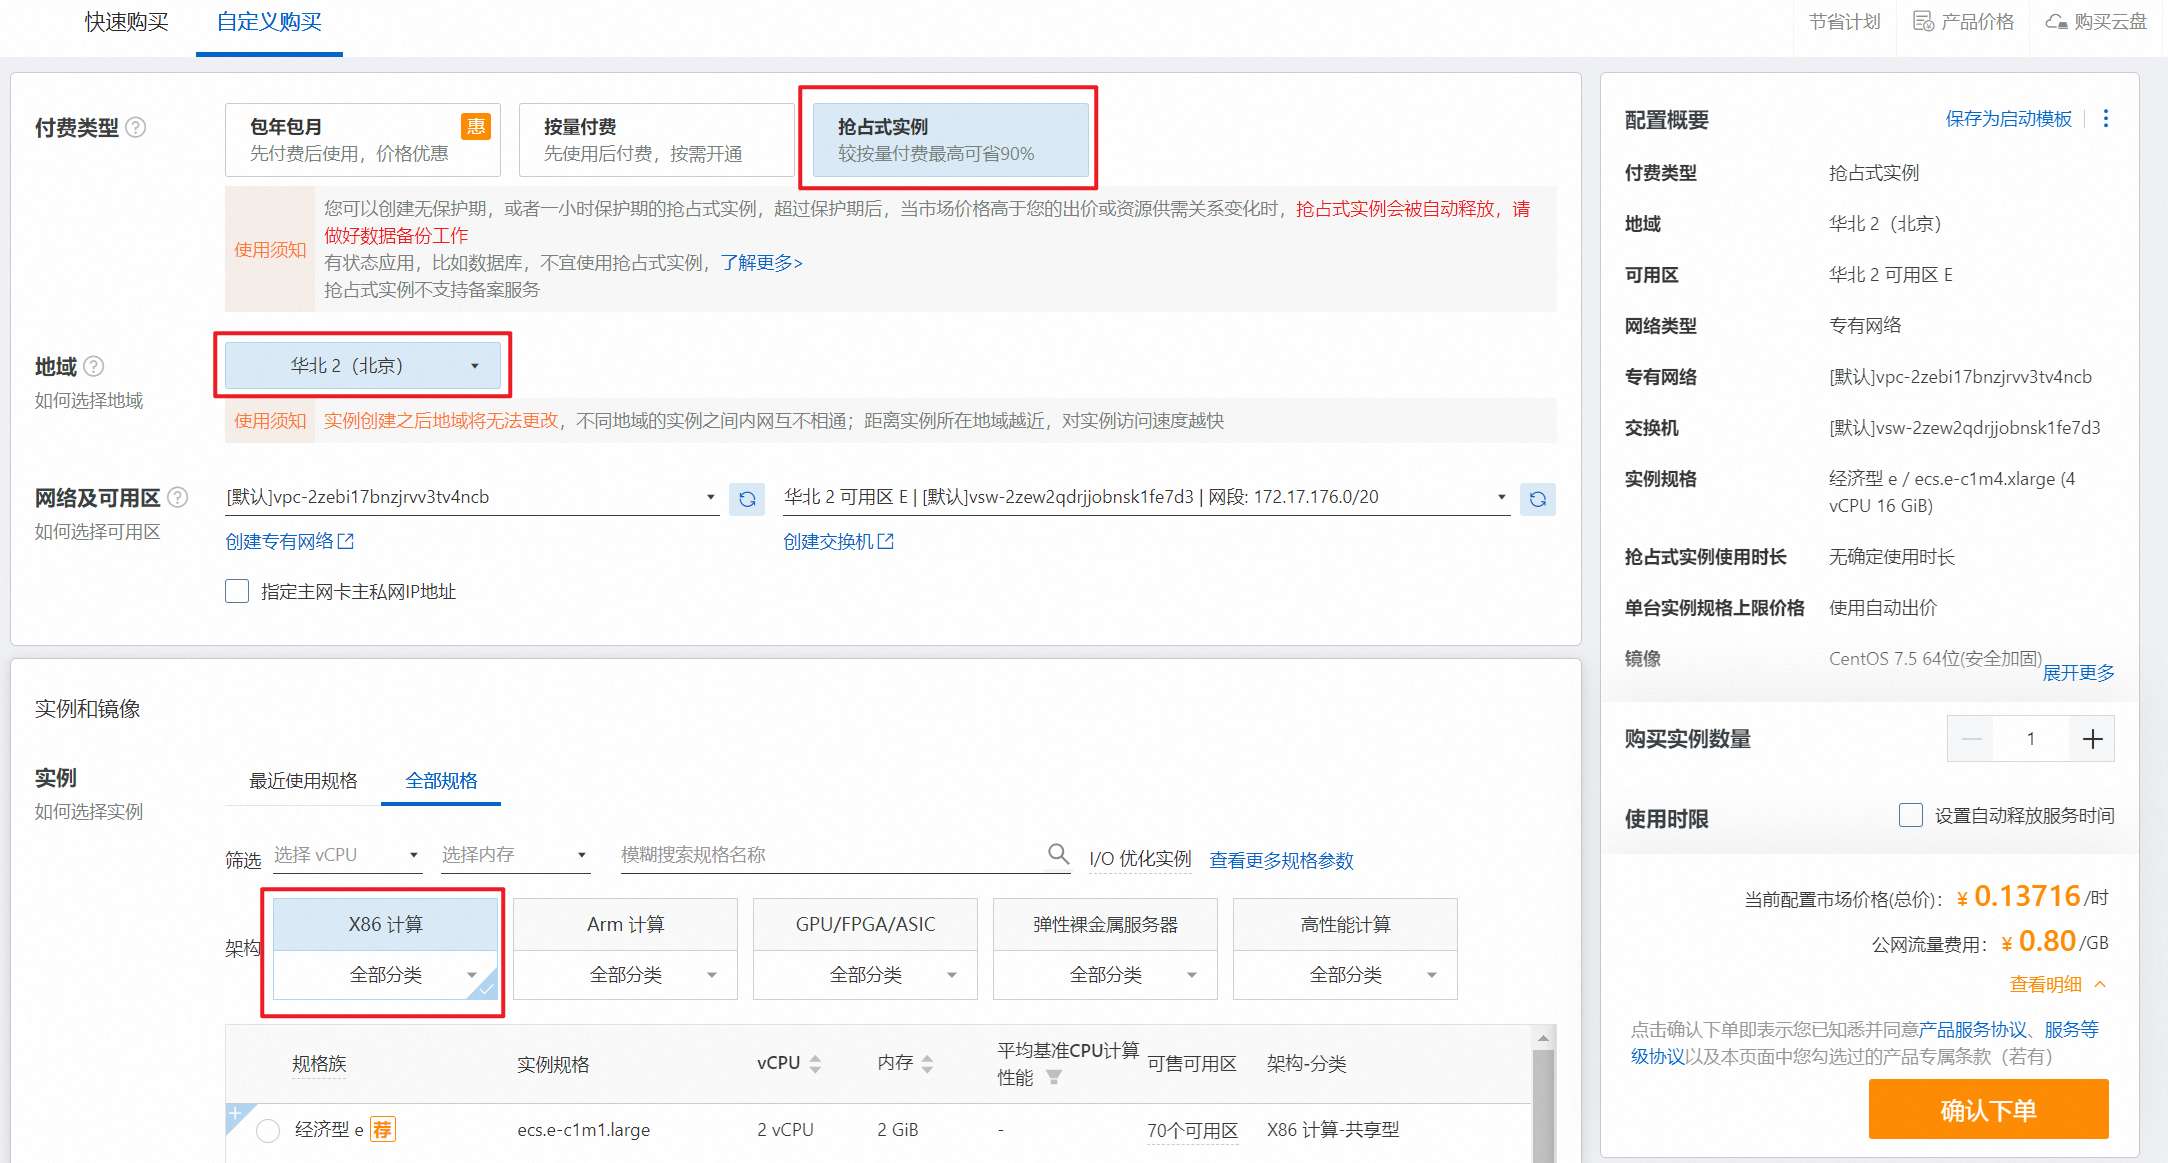
2.3 选择实例配置
如果目的是测试预览,则可以选择最低成本的抢占式实例。
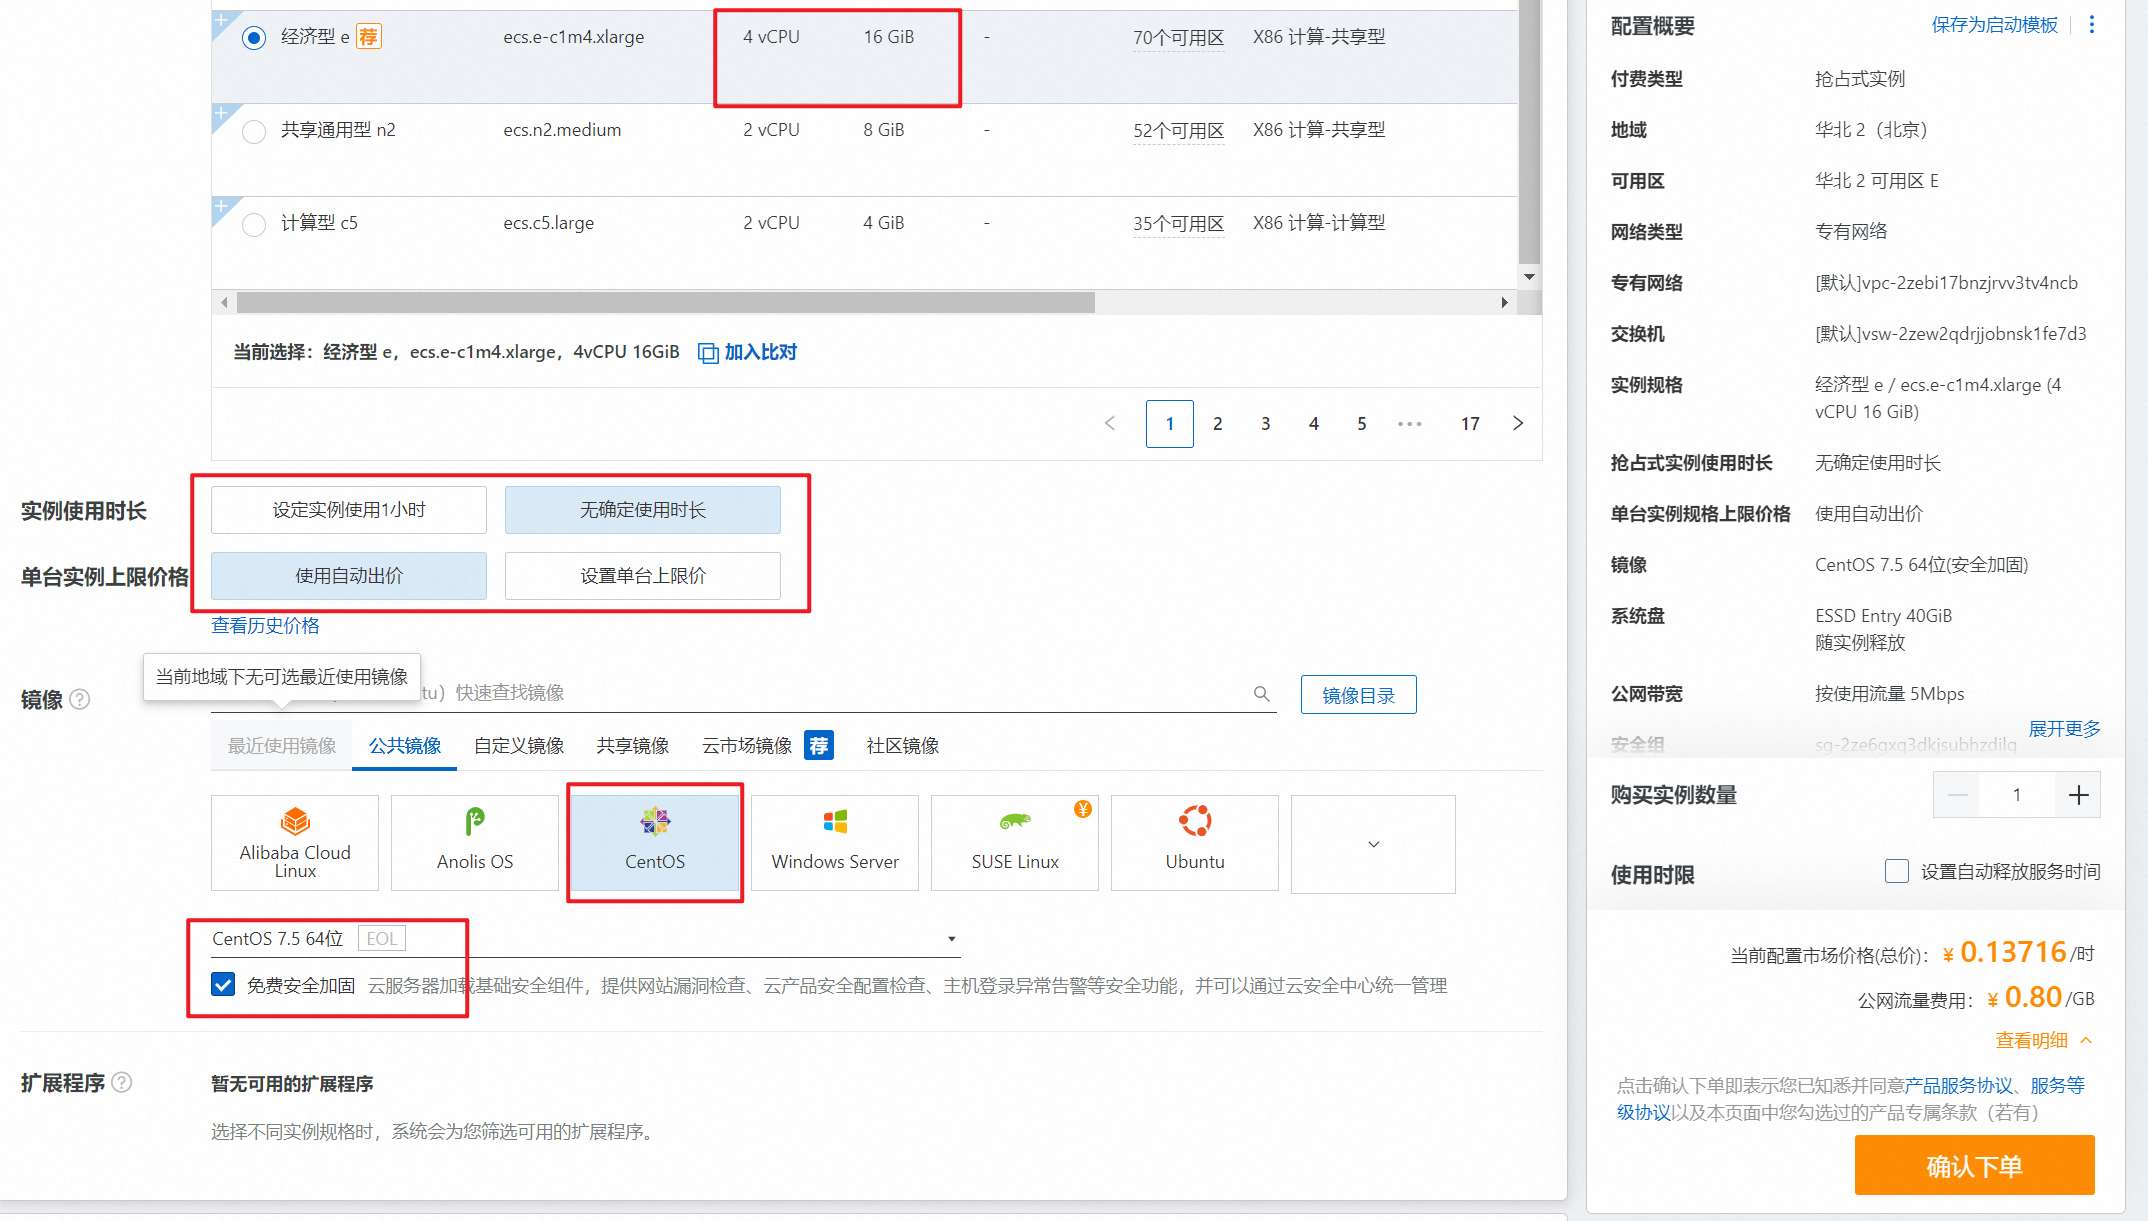
2.4 选择系统
购买三台,第一台配置高一些,4 核 16G 内存,另外两个可以 2 核 8G 内存即可
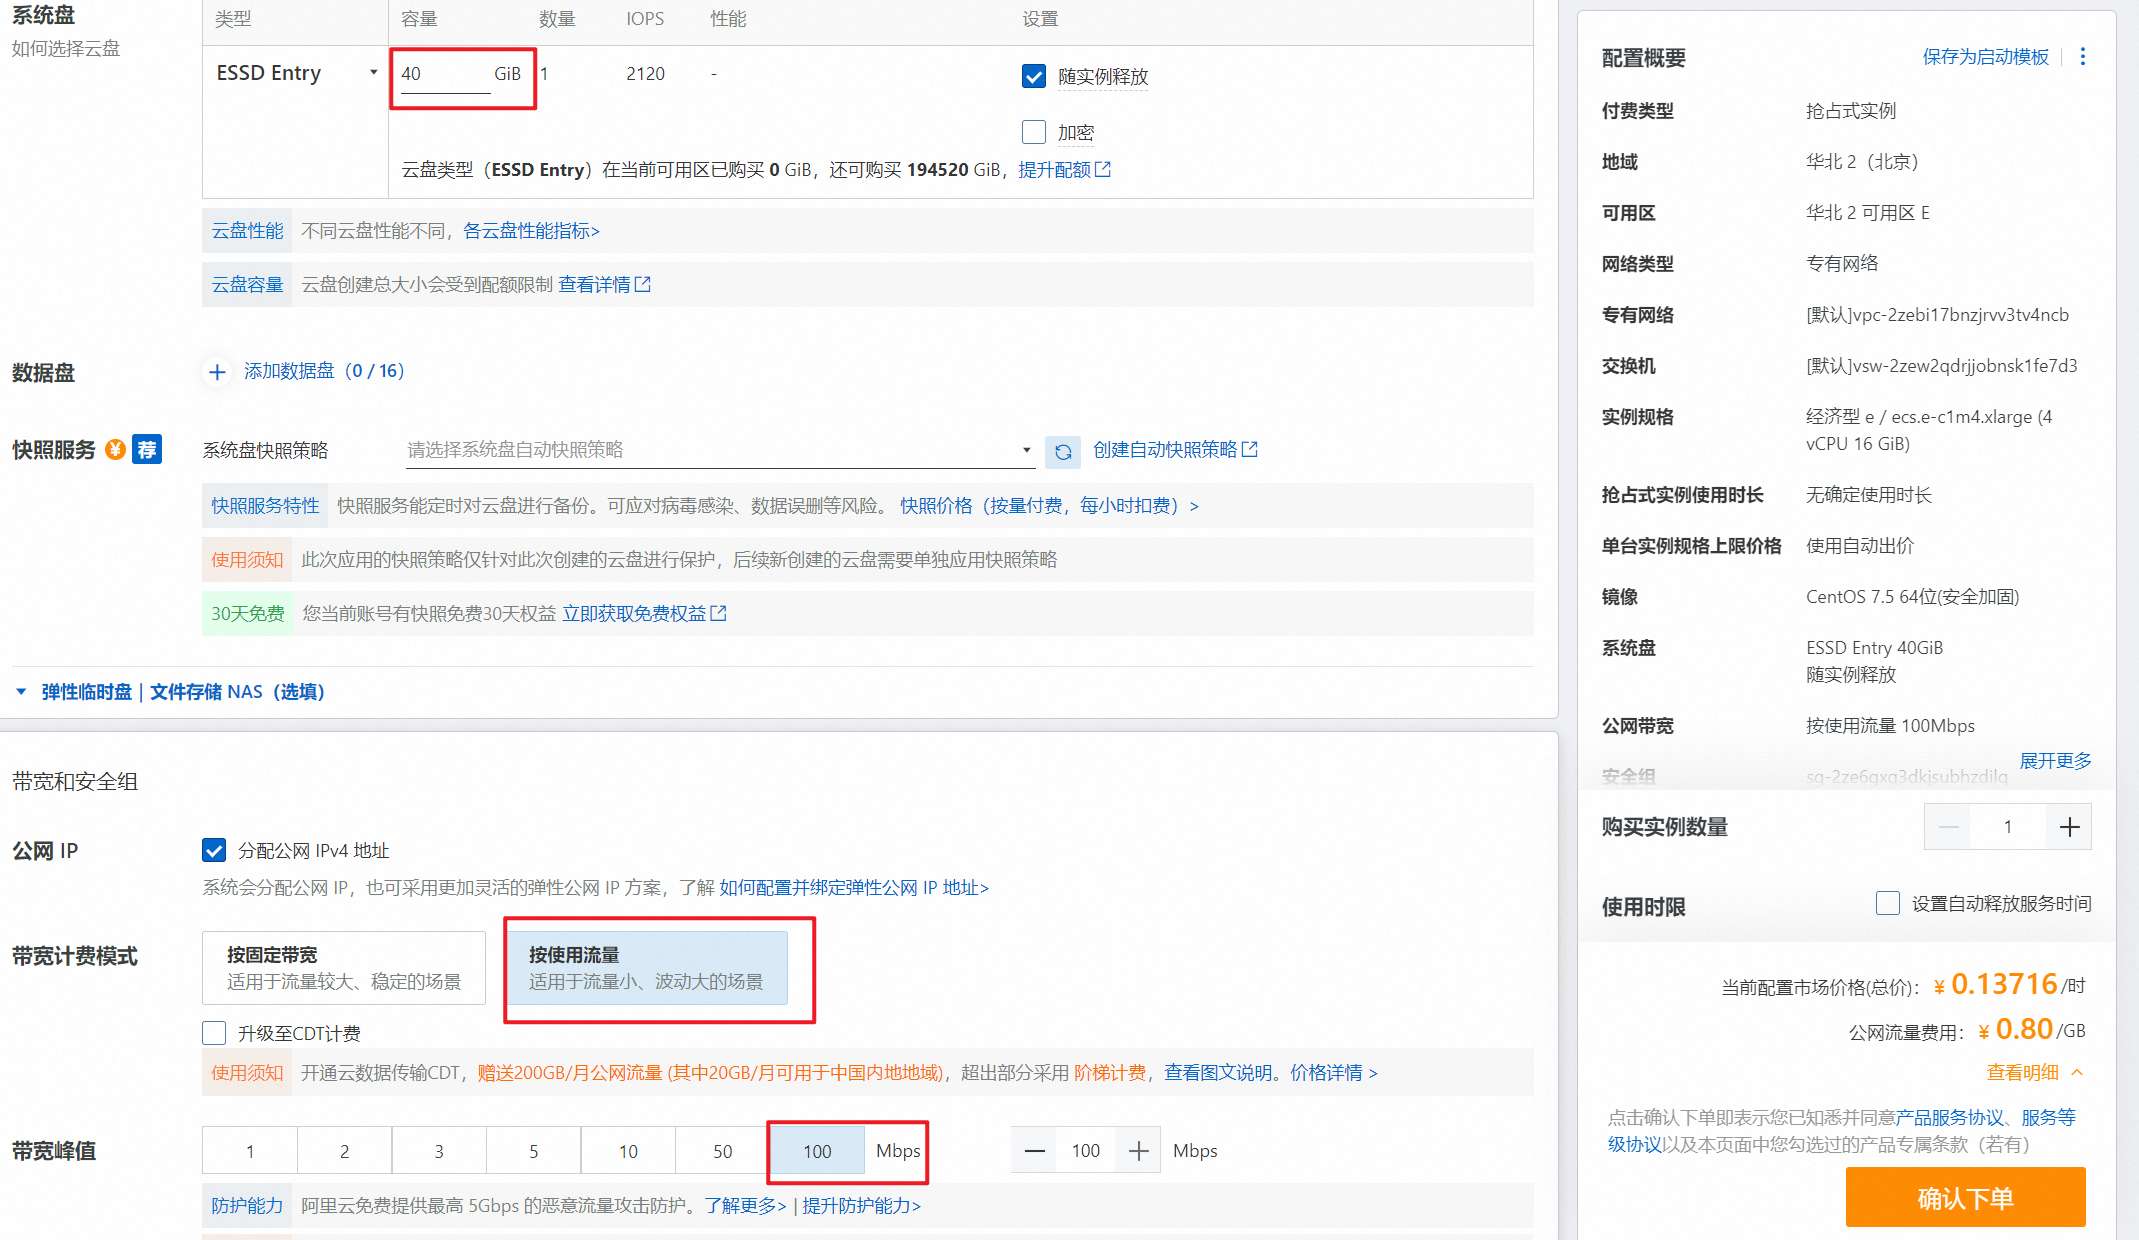
2.5 配置系统盘容量与网络
如果准备下载并上传全量 DataLight 资源包到节点,则推荐系统盘为 100G。
如果为了测试预览,则外网带宽可选择按量计费以降低成本。
在配置外网 IP 时,如果不希望除主节点外,其他节点有外网访问权限(可进一步降低成本),可在主节点上搭建 VPN 来实现对集群内其他节点的访问。
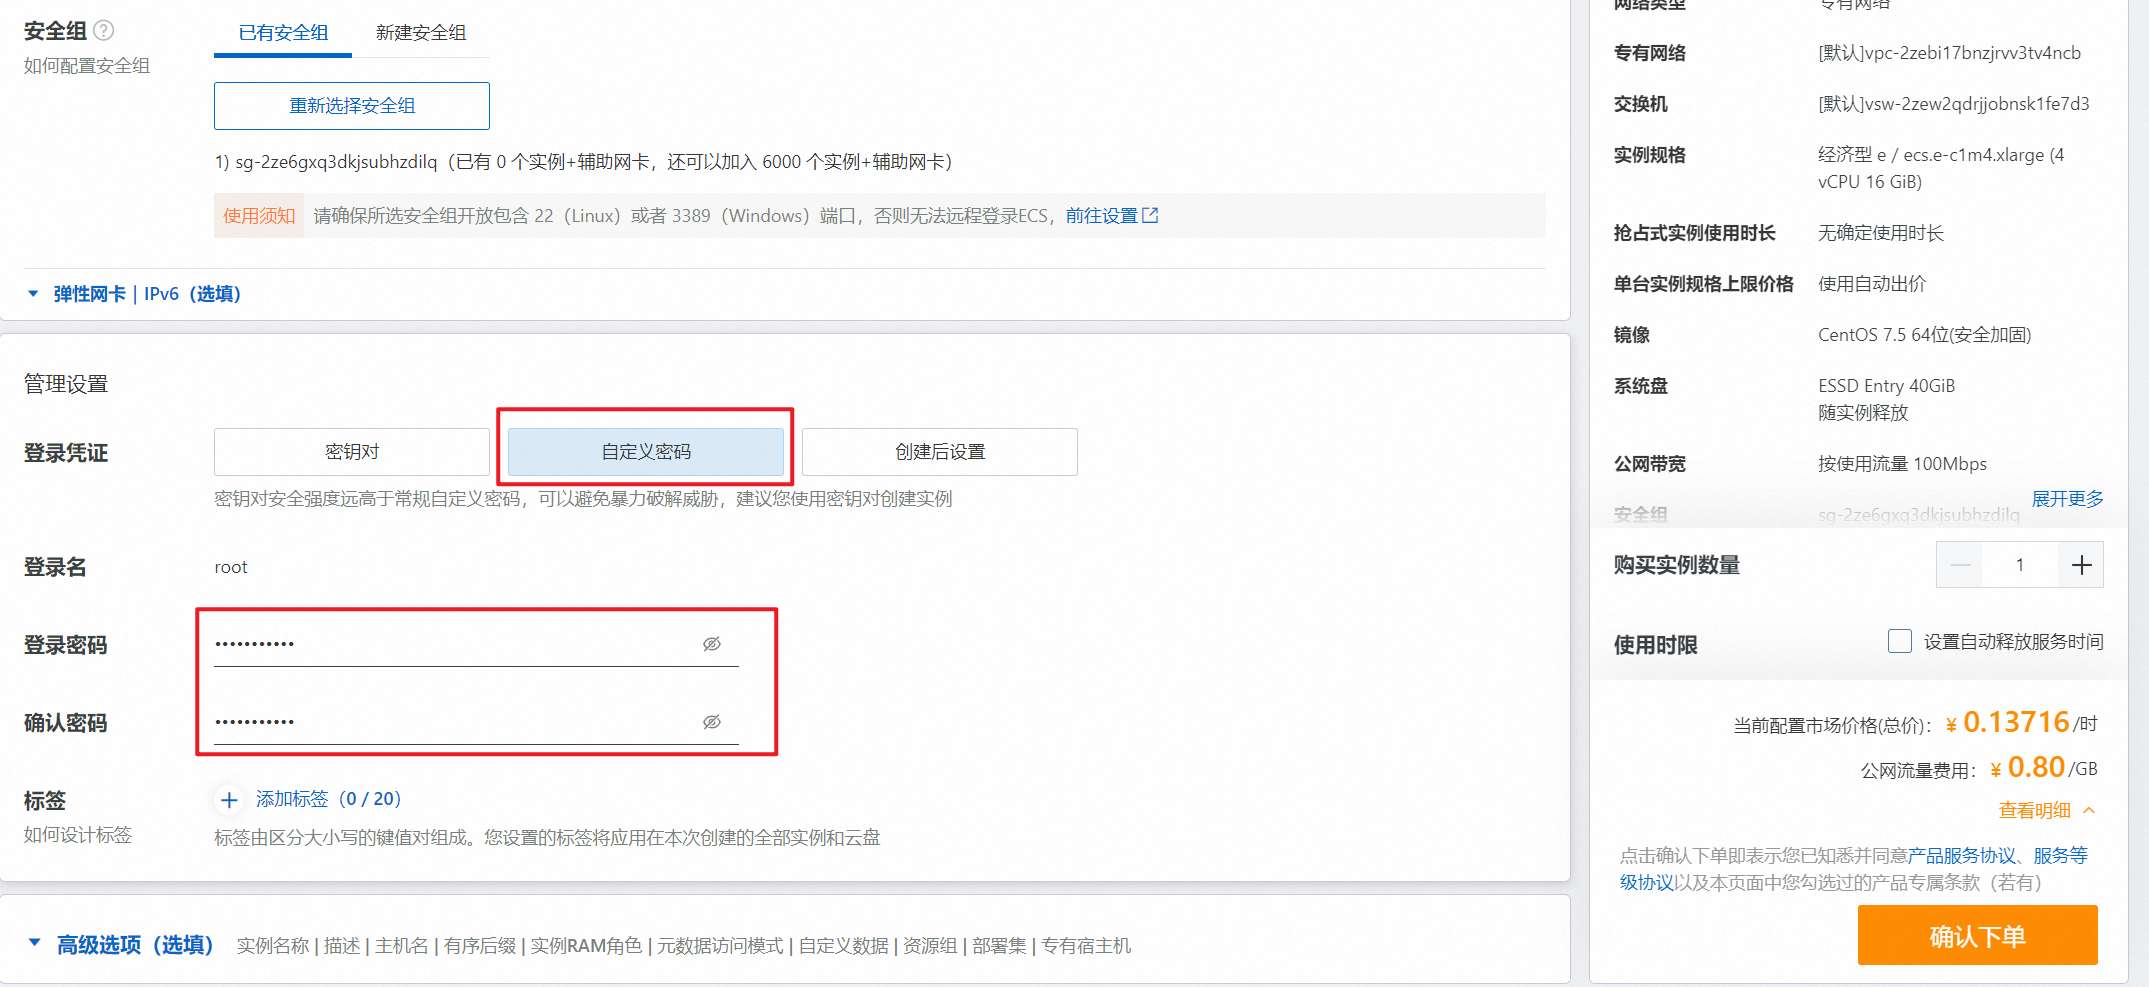
2.6 配置节点密码
配置访问系统的 root 用户的密码。
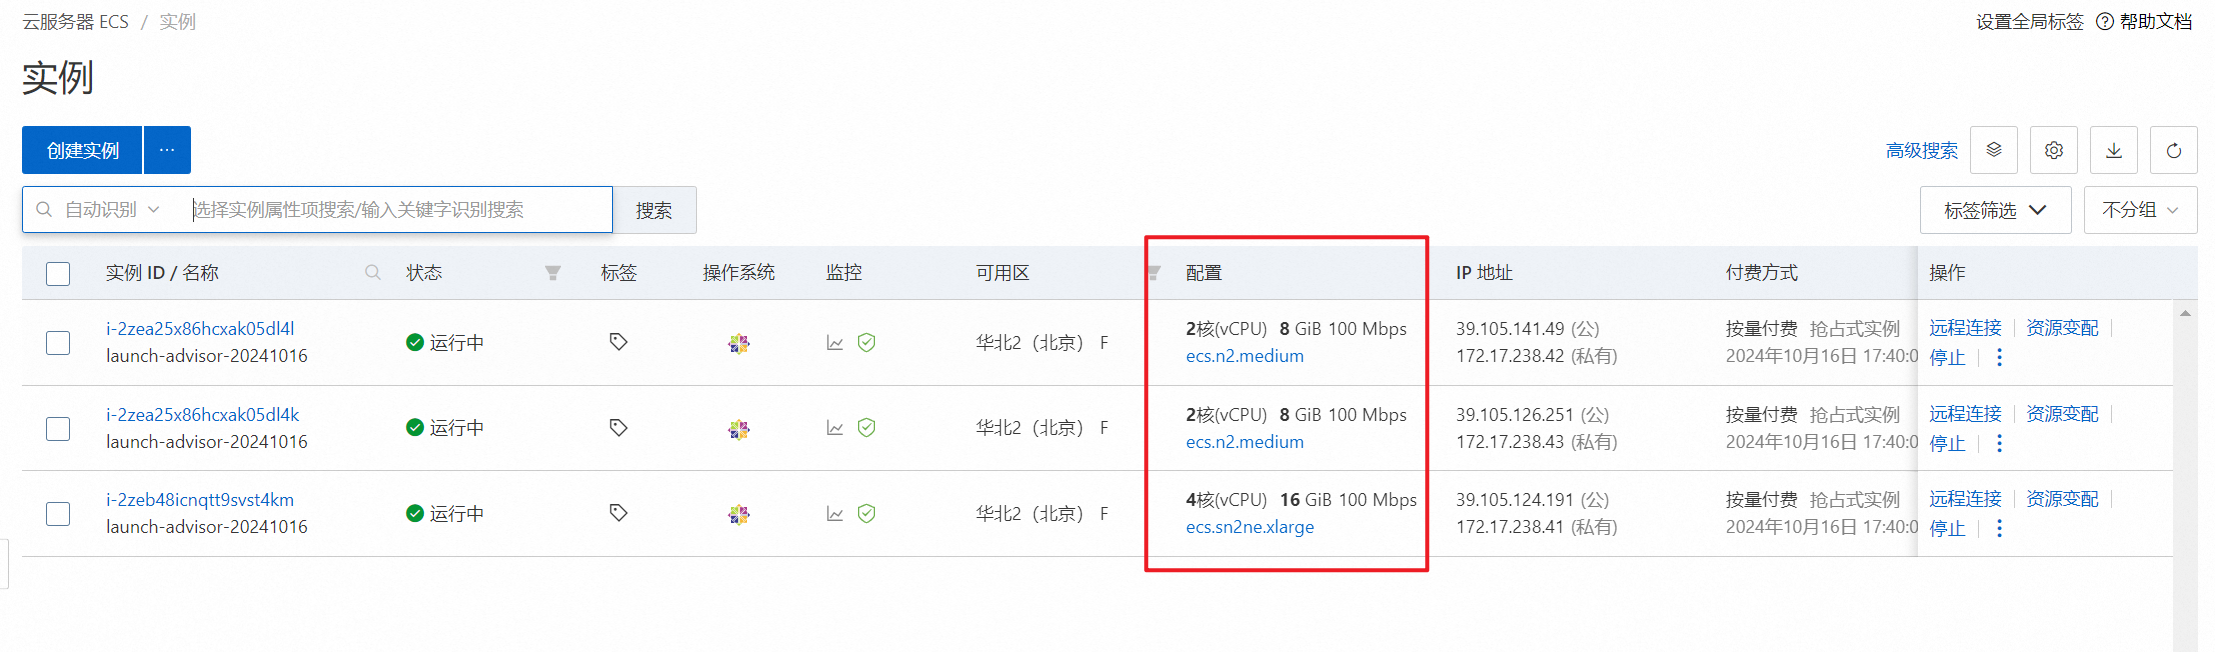
2.7 完成创建
购买成功,如下图所示。
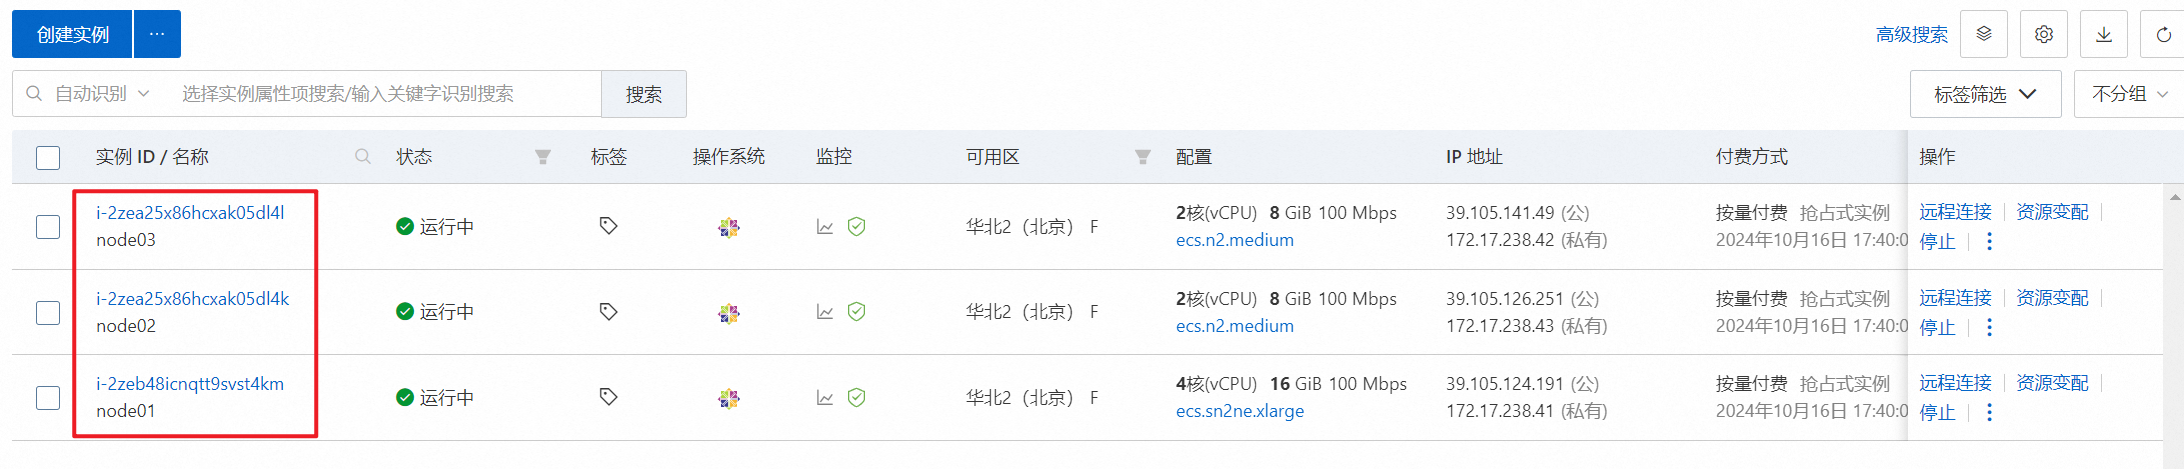
2.8 修改实例名称
用户可根据需要,自行修改 ECS 服务器名称。
三、修改节点配置
该过程在不同云厂商系统环境中可能存在细微区别,但大体上一致。
在初始化节点时,用户可根据 DataLight 教程,通过帮助脚本,完成节点的自动初始化工作。
当然,也可以手动完成。
3.1、建立远程连接
通过 SSH 工具,建立与 ECS 服务器的远程连接访问。此处可以通过 VPN 或直连外网 IP。建立连接的节点,是你准备部署 DataLight Master 进程所在的节点。
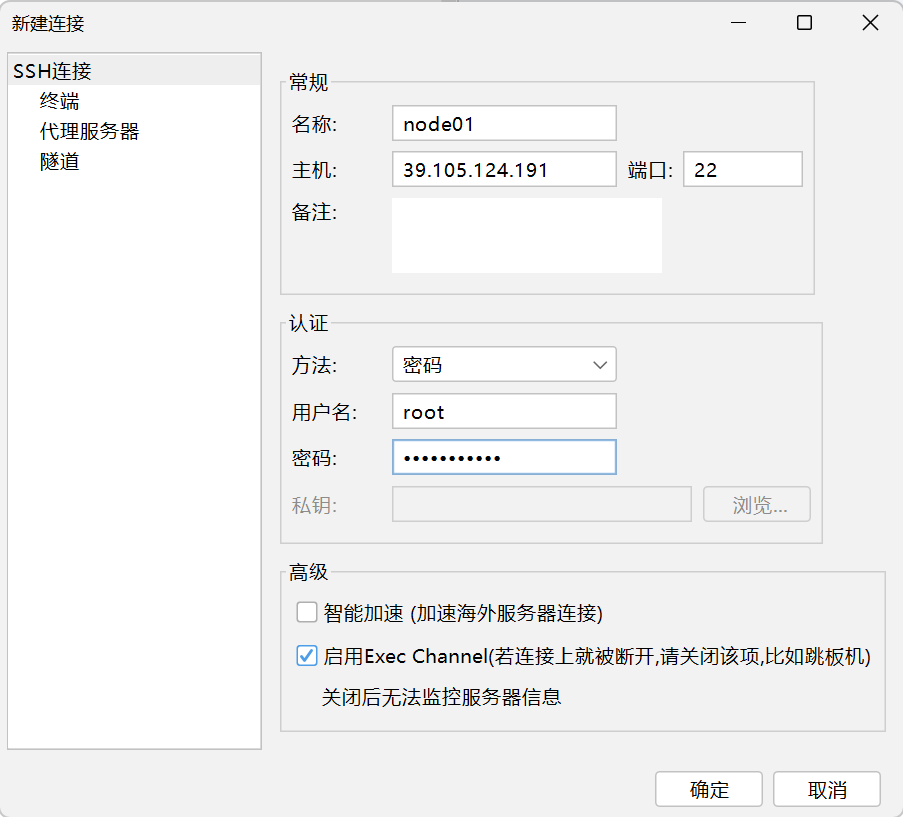
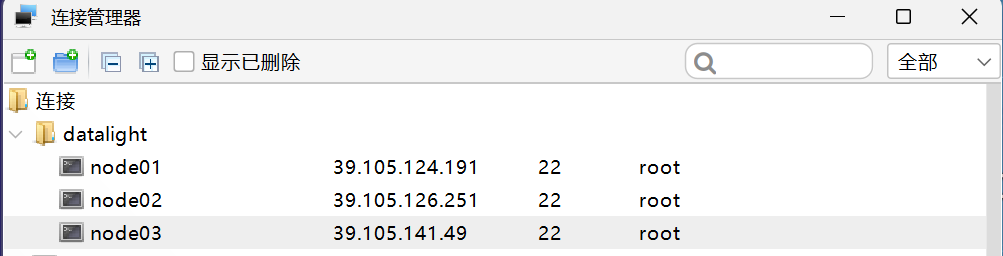
配置3台节点。此处如果 node02、node03 没有分配外网 IP,可以考虑在 node01 上搭建 VPN 以使得外网访问穿透到 node02 node03节点。
3.2、修改主机名
shell
sh /opt/datalight/assistant/scripts/init-hostname.sh node01
sh /opt/datalight/assistant/scripts/init-hostname.sh node02
sh /opt/datalight/assistant/scripts/init-hostname.sh node03
修改完,重启服务器
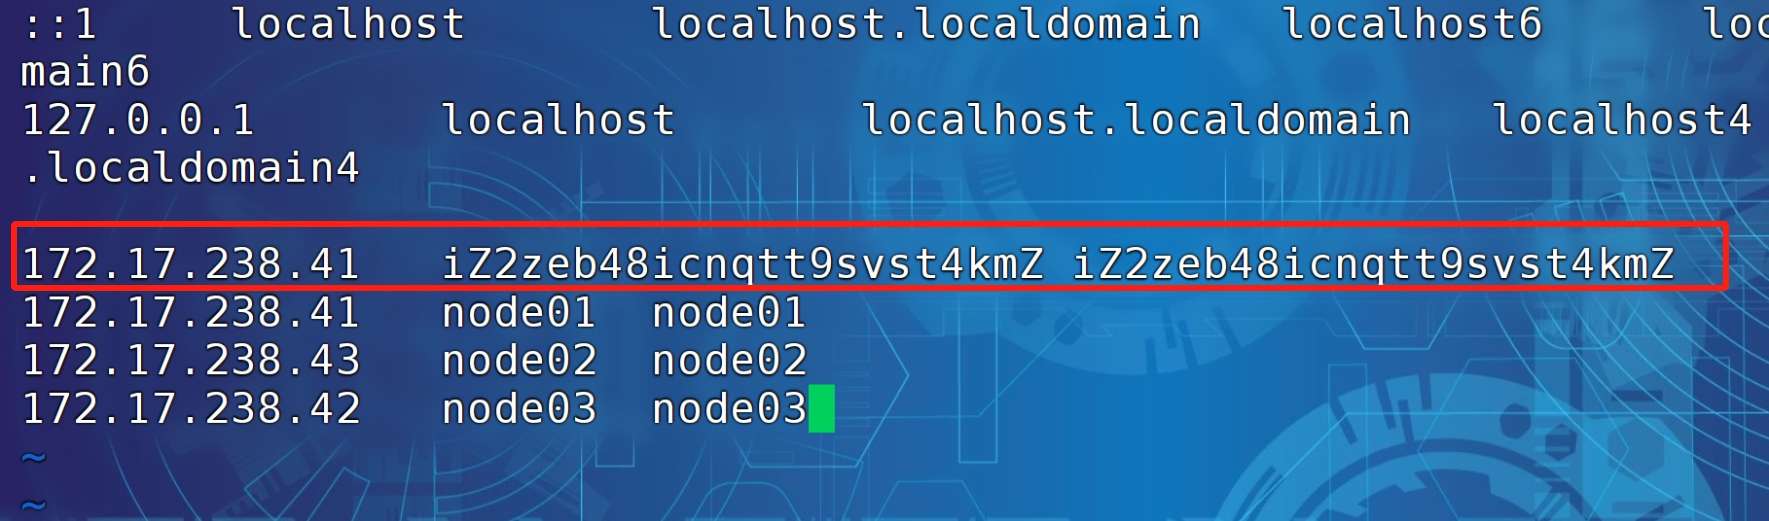
3.3、修改 hosts 映射文件
shell
vi /etc/hosts
shell
172.17.238.41   node01  node01
172.17.238.43   node02  node02
172.17.238.42   node03  node03
注意:阿里云的 /etc/hosts 中下方标记的内容需要删除。
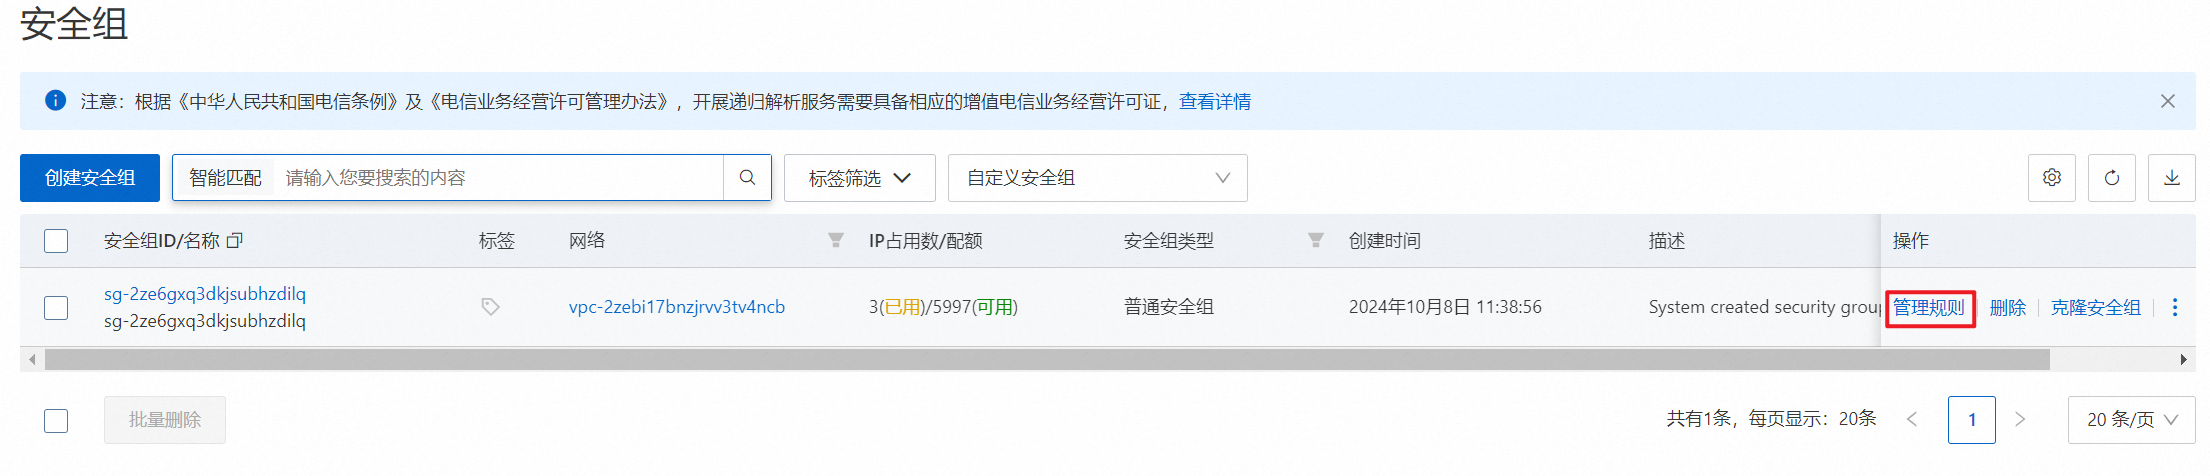
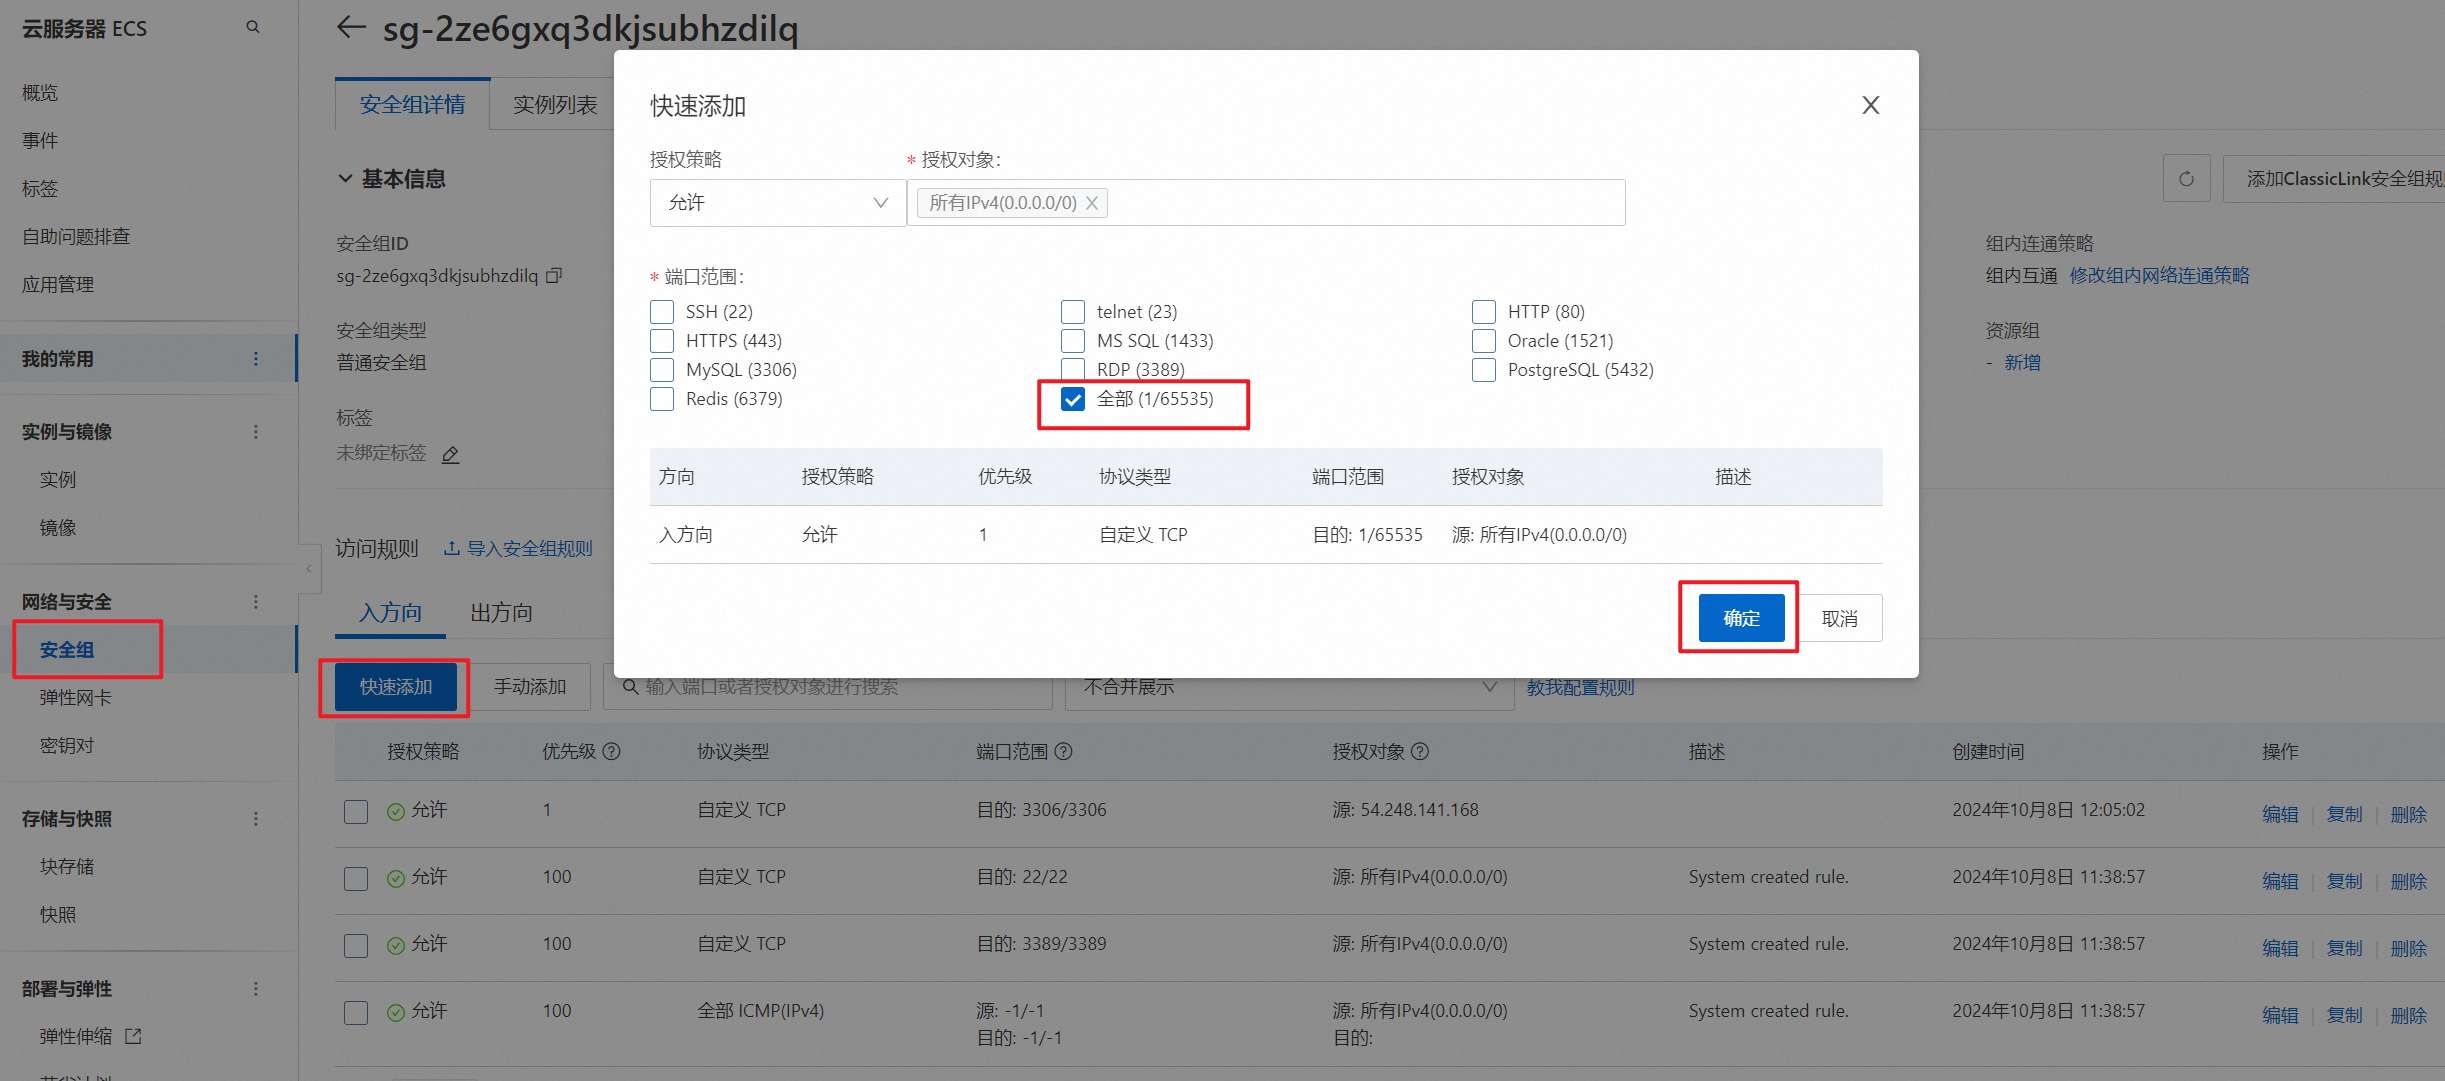
3.4、修改安全组
为了安装方便,放行所有端口,并指定允许的 IP 为你当前本机交换机或路由器的 IP 地址,防止网络恶意脚本的攻击。
注意:可以通过百度搜索:IP 来查看当前自己的本机外网 IP。
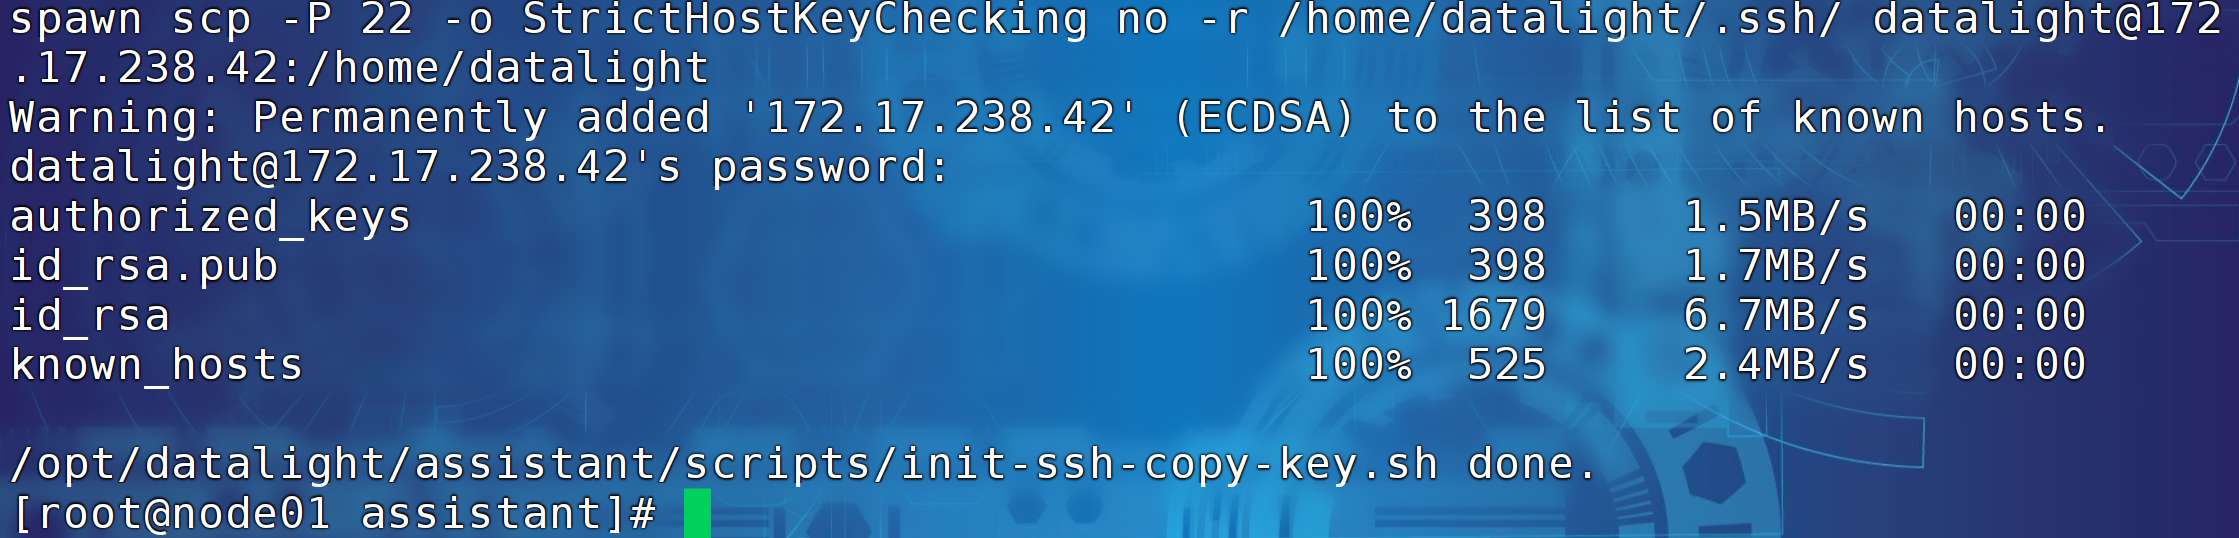
3.6、免密登录,可通过初始化脚本自行完成
shell
ssh-keygen -t rsa
然后免密登录 node01 node02 node03
ssh-copy-id node01
ssh-copy-id node02
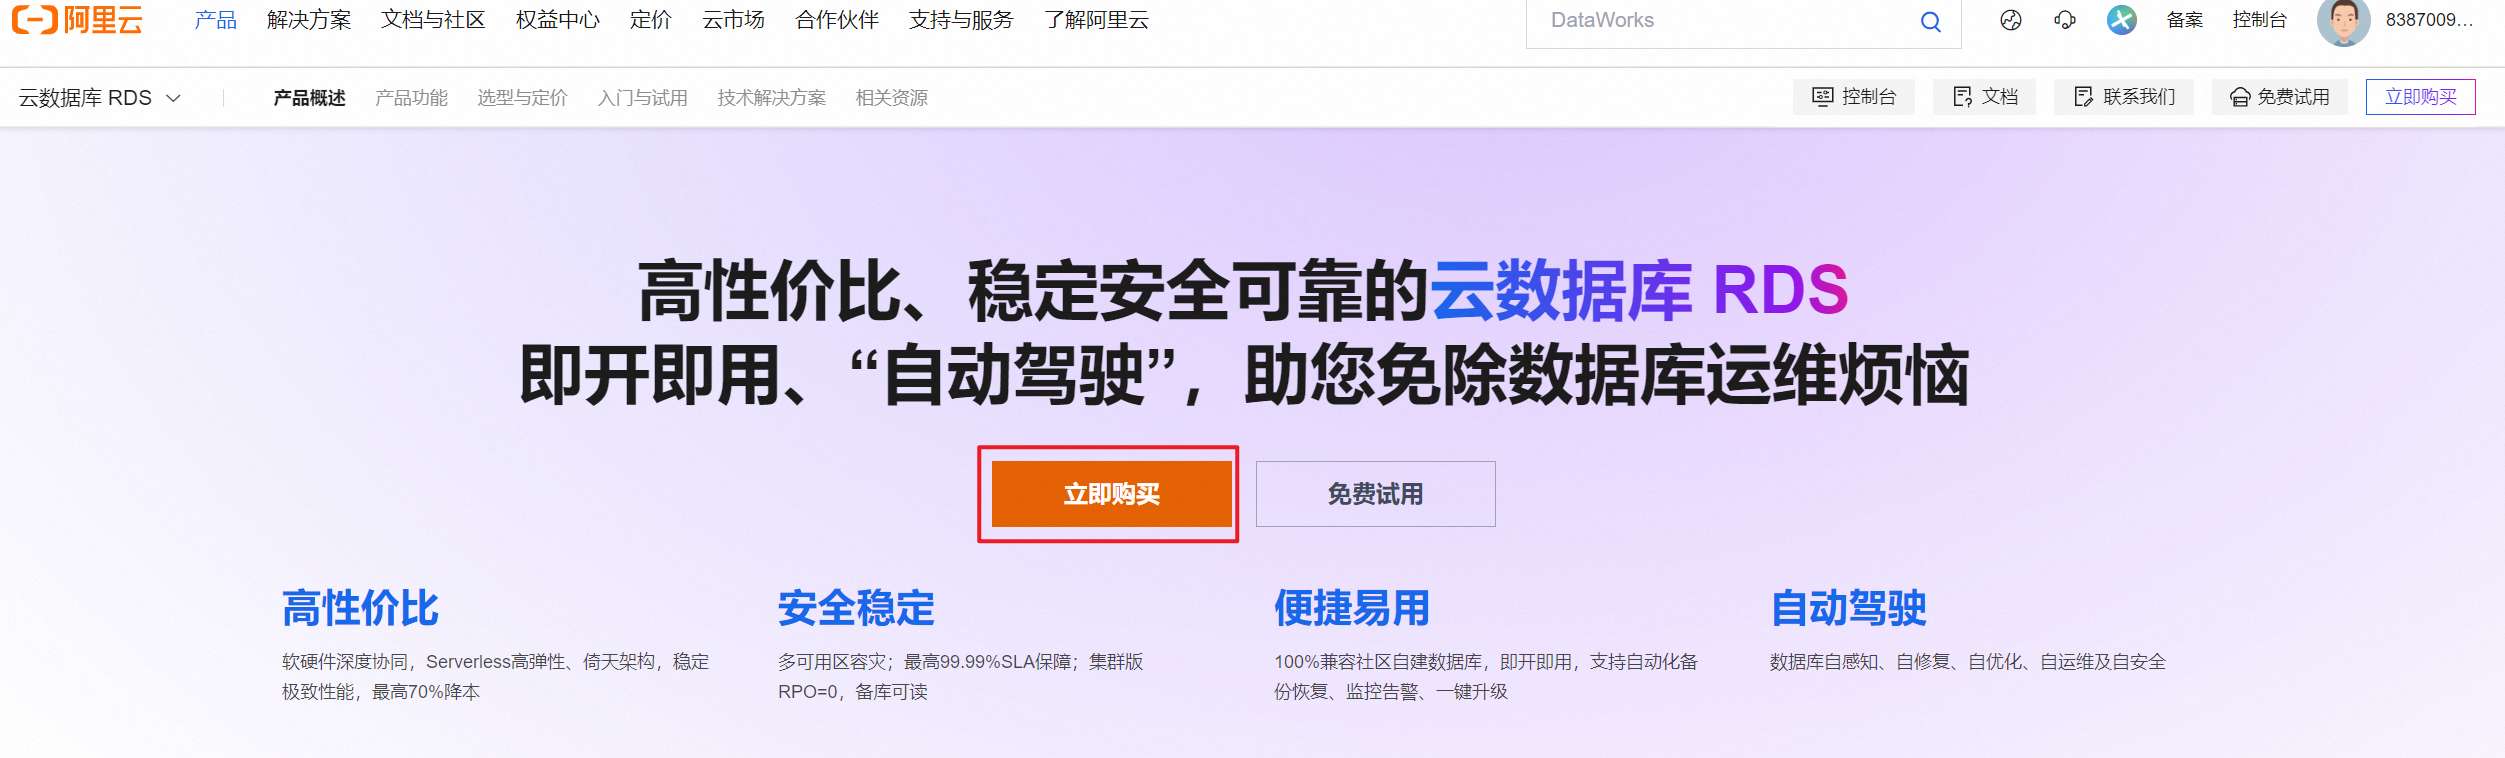
ssh-copy-id node03四、购买 mysql 数据库
4.1 前往阿里云 RDS 产品页面
购买 MySQL 数据库实例。

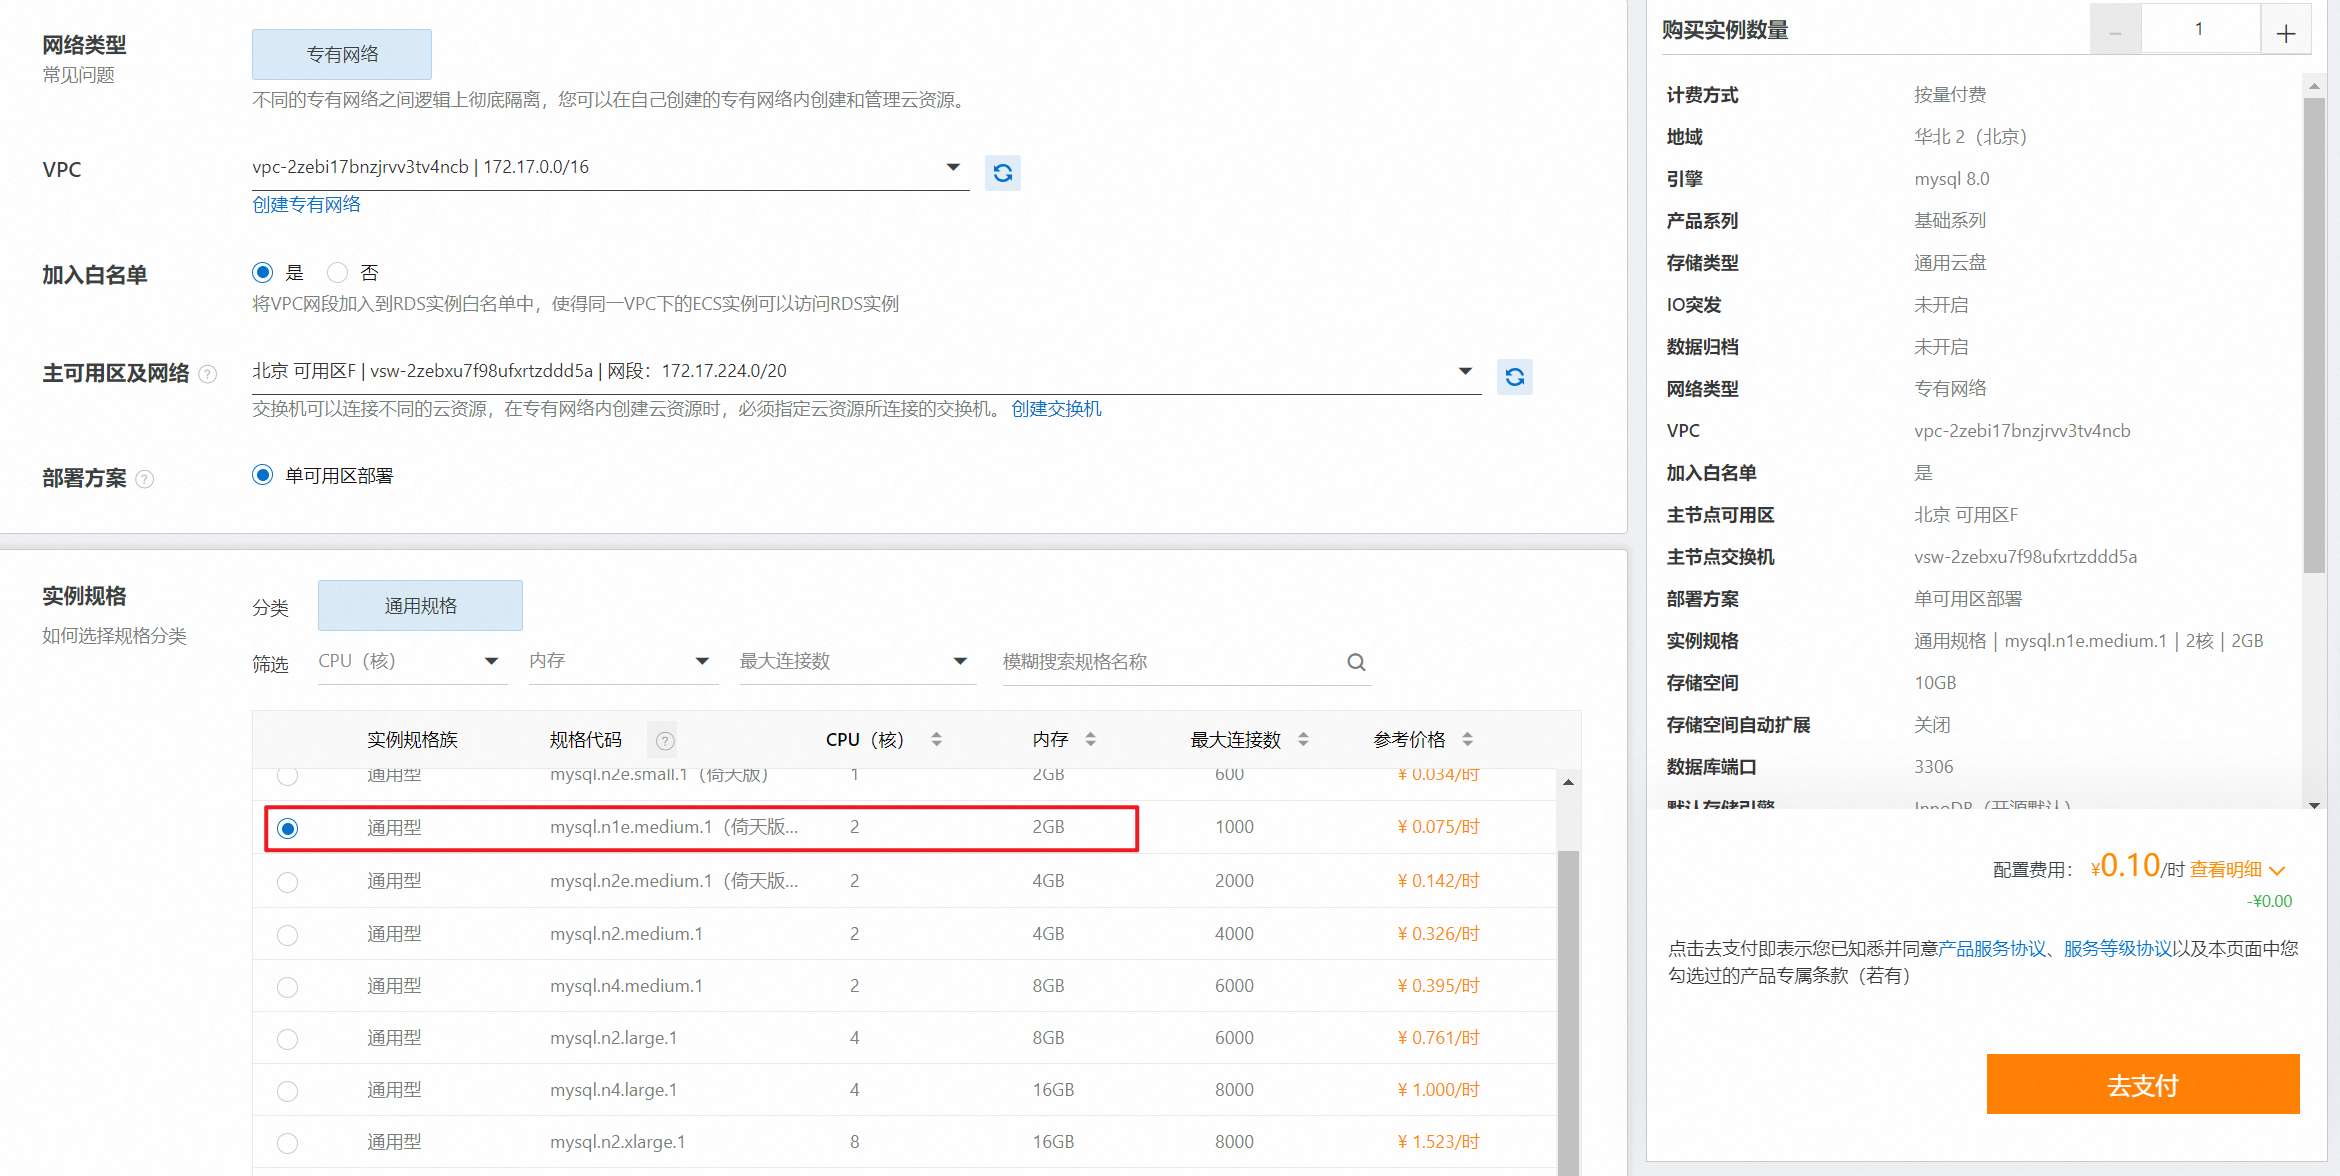
4.2 配置 RDS 实例内容

4.3 查看 RDS 实例列表

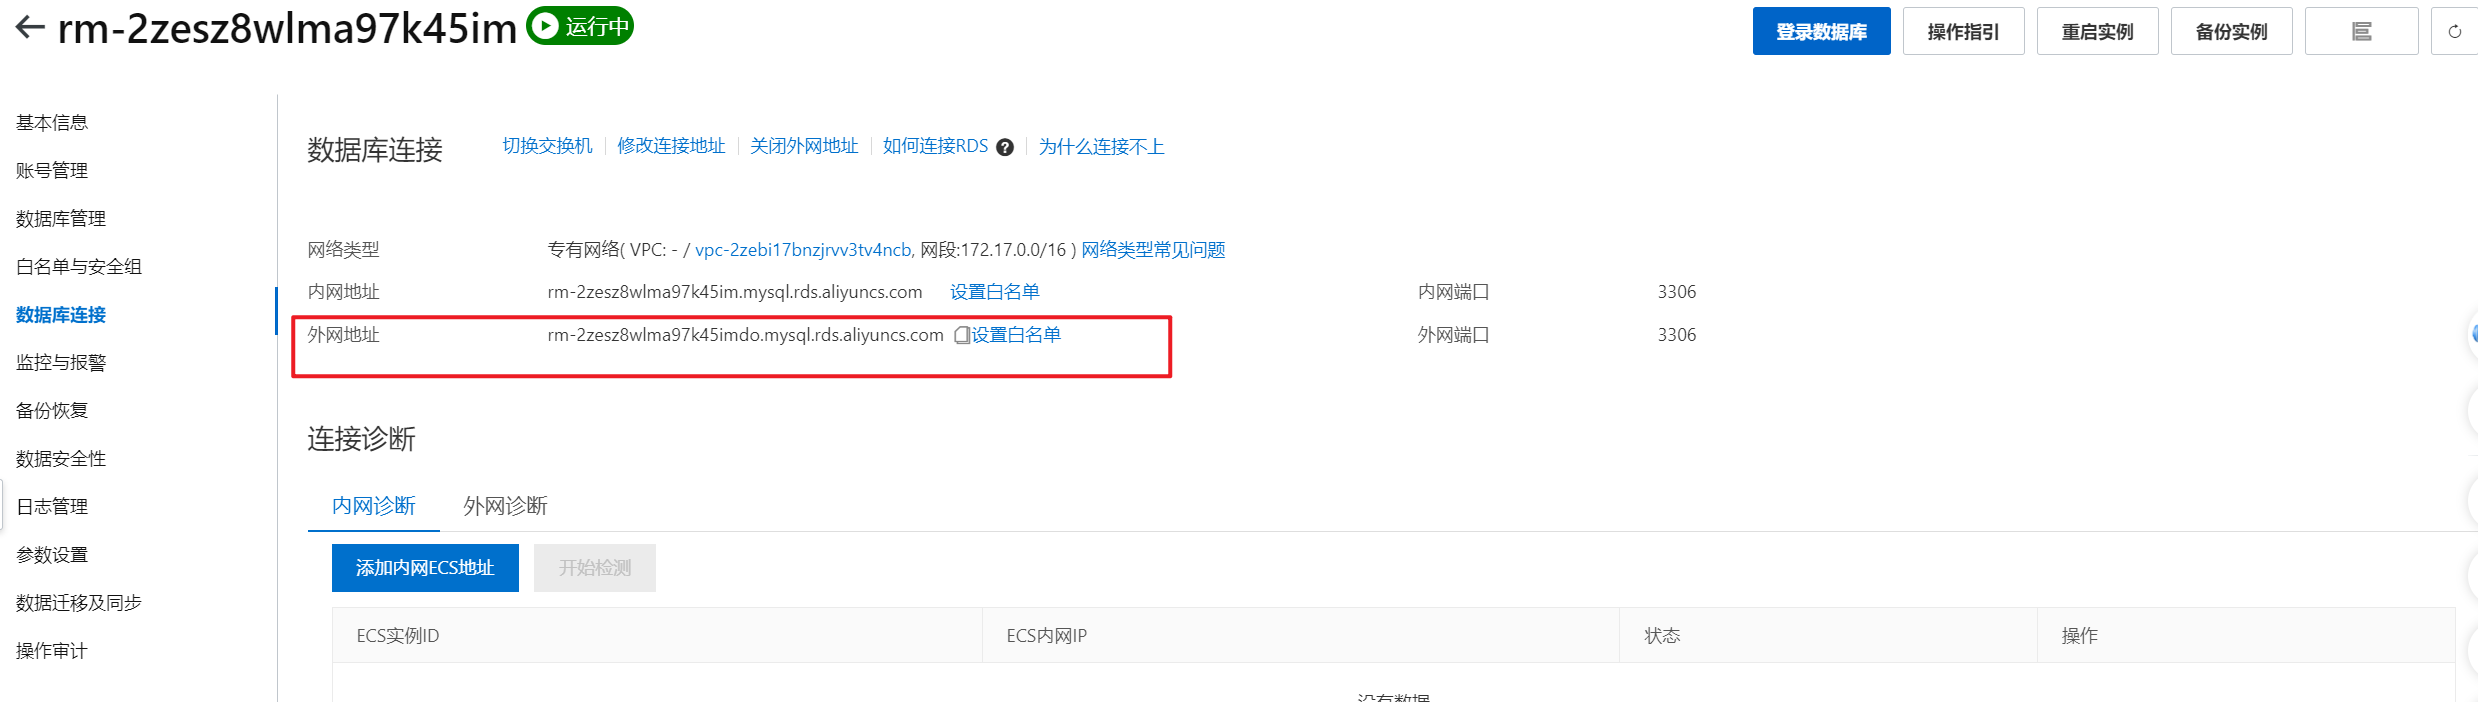
4.4 完成创建,并查看访问地址
创建成功后,点击进入,创建外网连接。
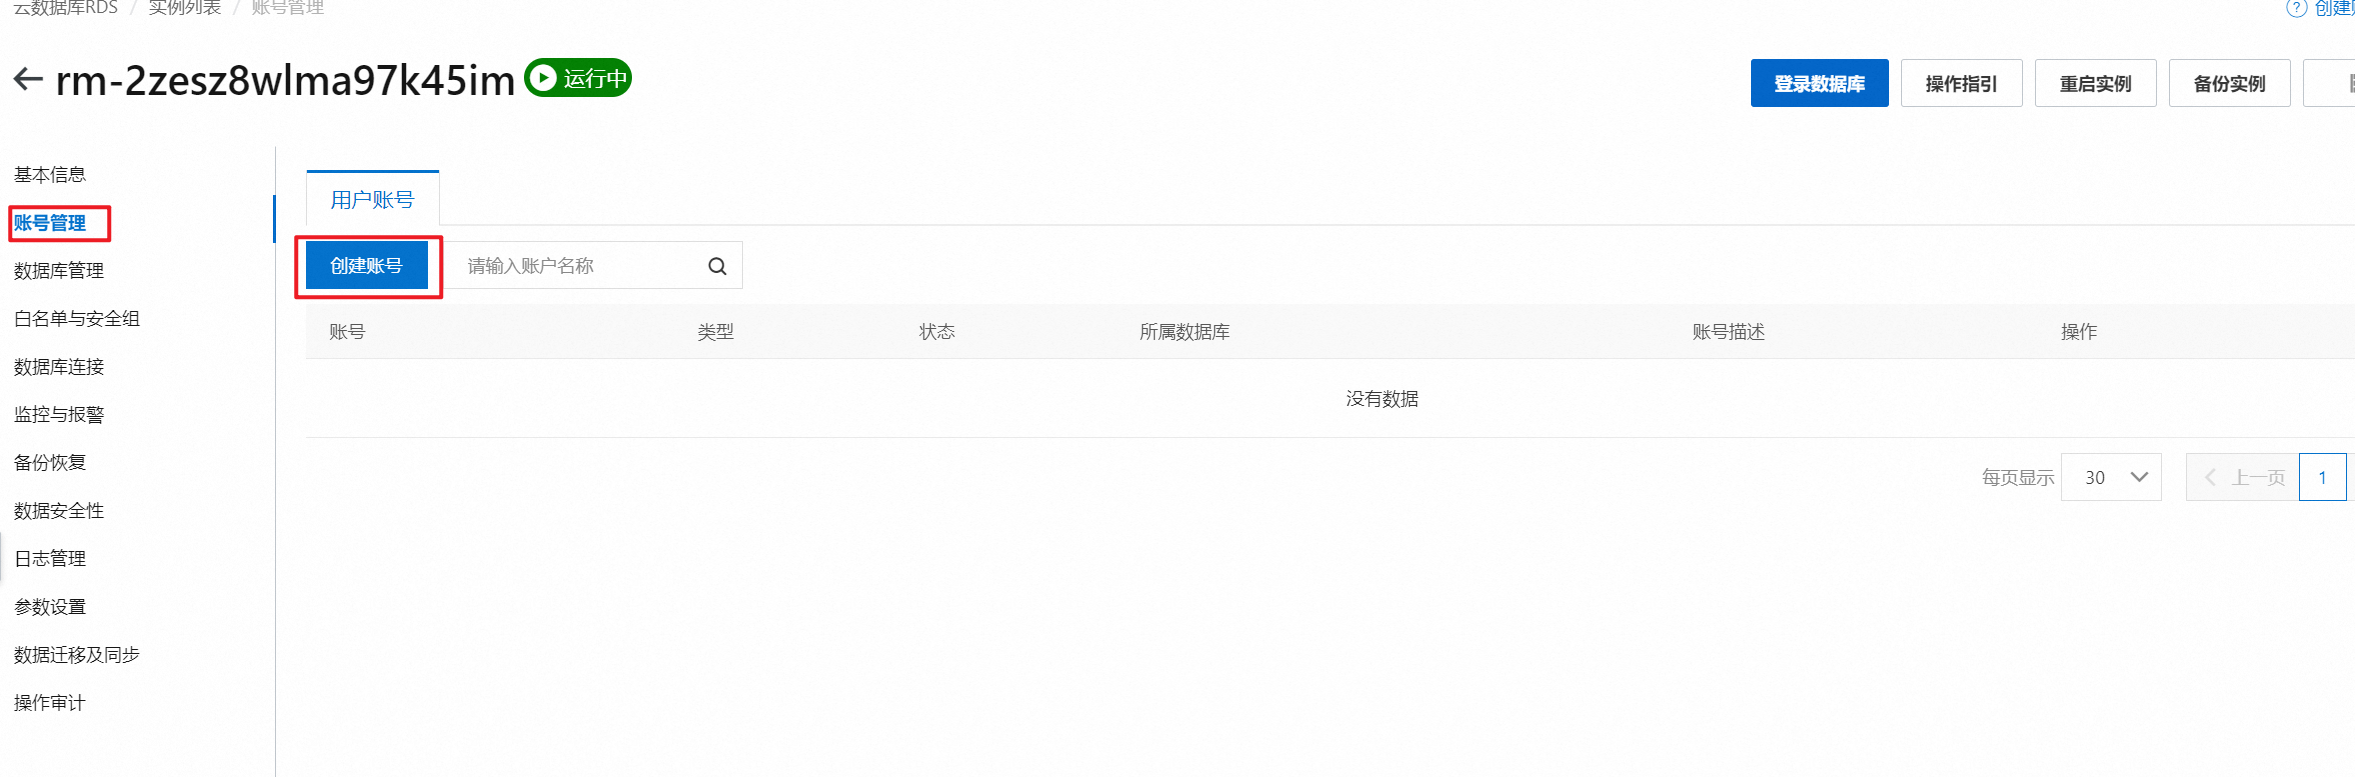
4.5 初始化 RDS 数据库账号密码
单击"创建账号"前往 RDS 账号密码配置页面。
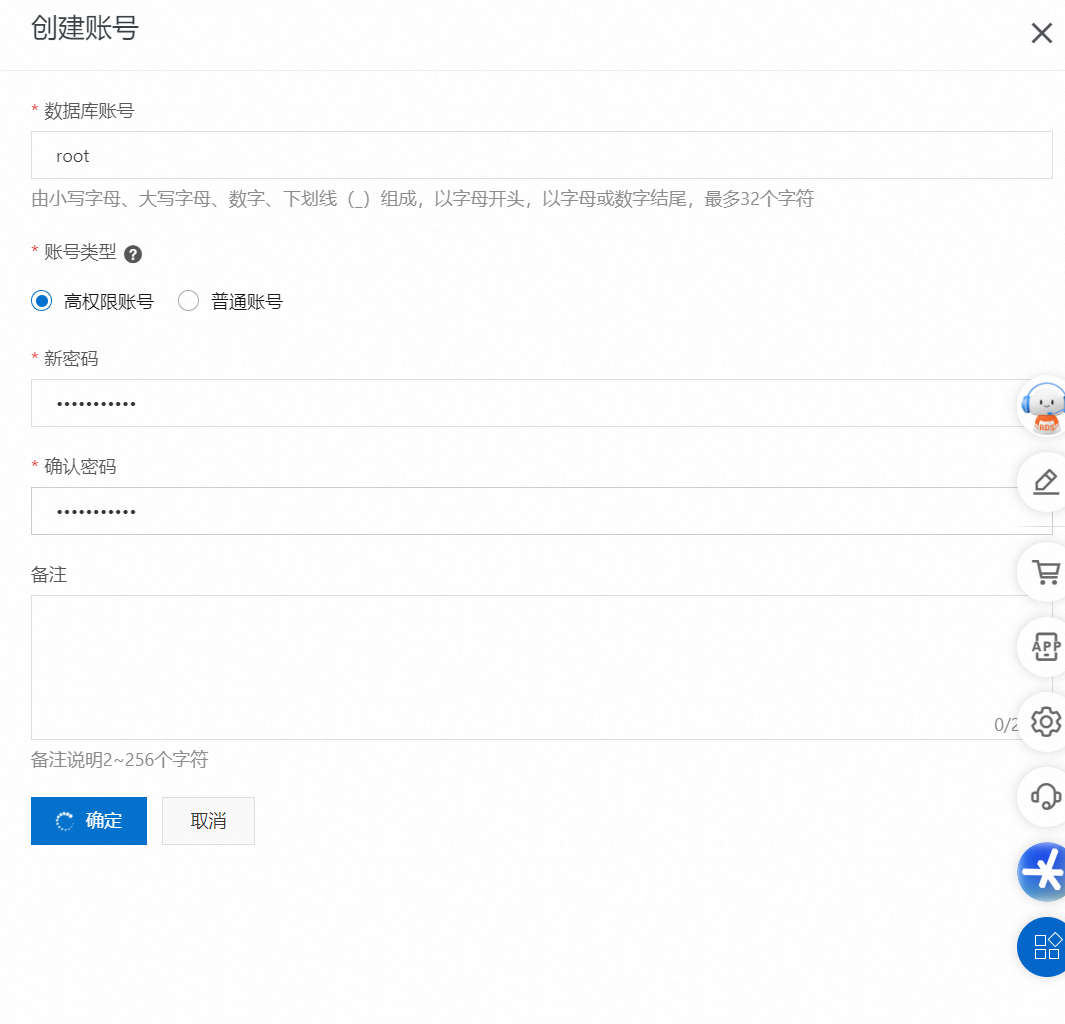
4.6 完成账号创建
创建数据库管理员账号、密码。
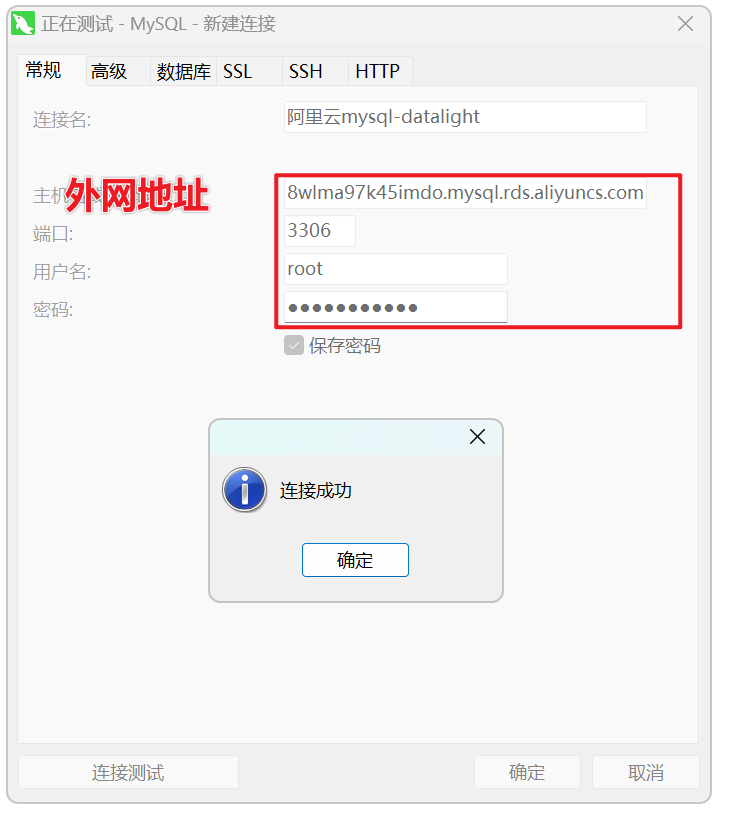
4.7 通过工具连接 RDS 数据库实例。
远程连接 MySQL:
五、初始化 MySQL 数据库
5.1 创建 DataLight 数据库
在运行 DataLight 之前,创建 DataLight 数据库。
python
CREATE DATABASE db_datalight DEFAULT CHARACTER SET utf8mb4 COLLATE utf8mb4_unicode_ci;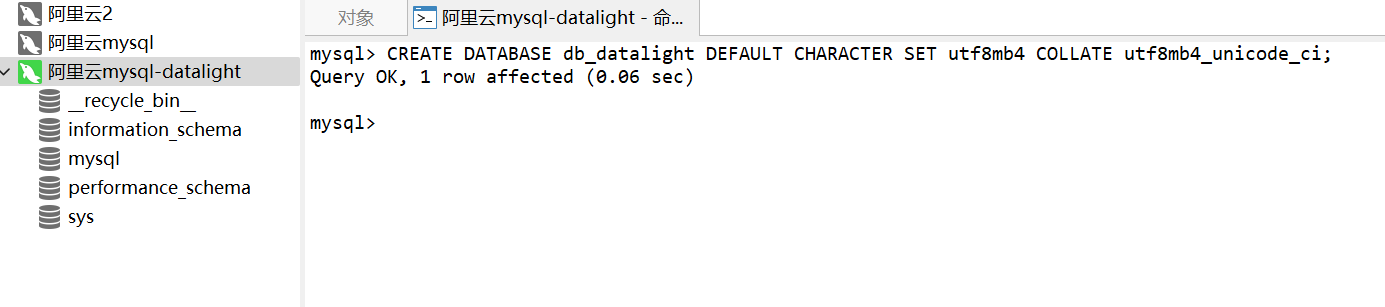
5.2 导入 DataLight 表结构
导入 sql 文件的数据,SQL 语句的位置:D:\datalight\Boundivore\datalight部署包\datalight\orm\sql
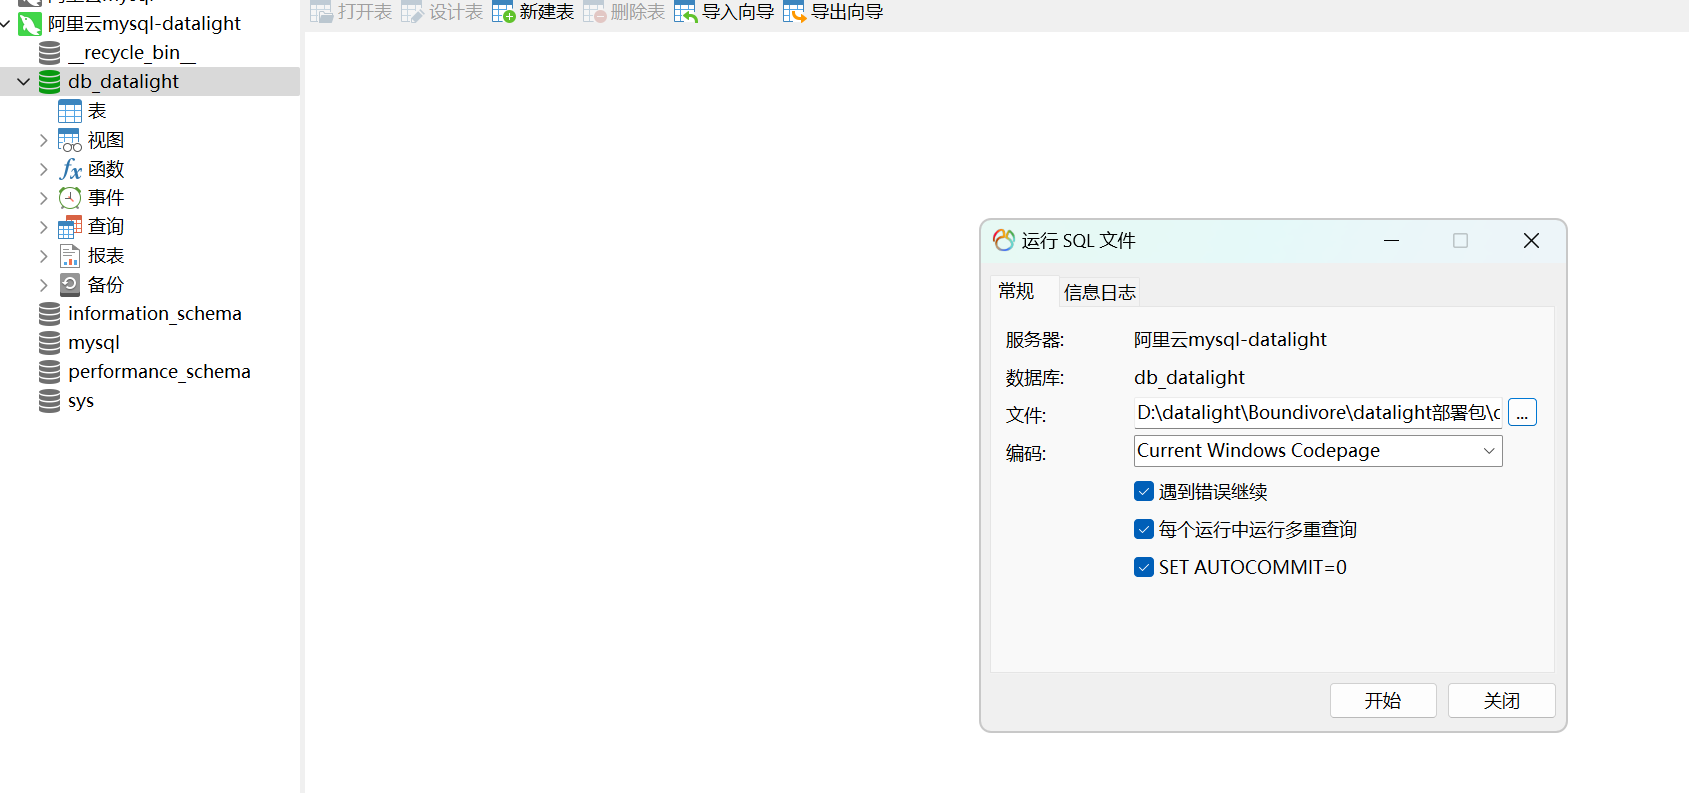
5.3 导入完成,查看表内容

六、上传 DataLight 资源包
6.1 创建 DataLight 文件夹
在 Linux 系统中,创建文件夹 DataLight,命令如下:
plain
mkdir -p /opt/datalight6.2 准备上传工具
将内容拷贝上去:由于 Finalshell 拷贝大量文件夹时,老出现拷贝不全的情况。
该工具的下载链接是:https://www.filezilla.cn/download/client
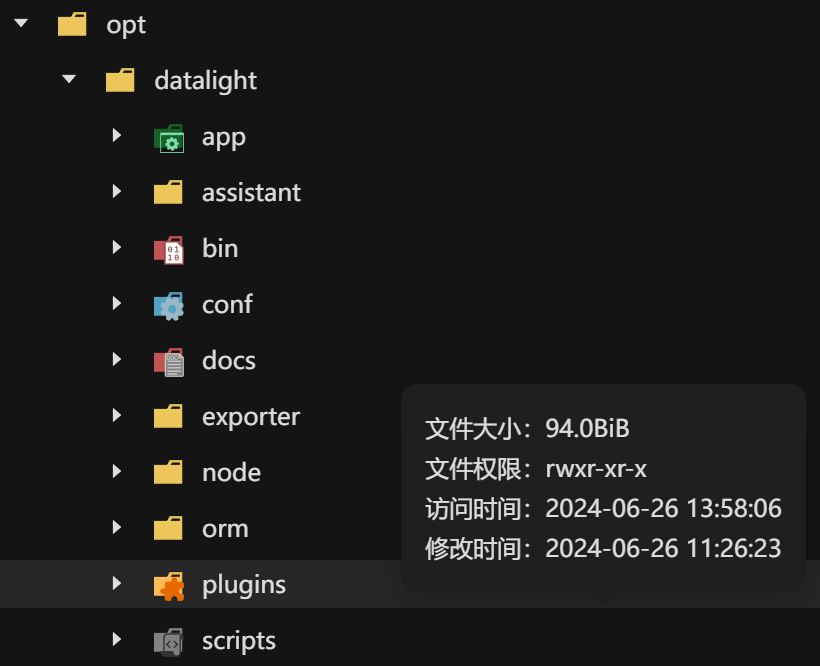
6.3 查看待上传内容

6.4 准备上传
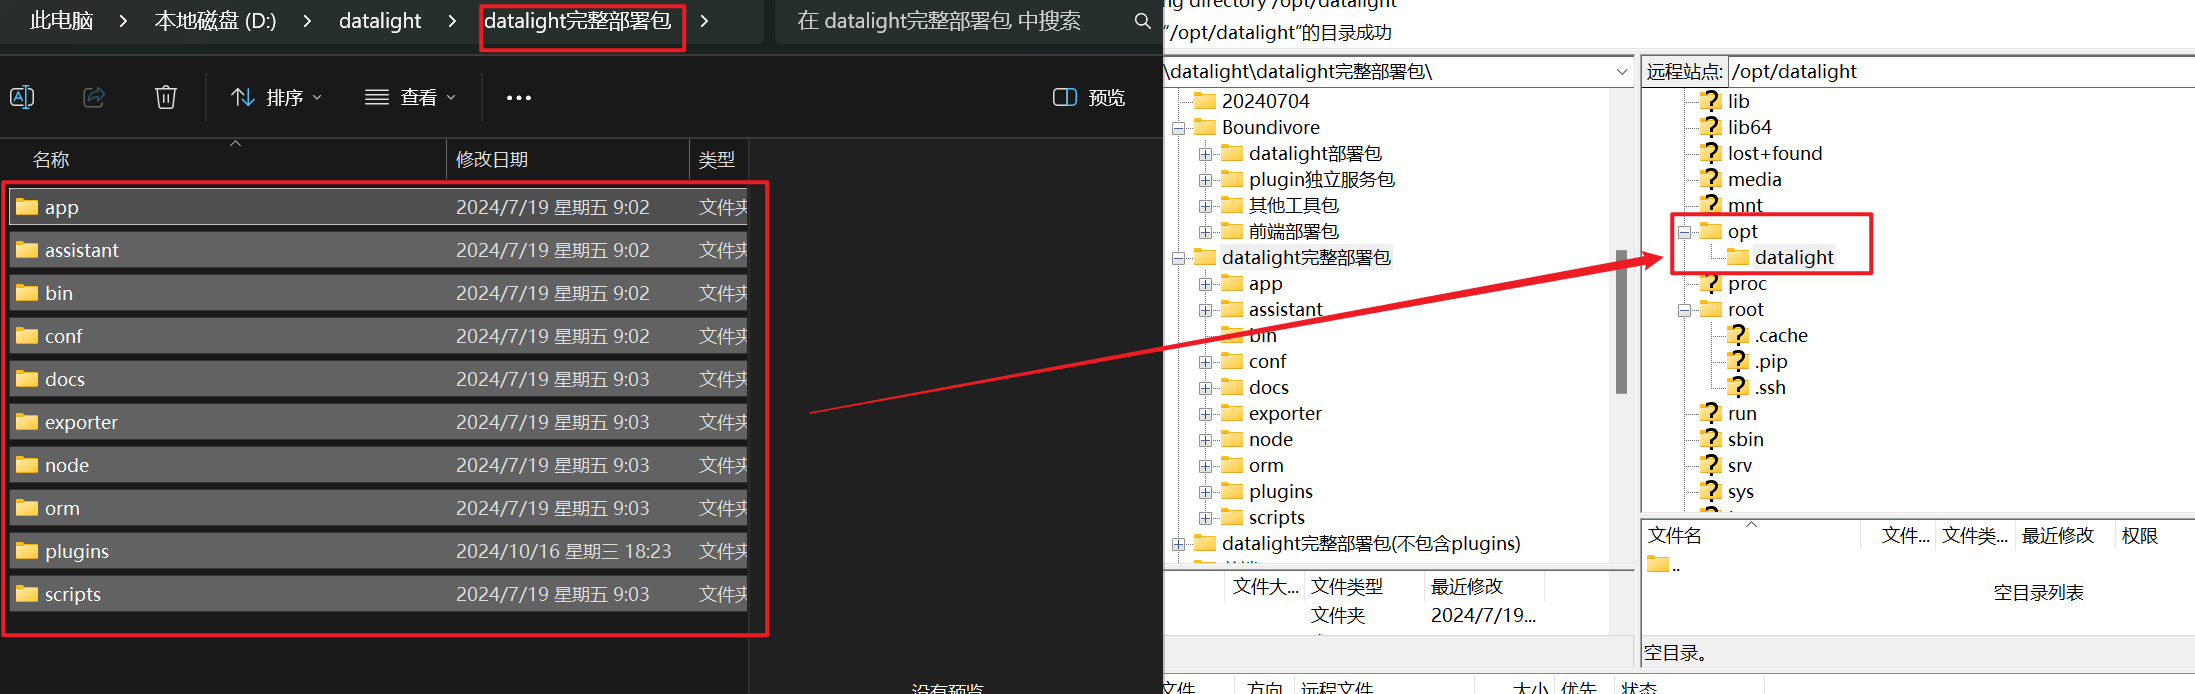
无论是 Finalshell 还是 Filezilla ,在拖拽的过程中,经常会因为网络抖动,造成文件丢失,所以为了保险起见,请先在当前本地系统中压缩整个资源包后,上传压缩包,并在 Linux解压更为稳妥。
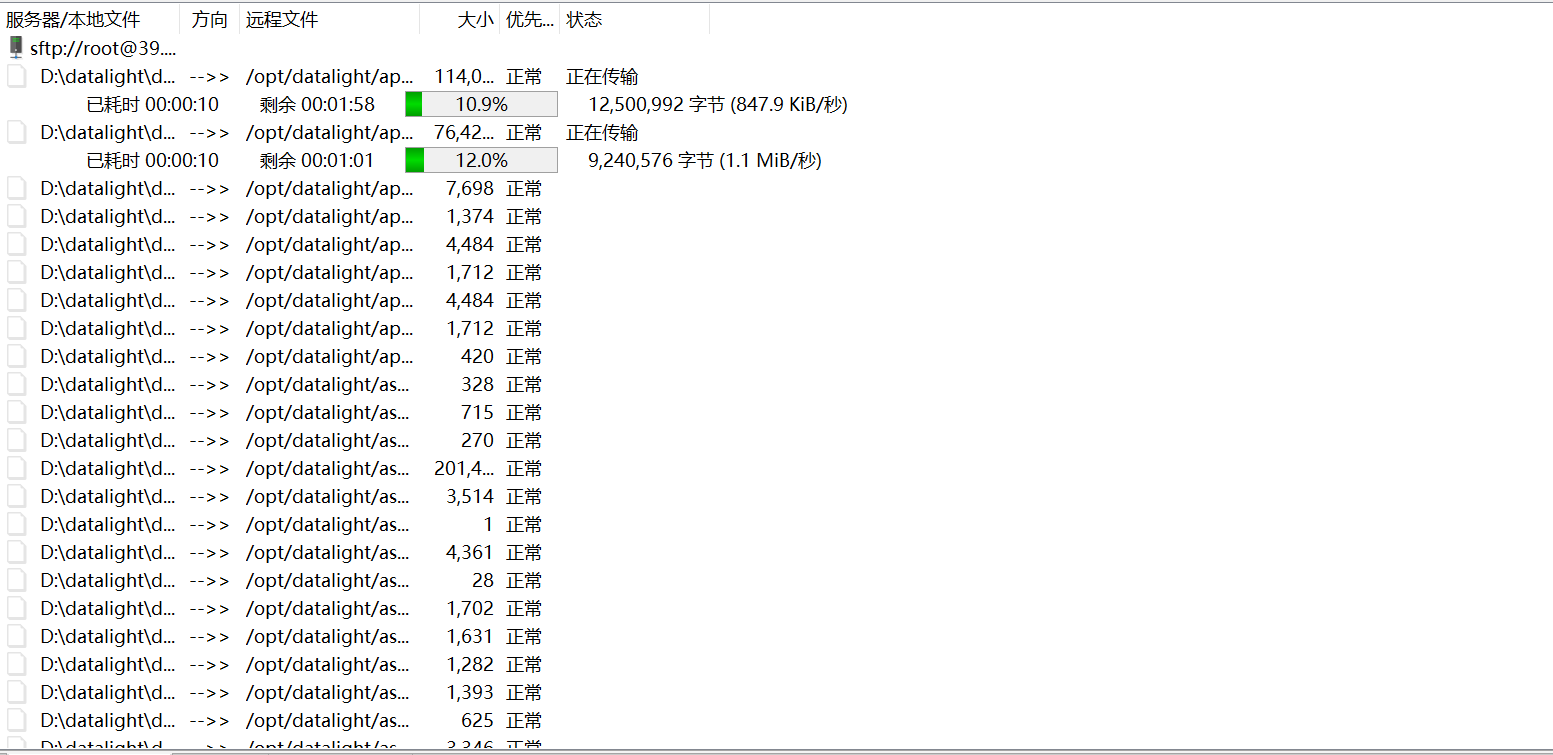
6.5 上传压缩包
由于 K8S 较大,很多尝鲜的小伙伴用不上,上传 plugins 的时候可以不上传 KUBESPHERE 插件包。
仅需在第一个 node01(主节点) 节点上上传 datalight 文件夹下的内容,其它节点不需要上传。
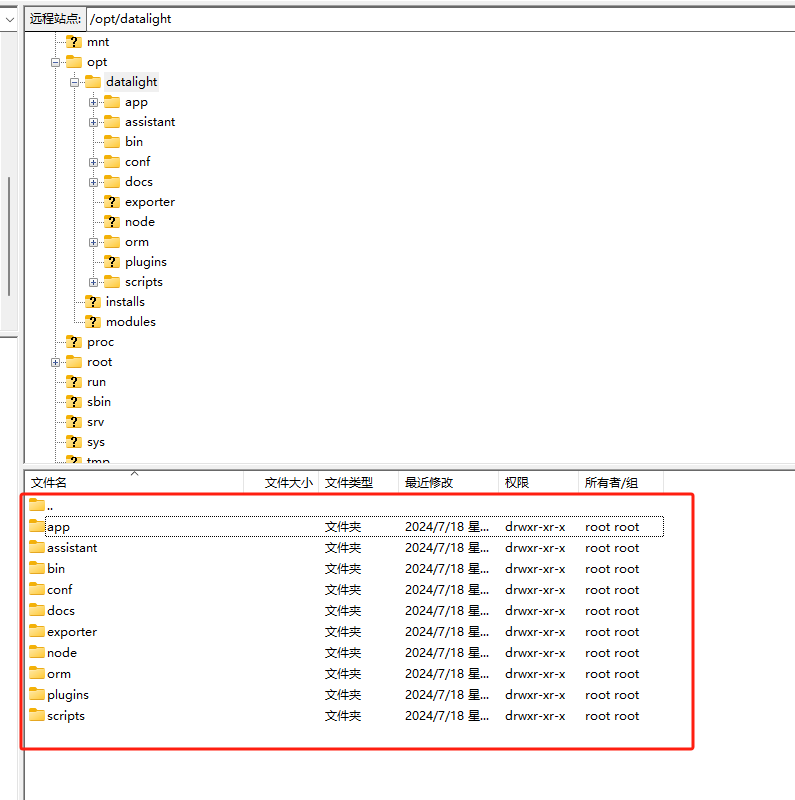
6.6 解压压缩包
上传完成后,使用如下命令解压压缩包:
shell
unzip dl.zip -d /opt/datalight/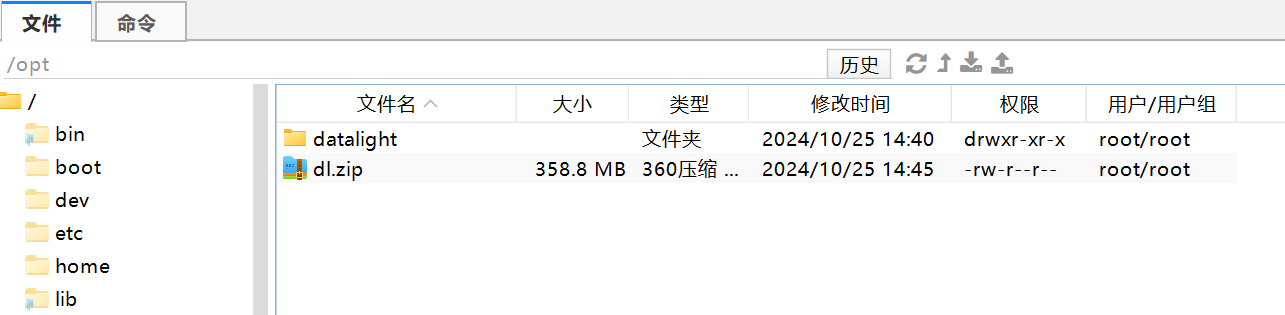
6.7 安装系统依赖
可手动在每个节点完成如下内容的安装,也可以使用自动初始化脚本完成安装。
shell
yum -y install epel-release  # 安装 EPEL 仓库,提供额外的软件包
yum -y install jq  # 安装 jq,用于处理 JSON 数据
yum -y install curl  # 安装 curl,用于命令行数据传输
yum -y install chrony  # 安装 chrony,用于时间同步
yum -y install expect  # 安装 expect,用于自动化交互式 shell 脚本
yum -y install openssl openssl-devel patch  # 安装 OpenSSL 和开发包及 patch 工具
yum -y install lrzsz  # 安装 lrzsz,用于 ZMODEM 文件传输
yum -y install unzip zip  # 安装 unzip 和 zip,用于解压和压缩文件
yum -y install yum-utils  # 安装 yum-utils,提供额外的 yum 命令
yum -y install net-tools  # 安装 net-tools,提供网络工具如 ifconfig
yum -y install bc
yum -y install gcc gcc-c++  # 安装 GCC 和 G++ 编译器
yum -y install make  # 安装 make,构建自动化工具
yum -y install autoconf automake libtool curl  # 安装 autoconf、automake、libtool 和 curl,用于构建和配置软件
yum -y install zlib lzo-devel zlib-devel openssl openssl-devel ncurses-devel ruby  # 安装 zlib、lzo-devel、zlib-devel、openssl、openssl-devel、ncurses-devel 和 ruby,用于压缩、加密、终端控制和 Ruby 语言支持
yum -y install snappy snappy-devel bzip2 bzip2-devel lzo lzo-devel lzop libXtst  # 安装 snappy、snappy-devel、bzip2、bzip2-devel、lzo、lzo-devel、lzop 和 libXtst,用于数据压缩和图形界面支持
6.8 修改自动初始化脚本配置
修改配置文件:/opt/datalight/assistant/conf/init-main-cluster.properties
properties
# 准备初始化的节点列表配置信息,Key 前缀为序号,不可重复,需要初始化多少节点,则添加多少节点
# 建议:1.node.ip 为当前执行脚本的节点 IP
1.node.ip=172.17.238.41
1.node.ssh.port=22
1.node.hostname=node01
1.node.user.root=root
1.node.pwd.root=***************
1.node.user.datalight=datalight
1.node.pwd.datalight=12345678

2.node.ip=172.17.238.43
2.node.ssh.port=22
2.node.hostname=node02
2.node.user.root=root
2.node.pwd.root=***************
2.node.user.datalight=datalight
2.node.pwd.datalight=12345678

3.node.ip=172.17.238.42
3.node.ssh.port=22
3.node.hostname=node03
3.node.user.root=root
3.node.pwd.root=***************
3.node.user.datalight=datalight
3.node.pwd.datalight=12345678
6.9 修改数据库连接配置
由于你使用的是阿里云的数据库,所以需要修改 Master 连接 MySQL 的连接。
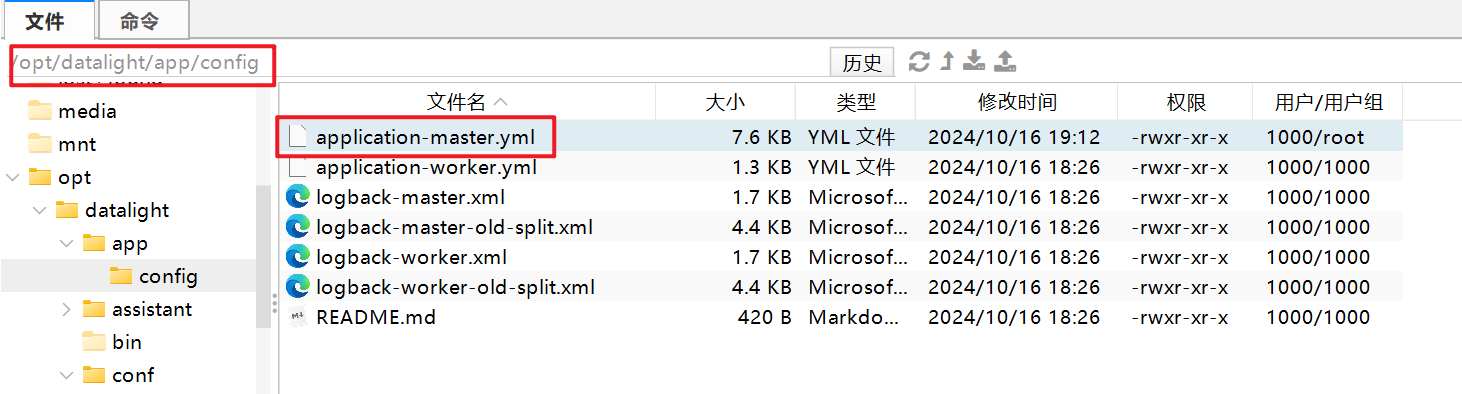
yaml
database:
mysql:
host: rm-2zesz8wlma97k45imdo.mysql.rds.aliyuncs.com
port: 3306
user: root
password: "******"
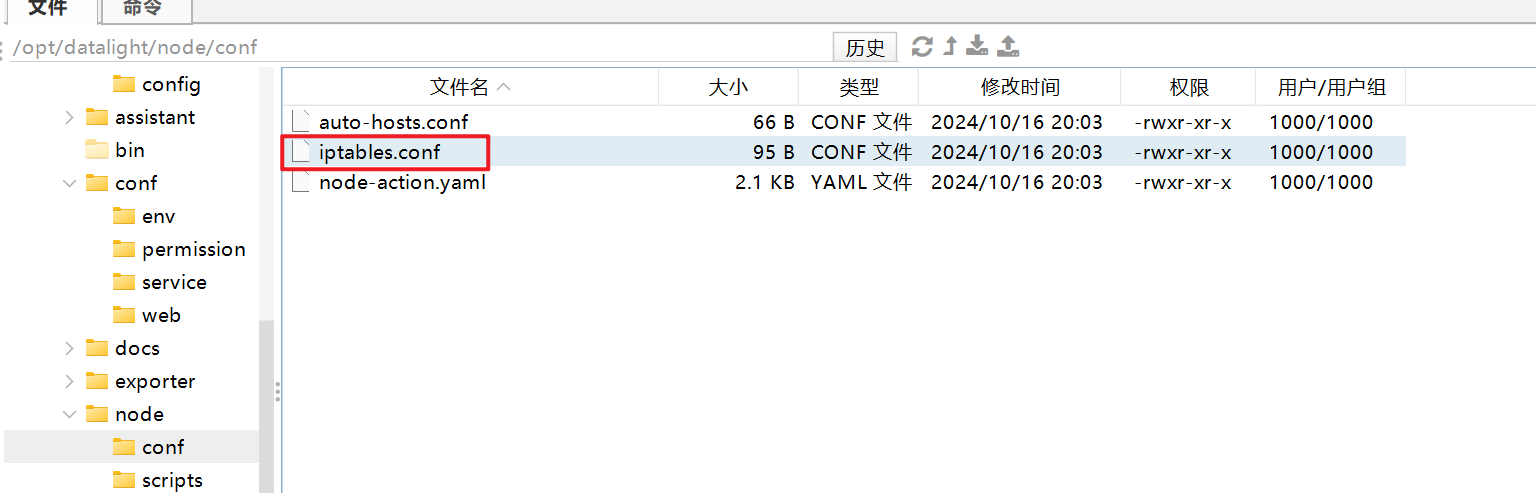
dbName: db_datalight6.10 修改 iptables.conf
如果启用了 iptables,则需修改如下内容。
shell
39.105.124.191 22
39.105.124.191 80
39.105.124.191 443
39.105.124.191 8001
39.105.124.191 8002
6.11 启动时间同步
三台服务器的时间要同步,不同步,启动会失败。
shell
systemctl enable chronyd
systemctl restart chronyd
6.12 执行整个节点的初始化脚本
上面的步骤中,有一部分内容的操作,在自动初始化脚本 init-main.sh 中已经包含了,只是本人手动操作了一部分。
具体差异可对比官方文档。
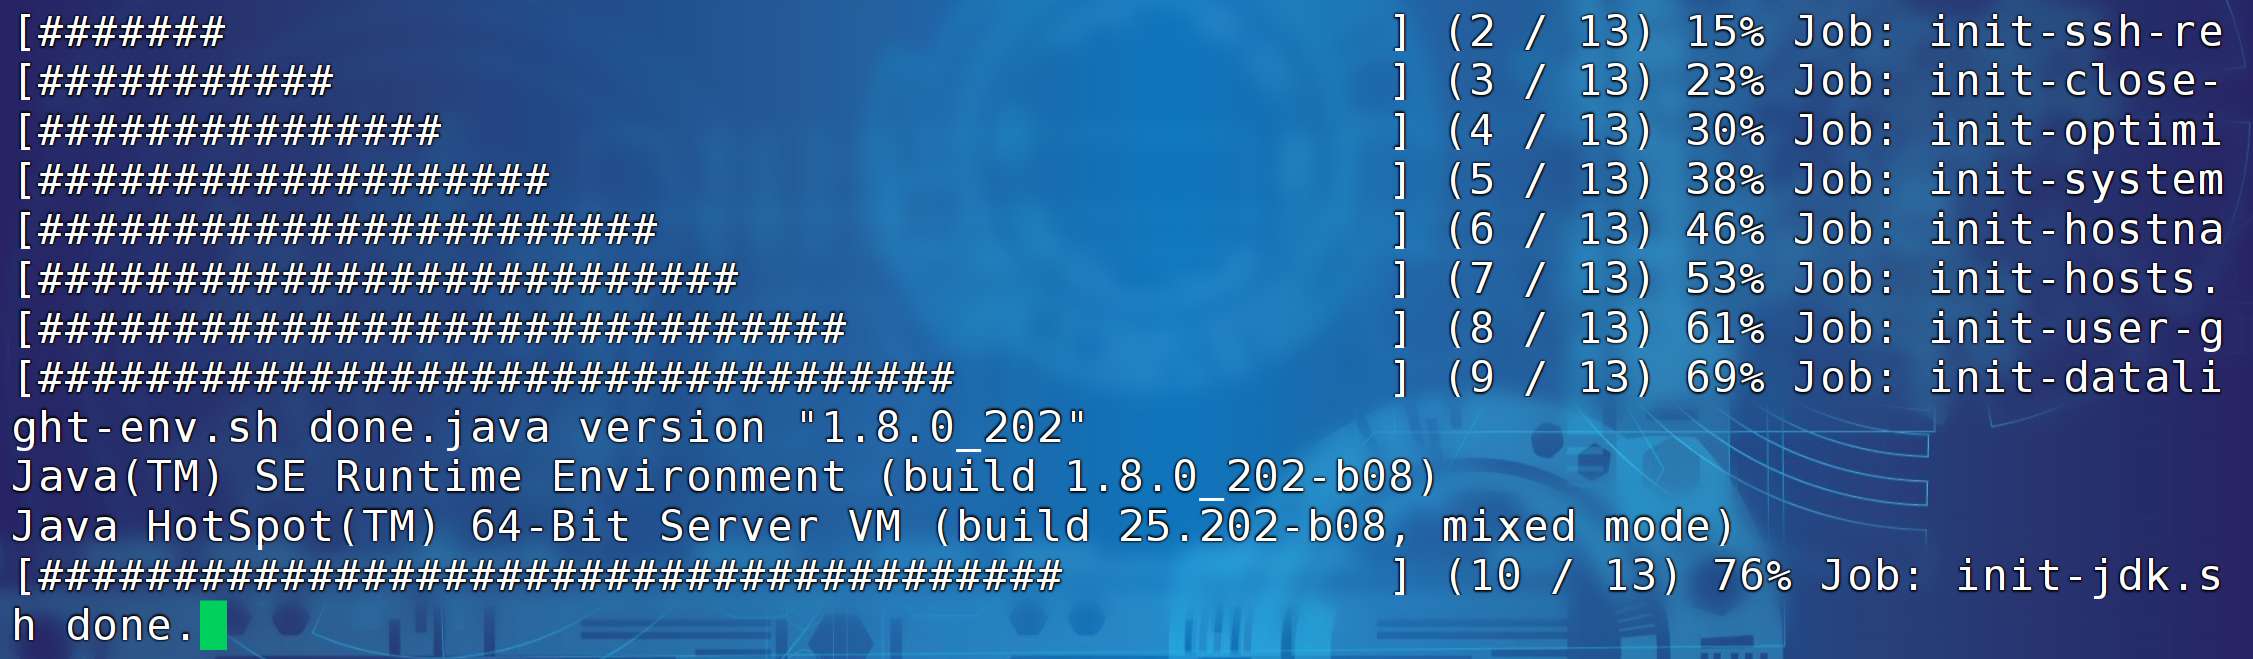
检查 /opt/datalight/assistant/repo/jdk 下 是否有jdk,没有的话需要上传。最终执行如下命令。
shell
cd /opt/datalight/assistant

sh main/init-main.sh
初始化过程如下图所示。
七、启动 Master
7.1 必要检查
请先检查 3 台节点的时间是否同步。
init-main.sh 脚本执行完毕后,环境变量不刷新,需要 3 台节点都重新刷新一下环境变量,以使当前 SSH Session 生效。或重连 SSH 会话。
shell
source /etc/profile7.2 启动 Master 进程
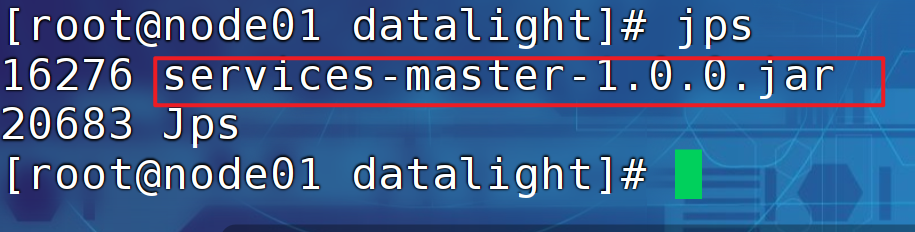
在 node01 节点,启动 Master 进程,命令如下。
plain
/opt/datalight/bin/datalight.sh start master 8001
通过 jps 命令查看进程。
八、配置本地 IP 与主机名映射
为方便后续使用,可以在本地系统中配置 hosts 映射。
Windwos 中的路径如下:
shell
C:\Windows\System32\drivers\etc添加内容:
shell
39.105.124.191 node01
39.105.126.251 node02
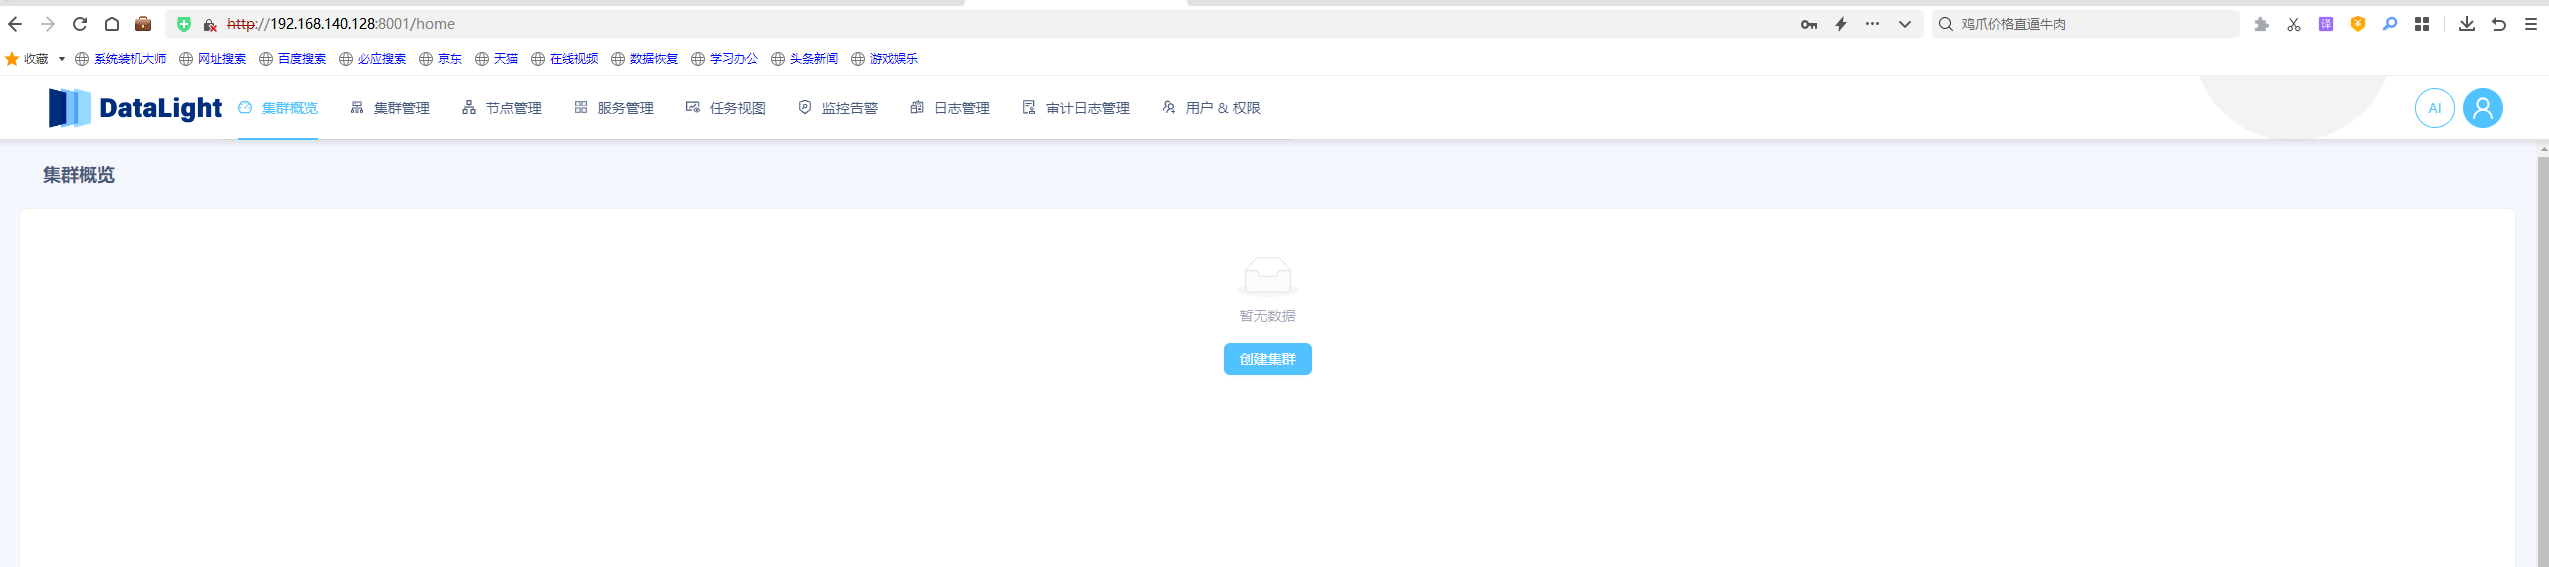
39.105.141.49 node03九、访问 DataLight 页面
启动成功后,进行页面访问:
默认账户:admin
默认密码:admin
访问页面如下:
如遇失败,可查看日志:
shell
/data/datalight/logs/app/datalight-master.log