1.安装地址
Manual Install (Windows, Linux)
Note that some dependencies do not yet support python 3.13 so using 3.12 is recommended.
Git clone this repo.
Put your SD checkpoints (the huge ckpt/safetensors files) in: models/checkpoints
Put your VAE in: models/vae
AMD GPUs (Linux only)
AMD users can install rocm and pytorch with pip if you don't have it already installed, this is the command to install the stable version:
pip install torch torchvision torchaudio --index-url https://download.pytorch.org/whl/rocm6.1This is the command to install the nightly with ROCm 6.2 which might have some performance improvements:
pip install --pre torch torchvision torchaudio --index-url https://download.pytorch.org/whl/nightly/rocm6.2NVIDIA
Nvidia users should install stable pytorch using this command:
pip install torch torchvision torchaudio --extra-index-url https://download.pytorch.org/whl/cu124This is the command to install pytorch nightly instead which might have performance improvements:
pip install --pre torch torchvision torchaudio --index-url https://download.pytorch.org/whl/nightly/cu124Troubleshooting
If you get the "Torch not compiled with CUDA enabled" error, uninstall torch with:
pip uninstall torchAnd install it again with the command above.
Dependencies
Install the dependencies by opening your terminal inside the ComfyUI folder and:
pip install -r requirements.txtAfter this you should have everything installed and can proceed to running ComfyUI.
Others:
Intel GPUs
Intel GPU support is available for all Intel GPUs supported by Intel's Extension for Pytorch (IPEX) with the support requirements listed in the Installation page. Choose your platform and method of install and follow the instructions. The steps are as follows:
- Start by installing the drivers or kernel listed or newer in the Installation page of IPEX linked above for Windows and Linux if needed.
- Follow the instructions to install Intel's oneAPI Basekit for your platform.
- Install the packages for IPEX using the instructions provided in the Installation page for your platform.
- Follow the ComfyUI manual installation instructions for Windows and Linux and run ComfyUI normally as described above after everything is installed.
Additional discussion and help can be found here.
Apple Mac silicon
You can install ComfyUI in Apple Mac silicon (M1 or M2) with any recent macOS version.
- Install pytorch nightly. For instructions, read the Accelerated PyTorch training on Mac Apple Developer guide (make sure to install the latest pytorch nightly).
- Follow the ComfyUI manual installation instructions for Windows and Linux.
- Install the ComfyUI dependencies. If you have another Stable Diffusion UI you might be able to reuse the dependencies.
- Launch ComfyUI by running
python main.pyNote : Remember to add your models, VAE, LoRAs etc. to the corresponding Comfy folders, as discussed in ComfyUI manual installation.
DirectML (AMD Cards on Windows)
pip install torch-directmlThen you can launch ComfyUI with:python main.py --directml
2.创建一个虚拟环境
安装git
在 Ubuntu 上安装 Git 可以通过包管理器 apt 进行。以下是在 Ubuntu 上安装 Git 的步骤:
打开终端。你可以按 Ctrl + Alt + T 组合键来打开终端。
运行以下命令以确保你的系统的软件包列表是最新的:
sudo apt update
安装 Git:
sudo apt install git
在安装过程中,系统可能会询问你是否要继续。输入 y 并按下 Enter。
安装完成后,你可以验证 Git 是否成功安装。运行以下命令:
git --version
如果安装成功,将显示 Git 的版本信息。
下载comfuui

https://github.com/comfyanonymous/ComfyUI.git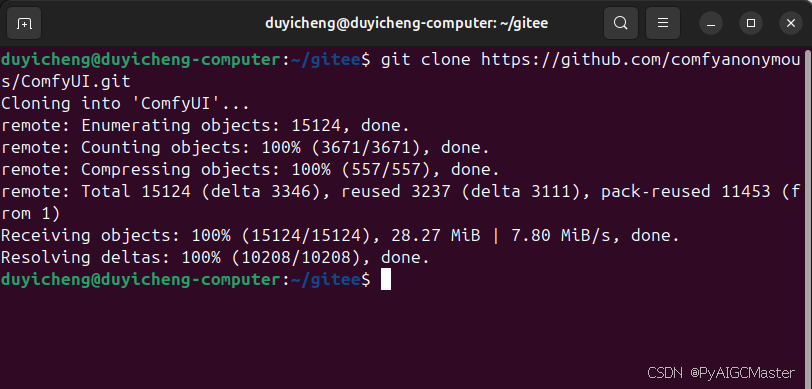
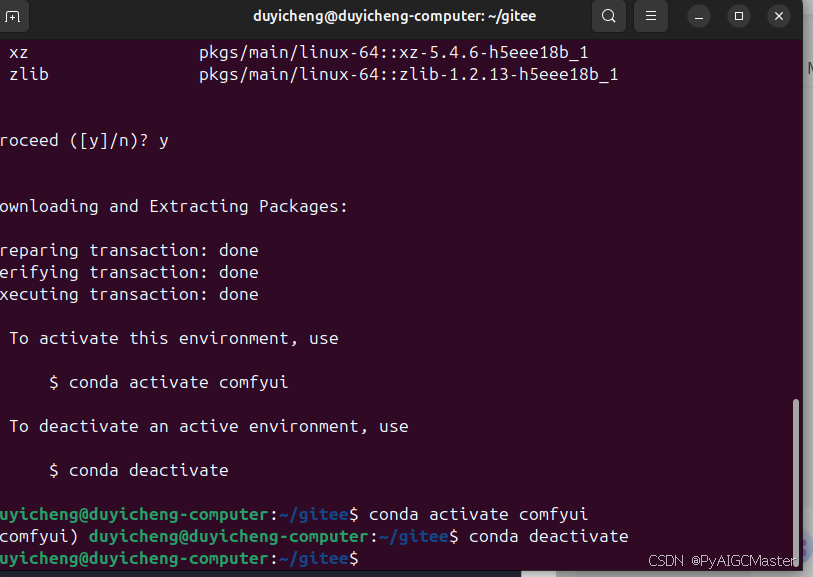
3.创建虚拟环境
conda create -n comfyui python=3.12
conda activate comfyui
4.测试虚拟环境并退出
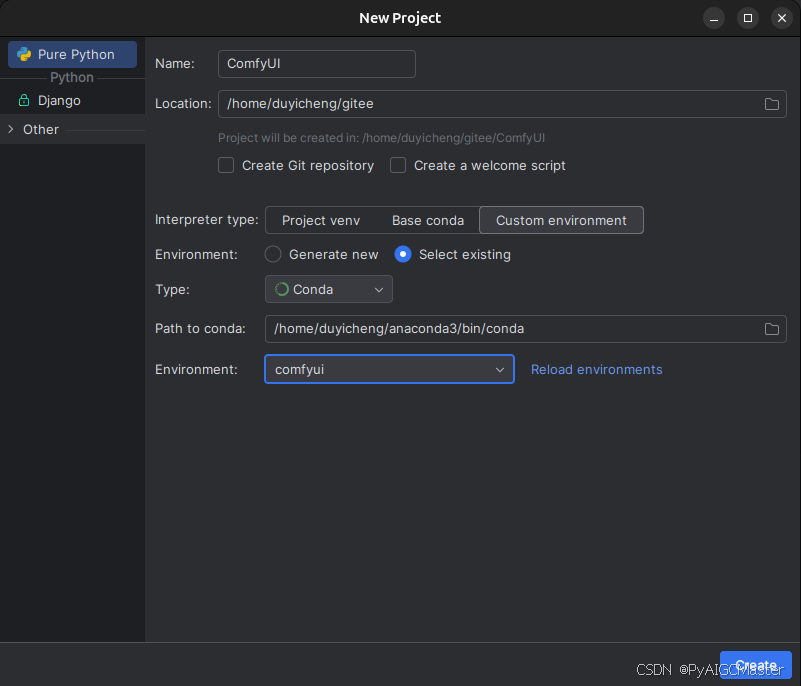
4.pycharm新建 工作 如图:
5.安装所用到的依赖
#安装pytorch
pip config set global.index-url https://pypi.tuna.tsinghua.edu.cn/simpl
pip3 install torch torchvision torchaudio

#安装相关依赖
pip install -r requirements.txt
6.修改端口启动
python main.py --port 15070 --listen 0.0.0.0启动成功
