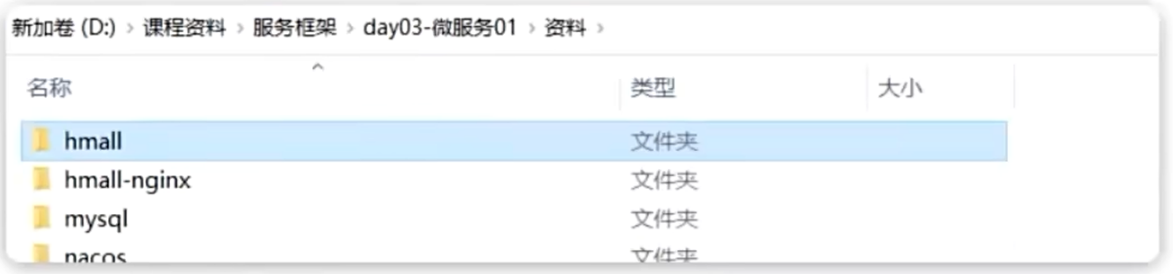
导入项目
本篇及后续的微服务学习都是基于Centos7系统下的Docker部署,因此需要准备:
- Centos7的环境
- SSH客户端
- 安装好Docker
- 会使用Docker
之前的学习, 导致虚拟机中存在黑马商城项目以及mysql数据库, 为了保持一致, 需要删除
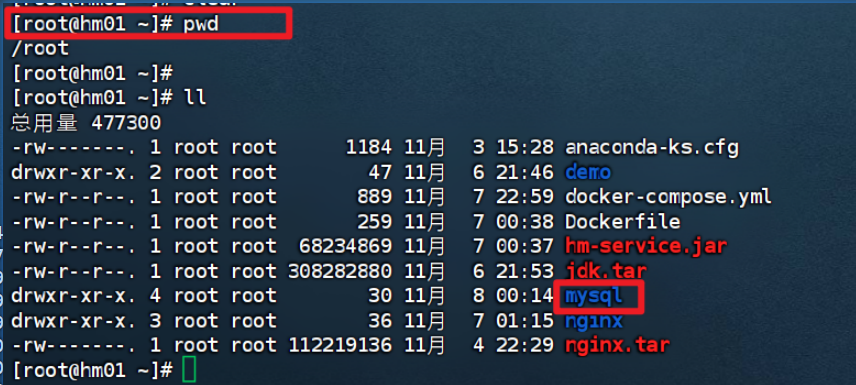
- cd /root
- docker compose down

安装mysql
- 在课前资料提供好了MySQL的一个目录, 其中有MySQL的配置文件和初始化脚本:
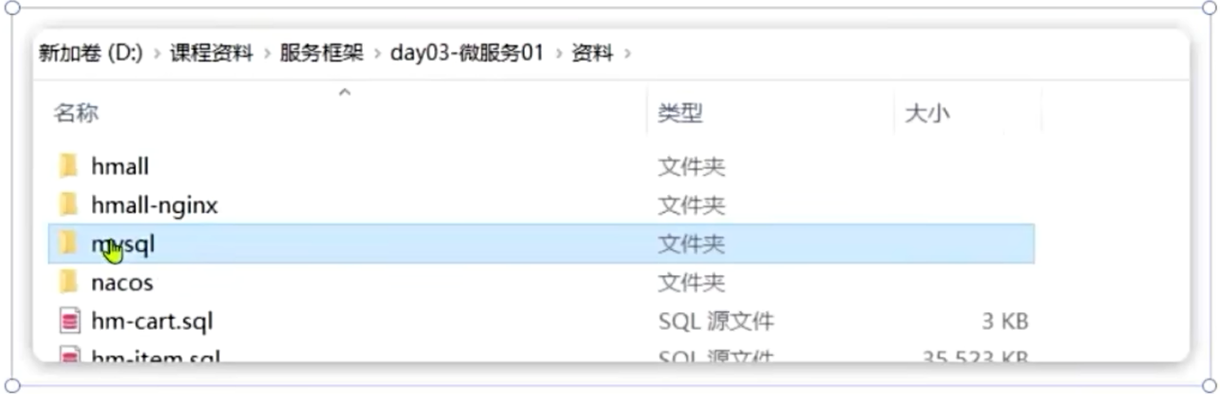
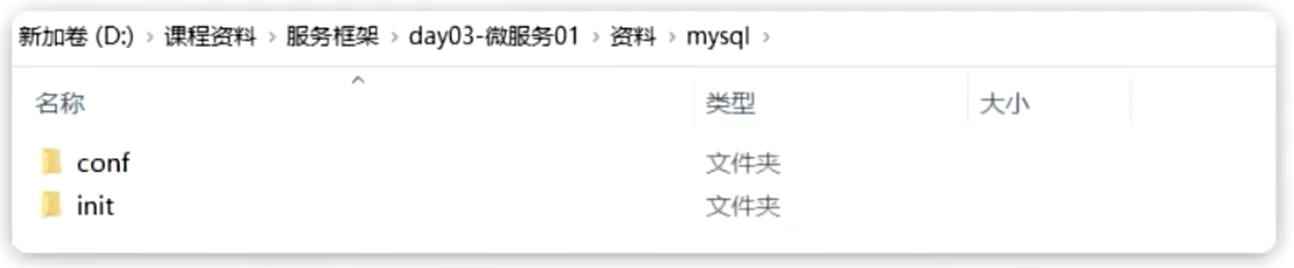
- 我们将其复制到虚拟机的 /root 目录。如果 /root下已经存在 mysql 日录则删除旧的
- 新建一个通用网络
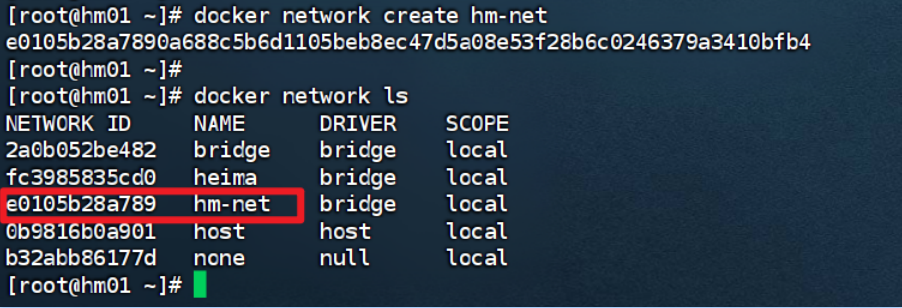
-
安装mysql
docker run -d
--name mysql
-p 3306:3306
-e TZ=Asia/Shanghai
-e MYSQL_ROOT_PASSWORD=123
-v /root/mysql/data:/var/lib/mysql
-v /root/mysql/conf:/etc/mysql/conf.d
-v /root/mysql/init:/docker-entrypoint-initdb.d
--network hm-net
mysql
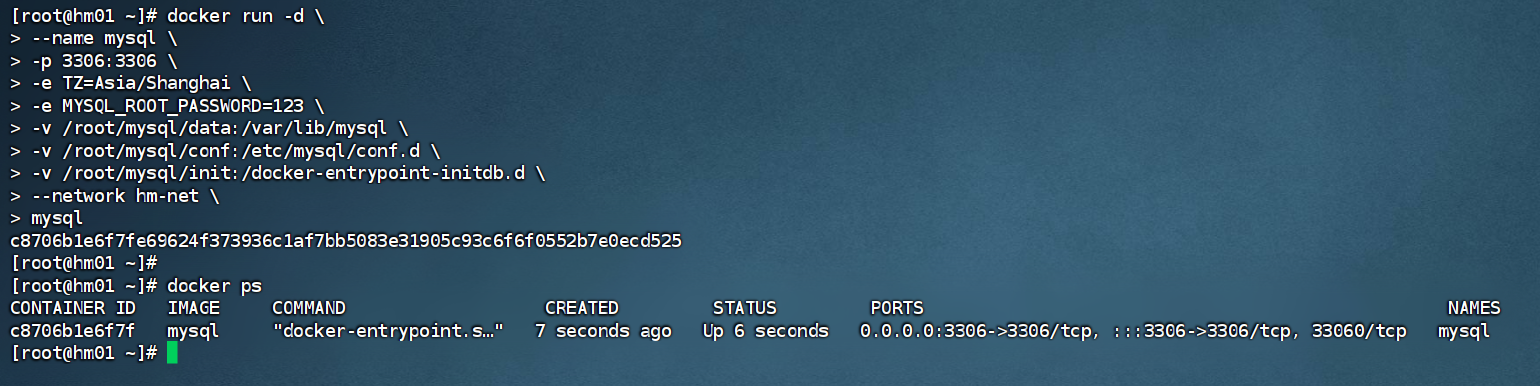
- 远程连接mysql
- 账密: root/123
运行后端
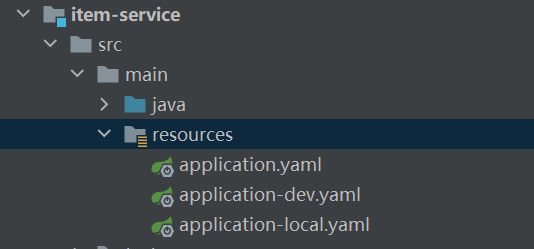
- 在课前资料提供了一个hmall目录, 将其复制到你的工作空间,然后利用Idea打开
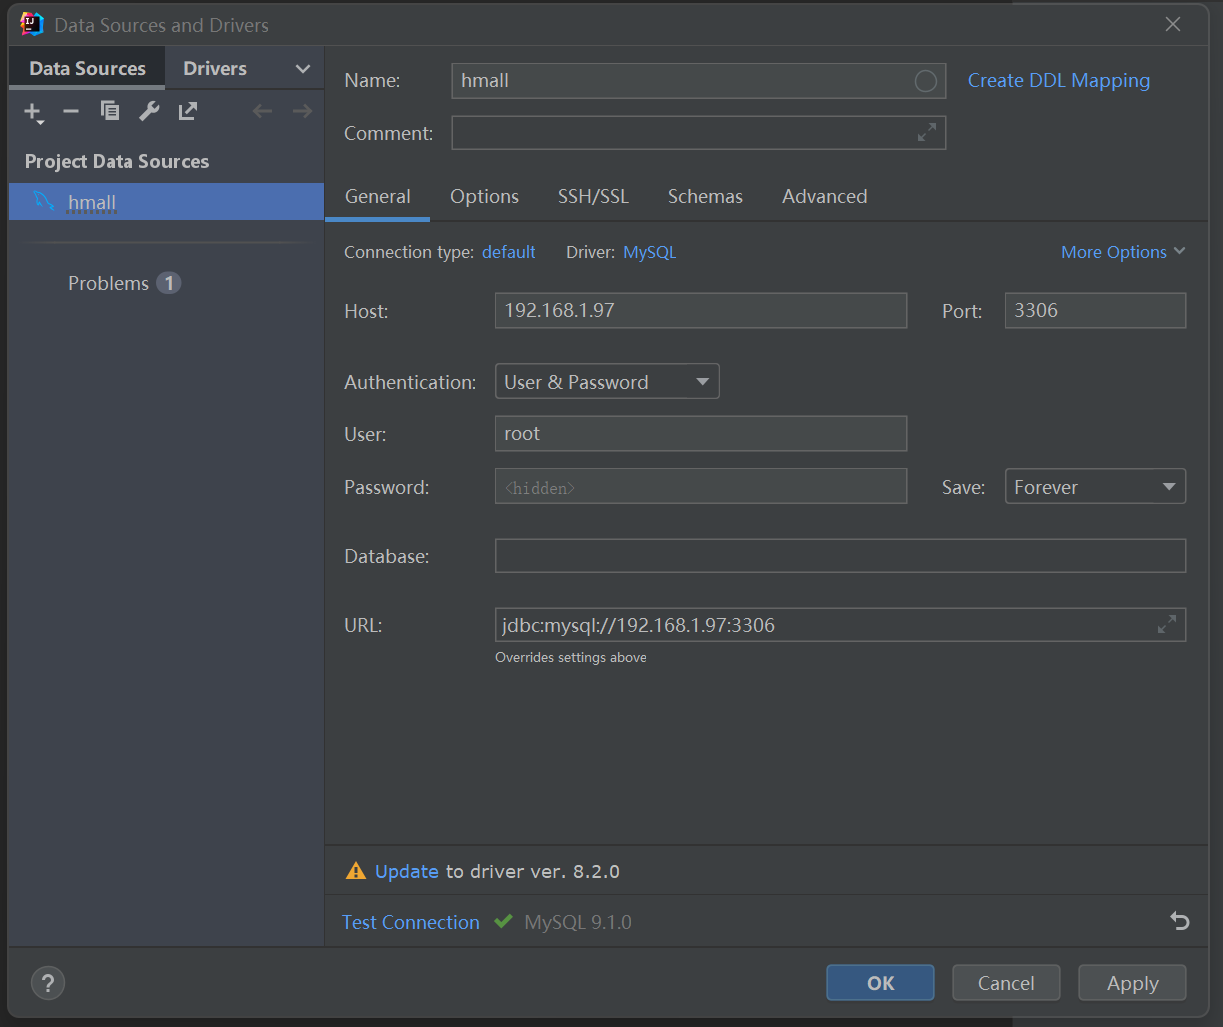
- 修改application-local.yaml文件, 配置自己的数据库IP地址

- 按下 ALT +8键打开services窗口,新增一个启动项, 在弹出窗口中鼠标向下滚动,找到 Spring Boot

- 目的就是让程序运行时读取local环境的配置文件
- 作用等同于修改下面的配置, 修改代码的话, 部署时要改回来, 麻烦
- 要把Mybatis的版本改为3.4.2, 不然上面的步骤会出现问题
- 启动服务并访问

运行前端
- 在课前资料中还提供了一个hmall-nginx的目录

- 其中就是一个nginx程序以及前端代码,将其复制到一个非中文、不包含特殊字符的目录下。
- 然后进入hmall-nginx目录,利用cmd启动即可, 双击exe启动关闭时不方便

- 访问前端

- http://localhost:18080/
- jack/123
认识微服务
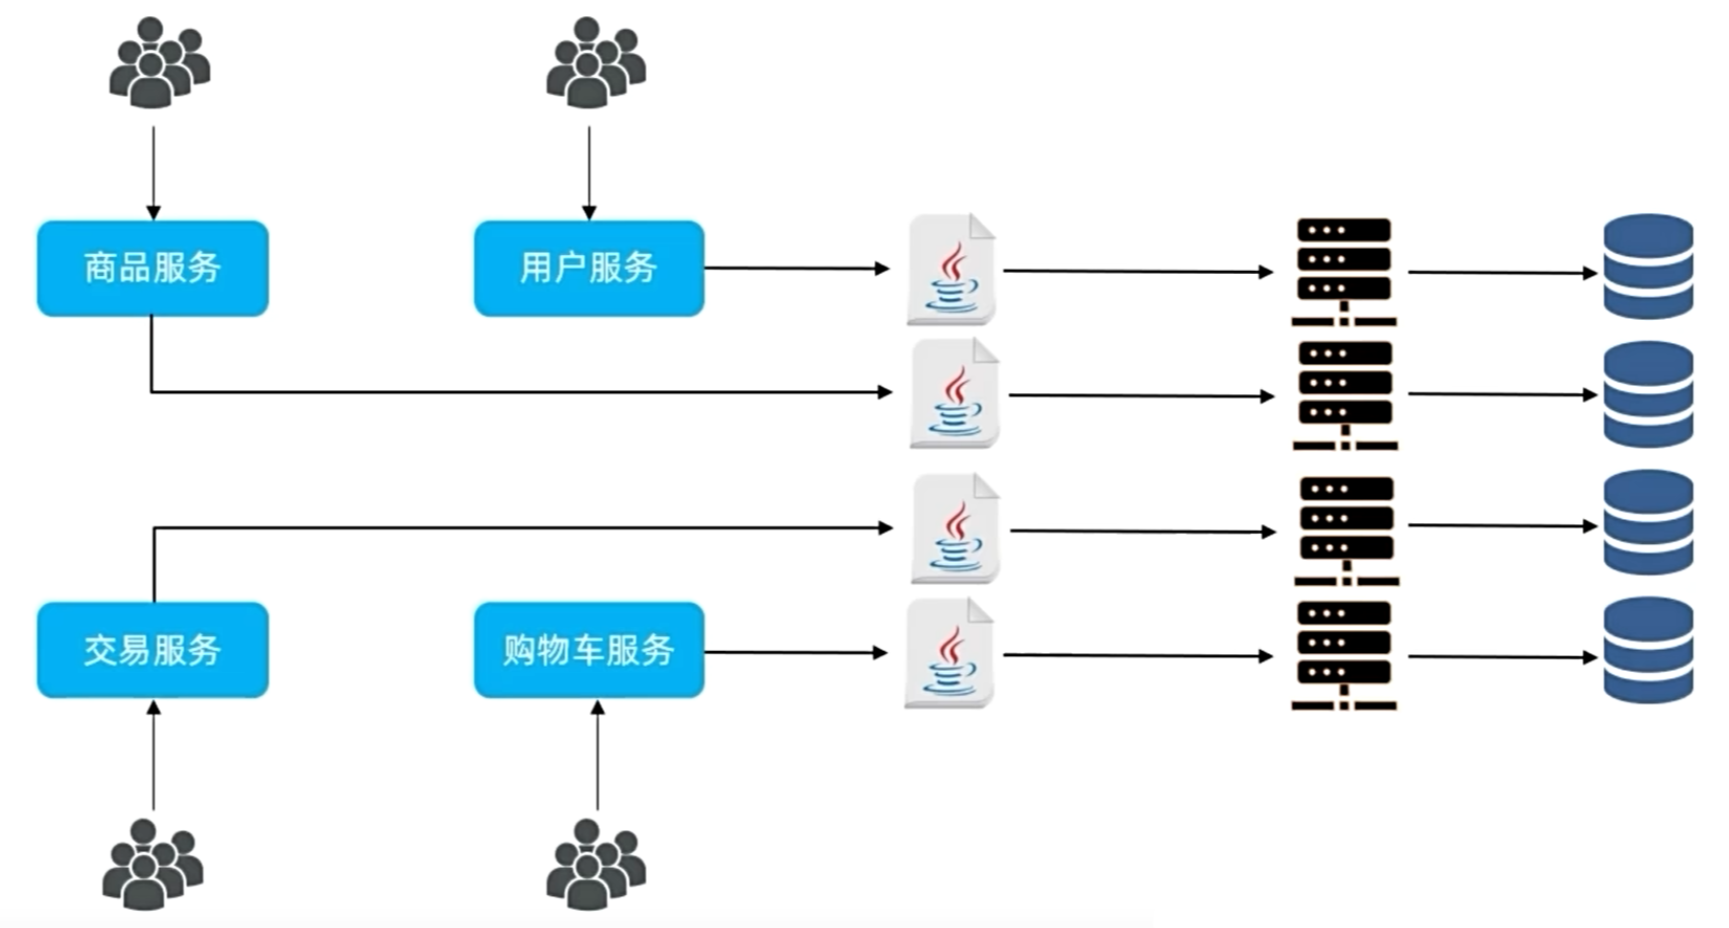
单体架构:将业务的所有功能集中在一个项目中开发,打成一个包部署
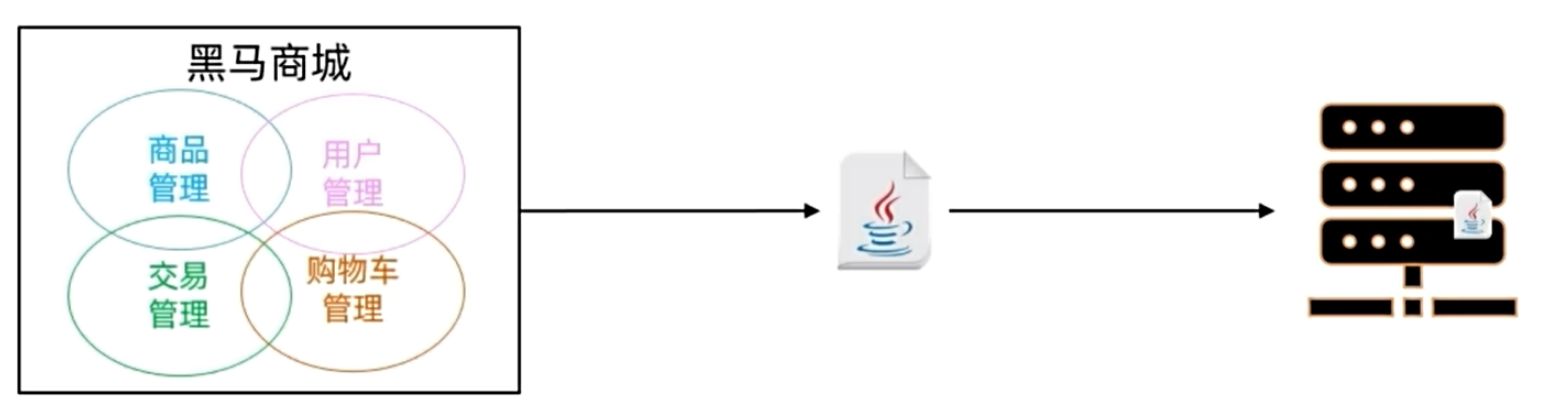
优点:: 架构简单, 部署成本低
缺点: 团队协作成本高, 系统发布效率低, 系统可用性差
总结: 单体架构适合开发功能相对简单,规模较小的项目
comcat服务器的连接数是有限的, 随着并发请求量的上升, 整个系统的响应速度就会变慢
微服务架构,是服务化思想指导下的一套最佳实践架构方案。服务化,就是把单体架构中的功能模块拆分为多个独立项目
优势: 粒度小, 团队自治, 服务自治
劣势: 部署和运维的复杂度提高, 跨模块的任务难度提高
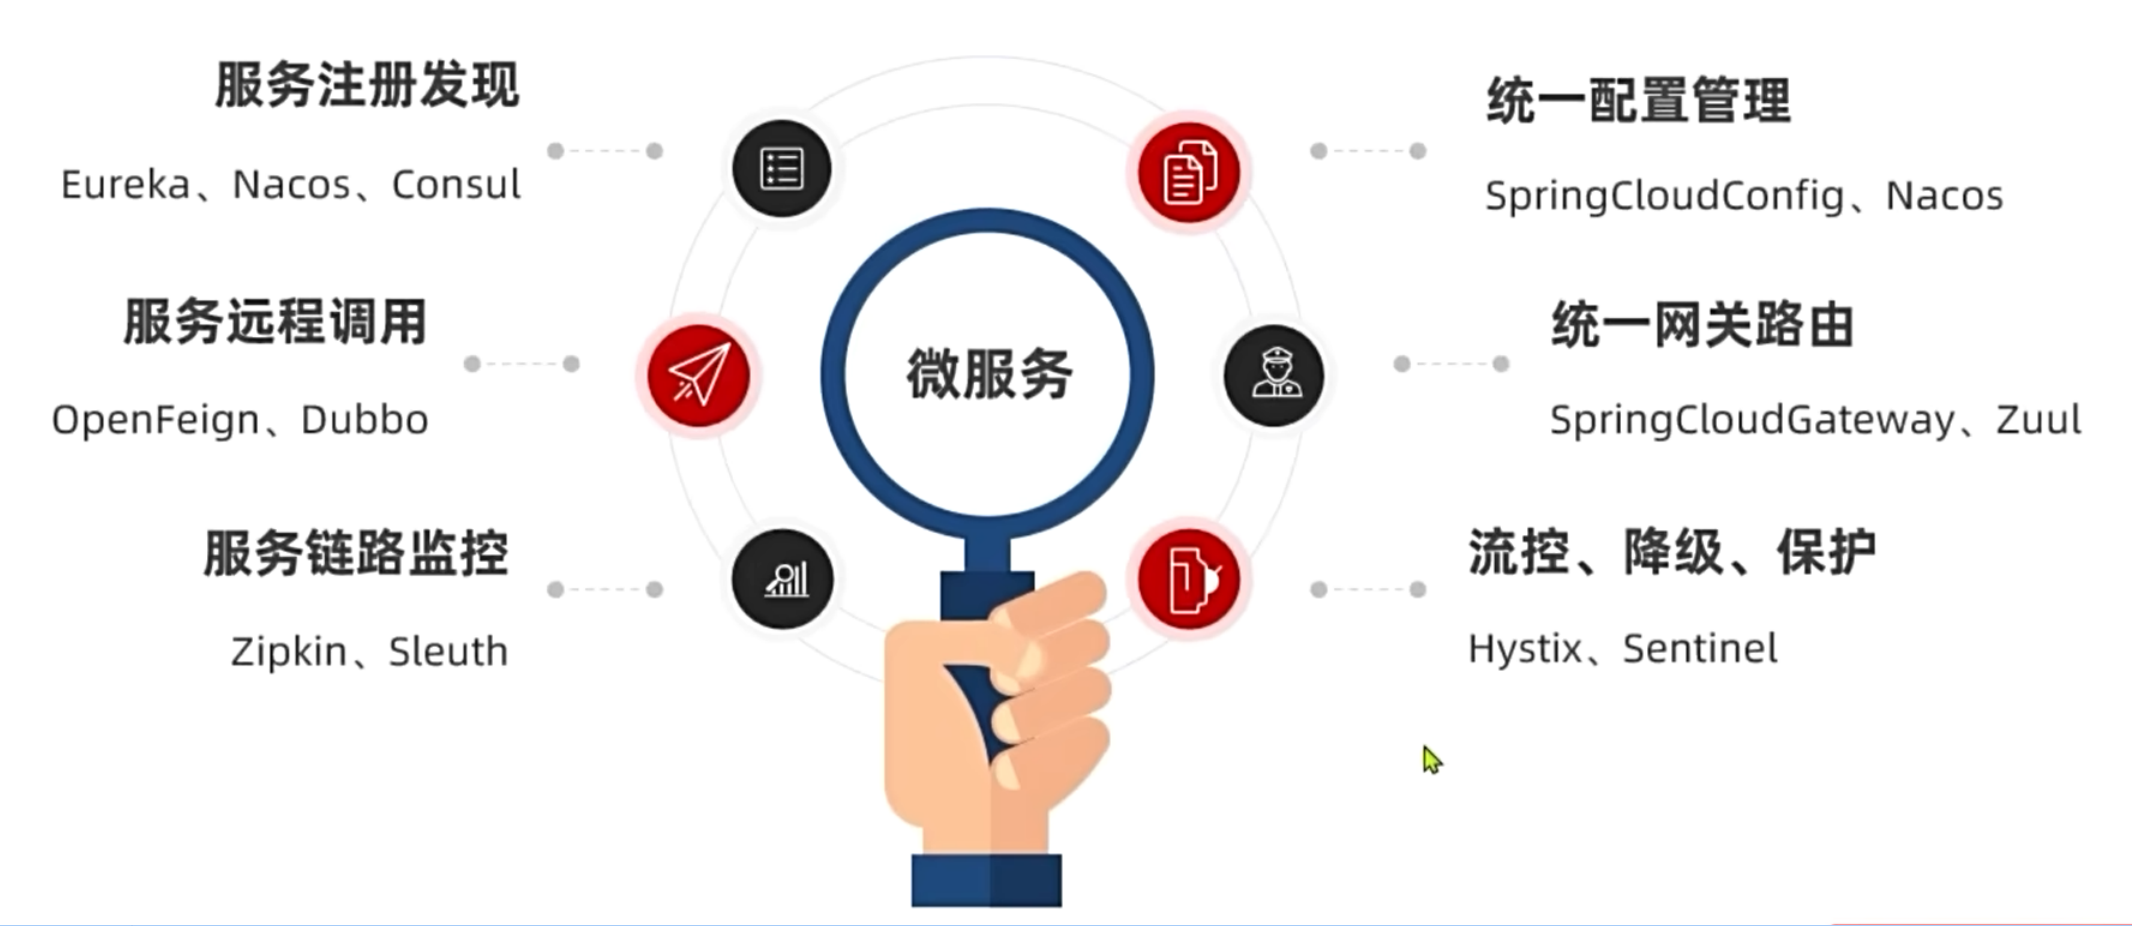
SpringCloud是目前国内使用最广泛的微服务框架。集成了各种微服务功能组件,并基于SpringBoot实现了这些组件的自动装配,从而提供了良好的开箱即用体验
官网地址: https://spring.io/proiects/spring-cloudSpringCloud
SpringCloud基于SpringBoot实现了微服务组件的自动装配,从而提供了良好的开箱即用体验。但对于SpringBoot的版本也有要求:

服务拆分
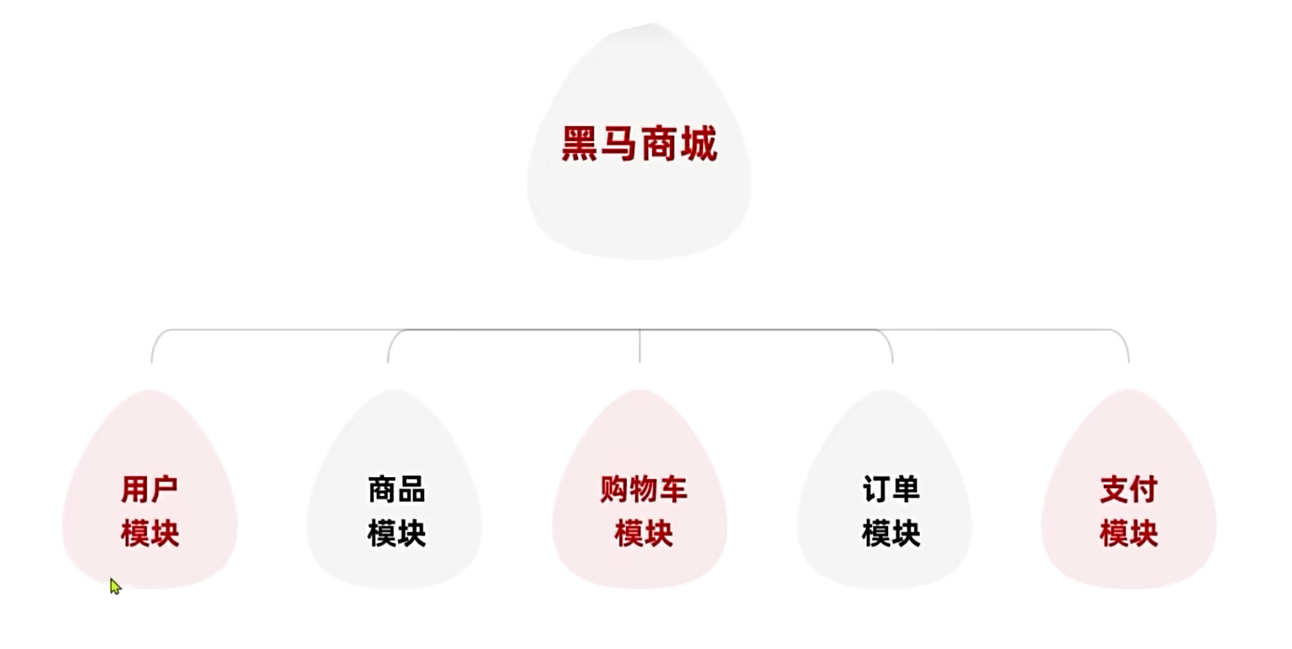
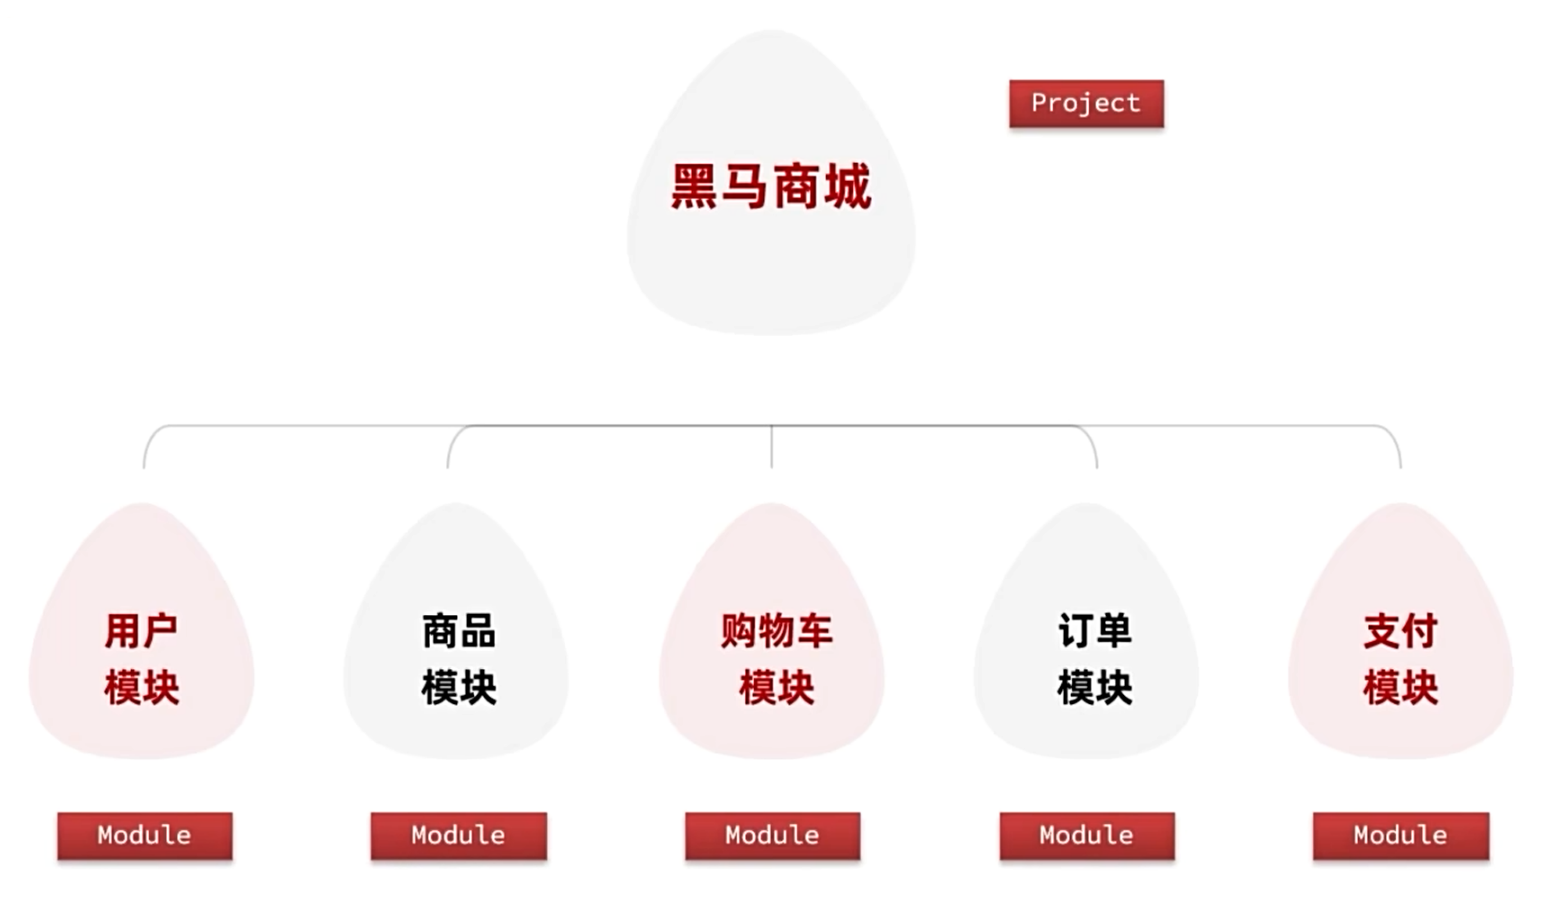
熟悉黑马商城
核心业务包含用户模块, 购物车模块, 支付模块
服务拆分原则
什么时候拆分?
创业型项目: 先采用单体架构,快速开发,快速试错。随着规模扩大,逐渐拆分。
确定的大型项目: 资金充足,目标明确,可以直接选择微服务架构,避免后续拆分的麻烦。
怎么拆分?
- 从拆分目标来说,要做到:
高内聚: 每个微服务的职责要尽量单一,包含的业务相互关联度高、完整度高。
低耦合: 每个微服务的功能要相对独立,尽量减少对其它微服务的依赖。
- 从拆分方式来说,一般包含两种方式:
纵向拆分: 按照业务模块来拆分
横向拆分: 抽取公共服务,提高复用性
拆成什么样?
微服务的工程结构有两种: 独立Project 和 Maven聚合
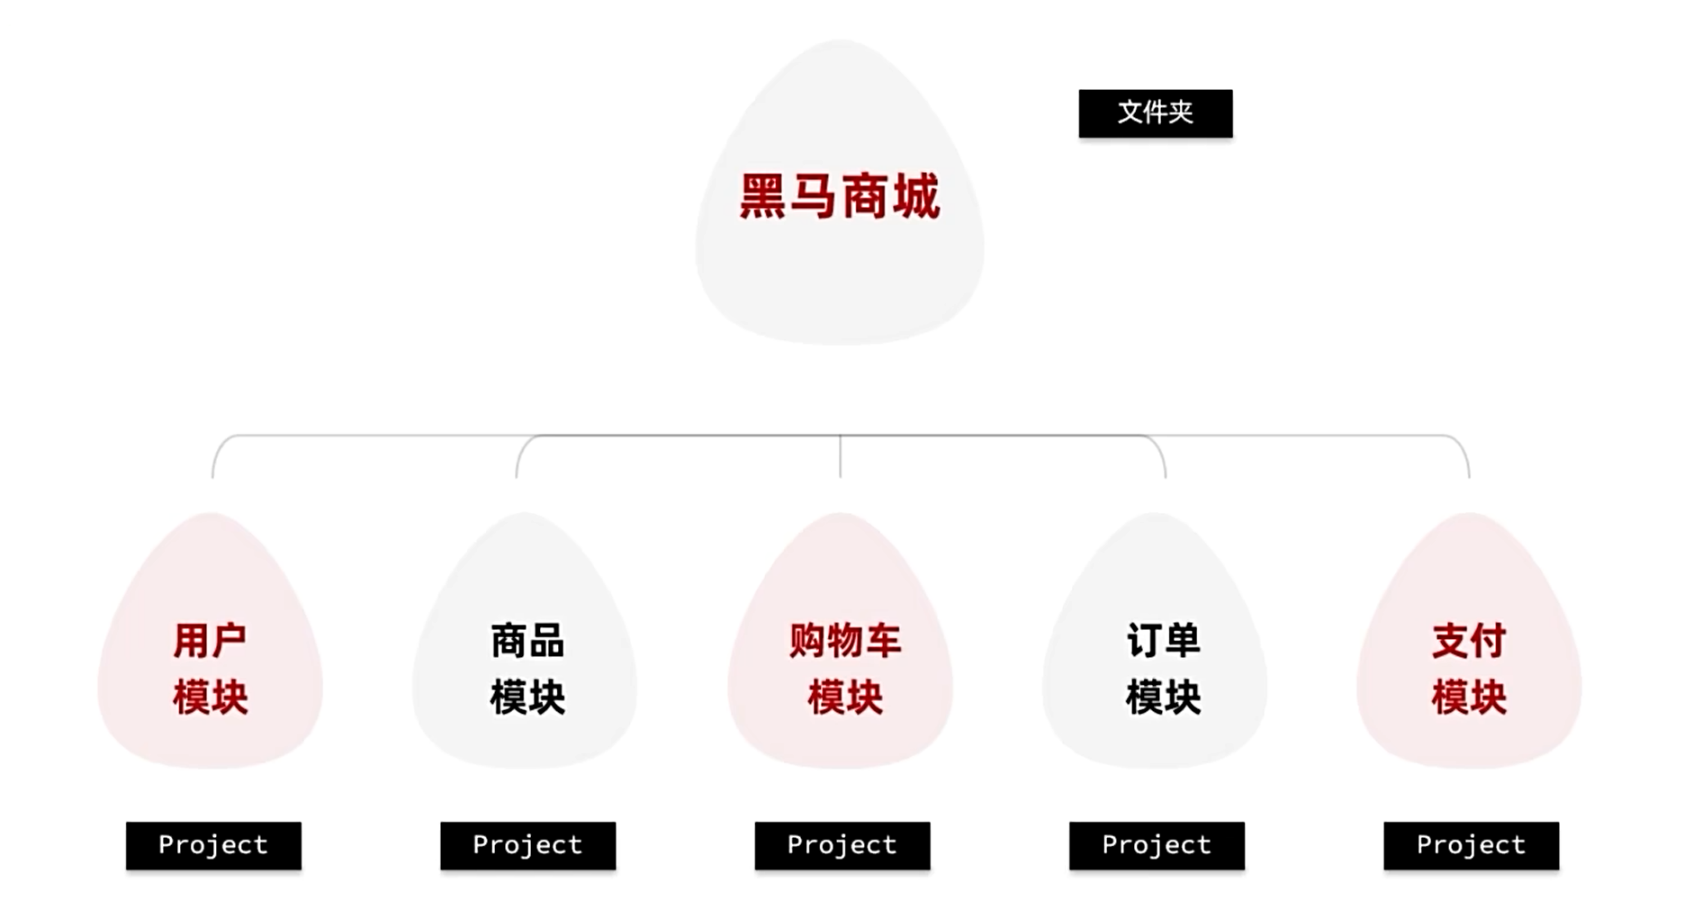
- 独立Project结构的微服务工程适合超大工程, 各个服务绝对独立, 但是代码分散, 管理成本较高
- Maven聚合适合一般工程, 父工程下, 各个服务被划分为模块, 项目还是集中管理
拆分服务
拆分商品服务item-service
将hm-service中与商品管理相关功能拆分到一个微服务module中,命名为item-service
- 飞书文档: Docs
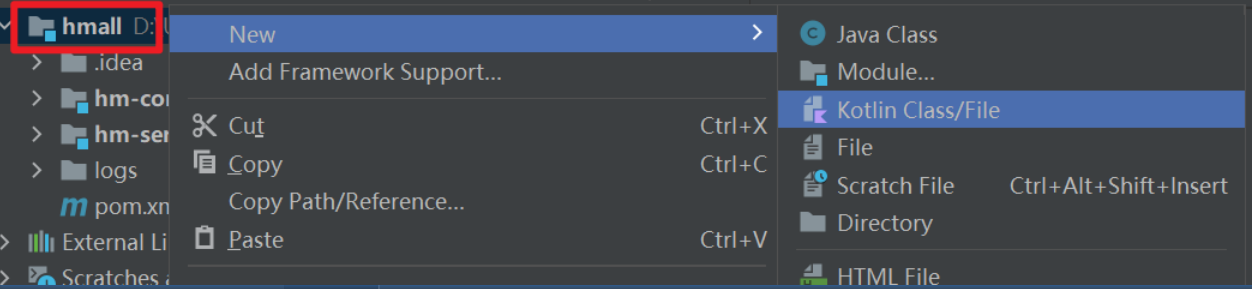
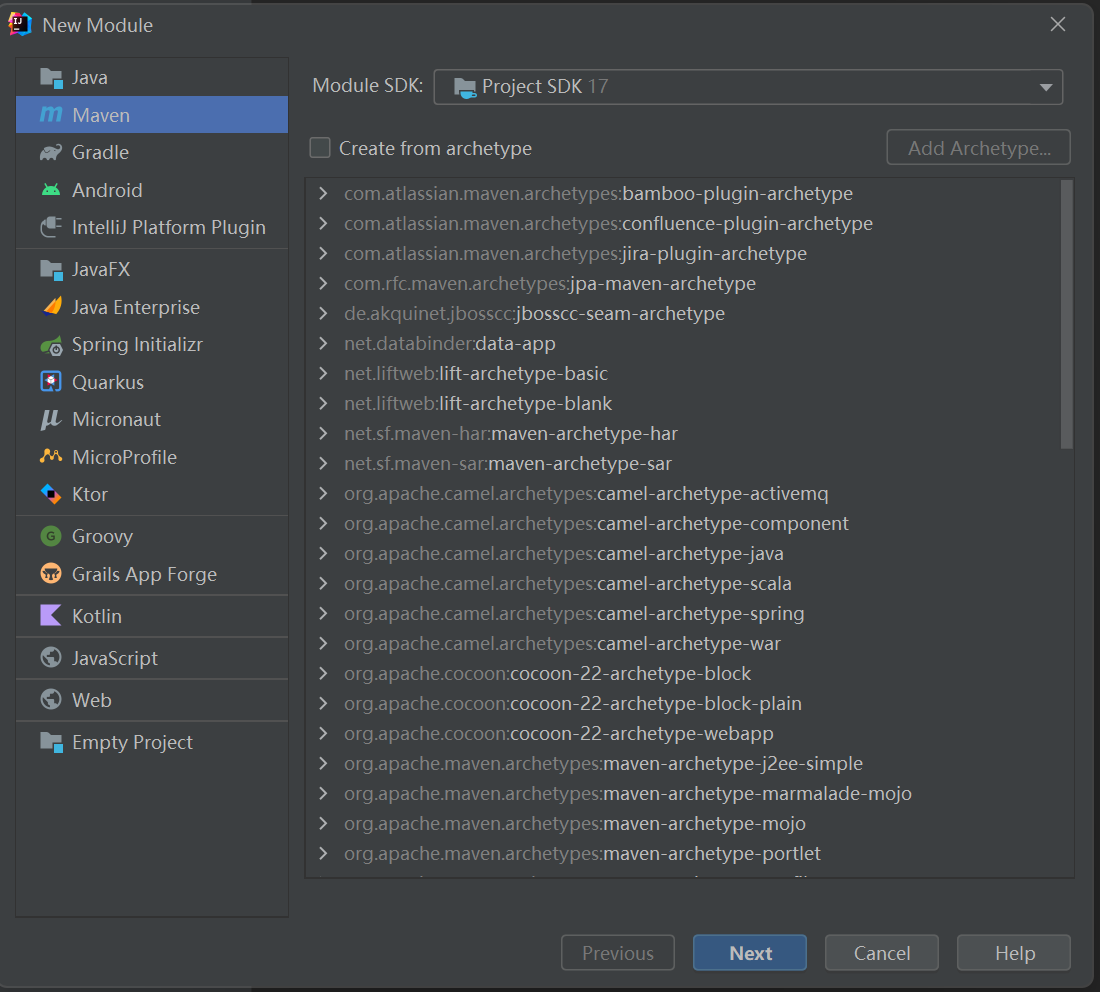
- 新建模块

-
拷贝依赖: 从hm-service中拷贝需要的依赖
com.heima hm-common 1.0.0 org.springframework.boot spring-boot-starter-web mysql mysql-connector-java com.baomidou mybatis-plus-boot-starter ${project.artifactId} org.springframework.boot spring-boot-maven-plugin -
创建启动类: 拷贝hmall-service的启动类, 进行修改
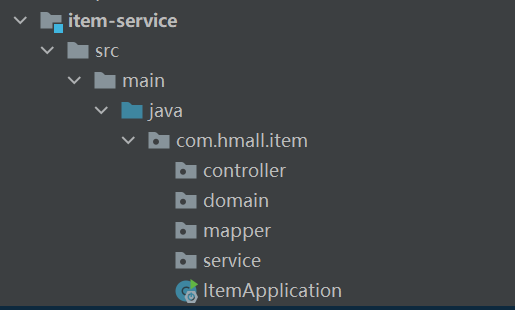
package com.hmall.item;

import org.mybatis.spring.annotation.MapperScan;
import org.springframework.boot.SpringApplication;
import org.springframework.boot.autoconfigure.SpringBootApplication;

@MapperScan("com.hmall.item.mapper")
@SpringBootApplication
public class ItemApplication {
    public static void main(String[] args) {
        SpringApplication.run(ItemApplication.class, args);
    }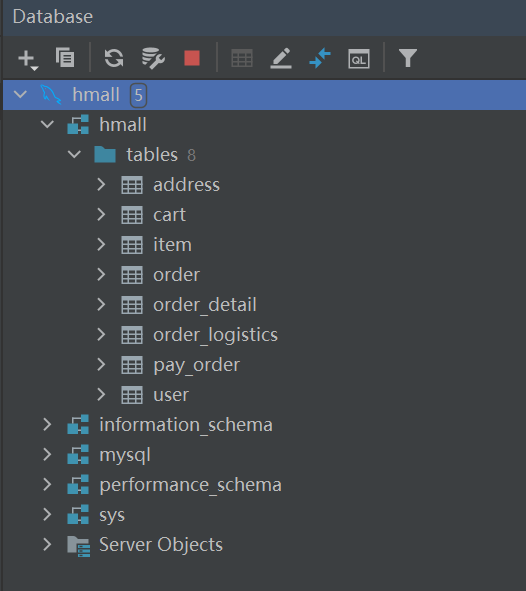
}- 准备数据库: 真实项目中一般是独立服务独立mysql, 我们采用一个mysql独立database, 进行数据隔离

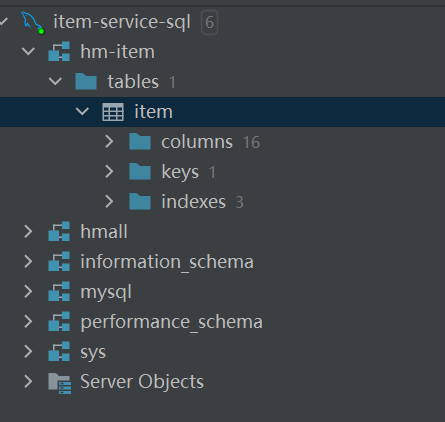
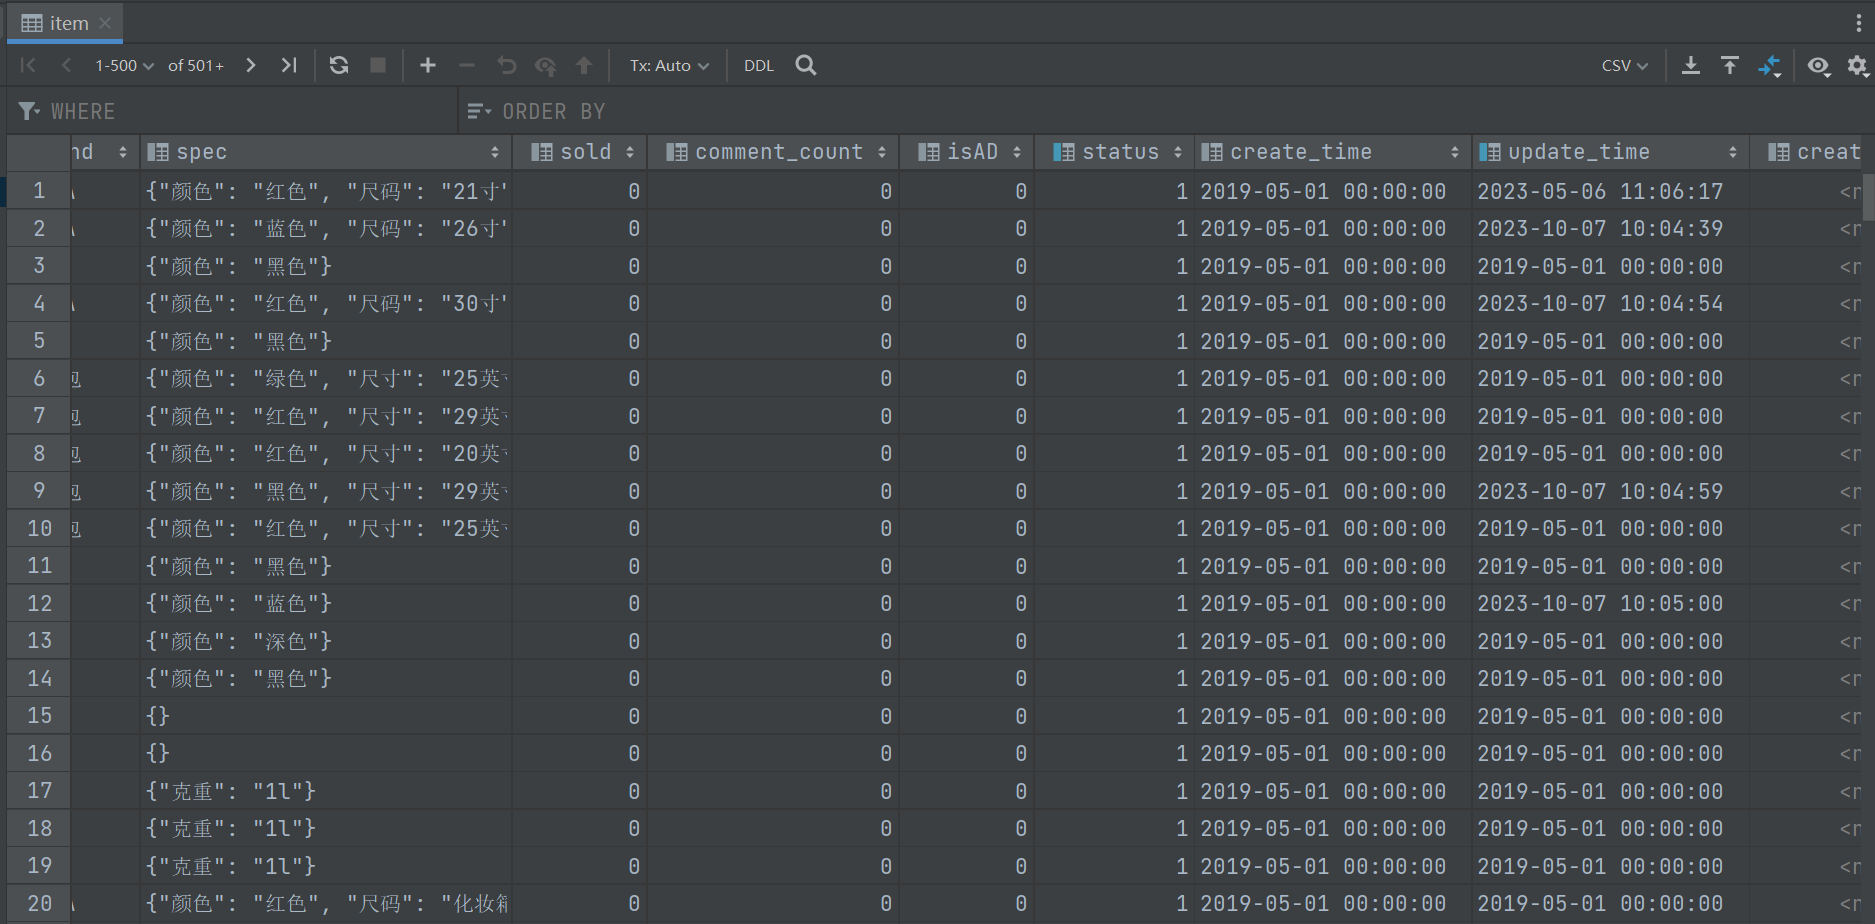
- 使用资料中提供的sql文件, 创建数据表并插入数据
- 注意要启动linux中的mysql服务
- 准备配置文件: 拷贝hmall-service的配置文件, 进行修改
server:
port: 8081 #每个微服务运行在不同端口
spring:
application:
name: item-service #每个微服务对应一个名称
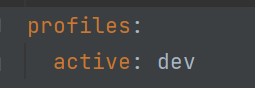
profiles:
active: dev #读取dev的配置
datasource: #数据库配置
url: jdbc:mysql://${hm.db.host}:3306/hm-item?useUnicode=true&characterEncoding=UTF-8&autoReconnect=true&serverTimezone=Asia/Shanghai
driver-class-name: com.mysql.cj.jdbc.Driver
username: root
password: ${hm.db.pw}
mybatis-plus:
configuration:
default-enum-type-handler: com.baomidou.mybatisplus.core.handlers.MybatisEnumTypeHandler
global-config:
db-config:
update-strategy: not_null
id-type: auto
logging: #日志配置
level: #日志记录级别
com.hmall: debug
pattern: #日志日期格式
dateformat: HH:mm:ss:SSS
file: #日志保存目录
path: "logs/${spring.application.name}"
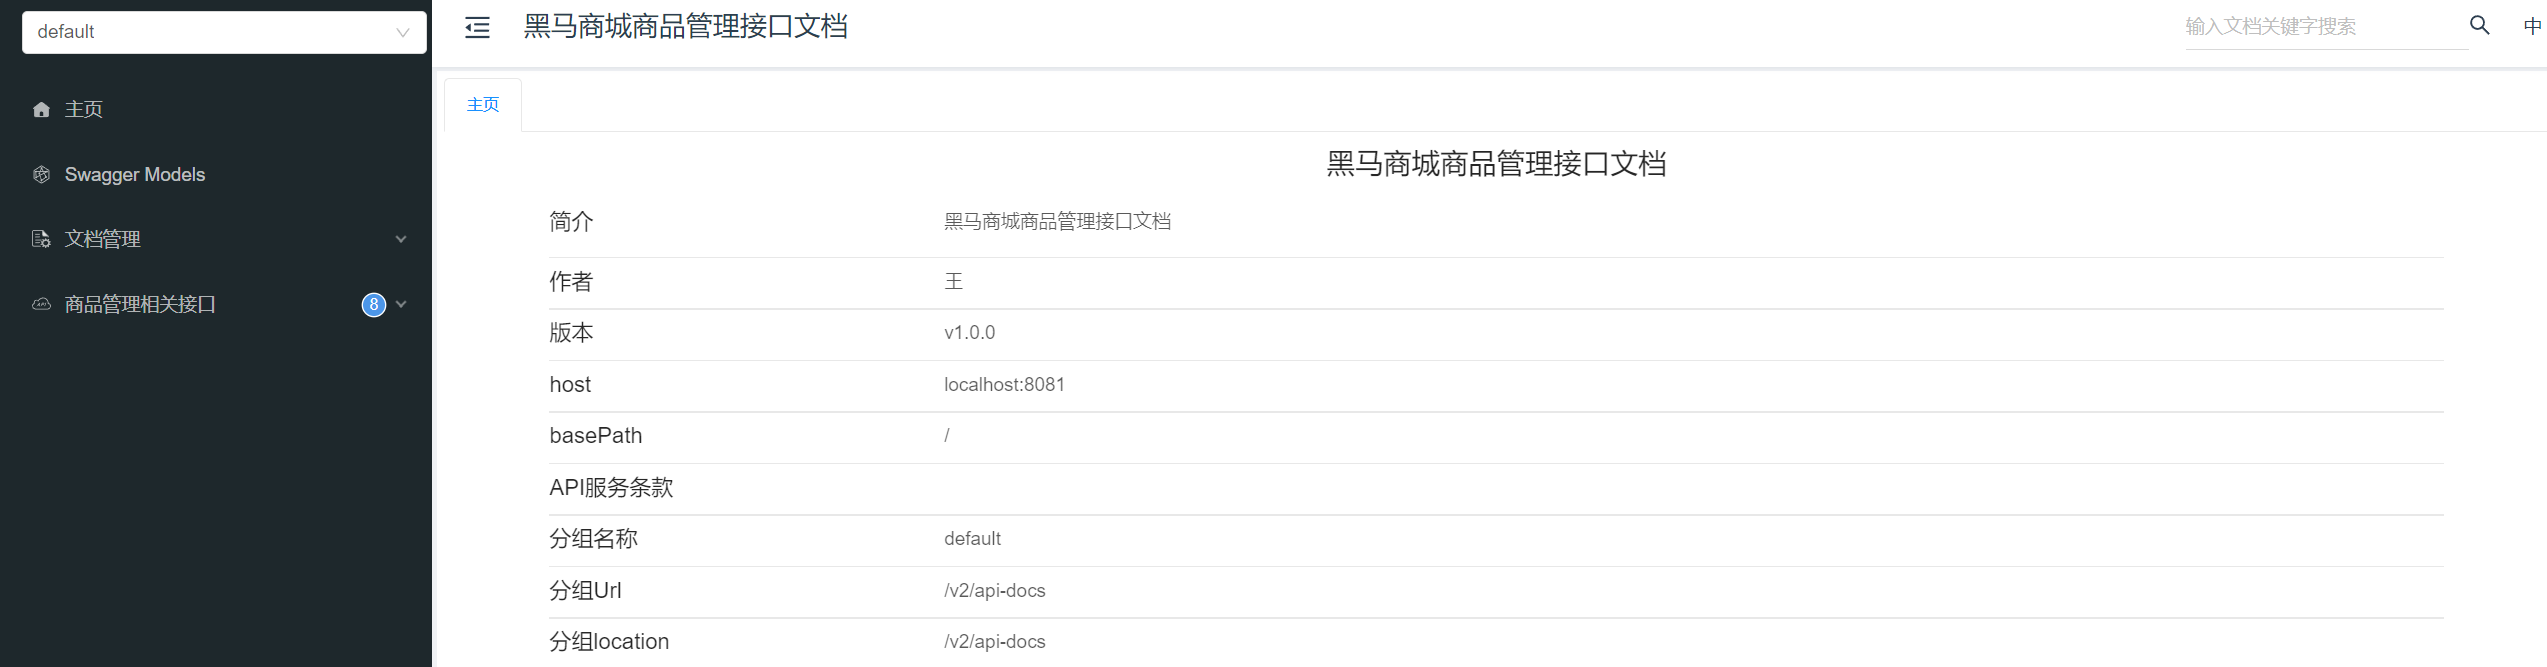
knife4j: #swagger配置
enable: true
openapi:
title: 黑马商城商品管理接口文档
description: "黑马商城商品管理接口文档"
email: 123456@qq.com
concat: 王
url: https://www.itcast.cn
version: v1.0.0
group:
default:
group-name: default
api-rule: package
api-rule-resources: # 指定扫描的包
- com.hmall.item.controller
hm:
db:
host: 192.168.1.97 # 修改为你自己的虚拟机IP地址
pw: 123 # 修改为docker中的MySQL密码- 拷贝业务代码
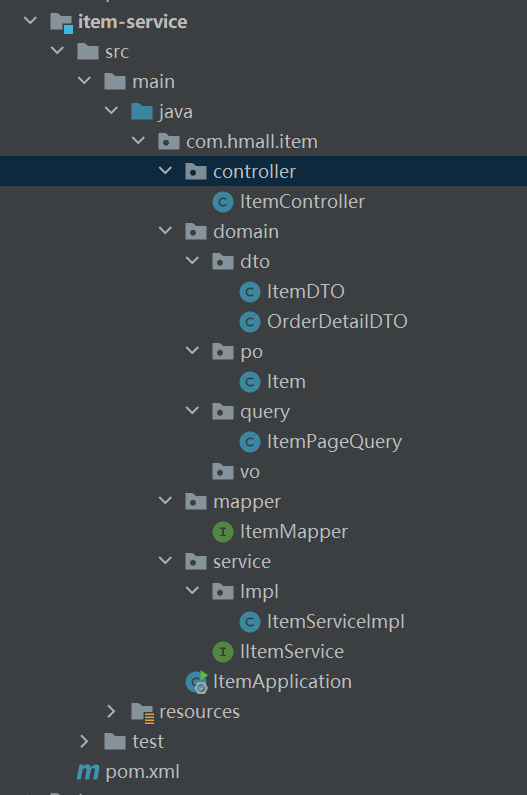
- 先复制实体类, 再复制mapper, 再复制service, 再复制controller
- 代码报错都是因为导包的路径发生了变化, 删除后让idea重新导入
- ItemServiceImpl中要手动修改下包的路径
- 补充
- po是用来封装数据库数据的
- vo是返回给前端的
- dto是封装前端请求参数的
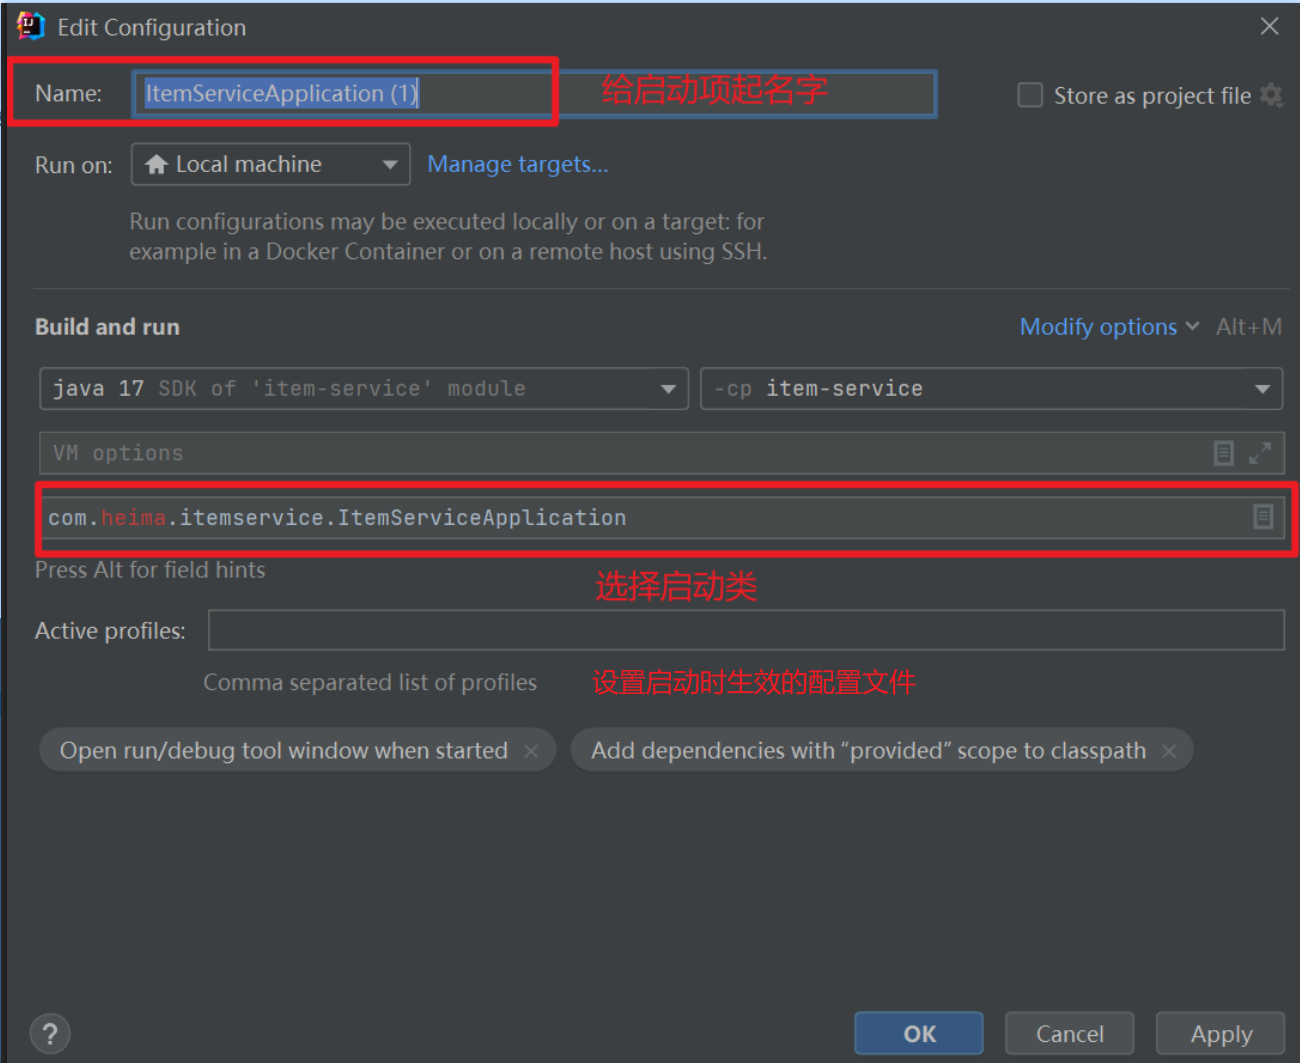
- 启动服务: 通过spring boot启动项启动服务, 快捷键 alt + 8
如果启动类没有出现在启动项面板, ,
- 可以刷新maven重试
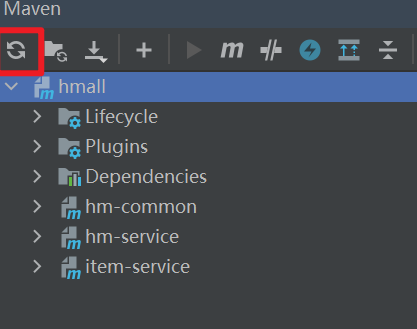
- 或者手动添加
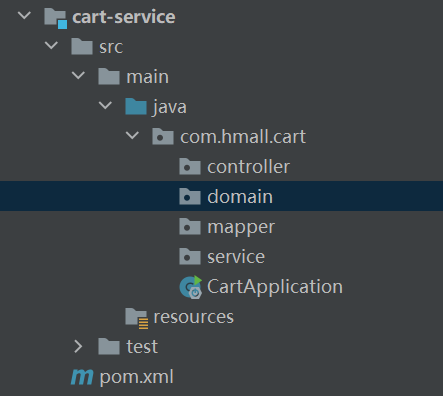
拆分购物车服务cart-service
将hm-service中与购物车有关的功能拆分到一个微服务module中,命名为cart-service
- 新建模块
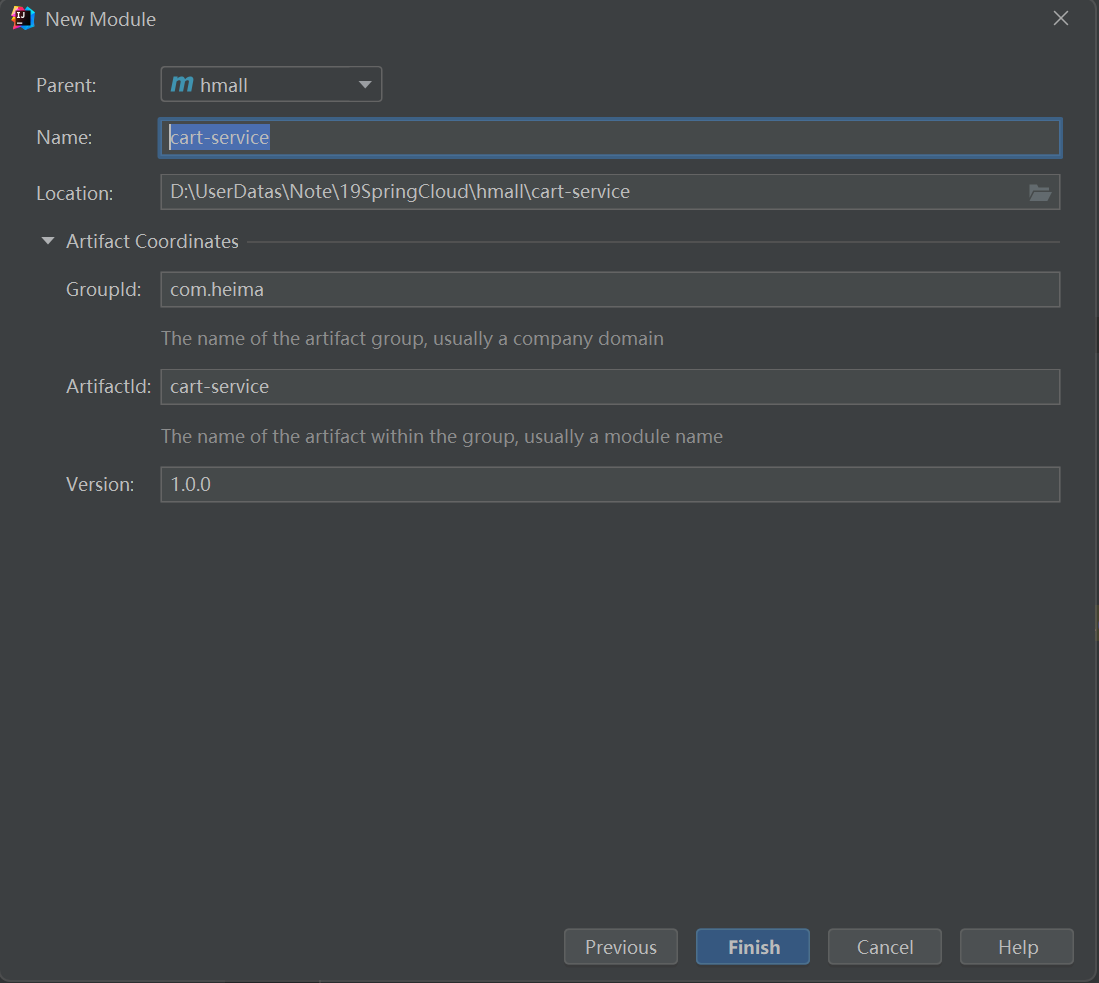
-
拷贝依赖: 从item-service中拷贝需要的依赖
com.heima hm-common 1.0.0 org.springframework.boot spring-boot-starter-web mysql mysql-connector-java com.baomidou mybatis-plus-boot-starter ${project.artifactId} org.springframework.boot spring-boot-maven-plugin -
创建启动类: 拷贝hmall-service的启动类, 进行修改
package com.hmall.cart;

import org.mybatis.spring.annotation.MapperScan;
import org.springframework.boot.SpringApplication;
import org.springframework.boot.autoconfigure.SpringBootApplication;

@MapperScan("com.hmall.cart.mapper")
@SpringBootApplication
public class CartApplication {
    public static void main(String[] args) {
        SpringApplication.run(CartApplication.class, args);
    }
}- 准备数据库: 使用资料中提供的sql文件, 创建数据表并插入数据

- 准备配置文件: 拷贝item-service的配置文件, 进行修改

server:
  port: 8082 #每个微服务运行在不同端口
spring:
  application:
    name: cart-service #每个微服务对应一个名称
  profiles:
    active: dev #读取dev的配置
  datasource: #数据库配置
    url: jdbc:mysql://${hm.db.host}:3306/hm-cart?useUnicode=true&characterEncoding=UTF-8&autoReconnect=true&serverTimezone=Asia/Shanghai
    driver-class-name: com.mysql.cj.jdbc.Driver
    username: root
    password: ${hm.db.pw}
mybatis-plus:
  configuration:
    default-enum-type-handler: com.baomidou.mybatisplus.core.handlers.MybatisEnumTypeHandler
  global-config:
    db-config:
      update-strategy: not_null
      id-type: auto
logging: #日志配置
  level: #日志记录级别
    com.hmall: debug
  pattern: #日志日期格式
    dateformat: HH:mm:ss:SSS
  file:  #日志保存目录
    path: "logs/${spring.application.name}"
knife4j: #swagger配置
  enable: true
  openapi:
    title: 黑马商城购物车管理接口文档
    description: "黑马商城购物车管理接口文档"
    email: 123456@qq.com
    concat: 王
    url: https://www.itcast.cn
    version: v1.0.0
    group:
      default:
        group-name: default
        api-rule: package
        api-rule-resources: # 指定扫描的包
- com.hmall.cart.controller- 拷贝业务代码
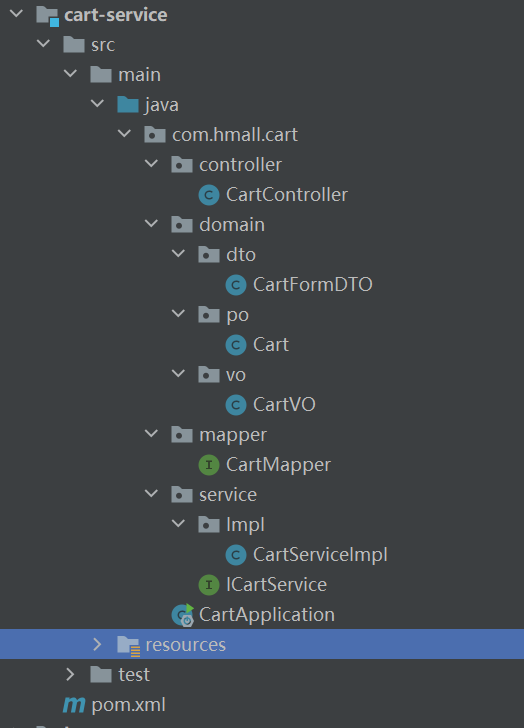
-
先复制实体类, 再复制mapper, 再复制service, 再复制controller
-
代码报错都是因为导包的路径发生了变化, 删除后让idea重新导入
-
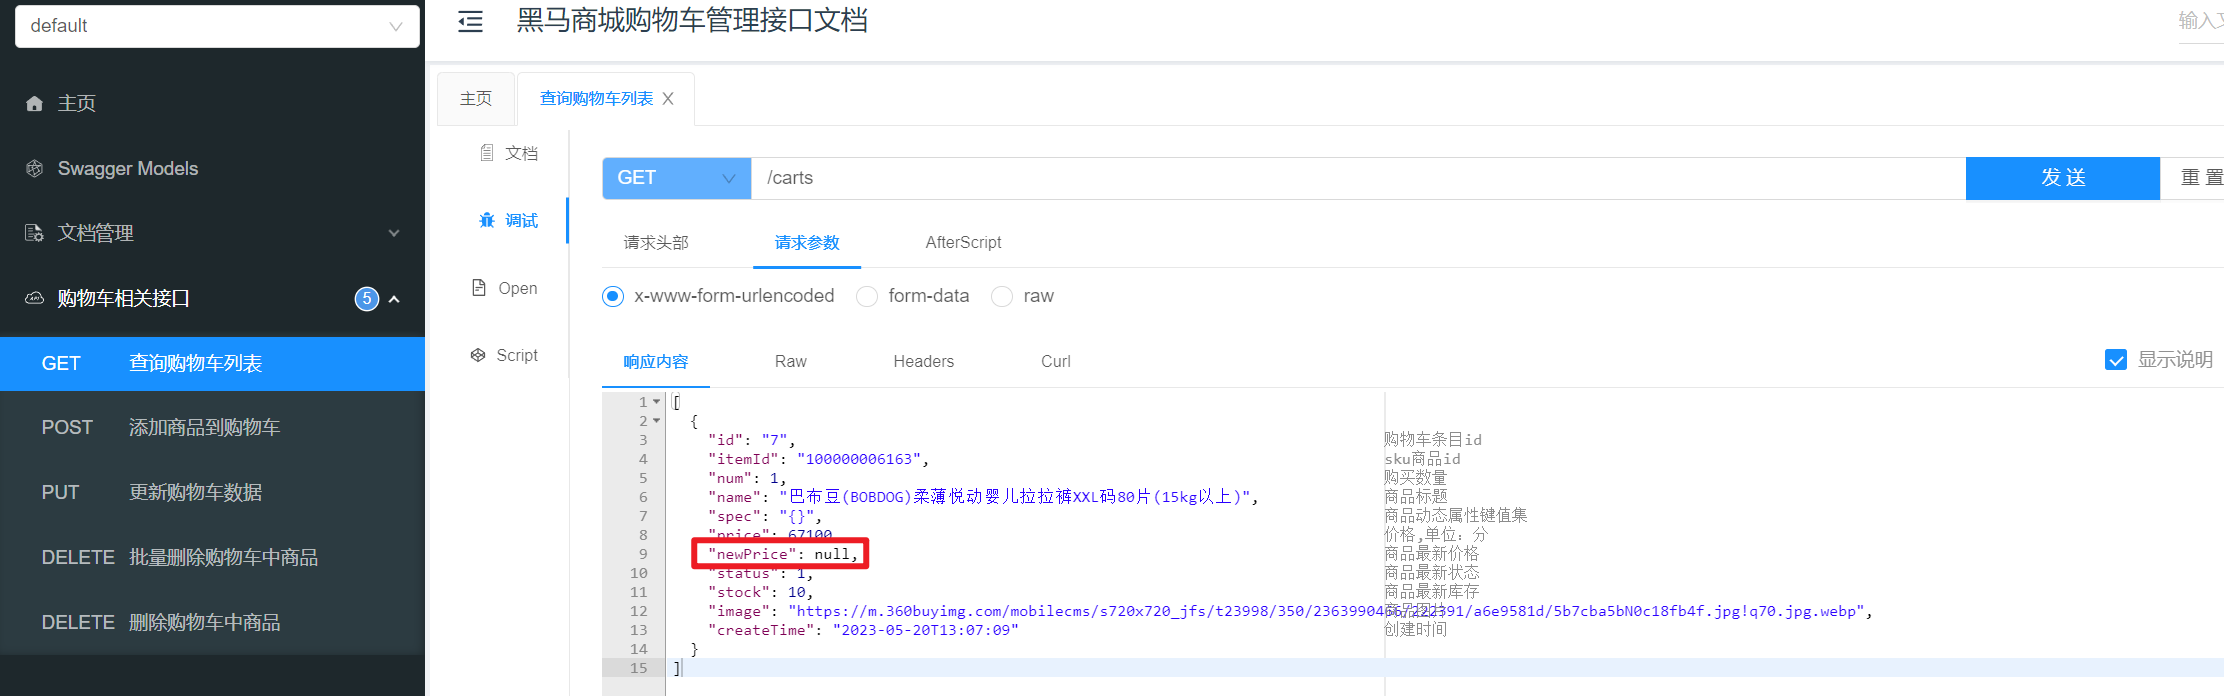
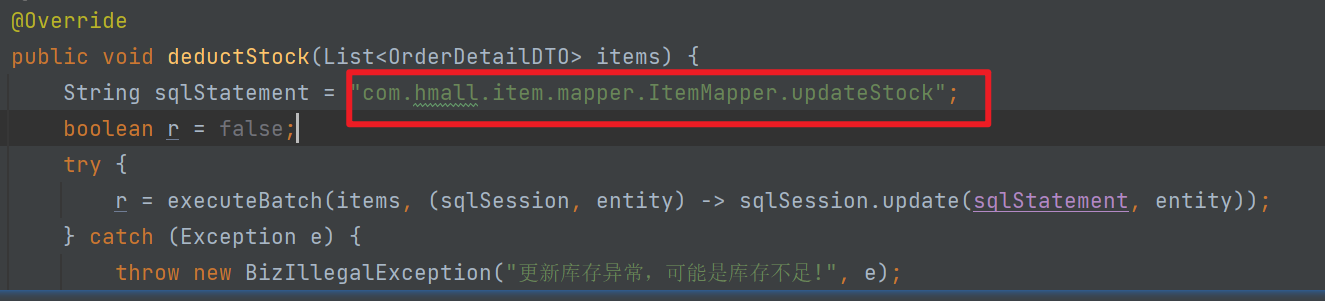
CartServiceImpl中耦合了其他模块的功能, 暂时注释掉
@Service
@RequiredArgsConstructor
public class CartServiceImpl extends ServiceImpl<CartMapper, Cart> implements ICartService {// 拆分微服务后, 无法注入其他模块的service使用了 // private final IItemService itemService; ... ... @Override public List<CartVO> queryMyCarts() { // 1.查询我的购物车列表 // todo: UserContext.getUser() => 写死1 ,待优化 List<Cart> carts = lambdaQuery().eq(Cart::getUserId,1L ).list(); ... ... } private void handleCartItems(List<CartVO> vos) { // todo 待优化// // 1.获取商品id
// SetitemIds = vos.stream().map(CartVO::getItemId).collect(Collectors.toSet());
// // 2.查询商品
// Listitems = itemService.queryItemByIds(itemIds);
// if (CollUtils.isEmpty(items)) {
// return;
// }
// // 3.转为 id 到 item的map
// Map<Long, ItemDTO> itemMap = items.stream().collect(Collectors.toMap(ItemDTO::getId, Function.identity()));
// // 4.写入vo
// for (CartVO v : vos) {
// ItemDTO item = itemMap.get(v.getItemId());
// if (item == null) {
// continue;
// }
// v.setNewPrice(item.getPrice());
// v.setStatus(item.getStatus());
// v.setStock(item.getStock());
// }
}
... ...
} -
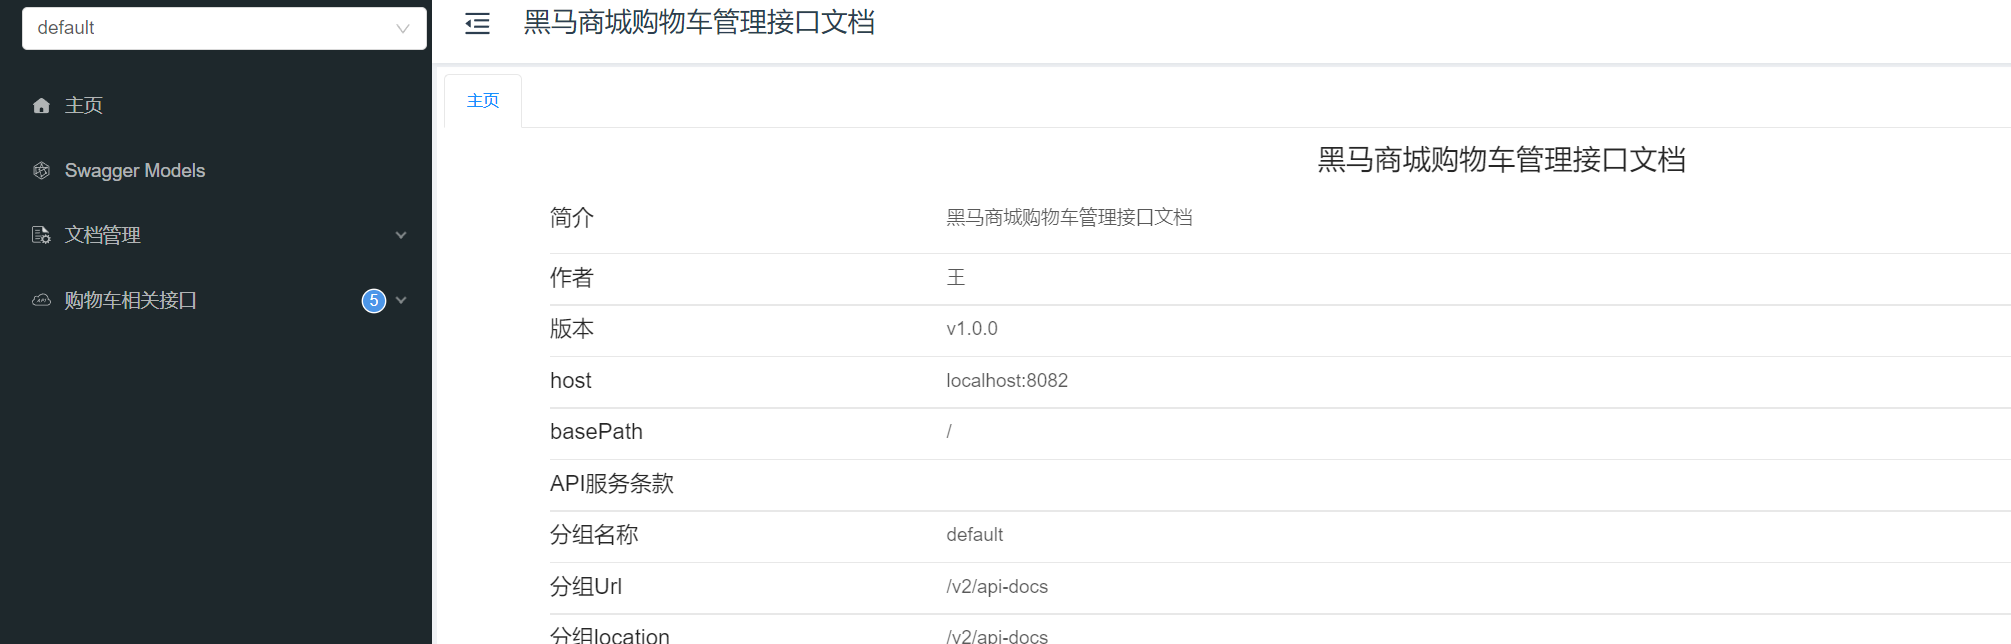
启动服务并访问接口文档: http://localhost:8081/doc.html#/home

服务调用
需求: 购物车服务需要使用商品服务, 但是代码已经拆分, 所以需要通过网络进行服务调用

Spring给我们提供了一个RestTemplate工具,可以方便的实现Http请求的发送。使用步骤如下:
- 注入RestTemplate到Spring容器

- 发起远程调用

代码改造
-
在启动类创建RestTemplate对象, 并加入到spring容器
@MapperScan("com.hmall.cart.mapper")
@SpringBootApplication
public class CartApplication {
public static void main(String[] args) {
SpringApplication.run(CartApplication.class, args);
}@Bean public RestTemplate restTemplate(){ return new RestTemplate(); }}
-
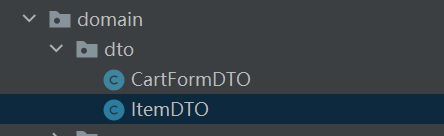
复制ItemDTO,
-
注入RestTemplate对象, 改造代码
@Service
@RequiredArgsConstructor
public class CartServiceImpl extends ServiceImpl<CartMapper, Cart> implements ICartService {//注入RestTemplate对象 //1.通过构造函数的形式注入对象 //2.用lambda提供的@RequiredArgsConstructor注解自动生成构造函数 //3.用final关键字控制对象是否生成构造函数 private final RestTemplate restTemplate; private void handleCartItems(List<CartVO> vos) { // 1.获取商品id Set<Long> itemIds = vos.stream().map(CartVO::getItemId).collect(Collectors.toSet()); // 2.查询商品 // List<ItemDTO> items = itemService.queryItemByIds(itemIds); //2.1 使用restTemplate远程调用商品服务 ResponseEntity<List<ItemDTO>> response = restTemplate.exchange( "http://localhost:8081/items?ids={ids}", HttpMethod.GET, null, new ParameterizedTypeReference<List<ItemDTO>>() { }, Map.of("ids", CollUtil.join(itemIds, ",")) ); //2.2解析响应 if (!response.getStatusCode().is2xxSuccessful()) { // 查询失败 return; } List<ItemDTO> items = response.getBody(); ... ... } ... ...}
-
接口调式: 商品价格没有变化, 后端就会返回null, 一旦商品价格变化了, 就会查出最新价格, 前端就会展示价差