如何使用自己训练的模型生成注意力热图(模型为DINOv2,基于ViT架构)
搞了整整3天,网上的代码试了很多,生成的都是奇怪的二维热图,终于成功,记录一下心路历程
要提前安装好gradCam包
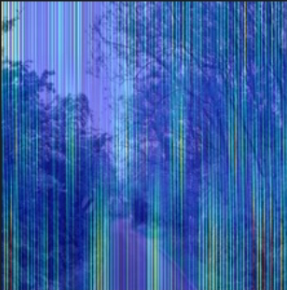
在网上找的代码,生成的热图都是线性的,很奇怪,把代码贴在下面:
python
'''
1)导入相关的包并加载模型
'''

import util
import arg
import network
from pytorch_grad_cam import GradCAM, ScoreCAM, GradCAMPlusPlus, AblationCAM, XGradCAM, EigenCAM
from pytorch_grad_cam.utils.image import show_cam_on_image, \
                                         deprocess_image, \
                                         preprocess_image
from torchvision.models import resnet50
import cv2
import numpy as np
import os

os.environ["KMP_DUPLICATE_LIB_OK"]="TRUE"

# 1.加载模型

args = arg.parse_arguments()
model = network.VPRNet()
# model = model.to(args.device)
model = util.resume_model(args, model)
# model = resnet50(pretrained=True) #预先训练
# 2.选择目标层
# target_layer = model.layer4[-1]
target_layer = [model.blocks[-1].norm1]
# target_layer = [model.backbone.blocks[-1]]
'''
Resnet18 and 50: model.layer4[-1]
VGG and densenet161: model.features[-1]
mnasnet1_0: model.layers[-1]
ViT: model.blocks[-1].norm1
'''
#------------------------------
'''
2)构建输入图像的Tensor形式,使其能传送到model里面去计算
'''
image_path = 'C:\\Users\\Administrator\\Desktop\\img.jpg'
rgb_img = cv2.imread(image_path, 1)[:, :, ::-1]   # 1是读取rgb
                                                 #imread返回从指定路径加载的图像
rgb_img = cv2.imread(image_path, 1) #imread()读取的是BGR格式
rgb_img = cv2.resize(rgb_img, (224, 224))
rgb_img = np.float32(rgb_img) / 255


# preprocess_image作用:归一化图像,并转成tensor
input_tensor = preprocess_image(rgb_img, mean=[0.485, 0.456, 0.406],
                                             std=[0.229, 0.224, 0.225])   # torch.Size([1, 3, 224, 224])
# Create an input tensor image for your model..
# Note: input_tensor can be a batch tensor with several images!


#----------------------------------------
'''
3)初始化CAM对象,包括模型,目标层以及是否使用cuda等
'''
# Construct the CAM object once, and then re-use it on many images:
cam = GradCAM(model=model, target_layers=target_layer, use_cuda=False)
'''
4)选定目标类别,如果不设置,则默认为分数最高的那一类
'''
# If target_category is None, the highest scoring category
# will be used for every image in the batch.
# target_category can also be an integer, or a list of different integers
# for every image in the batch.
target_category = None
#指定类:target_category = 281

'''
5)计算cam
'''
# You can also pass aug_smooth=True and eigen_smooth=True, to apply smoothing.
grayscale_cam = cam(input_tensor=input_tensor)  # [batch, 224,224], target_category=target_category

#----------------------------------
'''
6)展示热力图并保存
'''
# In this example grayscale_cam has only one image in the batch:
# 7.展示热力图并保存, grayscale_cam是一个batch的结果,只能选择一张进行展示
grayscale_cam = grayscale_cam[0]
visualization = show_cam_on_image(rgb_img, grayscale_cam)  # (224, 224, 3)
cv2.imwrite(f'first_try.jpg', visualization)
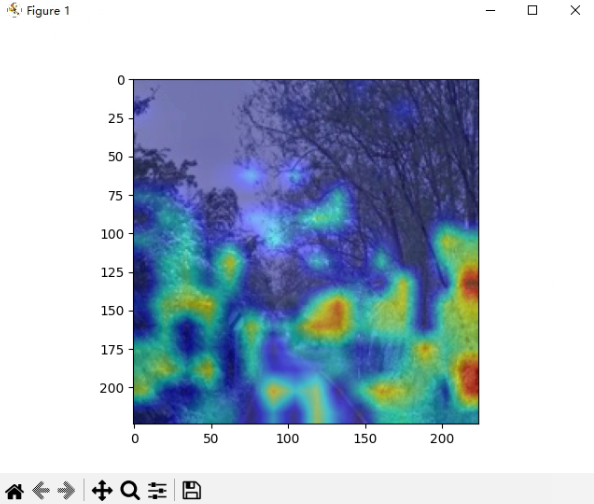
后来参考了B站up的方法成功实现使用Pytorch实现Grad-CAM并绘制热力图,文件树如下,代码仓库:
- 项目总文件夹
- grad_cam
- 自己训练模型的网络
- utills
- 画图代码main_vit
- grad_cam
python
import os
import numpy as np
import torch
from PIL import Image
import matplotlib.pyplot as plt
from torchvision import transforms
from util import GradCAM, show_cam_on_image, center_crop_img, resume_model
import network
import arg
class ReshapeTransform:
    def __init__(self, model):
        input_size = model.backbone.patch_embed.img_size
        patch_size = model.backbone.patch_embed.patch_size
        self.h = 16
        self.w = 16
        # self.h = input_size[0] // patch_size[0]
        # self.w = input_size[1] // patch_size[1]

    def __call__(self, x):
        # remove cls token and reshape
        # [batch_size, num_tokens, token_dim]
        result = x[:, 1:, :].reshape(x.size(0),
                                     self.h,
                                     self.w,
                                     x.size(2))

        # Bring the channels to the first dimension,
        # like in CNNs.
        # [batch_size, H, W, C] -> [batch, C, H, W]
        result = result.permute(0, 3, 1, 2)
        return result


def main():
    args = arg.parse_arguments()
    model = network.VPRNet()
    # model = model.to(args.device)
    model = resume_model(args, model)
    # weights_path = "./logs\\default\\2024-07-12_14-20-41\\best_model.pth"
    # model.load_state_dict(torch.load(weights_path, map_location="cpu"))
    # Since the final classification is done on the class token computed in the last attention block,
    # the output will not be affected by the 14x14 channels in the last layer.
    # The gradient of the output with respect to them, will be 0!
    # We should chose any layer before the final attention block.
    target_layers = [model.backbone.blocks[-1].norm1]

    data_transform = transforms.Compose([transforms.ToTensor(),
                                         transforms.Normalize([0.5, 0.5, 0.5], [0.5, 0.5, 0.5])])
    # load image
    img_path = "C:\\Users\\Administrator\\Desktop\\img.jpg"
    assert os.path.exists(img_path), "file: '{}' dose not exist.".format(img_path)
    img = Image.open(img_path).convert('RGB')
    img = np.array(img, dtype=np.uint8)
    img = center_crop_img(img, 224)
    # [C, H, W]
    img_tensor = data_transform(img)
    # expand batch dimension
    # [C, H, W] -> [N, C, H, W]
    input_tensor = torch.unsqueeze(img_tensor, dim=0)

    cam = GradCAM(model=model,
                  target_layers=target_layers,
                  use_cuda=False,
                  reshape_transform=ReshapeTransform(model))
    target_category = 281  # tabby, tabby cat
    # target_category = 254  # pug, pug-dog

    grayscale_cam = cam(input_tensor=input_tensor)#, target_category=target_category

    grayscale_cam = grayscale_cam[0, :]
    visualization = show_cam_on_image(img / 255., grayscale_cam, use_rgb=True)
    plt.imshow(visualization)

    plt.savefig('cam.jpg')


if __name__ == '__main__':
    main()