周日了解到angular已经更新到19了,想按官方教程学习一遍,工欲善其事必先利其器,先更新工具:
安装新版版本
卸载老的nodejs 20.10.0,安装最新的LTS版本
最新LTS版本已经是22.12.0
C:\Program Files\nodejs\ 目录改为 C:\nodejs\
PS C:\angular> node --version
v22.12.0
PS C:\angular> npm --version
10.9.0
重新更新angular
npm install -g @angular/cli
PS C:\angular> npm install -g @angular/cli
added 83 packages, removed 38 packages, and changed 189 packages in 23s
51 packages are looking for funding
run `npm fund` for details
npm notice
npm notice New patch version of npm available! 10.9.0 -> 10.9.2
npm notice Changelog: https://github.com/npm/cli/releases/tag/v10.9.2
npm notice To update run: npm install -g npm@10.9.2
npm notice
提示更新npm到最新版本,我就更新一下。
PS C:\angular> npm install -g npm@10.9.2
added 1 package in 8s
25 packages are looking for funding
run `npm fund` for details
查看angular版本
PS C:\angular> ng version
/ \ _ __ __ _ _ _| | __ _ _ __ / __| | | _|
/ △ \ | '_ \ / _` | | | | |/ _` | '__| | | | | | |
/ ___ \| | | | (| | || | | (| | | | || |_ | |
// \\| ||\, |\,||\,|| \____|||
|___/
Angular CLI: 19.0.4
Node: 22.12.0
Package Manager: npm 10.9.2
OS: win32 x64
Angular:
...
Package Version
@angular-devkit/architect 0.1900.4 (cli-only)
@angular-devkit/core 19.0.4 (cli-only)
@angular-devkit/schematics 19.0.4 (cli-only)
@schematics/angular 19.0.4 (cli-only)
已经是19.0.4最新版本了,完美。
教程学习
开始学习最新教程:
https://angular.dev/tutorials/first-app
https://www.youtube.com/watch?v=xAT0lHYhHMY&t=148s 教程
Download the code →https://goo.gle/learn-angular-step-1
他这个版本是angular15的,不能直接用,进入目录后npm install, 这个是根据package.json里面的版本信息安装。
我直接建立一个
ng new angular.io-example
bash
PS C:\angular> ng new angular.io-example
✔ Which stylesheet format would you like to use? CSS             [ https://developer.mozilla.org/docs/Web/CSS
          ]
✔ Do you want to enable Server-Side Rendering (SSR) and Static Site Generation (SSG/Prerendering)? No
CREATE angular.io-example/angular.json (2734 bytes)
CREATE angular.io-example/package.json (1087 bytes)
CREATE angular.io-example/README.md (1538 bytes)
CREATE angular.io-example/tsconfig.json (942 bytes)
CREATE angular.io-example/.editorconfig (331 bytes)
CREATE angular.io-example/.gitignore (629 bytes)
CREATE angular.io-example/tsconfig.app.json (439 bytes)
CREATE angular.io-example/tsconfig.spec.json (449 bytes)
CREATE angular.io-example/.vscode/extensions.json (134 bytes)
CREATE angular.io-example/.vscode/launch.json (490 bytes)
CREATE angular.io-example/.vscode/tasks.json (980 bytes)
CREATE angular.io-example/src/main.ts (256 bytes)
CREATE angular.io-example/src/index.html (315 bytes)
CREATE angular.io-example/src/styles.css (81 bytes)
CREATE angular.io-example/src/app/app.component.html (20239 bytes)
CREATE angular.io-example/src/app/app.component.spec.ts (981 bytes)
CREATE angular.io-example/src/app/app.component.ts (306 bytes)
CREATE angular.io-example/src/app/app.component.css (0 bytes)
CREATE angular.io-example/src/app/app.config.ts (318 bytes)
CREATE angular.io-example/src/app/app.routes.ts (80 bytes)
CREATE angular.io-example/public/favicon.ico (15086 bytes)
✔ Packages installed successfully.
Author identity unknown
试试能否运行:ng serve
bash
PS C:\angular\angular.io-example> ng serve
Initial chunk files | Names         |  Raw size
polyfills.js        | polyfills     |  90.20 kB |
main.js             | main          |  18.19 kB |
styles.css          | styles        |  95 bytes |

                    | Initial total | 108.48 kB

Application bundle generation complete. [7.280 seconds]

Watch mode enabled. Watching for file changes...
NOTE: Raw file sizes do not reflect development server per-request transformations.
  ➜  Local:   http://localhost:4200/
  ➜  press h + enter to show help
1.create Hello World
https://angular.dev/tutorials/first-app/01-hello-world
-
Open
first-app/src/index.html. Note: This step and the next are only for your local environment! -
In
index.html, replace the<title>element with this code to update the title of the app.Homes
3.Next, open first-app/src/app/app.component.ts.
import {Component} from '@angular/core';
@Component({
  selector: 'app-root',
  imports: [],
  template: `
    <h1>Hello world!</h1>
  `,
  styleUrls: ['./app.component.css'],
})
export class AppComponent {
  title = 'homes';
}
这样就能正确显示Hello World了
2. Create Home Component
ng generate component home
看了视频,与网页教程有区别,增加了两个参数:
ng generate component Home --standalone --inline-template
template就不会单独存储到html中了,放到ts文件中,对于小的组件确实方便。
PS C:\angular\angular.io-example> ng generate component home
CREATE src/app/home/home.component.html (20 bytes)
CREATE src/app/home/home.component.spec.ts (601 bytes)
CREATE src/app/home/home.component.ts (217 bytes)
CREATE src/app/home/home.component.css (0 bytes)
把Home组件增加到app中:
In app.component.ts, import HomeComponent by adding this line to the file level imports
import {HomeComponent} from './home/home.component';In app.component.ts, in @Component, update the imports array property and add HomeComponent.
import {Component} from '@angular/core';
import {HomeComponent} from './home/home.component';
@Component({
  selector: 'app-root',
  imports: [HomeComponent],
  template: `
    <main>
      <header class="brand-name">
        <img class="brand-logo" src="/assets/logo.svg" alt="logo" aria-hidden="true" />
      </header>
      <section class="content">
        <app-home></app-home>
      </section>
    </main>
  `,
  styleUrls: ['./app.component.css'],
})
export class AppComponent {
  title = 'homes';
}
发现logo.svg没有加载,下载上面链接中的例子,发现多了一个asset文件夹,拷贝到我自己的项目src目录下,还是提示404,最后发现angular.json中要定义这个asset
            "tsConfig": "tsconfig.app.json",
            "assets": [
                "src/favicon.ico",
                "src/assets"
            ],
            "styles": [
              "src/styles.css"
            ],
            "scripts": []
增加后可以正常显示图标和home组件了。
3. Add feature to Home Component
Replace in src/app/home/home.component.ts
import {Component} from '@angular/core';
import {CommonModule} from '@angular/common';
@Component({
  selector: 'app-home',
  imports: [CommonModule],
  template: `
    <section>
      <form>
        <input type="text" placeholder="Filter by city" />
        <button class="primary" type="button">Search</button>
      </form>
    </section>
  `,
  styleUrls: ['./home.component.css'],
})
export class HomeComponent {}
home.component.css 修改style
.results {
  display: grid;
  column-gap: 14px;
  row-gap: 14px;
  grid-template-columns: repeat(auto-fill, minmax(400px, 400px));
  margin-top: 50px;
  justify-content: space-around;
}
input[type="text"] {
  border: solid 1px var(--primary-color);
  padding: 10px;
  border-radius: 8px;
  margin-right: 4px;
  display: inline-block;
  width: 30%;
}
button {
  padding: 10px;
  border: solid 1px var(--primary-color);
  background: var(--primary-color);
  color: white;
  border-radius: 8px;
}
@media (min-width: 500px) and (max-width: 768px) {
  .results {
      grid-template-columns: repeat(2, 1fr);
  }
  input[type="text"] {
      width: 70%;
  }
}
@media (max-width: 499px) {
  .results {
      grid-template-columns: 1fr;
  }
}
修改样式后发现按钮显示不出来了,把根目录的样式文件也改一下:styles.css
/* You can add global styles to this file, and also import other style files */
* {
margin: 0;
padding: 0;
}
body {
font-family: 'Be Vietnam Pro', sans-serif;
}
:root {
--primary-color: #605DC8;
--secondary-color: #8B89E6;
--accent-color: #e8e7fa;
--shadow-color: #E8E8E8;
}
button.primary {
padding: 10px;
border: solid 1px var(--primary-color);
background: var(--primary-color);
color: white;
border-radius: 8px;
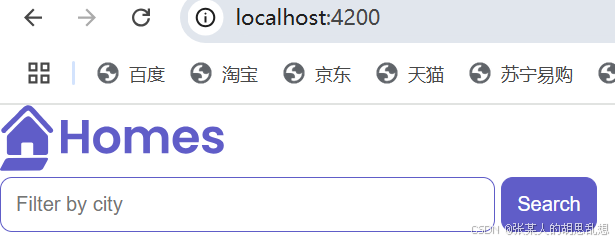
}这就可以显示一个搜索框和按钮了:
4. create the application's HousingLocation component
ng generate component housingLocation --standalone --inline-template
PS C:\angular\angular.io-example> ng generate component housingLocation --standalone --inline-template
CREATE src/app/housing-location/housing-location.component.spec.ts (679 bytes)
CREATE src/app/housing-location/housing-location.component.ts (282 bytes)
CREATE src/app/housing-location/housing-location.component.css (0 bytes)
Add the new component to your app's layout
Import HousingLocationComponent in src/app/home/home.component.ts
import {HousingLocationComponent} from '../housing-location/housing-location.component';Add HousingLocationComponent to imports array in src/app/home/home.component.ts
import {Component} from '@angular/core';
import {CommonModule} from '@angular/common';
import {HousingLocationComponent} from '../housing-location/housing-location.component';
@Component({
  selector: 'app-home',
  imports: [CommonModule, HousingLocationComponent],
  template: `
    <section>
      <form>
        <input type="text" placeholder="Filter by city" />
        <button class="primary" type="button">Search</button>
      </form>
    </section>
    <section class="results">
      <app-housing-location></app-housing-location>
    </section>
  `,
  styleUrls: ['./home.component.css'],
})
export class HomeComponent {}
增加housing-location组件的style:
.listing {
  background: var(--accent-color);
  border-radius: 30px;
  padding-bottom: 30px;
}
.listing-heading {
  color: var(--primary-color);
  padding: 10px 20px 0 20px;
}
.listing-photo {
  height: 250px;
  width: 100%;
  object-fit: cover;
  border-radius: 30px 30px 0 0;
}
.listing-location {
  padding: 10px 20px 20px 20px;
}
.listing-location::before {
  content: url("/assets/location-pin.svg") / "";
}
section.listing a {
  padding-left: 20px;
  text-decoration: none;
  color: var(--primary-color);
}
section.listing a::after {
  content: "\203A";
  margin-left: 5px;
}
5. Creating an interface
ng generate interface housingLocation
PS C:\angular\angular.io-example> ng generate interface housingLocation
CREATE src/app/housing-location.ts (39 bytes)
增加interface的内容
export interface HousingLocation {
  id: number;
  name: string;
  city: string;
  state: string;
  photo: string;
  availableUnits: number;
  wifi: boolean;
  laundry: boolean;
}
6. Create a test house for your app
Import HomeComponent in src/app/home/home.component.ts
import {HousingLocation} from '../housinglocation';In src/app/home/home.component.ts, replace the empty export class HomeComponent {} definition with this code to create a single instance of the new interface in the component.
readonly baseUrl = 'https://angular.dev/assets/images/tutorials/common';
  housingLocation: HousingLocation = {
    id: 9999,
    name: 'Test Home',
    city: 'Test city',
    state: 'ST',
    photo: `${this.baseUrl}/example-house.jpg`,
    availableUnits: 99,
    wifi: true,
    laundry: false,
  };
}
7. Add an input parameter to the component
Import HousingLocationComponent and Input in src/app/housing-location/housing-location.component.ts
import {Component, Input} from '@angular/core';
import {CommonModule} from '@angular/common';
import {HousingLocation} from '../housinglocation';
input
import {Component, Input} from '@angular/core';
import {CommonModule} from '@angular/common';
import {HousingLocation} from '../housinglocation';
@Component({
  selector: 'app-housing-location',
  imports: [CommonModule],
  template: `
    <p>housing-location works!</p>
  `,
  styleUrls: ['./housing-location.component.css'],
})
export class HousingLocationComponent {
  @Input() housingLocation!: HousingLocation;
}
其中的!表示必须非空。
8. Add a property binding to a component's template
Your app has data bindings in the HomeComponent template.
Your app sends data from the HomeComponent to the HousingLocationComponent.
数据绑定,数据在组件间通过Input传递
Add housingLocation property binding
<app-housing-location [housingLocation]="housingLocation"></app-housing-location>
    </section>
  `,
9. Add an interpolation(插值) to a component's template
Your app will display interpolated values in the HousingLocationComponent template.
Your app will render a housing location data to the browser.
增加插值;渲染数据;
Using the {{ expression }} in Angular templates
Update HousingLocationComponent template
<section class="listing">
<img
class="listing-photo"
[src]="housingLocation.photo"
alt="Exterior photo of {{ housingLocation.name }}"
crossorigin
/>
<h2 class="listing-heading">{{ housingLocation.name }}</h2>
<p class="listing-location">{{ housingLocation.city }}, {{ housingLocation.state }}</p>
</section>
`,
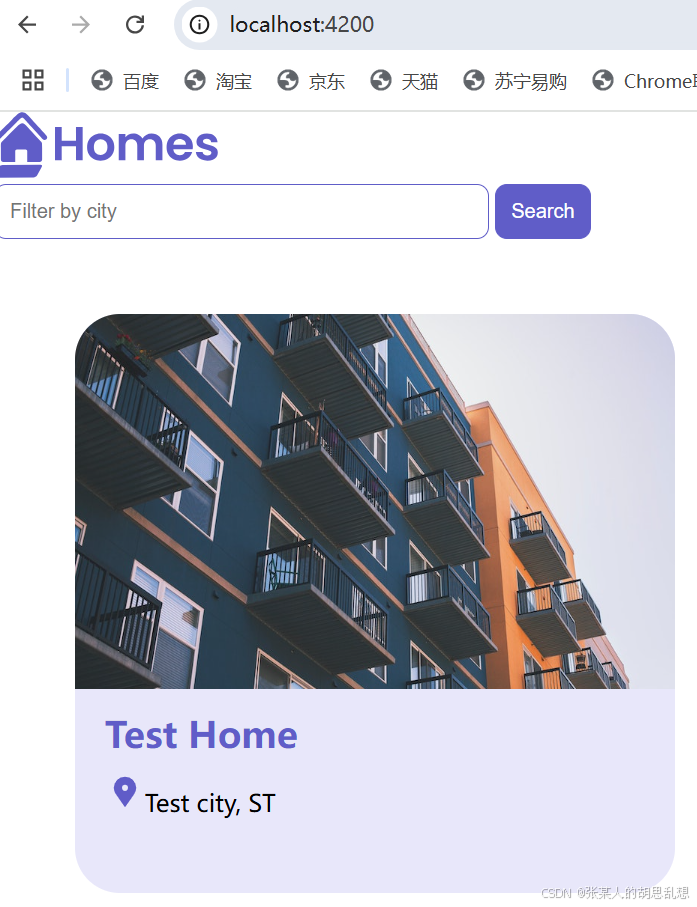
styleUrls: ['./housing-location.component.css'],其中的alt在图片无法加载时显示的信息。
这时已经可以多组件传递interface,并显示结果了:
10. Use *ngFor to list objects in components
使用循环显示列表
Add housing data to the HomeComponent 这次是增加多条数据了
src/app/home/home.component.ts
import {Component} from '@angular/core';
import {CommonModule} from '@angular/common';
import {HousingLocationComponent} from '../housing-location/housing-location.component';
import {HousingLocation} from '../housinglocation';
@Component({
  selector: 'app-home',
  imports: [CommonModule, HousingLocationComponent],
  template: `
    <section>
      <form>
        <input type="text" placeholder="Filter by city" />
        <button class="primary" type="button">Search</button>
      </form>
    </section>
    <section class="results">
      <app-housing-location
        *ngFor="let housingLocation of housingLocationList"
        [housingLocation]="housingLocation"
      ></app-housing-location>
    </section>
  `,
  styleUrls: ['./home.component.css'],
})
export class HomeComponent {
  readonly baseUrl = 'https://angular.dev/assets/images/tutorials/common';
  housingLocationList: HousingLocation[] = [
    {
      id: 0,
      name: 'Acme Fresh Start Housing',
      city: 'Chicago',
      state: 'IL',
      photo: `${this.baseUrl}/bernard-hermant-CLKGGwIBTaY-unsplash.jpg`,
      availableUnits: 4,
      wifi: true,
      laundry: true,
    },
    {
      id: 1,
      name: 'A113 Transitional Housing',
      city: 'Santa Monica',
      state: 'CA',
      photo: `${this.baseUrl}/brandon-griggs-wR11KBaB86U-unsplash.jpg`,
      availableUnits: 0,
      wifi: false,
      laundry: true,
    },
    {
      id: 2,
      name: 'Warm Beds Housing Support',
      city: 'Juneau',
      state: 'AK',
      photo: `${this.baseUrl}/i-do-nothing-but-love-lAyXdl1-Wmc-unsplash.jpg`,
      availableUnits: 1,
      wifi: false,
      laundry: false,
    },
    {
      id: 3,
      name: 'Homesteady Housing',
      city: 'Chicago',
      state: 'IL',
      photo: `${this.baseUrl}/ian-macdonald-W8z6aiwfi1E-unsplash.jpg`,
      availableUnits: 1,
      wifi: true,
      laundry: false,
    },
    {
      id: 4,
      name: 'Happy Homes Group',
      city: 'Gary',
      state: 'IN',
      photo: `${this.baseUrl}/krzysztof-hepner-978RAXoXnH4-unsplash.jpg`,
      availableUnits: 1,
      wifi: true,
      laundry: false,
    },
    {
      id: 5,
      name: 'Hopeful Apartment Group',
      city: 'Oakland',
      state: 'CA',
      photo: `${this.baseUrl}/r-architecture-JvQ0Q5IkeMM-unsplash.jpg`,
      availableUnits: 2,
      wifi: true,
      laundry: true,
    },
    {
      id: 6,
      name: 'Seriously Safe Towns',
      city: 'Oakland',
      state: 'CA',
      photo: `${this.baseUrl}/phil-hearing-IYfp2Ixe9nM-unsplash.jpg`,
      availableUnits: 5,
      wifi: true,
      laundry: true,
    },
    {
      id: 7,
      name: 'Hopeful Housing Solutions',
      city: 'Oakland',
      state: 'CA',
      photo: `${this.baseUrl}/r-architecture-GGupkreKwxA-unsplash.jpg`,
      availableUnits: 2,
      wifi: true,
      laundry: true,
    },
    {
      id: 8,
      name: 'Seriously Safe Towns',
      city: 'Oakland',
      state: 'CA',
      photo: `${this.baseUrl}/saru-robert-9rP3mxf8qWI-unsplash.jpg`,
      availableUnits: 10,
      wifi: false,
      laundry: false,
    },
    {
      id: 9,
      name: 'Capital Safe Towns',
      city: 'Portland',
      state: 'OR',
      photo: `${this.baseUrl}/webaliser-_TPTXZd9mOo-unsplash.jpg`,
      availableUnits: 6,
      wifi: true,
      laundry: true,
    },
  ];
}
ngfor:
<app-housing-location
*ngFor="let housingLocation of housingLocationList"
[housingLocation]="housingLocation"
></app-housing-location>
</section>
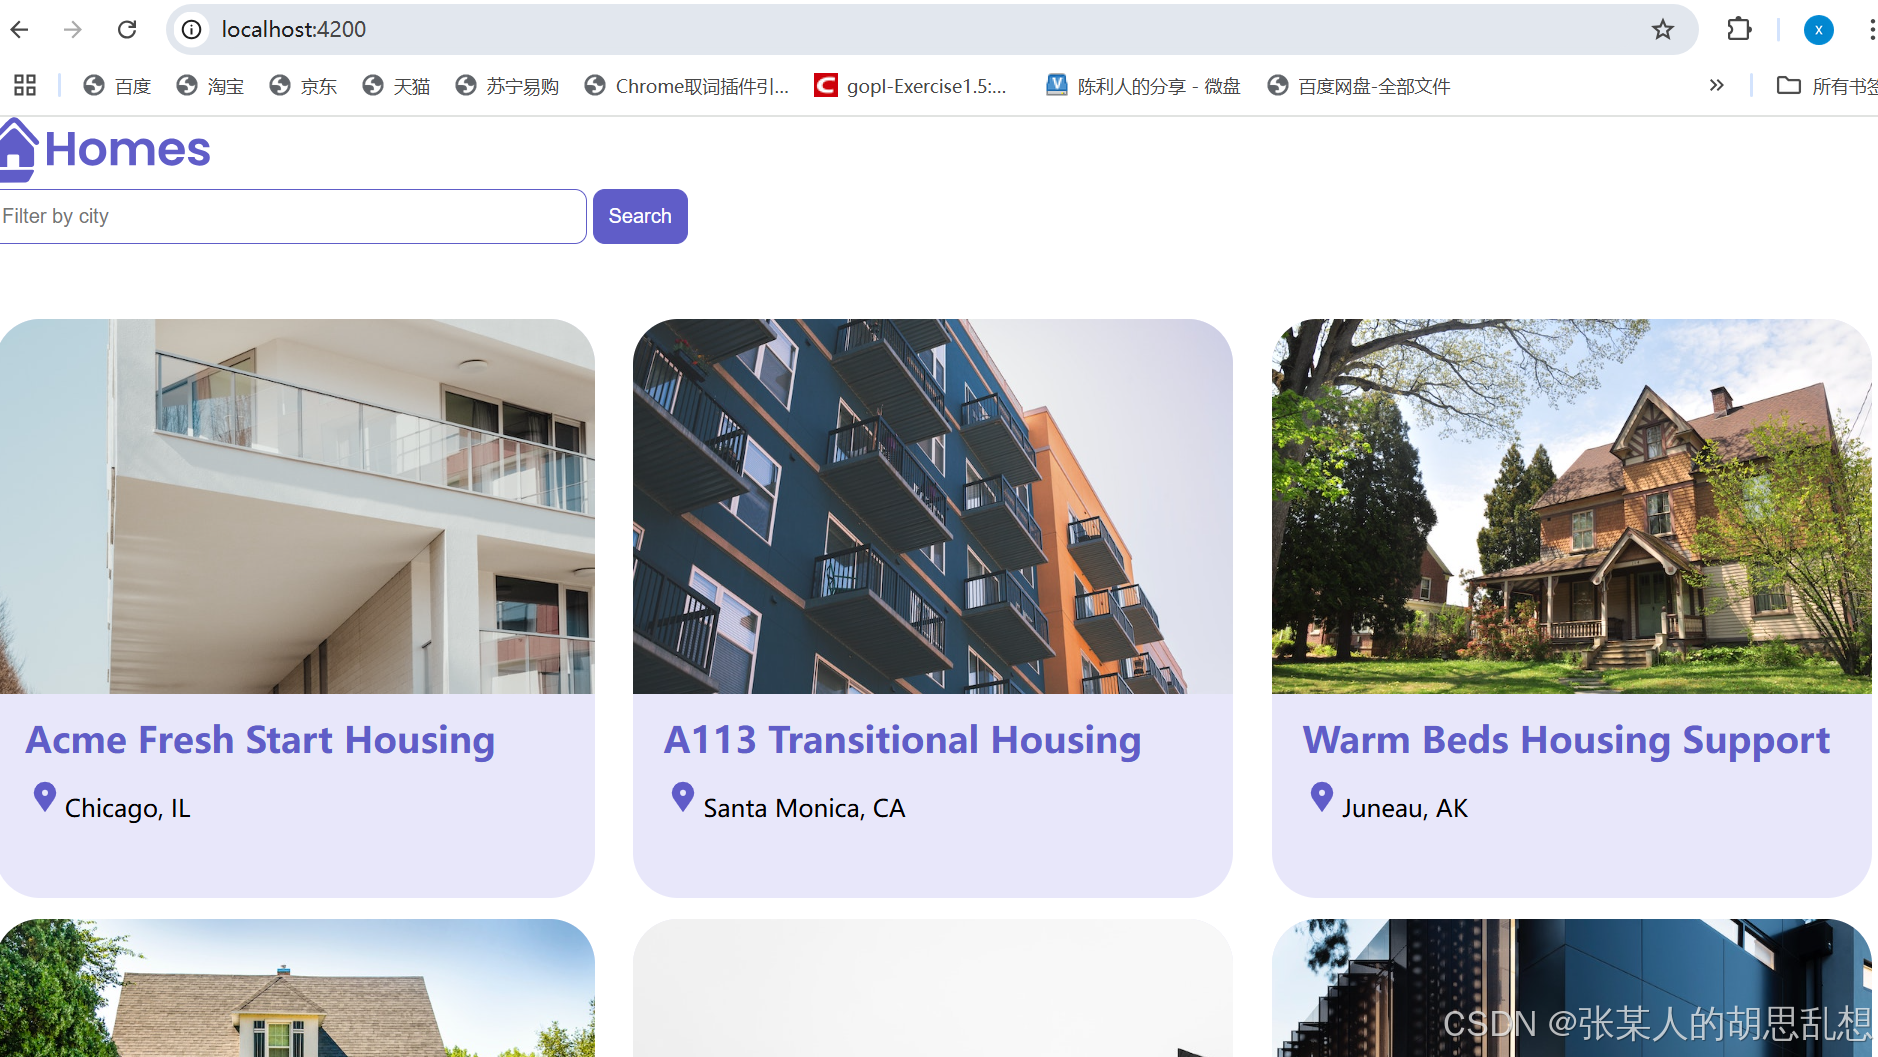
`,奇怪的时housing-location.component.ts里面的内容不需要动,就能显示列表了。这是为啥?
显示效果如下:
11. Add routes to the Application
main.ts 增加:
import { provideRouter } from '@angular/router';
bootstrapApplication(AppComponent 增加数组
import { provideRouter } from '@angular/router';

bootstrapApplication(AppComponent, {
  providers: [],
}).catch((err) => console.error(err));
新建 routes.ts
import {Routes} from '@angular/router';
import { HomeComponent } from './app/home/home.component';

const routeConfig: Routes = [];

export default routeConfig;
还没有路由,继续:
app.component.ts
import { RouterModule } from '@angular/router';

imports: [ HomeComponent,RouterModule ],
<app-home></app-home> 这种直接引用 home component改为路由
<router-outlet></router-outlet>这时屏幕就显示一个白板了,因为还没有路由
在routes.ts中增加路由
const routeConfig: Routes = [
    {
        path: '',
        component: HomeComponent,
        title: 'Home page',
    },
];
在main.ts中引入这个routeConfig
import routeConfig from './routes';

bootstrapApplication(AppComponent, {
  providers: [
    provideRouter(routeConfig)
  ],
}).catch((err) => console.error(err));
现在功能恢复正常。这样路由配置就加上了。
12 增加 详情组件
ng g c details --standalone --inline-template
ng g c details --standalone --inline-template
CREATE src/app/details/details.component.spec.ts (622 bytes)
CREATE src/app/details/details.component.ts (247 bytes)
CREATE src/app/details/details.component.css (0 bytes)
然后增加详情的路由routes.ts
import { DetailsComponent } from './app/details/details.component';

    {
        path: 'details/:id',
        component: DetailsComponent,
        title: 'Home details',
    },
在housing-location.ts中增加
首先引入RouteModule,然后加上路由链接。
import {RouterModule} from '@angular/router';

imports: [RouterModule],

<a [routerLink]="['/details', housingLocation.id]">Learn More</a>
这样这个detail组件就集成到链接中了。
其中routeLinker加了方括号,说明后面时个动态的值,里面传递了参数id.可以用如下形式访问:
localhost:4200/details/2
相应的routes.ts中也要体现这种动态路由:/details/:id
这个id传递过去后,detail组件要从route中接收,需要引入ActivatedRoute
details.components.ts中增加
import { Component, inject } from '@angular/core';
import {ActivatedRoute} from '@angular/router';
template: `
<p>
details works! {{housingLocationId}}
</p>
route: ActivatedRoute = inject(ActivatedRoute);
housingLocationId = 0;
constructor() {
this.housingLocationId = Number(this.route.snapshot.params['id']);
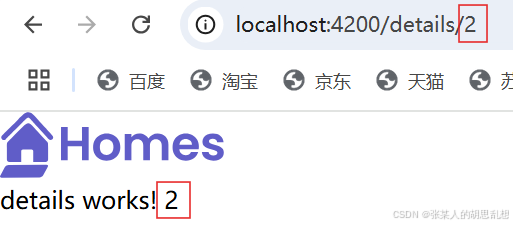
}这样可以点击到详情可以显示id
13 增加service,并进行依赖注入,用于访问数据
ng g s housing
PS C:\angular\angular.io-example> ng g s housing
CREATE src/app/housing.service.spec.ts (378 bytes)
CREATE src/app/housing.service.ts (145 bytes)
把HousingLocation组件的数据部分挪到这个service中。并增加了两个查找方法,一个全部查找,一个根据id查找。
import { Injectable } from '@angular/core';
import { HousingLocation } from './housing-location';

@Injectable({
  providedIn: 'root'
})
export class HousingService {
  readonly baseUrl = 'https://angular.dev/assets/images/tutorials/common';
  protected housingLocationList: HousingLocation[] = [
    {
      id: 0,
      name: 'Acme Fresh Start Housing',
      city: 'Chicago',
      state: 'IL',
      photo: `${this.baseUrl}/bernard-hermant-CLKGGwIBTaY-unsplash.jpg`,
      availableUnits: 4,
      wifi: true,
      laundry: true,
    },
    {
      id: 1,
      name: 'A113 Transitional Housing',
      city: 'Santa Monica',
      state: 'CA',
      photo: `${this.baseUrl}/brandon-griggs-wR11KBaB86U-unsplash.jpg`,
      availableUnits: 0,
      wifi: false,
      laundry: true,
    },
    {
      id: 2,
      name: 'Warm Beds Housing Support',
      city: 'Juneau',
      state: 'AK',
      photo: `${this.baseUrl}/i-do-nothing-but-love-lAyXdl1-Wmc-unsplash.jpg`,
      availableUnits: 1,
      wifi: false,
      laundry: false,
    },
    {
      id: 3,
      name: 'Homesteady Housing',
      city: 'Chicago',
      state: 'IL',
      photo: `${this.baseUrl}/ian-macdonald-W8z6aiwfi1E-unsplash.jpg`,
      availableUnits: 1,
      wifi: true,
      laundry: false,
    },
    {
      id: 4,
      name: 'Happy Homes Group',
      city: 'Gary',
      state: 'IN',
      photo: `${this.baseUrl}/krzysztof-hepner-978RAXoXnH4-unsplash.jpg`,
      availableUnits: 1,
      wifi: true,
      laundry: false,
    },
    {
      id: 5,
      name: 'Hopeful Apartment Group',
      city: 'Oakland',
      state: 'CA',
      photo: `${this.baseUrl}/r-architecture-JvQ0Q5IkeMM-unsplash.jpg`,
      availableUnits: 2,
      wifi: true,
      laundry: true,
    },
    {
      id: 6,
      name: 'Seriously Safe Towns',
      city: 'Oakland',
      state: 'CA',
      photo: `${this.baseUrl}/phil-hearing-IYfp2Ixe9nM-unsplash.jpg`,
      availableUnits: 5,
      wifi: true,
      laundry: true,
    },
    {
      id: 7,
      name: 'Hopeful Housing Solutions',
      city: 'Oakland',
      state: 'CA',
      photo: `${this.baseUrl}/r-architecture-GGupkreKwxA-unsplash.jpg`,
      availableUnits: 2,
      wifi: true,
      laundry: true,
    },
    {
      id: 8,
      name: 'Seriously Safe Towns',
      city: 'Oakland',
      state: 'CA',
      photo: `${this.baseUrl}/saru-robert-9rP3mxf8qWI-unsplash.jpg`,
      availableUnits: 10,
      wifi: false,
      laundry: false,
    },
    {
      id: 9,
      name: 'Capital Safe Towns',
      city: 'Portland',
      state: 'OR',
      photo: `${this.baseUrl}/webaliser-_TPTXZd9mOo-unsplash.jpg`,
      availableUnits: 6,
      wifi: true,
      laundry: true,
    },
  ];

  getAllHousingLocations() : HousingLocation[] {
    return this.housingLocationList;
  }

  getHousingLocationById(id: Number): HousingLocation | undefined {
    return this.housingLocationList.find(
      housingLocation => housingLocation.id === id
    );
  }

  constructor() { }
}
Home组件取数据的方法加上。注入service,然后取service中的数据。
import { Component,inject } from '@angular/core';
import { HousingService } from '../housing.service';

export class HomeComponent {
  housingLocationList: HousingLocation[] = [];
  housingService: HousingService = inject(HousingService);

  constructor() {
    this.housingLocationList = this.housingService.getAllHousingLocations();
  }
}
功能恢复运行!
14. 完善详情页
details.component.ts 注入service,引用HousingLocation,通过service经过参数ID查询到HousingLocation对象。
import { Component, inject } from '@angular/core';

import {HousingService} from '../housing.service';
import { HousingLocation } from '../housing-location';

  template: `
    <p>
      details works! {{housingLocation?.id}}
    </p>
  `,

export class DetailsComponent {

  housingService = inject(HousingService);
  housingLocation: HousingLocation | undefined;

  constructor() {
    const housingLocationId = Number(this.route.snapshot.params['id']);
    this.housingLocation = this.housingService.getHousingLocationById(housingLocationId);
  }
再完善一下显示模板
  template: `
    <article>
    <img
        class="listing-photo"
        [src]="housingLocation?.photo"
        alt="Exterior photo of {{ housingLocation?.name }}"
        crossorigin
      />
      <section class="listing-description">
        <h2 class="listing-heading">{{ housingLocation?.name }}</h2>
        <p class="listing-location">{{ housingLocation?.city }}, {{ housingLocation?.state }}</p>
      </section>
      <section class="listing-features">
        <h2 class="section-heading">About this housing location</h2>
        <ul>
          <li>Units available: {{ housingLocation?.availableUnits }}</li>
          <li>Does this location have wifi: {{ housingLocation?.wifi }}</li>
          <li>Does this location have laundry: {{ housingLocation?.laundry }}</li>
        </ul>
      </section>
    </article>
  `,
增加CSS
.listing-photo {
    height: 600px;
    width: 50%;
    object-fit: cover;
    border-radius: 30px;
    float: right;
  }
  .listing-heading {
    font-size: 48pt;
    font-weight: bold;
    margin-bottom: 15px;
  }
  .listing-location::before {
    content: url('/assets/location-pin.svg') / '';
  }
  .listing-location {
    font-size: 24pt;
    margin-bottom: 15px;
  }
  .listing-features > .section-heading {
    color: var(--secondary-color);
    font-size: 24pt;
    margin-bottom: 15px;
  }
  .listing-features {
    margin-bottom: 20px;
  }
  .listing-features li {
    font-size: 14pt;
  }
  li {
    list-style-type: none;
  }
  .listing-apply .section-heading {
    font-size: 18pt;
    margin-bottom: 15px;
  }
  label, input {
    display: block;
  }
  label {
    color: var(--secondary-color);
    font-weight: bold;
    text-transform: uppercase;
    font-size: 12pt;
  }
  input {
    font-size: 16pt;
    margin-bottom: 15px;
    padding: 10px;
    width: 400px;
    border-top: none;
    border-right: none;
    border-left: none;
    border-bottom: solid .3px;
  }
  @media (max-width: 1024px) {
    .listing-photo {
      width: 100%;
      height: 400px;
    }
  }
这样详情就更新完成了。
视频中还有一个apply按钮,估计是预定这个房子:
      <section class="listing-apply">
        <h2 clas="section-heading">Apply now to live here</h2>
        <button class="primary" type="button">Apply now</button>
      </section>
基本功能完成。后面还有2个视频,分别是form表单,还有就是增加search房子的功能。
太困了,明天上班,未完待续吧。。。。。