一、环境准备
|--------|--------|------------|-------|
| 主机名称 | CPU/内存 | 操作系统版本 | 备注 |
| master | 4C/8G | centos 7.9 | 集群主节点 |
| node1 | 4C/8G | centos 7.9 | 集群子节点 |
| node2 | 4C/8G | centos 7.9 | 集群子节点 |
二、安装docker
步骤一:清理实验环境
清理之前之前安装的docker版本(确保实验环境的整洁)
bash
yum remove docker \
>                   docker-client \
>                   docker-client-latest \
>                   docker-common \
>                   docker-latest \
>                   docker-latest-logrotate \
>                   docker-logrotate \
>                   docker-engine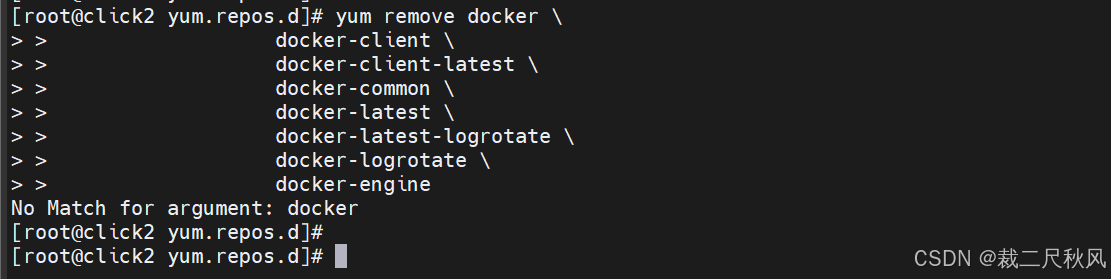
步骤二:安装相关的组件和依赖
1、安装gcc相关
bash
yum install -y gcc gcc-c++2、安装需要的软件包
bash
yum install -y yum-utils步骤三:安装docker镜像,配置yum源
bash
#官方镜像(不推荐,可能受到网络影响导致运行异常或者超时的情况发生)
yum-config-manager \
    --add-repo \
    https://download.docker.com/linux/centos/docker-ce.repo   ##此地址为官方的仓库地址,在国内建议不要用

#推荐阿里云镜像
 yum-config-manager \
  --add-repo \
   http://mirrors.aliyun.com/docker-ce/linux/centos/docker-ce.repo
/etc/yum.repos.d/docker-ce.repo内容
bash
[docker-ce-stable]
name=Docker CE Stable - $basearch
baseurl=https://mirrors.aliyun.com/docker-ce/linux/centos/$releasever/$basearch/stable
enabled=1
gpgcheck=1
gpgkey=https://mirrors.aliyun.com/docker-ce/linux/centos/gpg

[docker-ce-stable-debuginfo]
name=Docker CE Stable - Debuginfo $basearch
baseurl=https://mirrors.aliyun.com/docker-ce/linux/centos/$releasever/debug-$basearch/stable
enabled=0
gpgcheck=1
gpgkey=https://mirrors.aliyun.com/docker-ce/linux/centos/gpg

[docker-ce-stable-source]
name=Docker CE Stable - Sources
baseurl=https://mirrors.aliyun.com/docker-ce/linux/centos/$releasever/source/stable
enabled=0
gpgcheck=1
gpgkey=https://mirrors.aliyun.com/docker-ce/linux/centos/gpg

[docker-ce-test]
name=Docker CE Test - $basearch
baseurl=https://mirrors.aliyun.com/docker-ce/linux/centos/$releasever/$basearch/test
enabled=0
gpgcheck=1
gpgkey=https://mirrors.aliyun.com/docker-ce/linux/centos/gpg

[docker-ce-test-debuginfo]
name=Docker CE Test - Debuginfo $basearch
baseurl=https://mirrors.aliyun.com/docker-ce/linux/centos/$releasever/debug-$basearch/test
enabled=0
gpgcheck=1
gpgkey=https://mirrors.aliyun.com/docker-ce/linux/centos/gpg

[docker-ce-test-source]
name=Docker CE Test - Sources
baseurl=https://mirrors.aliyun.com/docker-ce/linux/centos/$releasever/source/test
enabled=0
gpgcheck=1
gpgkey=https://mirrors.aliyun.com/docker-ce/linux/centos/gpg

[docker-ce-nightly]
name=Docker CE Nightly - $basearch
baseurl=https://mirrors.aliyun.com/docker-ce/linux/centos/$releasever/$basearch/nightly
enabled=0
gpgcheck=1
gpgkey=https://mirrors.aliyun.com/docker-ce/linux/centos/gpg

[docker-ce-nightly-debuginfo]
name=Docker CE Nightly - Debuginfo $basearch
baseurl=https://mirrors.aliyun.com/docker-ce/linux/centos/$releasever/debug-$basearch/nightly
enabled=0
gpgcheck=1
gpgkey=https://mirrors.aliyun.com/docker-ce/linux/centos/gpg

[docker-ce-nightly-source]
name=Docker CE Nightly - Sources
baseurl=https://mirrors.aliyun.com/docker-ce/linux/centos/$releasever/source/nightly
enabled=0
gpgcheck=1
gpgkey=https://mirrors.aliyun.com/docker-ce/linux/centos/gpg
步骤四:安装docker相关的引擎
#先更新yum软件包索引
bash
yum makecache fasedocker社区、ee企业版 ce为社区版 官方推荐使用ce版,默认安装最新的docker
版本,也可以指定版本安装
bash
yum install -y docker-ce docker-ce-cli containerd.io步骤五:启动docker
bash
#启动
systemctl start docker
#查看状态
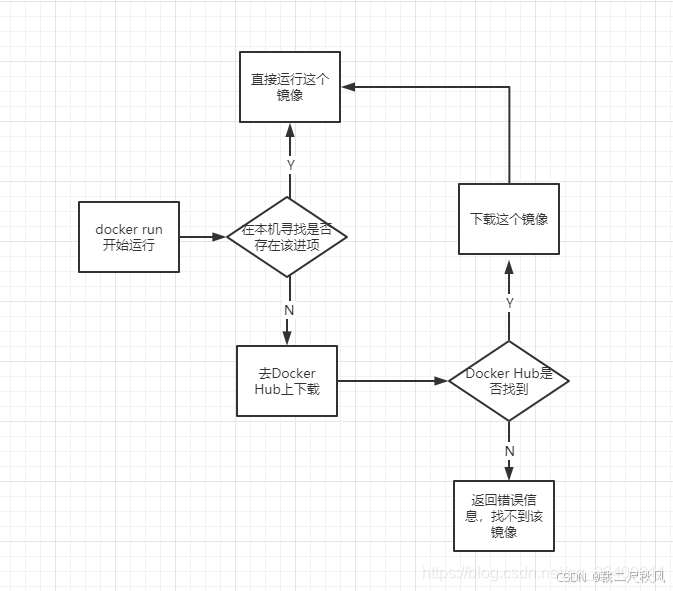
systemctl status docker步骤六:测试docker运行的情况
bash
docker run hello-world docker versiondocker run运行思维导图
步骤七:开启镜像加速
阿里云镜像加速地址:阿里云登录 - 欢迎登录阿里云,安全稳定的云计算服务平台
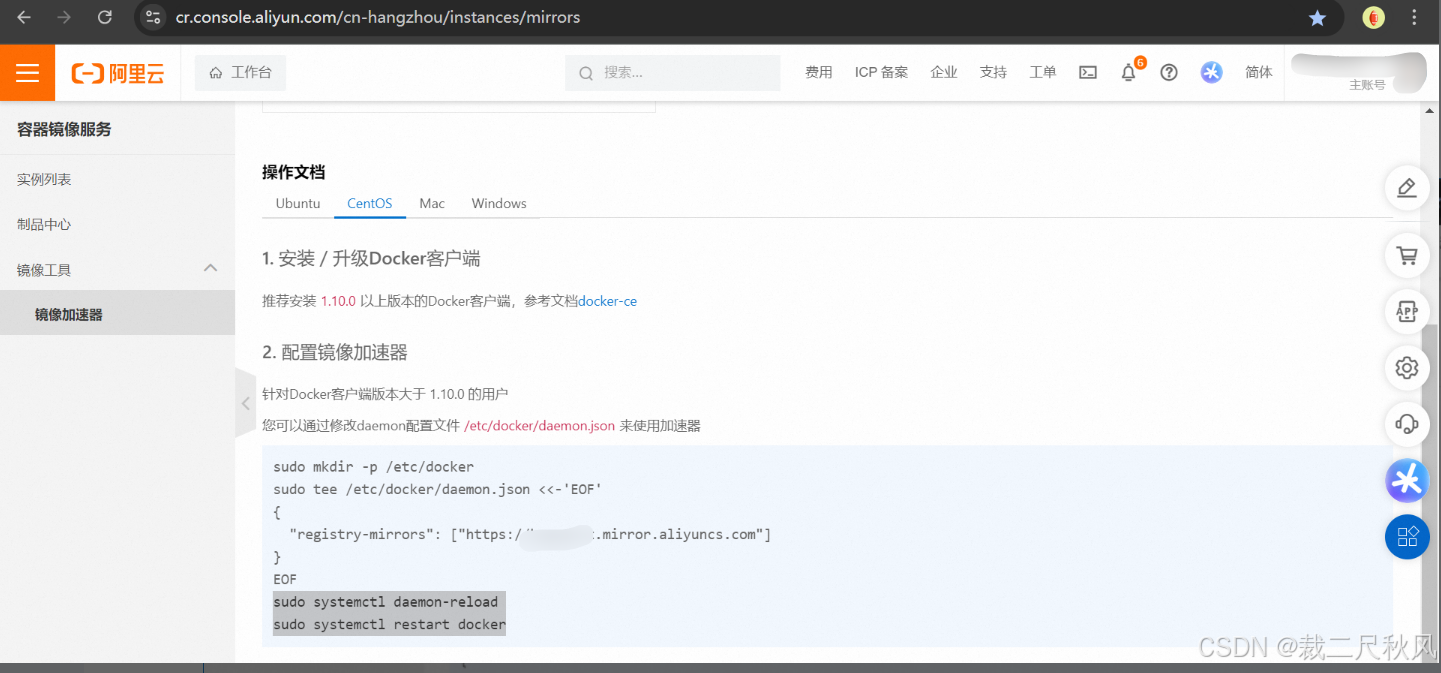
bash
sudo mkdir -p /etc/docker
sudo tee /etc/docker/daemon.json <<-'EOF'
{
  "registry-mirrors": ["https://xxxx.mirror.aliyuncs.com"]
}
EOF
sudo systemctl daemon-reload
sudo systemctl restart docker
使用阿里云加速拉取镜像报错,处理方法

解决方法:
bash
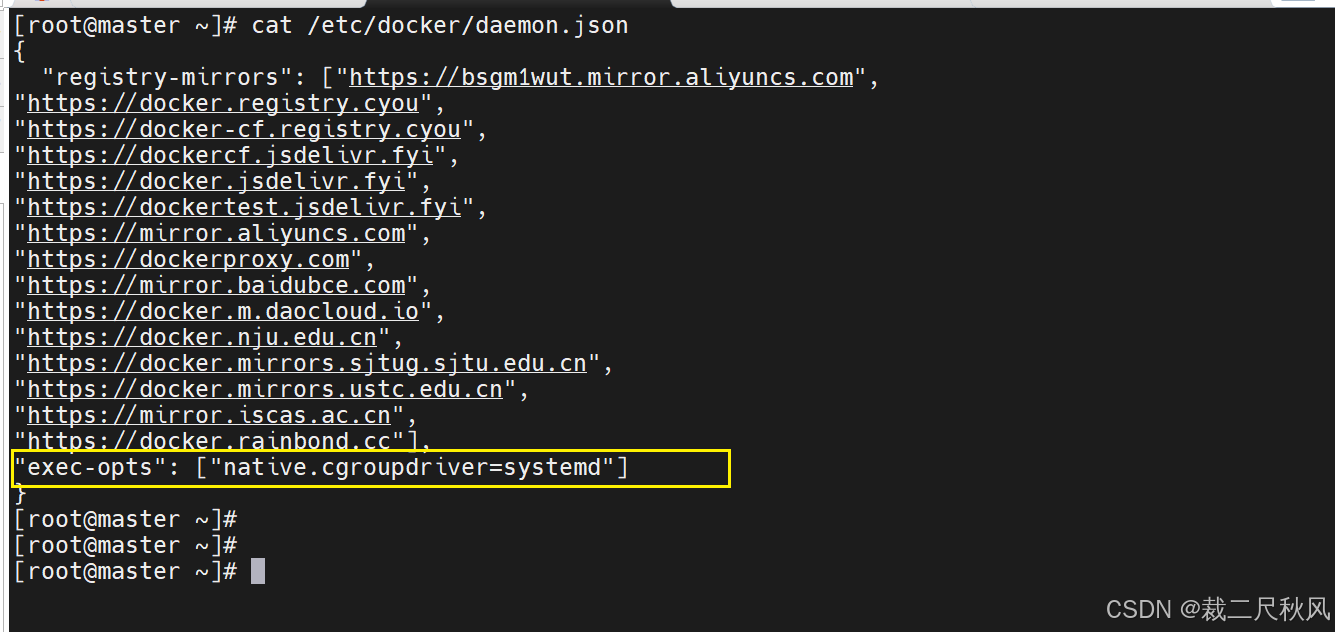
vim /etc/docker/daemon.json
{
  "registry-mirrors": ["https://bsgm1wut.mirror.aliyuncs.com",
"https://docker.registry.cyou",
"https://docker-cf.registry.cyou",
"https://dockercf.jsdelivr.fyi",
"https://docker.jsdelivr.fyi",
"https://dockertest.jsdelivr.fyi",
"https://mirror.aliyuncs.com",
"https://dockerproxy.com",
"https://mirror.baidubce.com",
"https://docker.m.daocloud.io",
"https://docker.nju.edu.cn",
"https://docker.mirrors.sjtug.sjtu.edu.cn",
"https://docker.mirrors.ustc.edu.cn",
"https://mirror.iscas.ac.cn",
"https://docker.rainbond.cc"]
}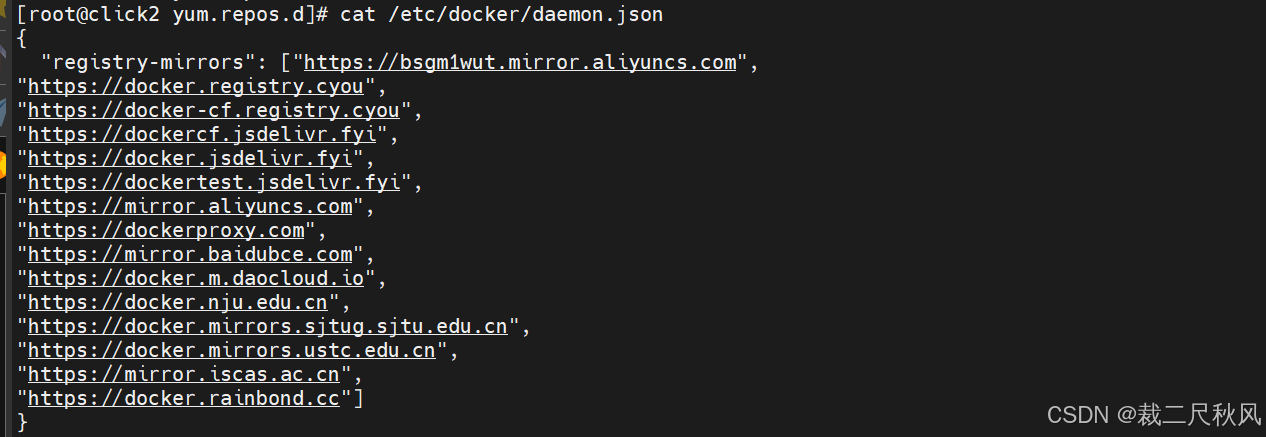
重新拉取镜像:


三、安装k8s前环境准备
- 一台兼容的 Linux 主机。Kubernetes 项目为基于 Debian 和 Red Hat 的 Linux 发行版以及一些不提供包管理器的发行版提供通用的指令。
- 每台机器 2 GB 或更多的 RAM(如果少于这个数字将会影响你应用的运行内存)。
- CPU 2 核心及以上。
- 集群中的所有机器的网络彼此均能相互连接(公网和内网都可以)。
- 节点之中不可以有重复的主机名、MAC 地址或 product_uuid。请参见这里了解更多详细信息。
- 开启机器上的某些端口。请参见这里了解更多详细信息。
- 禁用交换分区。为了保证 kubelet 正常工作,你必须禁用交换分区。
1、修改主机名
bash
hostnamectl set-hostname master
hostnamectl set-hostname node1
hostnamectl set-hostname node2
2、关闭内核防火墙
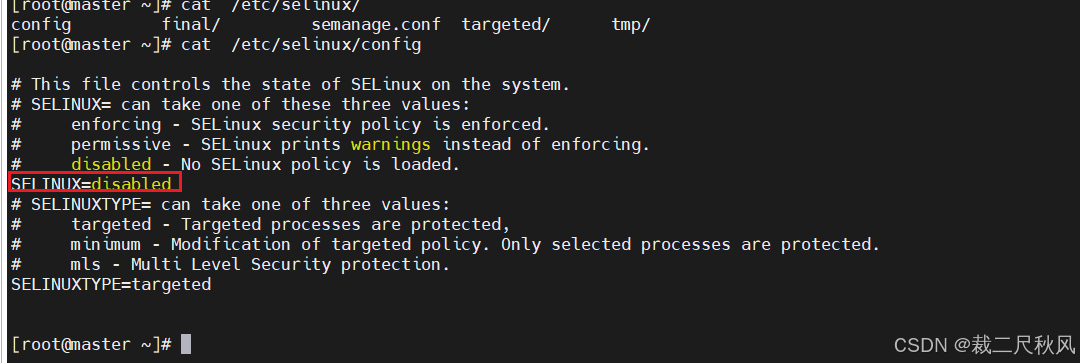
3、关闭交换分区
bash
#关闭交换分区并检查
swapoff -a && free -h

#注释掉开机交换分区自动挂载,并检查
sed -ri 's/.*swap.*/#&/' /etc/fstab && cat /etc/fstab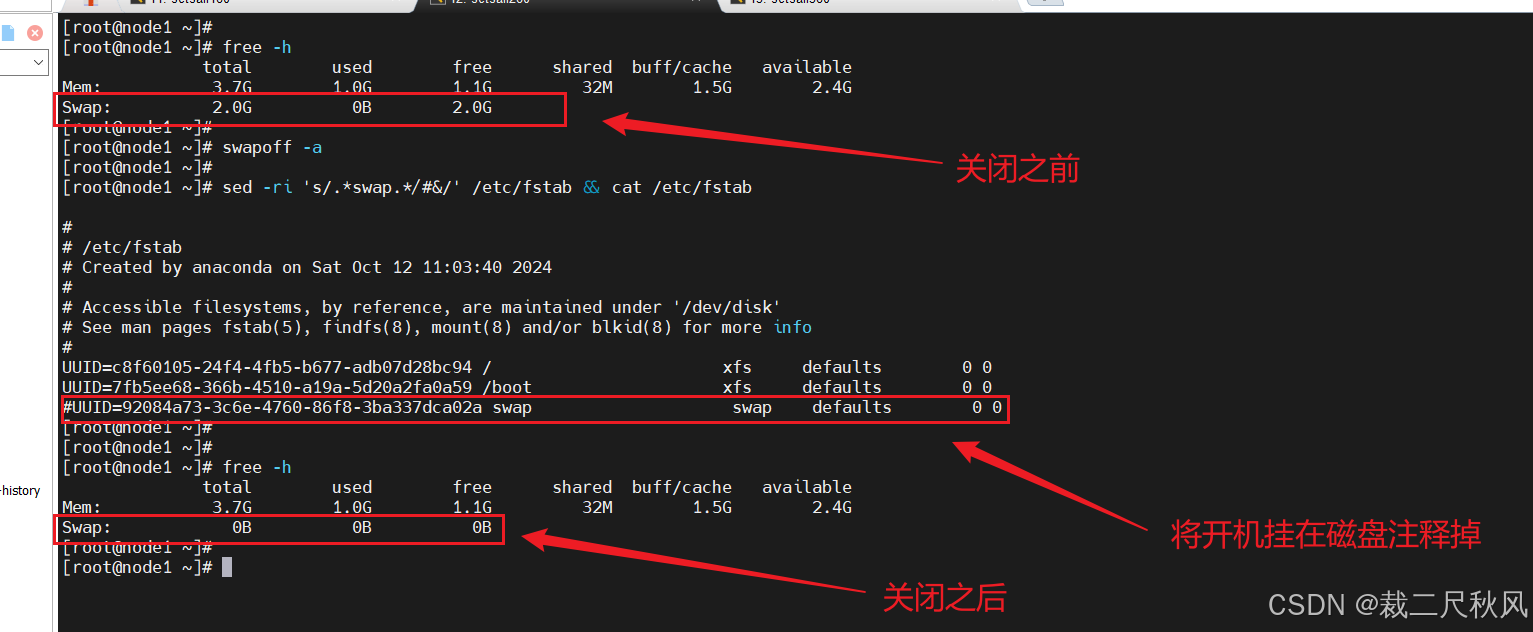
4、允许iptables检查交接流量
bash
cat << EOF | tee /etc/modules-load.d/k8s.conf
br_netfilter
EOF

cat << EOF | tee /etc/sysctl.d/k8s.conf
net.bridge.bridge-nf-call-ip6tables = 1
net.bridge.bridge-nf-call-iptables = 1
EOF

sysctl --system
5、配置每台机器的静态IP
bash
vim  /etc/sysconfig/network-scripts/ifcfg-ens33

BOOTPROTO="static"
ONBOOT="yes"
IPADDR="192.168.72.130"
PREFIX="24"
GATEWAY="192.168.72.2"
DNS1="114.114.114.114"
NDS2="8.8.8.8"

#重启网络
systemctl restart network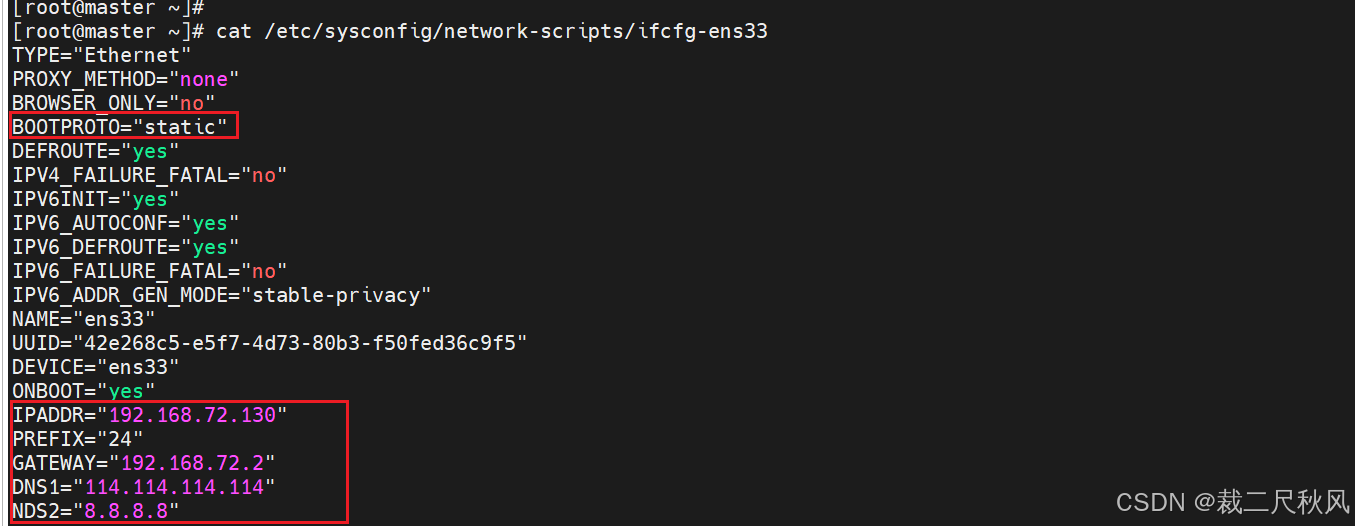
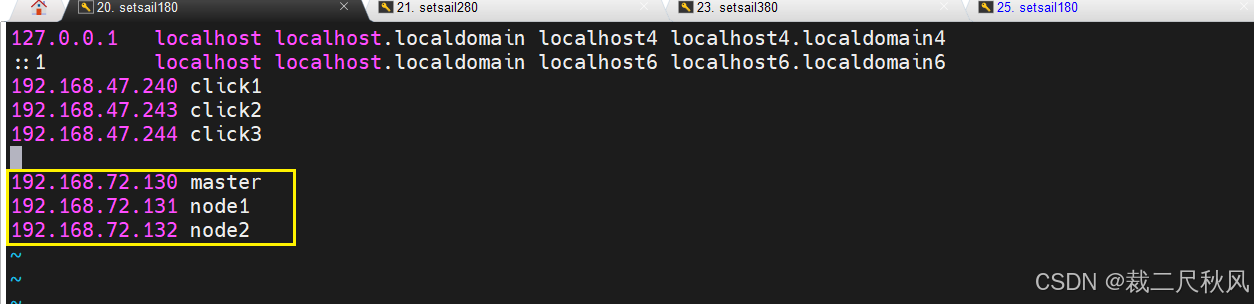
6、添加本地解析
四、安装k8s集群相关组件(kubeadm、kubelet和kubectl)
步骤一:安装k8s的yum源
bash
cat > /etc/yum.repos.d/kubernetes.repo << EOF
[kubernetes]
name=Kubernetes
baseurl=https://mirrors.aliyun.com/kubernetes/yum/repos/kubernetes-el7-x86_64
enabled=1
gpgcheck=0
repo_gpgcheck=0
gpgkey=https://mirrors.aliyun.com/kubernetes/yum/doc/yum-key.gpg https://mirrors.aliyun.com/kubernetes/yum/doc/rpm-package-key.gpg
EOF

#检查
cat /etc/yum.repos.d/kubernetes.repo
步骤二:安装kubeadm
bash
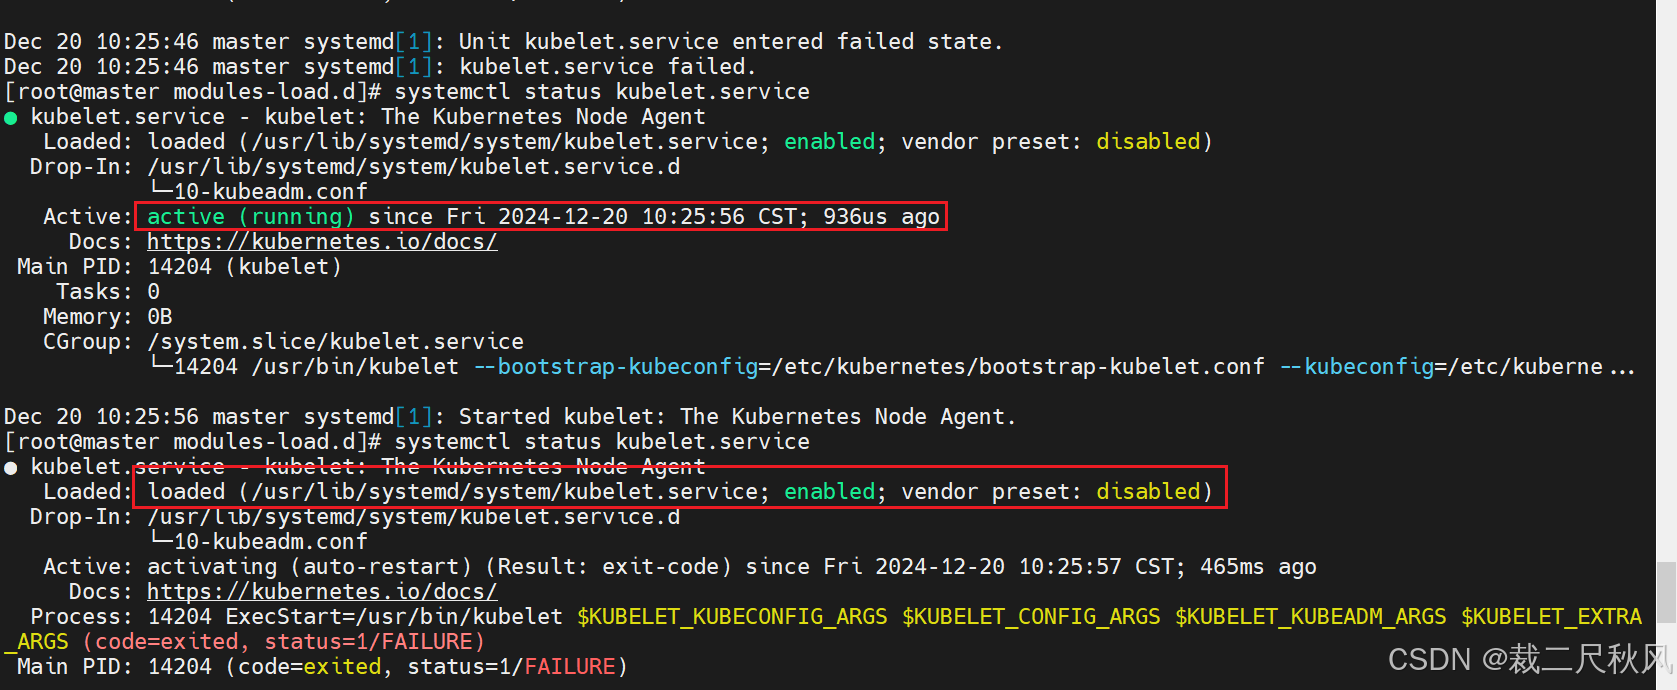
yum install -y kubelet-1.23.9 kubeadm-1.23.9 kubectl-1.23.9步骤三:启动kubelet服务
bash
systemctl enable --now kubelet.service启动kubelet之后,kubelet服务的状态一直在loaded和active之间进行切换,原因是在等待kubeadm的信息。
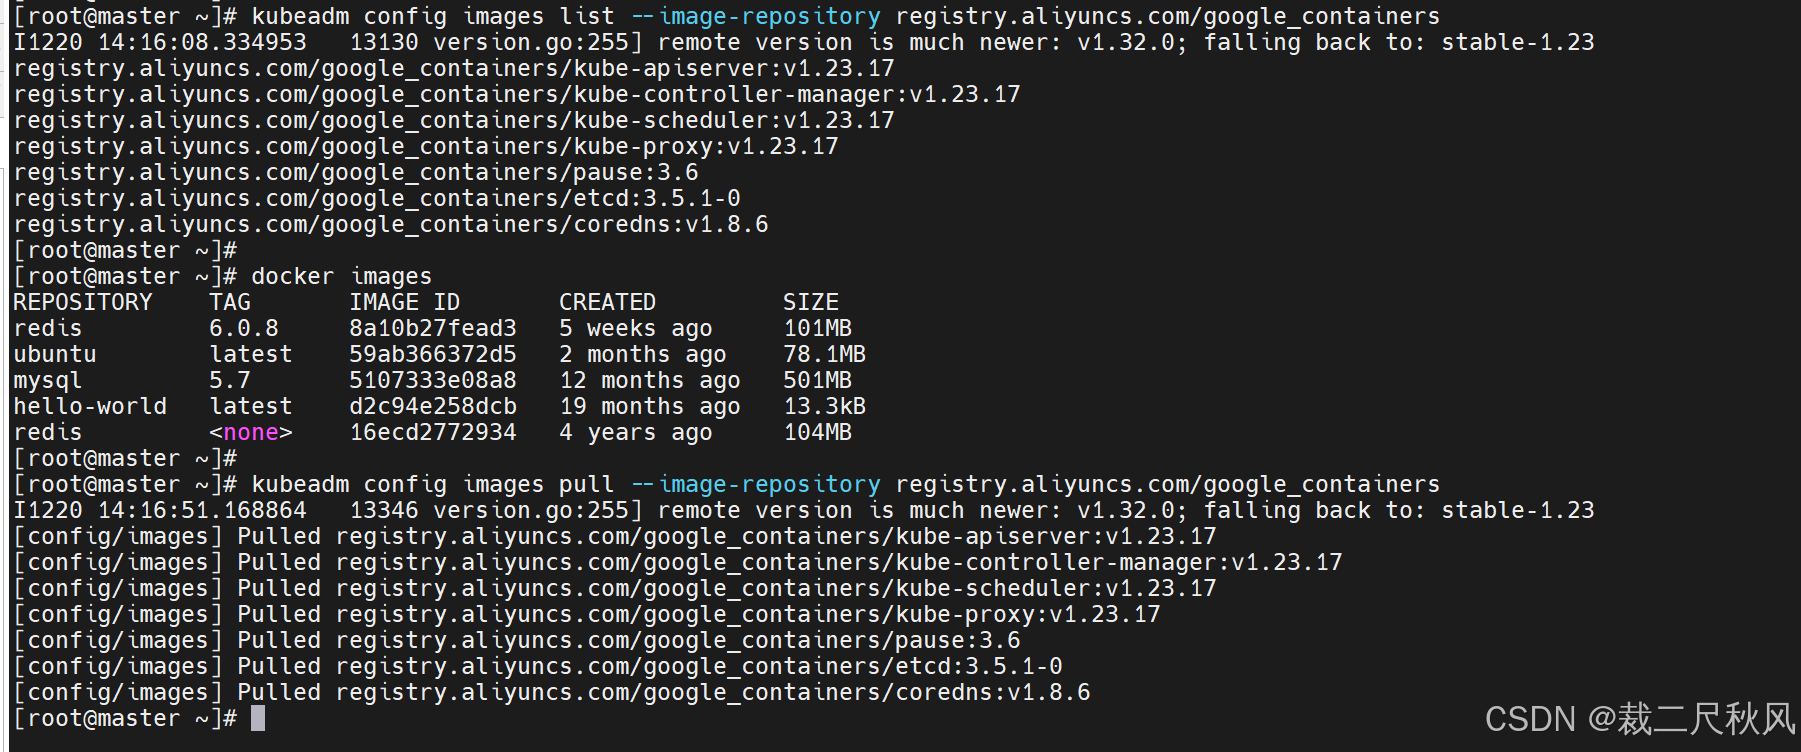
步骤四:拉取相关组件的信息拉取镜
bash
#查看各个组件镜像版本信息(默认的是k8s官网的地址)
kubeadm config images list
##查看阿里云上k8s所在的路径
kubeadm config images list --image-repository registry.aliyuncs.com/google_containers
##查看相关拉取命令的帮助
kubeadm config images --help
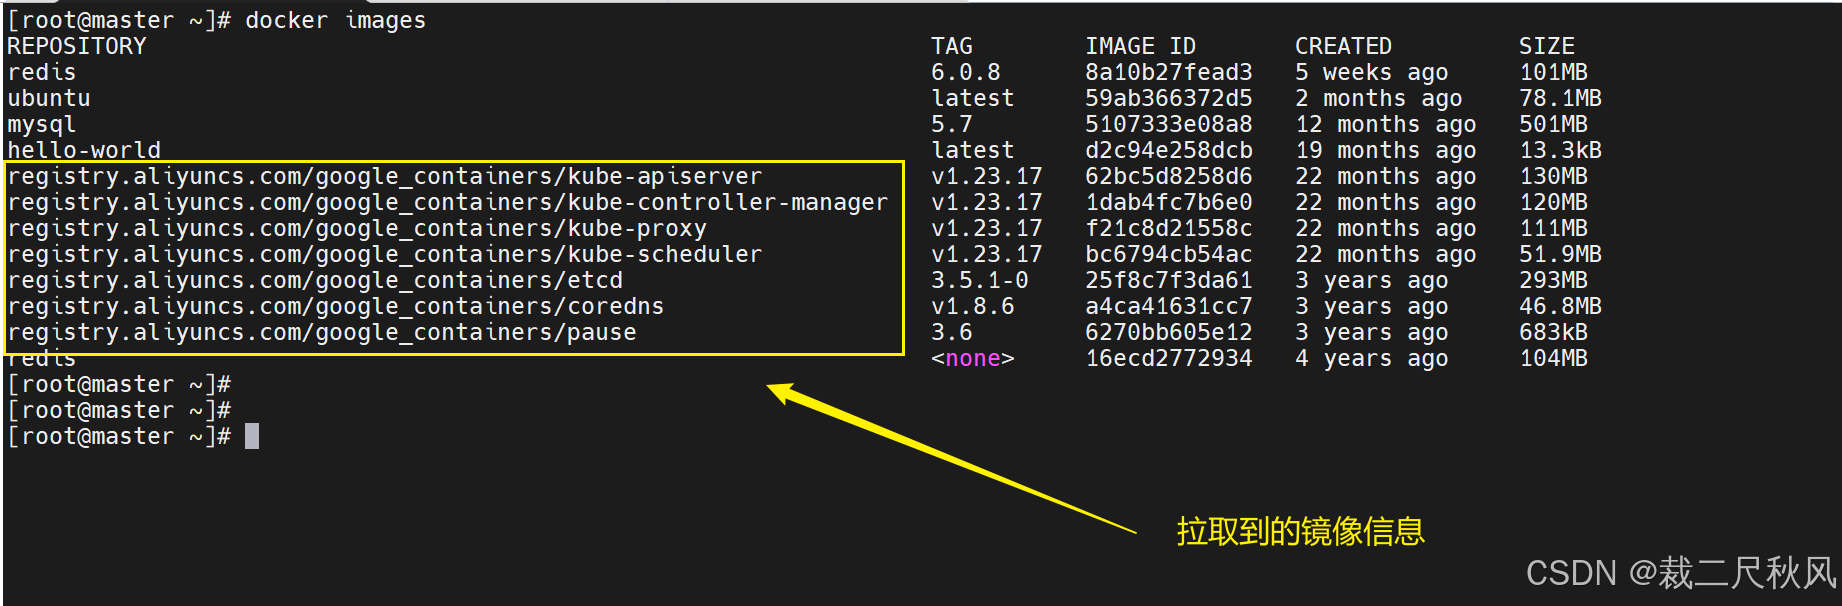
#拉取阿里云上相关组件的镜像
kubeadm config images pull --image-repository registry.aliyuncs.com/google_containers 
步骤五:初始化主节点
1、添加本地解析
之前步骤已经进行
2、节点初始化
bash
kubeadm init \
--apiserver-advertise-address=192.168.72.130 \                  #IP为master节点的IP
--control-plane-endpoint=cluster-endpoint \                     #这个为master节点的域名解析
--image-repository registry.aliyuncs.com/google_containers \    #镜像仓库使用阿里云
--kubernetes-version v1.23.9 \	                                #填写安装k8s版本号
--service-cidr=10.96.0.0/16 \                        			#k8s内部进行集群负载均衡的时候时使用IP,service-cidr= 不能和--pod-network-cidr=网络重叠也不能和机器的网络重叠。
--pod-network-cidr=192.168.0.0/16


#快捷粘贴
kubeadm init --apiserver-advertise-address=192.168.72.130 --control-plane-endpoint=cluster-endpoint --image-repository registry.aliyuncs.com/google_containers --kubernetes-version v1.23.9 --service-cidr=10.96.0.0/16 --pod-network-cidr=192.168.0.0/16
3、初始化常见问题处理
3.1、修改docker cgroup
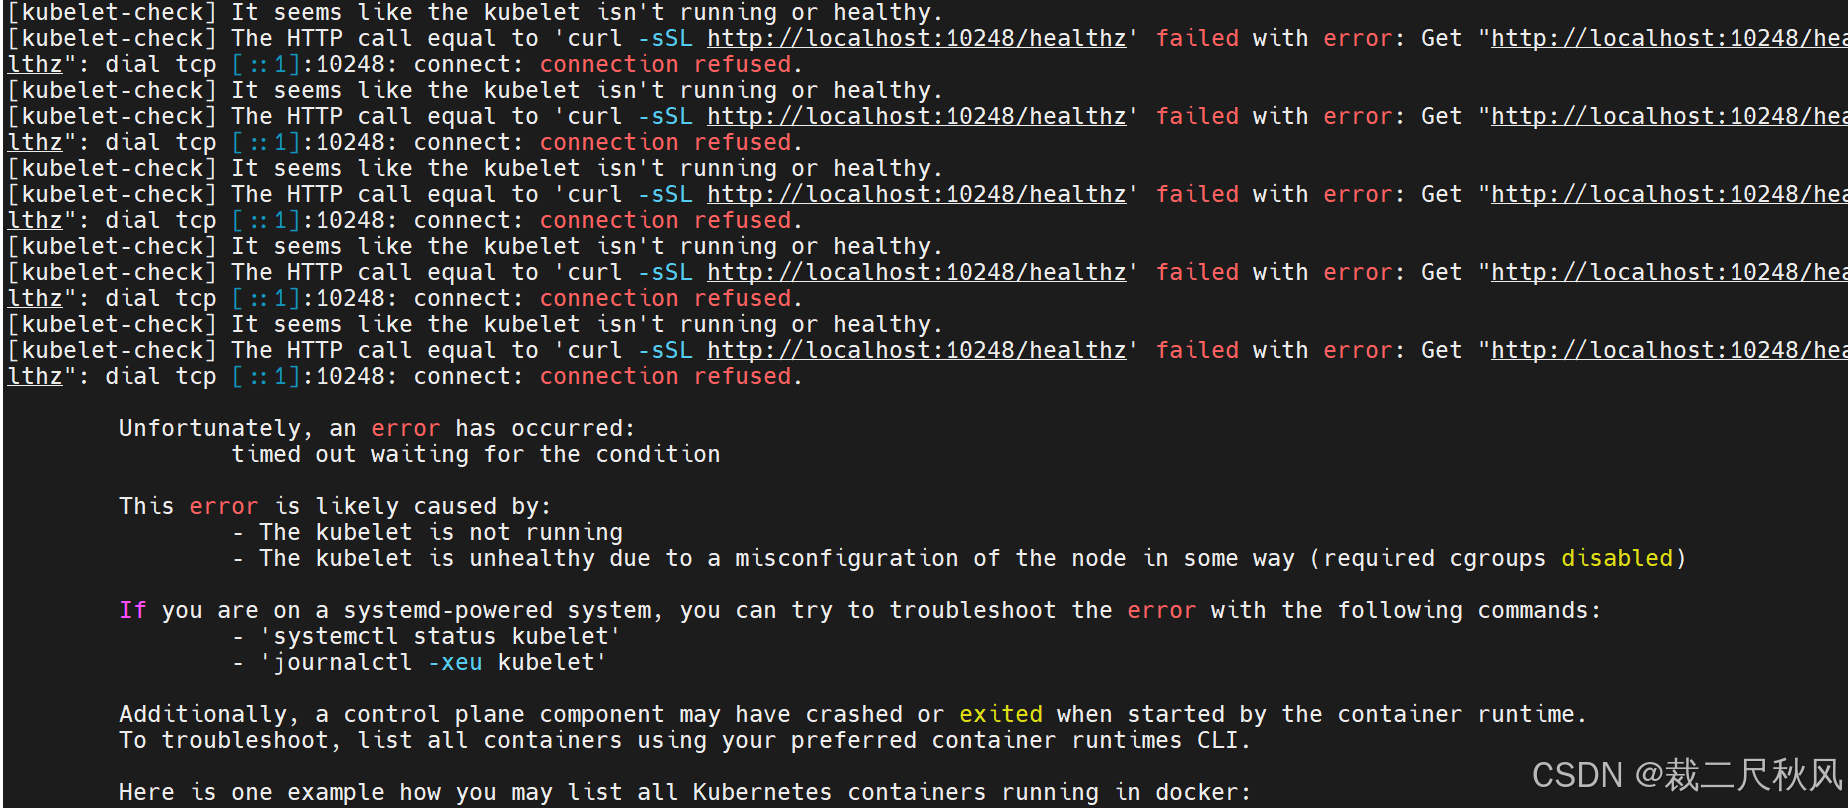
参考文档:https://blog.csdn.net/qq_35916454/article/details/123481996
bash
#解决方法:
vim /etc/docker/daemon.json
{
   .
   .
   .],
"exec-opts": ["native.cgroupdriver=systemd"]
}
出现上述失败后,重新初始化,发现端口已经被占用,此时已经不用再重新初始化了,需要reset重新初始化。
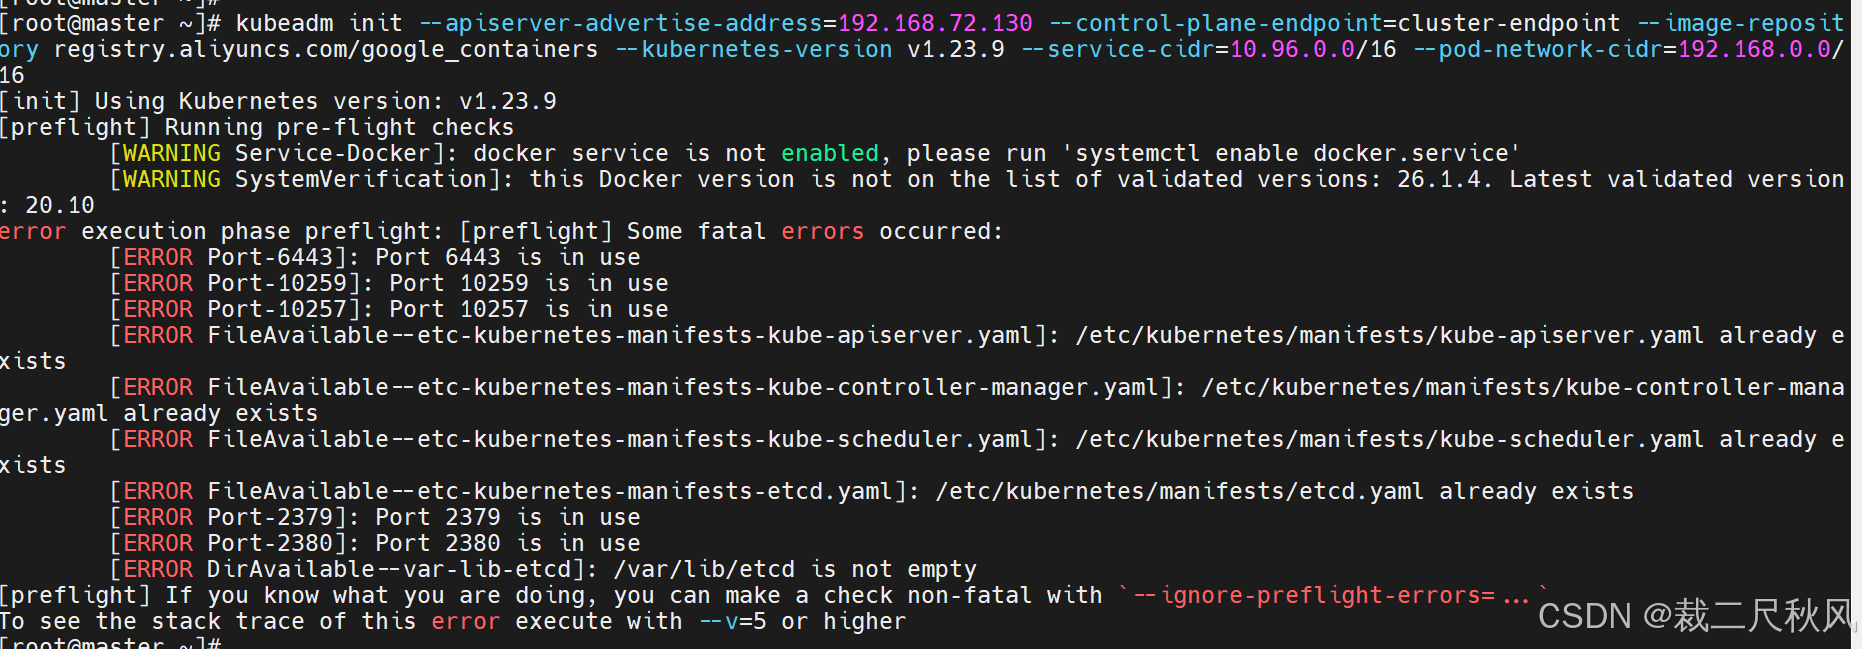
此时不需要再重新初始化了,需要reset
bash
#先reset
kubeadm reset

#再重新初始化
kubeadm init --apiserver-advertise-address=192.168.72.130 --control-plane-endpoint=cluster-endpoint --image-repository registry.aliyuncs.com/google_containers --kubernetes-version v1.23.9 --service-cidr=10.96.0.0/16 --pod-network-cidr=192.168.0.0/16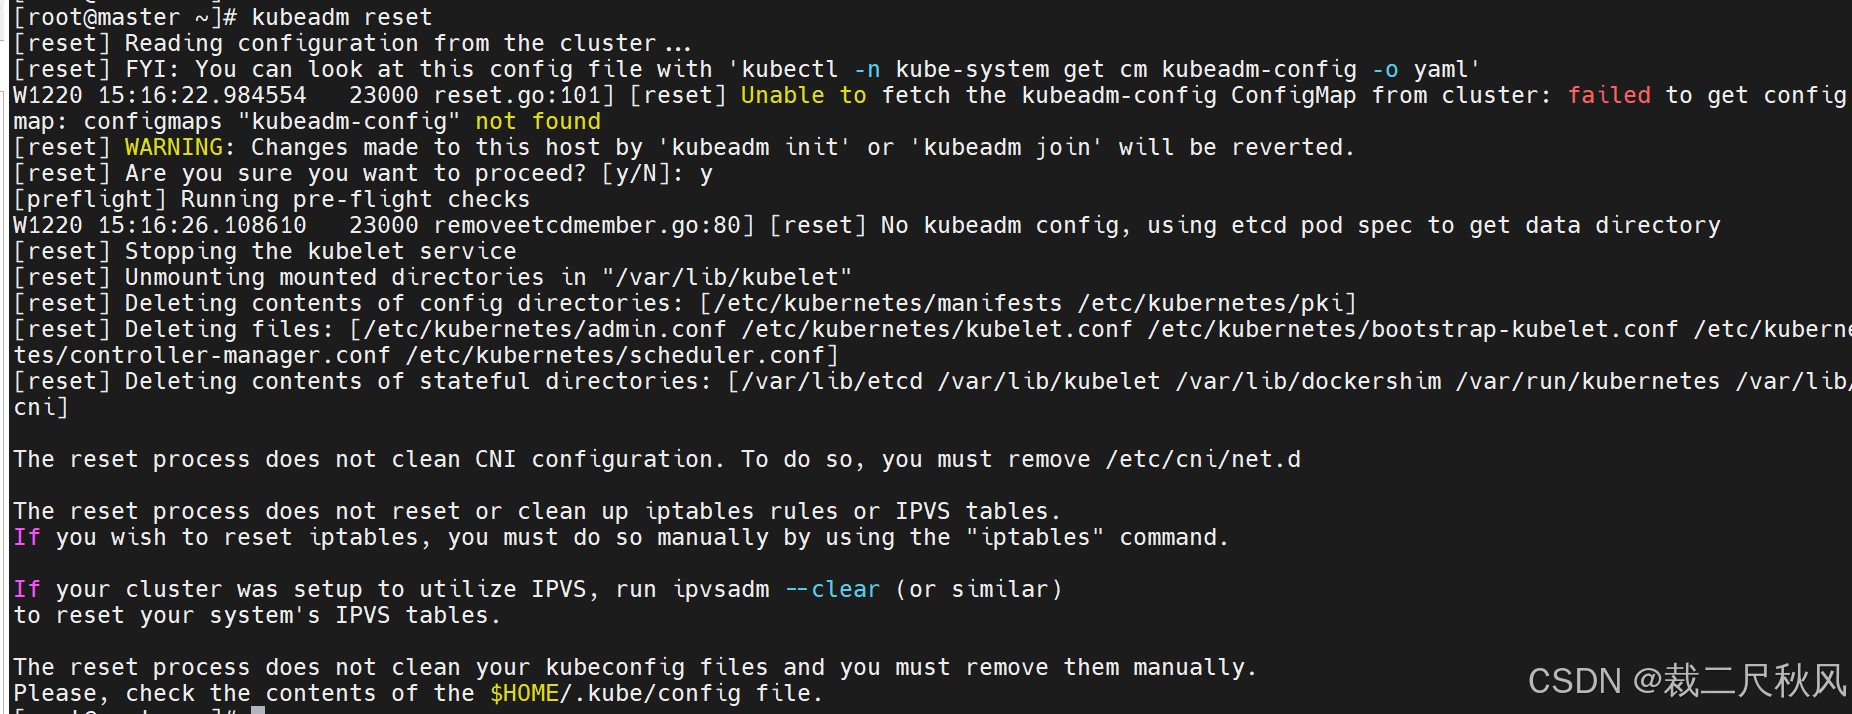
再重新初始化
4、初始化完成后安装提示信息进行操作
4.1、按照下图中提示的操作步骤进行操作
记住以下信息,将来可以加入主机点和worker节点
bash
Your Kubernetes control-plane has initialized successfully!

To start using your cluster, you need to run the following as a regular user:

  mkdir -p $HOME/.kube
  sudo cp -i /etc/kubernetes/admin.conf $HOME/.kube/config
  sudo chown $(id -u):$(id -g) $HOME/.kube/config

Alternatively, if you are the root user, you can run:

  export KUBECONFIG=/etc/kubernetes/admin.conf

You should now deploy a pod network to the cluster.
Run "kubectl apply -f [podnetwork].yaml" with one of the options listed at:
  https://kubernetes.io/docs/concepts/cluster-administration/addons/

You can now join any number of control-plane nodes by copying certificate authorities
and service account keys on each node and then running the following as root:

  kubeadm join cluster-endpoint:6443 --token xvb9a7.gmgv5u3g5wj3cjzd \
        --discovery-token-ca-cert-hash sha256:e108d86045d3d1b7fa248c07ad156cd63f365b477216cfb8a2b0c758c83efc92 \
        --control-plane

Then you can join any number of worker nodes by running the following on each as root:

kubeadm join cluster-endpoint:6443 --token xvb9a7.gmgv5u3g5wj3cjzd \
        --discovery-token-ca-cert-hash sha256:e108d86045d3d1b7fa248c07ad156cd63f365b477216cfb8a2b0c758c83efc92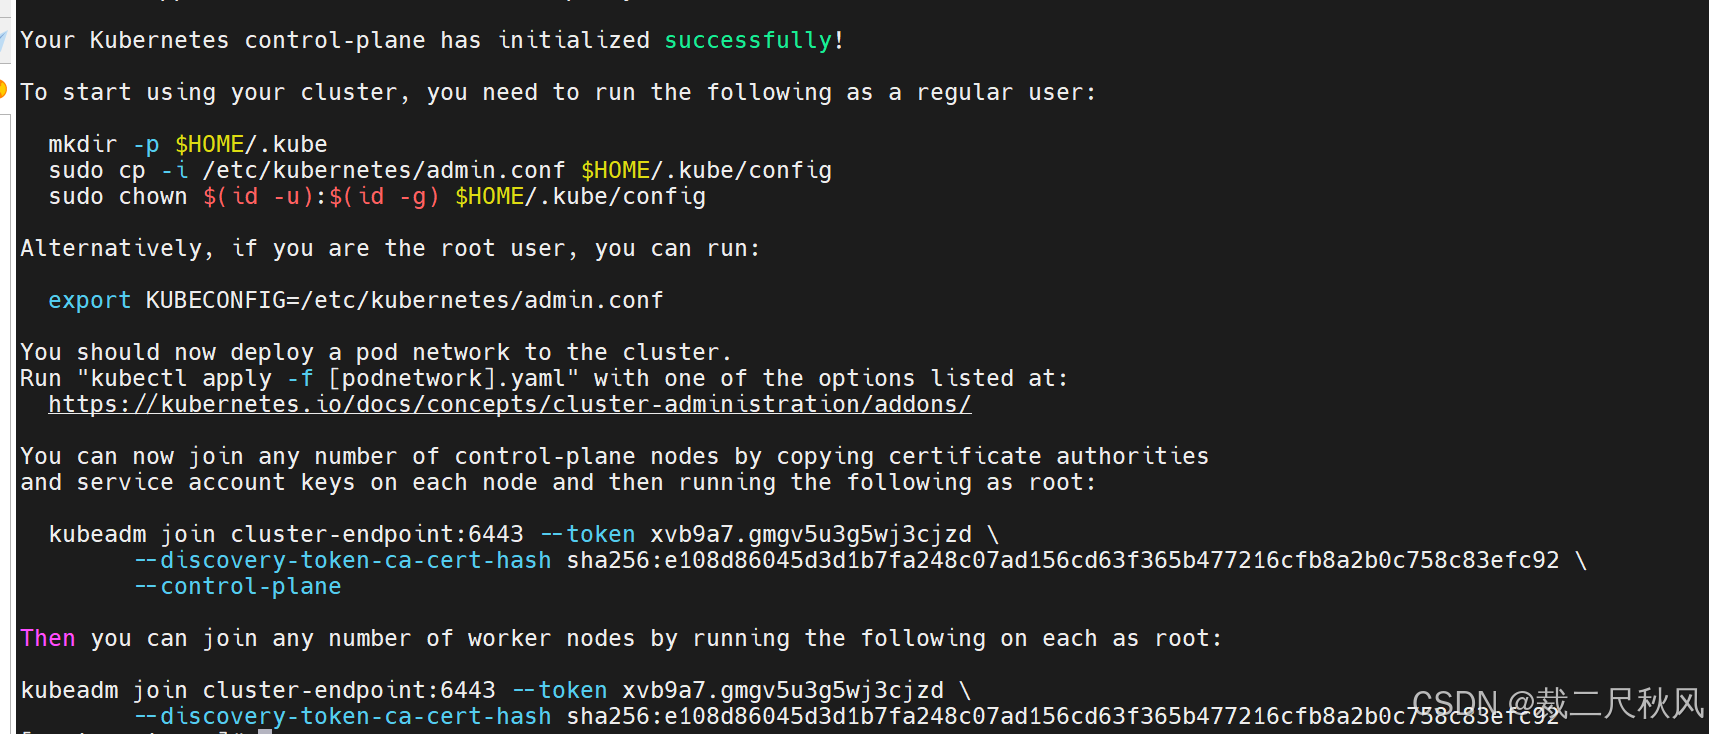
4.2、按照上图的操作步骤创建一个普通用户使用k8s的部署操作实验,
bash
#创建用户
useradd kubeadm
#授予sudo权限
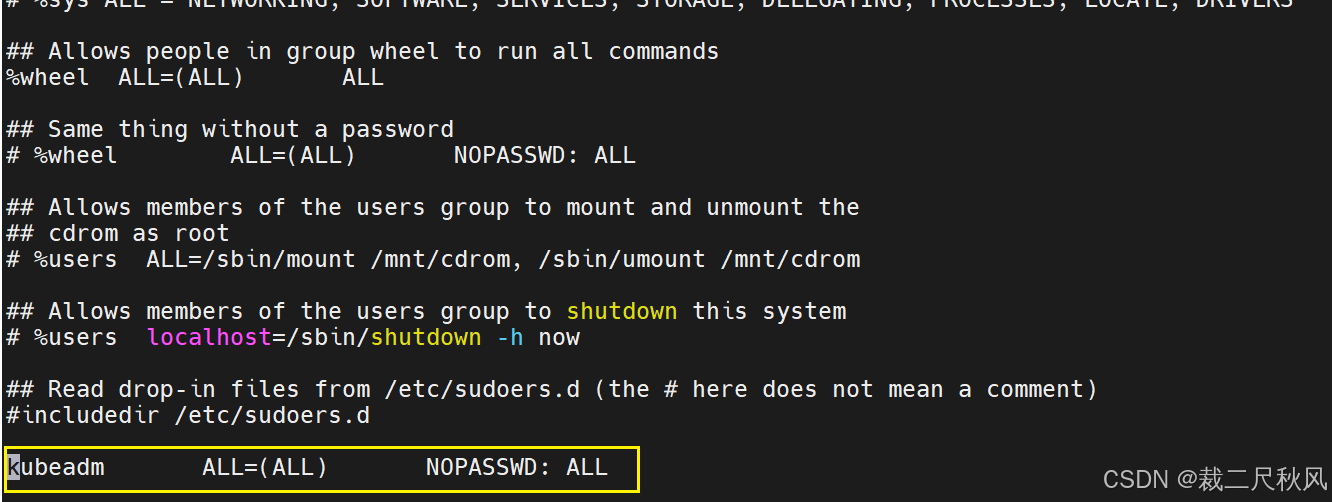
visudo
kubeadm ALL=(ALL) NOPASSWD: ALL
4.3、创建目录
bash
mkdir -p $HOME/.kube
sudo cp -i /etc/kubernetes/admin.conf $HOME/.kube/config
sudo chown $(id -u):$(id -g) $HOME/.kube/config
4.4、查看集群节点信息
bash
kubectl get node
4.5、部署集群串联使用的网络插件下载calico.yaml配置文件,再利用kubectl apply -f 命令下载calico.yaml里的相关插件信息。
bash
#将calico.yaml配置文件下载到本地
curl https://calico-v3-25.netlify.app/archive/v3.25/manifests/calico.yaml -O

#安装calico.yaml配置文件里的内容
kubectl apply -f calico.yaml 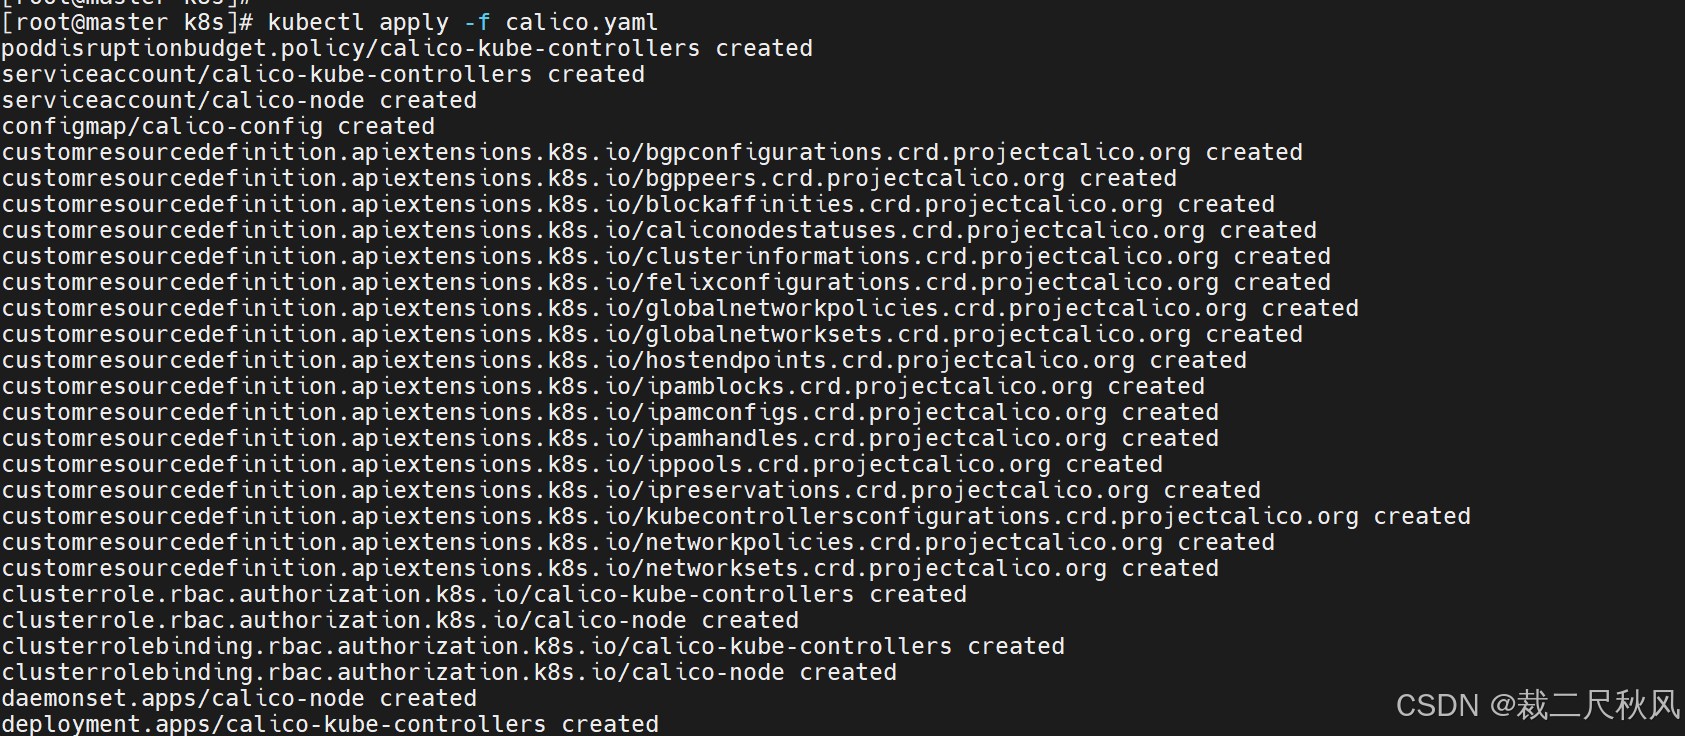
注意:如果初始化中的--pod-network-cidr=不是192.168.0.0/16则需要修改calico.yaml文件中的地址和初始化中的一样
calico.yml
bash
vim calico.yaml

...
    #   value: "192.168.0.0/16"     #改成初始化的IP
...
步骤六:集群中加入worker节点
bash
kubeadm join cluster-endpoint:6443 --token xvb9a7.gmgv5u3g5wj3cjzd \
        --discovery-token-ca-cert-hash sha256:e108d86045d3d1b7fa248c07ad156cd63f365b477216cfb8a2b0c758c83efc92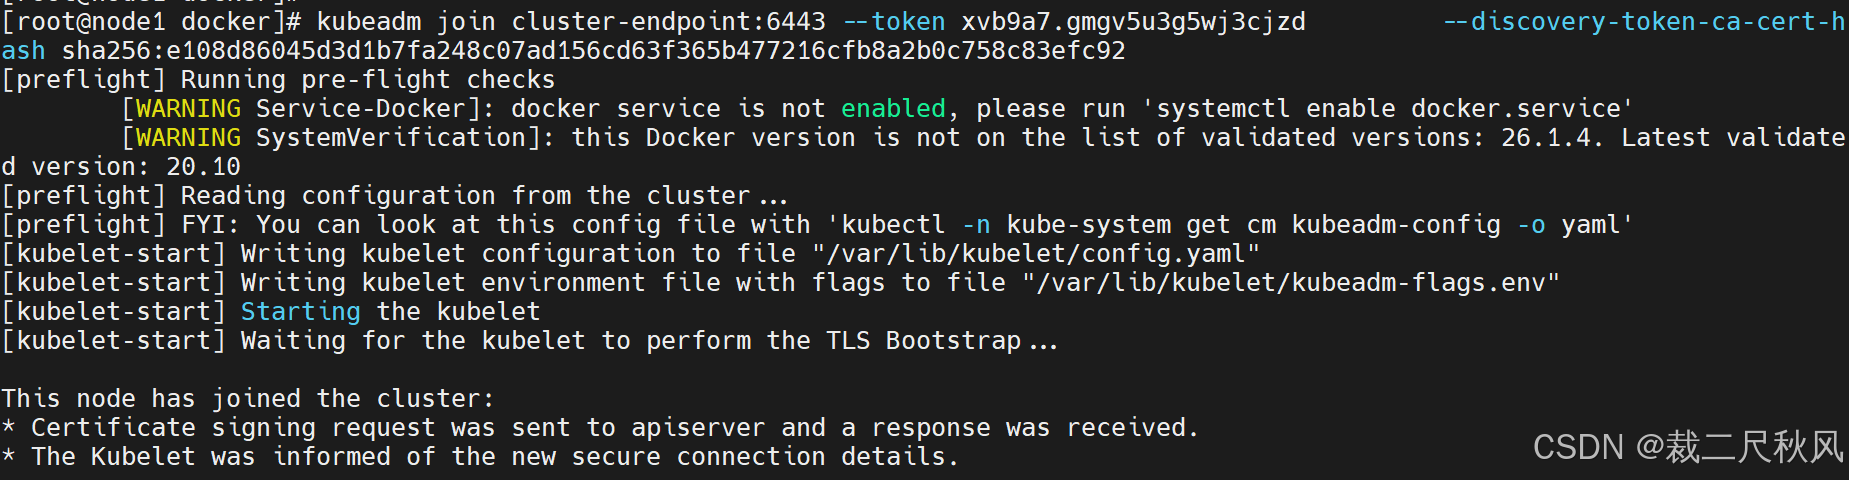
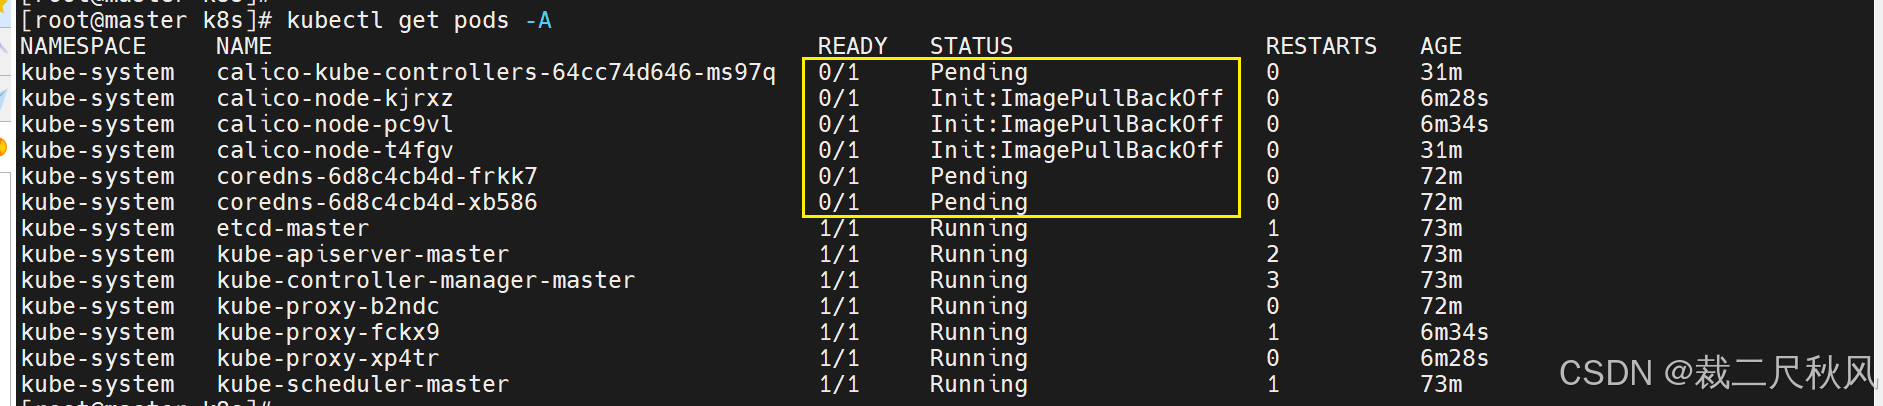
发现calico安装的组件报错,因为配置的是官网的镜像地址多以无法正常拉取,导致nci拉取报错

解决方法:
在csdn上下载calico-image-v3.25.0.zip安装包链接:https://download.csdn.net/download/paish87/88360784
calico-image-v3.25.0.zip解压之后会生成calico-image-v3.25.0.tar和calico.yaml文件
1)先将calico-image-v3.25.0.tar导入
bash
docker load -i calico-image-v3.25.0.tar
2)再将calico.yaml内容导入(所有接口上都执行)
bash
docker load -i calico-image-v3.25.0.tar
docker pull calico/cni:v3.25.0
docker pull calico/node:v3.25.0
docker pull calico/kube-controllers:v3.25.0

#先将国外的网络源注释掉
sed -i 's#docker.io/##g' calico.yaml

#在执行文件部署
kubectl apply -f  calico.yaml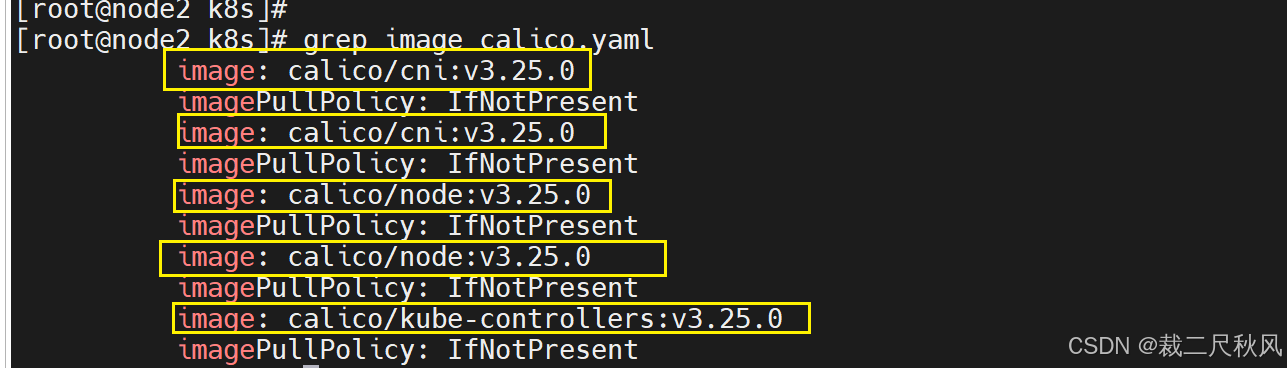
3)检查所有的pod是不是都是runing状态
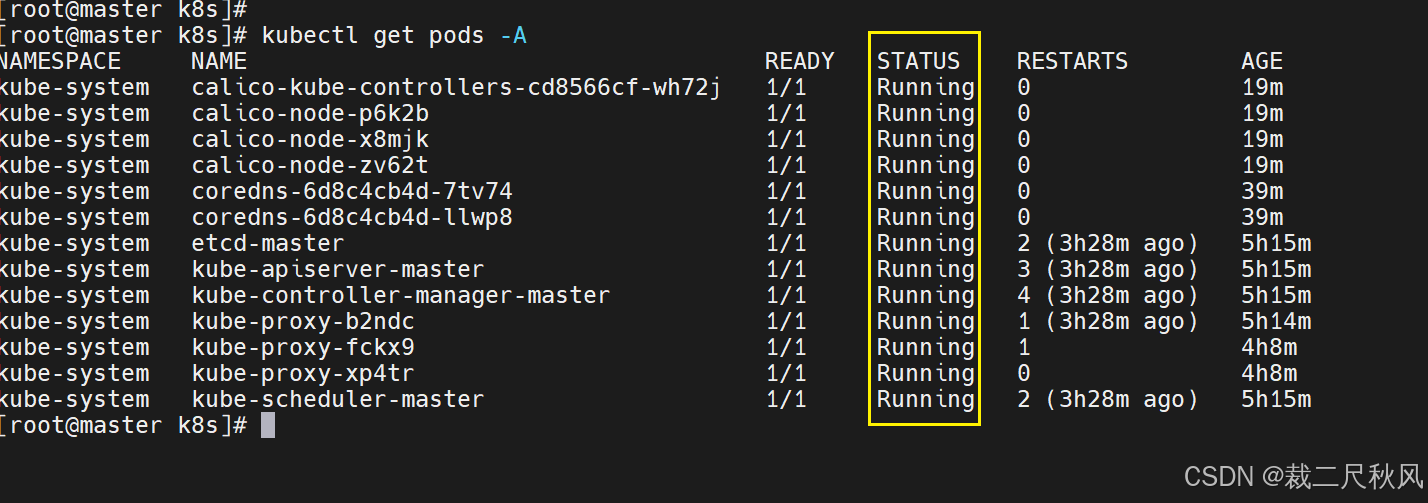
- 查看节点信息

常见的命令总结:
bash
#查看集群的节点信息
kucectl get node

#根据配置文件,给集群创建资源
kubectl apply -f xxx.yaml

#查看k8s部署了哪些应用
kubectl get pods -A  == docker ps

#查看pod节点的报错信息
kubectl describe pod calico-node-kjrxz -n kube-system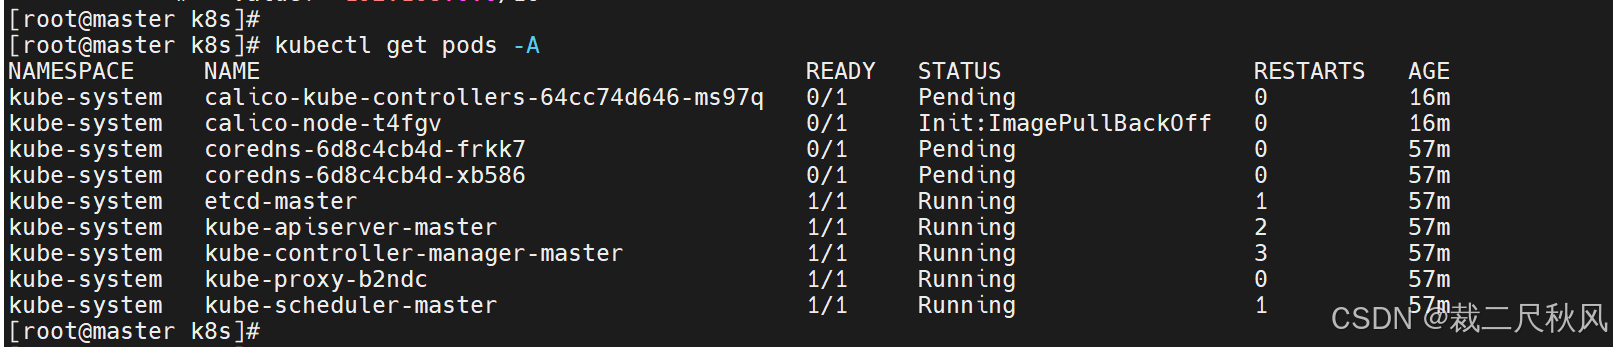
五、关机重启测试集群的稳定性

报错1:

说明6443端口没有开起来说明apiserver端口没有开启,此时需要检查docker的状态是否正常
报错2:
从节点启动异常处理

检查kubelet进程是否开启,启动异常则看系统日志cat /var/log/messages
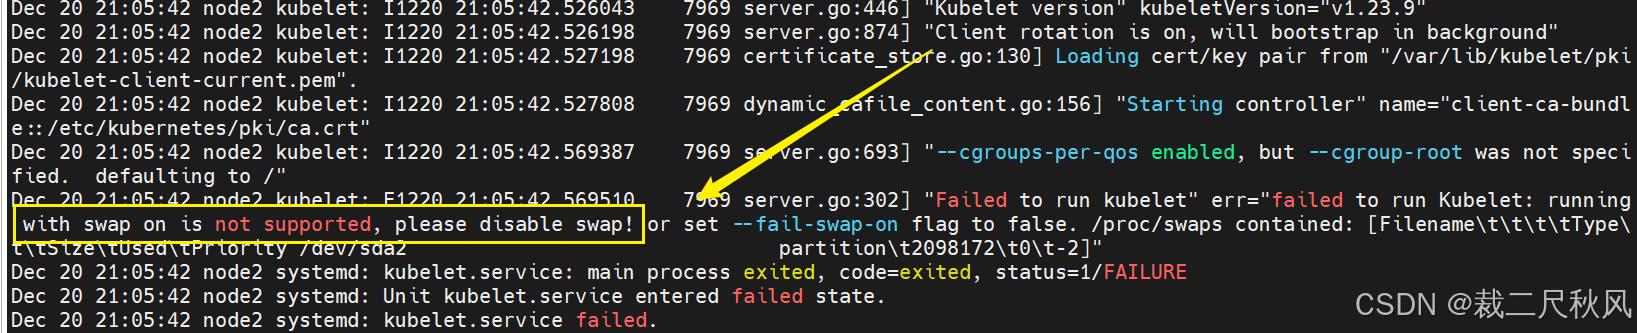
交换分区开机自动挂载未注释掉

问题解决!!