一、SPSS怎么上传数据
除了直接导入".CSV"、".SAV"等数据文件以外,SPSS还支持上传Excel和文本文件中的数据。接下来,我将结合实际案例来演示SPSS上传数据的步骤和注意事项。
1.上传Excel中的数据
打开SPSS数据分析软件,在文件下拉菜单中选择上传"Excel"中的数据。
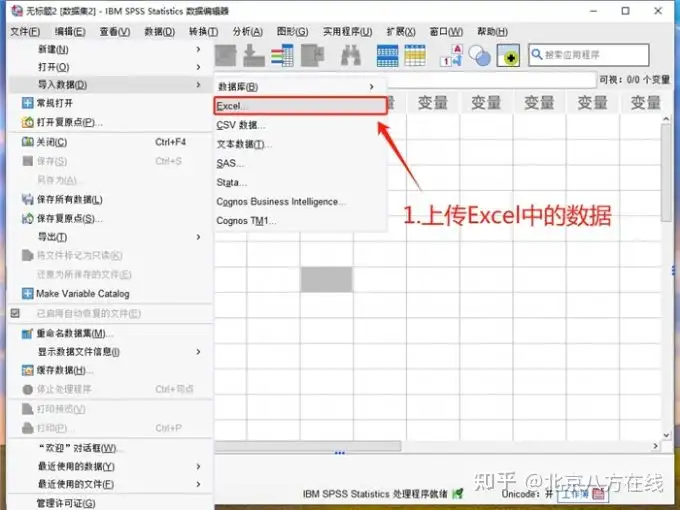
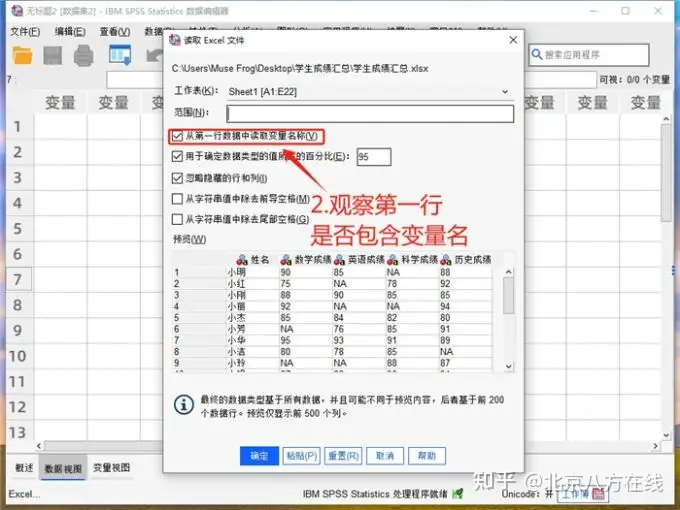
在新弹出的窗口中,根据预览界面中的数据结构,决定是否要勾选"从第一行数据中读取变量名"。
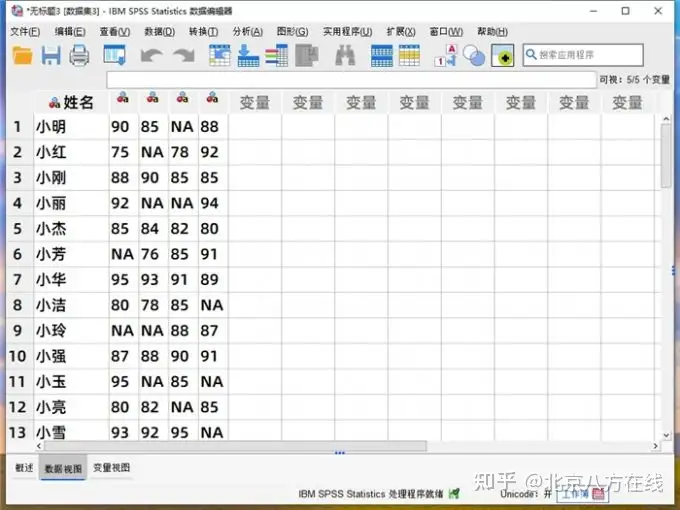
以下便是,将Excel中的数据上传到SPSS中的效果展示。
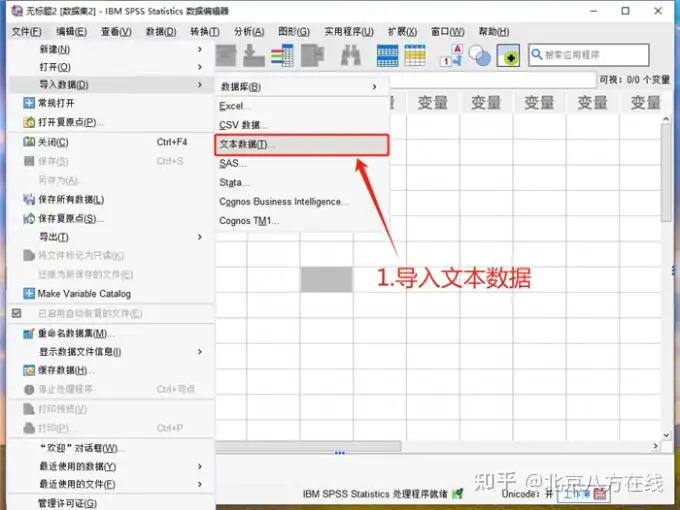
2.上传文本文件中的数据
打开SPSS数据分析软件,在文件下拉菜单中选择上传"文本文档"中的数据。
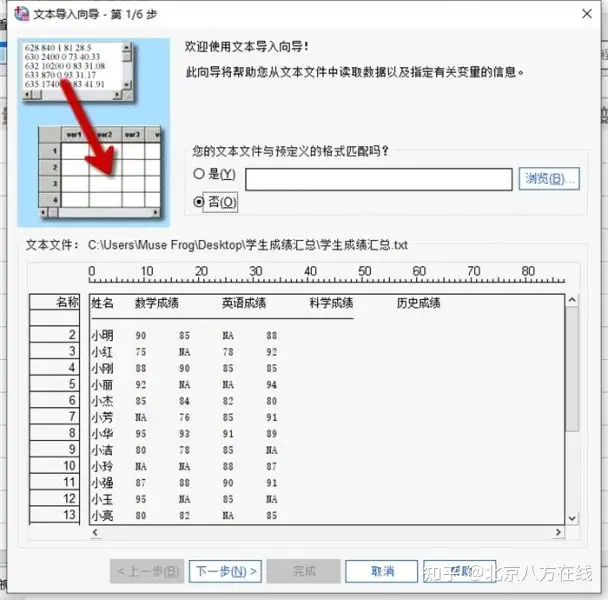
在新弹出的窗口中,选择与数据结构匹配的预定义格式,如果没有的话请勾选"否"。
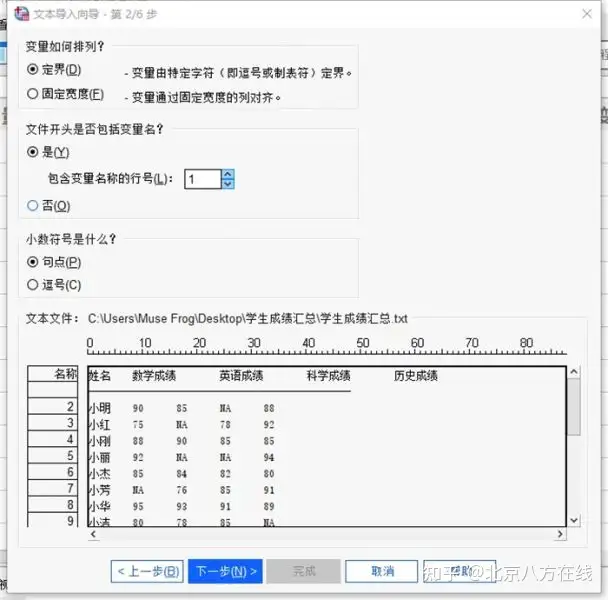
选择数据排列方式,以及变量名称的所在位置(这里是第一行),并且定义小数点的样式。
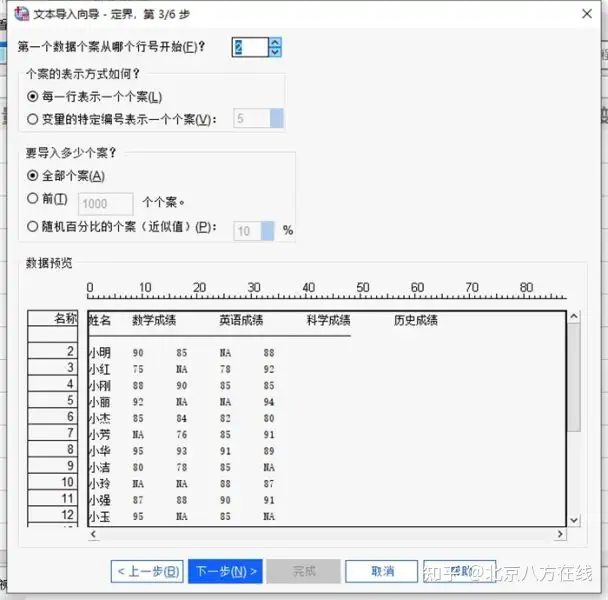
设置第一个数据开始的行号,以及需要导入的数据量(这里勾选的全部导入)。
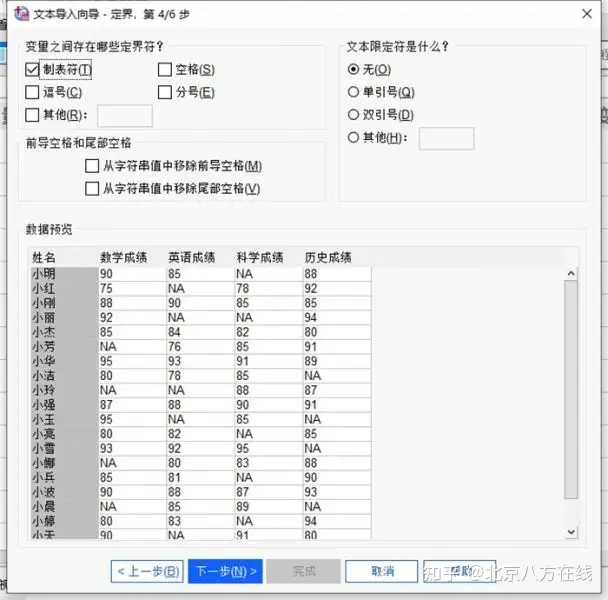
设置数据集的定界符与文本限定符,点击"下一步"进入变量设置。
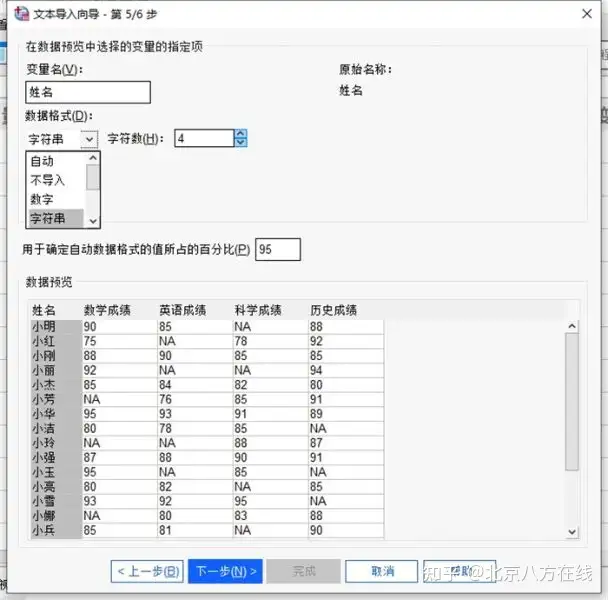
点击预览窗口中的数据列,我们可以在该页面中修改变量名。打开数据格式的下拉框,将四个课程变量的类型设置为数字,并且调整字符宽度。
预览数据无误后,点击"完成"将文本文档中的数据,上传到SPSS数据分析软件。
SPSS上传数据有缺失怎么办
在数据上传过程中,缺失值是较为常见的问题,通常是由采集遗漏、数据格式不符等原因造成。在SPSS数据分析软件中,数据缺失将直接影响最终的分析结果。接下来,我将介绍"定义"和"替换"SPSS缺失数据的操作步骤。
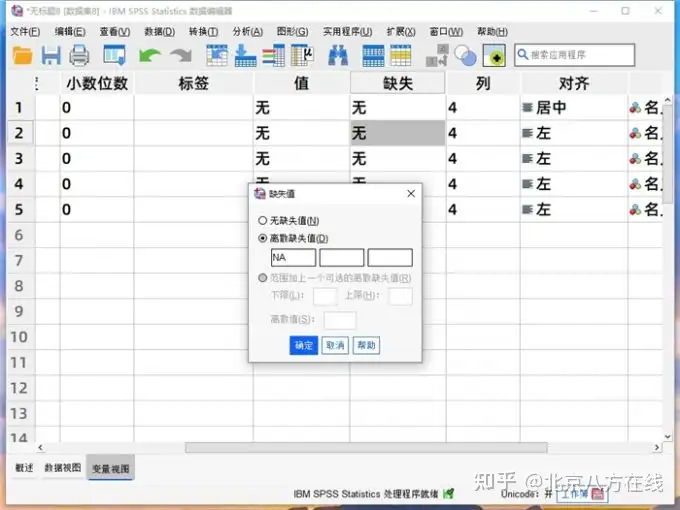
1.定义缺失数据
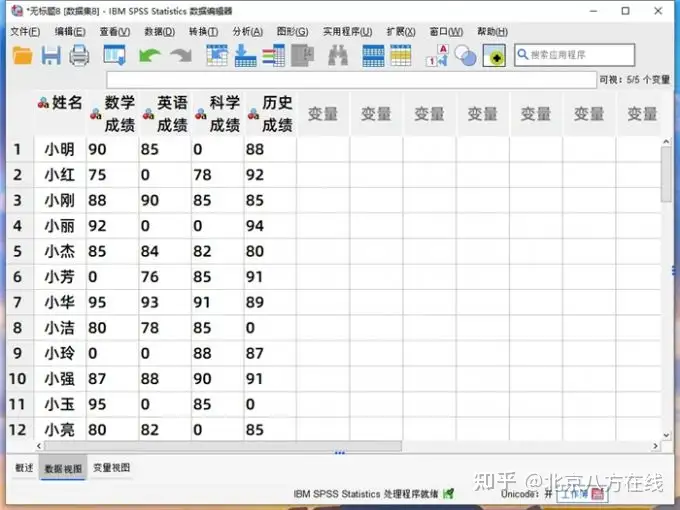
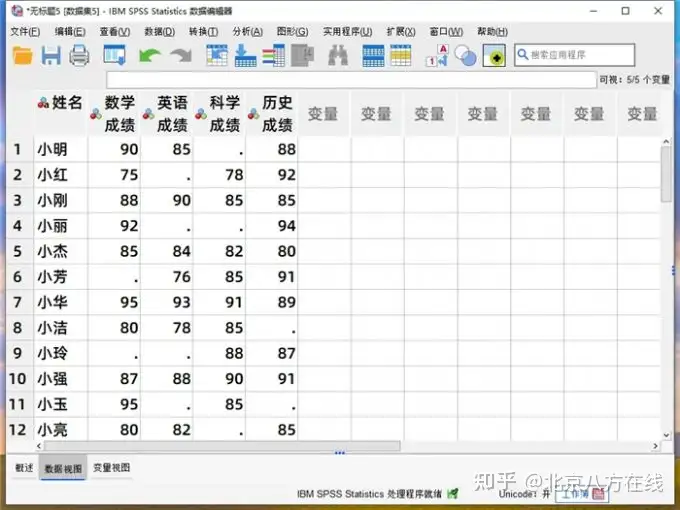
在SPSS的数据视图页面中,观察从Excel上传的数据,发现数据集中的缺失值均使用NA进行标注。
打开变量视图模式,在"缺失"属性栏中,点击学科变量的单元格。在弹出的窗口中,勾选"离散缺失值"并输入字母"NA",即可定义数据集中的所有缺失值。
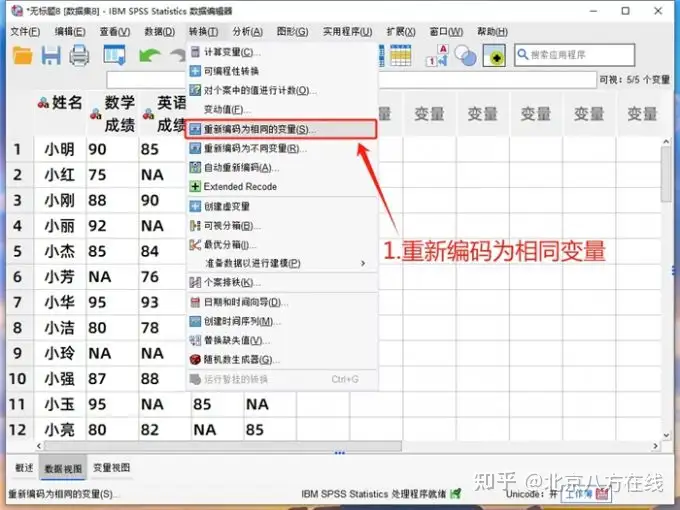
2.批量替换缺失数据
在"转换"下拉菜单中,打开"重新编码为相同变量"功能页面。
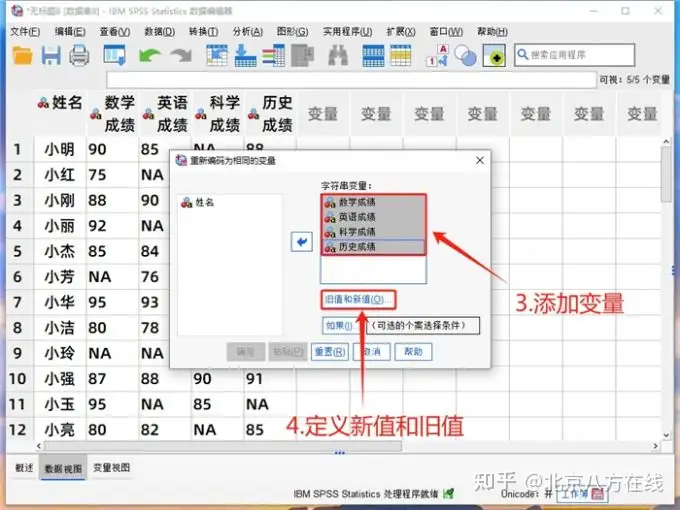
选中所有课程变量,并将它们添加到右侧的变量列表中,打开"旧值与新值"设置批量替换。
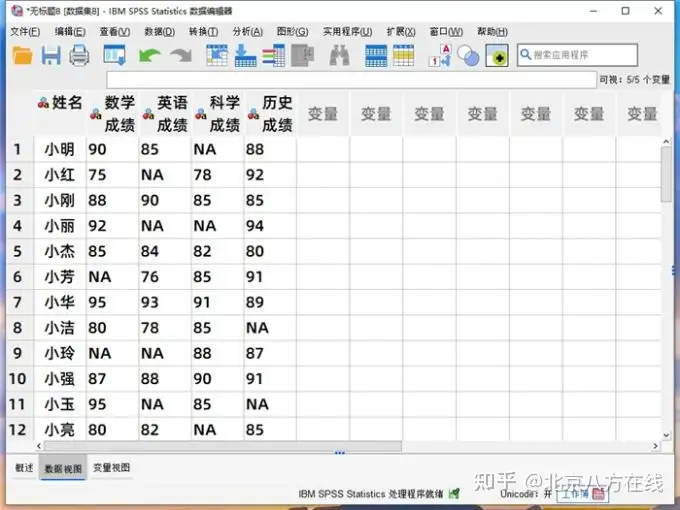
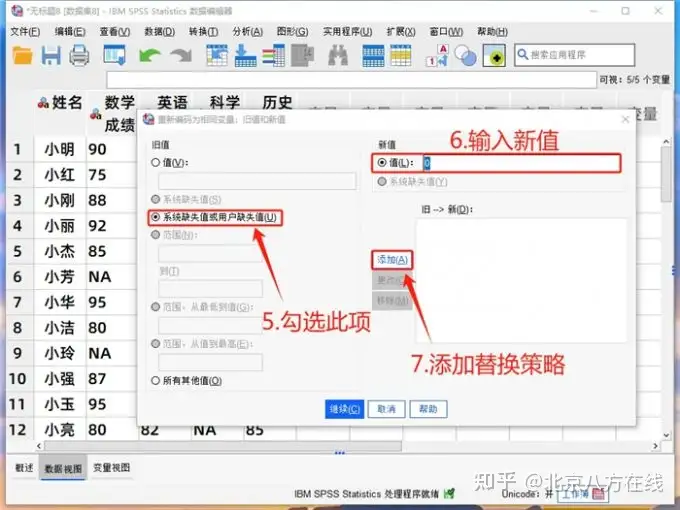
勾选"系统缺失值或用户缺失值"以后,在新值一栏中输入想要替换的内容(这里输入数字0),点击"添加"按钮生成替换策略。
下图为用SPSS数据分析软件,批量替换缺失数据的效果展示。