引言
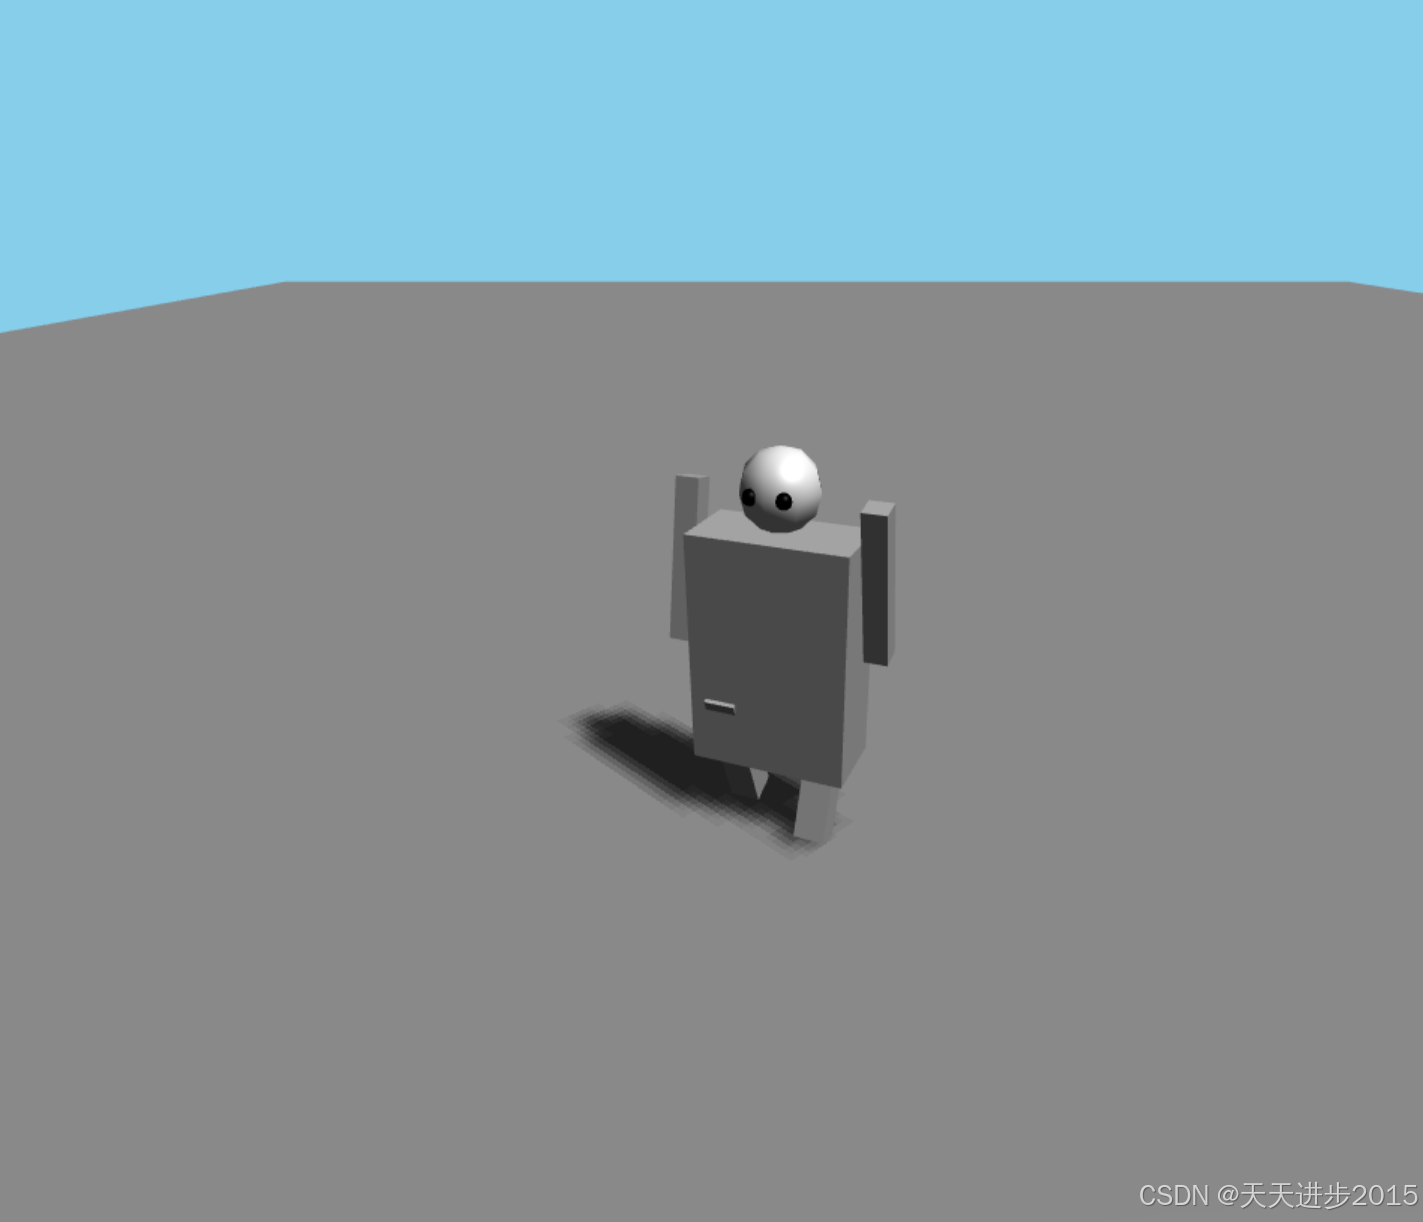
在这篇文章中,我们将探讨如何使用 Three.js 创建一个简单但有趣的 3D 人形机器人仿真系统。这个机器人可以通过键盘控制进行行走和转向,并具有基本的动画效果。

技术栈
- HTML5
- Three.js
- JavaScript
实现步骤
1. 基础设置
首先,我们需要创建基本的 HTML 结构并引入 Three.js 库:
html
<!DOCTYPE html>
<html>
<head>
    <title>3D Robot Simulation</title>
    <style>
        body {
            margin: 0;
            overflow: hidden;
        }
        canvas {
            display: block;
        }
        #info {
            position: absolute;
            top: 10px;
            left: 10px;
            color: white;
            font-family: Arial;
            font-size: 14px;
            background: rgba(0,0,0,0.5);
            padding: 10px;
        }
    </style>
</head>
<body>
    <div id="info">
        使用方向键控制机器人:<br>
        ↑ - 向前移动<br>
        ← → - 左右转向
    </div>
    <script src="https://cdnjs.cloudflare.com/ajax/libs/three.js/r128/three.min.js"></script>
</body>
</html>
2. 场景初始化
接下来,我们需要初始化 Three.js 的基本组件:
javascript
const scene = new THREE.Scene();
scene.background = new THREE.Color(0x87CEEB); // 天空蓝色背景

const camera = new THREE.PerspectiveCamera(75, window.innerWidth / window.innerHeight, 0.1, 1000);
const renderer = new THREE.WebGLRenderer({ antialias: true });
renderer.setSize(window.innerWidth, window.innerHeight);
renderer.shadowMap.enabled = true;
document.body.appendChild(renderer.domElement);
3. 创建机器人类
创建一个 Robot 类来管理机器人的所有组件和动作:
javascript
class Robot {
    constructor() {
        this.body = new THREE.Group();

        // 创建躯干
        const torsoGeometry = new THREE.BoxGeometry(2, 3, 1);
        const torsoMaterial = new THREE.MeshPhongMaterial({color: 0x999999});
        this.torso = new THREE.Mesh(torsoGeometry, torsoMaterial);
        this.torso.castShadow = true;

        // 创建头部
        const headGeometry = new THREE.SphereGeometry(0.5);
        const headMaterial = new THREE.MeshPhongMaterial({color: 0xcccccc});
        this.head = new THREE.Mesh(headGeometry, headMaterial);
        this.head.position.y = 2;
        this.head.castShadow = true;

        // ... 其他部件的创建代码 ...
    }

    // 创建四肢
    createLimb(width, height) {
        const geometry = new THREE.BoxGeometry(width, height, width);
        const material = new THREE.MeshPhongMaterial({color: 0x999999});
        const limb = new THREE.Mesh(geometry, material);
        limb.castShadow = true;
        return limb;
    }

    // 行走动画
    walk() {
        const legRotation = Math.sin(Date.now() * 0.005) * 0.5;
        this.leftLeg.rotation.x = legRotation;
        this.rightLeg.rotation.x = -legRotation;

        const armRotation = Math.sin(Date.now() * 0.005) * 0.25;
        this.leftArm.rotation.x = -armRotation;
        this.rightArm.rotation.x = armRotation;
    }

    // 转向和移动方法
    turn(angle) {
        this.body.rotation.y += angle;
    }

    moveForward(speed) {
        this.body.position.x += Math.sin(this.body.rotation.y) * speed;
        this.body.position.z += Math.cos(this.body.rotation.y) * speed;
    }
}
4. 添加环境元素
创建地面和光照系统:
javascript
// 创建地面
const groundGeometry = new THREE.PlaneGeometry(100, 100);
const groundMaterial = new THREE.MeshPhongMaterial({
    color: 0x808080,
    side: THREE.DoubleSide
});
const ground = new THREE.Mesh(groundGeometry, groundMaterial);
ground.rotation.x = -Math.PI / 2;
ground.position.y = -2.5;
ground.receiveShadow = true;
scene.add(ground);

// 添加光源
const directionalLight = new THREE.DirectionalLight(0xffffff, 1);
directionalLight.position.set(5, 10, 5);
directionalLight.castShadow = true;
scene.add(directionalLight);

const ambientLight = new THREE.AmbientLight(0x404040);
scene.add(ambientLight);
5. 实现控制系统
添加键盘控制和动画循环:
javascript
const keyStates = {};

document.addEventListener('keydown', (e) => {
    keyStates[e.key] = true;
});

document.addEventListener('keyup', (e) => {
    keyStates[e.key] = false;
});

function animate() {
    requestAnimationFrame(animate);

    if(keyStates['ArrowUp']) {
        robot.walk();
        robot.moveForward(0.1);
    }
    if(keyStates['ArrowLeft']) {
        robot.turn(0.05);
    }
    if(keyStates['ArrowRight']) {
        robot.turn(-0.05);
    }

    camera.position.x = robot.body.position.x;
    camera.position.z = robot.body.position.z + 10;
    camera.lookAt(robot.body.position);

    renderer.render(scene, camera);
}

animate();
主要特性
- 3D 人形机器人模型
- 基本的行走动画
- 键盘控制系统
- 相机跟随
- 阴影效果
- 响应式设计
控制方法
- ↑ 向前移动
- ← 向左转
- → 向右转
可能的改进方向
- 添加更多动作(如后退、跳跃)
- 改进机器人模型细节
- 添加碰撞检测
- 添加物理引擎
- 实现更复杂的动画效果
- 添加声音效果
- 增加更多交互控制选项
- 优化性能
结论
通过这个项目,我们展示了如何使用 Three.js 创建一个基本的 3D 人形机器人仿真系统。虽然这是一个相对简单的实现,但它为更复杂的 3D 网页应用提供了良好的起点。
完整代码
javascript
<!DOCTYPE html>
<html>
<head>
    <title>3D Robot Simulation</title>
    <style>
        body {
            margin: 0;
            overflow: hidden;
        }
        canvas {
            display: block;
        }
        #info {
            position: absolute;
            top: 10px;
            left: 10px;
            color: white;
            font-family: Arial;
            font-size: 14px;
            background: rgba(0,0,0,0.5);
            padding: 10px;
        }
    </style>
</head>
<body>
    <div id="info">
        使用方向键控制机器人:<br>
        ↑ - 向前移动<br>
        ← → - 左右转向
    </div>
    <script src="https://cdnjs.cloudflare.com/ajax/libs/three.js/r128/three.min.js"></script>
    <script>
        // 初始化场景、相机和渲染器
        const scene = new THREE.Scene();
        scene.background = new THREE.Color(0x87CEEB); // 天空蓝色背景

        const camera = new THREE.PerspectiveCamera(75, window.innerWidth / window.innerHeight, 0.1, 1000);
        const renderer = new THREE.WebGLRenderer({ antialias: true });
        renderer.setSize(window.innerWidth, window.innerHeight);
        renderer.shadowMap.enabled = true;
        document.body.appendChild(renderer.domElement);

        // 创建机器人类
        class Robot {
            constructor() {
                // 机器人主体
                this.body = new THREE.Group();

                // 躯干
                const torsoGeometry = new THREE.BoxGeometry(2, 3, 1);
                const torsoMaterial = new THREE.MeshPhongMaterial({color: 0x999999});
                this.torso = new THREE.Mesh(torsoGeometry, torsoMaterial);
                this.torso.castShadow = true;

                // 头部
                const headGeometry = new THREE.SphereGeometry(0.5);
                const headMaterial = new THREE.MeshPhongMaterial({color: 0xcccccc});
                this.head = new THREE.Mesh(headGeometry, headMaterial);
                this.head.position.y = 2;
                this.head.castShadow = true;

                // 眼睛
                const eyeGeometry = new THREE.SphereGeometry(0.1);
                const eyeMaterial = new THREE.MeshPhongMaterial({color: 0x000000});
                this.leftEye = new THREE.Mesh(eyeGeometry, eyeMaterial);
                this.rightEye = new THREE.Mesh(eyeGeometry, eyeMaterial);
                this.leftEye.position.set(-0.2, 2, 0.4);
                this.rightEye.position.set(0.2, 2, 0.4);

                // 手臂
                this.leftArm = this.createLimb(0.3, 2);
                this.leftArm.position.set(-1.2, 1, 0);
                this.rightArm = this.createLimb(0.3, 2);
                this.rightArm.position.set(1.2, 1, 0);

                // 腿部
                this.leftLeg = this.createLimb(0.4, 2);
                this.leftLeg.position.set(-0.6, -1.5, 0);
                this.rightLeg = this.createLimb(0.4, 2);
                this.rightLeg.position.set(0.6, -1.5, 0);

                // 组装机器人
                this.body.add(this.torso);
                this.body.add(this.head);
                this.body.add(this.leftEye);
                this.body.add(this.rightEye);
                this.body.add(this.leftArm);
                this.body.add(this.rightArm);
                this.body.add(this.leftLeg);
                this.body.add(this.rightLeg);
            }

            createLimb(width, height) {
                const geometry = new THREE.BoxGeometry(width, height, width);
                const material = new THREE.MeshPhongMaterial({color: 0x999999});
                const limb = new THREE.Mesh(geometry, material);
                limb.castShadow = true;
                return limb;
            }

            walk() {
                // 腿部摆动
                const legRotation = Math.sin(Date.now() * 0.005) * 0.5;
                this.leftLeg.rotation.x = legRotation;
                this.rightLeg.rotation.x = -legRotation;

                // 手臂摆动
                const armRotation = Math.sin(Date.now() * 0.005) * 0.25;
                this.leftArm.rotation.x = -armRotation;
                this.rightArm.rotation.x = armRotation;
            }

            turn(angle) {
                this.body.rotation.y += angle;
            }

            moveForward(speed) {
                this.body.position.x += Math.sin(this.body.rotation.y) * speed;
                this.body.position.z += Math.cos(this.body.rotation.y) * speed;
            }
        }

        // 创建地面
        const groundGeometry = new THREE.PlaneGeometry(100, 100);
        const groundMaterial = new THREE.MeshPhongMaterial({
            color: 0x808080,
            side: THREE.DoubleSide
        });
        const ground = new THREE.Mesh(groundGeometry, groundMaterial);
        ground.rotation.x = -Math.PI / 2;
        ground.position.y = -2.5;
        ground.receiveShadow = true;
        scene.add(ground);

        // 创建机器人实例
        const robot = new Robot();
        scene.add(robot.body);

        // 添加光源
        const directionalLight = new THREE.DirectionalLight(0xffffff, 1);
        directionalLight.position.set(5, 10, 5);
        directionalLight.castShadow = true;
        directionalLight.shadow.camera.near = 0.1;
        directionalLight.shadow.camera.far = 100;
        directionalLight.shadow.camera.left = -50;
        directionalLight.shadow.camera.right = 50;
        directionalLight.shadow.camera.top = 50;
        directionalLight.shadow.camera.bottom = -50;
        scene.add(directionalLight);

        const ambientLight = new THREE.AmbientLight(0x404040);
        scene.add(ambientLight);

        // 设置相机位置
        camera.position.set(0, 5, 10);
        camera.lookAt(robot.body.position);

        // 键盘状态
        const keyStates = {};

        // 键盘事件监听
        document.addEventListener('keydown', (e) => {
            keyStates[e.key] = true;
        });

        document.addEventListener('keyup', (e) => {
            keyStates[e.key] = false;
        });

        // 窗口大小调整
        window.addEventListener('resize', onWindowResize, false);

        function onWindowResize() {
            camera.aspect = window.innerWidth / window.innerHeight;
            camera.updateProjectionMatrix();
            renderer.setSize(window.innerWidth, window.innerHeight);
        }

        // 动画循环
        function animate() {
            requestAnimationFrame(animate);

            // 更新机器人动作
            if(keyStates['ArrowUp']) {
                robot.walk();
                robot.moveForward(0.1);
            }
            if(keyStates['ArrowLeft']) {
                robot.turn(0.05);
            }
            if(keyStates['ArrowRight']) {
                robot.turn(-0.05);
            }

            // 相机跟随
            camera.position.x = robot.body.position.x;
            camera.position.z = robot.body.position.z + 10;
            camera.lookAt(robot.body.position);

            renderer.render(scene, camera);
        }

        animate();
    </script>
</body>
</html>