Docker是用来快速构建、运行、管理应用的工具,简单来说就是用来部署项目,以及项目所依赖的各种组件,这是一个典型的运维工具。
之前没有Docker的时候,去做部署,往往都是基于手动的Linux命令,操作Linux服务器,基于简单的脚本实现部署。在CentOS上安装mysql,首先要查看本机Linux系统的版本,然后去官网下载相应的版本。然后将下载的安装包上传解压,安装之前还得卸载系统自带的数据库,安装之前还需要安装相应的依赖,然后按照顺序逐个安装。安装完成之后还需要进行mysql用户名、密码和字符集的配置,最后才能启动成功。会出现以下问题:
- 命令太多了,记不住
- 软件安装包名字复杂,不知道去哪里找
- 安装和部署步骤复杂,容易出错
使用docker安装MYSQL,只需要打开控制台端口,输入一行简单的命令。
卸载旧版
首先如果系统中已经存在旧的Docker,则先卸载:
Shell
yum remove docker \
    docker-client \
    docker-client-latest \
    docker-common \
    docker-latest \
    docker-latest-logrotate \
    docker-logrotate \
    docker-engine \

docker-selinux 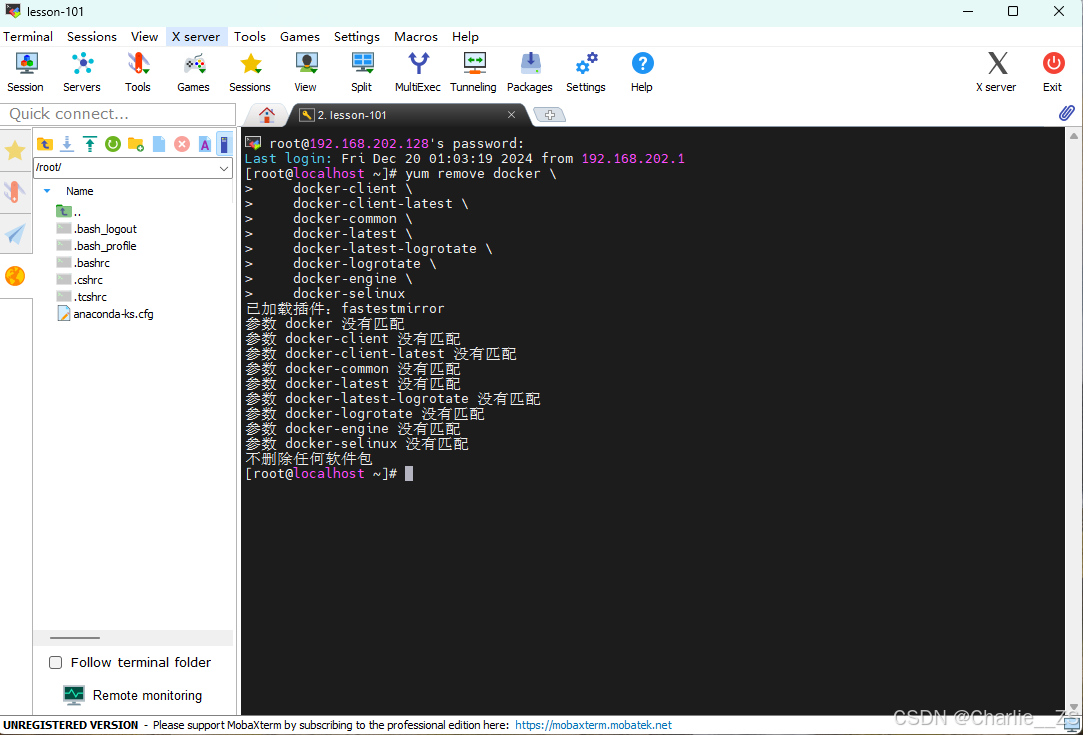
配置yum镜像源
CentOS7 的官方支持已经结束,部分仓库已被移至归档库。这导致了你的 yum 命令无法找到所需的元数据文件。CentOS7 的官方仓库在 2024 年 6 月 30 日之后已经停止维护。因此,使用最新的 CentOS7 官方仓库可能会遇到问题。
进入/etc/yum.repos.d目录下找到 CentOS-Base.repo
依次执行:
shel
cd /etc/yum.repos.d
cp  CentOS-Base.repo   CentOS-Base.repo.backup

vi CentOS-Base.repo
进入后改为:
按i进入编辑模式
shell
# CentOS-Base.repo
#
# The mirror system uses the connecting IP address of the client and the
# update status of each mirror to pick mirrors that are updated to and
# geographically close to the client.  You should use this for CentOS updates
# unless you are manually picking other mirrors.
#
# If the mirrorlist= does not work for you, as a fall back you can try the
# remarked out baseurl= line instead.
#
#

[base]
name=CentOS-$releasever - Base
#mirrorlist=http://mirrorlist.centos.org/?release=$releasever&arch=$basearch&repo=os&infra=$infra
#baseurl=http://mirror.centos.org/centos/$releasever/os/$basearch/
#baseurl=http://vault.centos.org/7.9.2009/x86_64/os/
baseurl=http://vault.centos.org/7.9.2009/os/$basearch/
gpgcheck=1
gpgkey=file:///etc/pki/rpm-gpg/RPM-GPG-KEY-CentOS-7

#released updates
[updates]
name=CentOS-$releasever - Updates
#mirrorlist=http://mirrorlist.centos.org/?release=$releasever&arch=$basearch&repo=updates&infra=$infra
#baseurl=http://mirror.centos.org/centos/$releasever/updates/$basearch/
#baseurl=http://vault.centos.org/7.9.2009/x86_64/os/
baseurl=http://vault.centos.org/7.9.2009/updates/$basearch/
gpgcheck=1
gpgkey=file:///etc/pki/rpm-gpg/RPM-GPG-KEY-CentOS-7

#additional packages that may be useful
[extras]
name=CentOS-$releasever - Extras
#mirrorlist=http://mirrorlist.centos.org/?release=$releasever&arch=$basearch&repo=extras&infra=$infra
#$baseurl=http://mirror.centos.org/centos/$releasever/extras/$basearch/
#baseurl=http://vault.centos.org/7.9.2009/x86_64/os/
baseurl=http://vault.centos.org/7.9.2009/extras/$basearch/
gpgcheck=1
gpgkey=file:///etc/pki/rpm-gpg/RPM-GPG-KEY-CentOS-7

#additional packages that extend functionality of existing packages
[centosplus]
name=CentOS-$releasever - Plus
#mirrorlist=http://mirrorlist.centos.org/?release=$releasever&arch=$basearch&repo=centosplus&infra=$infra
#baseurl=http://mirror.centos.org/centos/$releasever/centosplus/$basearch/
#baseurl=http://vault.centos.org/7.9.2009/x86_64/os/
baseurl=http://vault.centos.org/7.9.2009/centosplus/$basearch/
gpgcheck=1
enabled=0
gpgkey=file:///etc/pki/rpm-gpg/RPM-GPG-KEY-CentOS-7按esc进入底行模式,:wq退出并保存。
依次执行:
shell
sudo yum clean all
sudo yum makecache
然后执行两个命令中的一个,
curl -o /etc/yum.repos.d/CentOS-Base.repo https://mirrors.aliyun.com/repo/Centos-7.repo

wget -O /etc/yum.repos.d/CentOS-Base.repo https://mirrors.aliyun.com/repo/Centos-7.repo执行完成进入/etc/yum.repos.d
执行:
shell
cat CentOS-Base.repo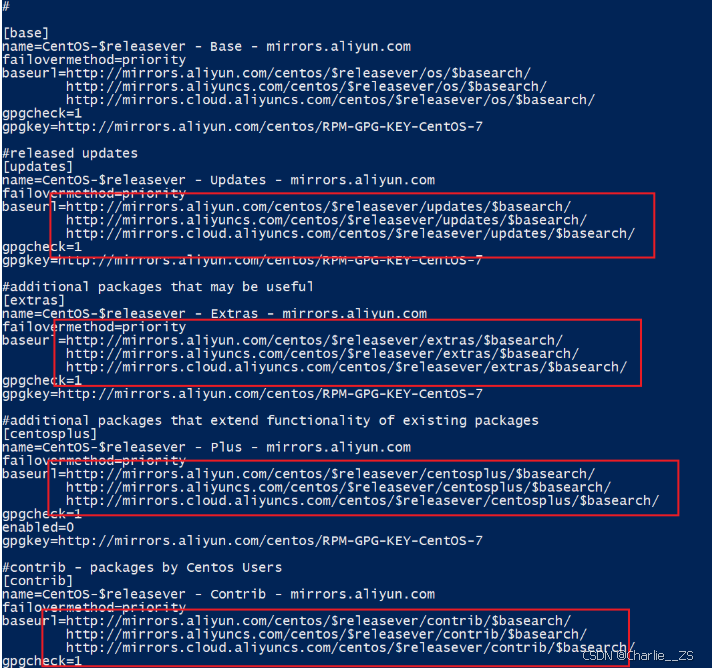
看着镜像是阿里云的即可。 建议在执行下
bash
sudo yum clean all

sudo yum makecacheAI助手
配置Docker的yum库
首先要安装一个yum工具
Bash
sudo yum install -y yum-utils安装成功后,执行命令,配置Docker的yum源(已更新为阿里云源):
Bash
sudo yum-config-manager --add-repo https://mirrors.aliyun.com/docker-ce/linux/centos/docker-ce.repo

sudo sed -i 's+download.docker.com+mirrors.aliyun.com/docker-ce+' /etc/yum.repos.d/docker-ce.repo
更新yum,建立缓存
Bash
sudo yum makecache fast安装Docker
最后,执行命令,安装Docker
Bash
sys启动和校验
Docker安装结束之后,docker -v验证dock的版本。能看到版本号不代表安装成功了,还需要输入docker images,发现无法连接到dock的守护进程。因为docker本身也是服务,需要启动起来,一直运行。输入的一切命令都是发送给了这个进程,由这个进程处理命令,现在连不上意味着docker没有启动,所以需要启动docker。
systemctl enable docker命令,让docker能够开机自启。
systemctl start docker启动docker,再次输入docker images,发现没有报错,证明docker成功启动了。
Bash
# 启动Docker
systemctl start docker

# 停止Docker
systemctl stop docker

# 重启
systemctl restart docker

# 设置开机自启
systemctl enable docker

# 执行docker ps命令,如果不报错,说明安装启动成功
docker ps
配置Docker镜像加速
以后使用docker安装部署应用时需要下载一些东西,这个下载默认在国外,速度比较慢。
镜像地址可能会变更,如果失效可以百度找最新的docker镜像。
配置镜像步骤如下:
Bash
# 创建目录
mkdir -p /etc/docker

# 复制内容
tee /etc/docker/daemon.json <<-'EOF'
{
    "registry-mirrors": [
        "http://hub-mirror.c.163.com",
        "https://mirrors.tuna.tsinghua.edu.cn",
        "http://mirrors.sohu.com",
        "https://ustc-edu-cn.mirror.aliyuncs.com",
        "https://ccr.ccs.tencentyun.com",
        "https://docker.m.daocloud.io",
        "https://docker.awsl9527.cn"
    ]
}
EOF
进入/etc/docker查看是否配置Docker镜像源
shell
cd /etc/docker
ll
Bash
# 重新加载配置
systemctl daemon-reload

# 重启Docker
systemctl restart docker
阿里云镜像
在首页的产品中,找到阿里云的容器镜像服务:
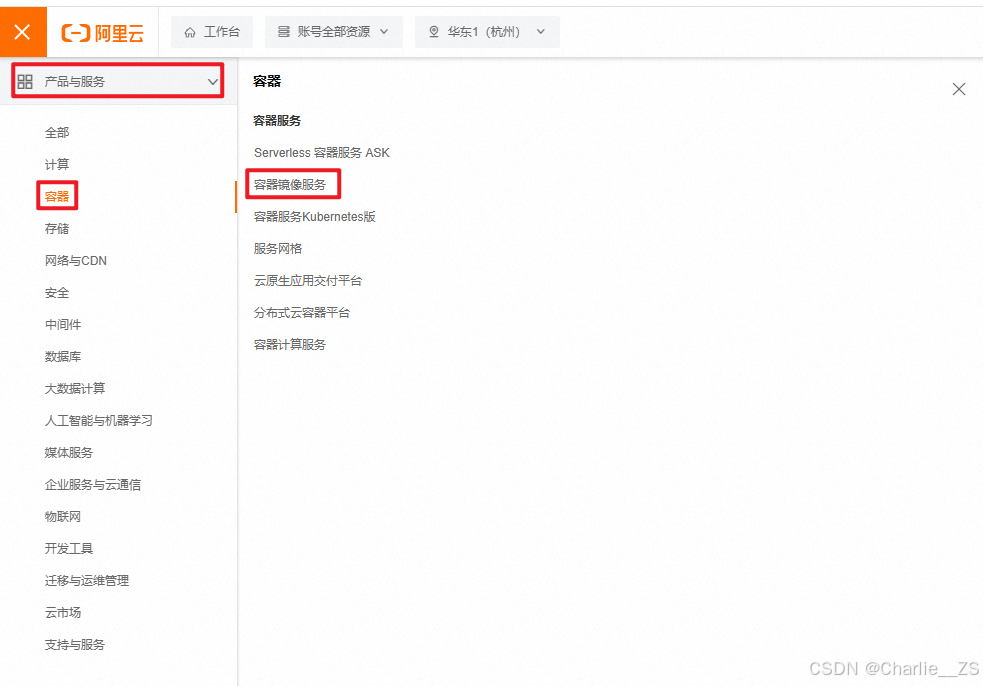
点击后进入控制台:

首次可能需要选择立刻开通,然后进入控制台。
找到镜像工具 下的镜像加速器,页面向下滚动,即可找到配置的文档说明:
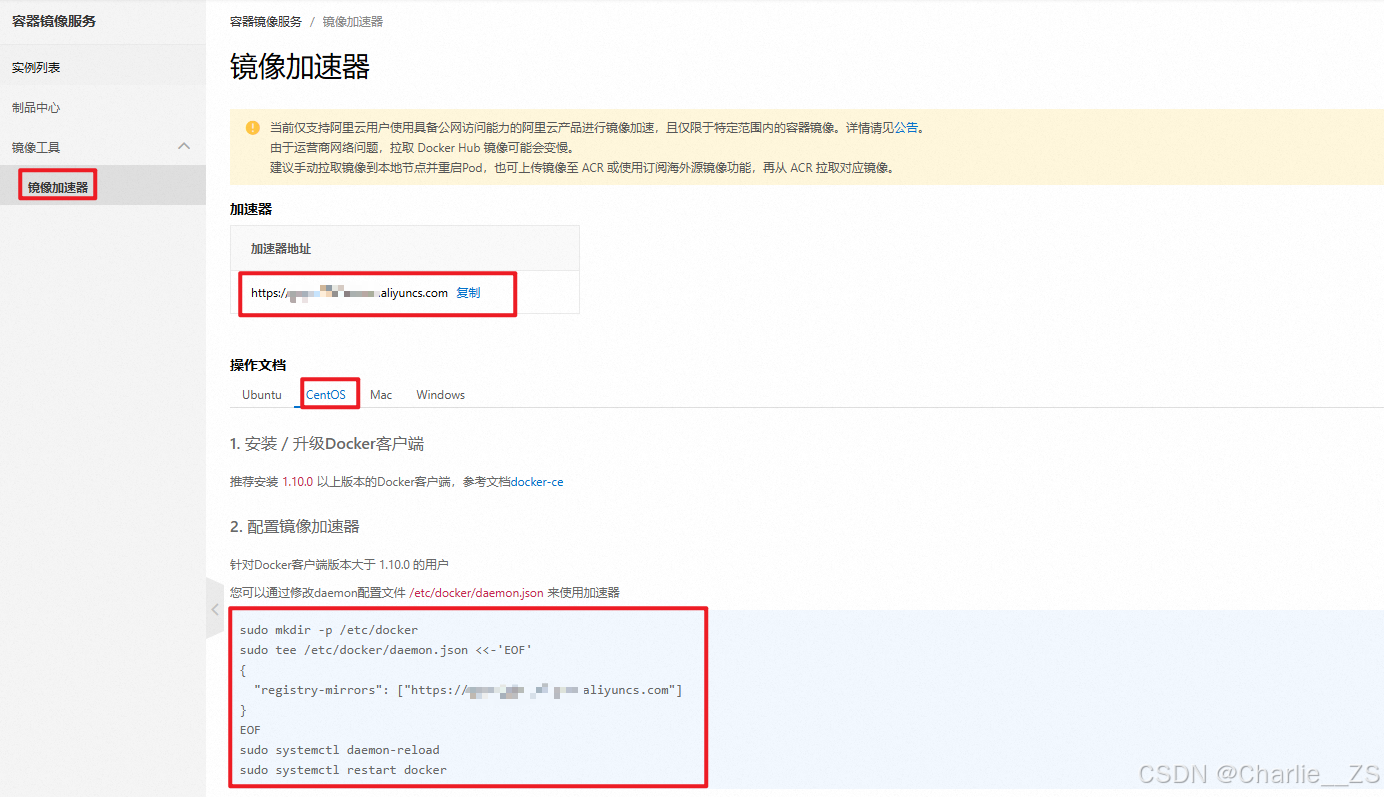
具体命令如下:
Bash
# 创建目录
mkdir -p /etc/docker

# 复制内容,注意把其中的镜像加速地址改成你自己的
tee /etc/docker/daemon.json <<-'EOF'
{
  "registry-mirrors": ["https://xxxx.mirror.aliyuncs.com"]
}
EOF

# 重新加载配置
systemctl daemon-reload

# 重启Docker
systemctl restart docker