
目录
[Spring、Spring Boot和Spring MVC的关系及差别](#Spring、Spring Boot和Spring MVC的关系及差别)
前言
在前面中,我们讲解了Spring MVC是什么以及如何使用。那么本篇我们就来讲Spirng Framework,我们一般讲的Spring就指的是Spring Framework。
在前面中,我们已经讲解了什么是Spring,IOC和AOP是Spring框架的核心思想。
本篇我们主要讲IOC容器的使用。
想了解什么是Spirng可以看这篇【Spring】什么是Spring?-CSDN博客
回顾一下IOC和DI。
IOC(控制反转)是Spring框架中的核心思想。
控制反转(Inversion of Control,IoC)是一种设计思想 ,其核心是将对象的创建和管理的控制权从使用方(客户端)转移到一个专门的容器(如Spring容器)
在软件开发中,传统设计都是将对象的创建和管理交给使用方来进行创建;而Ioc则是将对象的创建和管理交给IOC,在需要使用的时候,我们只需要告诉Ioc容器所需的对象,那么它就可以为我们创建好。
Ioc很好的让每个模块进行了解耦,实现了高内聚低耦合。
DI(Dependency Injection)依赖注入,是Ioc的一种具体方式,将对象的创建和管理权交给外部容器。依赖注入将对象的依赖关系通过外部容器注入的方式来传递给对象, 而不是让对象自己去创建或查找依赖。
IoC和DI的使用
通过前面的学习,相信对IoC和DI有初步的认识,那么接下来我们就来具体学习IoC和DI的代码实现。
既然Spring是一个IoC(控制反转)容器,作为容器,那么就具备两个功能:存和取。
Sring容器管理的主要是对象,这些对象,我们称为"Bean",把这些对象交给Spring管理,由Spring来负责对象的创建和销毁,我们只需要告诉Spring,哪些要存,以及如何从Spring中取出对象。
那么在Spring中如何存取Bean?
- 将类存储进Spring Ioc容器我们需要通过 @Component注解(不止这个)。
- 取出对象需要使用注解 @Autowired。
示例:
java
package com.example.demo.model;

import org.springframework.stereotype.Component;

@Component
public class UserInfo {
    private String userName;
    public void hi(){
        System.out.println("hi");
    }
}
java
package com.example.demo.component;
import com.example.demo.model.UserInfo;
import org.springframework.beans.factory.annotation.Autowired;
import org.springframework.web.bind.annotation.RequestMapping;
import org.springframework.web.bind.annotation.RestController;
@RequestMapping("/user")
@RestController
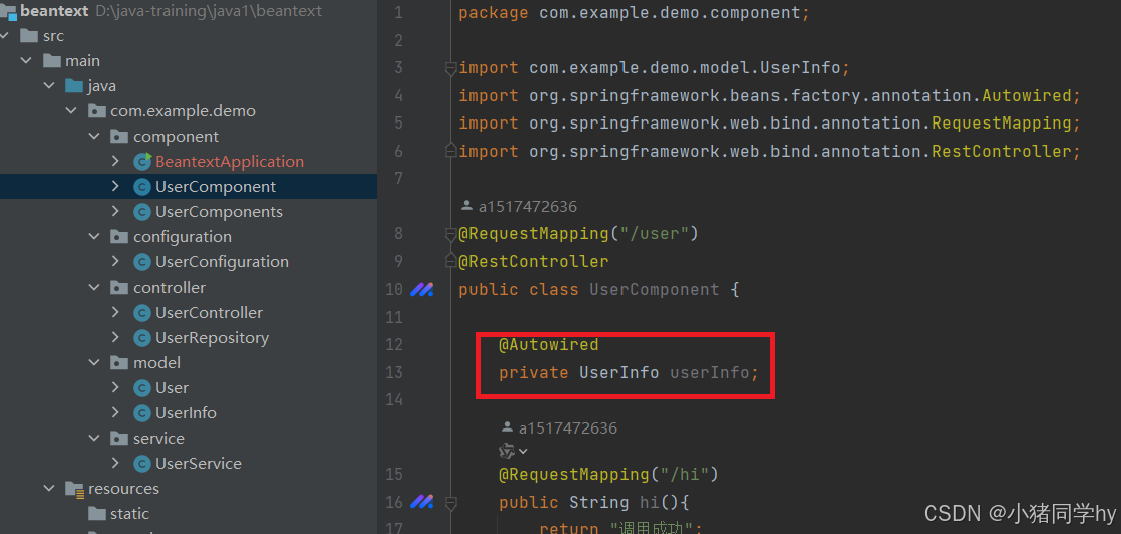
public class UserComponent {
@Autowired
private UserInfo userInfo;
@RequestMapping("/hi")
public String hi(){
userInfo.hi();
return "调用成功";
}
}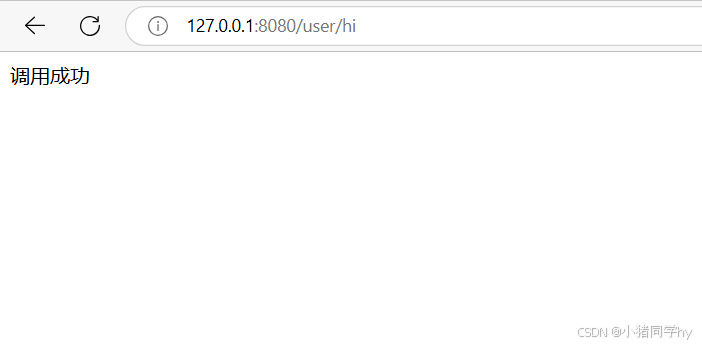

可以看到,确实能显现出我们想要的结果,说明这两个注解能够实现堆Bean的存取。
注意:我们在使用 @Autowired 注解时,需要使用该注解的类有 @Controller 注解修饰 ,要使用Spring的IoC容器,就要保证这个类是由Spring管理的。
以上展示的就是Ioc和DI的基本使用,接下来,我们来深入学习IoC和DI。
IoC详解
Bean存储
在前面的案例中,我们要把某个对象交给 IoC 容器管理,那么就需要在类上添加一个注解:@Component。而Spring框架为了更好的服务Wen应用程序,提供了丰富的注解。
共有两类注解类型可以实现:
- 类注解 :@Controller、@Service、@Repository、@Component、@Configuration
- 方法注解 :@Bean
我们先来讲下类注解。
@Controller(控制器存储)
使用 @Controller 存储Bean:
java
package com.example.demo.controller;
import org.springframework.stereotype.Controller;
@Controller
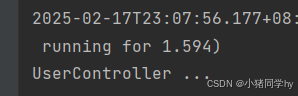
public class UserController {
public void say(){
System.out.println("UserController ...");
}
}既然我们已经将Bean存储到IoC容器中了,那么如何获取Bean?
获取Bean
先上代码:
java
@SpringBootApplication
public class BeantextApplication {

	public static void main(String[] args) {
	    // 启动Spring Boot应用,并将应用上下文注入到变量context中
	    ApplicationContext context=SpringApplication.run(BeantextApplication.class, args);

	    // 从应用上下文中获取UserController bean的实例
	    UserController bean = context.getBean(UserController.class);

	    // 调用UserController实例的say方法,执行相关逻辑
	    bean.say();
	}

}
代码是由 @SpringBootApplication 注解修饰的类中写的,并且我们用 ApplicationContext接口来接收run()方法的返回值。
当我们运行一个带有 @SpringBootApplication 注解修饰的类,会启动Spring项目,并且SpringApplication.run() 是有返回值的,这个返回值可以接收,也可以不接收。
那为什么能用 ApplicationContext 类来接收?为什么要用这个类?
我们可以先查看一下run()方法的返回值是什么:
我们可以看到,run()的返回值类型是一个 ConfigurableApplicationContext接口,那这个接口内部是什么样?
可以看到, ConfigurableApplicationContext 接口 是 ApplicationContext 接口 的一个子接口,根据java的多态性,子接口的实例可以被父接口类型接收,因此这里可以用 ApplicationContext来接收。
至于为什么要使用该接口?
ApplicationContext 是Spring框架中管理Bean的核心接口,提供了访问Spring容器中所有Bean的基本功能,几乎所有与Spring 容器的交互都可以通过 ApplicationContext 完成。
而在此处,我们是要获取Bean,那就需要使用 ApplicationContext 。


在BeanFactory在,我们可以看到getBean() 方法,顾名思义这个方法就是用来获取Bean的。
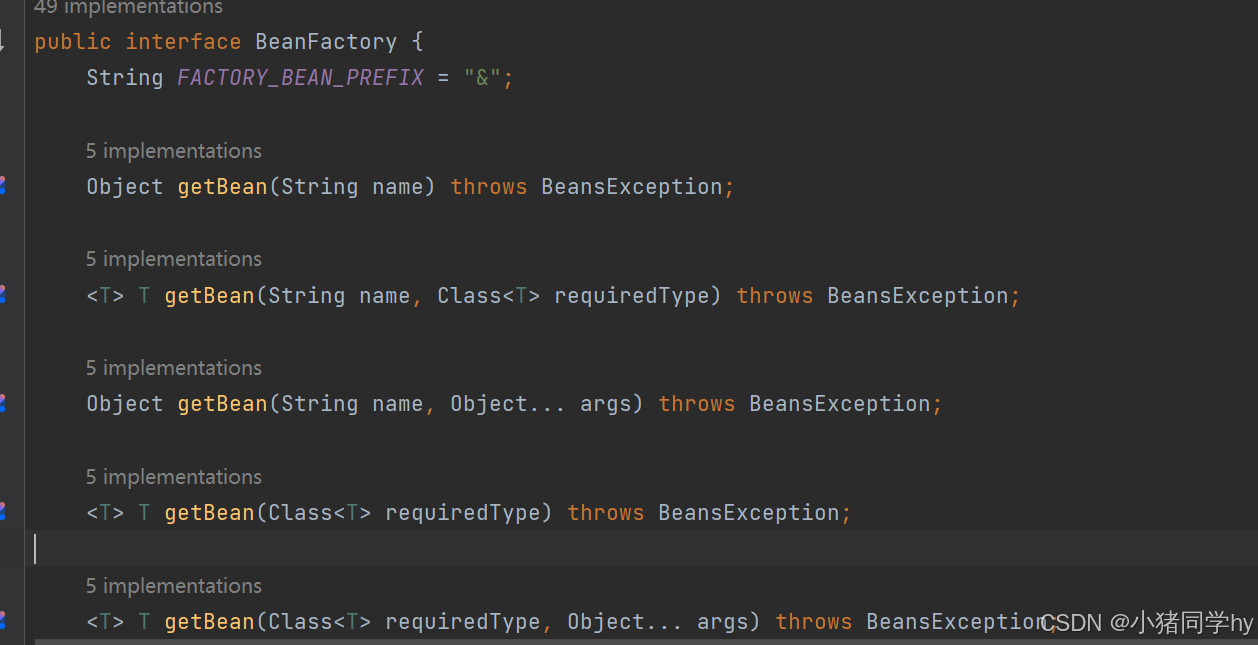
在这里,我们只介绍1、2、4种。
根据Bean类型获取Bean
在上面中,我们就是根据Bean的类型来获取到Bean。
这种方式是Sprinig利用反射机制实现的。Spring能通过类型找到对应的Bean,是因为在容器初始化的时候,Spring会通过反射机制扫描并注册所有Bean的定义信息。
反射是Spring实现依赖注入和Bean管理的核心技术,允许Spring在运行时动态地创建对象、访问和修改对象的字段、调用对象的方法。
java
@SpringBootApplication
public class BeantextApplication {

	public static void main(String[] args) {
	    // 启动Spring Boot应用,并将应用上下文注入到变量context中
	    ApplicationContext context=SpringApplication.run(BeantextApplication.class, args);

	    // 从应用上下文中获取UserController bean的实例
	    UserController bean = context.getBean(UserController.class);

	    // 调用UserController实例的say方法,执行相关逻辑
	    bean.say();
	}

}
根据Bean名称获取Bean
Bean名称应该如何写?
我们可以看下官方回答:
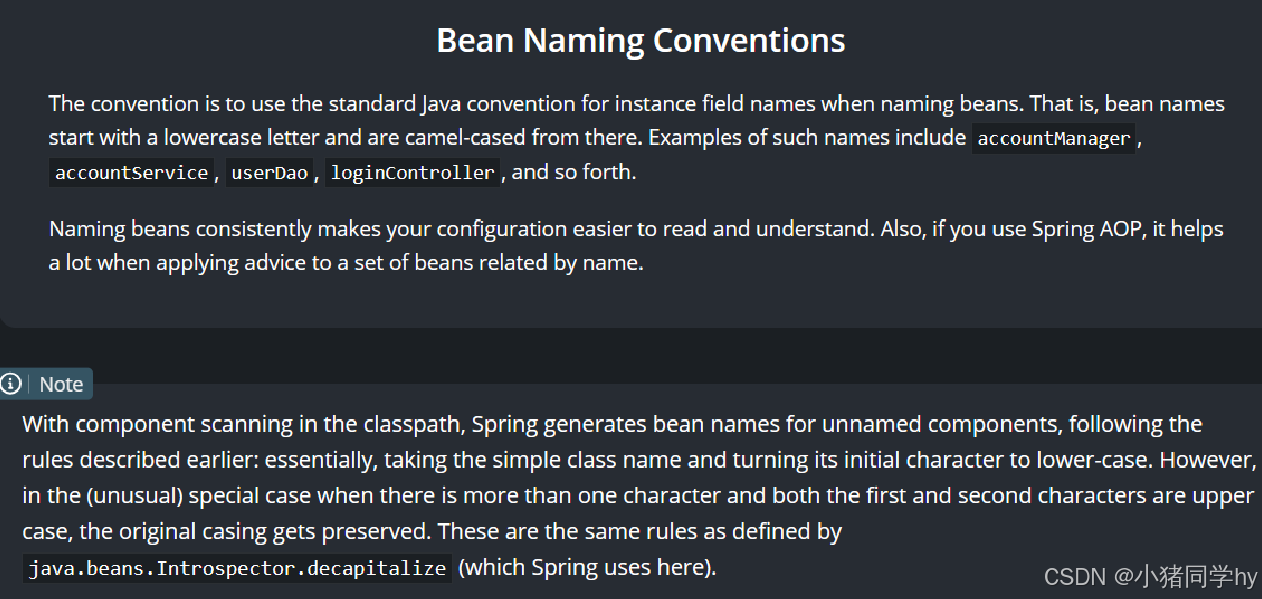


简单来说,就是如果类名前两个字母中大写字母个数小于2(也就是只有首字母大写),那么该类在交给Ioc后,就会以第一个字母小写的小驼峰形式命名,当类名前两个字母都大写,那么该类型就作Bean名称。
java
public static void main(String[] args) {
	    // 启动Spring Boot应用,并将应用上下文注入到变量context中
	    ApplicationContext context=SpringApplication.run(BeantextApplication.class, args);

	    // 从应用上下文中获取UserController bean的实例
		UserController bean = (UserController) context.getBean("userController");

	    // 调用UserController实例的say方法,执行相关逻辑
	    bean.say();
	}
根据Bean的名称和Bean类型获取Bean
java
public static void main(String[] args) {
	    // 启动Spring Boot应用,并将应用上下文注入到变量context中
	    ApplicationContext context=SpringApplication.run(BeantextApplication.class, args);

	    // 从应用上下文中获取UserController bean的实例
		UserController bean = (UserController) context.getBean("userController", UserController.class);

	    // 调用UserController实例的say方法,执行相关逻辑
	    bean.say();
	}
@Service(业务逻辑)
这个注解也可以存储Bean。
java
package com.example.demo.service;

import org.springframework.stereotype.Service;

@Service
public class UserService {
    public void say(){
        System.out.println("UserService say");
    }
}
读取:
java
public static void main(String[] args) {
	    // 启动Spring Boot应用,并将应用上下文注入到变量context中
	    ApplicationContext context=SpringApplication.run(BeantextApplication.class, args);

		UserService userService = (UserService) context.getBean("userService");
		userService.say();

	}
@Repository(仓库存储)
java
package com.example.demo.controller;

import org.springframework.stereotype.Repository;

@Repository
public class UserRepository {
    public void say() {
        System.out.println("UserRepository say");
    }
}
java
	public static void main(String[] args) {
	    // 启动Spring Boot应用,并将应用上下文注入到变量context中
	    ApplicationContext context=SpringApplication.run(BeantextApplication.class, args);

		UserRepository userRepository = (UserRepository)context.getBean("userRepository");
		userRepository.say();
    }
@Component(组件存储)
java
package com.example.demo.component;

import org.springframework.stereotype.Component;

@Component
public class UserComponents {
    public void say() {
        System.out.println("UserComponents say");
    }
}
java
public static void main(String[] args) {
	    // 启动Spring Boot应用,并将应用上下文注入到变量context中
	    ApplicationContext context=SpringApplication.run(BeantextApplication.class, args);
		UserComponents bean = context.getBean(UserComponents.class);
		bean.say();
    }
@Configuration(配置存储)
java
package com.example.demo.configuration;

import org.springframework.context.annotation.Configuration;

@Configuration
public class UserConfiguration {
    public void say() {
        System.out.println("UserConfiguration");
    }
}
java
	public static void main(String[] args) {
	    // 启动Spring Boot应用,并将应用上下文注入到变量context中
	    ApplicationContext context=SpringApplication.run(BeantextApplication.class, args);
		UserConfiguration bean = context.getBean(UserConfiguration.class);
		bean.say();
    }
额外小话题
下面的代码在最后判断对象是否相等?那会不会相等呢?
java
	public static void main(String[] args) {
	    // 启动Spring Boot应用,并将应用上下文注入到变量context中
	    ApplicationContext context=SpringApplication.run(BeantextApplication.class, args);
		UserConfiguration bean = context.getBean(UserConfiguration.class);
		bean.say();

		UserConfiguration bean1 = (UserConfiguration) context.getBean("userConfiguration");
		bean1.say();

		UserConfiguration bean2 = context.getBean("userConfiguration", UserConfiguration.class);
		bean2.say();

		System.out.println(bean);
		System.out.println(bean1);
		System.out.println(bean2);
		System.out.println(bean == bean1);
		System.out.println(bean == bean2);
}
我们来看下结果:
 我们可以看到,利用三种方法获取Bean,但最后返回的都是同一个实例,这是因为Spring中,默认情况下,Bean的作用域是单例。
为什么要有这么多类注解?
这个和前面讲的应用分层相呼应的,当开发者看到类注解的时候,就能直接了解当前类的用途。
- @Controller:控制层,接收请求,对请求进⾏处理,并进⾏响应
- @Servie:业务逻辑层,处理具体的业务逻辑
- @Repository:数据访问层,也称为持久层.负责数据访问操作
- @Configuration:配置层.处理项⽬中的⼀些配置信息

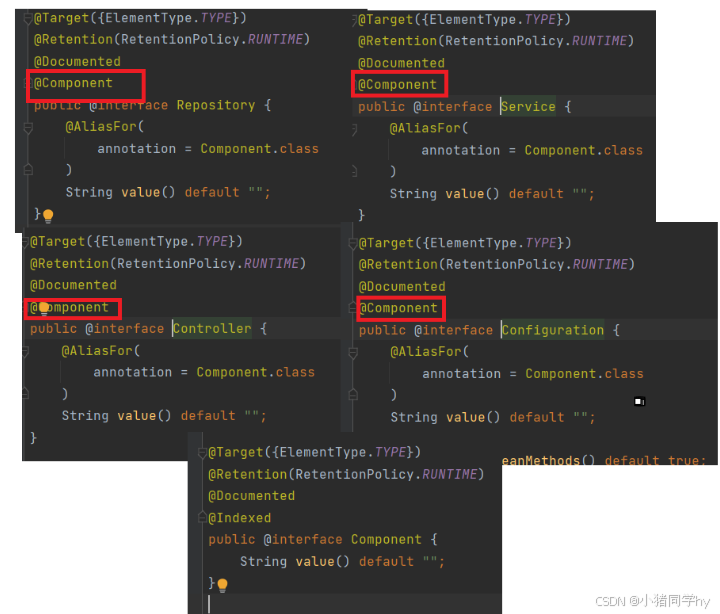
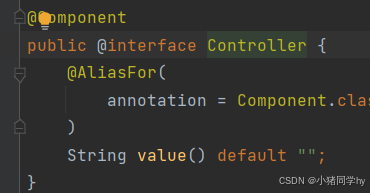
我们可以看到,@Component都有在其他四个注解中,说明@Component 是其他注解的"父类",即其他注解是@Component注解的衍生注解。
不过其他四个注解用于更具体的用例,如三层结构,@Controller对应控制层、@Service对于业务逻辑层、@Repository对应持久层。
方法注解
类注解是加上类上的,但是存在两个问题:
- 使用外部包里的类,没有办法添加类注解;
- 一个类,需要多个对象,比如多个数据源。
对于这种场景,我们就需要用方法注解@Bean。
我们假设User类是一个外包中的类,不能加类注解,所以这就需要使用方法注解。
java
package com.example.demo.model;

import lombok.Data;

@Data
public class User {
    private String name;
    private int age;
}
java
package com.example.demo.controller;
import com.example.demo.model.User;
import org.springframework.context.annotation.Bean;
public class UserController {
@Bean
public User user(){
User user = new User();
user.setName("张三");
user.setAge(18);
return user;
}
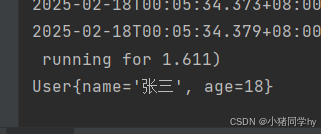
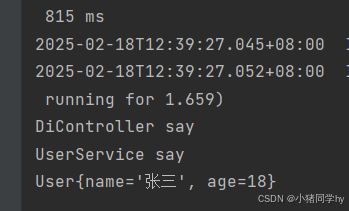
}测试一下代码:

可以看到报了异常说没有找到Bean,这是因为UserController没有加类注解,Spring没有扫描到。所以要加上类注解:
java
package com.example.demo.controller;

import com.example.demo.model.User;
import org.springframework.context.annotation.Bean;
import org.springframework.stereotype.Controller;

@Controller
public class UserController {

    @Bean
    public User user(){
        User user = new User();
        user.setName("张三");
        user.setAge(18);
        return user;
    }
}
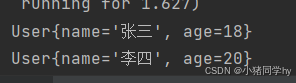
同一个类创建多个对象
在前面中,我们已经知道了在Spring容器中,Bean默认是单例,那么如果想要获取多个Bean,应该如何做?
在使用@Bean时指定Bean名称,这里的名称是方法名称。
java
package com.example.demo.controller;

import com.example.demo.model.User;
import org.springframework.context.annotation.Bean;
import org.springframework.stereotype.Controller;

@Controller
public class UserController {

    @Bean
    public User user(){
        User user = new User();
        user.setName("张三");
        user.setAge(18);
        return user;
    }

    @Bean("user1")
    public User user1(){
        User user = new User();
        user.setName("李四");
        user.setAge(20);
        return user;
    }
}
此外,我们观察@Bean注解的属性,可以看到:
name字段是一个字符串数组,说明一个Bean可以有多个名称。
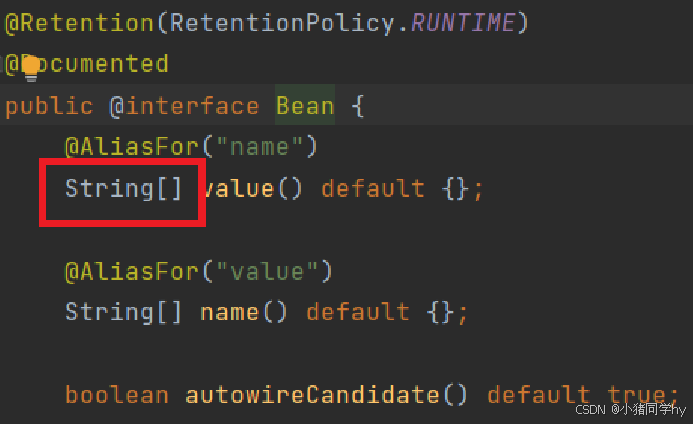
例如:
java
@Bean(name={"user1","lisi"})需要注意:有多个名称的情况下,需要用大括号括起来,并指定字段。
当然,类注解也可以指定名称,但只能指定一个。
扫描路径
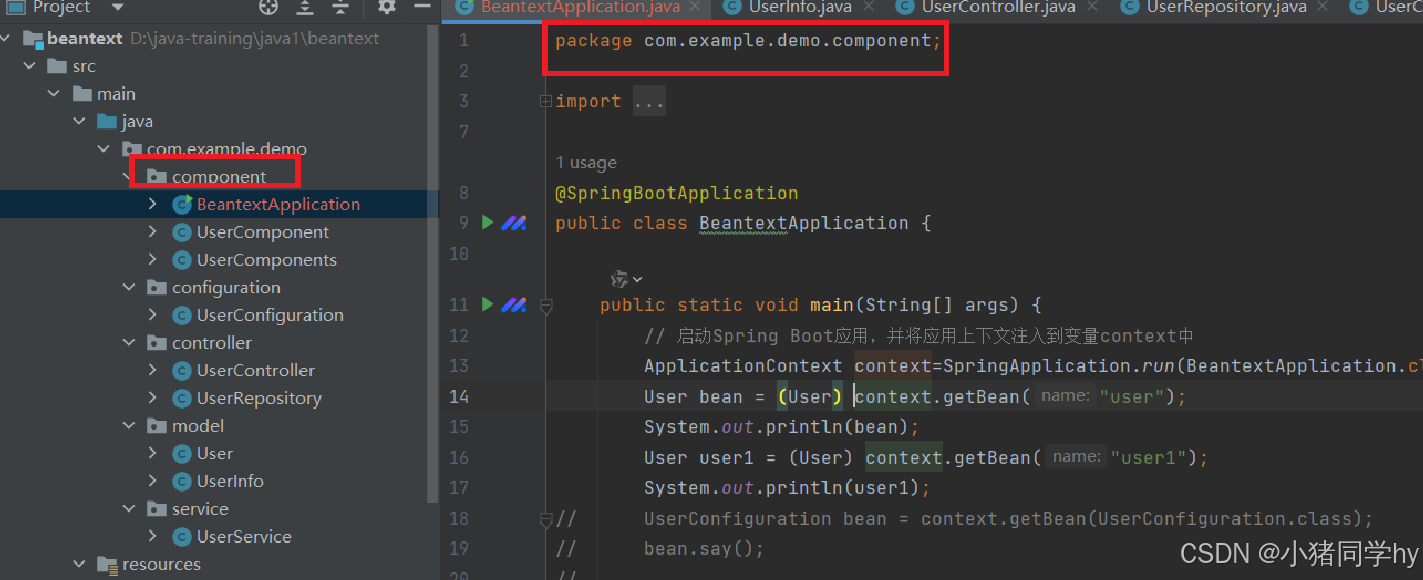
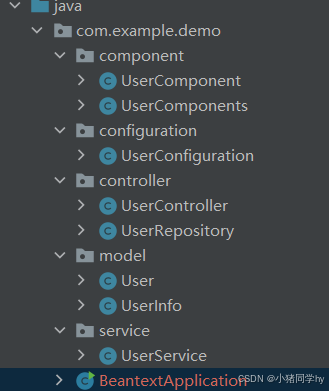
在项目中,不是所有的文件都会被扫描的,只有在 @SpringBootApplication注解所在的包中才会被扫描。
假如我们把 @SpringBootApplication的类移动一下。
 运行一下:
运行一下:
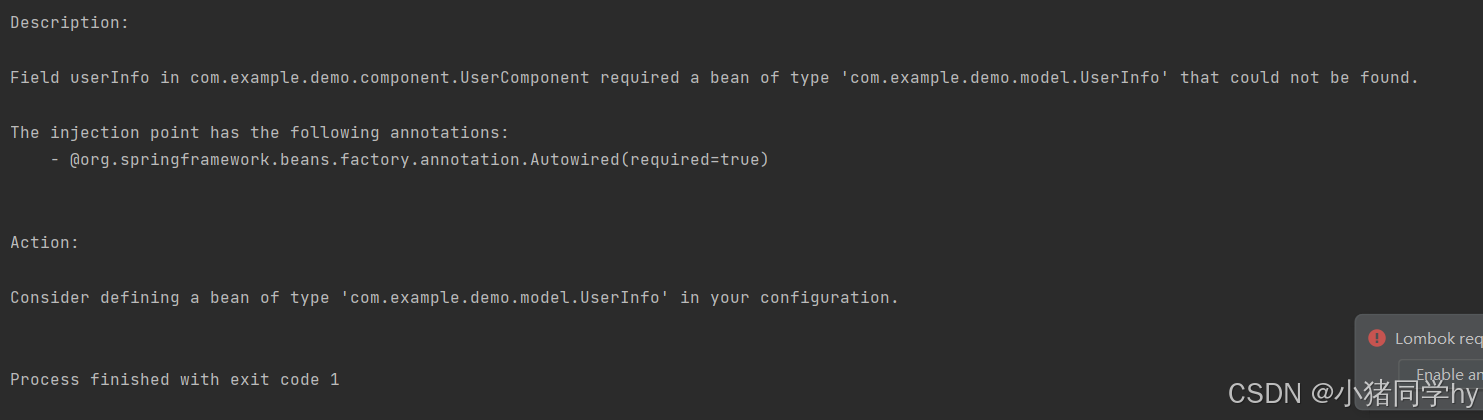
该错误是由于Spring容器无法找到类型为com.example.demo.model.UserInfo的Bean,导致依赖注入失败。具体来说,UserComponent类中的userInfo字段需要一个UserInfo类型的Bean,但Spring上下文中没有定义该Bean。
这是因为UserInfo类没有被扫描的,因为UserInfo类不在SpringBoot启动类所在的包中。所以无法注入。
默认扫描的范围是SpringBoot启动类所在包以及其子包
推荐:把启动类放在我们希望扫描的包的路径下,这样我们定义的Bean就都能被扫描到。
DI详解
依赖注入是一个过程,指IoC容器在创建Bean时,去提供运行时所依赖的资源,而资源指的就是对象。在前面IoC学习中,我们使用了 @Autowired 注解来完成注入。
对于依赖注入,Spring给我们提供了三种方式:
- 属性注入(Field Injection)
- 构造方法注入(Constructor Injection)
- Setter 注入(Setter Injection)
属性注入
属性注入是用 @Autowired 实现的,直接在属性上加上该注解。
java
package com.example.demo.service;

import org.springframework.stereotype.Service;

@Service
public class UserService {
    public void say(){
        System.out.println("UserService say");
    }
}
java
package com.example.demo.controller;

import com.example.demo.service.UserService;
import org.springframework.beans.factory.annotation.Autowired;
import org.springframework.stereotype.Controller;

@Controller
public class DiController {
    //属性注入
    @Autowired
    private UserService userService;

    public void say(){
        System.out.println("DiController say");
        userService.say();
    }
}
测试一下;
java
	public static void main(String[] args) {
	    // 启动Spring Boot应用,并将应用上下文注入到变量context中
	    ApplicationContext context=SpringApplication.run(BeantextApplication.class, args);
		DiController bean = context.getBean(DiController.class);
		bean.say();
    }
构造方法注入
java
package com.example.demo.controller;

import com.example.demo.service.UserService;
import org.springframework.beans.factory.annotation.Autowired;
import org.springframework.stereotype.Controller;

@Controller
public class DiController {
    //属性注入
//    @Autowired
    private UserService userService;

    //构造方法注入
    public DiController(UserService userService){
        this.userService = userService;
    }
    public void say(){
        System.out.println("DiController say");
        userService.say();
    }
}
注意:如果类中只有一个构造方法,那么 @Autowired 注解就可以省略,但如果类中有多个构造方法,那么就需要用 @Autowired 来明确要使用哪个构造方法。
java
package com.example.demo.controller;

import com.example.demo.service.UserService;
import org.springframework.beans.factory.annotation.Autowired;
import org.springframework.stereotype.Controller;

@Controller
public class DiController {
    //属性注入
//    @Autowired
    private UserService userService;

    public DiController(){
        System.out.println("DiController 构造函数");
    }

    @Autowired
    public DiController(UserService userService){
        this.userService = userService;
    }
    public void say(){
        System.out.println("DiController say");
        userService.say();
    }
}
Setter方法注入
java
@Controller
public class DiController {
//属性注入
// @Autowired
private UserService userService;
//set注入
public void setUserService(UserService userService) {
this.userService = userService;
}
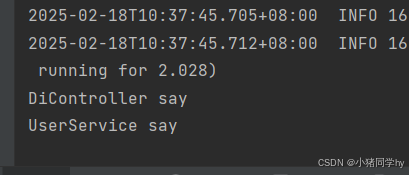
public void say(){
System.out.println("DiController say");
userService.say();
}
}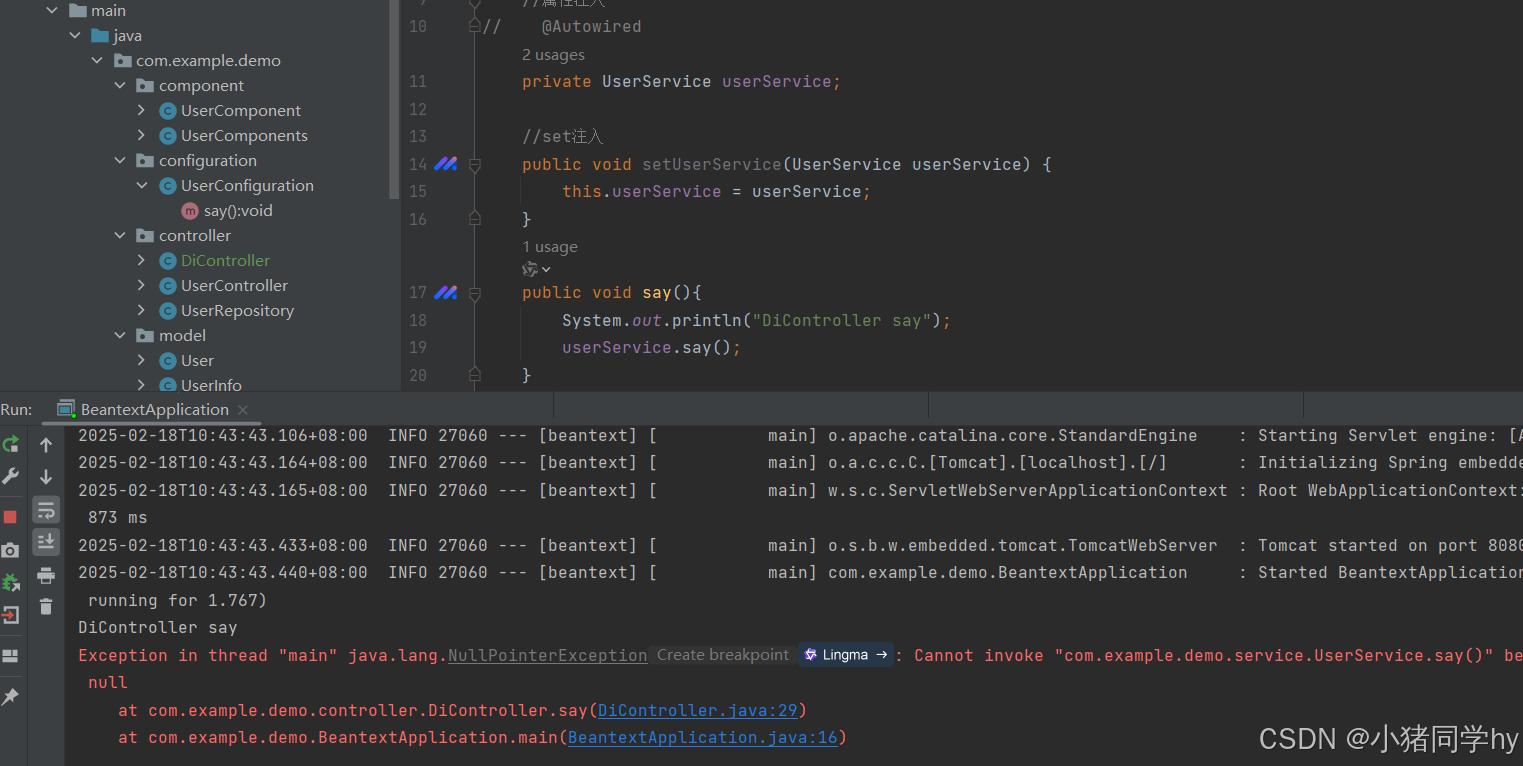
这里报错的原因是由于set方法没有被调用到,所以我们需要用 @Autowired注解修饰。
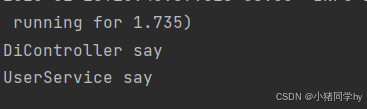
java
package com.example.demo.controller;

import com.example.demo.service.UserService;
import org.springframework.beans.factory.annotation.Autowired;
import org.springframework.stereotype.Controller;

@Controller
public class DiController {
    //属性注入
//    @Autowired
    private UserService userService;

    //set注入
    @Autowired
    public void setUserService(UserService userService) {
        this.userService = userService;
    }
    public void say(){
        System.out.println("DiController say");
        userService.say();
    }
}
三种注入方式的优缺点
- 属性注入 :
- 优点:简单,使用方便;
- 缺点:
- 只能用于IoC容器,如果是非IoC容器不可用,并且只有在使用的时候才会出现NPE(空指针异常);
- 不能注入一个Final修饰的属性
- 构造方法注入(Spring 4.X推荐):
- 优点:
- 可以注入final修饰的属性
- 注入的对象不会被修改
- 依赖对象在使用前一定会被完全初始化,因为依赖是在类的构造方法中执行的,而构造方法是在类加载阶段就会执行的方法。
- 通用性好,构造方法是JDK支持的,所以更换任何框架,都适用
- 缺点:注入多个对象时,代码会比较繁琐
- Setter注入(Spring 3.X推荐):
- 优点:方便在类实例后,重新对该对象进行配置或者注入
- 缺点:
- 不能注入一个Final修饰的属性;
- 注入对象可能会被改变,因为setter方法可能会被多次调用,就有被修改的风险
示例:
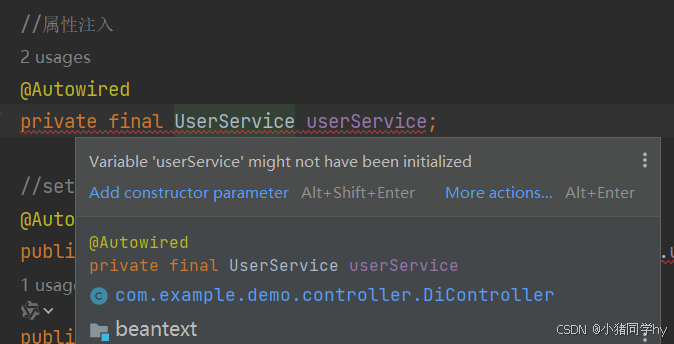
 为什么有final修饰的属性不能直接注入?
如果一个属性被final修饰,那么这个属性就变成了一个常量,不可被修改,而依赖注入的属性需要动态地修改属性的值,所以不能对final修饰的属性进行依赖注入。
但在构造方法中,final修饰的属性是可以被赋值的,这是因为构造方法是在对象创建时执行,此时final属性还没有被赋值,所以在构造方法中可以对final属性进行赋值。
总的来说**,final修饰的属性不能直接通过依赖注入赋值,是因为其不可变性和依赖注入的动态赋值机制相冲突**;但构造方法注入是一种合法且符合final语义的方案。
Autowired存在的问题
当同一个类类型存在多个Bean,使用 @Autowired 会存在问题。
java
package com.example.demo.controller;

import com.example.demo.model.User;
import org.springframework.context.annotation.Bean;
import org.springframework.stereotype.Controller;

@Controller
public class UserController {

    @Bean
    public User user1(){
        User user = new User();
        user.setName("张三");
        user.setAge(18);
        return user;
    }

    @Bean("u2")
    public User user2(){
        User user = new User();
        user.setName("李四");
        user.setAge(20);
        return user;
    }
}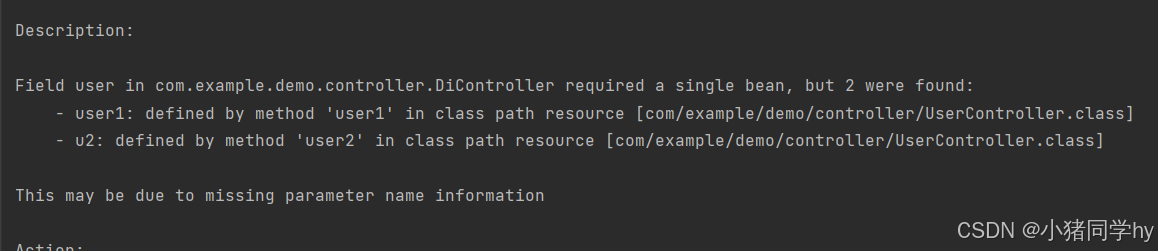
那么应该如何解决上面这种情况呢?
在下面有给出了建议:


在Spring中,提供了以下几种方法:
- @Primary
- @Qualifier
- @Resource
@Primary
使用该注解:当存在多个相同类型的Bean注入时,加上@Primary注解,来确定默认的实现。
java
package com.example.demo.controller;

import com.example.demo.model.User;
import org.springframework.context.annotation.Bean;
import org.springframework.context.annotation.Primary;
import org.springframework.stereotype.Controller;

@Controller
public class UserController {

    @Bean
    public User user1(){
        User user = new User();
        user.setName("张三");
        user.setAge(18);
        return user;
    }

    @Bean("u2")
    @Primary
    public User user2(){
        User user = new User();
        user.setName("李四");
        user.setAge(20);
        return user;
    }
}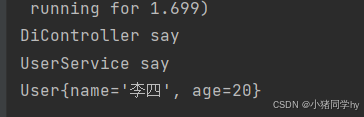
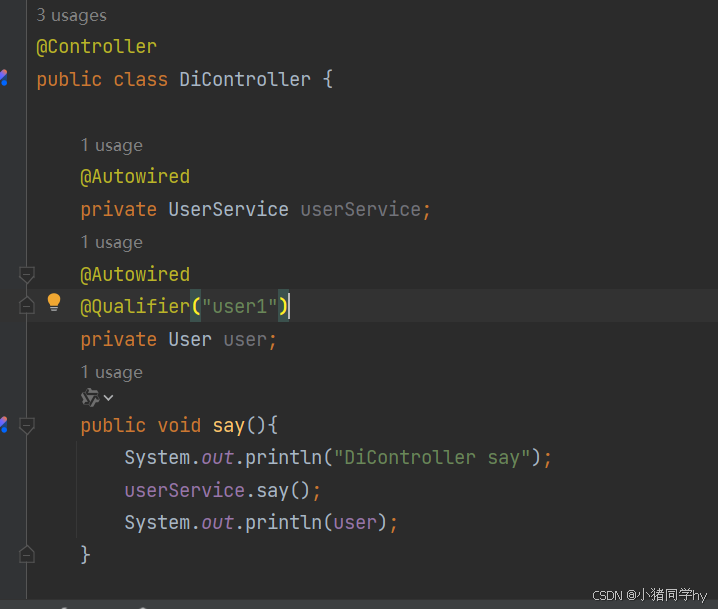
@Qualifier
@Qualifier注解:指定当前要注入的Bean对象,在@Qualifier的value属性中,指定要注入Bean的名称。
注意 :@Qualifier注解不能单独使用,必须配合@Autowired使用。
@Resource
@Resource:按照Bean的名称来进行注入。通过name属性来指定要注入的bean名称。
java
    @Resource(name = "user1")
    private User user;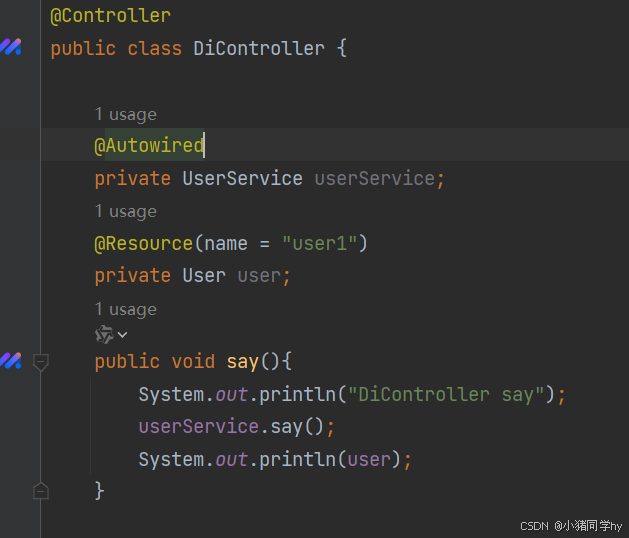

@Autowired自动装配流程图
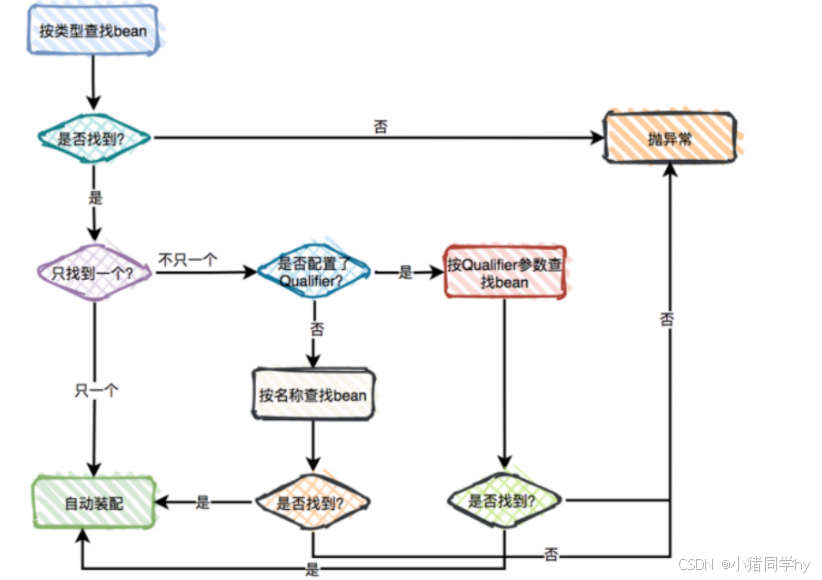
@Autowired和@Resouce的区别
- @Autowired 是spring框架提供的注解,⽽@Resource是JDK提供的注解
- @Autowired 默认是按照类型注⼊,⽽@Resource是按照名称注⼊。相⽐于 @Autowired 来说,@Resource 支持更多的参数设置,例如 name 设置,根据名称获取 Bean。
总结
Spring、Spring Boot和Spring MVC的关系及差别
区别
Spring :Spring是一个轻量级、一站式、模块化的开发应用框架,其目的是用于简化企业应用程序开发。
Spring MVC :Spring MVC是Spring的一个子框架,Spring诞生之后,那要如何使用?所以就需要提供接口,于是按照MVC设计模式设计了一个MVC框架(一些用Spring解耦的组件),主要用于Web开发和网络接口,简单来说,Spring MVC是一个Web框架。
Spring Boot :Spring Boot是对Spring的一个封装,为了简化Spring应用开发而出现的,使用Spring Boot能更加快速的搭建框架,降低成本,让开发者更加专注Spring应用开发,而无需过多关注XML的配置和一些底层实现。
关系
Spring的主要功能是管理对象,以及对象之间的依赖关系,AOP、数据库事务管理、数据访问、Wen框架等。
而Spring MVC是基于Spring开发的,与Spring框架集成,可以让我们更加简洁的进行Wen开发。
而Spring相当于一个脚手架,插拔式搭建项目,可以快速集成其他框架进来。
比如我们想要使用Spring Boot开发Web项目,那么只需要引入 Spring MVC即可,Wen开发的工作是Spring MVC完成的,而不是Spring Boot,想要完成数据访问,就只需要引入MyBatis框架。
用一句话总结:Spring MVC和Spring Boot都属于SprIng,Spring MVC是基于Spring的一个Web MVC框架,而Spring Boot是基于Spring的一套快速开发整合包。
Bean的命名
五大注解存储Bean
前两位字母均为大写,则Bean名称为类型
其他的为类名首字母小写
通过value属性设置,如@Controller(value="user")。
@Bean注解存储Bean
- bean名称为方法名
- 通过name属性设置
Spring中常见注解
- web url映射:@RequestMapping
- 参数接收和接口响应:@RequestParam、@RequestBody、@ResponseBody
- bean的存储:@Controller、@Service、@Repository、@Component、@Configuration、@Bean
- bean的获取:@Autowired、@Qualifier、@Resource

以上就是有关IoC和DI的相关知识。
若有不足,欢迎指正~