一部分来自1. 创建纹理贴图 | Three.js中文网 ,一部分是自己的总结。
一、创建纹理贴图
注意:把一张图片贴在模型上就是纹理贴图
1、纹理加载器TextureLoader
注意:将图片加载到加载器中
通过纹理贴图加载器TextureLoader的load()方法加载一张图片可以返回一个纹理对象Texture,纹理对象Texture可以作为模型材质颜色贴图.map属性的值。
javascript
const geometry = new THREE.PlaneGeometry(200, 100);
//纹理贴图加载器TextureLoader
const texLoader = new THREE.TextureLoader();
// .load()方法加载图像,返回一个纹理对象Texture
const texture = texLoader.load('./earth.jpg');
const material = new THREE.MeshLambertMaterial({
    // 设置纹理贴图:Texture对象作为材质map属性的属性值
    map: texture,//map表示材质的颜色贴图属性
});2、颜色贴图属性.map
也可以通过颜色贴图属性.map直接设置纹理贴图,和材质的参数设置一样。
javascript
material.map = texture;3、颜色贴图和color属性颜色值会混合
材质的颜色贴图属性.map设置后,模型会从纹理贴图上采集像素值,这时候一般来说不需要再设置材质颜色.color。.map贴图之所以称之为颜色贴图就是因为网格模型会获得颜色贴图的颜色值RGB。
颜色贴图map和color属性颜色值会混合。如果没有特殊需要,设置了颜色贴图.map,不用设置color的值,color默认白色0xffffff。
javascript
const material = new THREE.MeshBasicMaterial({
    color:'green',
    map:texture
})
4、测试不同几何体添加纹理贴图的效果
你可以尝试把颜色纹理贴图映射到不同的几何体上查看渲染效果,至于为什么映射效果不同,其实和UV坐标相关,具体可以关注下节课关于UV坐标的讲解
4.1、矩形
javascript
const geometry = new THREE.BoxGeometry(100, 100, 100); //长方体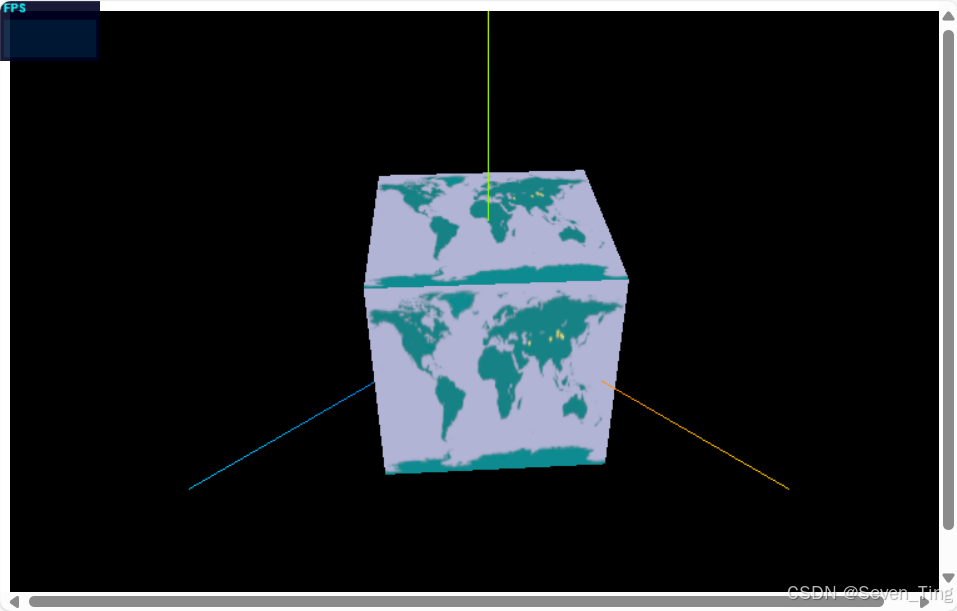
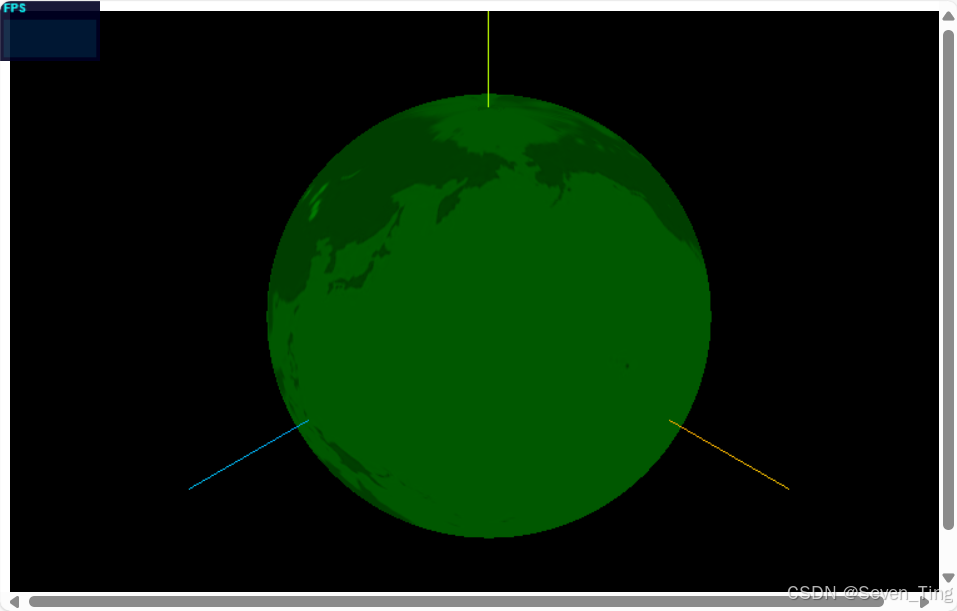
4.2、圆形
javascript
const geometry = new THREE.SphereGeometry(60, 25, 25); //球体
5、全部代码:
javascript
import * as THREE from 'three'

const geometry = new THREE.SphereGeometry(100,100,100)
const LoadTex = new THREE.TextureLoader();
const texture = LoadTex.load('./map.jpg')
const material = new THREE.MeshBasicMaterial({
    // color:'green'
    map:texture
})

const mesh = new THREE.Mesh(geometry,material)
export default mesh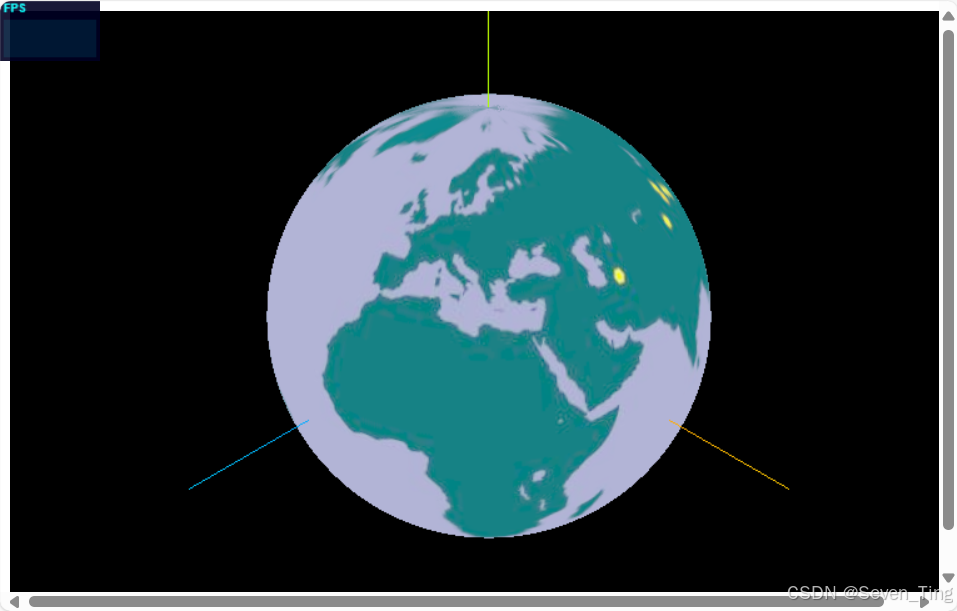
二、自定义顶点UV坐标
学习自定义顶点UV坐标之前,首先保证你对BufferGeometry的顶点数据、纹理贴图都有一定的理解。
1、顶点UV坐标的作用
顶点UV坐标的作用是从纹理贴图上提取像素映射到网格模型Mesh的几何体表面上。
浏览器控制台查看threejs几何体默认的UV坐标数据
javascript
const geometry = new THREE.PlaneGeometry(200, 100); //矩形平面
// const geometry = new THREE.BoxGeometry(100, 100, 100); //长方体
// const geometry = new THREE.SphereGeometry(100, 30, 30);//球体
console.log('uv',geometry.attributes.uv);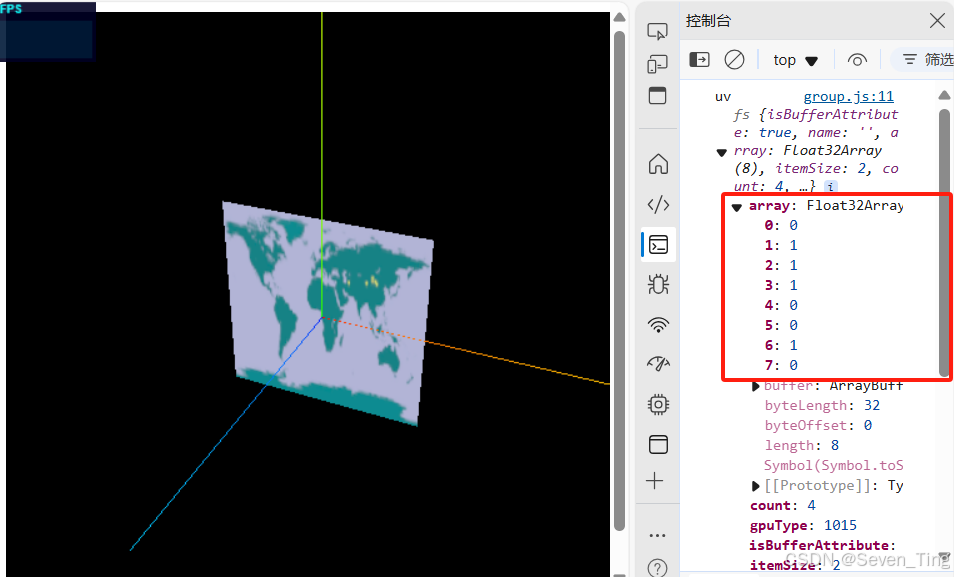
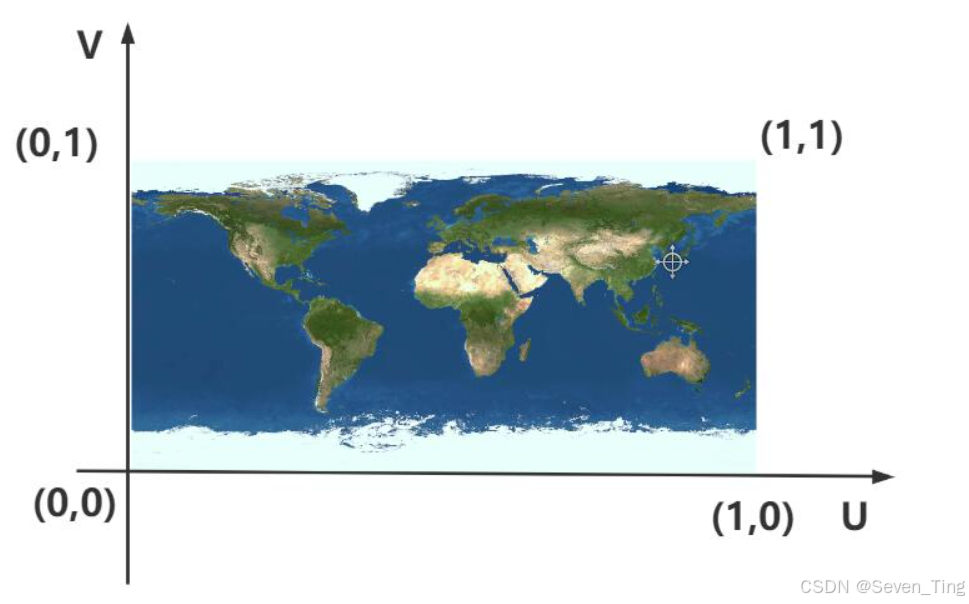
2、纹理贴图UV坐标范围
顶点UV坐标可以在0~1.0之间任意取值,纹理贴图左下角 对应的UV坐标是(0,0),右上角 对应的坐标(1,1)。
3、自定义顶点UVgeometry.attributes.uv
javascript
/**纹理坐标0~1之间随意定义*/
const uvs = new Float32Array([
    0, 0, //图片左下角
    1, 0, //图片右下角
    1, 1, //图片右上角
    0, 1, //图片左上角
]);
// 设置几何体attributes属性的位置normal属性
geometry.attributes.uv = new THREE.BufferAttribute(uvs, 2); //2个为一组,表示一个顶点的纹理坐标
4、获取纹理贴图四分之一
获取纹理贴图左下角四分之一部分的像素值
javascript
const uvs = new Float32Array([
    0, 0,
    0.5, 0,
    0.5, 0.5,
    0, 0.5,
]);
5、全部代码:
javascript
import * as THREE from 'three';

const geometry = new THREE.BufferGeometry();
const vertices = new Float32Array([
    0, 0, 0,
    100, 0, 0,
    100, 100, 0,
    0, 0, 0,
    100, 100, 0,
    0, 100, 0
])
const attribue = new THREE.BufferAttribute(vertices, 3);
geometry.attributes.position = attribue;

const uv = new Float32Array([
    0, 0,
    1, 0,
    1, 1,
    0, 0,
    1, 1,
    0, 1
])
geometry.attributes.uv = new THREE.BufferAttribute(uv, 2)

const LoadTex = new THREE.TextureLoader();
const texture = LoadTex.load('./map.jpg')
const material = new THREE.MeshBasicMaterial({
    // color: 'green',
    map: texture
})

const mesh = new THREE.Mesh(geometry, material)
export default mesh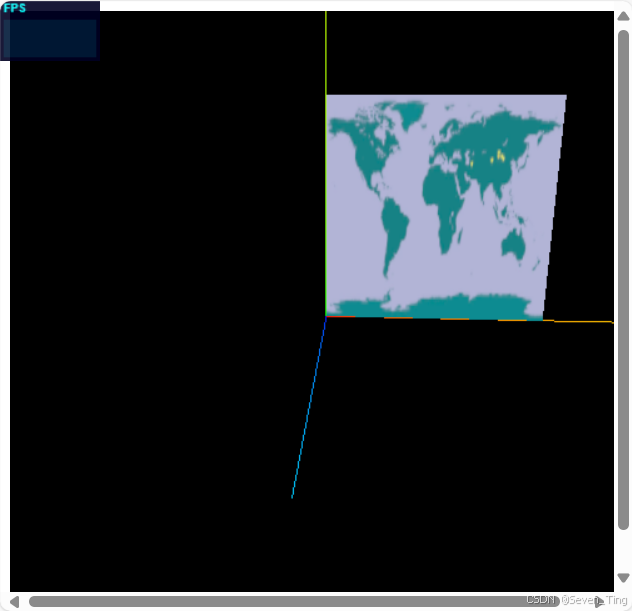
三、圆形平面设置纹理贴图
其实很简单,可以通过圆形几何体CircleGeometry创建一个网格模型Mesh,把一张图片作为圆形Mesh材质的颜色贴图,这样就可以把一张方形图片剪裁渲染为圆形效果。
javascript
import * as THREE from 'three';

const geometry = new THREE.CircleGeometry(100,100)

const LoadTex = new THREE.TextureLoader();
const texture = LoadTex.load('./map.jpg')
const material = new THREE.MeshBasicMaterial({
    // color: 'green',
    map: texture
})

const mesh = new THREE.Mesh(geometry, material)
export default mesh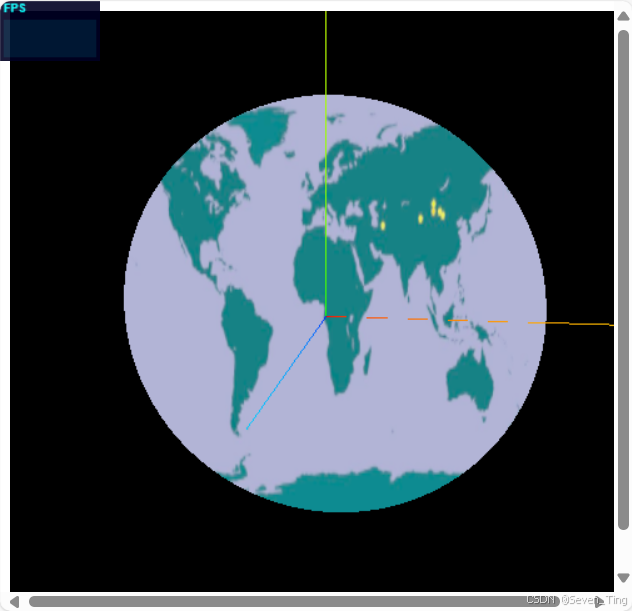
四、纹理对象Texture阵列
使用threejs纹理对象Texture的阵列功能+矩形平面几何体PlaneGeometry实现一个地面瓷砖效果
1、矩形平面设置颜色贴图
javascript
const geometry = new THREE.PlaneGeometry(2000, 2000);
//纹理贴图加载器TextureLoader
const texLoader = new THREE.TextureLoader();
// .load()方法加载图像,返回一个纹理对象Texture
const texture = texLoader.load('./瓷砖.jpg');
const material = new THREE.MeshLambertMaterial({
    // 设置纹理贴图:Texture对象作为材质map属性的属性值
    map: texture,//map表示材质的颜色贴图属性
});
const mesh = new THREE.Mesh(geometry, material);2、纹理对象Texture的阵列功能
javascript
// .load()方法加载图像,返回一个纹理对象Texture
const texture = texLoader.load('./瓷砖.jpg');
// 设置阵列模式
texture.wrapS = THREE.RepeatWrapping;
texture.wrapT = THREE.RepeatWrapping;
// uv两个方向纹理重复数量
texture.repeat.set(12,12);//注意选择合适的阵列数量
3、旋转矩形平面
注意旋转方向影响矩形平面背面还是正面朝上,threejs默认渲染正面,不渲染背面
javascript
// 旋转矩形平面
mesh.rotateX(-Math.PI/2);
5、全部代码
javascript
import * as THREE from 'three';

const geometry = new THREE.PlaneGeometry(2000, 2000)

const LoadTex = new THREE.TextureLoader();
const texture = LoadTex.load('./瓷砖.jpg')
//允许阵列
texture.wrapS = THREE.RepeatWrapping;
texture.wrapT = THREE.RepeatWrapping;

texture.repeat.set(12, 12)

const material = new THREE.MeshBasicMaterial({
    // color: 'green',
    map: texture
})

const mesh = new THREE.Mesh(geometry, material)
mesh.rotateX(-Math.PI/2)
export default mesh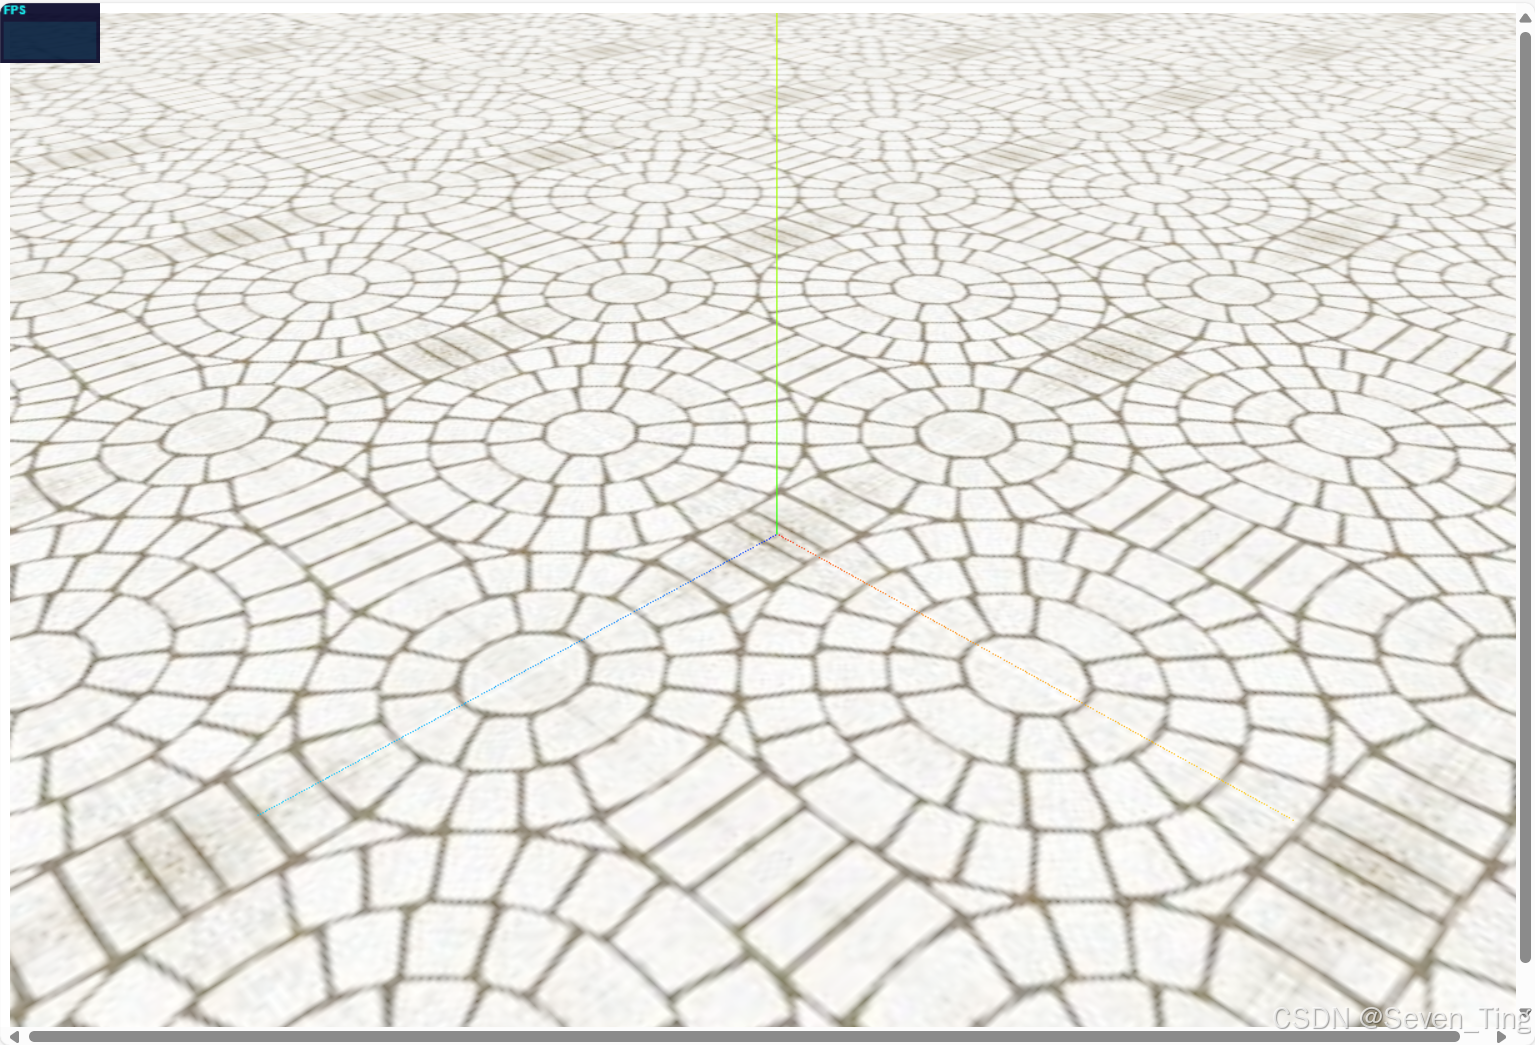
五、矩形Mesh+背景透明png贴图
three.js项目开发中,把一个背景透明的.png图像作为平面矩形网格模型Mesh的颜色贴图是一个非常有用的功能,通过这样一个功能,可以对three.js三维场景进行标注。
整体思路:创建一个矩形平面,设置颜色贴图.map,注意选择背景透明的.png图像作为颜色贴图,同时材质设置transparent: true,这样png图片背景完全透明的部分不显示。
javascript
// 矩形平面网格模型设置背景透明的png贴图
const geometry = new THREE.PlaneGeometry(60, 60); //默认在XOY平面上
const textureLoader = new THREE.TextureLoader();
const material = new THREE.MeshBasicMaterial({
    map: textureLoader.load('./指南针.png'),
    transparent: true, //使用背景透明的png贴图,注意开启透明计算
});
const mesh = new THREE.Mesh(geometry, material);
mesh.rotateX(-Math.PI / 2);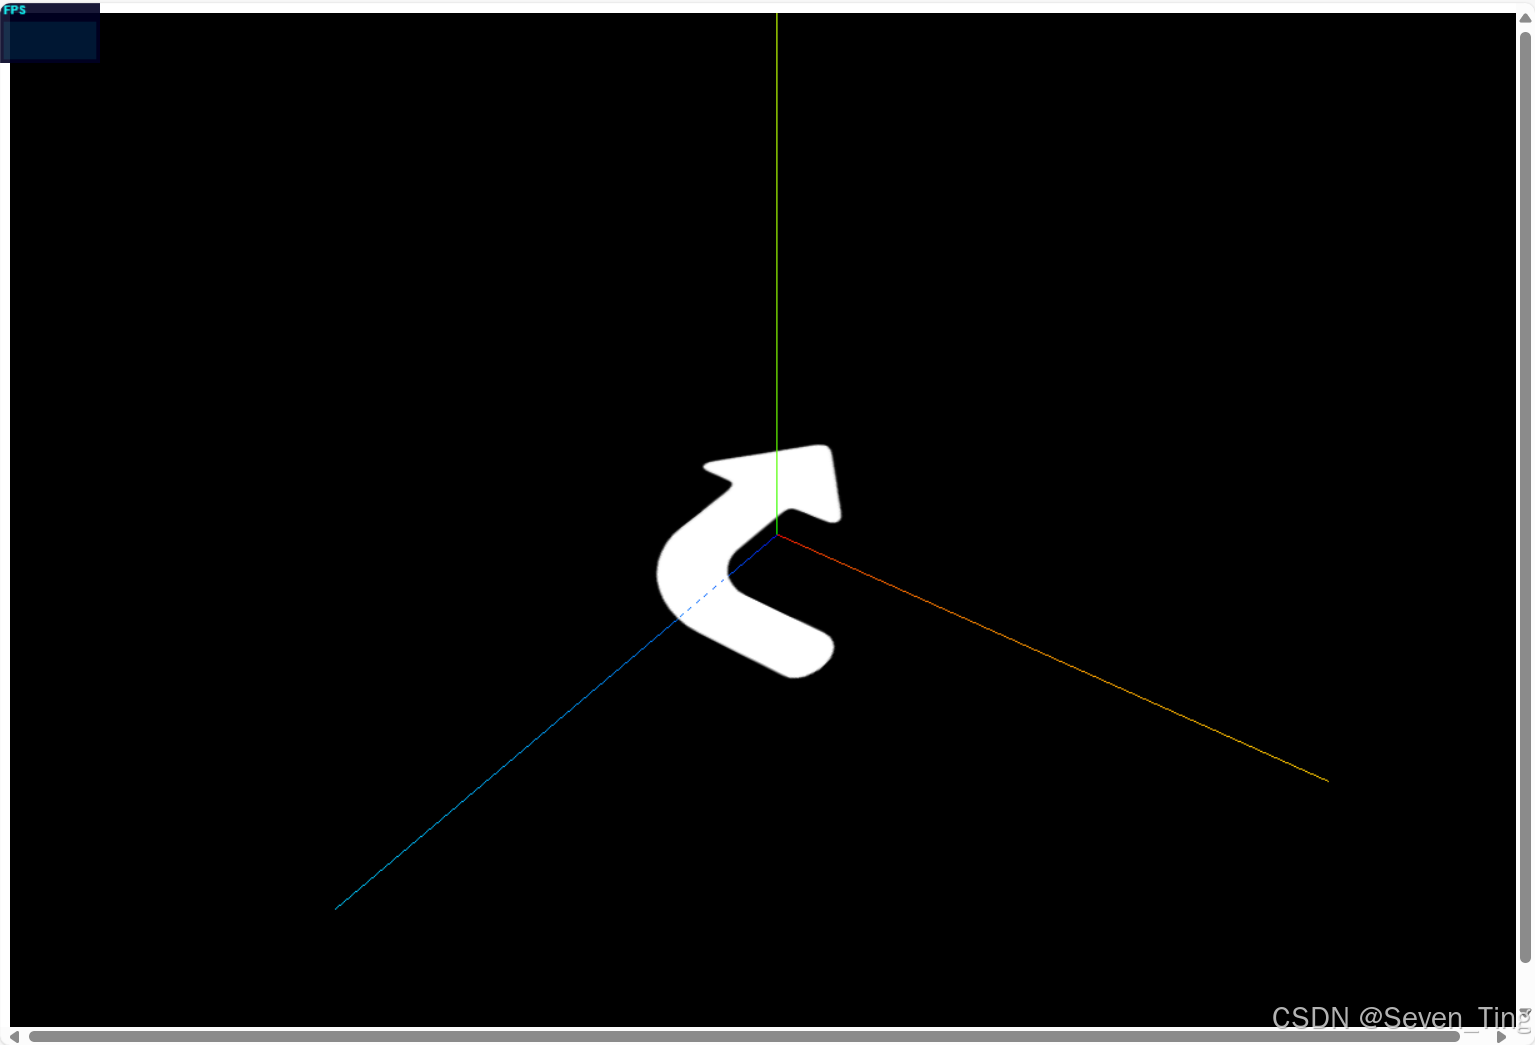
1、网格地面辅助观察GridHelper
javascript
//辅助网格线
const gridHelper = new THREE.GridHelper(500,25,'green','red')
scene.add(gridHelper)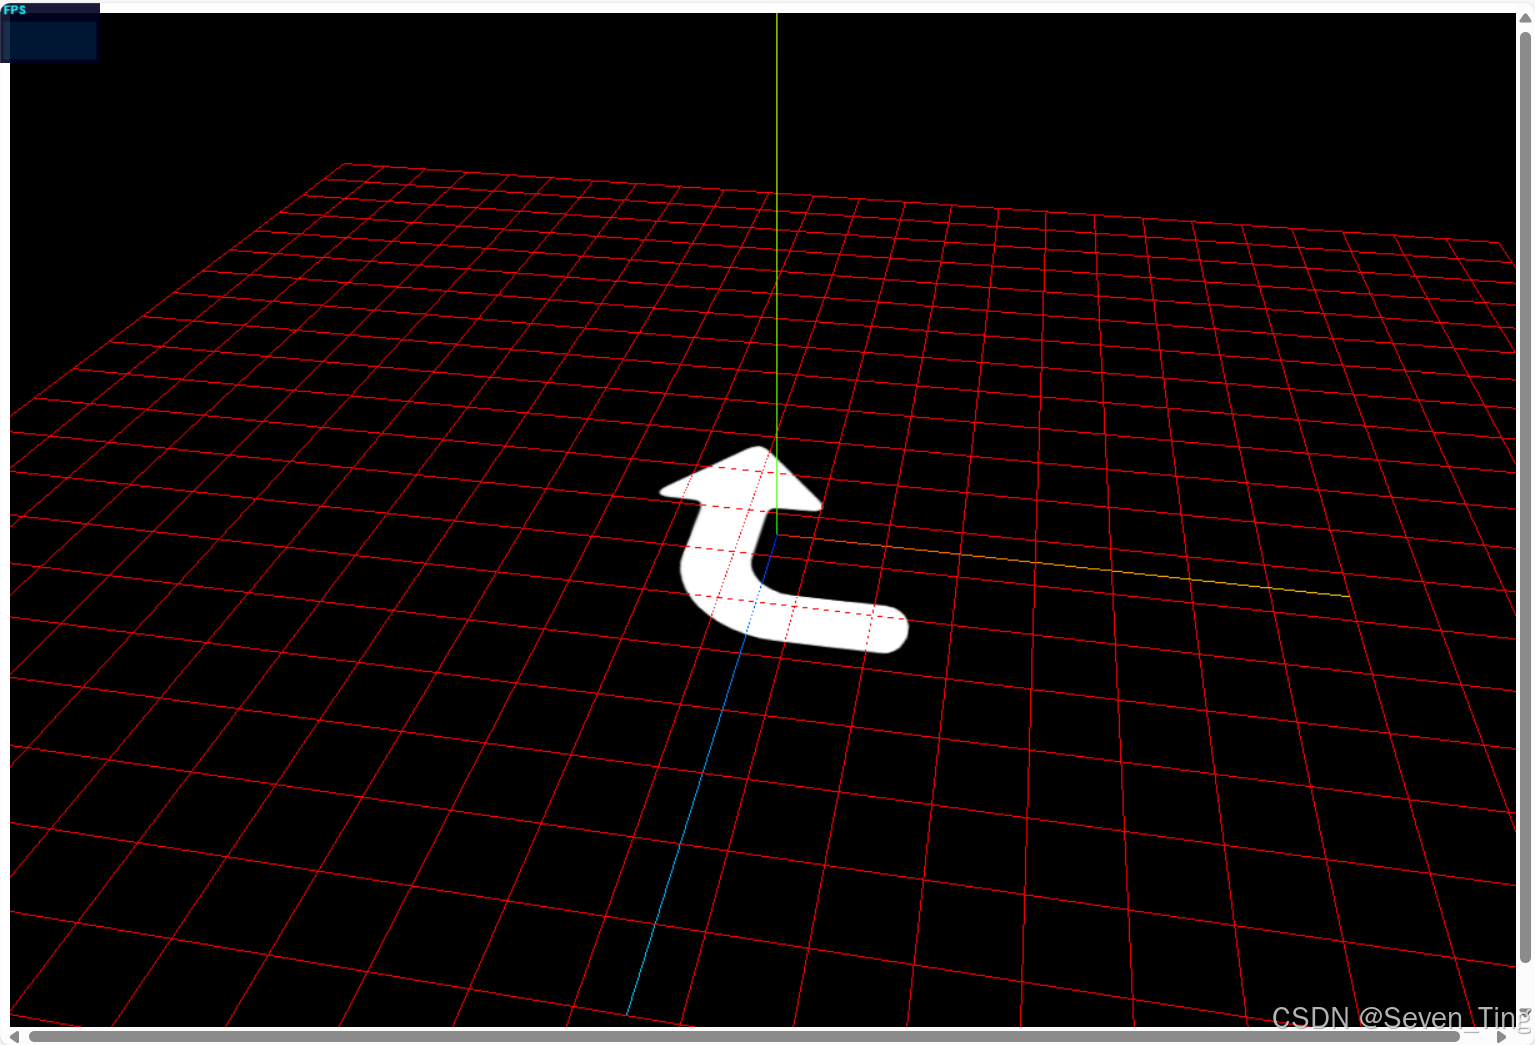
2、开启透明transparent: true
javascript
const material = new THREE.MeshBasicMaterial({
    // color: 'green',
    map: texture,
    transparent: true, //使用背景透明的png贴图,注意开启透明计算
})
3、旋转平移矩形平面
PlaneGeometry矩形平面默认是在XOY平面上,如果你想平行于XOZ平面,就需要手动旋转。
javascript
mesh.rotateX(-Math.PI/2);//平行地面:矩形Mesh默认单面可见,注意旋转-Math.PI / 2如果你不想矩形平面Mesh与地面网格线重合,可以通过位置属性.position偏移。
javascript
mesh.position.y = 1;//适当偏移,不与地面重合六、UV动画
通过纹理对象的偏移属性.offset给大家实现一个UV动画效果。
1、纹理对象.offset属性
纹理对象Texture的.offset的功能是偏移贴图在Mesh上位置,本质上相当于修改了UV顶点坐标。
javascript
texture.offset.x +=0.5;//纹理U方向偏移
javascript
texture.offset.y +=0.5;//纹理V方向偏移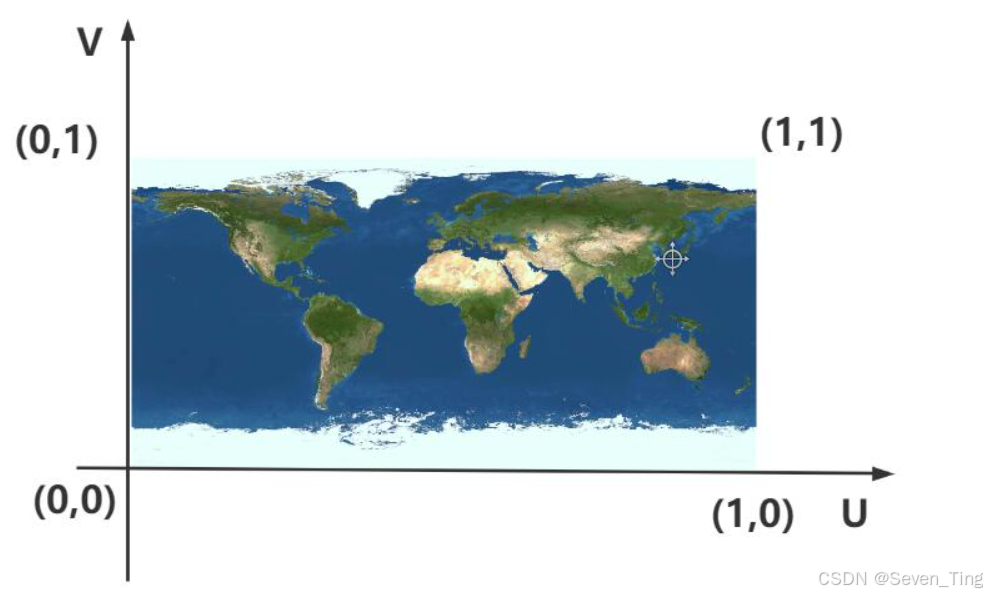
2、纹理对象.wrapS或.wrapT与.offset组合使用
javascript
texture.offset.x +=0.5;//纹理U方向偏移
// 设置.wrapS也就是U方向,纹理映射模式(包裹模式)
texture.wrapS = THREE.RepeatWrapping;//对应offste.x偏移
javascript
texture.offset.y +=0.5;//纹理V方向偏移
// 设置.wrapT也就是V方向,纹理映射模式
texture.wrapT = THREE.RepeatWrapping;//对应offste.y偏移
3、纹理UV动画
纹理对象Texture的.offset的功能是偏移贴图在Mesh上位置。
javascript
// 渲染循环
function render() {
    texture.offset.x +=0.001;//设置纹理动画:偏移量根据纹理和动画需要,设置合适的值
    renderer.render(scene, camera);
    requestAnimationFrame(render);
}
render();
4、纹理贴图阵列 + UV动画
通过阵列纹理贴图设置.map,这样的话贴图像素可以更小一些
javascript
// 设置U方向阵列模式
texture.wrapS = THREE.RepeatWrapping;
// uv两个方向纹理重复数量
texture.repeat.x=50;//注意选择合适的阵列数量
javascript
// 渲染循环
function render() {
texture.offset.x +=0.1;//设置纹理动画:偏移量根据纹理和动画需要,设置合适的值
renderer.render(scene, camera);
requestAnimationFrame(render);
}
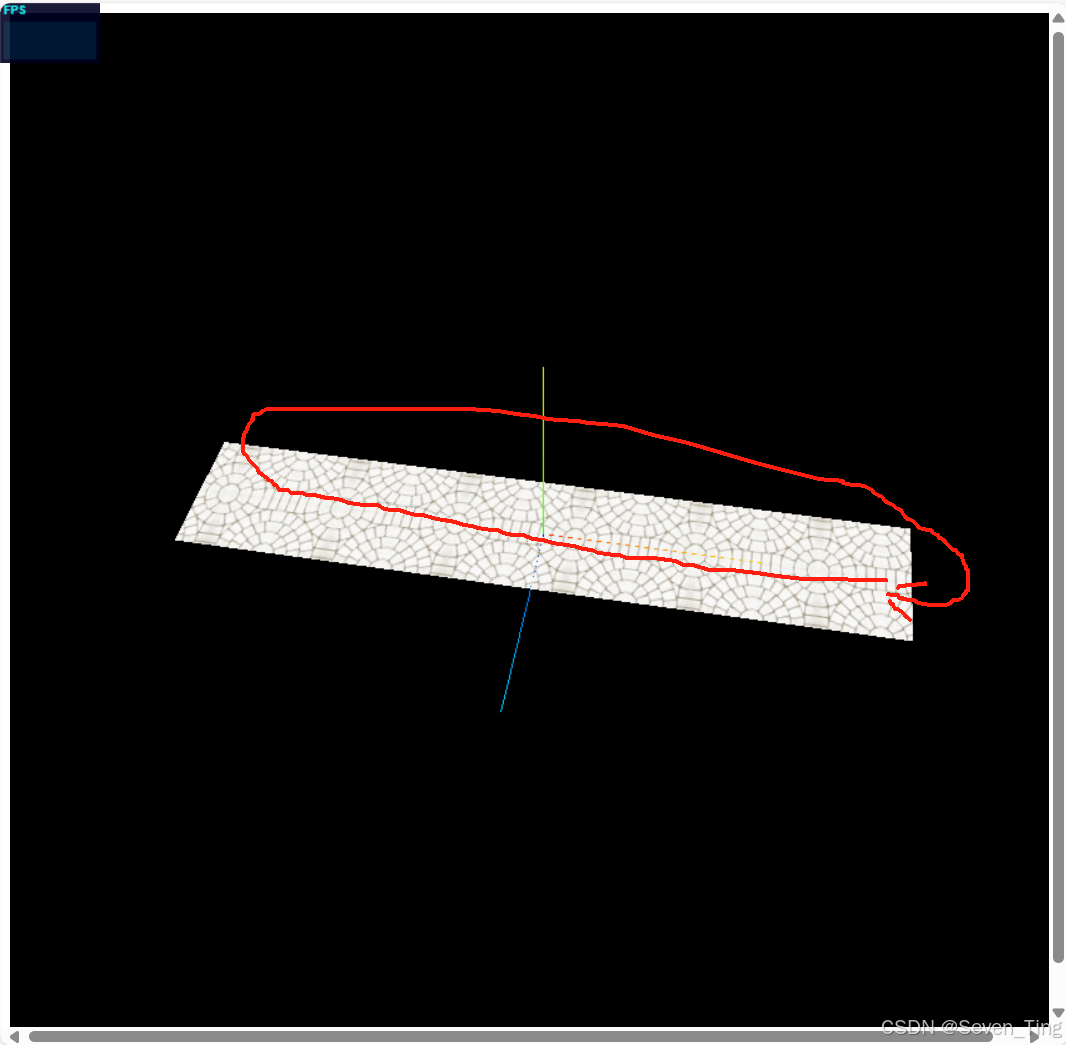
render();5、全部代码
javascript
import * as THREE from 'three';

const geometry = new THREE.PlaneGeometry(500, 100)

const LoadTex = new THREE.TextureLoader();
const texture = LoadTex.load('./瓷砖.jpg')
const material = new THREE.MeshBasicMaterial({
    // color: 'green',
    map: texture,
    transparent: true, //使用背景透明的png贴图,注意开启透明计算
})


texture.wrapS = THREE.RepeatWrapping;
texture.repeat.x = 6;
const cube = new THREE.Mesh(geometry, material)
cube.rotateX(-Math.PI / 2);
export  { cube, texture }
javascript
import { cube, texture } from './group.js'

function render() {
    texture.offset.x += 0.005
    renderer.render(scene, camera)
    requestAnimationFrame(render)
}

render()