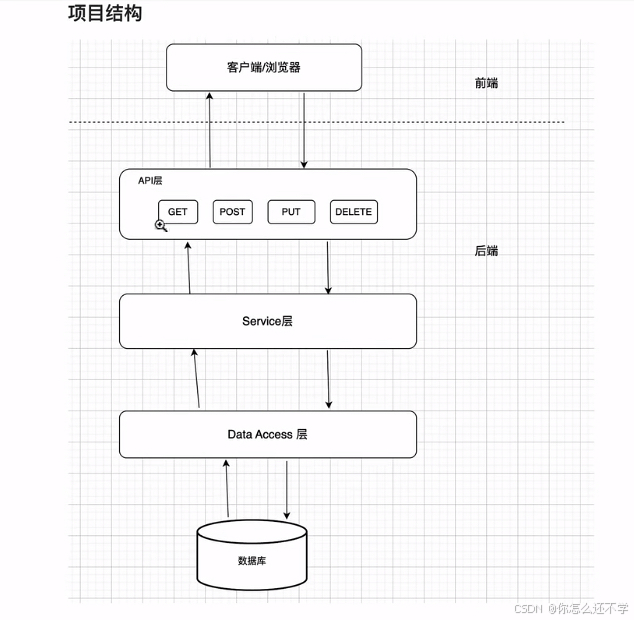
主要流程:
前端发送网络请求->controller->调用service->操纵mapper->操作数据库->对entity数据对象赋值->返回前端
前期准备:maven、mysql下载好
跟学视频,感谢老师: https://www.bilibili.com/video/BV1gm411m7i6/?share_source=copy_web\&vd_source=92d754038ee61d01dacfbb2bacae8320打点:
00:00 - 42:53 GET接口
42:54 - 51:24 POST接口
51:25 - 54:20 DELETE接口
54:21 - 1:02:11 UPDATE接口
1:02:17 - 1:04:22 打包
一、项目创建
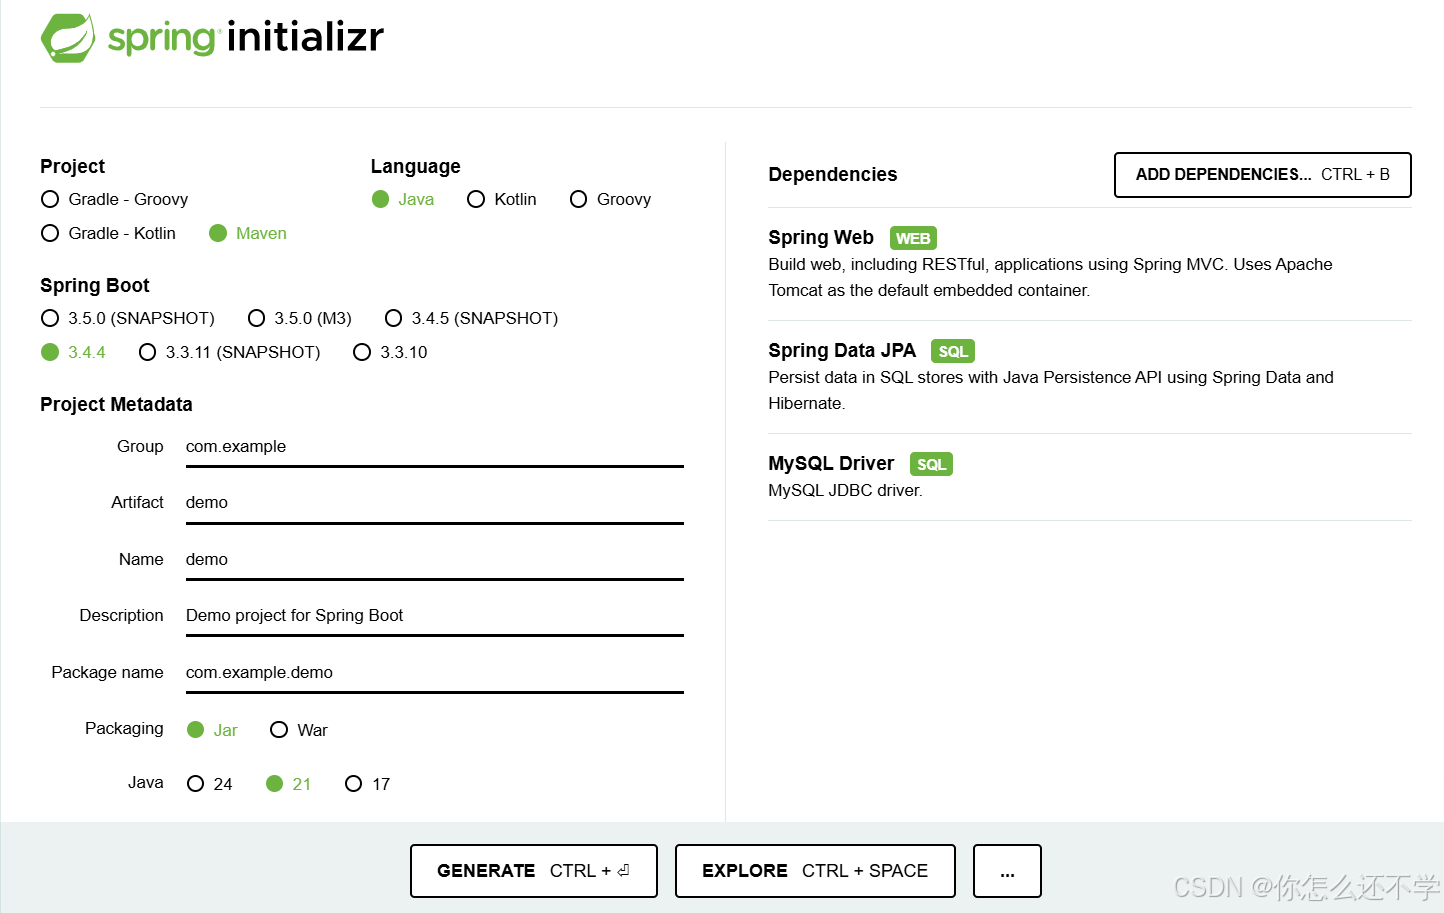
初始化Spring boot应用:Spring Initializr
配置好以下内容(根据实际情况选择java版本) ,点GENERATE生成项目。
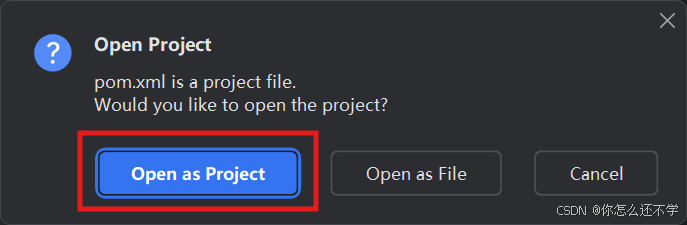
解压项目之后,idea打开open,导入项目的pom.xml文件。


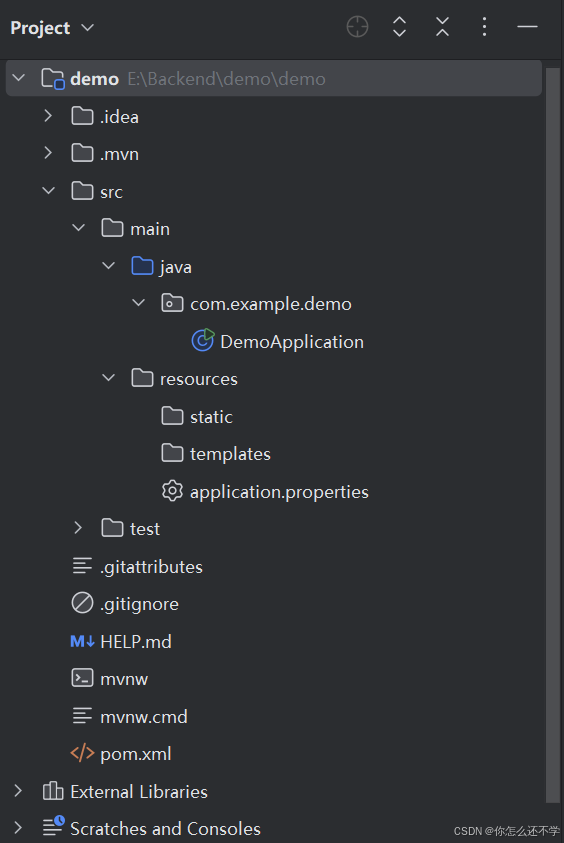
项目结构,源代码全部放在JAVA文件夹下
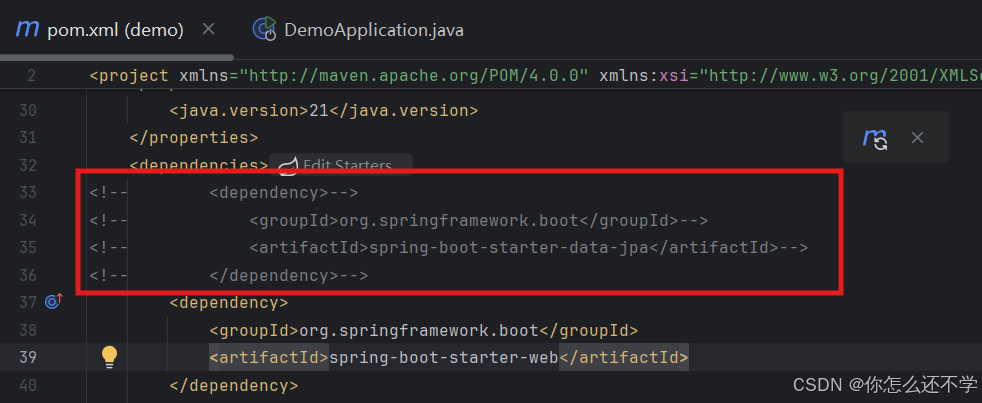
因为还没有数据库,所以先把pom.xml里数据库的部分注释掉(不然会报错)
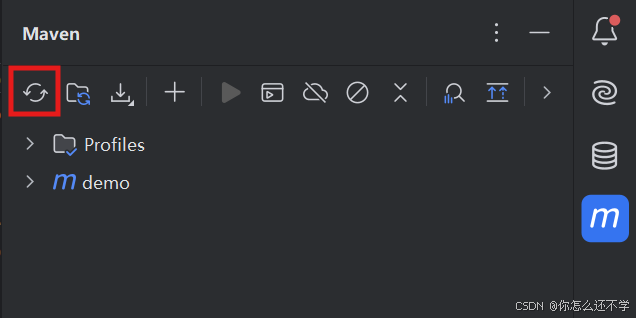
然后刷新一下maven,手动reload一下
接下来尝试运行,打开java文件,点击三角,运行main方法


可以看见运行起来

右键创建一个测试的controller,编写代码然后运行。


java
package com.example.demo;

import org.springframework.web.bind.annotation.GetMapping;
import org.springframework.web.bind.annotation.RestController;

@RestController
public class TestController {
    @GetMapping ("/hello")
    public String hello() {
        return "Hello World";
    }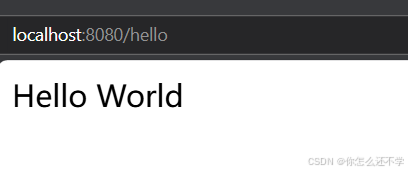
}运行后,浏览器访问localhost:8080/hello
基本概念
- **
@Controller**:标记类为 Spring MVC 控制器,处理 HTTP 请求并返回视图(如 HTML)。- **
@ResponseBody**:将方法的返回值直接写入 HTTP 响体中,而非渲染视图。- **
@RestController** =@Controller+@ResponseBody,专用于 RESTful API,自动将返回对象转为 JSON/XML 格式。核心功能
- 通过
@RequestMapping、@GetMapping、@PostMapping等注解绑定 URL 路径。
改为List:
java
package com.example.demo;
import org.springframework.web.bind.annotation.GetMapping;
import org.springframework.web.bind.annotation.RestController;
import java.util.List;
@RestController
public class TestController {
@GetMapping ("/hello")
public List<String> hello() {
return List.of("Hello","World");
}
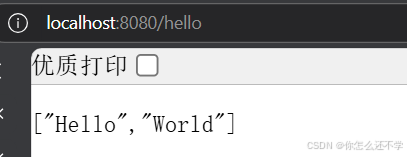
}显示JSON格式 :
二、rest api规范
8个HTTP方法:
GET
POST
PUT
DELETEOPTIONS
HEAD
TRACE
CONNECT
1.创建数据库
启动数据库:net start mysql
登录数据库:mysql -uroot -p1234(-u和-p后写自己的用户名和密码)
sql
//创建数据库
create database test
	character set utf8mb4
	collate utf8mb4_general_ci

//选中该数据库
use test;

//创建数据表
create table student(
	id int auto_increment primary key,
	name varchar(50) not null,
	phone char(11) not null,
	age int
);


//插入一条数据
insert into student (name,phone,age)
values('TOM','12345678910',30);
2.写实际代码
①GET接口
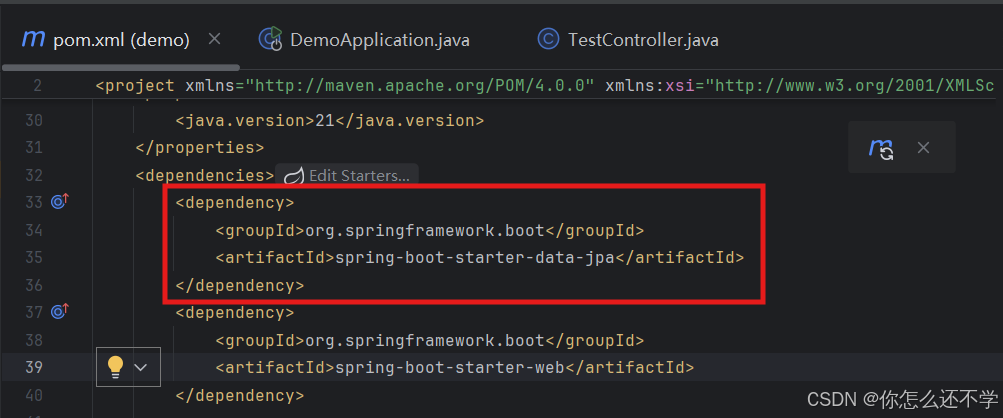
恢复上面注释的依赖
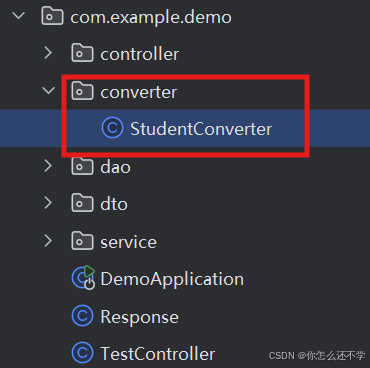
新建对应的package,在package里新建接口StudentRepository:


再建一个学生类:

java
//Student.java
package com.example.demo.dao;

import jakarta.persistence.*;

@Entity
@Table(name="student")
public class Student {

    @Id
    @Column(name = "id")
    @GeneratedValue(strategy = GenerationType.IDENTITY)
    private long id;

    @Column(name = "name")
    private String name;

    @Column(name = "phone")
    private String phone;

    @Column(name = "age")
    private int age;

    public long getId() {
        return id;
    }

    public void setId(long id) {
        this.id = id;
    }

    public String getName() {
        return name;
    }

    public void setName(String name) {
        this.name = name;
    }

    public String getPhone() {
        return phone;
    }

    public void setPhone(String phone) {
        this.phone = phone;
    }

    public int getAge() {
        return age;
    }

    public void setAge(int age) {
        this.age = age;
    }
}
java
//StudentRepository.java
package com.example.demo.dao;
import org.springframework.data.jpa.repository.JpaRepository;
import org.springframework.stereotype.Repository;
@Repository
public interface StudentRepository extends JpaRepository<Student,Long> {
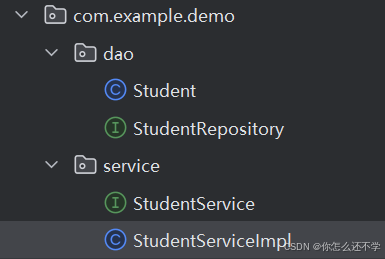
}然后再创建一个package,写service层,同样新建一个接口文件StudentService,以及对应的一个实现StudentServiceImpl
现在目录是这个格式:
java
//StudentServiceImpl.java
package com.example.demo.service;

import com.example.demo.dao.Student;
import com.example.demo.dao.StudentRepository;
import org.springframework.beans.factory.annotation.Autowired;
import org.springframework.stereotype.Service;

@Service
public class StudentServiceImpl implements StudentService {

    @Autowired
    private StudentRepository studentRepository;

    @Override
    public Student getStudentById(long id) {
        return studentRepository.findById(id).orElseThrow(RuntimeException::new);
    }
}
java
//StudentService.java
package com.example.demo.service;
import com.example.demo.dao.Student;
public interface StudentService {
public Student getStudentById(long id);
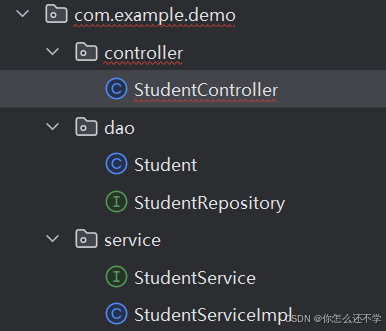
}接下来写对应的api层controller的代码,新建package名为controller,包里建StudentController类。
java
package com.example.demo.controller;

import com.example.demo.dao.Student;
import com.example.demo.service.StudentService;
import org.springframework.beans.factory.annotation.Autowired;
import org.springframework.web.bind.annotation.GetMapping;
import org.springframework.web.bind.annotation.PathVariable;
import org.springframework.web.bind.annotation.RestController;

@RestController
public class StudentController {

    @Autowired
    private StudentService studentService;

    @GetMapping("/student/{id}")
    public Student getStudent(@PathVariable long id) {
        return studentService.getStudentById(id);
    }
}
配置数据库url(用户名和密码写自己的):

java
spring.datasource.url=jdbc:mysql://localhost:3306/test?characterEncoding=utf-8
spring.datasource.username=root
spring.datasource.password=1234
在浏览器中输入 localhost:8080/student/1
返回信息:
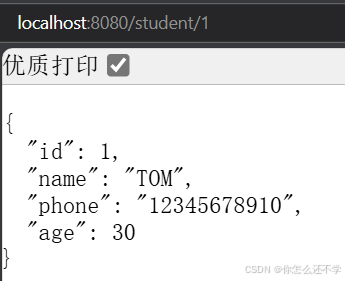
因为controller直接返回了这些值不够规范,有些加密字段是不想展示给前端的,比如这里将年龄保密,不显示。
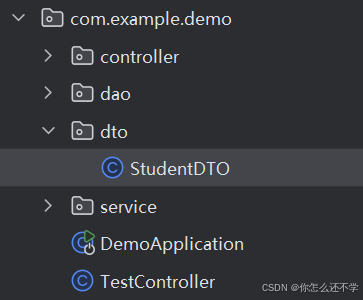
所以新建一个dto的package以及StudentDTO对象,用来展示可以给前端的数据。
java
package com.example.demo.dto;

public class StudentDTO {
    private long id;
    private String name;
    private String phone;

    public long getId() {
        return id;
    }

    public void setId(long id) {
        this.id = id;
    }

    public String getName() {
        return name;
    }

    public void setName(String name) {
        this.name = name;
    }

    public String getPhone() {
        return phone;
    }

    public void setPhone(String phone) {
        this.phone = phone;
    }
}
修改controller层和service层 :
java
package com.example.demo.controller;

import com.example.demo.Response;
import com.example.demo.dao.Student;
import com.example.demo.dto.StudentDTO;
import com.example.demo.service.StudentService;
import org.springframework.beans.factory.annotation.Autowired;
import org.springframework.web.bind.annotation.GetMapping;
import org.springframework.web.bind.annotation.PathVariable;
import org.springframework.web.bind.annotation.RestController;

@RestController
public class StudentController {

    @Autowired
    private StudentService studentService;

    @GetMapping("/student/{id}")
    public Response<StudentDTO> getStudent(@PathVariable long id) {
        return Response.newSuccess(studentService.getStudentById(id));
    }
}
java
package com.example.demo.service;

import com.example.demo.dao.Student;
import com.example.demo.dto.StudentDTO;

public interface StudentService {
    StudentDTO getStudentById(long id);
}
java
package com.example.demo.service;

import com.example.demo.converter.StudentConverter;
import com.example.demo.dao.Student;
import com.example.demo.dao.StudentRepository;
import com.example.demo.dto.StudentDTO;
import org.springframework.beans.factory.annotation.Autowired;
import org.springframework.stereotype.Service;

@Service
public class StudentServiceImpl implements StudentService {

    @Autowired
    private StudentRepository studentRepository;

    @Override
    public StudentDTO getStudentById(long id) {
        Student student= studentRepository.findById(id).orElseThrow(RuntimeException::new);
         return StudentConverter.convertStudent(student);
    }
}
新建package和类:
java
package com.example.demo.converter;
import com.example.demo.dao.Student;
import com.example.demo.dto.StudentDTO;
public class StudentConverter {
public static StudentDTO convertStudent(Student student) {
StudentDTO studentDTO = new StudentDTO();
studentDTO.setId(student.getId());
studentDTO.setName(student.getName());
studentDTO.setPhone(student.getPhone());
return studentDTO;
}
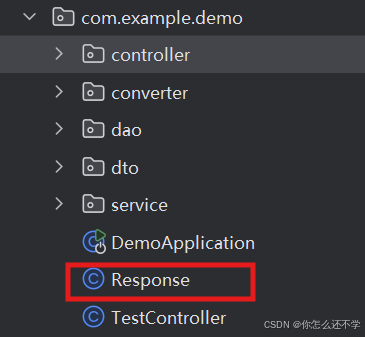
}新建一个Response类,统一一些后端访问的格式:
java
package com.example.demo;

public class Response <T>{
    private T data;
    private boolean success;
    private String errorMsg;

    public static <K> Response<K> newSuccess(K data) {
        Response<K> response = new Response<>();
        response.setData(data);
        response.setSuccess(true);
        return response;
    }

    public static Response<Void> newFail(String errorMsg) {
        Response<Void> response = new Response<>();
        response.setErrorMsg(errorMsg);
        response.setSuccess(false);
        return response;
    }

    public T getData() {
        return data;
    }

    public void setData(T data) {
        this.data = data;
    }

    public boolean isSuccess() {
        return success;
    }

    public void setSuccess(boolean success) {
        this.success = success;
    }

    public String getErrorMsg() {
        return errorMsg;
    }

    public void setErrorMsg(String errorMsg) {
        this.errorMsg = errorMsg;
    }
}
把代码都修改完之后启动,可以看见age隐藏了没有显示。返回成功。
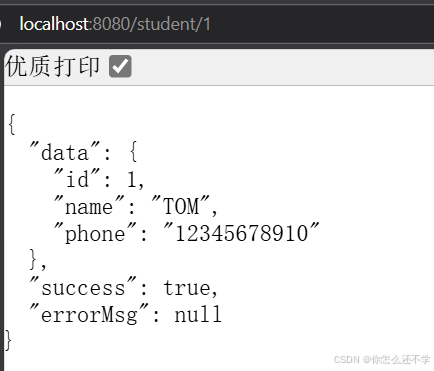
以上是完整的GET查询接口的实现,用来查询id=1的学生信息。
②POST接口
接下来新增一个POST接口,用来新增学生信息。
目的:将前端传来的json文件转为Java对象存储至数据库。因为传过来的DTO,所以需要converter,之所以返回getbyid,因为这个方法返回是Long。
编写代码,在原有文件上新增就行,以下复制完整的:
java
package com.example.demo.controller;

import com.example.demo.Response;
import com.example.demo.dao.Student;
import com.example.demo.dto.StudentDTO;
import com.example.demo.service.StudentService;
import org.springframework.beans.factory.annotation.Autowired;
import org.springframework.web.bind.annotation.*;

@RestController
public class StudentController {

    @Autowired
    private StudentService studentService;

    @GetMapping("/student/{id}")
    public Response<StudentDTO> getStudent(@PathVariable long id) {
        return Response.newSuccess(studentService.getStudentById(id));
    }

    @RequestMapping("/student")
    @PostMapping("/student")
    public Response<Long> addNewStudent(@RequestParam StudentDTO studentDTO) {
        return Response.newSuccess(studentService.addNewStudent(studentDTO));

    }
}
java
package com.example.demo.service;

import com.example.demo.dao.Student;
import com.example.demo.dto.StudentDTO;

public interface StudentService {
    StudentDTO getStudentById(long id);

    Long addNewStudent(StudentDTO studentDTO);
}
java
package com.example.demo.service;

import com.example.demo.converter.StudentConverter;
import com.example.demo.dao.Student;
import com.example.demo.dao.StudentRepository;
import com.example.demo.dto.StudentDTO;
import org.springframework.beans.factory.annotation.Autowired;
import org.springframework.stereotype.Service;
import org.springframework.util.CollectionUtils;

import java.util.List;

@Service
public class StudentServiceImpl implements StudentService {

    @Autowired
    private StudentRepository studentRepository;

    @Override
    public StudentDTO getStudentById(long id) {
        Student student= studentRepository.findById(id).orElseThrow(RuntimeException::new);
        return StudentConverter.convertStudent(student);
    }

    @Override
    public Long addNewStudent(StudentDTO studentDTO) {
        List<Student> studentList=studentRepository.findByPhone(studentDTO.getPhone());
        if (!CollectionUtils.isEmpty(studentList)){
            throw new IllegalStateException("phone:"+studentDTO.getPhone()+" has been taken");
        }
        Student student=studentRepository.save(StudentConverter.convertStudent(studentDTO));
        return student.getId();
    }
}
java
package com.example.demo.converter;

import com.example.demo.dao.Student;
import com.example.demo.dto.StudentDTO;

public class StudentConverter {
    public static StudentDTO convertStudent(Student student) {
        StudentDTO studentDTO = new StudentDTO();
        studentDTO.setId(student.getId());
        studentDTO.setName(student.getName());
        studentDTO.setPhone(student.getPhone());
        return studentDTO;
    }

    public static Student convertStudent(StudentDTO studentDTO) {
        Student student = new Student();
        student.setName(studentDTO.getName());
        student.setPhone(studentDTO.getPhone());
        return student;
    }
}
java
package com.example.demo.dao;

import org.springframework.data.jpa.repository.JpaRepository;
import org.springframework.stereotype.Repository;

import java.util.List;

@Repository
public interface StudentRepository extends JpaRepository<Student,Long> {

    List<Student> findByPhone(String phone);
}
修改完代码就可以使用Postman工具新增学生信息(没有下载所以跳过这步了)
③DELETE接口
接下来实现DELETE删除接口。
在原有文件新增就行,新增代码如下:
java
//StudentController
    @DeleteMapping("/student/{id}")
    public void deleteStudentById(@PathVariable long id) {
        studentService.deleteStudentById(id);
    }


//StudentService
void deleteStudentById(long id);


//StudentServiceImpl
 @Override
    public void deleteStudentById(long id) {
        studentRepository.findById(id).orElseThrow(() -> new IllegalArgumentException("id:"+ id +"doesn't exist!"));
        studentRepository.deleteById(id);
    }
接下来也是使用postman来删除和查询。(没下载所以又跳过这步,之后如果下载了再来补)
④UPDATE接口
接下来实现UPDATE接口。
在原有文件新增代码如下:
java
//StudentController
     @PutMapping("/student/{id}")
    public Response<StudentDTO> updateStudentById(@PathVariable long id, @RequestParam (required = false)String name,
                                              @RequestParam(required = false)String phone) {
        return Response.newSuccess(studentService.updataStudentById(id,name,phone));
    }


//StudentService
StudentDTO updataStudentById(long id, String name, String phone);


//StudentServiceImpl
 @Override
    @Transactional
    public StudentDTO updataStudentById(long id, String name, String phone) {
        Student studentInDB=studentRepository.findById(id).orElseThrow(() -> new IllegalArgumentException("id:"+ id +"doesn't exist!"));
        if(StringUtils.hasLength(name) && !studentInDB.getName().equals(name)){
            studentInDB.setName(name);
        }
        if(StringUtils.hasLength(phone) && !studentInDB.getPhone().equals(phone)){
            studentInDB.setPhone(phone);
        }
        Student student=studentRepository.save(studentInDB);
        return StudentConverter.convertStudent(student);
    }
接下来也是使用postman来更新和查询。
三、打包项目
使用命令:mvn clean install
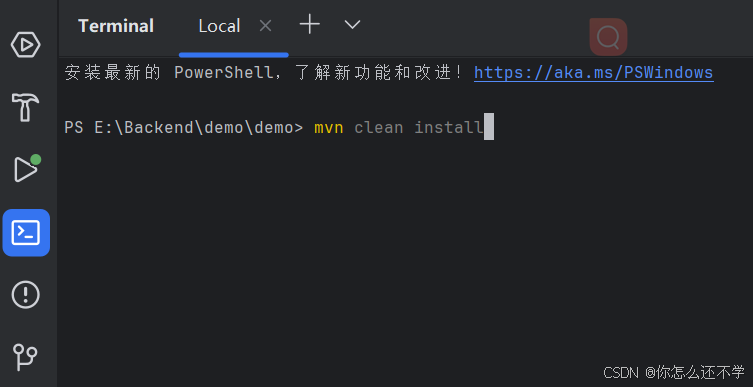
但是出现错误:
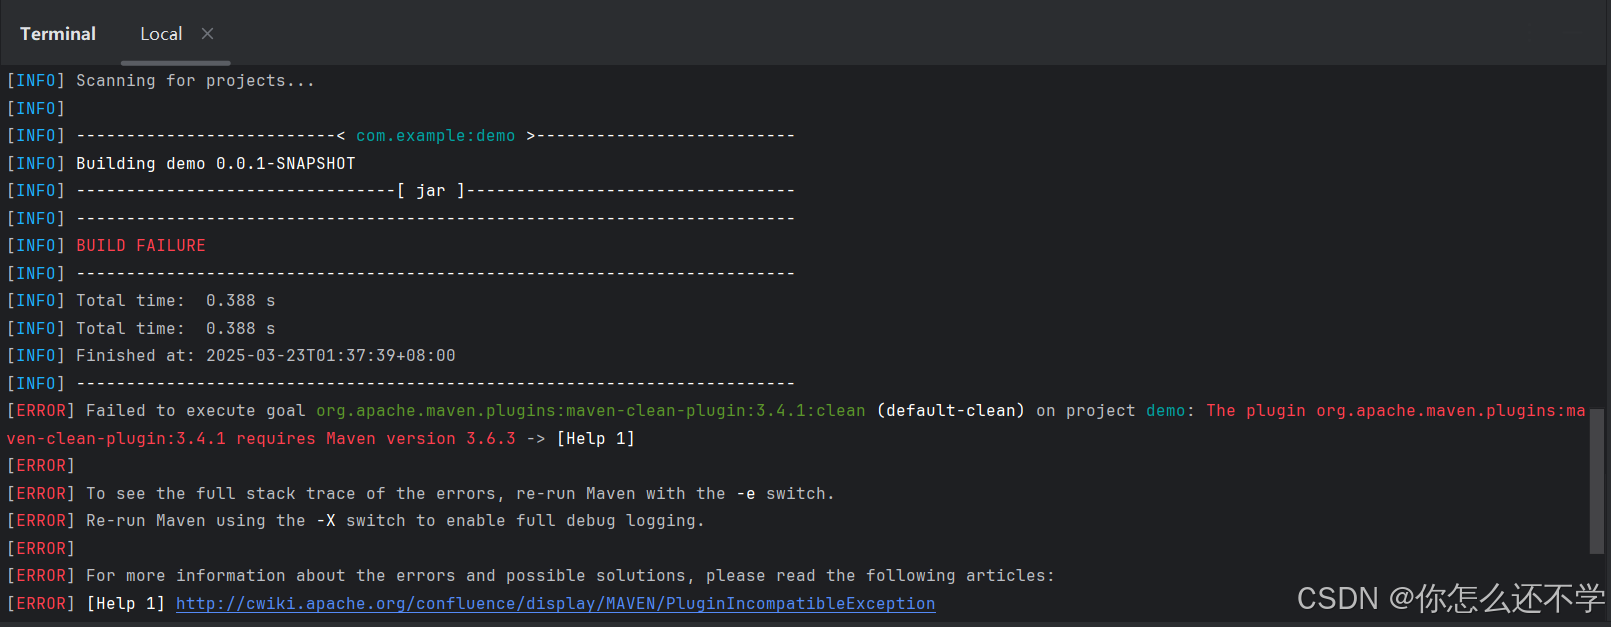
错误信息:
java
[ERROR] Failed to execute goal org.apache.maven.plugins:maven-clean-plugin:3.4.1:clean (default-clean) on project demo: The plugin org.apache.maven.plugins:maven-clean-plugin:3.4.1 requires Maven version 3.6.3 -> [Help 1]
[ERROR]
[ERROR] To see the full stack trace of the errors, re-run Maven with the -e switch.
[ERROR] Re-run Maven using the -X switch to enable full debug logging.
[ERROR]
[ERROR] For more information about the errors and possible solutions, please read the following articles:
[ERROR] [Help 1] http://cwiki.apache.org/confluence/display/MAVEN/PluginIncompatibleException
原因是当前maven版本为3.6.1,但项目依赖 Spring Boot 3.4.4,官方要求 Maven 3.8.8+ 或 Java 21+。
重新下载更高级的maven版本:Welcome to Apache Maven -- Maven
下载教程:Maven下载以及项目创建(笔记)_maven 依赖 如何下载 com.github-CSDN博客
需要注意!重新配置maven环境变量时,最好删除原来的MAVEN_HOME,重新添加,不然不会更新。
IDEA重新配置maven路径,重启:
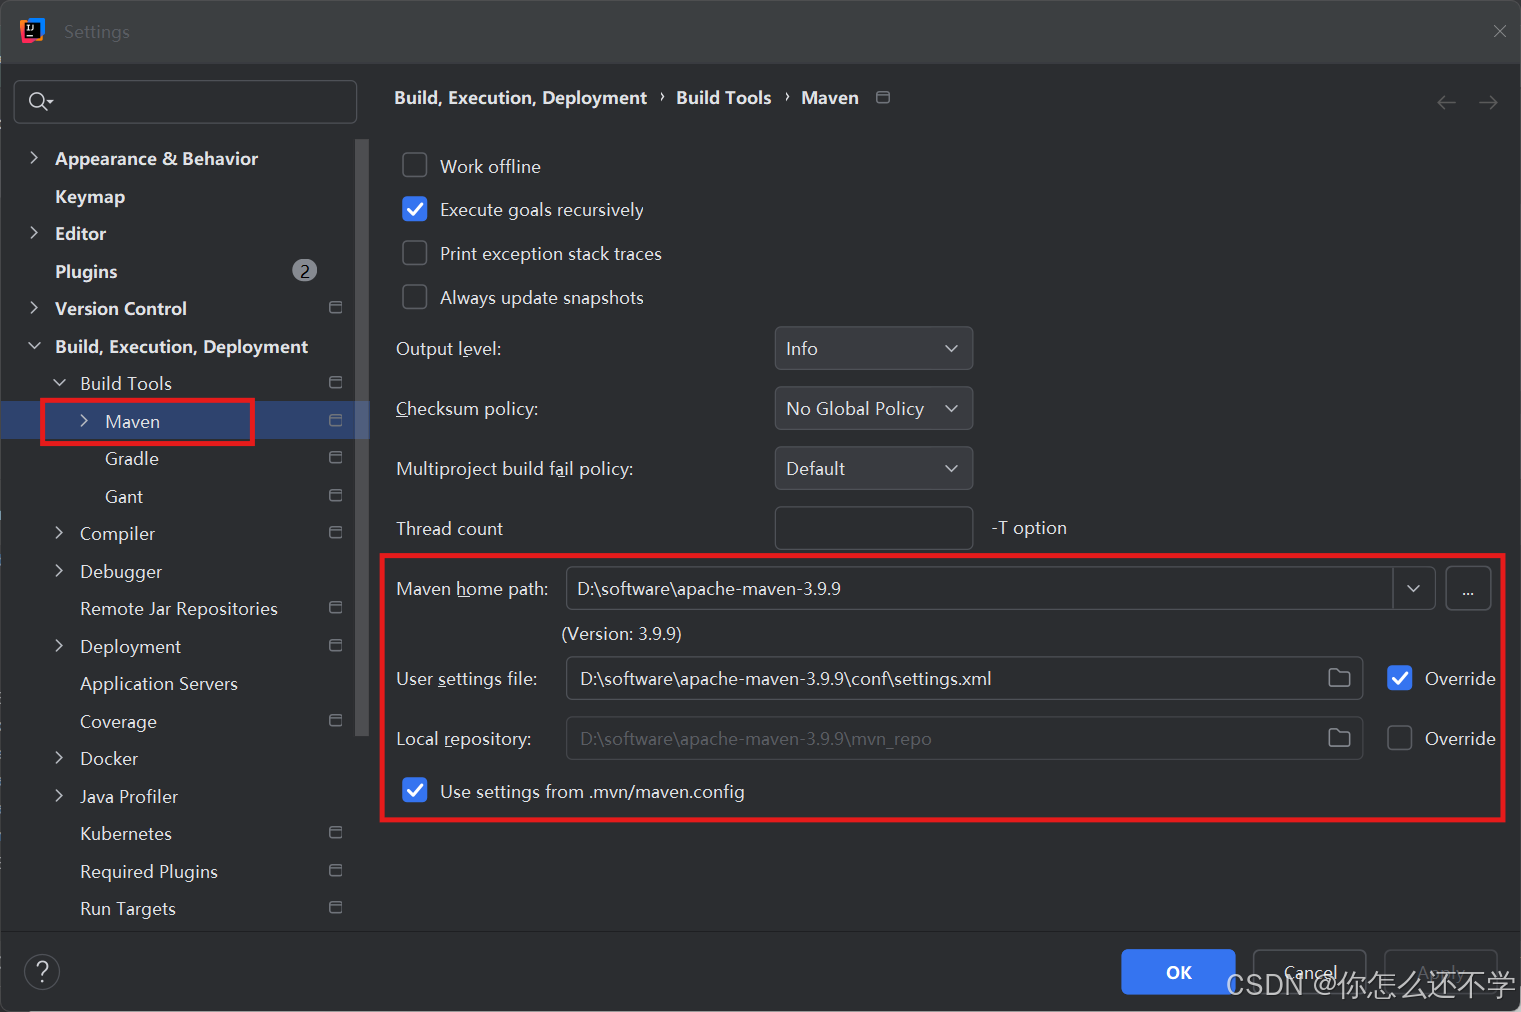
可以看到已经将版本更新了
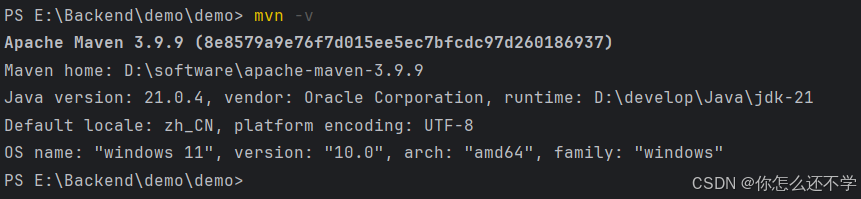
使用命令:mvn clean install,成功啦!!


复制一下jar包路径

可以用java -jar demo-0.0.1-SNAPSHOT.jar 来启动项目: 
以上,总结:
完结撒花,零基础,耗时7小时。