目录:
1、共享主题样式

dart
MaterialApp(
  title: appName,
  theme: ThemeData(
    // Define the default brightness and colors.
    colorScheme: ColorScheme.fromSeed(
      seedColor: Colors.purple,
      // ···
      brightness: Brightness.dark,
    ),

    // Define the default `TextTheme`. Use this to specify the default
    // text styling for headlines, titles, bodies of text, and more.
    textTheme: TextTheme(
      displayLarge: const TextStyle(
        fontSize: 72,
        fontWeight: FontWeight.bold,
      ),
      // ···
      titleLarge: GoogleFonts.oswald(
        fontSize: 30,
        fontStyle: FontStyle.italic,
      ),
      bodyMedium: GoogleFonts.merriweather(),
      displaySmall: GoogleFonts.pacifico(),
    ),
  ),
  home: const MyHomePage(title: appName),
);
大部分 ThemeData 实例会设置以下两个属性。它们会影响大部分样式属性。
- colorScheme 定义了颜色。
- textTheme 定义了文字样式。
你可以在 ThemeData 文档中查看所有可自定义的颜色和字体样式。
dart
Container(
padding: const EdgeInsets.symmetric(horizontal: 12, vertical: 12),
color: Theme.of(context).colorScheme.primary,
child: Text(
'Text with a background color',
// ···
style: Theme.of(context).textTheme.bodyMedium!.copyWith(
color: Theme.of(context).colorScheme.onPrimary,
),
),
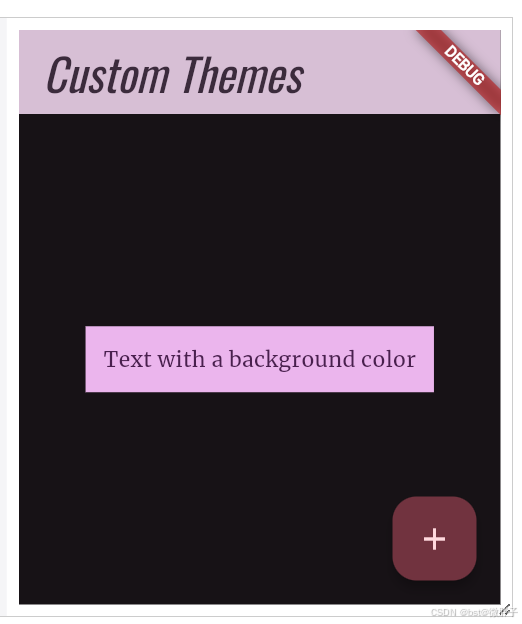
),效果示例一:
dart
import 'package:flutter/material.dart';
// Include the Google Fonts package to provide more text format options
// https://pub.dev/packages/google_fonts
import 'package:google_fonts/google_fonts.dart';

void main() {
  runApp(const MyApp());
}

class MyApp extends StatelessWidget {
  const MyApp({super.key});

  @override
  Widget build(BuildContext context) {
    const appName = 'Custom Themes';

    return MaterialApp(
      title: appName,
      theme: ThemeData(
        // Define the default brightness and colors.
        colorScheme: ColorScheme.fromSeed(
          seedColor: Colors.purple,
          // TRY THIS: Change to "Brightness.light"
          //           and see that all colors change
          //           to better contrast a light background.
          brightness: Brightness.dark,
        ),

        // Define the default `TextTheme`. Use this to specify the default
        // text styling for headlines, titles, bodies of text, and more.
        textTheme: TextTheme(
          displayLarge: const TextStyle(
            fontSize: 72,
            fontWeight: FontWeight.bold,
          ),
          // TRY THIS: Change one of the GoogleFonts
          //           to "lato", "poppins", or "lora".
          //           The title uses "titleLarge"
          //           and the middle text uses "bodyMedium".
          titleLarge: GoogleFonts.oswald(
            fontSize: 30,
            fontStyle: FontStyle.italic,
          ),
          bodyMedium: GoogleFonts.merriweather(),
          displaySmall: GoogleFonts.pacifico(),
        ),
      ),
      home: const MyHomePage(title: appName),
    );
  }
}

class MyHomePage extends StatelessWidget {
  final String title;

  const MyHomePage({super.key, required this.title});

  @override
  Widget build(BuildContext context) {
    return Scaffold(
      appBar: AppBar(
        title: Text(
          title,
          style: Theme.of(context).textTheme.titleLarge!.copyWith(
            color: Theme.of(context).colorScheme.onSecondary,
          ),
        ),
        backgroundColor: Theme.of(context).colorScheme.secondary,
      ),
      body: Center(
        child: Container(
          padding: const EdgeInsets.symmetric(horizontal: 12, vertical: 12),
          color: Theme.of(context).colorScheme.primary,
          child: Text(
            'Text with a background color',
            // TRY THIS: Change the Text value
            //           or change the Theme.of(context).textTheme
            //           to "displayLarge" or "displaySmall".
            style: Theme.of(context).textTheme.bodyMedium!.copyWith(
              color: Theme.of(context).colorScheme.onPrimary,
            ),
          ),
        ),
      ),
      floatingActionButton: Theme(
        data: Theme.of(context).copyWith(
          // TRY THIS: Change the seedColor to "Colors.red" or
          //           "Colors.blue".
          colorScheme: ColorScheme.fromSeed(
            seedColor: Colors.pink,
            brightness: Brightness.dark,
          ),
        ),
        child: FloatingActionButton(
          onPressed: () {},
          child: const Icon(Icons.add),
        ),
      ),
    );
  }
}
2、文字

dart
Text(
  'This is Google Fonts',
  style: GoogleFonts.lato(),
),
或通过在结果上设置属性来自定义 :TextStyle
dart
Text(
  'This is Google Fonts',
  style: GoogleFonts.lato(
    textStyle: Theme.of(context).textTheme.displayLarge,
    fontSize: 48,
    fontWeight: FontWeight.w700,
    fontStyle: FontStyle.italic,
  ),
),
使用以下 API 以编程方式更改静态字体 (但请记住,这仅在字体设计为支持该功能时才有效):
- FontFeature 选择字形
- FontWeight 修改粗细
- 将 FontStyle 设置为斜体
- FontVariation 来指定特定属性的值范围
3、使用自定义字体
Flutter 可以很方便地使用自定义字体,不仅能够将其用于整个应用里,还可以用在某个单独的 widget 中。 本指南参照下面的步骤使用自定义字体:
- 选择你的字体。
- 导入字体文件。
- 在 中声明字体。pubspec.yaml
- 设置默认字体。
- 将字体用于特定 widget。
代码示例:
dart
import 'package:flutter/material.dart';

void main() => runApp(const MyApp());

class MyApp extends StatelessWidget {
  const MyApp({super.key});

  @override
  Widget build(BuildContext context) {
    return MaterialApp(
      title: 'Custom Fonts',
      // Set Raleway as the default app font.
      theme: ThemeData(fontFamily: 'Raleway'),
      home: const MyHomePage(),
    );
  }
}

class MyHomePage extends StatelessWidget {
  const MyHomePage({super.key});

  @override
  Widget build(BuildContext context) {
    return Scaffold(
      // The AppBar uses the app-default Raleway font.
      appBar: AppBar(title: const Text('Custom Fonts')),
      body: const Center(
        // This Text widget uses the RobotoMono font.
        child: Text(
          'Roboto Mono sample',
          style: TextStyle(fontFamily: 'RobotoMono'),
        ),
      ),
    );
  }
}
4、以 package 的方式使用字体
1. 将字体添加到 package
通过 package 的方式使用字体,需要将字体文件导入 package 项目的 lib 文件夹中。你既可以将字体文件直接放在 lib 文件夹中,也可以放在子目录中,例如 lib/fonts。
在此示例中,假设你已有一个名为 awesome_package 的 library,其中包含了 lib/fonts 文件夹中的字体资源。
dart
awesome_package/
  lib/
    awesome_package.dart
    fonts/
      Raleway-Regular.ttf
      Raleway-Italic.ttf
2. 将 package 和字体添加到应用
现在你可以使用该 package 以及它提供的字体。我们来编辑 应用程序 根目录下的 pubspec.yaml 文件。
将 package 添加到应用中:
运行 flutter pub add 将 awesome_package 添加为依赖。
dart
flutter pub add awesome_package声明字体资源:
现在已经导入了 package,你需要告之 Flutter 在 awesome_package 中的哪里可以找到字体文件。
要想声明 package 中的字体,必须在 packages/awesome_package 的路径前加上字体声明。这将会让 Flutter 检索到 lib package 的文件夹中的字体。
dart
flutter:
  fonts:
    - family: Raleway
      fonts:
        - asset: packages/awesome_package/fonts/Raleway-Regular.ttf
        - asset: packages/awesome_package/fonts/Raleway-Italic.ttf
          style: italic
3. 使用字体
你可以使用 TextStyle 来更改文本的外观。在使用 package 中的字体时,你不仅需要声明该文字所要使用的字体,还需要声明字体所属的 package。
dart
child: Text(
  'Using the Raleway font from the awesome_package',
  style: TextStyle(fontFamily: 'Raleway'),
),