文章目录
-
- 前言(Introduction)
- [开发环境搭建(Development environment setup)](#开发环境搭建(Development environment setup))
- [运行(Run test)](#运行(Run test))
- 开发者(Developer)
- 编译(Compile)
- 报错
前言(Introduction)
GraphExecuter 是一款基于 NodeGraphQt 开发的开源软件,采用 多线程图执行 架构,用户只需编写节点逻辑并通过连线构建图,即可自动调度并运行复杂的工作流。
该系统结合了 可视化节点编辑 和 高效并行计算,适用于数据处理、自动化任务、分布式计算等场景。开发者无需关心线程管理,只需专注于节点功能的实现,即可快速搭建高性能工作流。GraphExecuter 为需要 灵活、可扩展、可视化编排 的用户提供了便捷的解决方案,适用于从实验到生产的各种需求。
GraphExecuter is an open-source software built on NodeGraphQt, designed to simplify complex workflow execution through a node-based graph system. By utilizing multi-threading, it efficiently processes connected nodes, allowing users to focus on defining individual node logic while the framework handles task scheduling and parallel execution.
With an intuitive node-based interface, users can easily design, connect, and execute workflows for tasks like data processing, automation, or distributed computing. GraphExecuter is ideal for developers and researchers who need a flexible, visual, and high-performance way to manage complex workflows without dealing with low-level concurrency control.
code: GraphExecuter
video: 高效创建工作流,可实现类似unreal engine的蓝图效果,内部使用多线程高效执行节点函数
开发环境搭建(Development environment setup)
shell
pip install -r .\requirements.txt

## 强制重新安装模块
pip install --force-reinstall --no-cache-dir pyside6
运行(Run test)
shell
python main.py❇️创建节点

❇️连接节点

❇️从选中节点开始运行图

开发者(Developer)
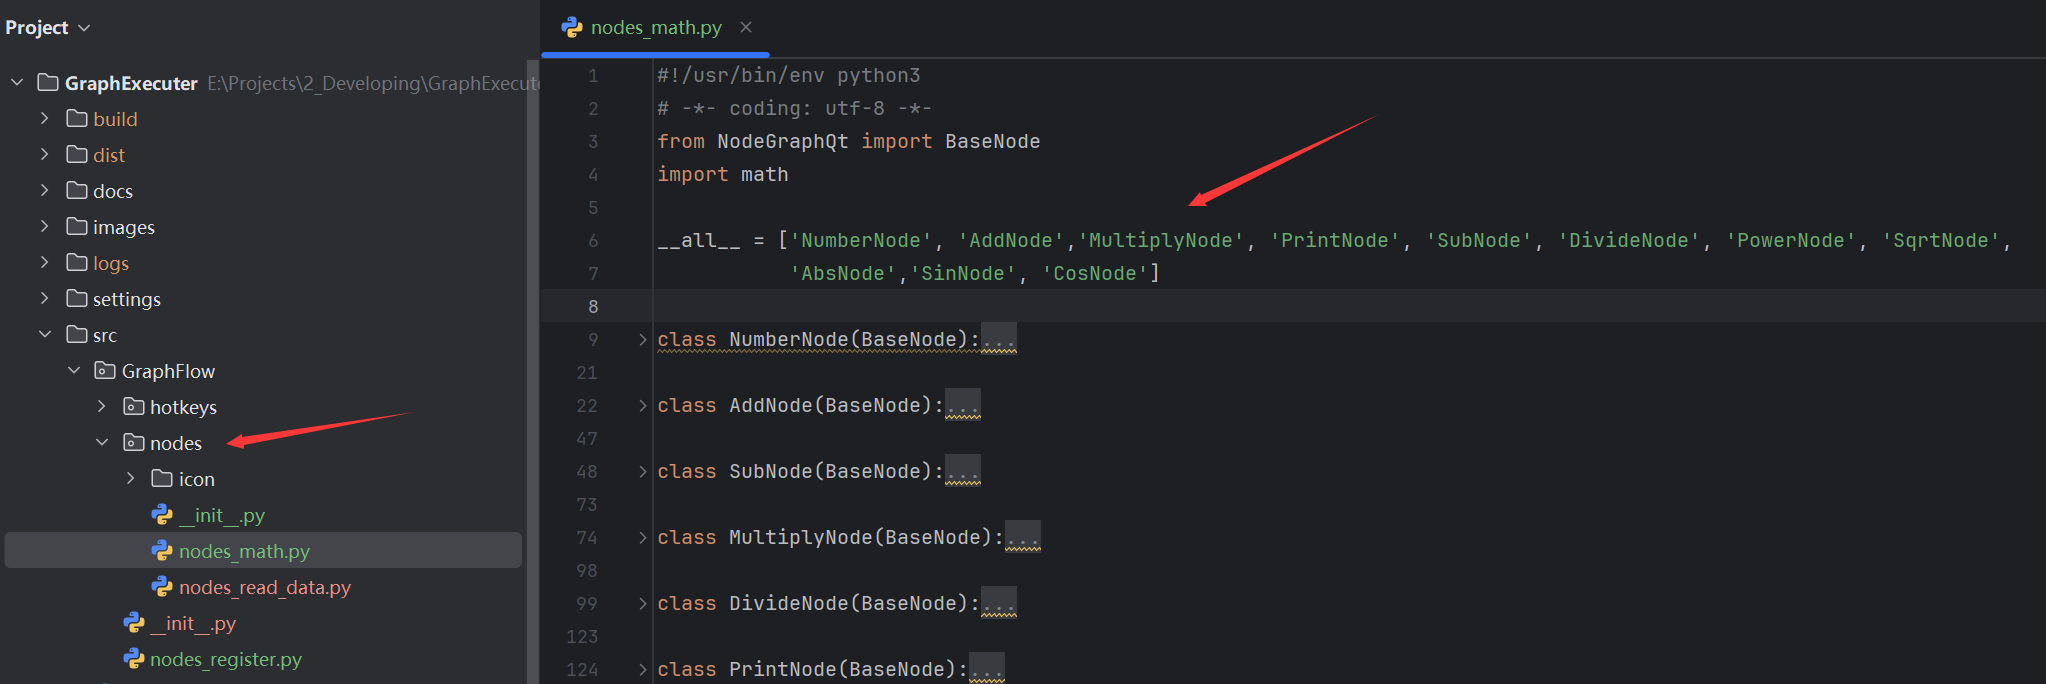
❇️编写节点(Create node type)
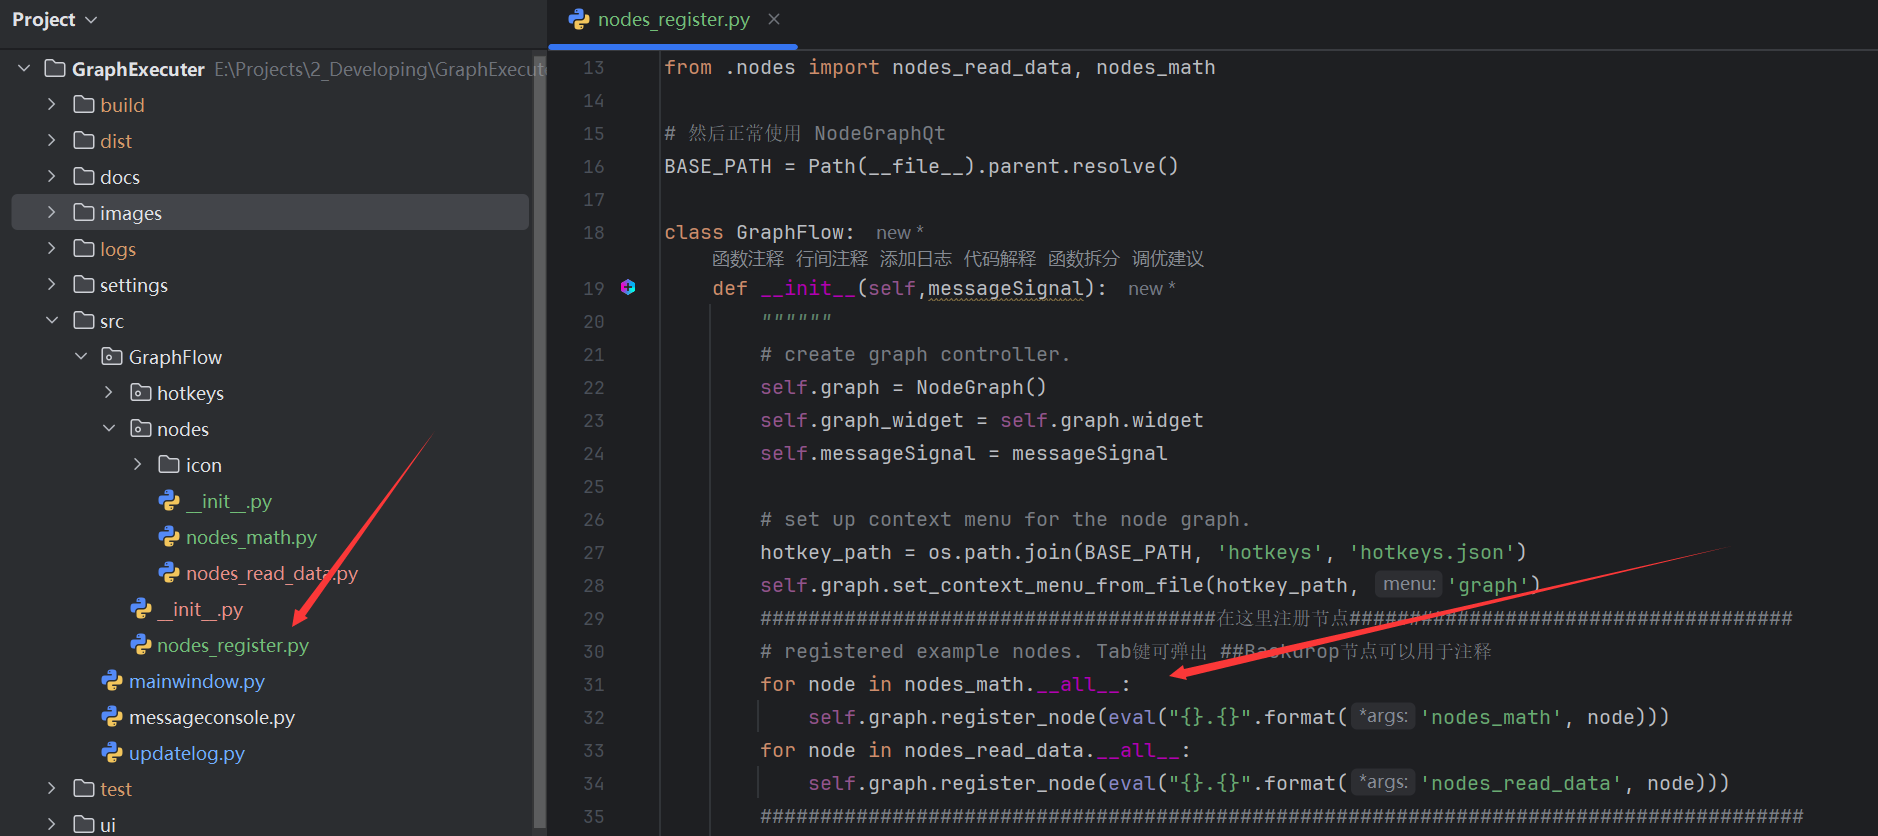
❇️注册节点(Register node type)
编译(Compile)
shell
./compile.bat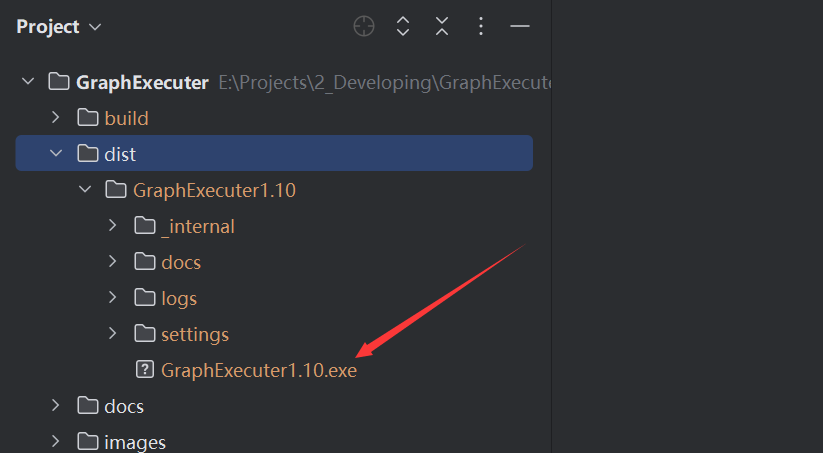
生成的可执行文件存放在dist文件夹下
报错
❌框选节点的时候报错
shell
Error calling Python override of QGraphicsView::mouseMoveEvent(): Traceback (most recent call last):
  File "D:\ProgramData\anaconda3\envs\DataProcessUI\Lib\site-packages\NodeGraphQt\widgets\viewer.py", line 619, in mouseMoveEvent
    self.scene().setSelectionArea(
TypeError: 'PySide6.QtWidgets.QGraphicsScene.setSelectionArea' called with wrong argument types:
  PySide6.QtWidgets.QGraphicsScene.setSelectionArea(QPainterPath, ItemSelectionMode)
Supported signatures:
  PySide6.QtWidgets.QGraphicsScene.setSelectionArea(path: PySide6.QtGui.QPainterPath, /, selectionOperation: PySide6.QtCore.Qt.ItemSelectionOperation = Instance(Qt.ReplaceSelection), mode: PySide6.QtCore.Qt.ItemSelectionMode = Instance(Qt.IntersectsItemShape), deviceTransform: PySide6.QtGui.QTransform = Default(QTransform))
PySide6.QtWidgets.QGraphicsScene.setSelectionArea(path: PySide6.QtGui.QPainterPath, deviceTransform: PySide6.QtGui.QTransform, /)✔️Pyside6和nodegraphqt版本不适配导致,更改viewer.py以下位置即可:
shell
# "D:\ProgramData\anaconda3\envs\XXXXXXXX\Lib\site-packages\NodeGraphQt\widgets\viewer.py"

# self.scene().setSelectionArea(
#     path, QtCore.Qt.IntersectsItemShape
# )
self.scene().setSelectionArea(
    path,
    selectionOperation=QtCore.Qt.ItemSelectionOperation.ReplaceSelection,
    mode=QtCore.Qt.ItemSelectionMode.IntersectsItemShape
)