一、解压并安装 Ollama
1. 解压文件
bash
# 1. 解压文件(默认会得到一个二进制文件)
[root@localhost ~]# tar -xzvf ollama-linux-amd64.tgz
bin/ollama
lib/ollama/cuda_v11/
lib/ollama/cuda_v11/libggml-cuda.so
lib/ollama/cuda_v11/libcublas.so.11
lib/ollama/cuda_v11/libcublas.so.11.5.1.109
lib/ollama/cuda_v11/libcublasLt.so.11.5.1.109
lib/ollama/cuda_v11/libcudart.so.11.3.109
lib/ollama/cuda_v11/libcublasLt.so.11
lib/ollama/cuda_v11/libcudart.so.11.0
lib/ollama/cuda_v12/
lib/ollama/cuda_v12/libggml-cuda.so
lib/ollama/cuda_v12/libcudart.so.12
lib/ollama/cuda_v12/libcudart.so.12.8.90
lib/ollama/cuda_v12/libcublasLt.so.12
lib/ollama/cuda_v12/libcublas.so.12.8.4.1
lib/ollama/cuda_v12/libcublas.so.12
lib/ollama/cuda_v12/libcublasLt.so.12.8.4.1
lib/ollama/libggml-base.so
lib/ollama/libggml-cpu-alderlake.so
lib/ollama/libggml-cpu-haswell.so
lib/ollama/libggml-cpu-icelake.so
lib/ollama/libggml-cpu-sandybridge.so
lib/ollama/libggml-cpu-skylakex.so
2. 创建安装目录
bash
[root@localhost ~]# sudo mkdir -p /opt/ollama
[root@localhost ~]# sudo cp -r bin/ /opt/ollama/
[root@localhost ~]# sudo cp -r lib/ /opt/ollama/
3.创建符号链接到系统路径
bash
sudo ln -s /opt/ollama/bin/ollama /usr/local/bin/ollama4. 配置动态库路径
确保 Ollama 能找到 CUDA 和 CPU 架构的动态库:
bash
[root@localhost ~]# echo "export LD_LIBRARY_PATH=/opt/ollama/lib/ollama:\$LD_LIBRARY_PATH" | sudo tee -a /etc/profile.d/ollama.sh
export LD_LIBRARY_PATH=/opt/ollama/lib/ollama:$LD_LIBRARY_PATH
[root@localhost ~]# source /etc/profile.d/ollama.sh
5. 验证安装
提示无法连接到正在运行的Ollama实例,是因为没有配置service服务
bash
[root@localhost ~]# ollama --version
Warning: could not connect to a running Ollama instance
Warning: client version is 0.6.5二、配置 Ollama 服务
1. 创建专用用户和目录
bash
# 创建 ollama 用户的主目录(如果不存在)
sudo mkdir -p /home/ollama
# 设置目录所有权为 ollama 用户
sudo chown ollama:ollama /home/ollama
# 确保目录权限正确(用户可读写)
sudo chmod 700 /home/ollama
sudo useradd -r -s /bin/false ollama
#创建模型存储目录并授权
sudo mkdir -p /etc/ollama /var/lib/ollama
sudo chown -R ollama:ollama /etc/ollama /var/lib/ollama2. 配置 Systemd 服务
bash
sudo tee /etc/systemd/system/ollama.service <<'EOF'
[Unit]
Description=Ollama Service
After=network-online.target
Requires=network-online.target

[Service]
User=ollama
Group=ollama
ExecStart=/usr/local/bin/ollama serve
Restart=on-failure

# 环境变量
Environment="PATH=/usr/local/sbin:/usr/local/bin:/usr/sbin:/usr/bin:/sbin:/bin"
Environment="OLLAMA_MODELS=/var/lib/ollama"
Environment="OLLAMA_HOST=0.0.0.0:11434"  # 绑定所有接口,端口 11434

# 资源限制
MemoryLimit=4G
CPUQuota=200%

# 安全配置
NoNewPrivileges=true
PrivateTmp=true
ProtectSystem=full

[Install]
WantedBy=multi-user.target
EOF
3. 启动服务
bash
sudo systemctl daemon-reload
sudo systemctl start ollama
sudo systemctl enable ollama
4. 放行防火墙端口
bash
sudo firewall-cmd --permanent --add-port=11434/tcp
sudo firewall-cmd --reload
[root@koji-builder ~]# sudo firewall-cmd --list-ports | grep 11434
11434/tcp三、验证安装
1. 检查服务状态
bash
[root@koji-builder ~]# sudo systemctl status ollama
● ollama.service - Ollama Service
   Loaded: loaded (/etc/systemd/system/ollama.service; enabled; vendor preset: disabled)
   Active: active (running) since Mon 2025-04-14 11:41:24 CST; 7min ago
 Main PID: 357650 (ollama)
    Tasks: 16 (limit: 100784)
   Memory: 17.8M
   CGroup: /system.slice/ollama.service
           └─357650 /usr/local/bin/ollama serve

4月 14 11:41:24 koji-builder systemd[1]: Started Ollama Service.
4月 14 11:41:24 koji-builder ollama[357650]: 2025/04/14 11:41:24 routes.go:1231: INFO server config env="map[CUDA_VISIBLE_DEVICES: GPU_DEVICE_ORDINAL:>
4月 14 11:41:24 koji-builder ollama[357650]: time=2025-04-14T11:41:24.960+08:00 level=INFO source=images.go:458 msg="total blobs: 0"
4月 14 11:41:24 koji-builder ollama[357650]: time=2025-04-14T11:41:24.960+08:00 level=INFO source=images.go:465 msg="total unused blobs removed: 0"
4月 14 11:41:24 koji-builder ollama[357650]: time=2025-04-14T11:41:24.960+08:00 level=INFO source=routes.go:1298 msg="Listening on 127.0.0.1:11434 (ve>
4月 14 11:41:24 koji-builder ollama[357650]: time=2025-04-14T11:41:24.961+08:00 level=INFO source=gpu.go:217 msg="looking for compatible GPUs"
4月 14 11:41:24 koji-builder ollama[357650]: time=2025-04-14T11:41:24.974+08:00 level=INFO source=gpu.go:377 msg="no compatible GPUs were discovered"
4月 14 11:41:24 koji-builder ollama[357650]: time=2025-04-14T11:41:24.974+08:00 level=INFO source=types.go:130 msg="inference compute" id=0 library=cp>
4月 14 11:47:58 koji-builder ollama[357650]: [GIN] 2025/04/14 - 11:47:58 | 200 |      99.397µs |       127.0.0.1 | GET      "/"
lines 1-18/18 (END)2. 验证端口监听状态
bash
[root@koji-builder ~]# ss -tulnp | grep 11434
tcp   LISTEN 0      128                 *:11434            *:*    users:(("ollama",pid=369774,fd=3))
[root@koji-builder ~]#
3. 测试 API 连通性
bash
[root@koji-builder ~]# curl http://localhost:11434
Ollama is running
四、安装 DeepSeek 模型
1. 直接拉取模型(需网络通畅)
bash
[root@koji-builder ~]# ollama pull deepseek-r1:7b
pulling manifest
pulling 96c415656d37... 100% ▕███████████████████████████████████████████████████████████████████████████████████████▏ 4.7 GB
pulling 369ca498f347... 100% ▕███████████████████████████████████████████████████████████████████████████████████████▏  387 B
pulling 6e4c38e1172f... 100% ▕███████████████████████████████████████████████████████████████████████████████████████▏ 1.1 KB
pulling f4d24e9138dd... 100% ▕███████████████████████████████████████████████████████████████████████████████████████▏  148 B
pulling 40fb844194b2... 100% ▕███████████████████████████████████████████████████████████████████████████████████████▏  487 B
verifying sha256 digest
writing manifest
success
[root@koji-builder ~]#
2. 运行模型
bash
[root@koji-builder ~]# ollama run deepseek-r1:7b
>>> 你好,DeepSeek!
<think>

</think>

你好!我是DeepSeek-R1,一个由深度求索公司开发的智能助手,我会尽我所能为您提供帮助。请问有什么可以为您服务的?
五、安装 Open WebUI
1.添加 Docker 仓库
bash
sudo dnf config-manager --add-repo=https://repo.huaweicloud.com/docker-ce/linux/centos/docker-ce.repo
sudo sed -i 's+download.docker.com+repo.huaweicloud.com/docker-ce+' /etc/yum.repos.d/docker-ce.repo
sudo sed -i 's+\$releasever+8+' /etc/yum.repos.d/docker-ce.repo
2.安装 Docker
使用以下命令安装 Docker:
javascript
yum remove runc
sudo yum install docker-ce docker-ce-cli containerd.io -y
3.启动并启用 Docker 服务
启动 Docker 服务并设置为开机自启动:
javascript
[root@koji-builder ~]# sudo systemctl start docker
[root@koji-builder ~]# sudo systemctl enable docker --now
[root@koji-builder ~]# systemctl status docker.service
● docker.service - Docker Application Container Engine
   Loaded: loaded (/usr/lib/systemd/system/docker.service; enabled; vendor preset: disabled)
   Active: active (running) since Mon 2025-04-14 14:23:11 CST; 13min ago
     Docs: https://docs.docker.com
 Main PID: 366089 (dockerd)
    Tasks: 52
   Memory: 4.8G
   CGroup: /system.slice/docker.service
           ├─366089 /usr/bin/dockerd -H fd:// --containerd=/run/containerd/containerd.sock
           ├─367006 /usr/bin/docker-proxy -proto tcp -host-ip 0.0.0.0 -host-port 3000 -container-ip 172.17.0.2 -container-port 8080
           └─367013 /usr/bin/docker-proxy -proto tcp -host-ip :: -host-port 3000 -container-ip 172.17.0.2 -container-port 8080

4月 14 14:23:09 koji-builder dockerd[366089]: time="2025-04-14T14:23:09.876058935+08:00" level=info msg="Loading containers: start."
4月 14 14:23:11 koji-builder dockerd[366089]: time="2025-04-14T14:23:11.681953947+08:00" level=info msg="Firewalld: interface docker0 already part of >
4月 14 14:23:11 koji-builder dockerd[366089]: time="2025-04-14T14:23:11.883178595+08:00" level=info msg="Loading containers: done."
4月 14 14:23:11 koji-builder dockerd[366089]: time="2025-04-14T14:23:11.912847572+08:00" level=info msg="Docker daemon" commit=8e96db1 containerd-snap>
4月 14 14:23:11 koji-builder dockerd[366089]: time="2025-04-14T14:23:11.913161898+08:00" level=info msg="Daemon has completed initialization"
4月 14 14:23:11 koji-builder dockerd[366089]: time="2025-04-14T14:23:11.956811112+08:00" level=info msg="API listen on /run/docker.sock"
4月 14 14:23:11 koji-builder systemd[1]: Started Docker Application Container Engine.
4月 14 14:30:56 koji-builder dockerd[366089]: time="2025-04-14T14:30:56.087596330+08:00" level=error msg="Not continuing with pull after error: contex>
4月 14 14:33:36 koji-builder dockerd[366089]: time="2025-04-14T14:33:36.929237215+08:00" level=info msg="Pull session cancelled"
4月 14 14:33:37 koji-builder dockerd[366089]: time="2025-04-14T14:33:37.845187027+08:00" level=error msg="Not continuing with pull after error: contex>
4.验证 Docker 安装
运行以下命令检查 Docker 版本:
javascript
[root@koji-builder ~]# docker --version
Docker version 26.1.3, build b72abbb
[root@koji-builder ~]#
5.通过 Docker 快速安装open-webui
bash
[root@koji-builder ~]# docker run -d -p 3000:8080 -e OLLAMA_BASE_URL=http://172.16.104.203:11434 -v open-webui:/app/backend/data --name open-webui --restart always ghcr.io/open-webui/open-webui:main
Unable to find image 'ghcr.io/open-webui/open-webui:main' locally
main: Pulling from open-webui/open-webui
8a628cdd7ccc: Pull complete
2a47a8c4fd5c: Pull complete
9c538fc35491: Pull complete
47bbb0afa7fe: Pull complete
782acb99e453: Pull complete
4f4fb700ef54: Pull complete
b7915144f9c7: Pull complete
633be3c6bab0: Pull complete
266a80d83771: Pull complete
7b4a3fa111d1: Pull complete
693caf783e3a: Pull complete
dc27e7f6d410: Pull complete
734b72bc705c: Pull complete
1f468c116822: Pull complete
9cbf3744ebb9: Pull complete
Digest: sha256:ae21d77f8d3c5ab06cdd79b5e1462ef57ca162de04e2ccb8977615e301fcb42a
Status: Downloaded newer image for ghcr.io/open-webui/open-webui:main
e27380dce3851bd9be09ce050bb8b0ffd0054abefe97ab4e3ede61f1989cd100
六、访问open-webui
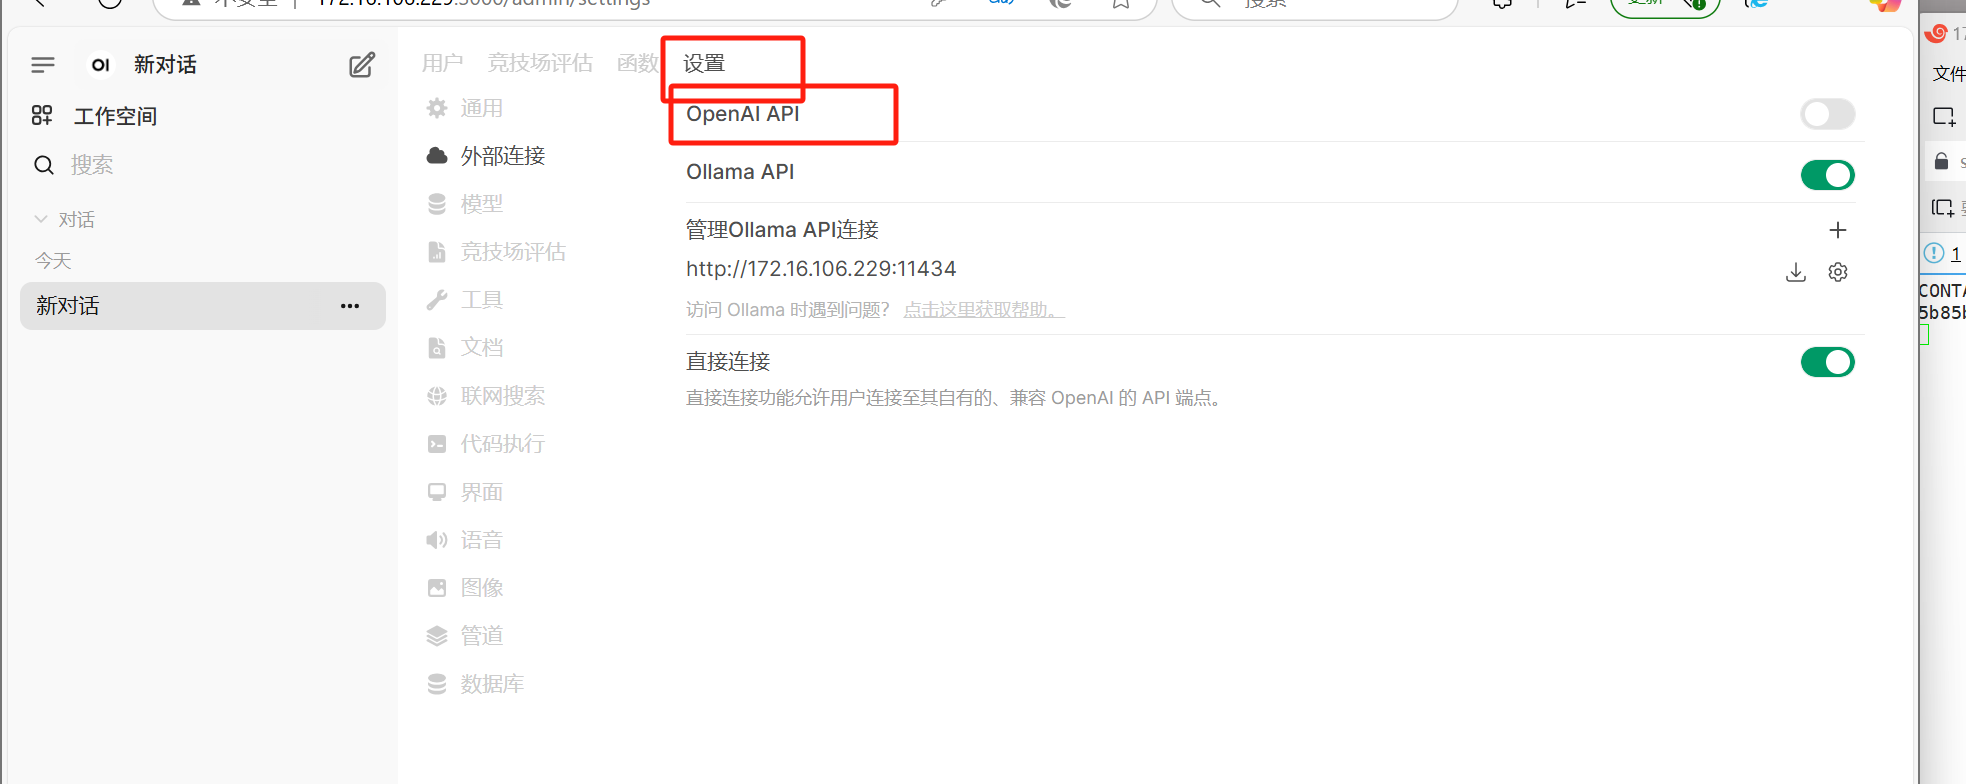
如果第一次访问ip时没有报500,就可以登录进去关闭openai的API
1. 查看 Docker 映射到宿主机webui.db位置
为了解决 OpenWebUI 报错 500
1. 查看容器挂载详情
bash
[root@koji-builder ~]# docker inspect open-webui | grep -A 10 "Mounts"
        "Mounts": [
            {
                "Type": "volume",
                "Name": "open-webui",
                "Source": "/var/lib/docker/volumes/open-webui/_data",
                "Destination": "/app/backend/data",
                "Driver": "local",
                "Mode": "z",
                "RW": true,
                "Propagation": ""
            }
[root@koji-builder ~]#
2.定位文件位置
bash
[root@koji-builder ~]# cd /var/lib/docker/volumes/open-webui/_data
[root@koji-builder _data]# ls
cache  uploads  vector_db  webui.db
[root@koji-builder _data]# 2. 修改修改 config 表中 openai.enable 字段
如果不修改的话,会报500,因为openwebui使用了openai的api,如果不能访问外网的情况下,需要修改数据库表的openai.enable 字段
1.安装sqlite
bash
yum install sqlite2.备份数据库和停止 Open WebUI 容器
bash
sudo cp webui.db webui.db.bak
#停止 Open WebUI 容器
docker stop open-webui3. 进入 SQLite 交互模式
bash
[root@koji-builder _data]# sqlite3  webui.db
SQLite version 3.26.0 2018-12-01 12:34:55
Enter ".help" for usage hints.
sqlite>
4. 查看所有表,是否有config 表
bash
sqlite> .tables
alembic_version   config            group             model
auth              document          knowledge         prompt
channel           feedback          memory            tag
channel_member    file              message           tool
chat              folder            message_reaction  user
chatidtag         function          migratehistory
sqlite>
5. 修改config 表"openai":{"enable"是的修改true
bash
#修改
sqlite> UPDATE config
   ...> SET data = json_set(
   ...>   data,
   ...>   '$.openai.enable',
   ...>   json('false')
   ...> )
   ...> WHERE id = 1;
#-- 验证结果
sqlite> SELECT json_extract(data, '$.openai.enable') FROM config WHERE id = 1;
0
6. 查看config 表中的"openai":{"enable"是的修改false
bash
sqlite> select * from config;
1|{"version":0,"ui":{"default_locale":"","prompt_suggestions":[{"title":["Help me study","vocabulary for a college entrance exam"],"content":"Help me study vocabulary: write a sentence for me to fill in the blank, and I'll try to pick the correct option."},{"title":["Give me ideas","for what to do with my kids' art"],"content":"What are 5 creative things I could do with my kids' art? I don't want to throw them away, but it's also so much clutter."},{"title":["Tell me a fun fact","about the Roman Empire"],"content":"Tell me a random fun fact about the Roman Empire"},{"title":["Show me a code snippet","of a website's sticky header"],"content":"Show me a code snippet of a website's sticky header in CSS and JavaScript."},{"title":["Explain options trading","if I'm familiar with buying and selling stocks"],"content":"Explain options trading in simple terms if I'm familiar with buying and selling stocks."},{"title":["Overcome procrastination","give me tips"],"content":"Could you start by asking me about instances when I procrastinate the most and then give me some suggestions to overcome it?"},{"title":["Grammar check","rewrite it for better readability "],"content":"Check the following sentence for grammar and clarity: \"[sentence]\". Rewrite it for better readability while maintaining its original meaning."}],"enable_signup":false},"ollama":{"enable":true,"base_urls":["http://172.16.104.203:11434"],"api_configs":{"0":{}}},"openai":{"enable":false,"api_base_urls":["https://api.openai.com/v1"],"api_keys":[""],"api_configs":{"0":{}}}}|0|2025-04-14 08:07:08|2025-04-14 08:50:11.453672
sqlite>
#-- 退出
sqlite> .quit
7. 重启open-webui容器
bash
[root@koji-builder _data]# docker start  open-webui
open-webui
bash
如果启动后没有反应需要进容器里启动
[root@koji-builder _data]# docker  exec -it open-webui /bin/bash
root@69d9b2ad6b44:/app/backend# ls
data  dev.sh  open_webui  requirements.txt  start.sh  start_windows.bat
root@69d9b2ad6b44:/app/backend# ./start.sh 3. 访问open-webui
bash
http://ip:3000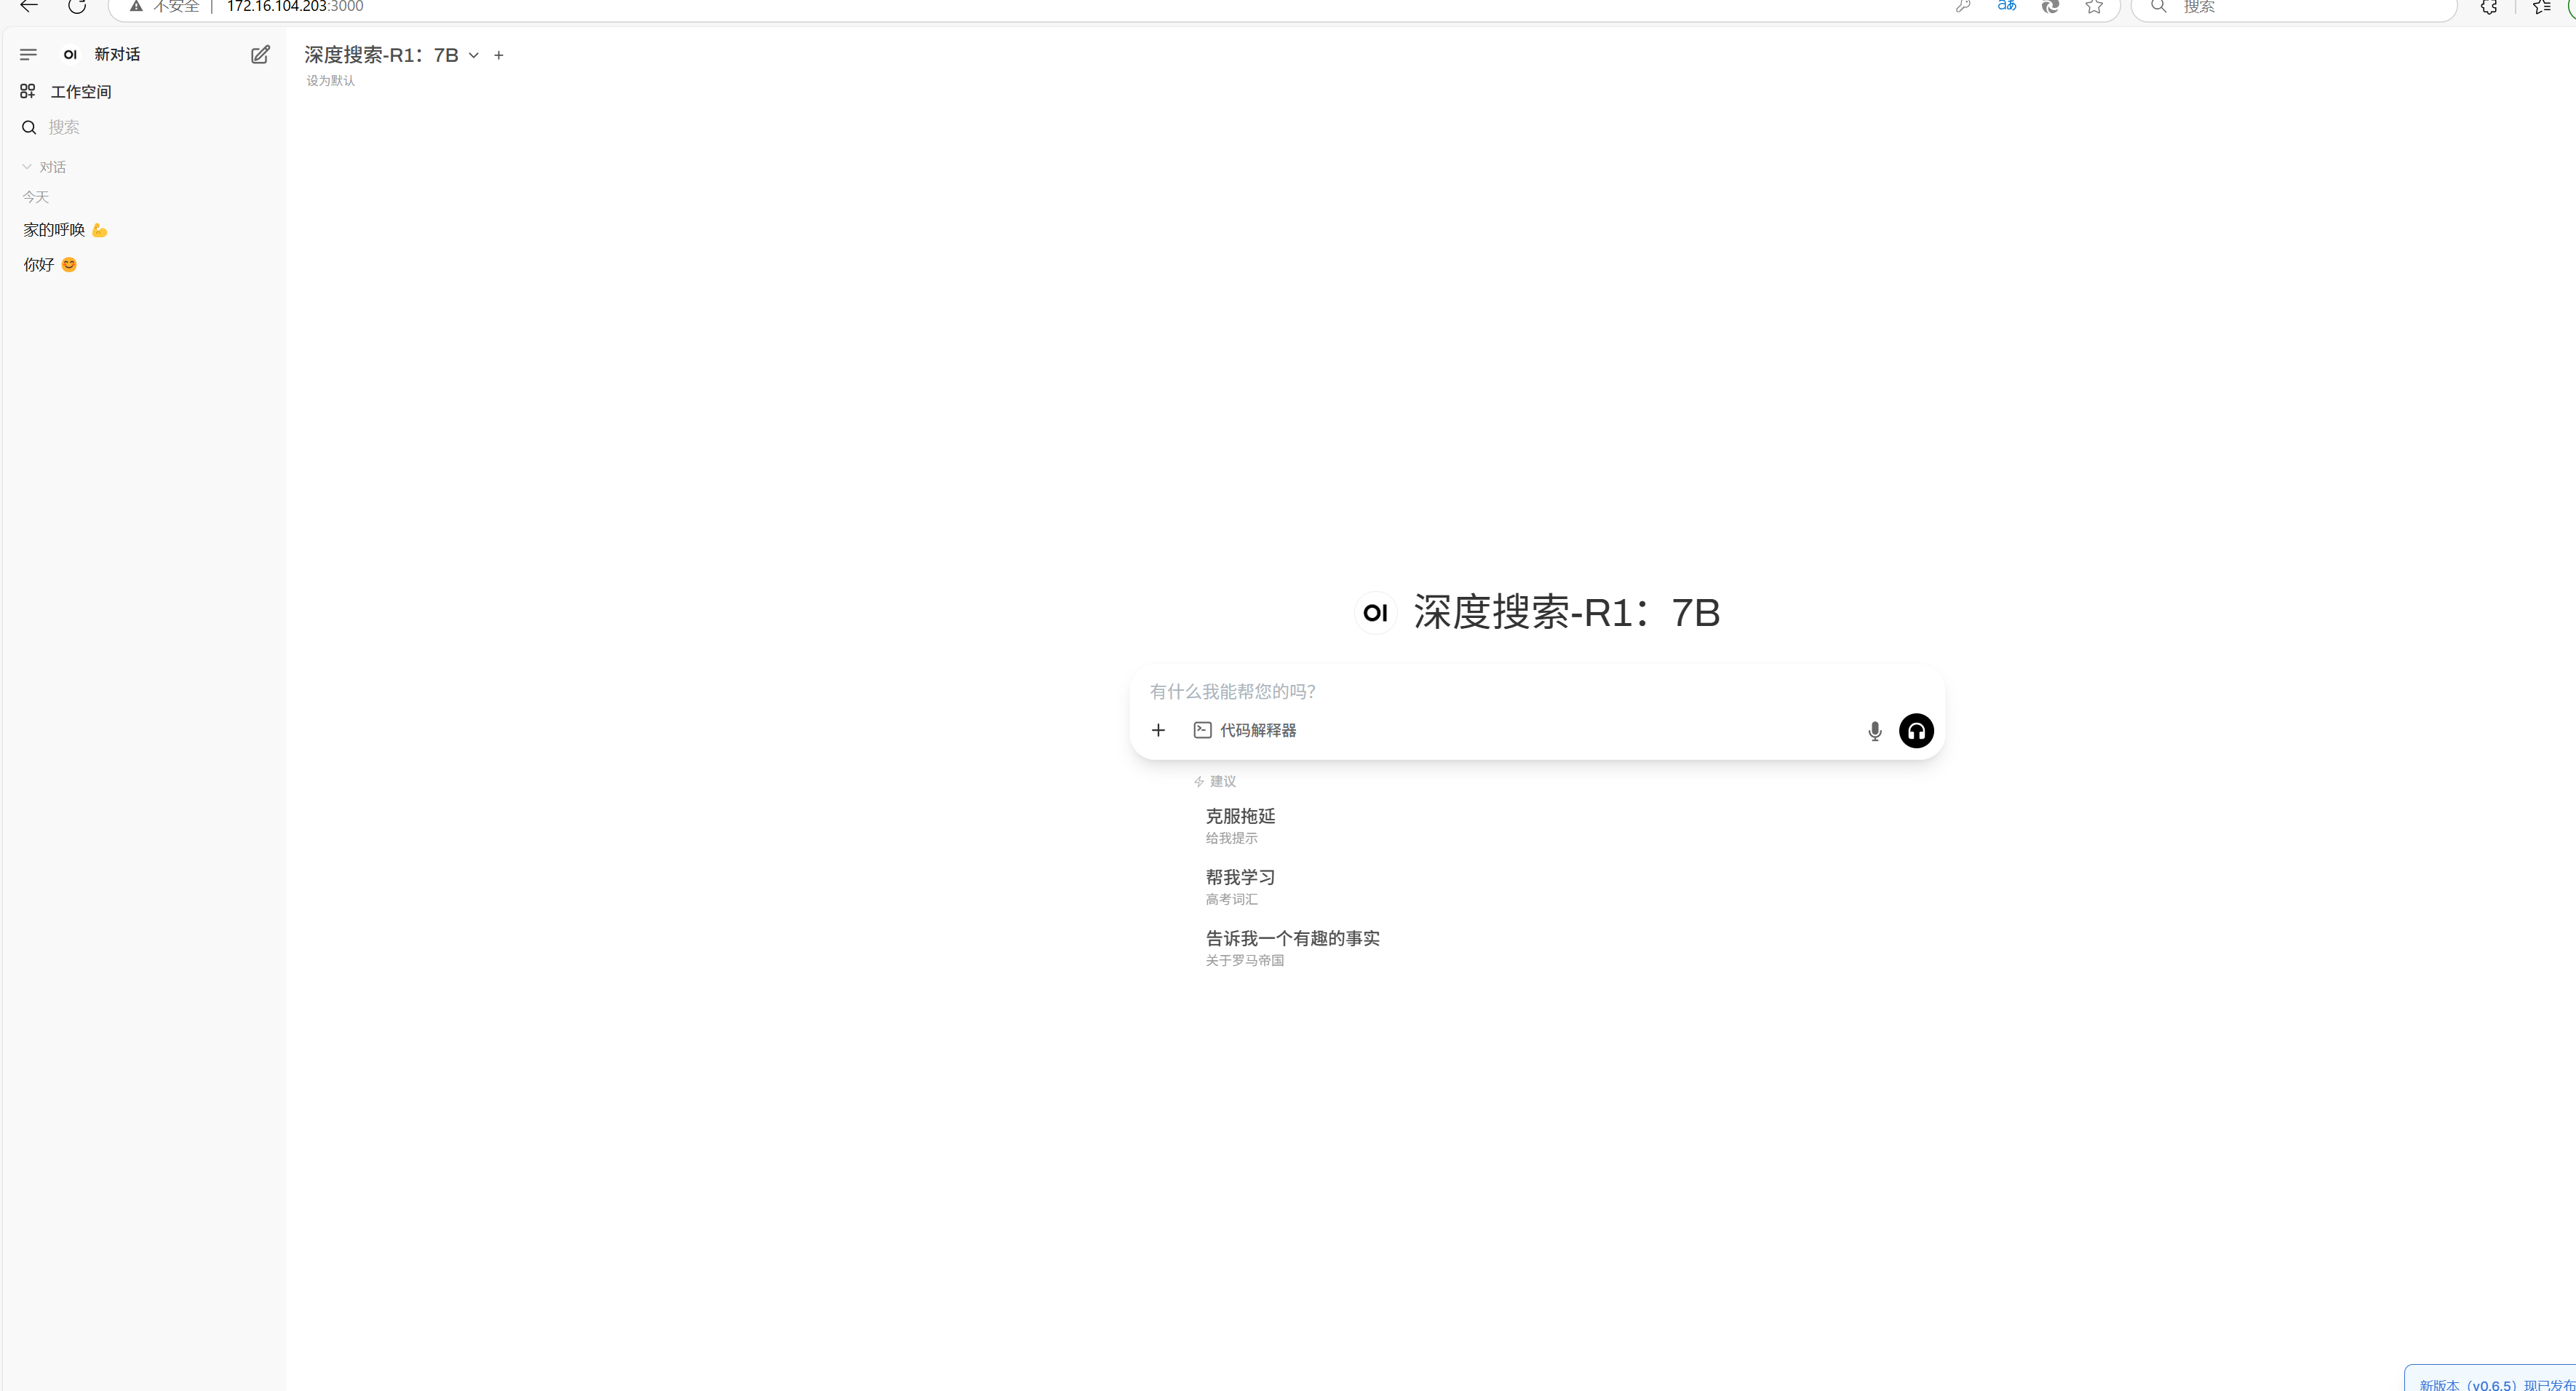
七、删除 Docker 上所有与 Open WebUI 相关资源的完整步骤:
1. 停止并删除容器
bash
# 查找容器名称或 ID
docker ps -a | grep open-webui
# 停止并删除容器(替换为实际容器 ID 或名称)
docker stop open-webui && docker rm open-webui2. 删除数据卷
bash
# 查看数据卷列表
docker volume ls | grep open-webui
# 删除数据卷(替换为实际卷名)
docker volume rm open-webui3. 清理镜像
bash
# 查看镜像 ID
docker images | grep open-webui
# 删除镜像(替换为实际镜像 ID)
docker rmi ghcr.io/open-webui/open-webui:main4. 强制清理所有残留资源
bash
# 删除所有未使用的容器、镜像、卷和网络
docker system prune -af5. 验证清理结果
bash
# 检查容器、卷、镜像是否已删除
docker ps -a | grep open-webui      # 应无输出
docker volume ls | grep open-webui  # 应无输出
docker images | grep open-webui # 应无输出6. 手动清理宿主机的残留文件(可选)
bash
# 删除可能残留的本地文件(路径根据实际情况调整)
sudo rm -rf /var/lib/docker/volumes/open-webui