打包部署
xml
<!‐‐ 这个插件,可以将应用打包成一个可执行的jar包;‐‐>
<build>
  <plugins>
    <plugin>
      <groupId>org.springframework.boot</groupId>
      <artifactId>spring‐boot‐maven‐plugin</artifactId>
    </plugin>
  </plugins>
</build>
将这个应用打成jar包,直接使用java -jar的命令进行执行;
POM文件(父项目)
xml
<parent>
  <groupId>org.springframework.boot</groupId>
  <artifactId>spring‐boot‐starter‐parent</artifactId>
  <version>1.5.9.RELEASE</version>
</parent>

<!--他的父项目是-->
<parent>
  <groupId>org.springframework.boot</groupId>
  <artifactId>spring‐boot‐dependencies</artifactId>
  <version>1.5.9.RELEASE</version>
  <relativePath>../../spring‐boot‐dependencies</relativePath>
</parent>
<!--他来真正管理Spring Boot应用里面的所有依赖版本-->
Spring Boot的版本仲裁中心;
以后我们导入依赖默认是不需要写版本;(没有在dependencies里面管理的依赖自然需要声明版本号)
启动器【starter】
xml
<dependency>
  <groupId>org.springframework.boot</groupId>
  <artifactId>spring-boot-starter-web</artifactId>
</dependency>
**spring-boot-starter-web: **
spring-boot-starter:spring-boot场景启动器;帮我们导入了web模块正常运行所依赖的组件;
里面所包含的依赖:
Spring Boot将所有的功能场景都抽取出来,做成一个个的starters(启动器),只需要在项目里面引入这些starter,相关场景的所有依赖都会导入进来。要用什么功能就导入什么场景的启动器 。
主程序类(入口)
java
//@SpringBootApplication 来标注一个主程序类,说明这是一个Spring Boot应用
@SpringBootApplication
public class HystrixApplication {

    public static void main(String[] args) {
        // Spring应用启动起来
        SpringApplication.run(HystrixApplication.class, args);
    }
}@SpringBootApplication: Spring Boot应用标注在某个类上说明这个类是SpringBoot的主配置类,SpringBoot就应该运行这个类的main方法来启动SpringBoot应用;
java
@SpringBootConfiguration
@EnableAutoConfiguration
@ComponentScan(excludeFilters = { @Filter(type = FilterType.CUSTOM, classes = TypeExcludeFilter.class),
		@Filter(type = FilterType.CUSTOM, classes = AutoConfigurationExcludeFilter.class) })
public @interface SpringBootApplication {
}1、@SpringBootConfifiguration
@SpringBootConfifiguration:Spring Boot的配置类; 标注在某个类上,表示这是一个Spring Boot的配置类;
java
@Target(ElementType.TYPE)
@Retention(RetentionPolicy.RUNTIME)
@Documented
@Configuration
public @interface SpringBootConfiguration {
}@Confifiguration:配置类上来标注这个注解; 配置类 ----- 配置文件;配置类也是容器中的一个组件;@Component 。
java
@Target(ElementType.TYPE)
@Retention(RetentionPolicy.RUNTIME)
@Component
public @interface Configuration {
}
2、EnableAutoConfiguration
@EnableAutoConfiguration:开启自动配置功能;
以前我们需要配置的东西,现在Spring Boot帮我们自动配置;@EnableAutoConfifiguration告诉SpringBoot开启自动配置功能;这样自动配置才能生效;
java
@AutoConfigurationPackage
@Import(AutoConfigurationImportSelector.class)
public @interface EnableAutoConfiguration {
}- @AutoConfifigurationPackage:自动配置包
java
@Import(AutoConfigurationPackages.Registrar.class)
public @interface AutoConfigurationPackage {
}@Import(AutoConfifigurationPackages.Registrar.class):
Spring的底层注解@Import,给容器中导入一个组件;导入的组件AutoConfifigurationPackages.Registrar.class;
扫描启动类下所在的包,以及下面的子包。
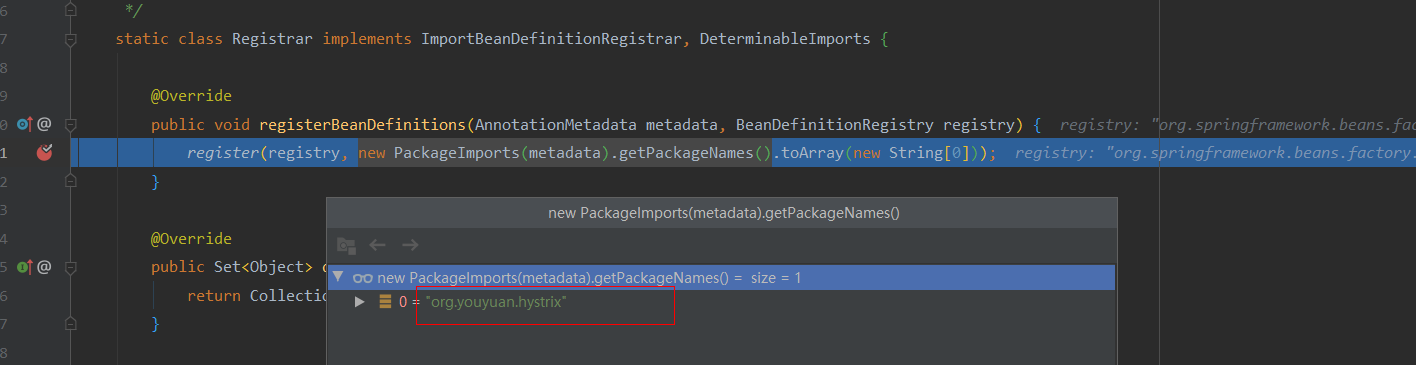
将主配置类(@SpringBootApplication标注的类)的所在包及下面所有子包里面的所有组件扫描到Spring容器;
- @Import(EnableAutoConfigurationImportSelector.class); 给容器中导入组件?
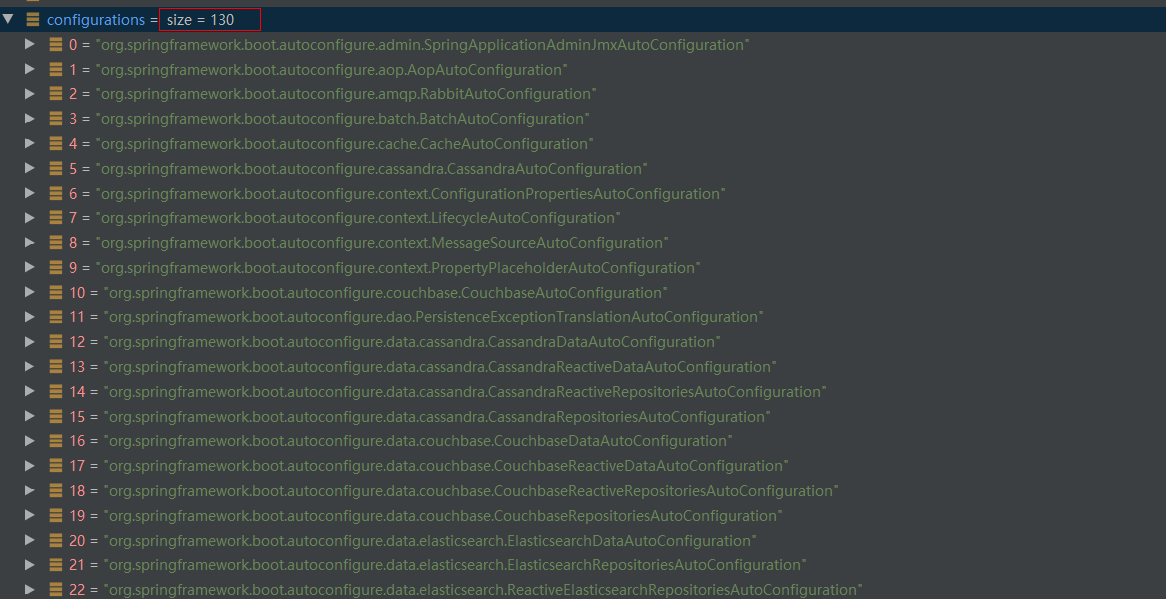
EnableAutoConfigurationImportSelector:导入哪些组件的选择器;
将所有需要导入的组件以全类名的方式返回;这些组件就会被添加到容器中;
会给容器中导入非常多的自动配置类(xxxAutoConfifiguration);就是给容器中导入这个场景需要的所有组件, 并配置好这些组件;
有了自动配置类,免去了我们手动编写配置注入功能组件等的工作;
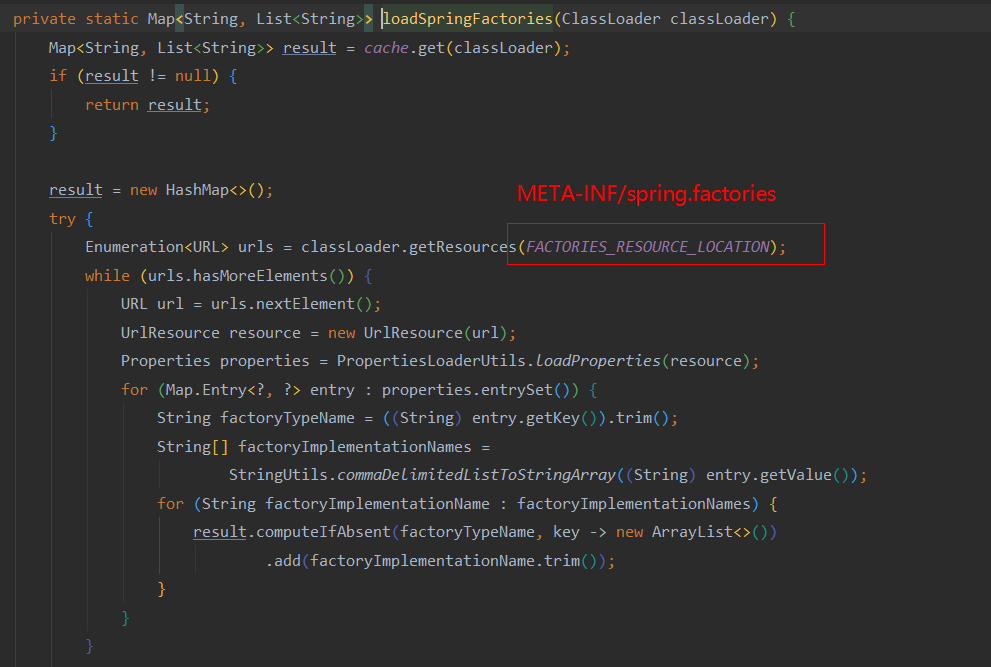
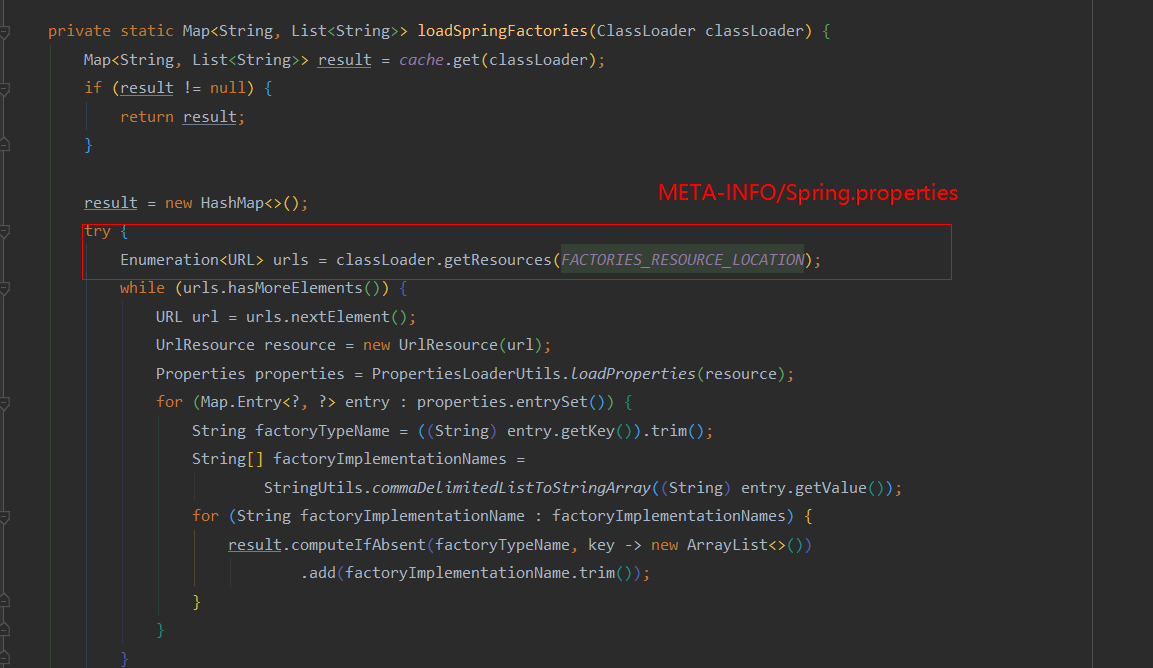
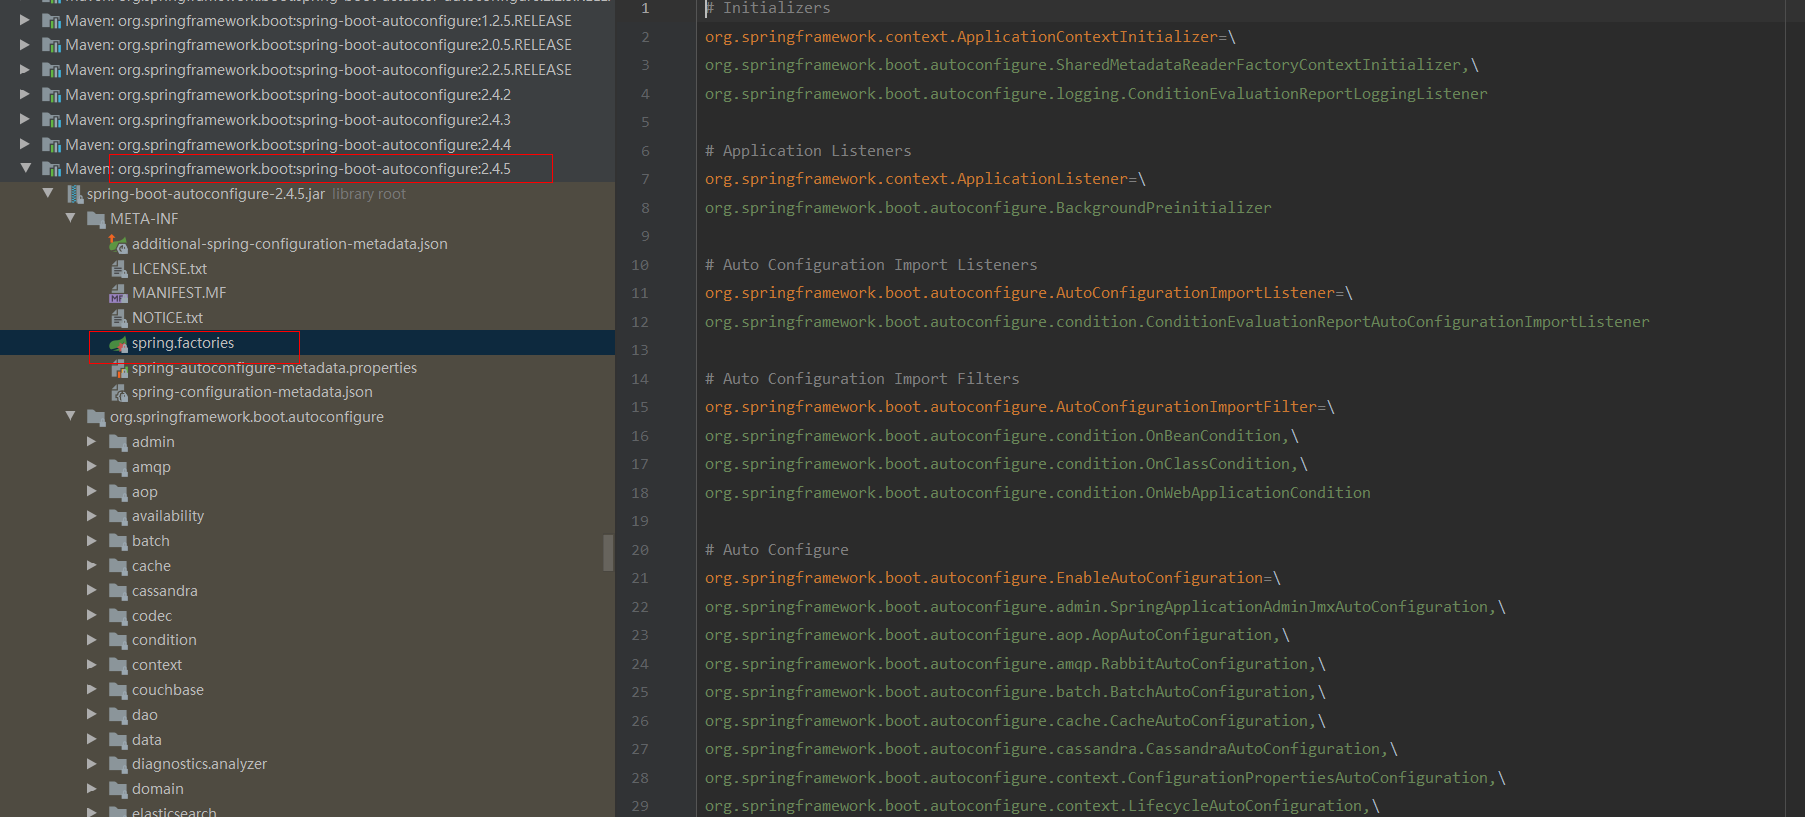
Spring Boot在启动的时候从类路径下的META-INF/spring.factories中获EnableAutoConfifiguration指定的值,将这些值作为自动配置类导入到容器中,自动配置类就生效,帮我们进行自动配置工作;
以前我们需要自己配置的东 西,自动配置类都帮我们;
J2EE的整体整合解决方案和自动配置都在spring-boot-autoconfifigure-1.5.9.RELEASE.jar;
YAML
1、基本语法
k:(空格)v:表示一对键值对(空格必须有);
以空格的缩进来控制层级关系;只要是左对齐的一列数据,都是同一个层级的
属性和值也是大小写敏感;
2、值的写法
- **字面量:普通的值(数字,字符串,布尔) **
k: v:字面直接来写;
字符串默认不用加上单引号或者双引号;
"":双引号;不会转义字符串里面的特殊字符;特殊字符会作为本身想表示的意思
name: "zhangsan \n lisi":输出;zhangsan 换行 lisi
yaml
user:
  diy:
    name: "zhangsan \n lisi"
'':单引号;会转义特殊字符,特殊字符最终只是一个普通的字符串数据
name: 'zhangsan \n lisi':输出;zhangsan \n lisi
yaml
user:
  diy:
    name: 'zhangsan \n lisi'
- **对象、Map(属性和值)(键值对): **
k: v:在下一行来写对象的属性和值的关系;注意缩进
对象还是k: v的方式
yaml
myuser:
    friends:
      lastName: zhangsan
      age: 20
行内写法:
yaml
myuser:
friends: {lastName: zhangsan,age: 20}- 数组(List 、Set)
用- 值表示数组中的一个元素
yaml
pets:
  ‐ cat
  ‐ dog
  ‐ pig
行内写法
yaml
pets: [cat,dog,pig]
java
person.last-name-张三
person.age=18
person.birth=2017/12/15
person.boss=false
person.maps.k1=v1
person.maps.k2=14
person.1ists=a,b,c
person.dog.name=dog
person.dog.age=15
3、配置文件值注入
配置文件
yaml
person:
  lastName: hello
  age: 18
  boss: false
  birth: 2017/12/12
  maps: {k1: v1,k2: 12}
  lists:
    - cat
    - pig
  dog:
    name: 小狗
    age: 12
JavaBean
java
/**
* @ConfigurationProperties:告诉SpringBoot将本类中的所有属性和配置文件中相关的配置进行绑定;
* prefix = "person":配置文件中哪个下面的所有属性进行一一映射
* 只有这个组件是容器中的组件,才能容器提供的@ConfigurationProperties功能;
*/
@Data
@Component
@ConfigurationProperties(prefix = "person")
public class MyPerson {
    private String lastName;
    private Integer age;
    private Boolean boss;
    private Date birth;
    private Map<String,Object> maps;
    private List<Object> lists;
    private Dog dog;
}
导入配置文件处理器,以后编写配置就有提示了
xml
<!--导入配置文件处理器,配置文件进行绑定就会有提示-->
<dependency>
  <groupId>org.springframework.boot</groupId>
  <artifactId>spring-boot-configuration-processor</artifactId>
  <optional>true</optional>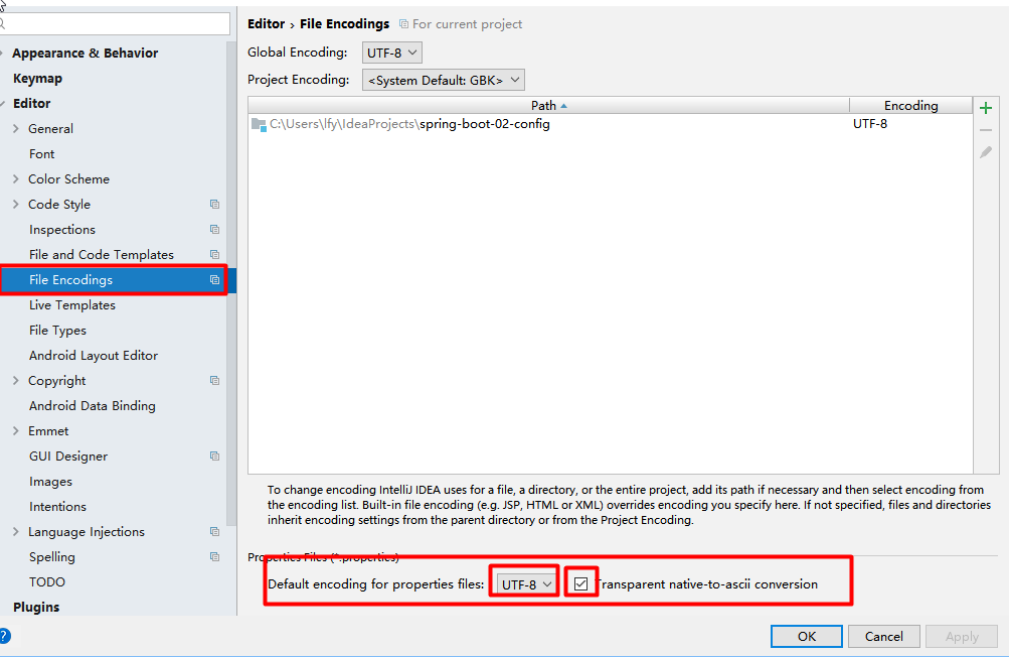
</dependency>properties配置文件在 idea中默认utf-8****可能会乱码
4、@Value获取值和@ConfifigurationProperties获取值比较
| @ConfifigurationProperties | @Value | |
|---|---|---|
| 功能 | 批量注入配置文件中的属性 | 一个个指定 |
| 松散绑定(松散语法) | 支持 | 不支持 |
| SpEL | 不支持 | 支持 |
| JSR303数据校验 | 支持 | 不支持 |
| 复杂类型封装 | 支持 | 不支持 |
配置文件yml还是properties他们都能获取到值;
如果说,我们只是在某个业务逻辑中需要获取一下配置文件中的某项值,使用@Value;
如果说,我们专门编写了一个javaBean来和配置文件进行映射,我们就直接使用@ConfifigurationProperties;
5、@PropertySource&@ImportResource&@Bean
@PropertySource:加载指定的配置文件;
java
@Data
@Component
@PropertySource(value = {"classpath:person.properties"})
@ConfigurationProperties(prefix = "person1")
public class MyUser {
    private String name;
    private String address;
}
@ImportResource:导入Spring的配置文件,让配置文件里面的内容生效;
Spring Boot里面没有Spring的配置文件,我们自己编写的配置文件,也不能自动识别;
想让Spring的配置文件生效,加载进来;@ImportResource标注在一个配置类上
java
@ImportResource(locations = {"classpath:beans.xml"})
//导入Spring的配置文件让其生效
Profifile
1、多Profifile文件
我们在主配置文件编写的时候,文件名可以是 application-{profifile}.properties/yml
默认使用application.properties的配置;
2、yml支持多文档块方式
yaml
server:
	port: 8081
spring:
  profiles:
    active: prod   #指定属于哪个环境
‐‐‐
server:
  port: 8083
spring:
  profiles: dev
---
server:
  port: 8084
spring:
  profiles: prod
3、激活指定profifile
1、在配置文件中指定
yaml
spring.profifiles.active=dev2、命令行:
bash
java -jar upload-0.0.1-SNAPSHOT.jar --spring.profiles.active=prod可以直接在测试的时候,配置传入命令行参数
3、虚拟机参数;
-Dspring.profifiles.active=dev
配置文件加载位置
springboot 启动会扫描以下位置的application.properties或者application.yml文件作为Spring boot的默认配置文
件
--fifile:./confifig/
--fifile:./
--classpath:/confifig/
--classpath:/
优先级由高到底,高优先级的配置会覆盖低优先级的配置;
SpringBoot会从这四个位置全部加载主配置文件;互补配置;
我们还可以通过spring.confifig.location来改变默认的配置文件位置
**项目打包好以后,我们可以使用命令行参数的形式,启动项目的时候来指定配置文件的新位置;指定配置文件和默认加载的这些配置文件共同起作用形成互补配置; **
bash
java -jar webupload.jar --spring.confifig.location=G:/application.properties外部配置加载顺序
SpringBoot也可以从以下位置加载配置; 优先级从高到低;高优先级的配置覆盖低优先级的配置,所有的配置会 形成互补配置****。
1.命令行参数
所有的配置都可以在命令行上进行指定
bash
java -jar webupload.jar --server.port=8087 --server.context-path=/abc多个配置用空格分开; --配置项=值
2.来自java:comp/env的JNDI属性
3.Java系统属性(System.getProperties())
4.操作系统环境变量
5.RandomValuePropertySource配置的random.*属性值
**由jar包外向jar包内进行寻找; **
**优先加载带profifile **
**6.jar包外部的application-{profifile}.properties或application.yml(带spring.profifile)配置文件 **
**7.jar包内部的application-{profifile}.properties或application.yml(带spring.profifile)配置文件 **
**再来加载不带profifile **
**8.jar包外部的application.properties或application.yml(不带spring.profifile)配置文件 **
**9.jar包内部的application.properties或application.yml(不带spring.profifile)配置文件 **
10.@Confifiguration注解类上的@PropertySource
11.通过SpringApplication.setDefaultProperties指定的默认属性
静态资源的映射规则
1)所有 /webjars/** ,都去 classpath:/META-INF/resources/webjars/ 找资源;
2)"/**" 访问当前项目的任何资源,都去(静态资源的文件夹)找映射
java
private static final String[] CLASSPATH_RESOURCE_LOCATIONS = { "classpath:/META-INF/resources/","classpath:/resources/", "classpath:/static/", "classpath:/public/" };3)欢迎页; 静态资源文件夹下的所有index.html页面;被"/**"映射;
localhost:8080/ 找index页面
4)所有的 **/favicon.ico 都是在静态资源文件下找;
配置嵌入式Servlet容器
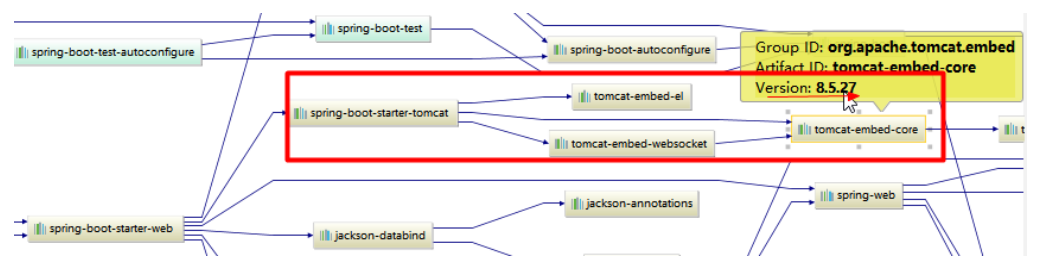
SpringBoot默认使用Tomcat作为嵌入式的Servlet容器;
如何定制和修改Servlet容器的相关配置** **
- 修改和server有关的配置(ServerProperties【也是EmbeddedServletContainerCustomizer】)
plain
server.port=8081
server.context‐path=/crud
server.tomcat.uri‐encoding=UTF‐8 /
/通用的Servlet容器设置
server.xxx
//Tomcat的设置
server.tomcat.xxx- 编写一个EmbeddedServletContainerCustomizer:嵌入式的Servlet容器的定制器;来修改Servlet容器的配置
java
@Configuration
public class TomcatConfig {
    @Bean
    public WebServerFactoryCustomizer<ConfigurableServletWebServerFactory> webServerFactoryCustomizer(){
        return new WebServerFactoryCustomizer<ConfigurableServletWebServerFactory>() {
            @Override
            public void customize(ConfigurableServletWebServerFactory factory) {
                factory.setPort(8888);
            }
        };
    }
}
注册Servlet三大组件【Servlet、Filter、Listener】
java
public class MyServlet extends HttpServlet {

    @Override
    protected void doGet(HttpServletRequest req, HttpServletResponse resp) throws ServletException, IOException {
        resp.getWriter().write("hello");
    }

    @Override
    protected void doPost(HttpServletRequest req, HttpServletResponse resp) throws ServletException, IOException {
        resp.getWriter().write("hello");
    }
}


public class MyListener implements ServletContextListener {

    @Override
    public void contextInitialized(ServletContextEvent sce) {
        System.out.println("contextInitialized应用启动....");
    }

    @Override
    public void contextDestroyed(ServletContextEvent sce) {
        System.out.println("contextInitialized应用销毁");
    }

}

public class MyFilter implements Filter {
    @Override
    public void init(FilterConfig filterConfig) throws ServletException {

    }

    @Override
    public void doFilter(ServletRequest request, ServletResponse response, FilterChain chain) throws IOException, ServletException {
        System.out.println("filter");
        chain.doFilter(request,response);
    }

    @Override
    public void destroy() {

    }
}
注册ServletRegistrationBean 、FilterRegistrationBean 、ServletListenerRegistrationBean
java
@Configuration
public class MvcConfig {

    //注册三大组件之Servlet
    @Bean
    public ServletRegistrationBean myServlet() {
        ServletRegistrationBean servletRegistrationBean = new ServletRegistrationBean(new MyServlet(),"/myServlet");
        return servletRegistrationBean;
    }

    //注册三大组件之Filter
    @Bean
    public FilterRegistrationBean myFilter() {
        FilterRegistrationBean filterRegistrationBean = new FilterRegistrationBean();
        filterRegistrationBean.setFilter(new MyFilter());
        //拦截指定的接口
        filterRegistrationBean.setUrlPatterns(Arrays.asList("/hello","/myServlet"));
        return filterRegistrationBean;
    }

    //注册三大组件之Listener
    @Bean
    public ServletListenerRegistrationBean myListener() {
        ServletListenerRegistrationBean<MyListener> myListenerServletListenerRegistrationBean = new ServletListenerRegistrationBean<>(new MyListener());
        myListenerServletListenerRegistrationBean.setOrder(1);
        return myListenerServletListenerRegistrationBean;
    }
}