FreeSWITCH 简单图形化界面43 - 使用百度的unimrcp搞个智能话务台
- 0、一个fs的web配置界面预览
- 1、安装unimrcp模块
- 2、安装完成后,配置FreeSWITCH。
-
- [2.1 有界面的配置](#2.1 有界面的配置)
-
- [2.1.1 mod_unimrcp模块配置](#2.1.1 mod_unimrcp模块配置)
- [2.1.2 mod_unimrcp客户端配置](#2.1.2 mod_unimrcp客户端配置)
- [2.2 无界面的配置](#2.2 无界面的配置)
- 3、呼叫规则
- 4、编写流程
-
- [4.1 python代码](#4.1 python代码)
- [4.2 主要是detect_speech和speak](#4.2 主要是detect_speech和speak)
- 5、效果
- [6、 一些参考的官网网址](#6、 一些参考的官网网址)
0、一个fs的web配置界面预览
用户名:admin,密码:admin
FreeSWITCH界面安装参考:https://blog.csdn.net/jia198810/article/details/137820796
1、安装unimrcp模块
参考链接:
1、https://docs.qq.com/pdf/DVFFub1JpSmNMRXdJ] 百度mrcp章节
2、https://blog.csdn.net/jia198810/article/details/118461176?spm=1011.2415.3001.5331
安装完成后,配置unimrcp服务器的端口为6060。
如果这里模块没有安装成功,就不用继续了哈,请划过。
2、安装完成后,配置FreeSWITCH。
2.1 有界面的配置
2.1.1 mod_unimrcp模块配置

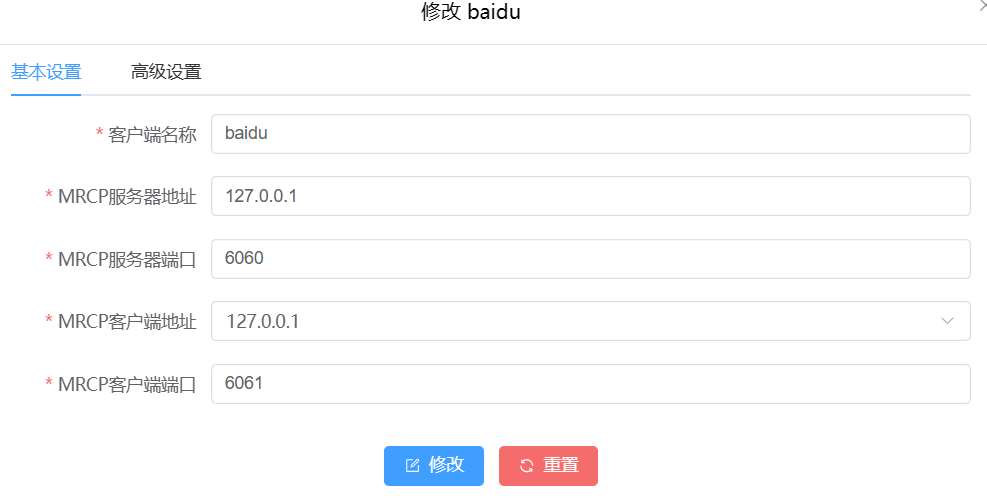
2.1.2 mod_unimrcp客户端配置
2.2 无界面的配置
如果使用的是没有界面的FreeSWITCH,配置如下:
xml
<configuration name="unimrcp.conf" description="UniMRCP Client">
<settings>
<!-- UniMRCP profile to use for TTS -->
<param name="default-tts-profile" value="baidu"/>
<!-- UniMRCP profile to use for ASR -->
<param name="default-asr-profile" value="baidu"/>
<!-- UniMRCP logging level to appear in freeswitch.log. Options are:
EMERGENCY|ALERT|CRITICAL|ERROR|WARNING|NOTICE|INFO|DEBUG -->
<param name="log-level" value="info"/>
<!-- Enable events for profile creation, open, and close -->
<param name="enable-profile-events" value="true"/>
<param name="max-connection-count" value="100"/>
<param name="offer-new-connection" value="1"/>
<param name="request-timeout" value="3000"/>
</settings>
<profiles>
<profile name="baidu" version="2">
<param name="server-ip" value="127.0.0.1"/>
<!-- Mrcp Server 端口号 -->
<param name="server-port" value="6060"/>
<param name="resource-location" value=""/>
<param name="client-ip" value="127.0.0.1"/>
<param name="client-port" value="6061"/>
<param name="sip-transport" value="udp"/>
<param name="rtp-ip" value="127.0.0.1"/>
<param name="rtp-port-min" value="30000"/>
<param name="rtp-port-max" value="30500"/>
<param name="speechsynth" value="speechsynthesizer"/>
<param name="speechrecog" value="speechrecognizer"/>
<param name="codecs" value="PCMU PCMA L16/96/8000"/>
<!-- Add any default MRCP params for SPEAK requests here -->
<synthparams> </synthparams>
<!-- Add any default MRCP params for RECOGNIZE requests here -->
<recogparams>
<!-- param name="start-input-timers" value="false"/ -->
</recogparams>
</profile>
</profiles>
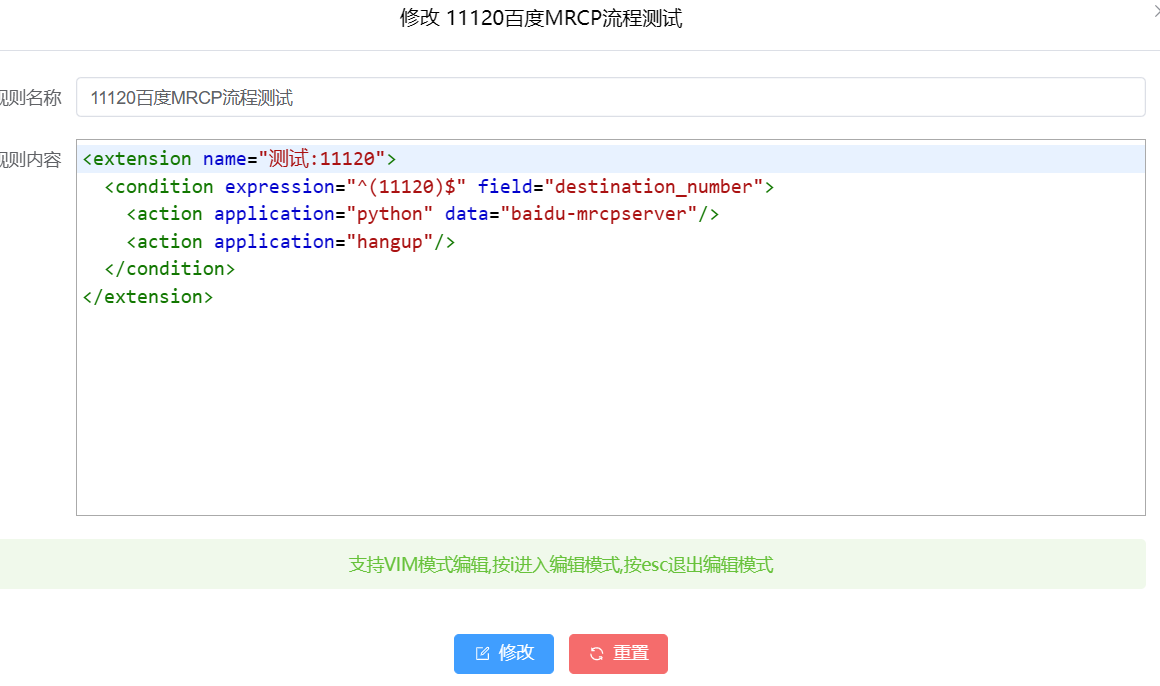
</configuration>3、呼叫规则
xml
<extension name="测试:11120">
  <condition expression="^(11120)$" field="destination_number">
    <action application="python" data="baidu-mrcpserver"/>
    <action application="hangup"/>
  </condition>
</extension>
如下图:
4、编写流程
编写baidu-mrcpserver.py代码,放在/usr/local/freeswitch/scripts/下面,如下代码用的python,lua脚本换下语法即可,Freeswitch的lua API和python的API是通用的,名称都一样。
4.1 python代码
python
#!/usr/local/python3/bin/python3
from freeswitch import *
"""
baidu-mrcpserver.py
拨号规则:
<extension name="测试:11120">
  <condition expression="^(11120)$" field="destination_number">
    <action application="python" data="baidu-mrcpserver"/>
    <action application="hangup"/>
  </condition>
</extension>

# 识别用户输入后,交由第三方处理,并读出结果。
"""
from xml.dom import minidom
from openai import OpenAI
import re

deepseek_api_key = "i am a key "

# 解析百度的asr结果,XML格式的
def parse_xml(xml_string):
    text = ""
    try:
        dom = minidom.parseString(xml_string)
        input_element = dom.getElementsByTagName('input')[0]
        text = input_element.firstChild.nodeValue
    except Exception as e:
        consoleLog("error", f"解析xml出错:{e}")
    return text

# 说
def speak(session, text):
    if text:
        session.consoleLog("info", f"正在说:{text}")
        session.execute("speak", f"unimrcp:baidu||{text}")

# 开始听
def start_listen(session):
    # timeout为语音识别时间,单位为毫秒
    # session.consoleLog("info", f"开始语音识别")

    # 设置识别超时时间
    timeout = 10000
    session.execute("detect_speech", f"param speech-timeout {timeout}")
    session.execute("detect_speech", "unimrcp baidu builtin:grammar/baidu")

# 暂停听
def pause_listen(session):
    session.consoleLog("info", "暂停语音识别")
    session.execute("detect_speech", "pause")

# 结束听
def stop_listen(session):
    session.consoleLog("info", "结束语音识别")
    session.execute("detect_speech", "stop")

# 恢复听
def resume_listen(session):
    session.consoleLog("info", "恢复语音识别")
    # resume 不好使,用detect_speech代替
    # session:execute("detect_speech", "resume");
    start_listen(session)

# 连说带听,不会触发回调
def speak_and_listen(session, text, time=5000):
    session.execute("set","tts_engine=unimrcp")
    session.execute("play_and_detect_speech",f"say:{text} detect:unimrcp:baidu builtin:grammar/baidu")
    session.execute("sleep", f"{time}")

# 第三方处理
# 这里可以编写对于语音识别的处理,这里是调用deepseek的python接口处理语音识别结果
def process_result(session, result):
    if "挂机" in result or "退出" in result or "结束" in result or "再见" in result or "结束通话" in result or "挂断" in result or "拜拜" in result:
        speak(session, "再见")
        session.hangup()
        return "break"
    if session.ready():
        speak(session, f"正在查询{result},请稍等")
        try:
            sentence_delimiters = r'([,。!?,\.!\?\n])'  # [1,3,7](@ref)
            buffer = ""
            current_sentence = ""

            client = OpenAI(api_key=deepseek_api_key, base_url="https://api.deepseek.com")

            response = client.chat.completions.create(
                model="deepseek-chat",
                messages=[
                    {"role": "system", "content": "生活助手"},
                    {"role": "user", "content": f"{result},不要超过100字回复,简洁回答,不要出现表情、星号、井号等特殊符号"},
                ],
                stream=True  # 设置 stream 参数为 True
            )

            for chunk in response:
                if chunk.choices and chunk.choices[0].delta.content:
                    content = chunk.choices[0].delta.content
                    buffer += content

                    # 实时检测分隔符
                    while True:
                        match = re.search(sentence_delimiters, buffer)
                        if not match:
                            break

                        # 分割出完整句子
                        split_pos = match.end()
                        sentence_part = buffer[:split_pos]
                        buffer = buffer[split_pos:]

                        # 将句子片段添加到当前句子
                        current_sentence += sentence_part

                        # 判断是否遇到句子结束符
                        if match.group() in ['。', '.', '!', '!', '?', '?', '\n']:  # [3,7](@ref)
                            # 分段说,避免句子太长,tts生成的太慢
                            speak(session,current_sentence.strip())
                            current_sentence = ""
            # 输出缓冲区剩余内容
            if buffer.strip():
                speak(session,current_sentence.strip())
        except Exception as e:
            consoleLog("info", f"处理结果出错:{e}")
    return "break"

# 只有在detect_speech成功后才会调用,play_and_detect_speech不会调用
# 最大识别次数,超过次数挂机
max_retries = 3
def on_input(session, callback_type, obj, arg):
    global max_retries
    if max_retries <= 0:
        # 重试次数用完,结束监听
        speak(session, "通话超时,感谢您的使用")
        session.hangup()
        return "break"

    # 处理用户按键
    if callback_type == "dtmf":
        session.consoleLog("info", f"用户按了DTMF,收集到的按键:{obj.digit}")
        return ""

    # 处理事件
    if callback_type == "event":
        event_type = obj.getHeader("Speech-Type")
        # 触发了detected-speech事件
        if event_type == "detected-speech":
            speech_output = obj.getBody()
            if speech_output:
                text = parse_xml(speech_output)
                if text and len(text) >= 2:
                    # 获取结果后进行其他处理
                    process_result(session, text)
                    speak(session, "还有什么可以帮到您?")
                else:
                    # 识别结果太短,重新开始监听
                    speak(session, "没听清,请再说一遍")
            else:
                # 识别结果太短,重新开始监听
                speak(session, "没听清,请再说一遍")
            max_retries -= 1
            # 立即结束本次处理
            return "break"
        # 立即结束本次处理
        return "break"
    # 立即结束本次处理
    return "break"

# 通话入口
def handler(session, args):
    # 应答
    session.answer()

    # 是否向event_socket发送asr事件,我们是拨号规则处理asr事件,所以不需要
    # session.setVariable("fire_asr_events", "true")

    # 注册事件回调,python的回调函数不要加引号
    session.setInputCallback(on_input)

    # 欢迎语
    speak(session,text="请问有什么可以帮助您的?")

    # 一直听,识别,读结果,直到max_retries用完
    while session.ready():
        start_listen(session)
        session.streamFile("silence_stream://90000000")

    # 挂机
    session.hangup()
4.2 主要是detect_speech和speak
5、效果
freeswitch 百度mrcp测试
6、 一些参考的官网网址
mod_unimrcp
https://developer.signalwire.com/freeswitch/FreeSWITCH-Explained/Modules/mod_unimrcp_6586728
MRCP的参数设置
No-Input-Timeout, Recognition-Timeout, Start-Input-Timers
https://www.rfc-editor.org/rfc/rfc6787
speak
https://developer.signalwire.com/freeswitch/FreeSWITCH-Explained/Modules/mod-dptools/6587123/#0-about
play_and_detect_speech
https://developer.signalwire.com/freeswitch/FreeSWITCH-Explained/Modules/mod-dptools/6586714#lua
detect_speech
https://developer.signalwire.com/freeswitch/FreeSWITCH-Explained/Modules/mod-dptools/6586756#about
详细的语音识别流程,识别用户分机的案例
https://developer.signalwire.com/freeswitch/FreeSWITCH-Explained/Client-and-Developer-Interfaces/Lua-API-Reference/Lua-examples/Lua-ASR-TTS-Directory-example_1049011/
祝君成功,好运连连