windows 使用yolov5训练模型,之后opencv加载模型进行推理。
一,搭建环境
安装 Anaconda
二,创建虚拟环境并安装yolov5
conda create -n yolov5 python=3.9 -y
conda activate yolov5
git clone https://github.com/ultralytics/yolov5
cd yolov5
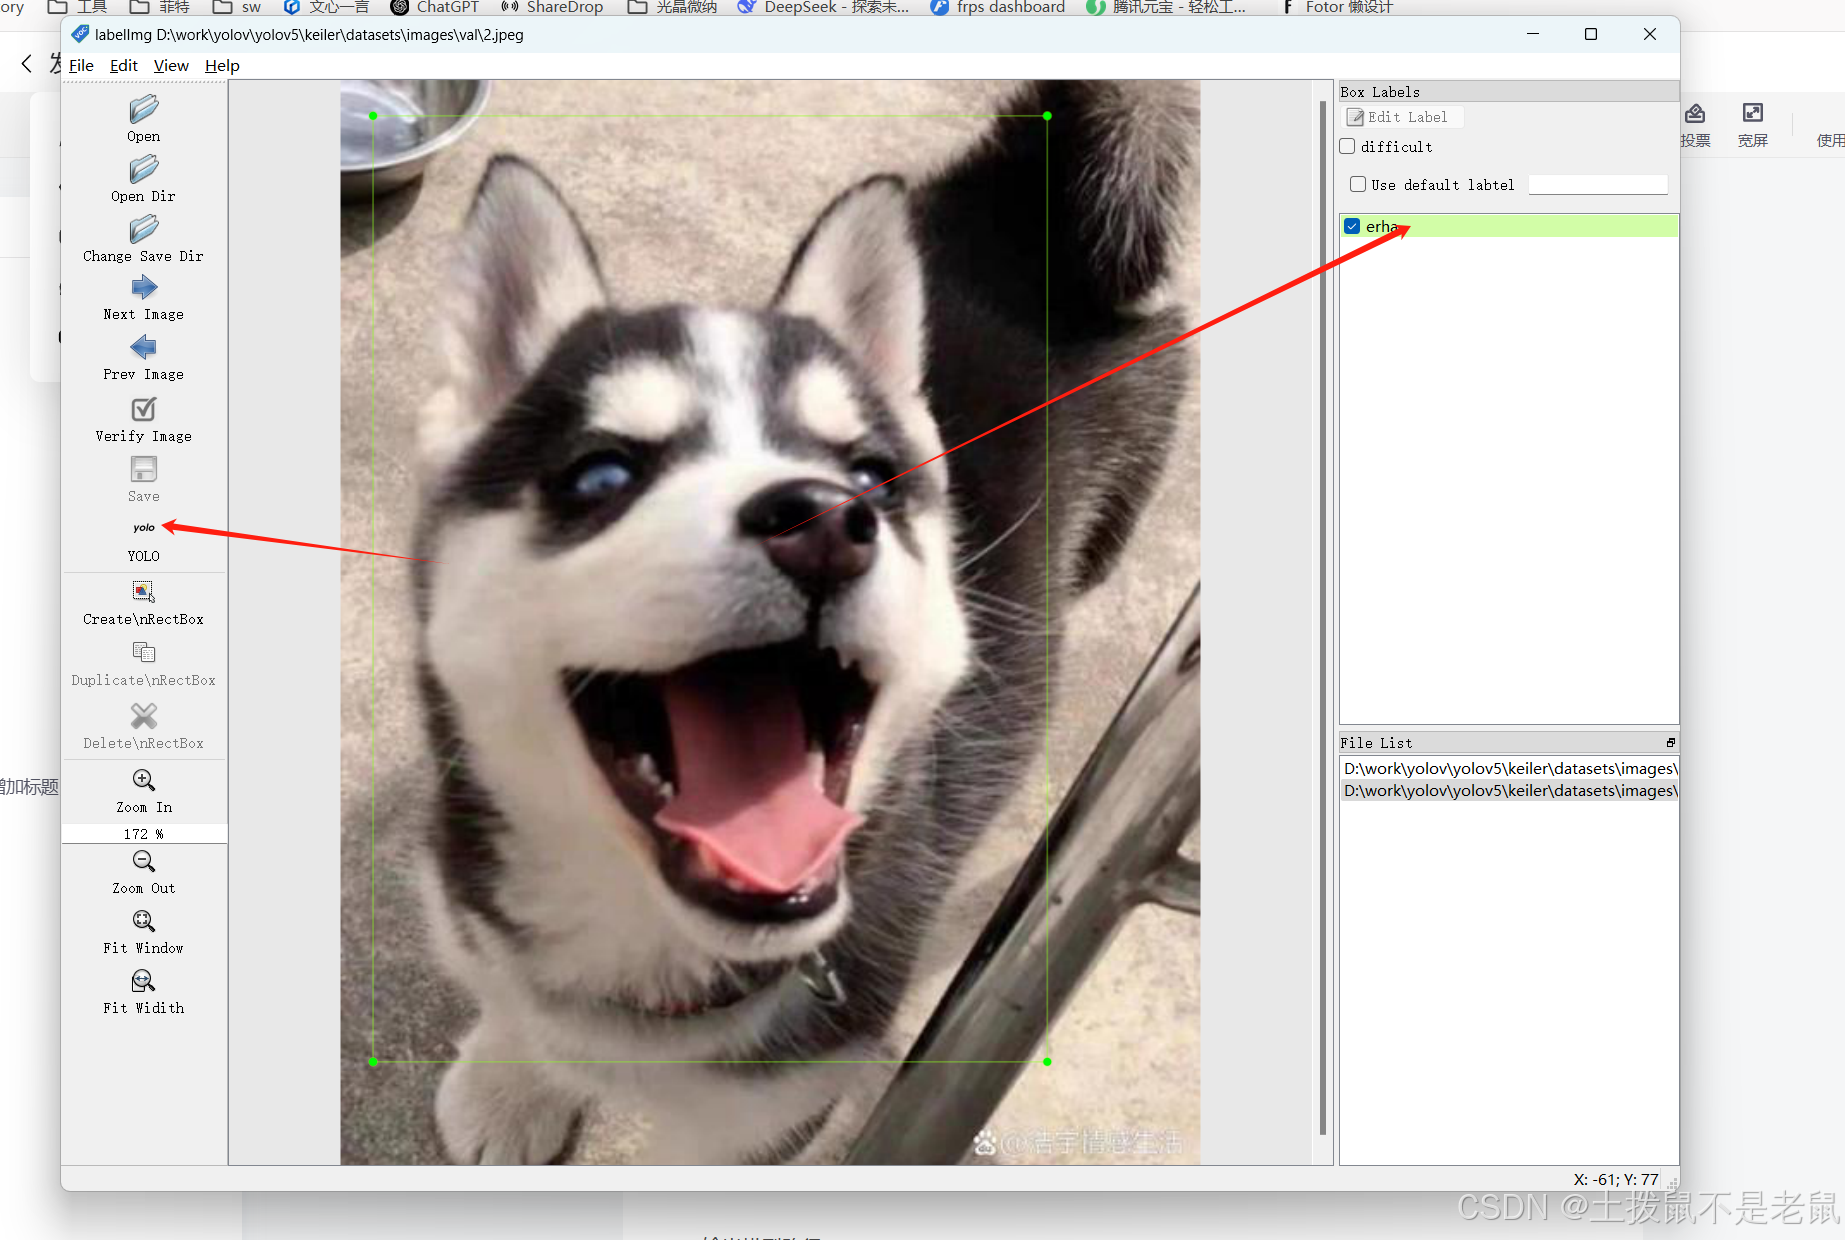
pip install -r requirements.txt三,安装LabelImg 进行标注
四,准备训练配置
1,data.yaml
train: ./images/train
val: ./images/val

nc: 1
names: ['erha'] #类别名称,比如二哈
2,确保图像和标签对应
images/train/img001.jpg
labels/train/img001.txt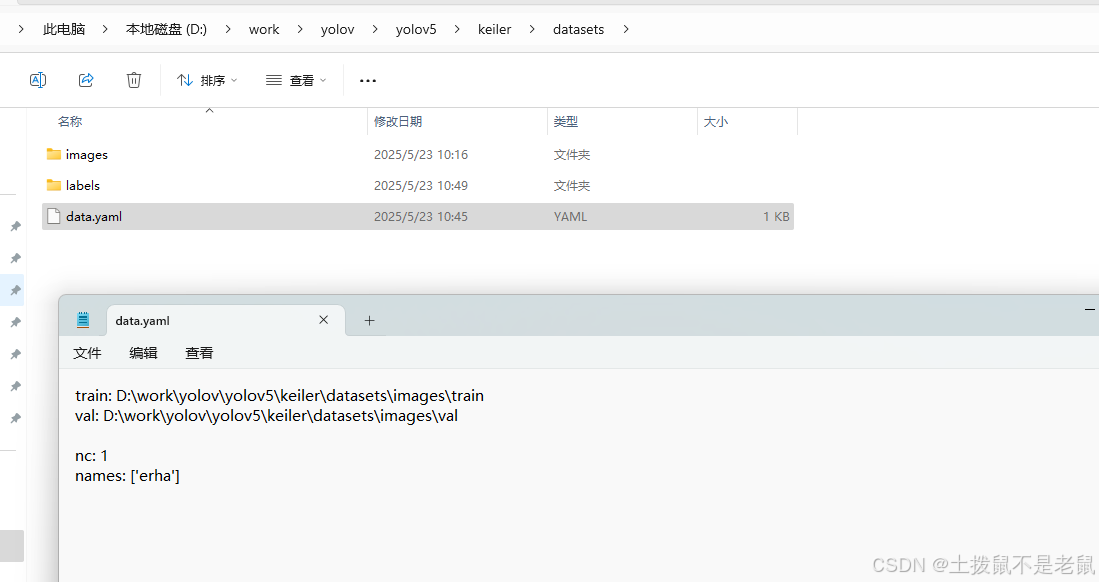
3,训练
python train.py --img 640 --batch 16 --epochs 50 --data ./keiler/datasets/data.yaml --weights yolov5s.pt --name erha输出模型路径:
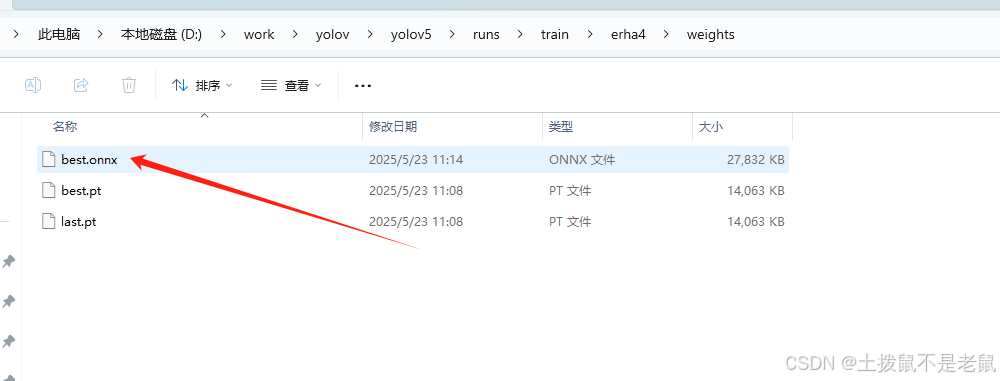
runs/train/erha4/weights/best.pt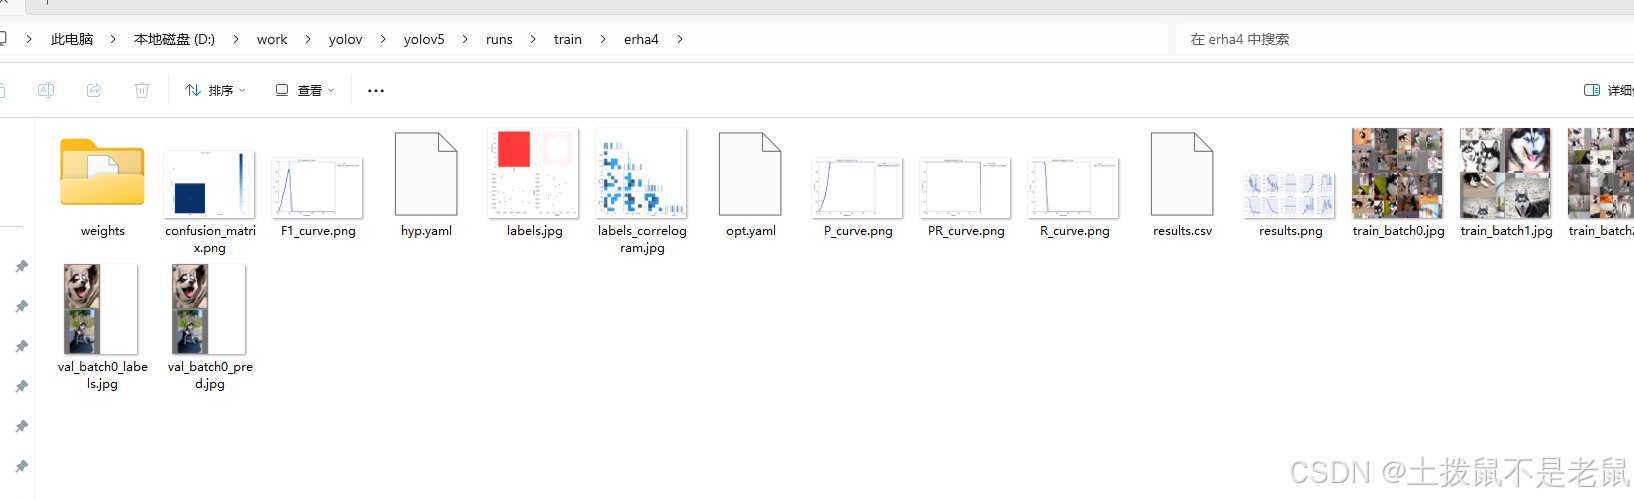
4,将模型 转成 onnx格式,这样才能给到opencv 加载

 五,opencv 推理
#include <iostream>
#include <Thread/semaphore.h>
#include <signal.h>
#include "core/Engine.h"
#include <opencv2/opencv.hpp>
#include <opencv2/dnn.hpp>
#include <iostream>
using namespace toolkit;

using namespace cv;
using namespace dnn;
using namespace std;

int main()
{
     // 加载模型
    Net net = readNetFromONNX("best.onnx");
    net.setPreferableBackend(DNN_BACKEND_OPENCV);
    net.setPreferableTarget(DNN_TARGET_CPU); // 可改为 DNN_TARGET_CUDA
    cout << "Net is empty? " << net.empty() << endl;

    // 读取图像
    Mat image = imread("test.jpeg");
    if (image.empty())
    {
        cerr << "Image not found!" << endl;
        return -1;
    }

    // YOLOv5 输入大小
    int input_width = 640;
    int input_height = 640;
    int num_classes = 1;

    // 原图尺寸
    int original_width = image.cols;
    int original_height = image.rows;

    // 预处理
    Mat blob;
    resize(image, image, Size(input_width, input_height));
    blobFromImage(image, blob, 1.0 / 255.0, Size(input_width, input_height), Scalar(), true, false);

    // 设置输入
    net.setInput(blob);

    // 前向推理
    std::vector<Mat> outputs;
    net.forward(outputs, net.getUnconnectedOutLayersNames());

    // 后处理
    float confThreshold = 0.001;
    float nmsThreshold = 0.001;

    vector<int> classIds;
    vector<float> confidences;
    vector<Rect> boxes;

    // 输出维度 [1, N, 85]
    Mat output = outputs[0];
    const int num_detections = output.size[1];
    const int dimensions = output.size[2];

    float* data = (float*)output.data;

    float x_factor = (float)original_width / input_width;
    float y_factor = (float)original_height / input_height;

    std::cout<<"num_detections "<<num_detections<<std::endl;

    for (int i = 0; i < num_detections; ++i) {
        float obj_conf = data[i * dimensions + 4];
        std::cout<<" obj_conf"<<obj_conf<<std::endl;
        if (obj_conf < confThreshold)
            continue;

        float* class_scores = data + i * dimensions + 5;
        Mat scores(1, num_classes, CV_32F, class_scores);
        Point classIdPoint;
        double max_class_score;
        minMaxLoc(scores, 0, &max_class_score, 0, &classIdPoint);

        float confidence = obj_conf * (float)max_class_score;
        std::cout<<" confidence"<<confidence<<std::endl;

        if (confidence > confThreshold) {
            // 解码框坐标
            float cx = data[i * dimensions + 0];
            float cy = data[i * dimensions + 1];
            float w = data[i * dimensions + 2];
            float h = data[i * dimensions + 3];

            int left = (int)((cx - w / 2) * x_factor);
            int top = (int)((cy - h / 2) * y_factor);
            int width = (int)(w * x_factor);
            int height = (int)(h * y_factor);

            boxes.push_back(Rect(left, top, width, height));
            confidences.push_back(confidence);
            classIds.push_back(classIdPoint.x);
        }
    }

    // NMS 抑制
    vector<int> indices;
    NMSBoxes(boxes, confidences, confThreshold, nmsThreshold, indices);

    for (int idx : indices) {
        Rect box = boxes[idx];
        rectangle(image, box, Scalar(0, 255, 0), 2);
        putText(image, to_string(classIds[idx]), box.tl(), FONT_HERSHEY_SIMPLEX, 0.6, Scalar(0, 0, 255), 2);
    }
    cv::imwrite("result.jpg", image);

}
失败了,没有检测出来,稍后再查查。