目录
- [1 准备工作:python库包安装](#1 准备工作:python库包安装)
-
- [1.1 安装必要库](#1.1 安装必要库)
- 案例说明:模拟视频帧的时序建模
- 参考
ConvLSTM的原理说明可参见另一博客-【ConvLSTM第一期】ConvLSTM原理。
1 准备工作:python库包安装
1.1 安装必要库
bash
pip install torch torchvision matplotlib numpy案例说明:模拟视频帧的时序建模
🎯 目标:给定一个人工生成的动态图像序列(例如移动的方块),使用 ConvLSTM 对其进行建模,输出预测结果,并查看输出的维度和特征变化。
ConvLSTM概述
ConvLSTM 的基本结构,包括:
- ConvLSTMCell:实现了一个时间步的 ConvLSTM 单元,类似于一个"时刻"的神经元。
- ConvLSTM:实现了多层ConvLSTM结构,能够处理一整个时间序列的视频帧数据。
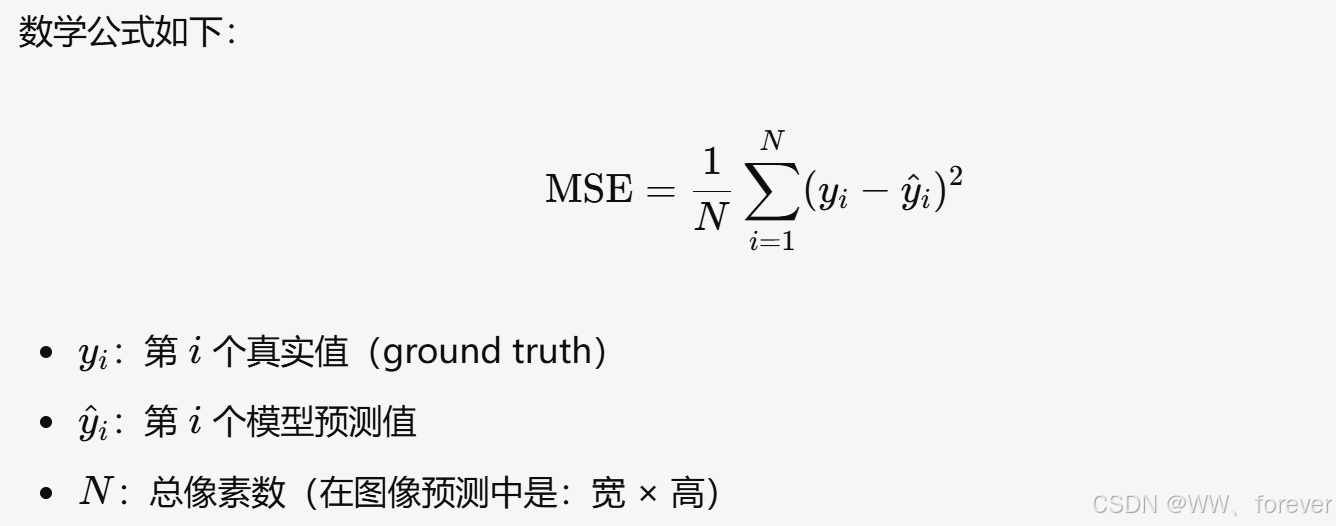
损失函数说明
MSE(均方误差) 衡量预测值和真实值之间的平均平方差。
关于训练终止条件:
可以根据 MSE是否达到某个阈值(如 < 0.001)提前终止训练,这是所谓的 "Early Stopping(提前停止)策略"。
(python全代码)
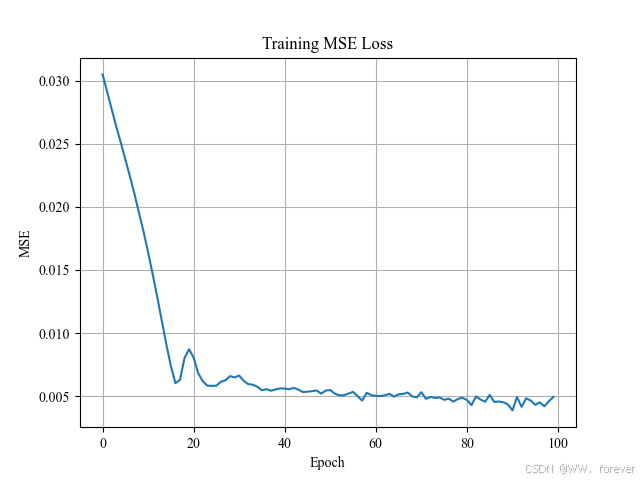
MSE损失函数曲线如下:可知MSE一直在下降,虽然存在振荡
前9帧图像及预测的第十帧图像得到的动图如下:
python完整代码如下:
python
import os
import torch
import torch.nn as nn
import torch.optim as optim
import matplotlib.pyplot as plt
import numpy as np
from PIL import Image

# 设置字体
plt.rcParams['font.family'] = 'Times New Roman'

# 创建保存图像目录
os.makedirs("./Figures", exist_ok=True)

# 设置设备
device = torch.device("cuda" if torch.cuda.is_available() else "cpu")

# ====================================
# 一、ConvLSTM 模型结构
# ====================================

class ConvLSTMCell(nn.Module):
    def __init__(self, input_channels, hidden_channels, kernel_size, bias=True):
        super(ConvLSTMCell, self).__init__()
        padding = kernel_size // 2
        self.input_channels = input_channels
        self.hidden_channels = hidden_channels
        self.conv = nn.Conv2d(input_channels + hidden_channels, 4 * hidden_channels, kernel_size, padding=padding, bias=bias)

    def forward(self, x, h_prev, c_prev):
        combined = torch.cat([x, h_prev], dim=1)
        conv_output = self.conv(combined)
        cc_i, cc_f, cc_o, cc_g = torch.chunk(conv_output, 4, dim=1)
        i = torch.sigmoid(cc_i)
        f = torch.sigmoid(cc_f)
        o = torch.sigmoid(cc_o)
        g = torch.tanh(cc_g)
        c = f * c_prev + i * g
        h = o * torch.tanh(c)
        return h, c

class ConvLSTM(nn.Module):
    def __init__(self, input_channels, hidden_channels, kernel_size, num_layers):
        super(ConvLSTM, self).__init__()
        self.num_layers = num_layers
        layers = []
        for i in range(num_layers):
            in_channels = input_channels if i == 0 else hidden_channels
            layers.append(ConvLSTMCell(in_channels, hidden_channels, kernel_size))
        self.layers = nn.ModuleList(layers)

    def forward(self, input_seq):
        b, t, c, h, w = input_seq.size()
        h_t = [torch.zeros(b, layer.hidden_channels, h, w).to(input_seq.device) for layer in self.layers]
        c_t = [torch.zeros(b, layer.hidden_channels, h, w).to(input_seq.device) for layer in self.layers]

        for time in range(t):
            x = input_seq[:, time]
            for i, layer in enumerate(self.layers):
                h_t[i], c_t[i] = layer(x, h_t[i], c_t[i])
                x = h_t[i]

        return h_t[-1]  # 返回最后一层最后一帧的隐藏状态

# ====================================
# 二、生成移动方块序列数据
# ====================================

def generate_moving_square_sequence(batch_size, time_steps, height, width):
    data = torch.zeros((batch_size, time_steps, 1, height, width))
    for b in range(batch_size):
        dx = np.random.randint(1, 3)
        dy = np.random.randint(1, 3)
        x = np.random.randint(0, width - 6)
        y = np.random.randint(0, height - 6)
        for t in range(time_steps):
            data[b, t, 0, y:y+5, x:x+5] = 1.0
            x = (x + dx) % (width - 5)
            y = (y + dy) % (height - 5)
    return data

# ====================================
# 三、模型、损失、优化器
# ====================================

class ConvLSTM_Predictor(nn.Module):
    def __init__(self):
        super().__init__()
        self.convlstm = ConvLSTM(input_channels=1, hidden_channels=16, kernel_size=3, num_layers=1)
        self.decoder = nn.Conv2d(in_channels=16, out_channels=1, kernel_size=1)

    def forward(self, input_seq):
        hidden = self.convlstm(input_seq)
        pred = self.decoder(hidden)
        return pred

model = ConvLSTM_Predictor().to(device)
criterion = nn.MSELoss()
optimizer = optim.Adam(model.parameters(), lr=1e-3)

# ====================================
# 四、训练过程
# ====================================

mse_list = []
max_epochs = 100
mse_threshold = 0.001
height, width = 64, 64

for epoch in range(max_epochs):
    model.train()
    seq = generate_moving_square_sequence(8, 10, height, width).to(device)
    input_seq = seq[:, :9]
    target_frame = seq[:, 9, 0].unsqueeze(1)

    optimizer.zero_grad()
    output = model(input_seq)
    loss = criterion(output, target_frame)
    loss.backward()
    optimizer.step()

    mse = loss.item()
    mse_list.append(mse)

    print(f"Epoch {epoch+1}/{max_epochs}, MSE: {mse:.6f}")

    # 提前停止条件
    if mse < mse_threshold:
        print(f"✅ 提前停止:MSE 已达到阈值 {mse_threshold}")
        break

# ====================================
# 五、测试与可视化结果
# ====================================

model.eval()
with torch.no_grad():
    test_seq = generate_moving_square_sequence(1, 10, height, width).to(device)
    input_seq = test_seq[:, :9]
    true_frame = test_seq[:, 9, 0]
    pred_frame = model(input_seq)[0, 0].cpu().numpy()

# 保存输入帧
for t in range(9):
    frame = input_seq[0, t, 0].cpu().numpy()
    plt.imshow(frame, cmap='gray')
    plt.title(f"Input Frame t={t}")
    plt.colorbar()
    plt.savefig(f"./Figures/input_frame_{t}.png")
    plt.close()

# 保存 Ground Truth
plt.imshow(true_frame[0].cpu().numpy(), cmap='gray')
plt.title("Ground Truth Frame t=9")
plt.colorbar()
plt.savefig("./Figures/ground_truth_t9.png")
plt.close()

# 保存预测帧
plt.imshow(pred_frame, cmap='gray')
plt.title("Predicted Frame t=9")
plt.colorbar()
plt.savefig("./Figures/predicted_t9.png")
plt.close()

# 保存 MSE 曲线图
plt.plot(mse_list)
plt.title("Training MSE Loss")
plt.xlabel("Epoch")
plt.ylabel("MSE")
plt.grid(True)
plt.savefig("./Figures/mse_curve.png")
plt.close()

# ---------------- 生成动图 ----------------

frames = []

# 添加前9帧输入
for t in range(9):
    img = Image.open(f"./Figures/input_frame_{t}.png")
    frames.append(img.copy())

# 添加预测帧
img = Image.open("./Figures/predicted_t9.png")
frames.append(img.copy())

# 保存动图
frames[0].save("./Figures/sequence.gif", save_all=True, append_images=frames[1:], duration=500, loop=0)
print("✅ 所有图像和动图已保存至 ./Figures 文件夹")