前言
加载和渲染3D模型是 three.js 的核心功能之一,在许多和3D相关的业务中许多的功能都会围绕着3d模型进行实现
传统的业务开发过程中我们对three.js3D场景内容(材质,位置,缩放,相机,灯光,场景)都是通过代码设置参数值的方式来实现的。
通过手动修改代码参数值的方式来修改three.js3D场景内容,也就意味着需要花费更多的时间成本和维护代价
本篇以作者个人的角度给大家分享一下如何使用作者自己开发的three.js3D编辑器 工具,实现基于three.js3D模型和3D场景的低代码开发模式
模式一:使用three.js3D模型可视化编辑系统
项目在线链接:
three3d-0gte3eg619c78ffd-1301256746.tcloudbaseapp.com/threejs-3dm...
git地址:gitee.com/ZHANG_6666/...
首先对需要编辑的模型内容进行在线修改
这里我们对three.js的场景、模型材质、灯光、动画、标签内容进行了修改和调整

然后点击 "嵌入代码" 按钮 将弹框内的代码复制粘贴到自己的项目中去
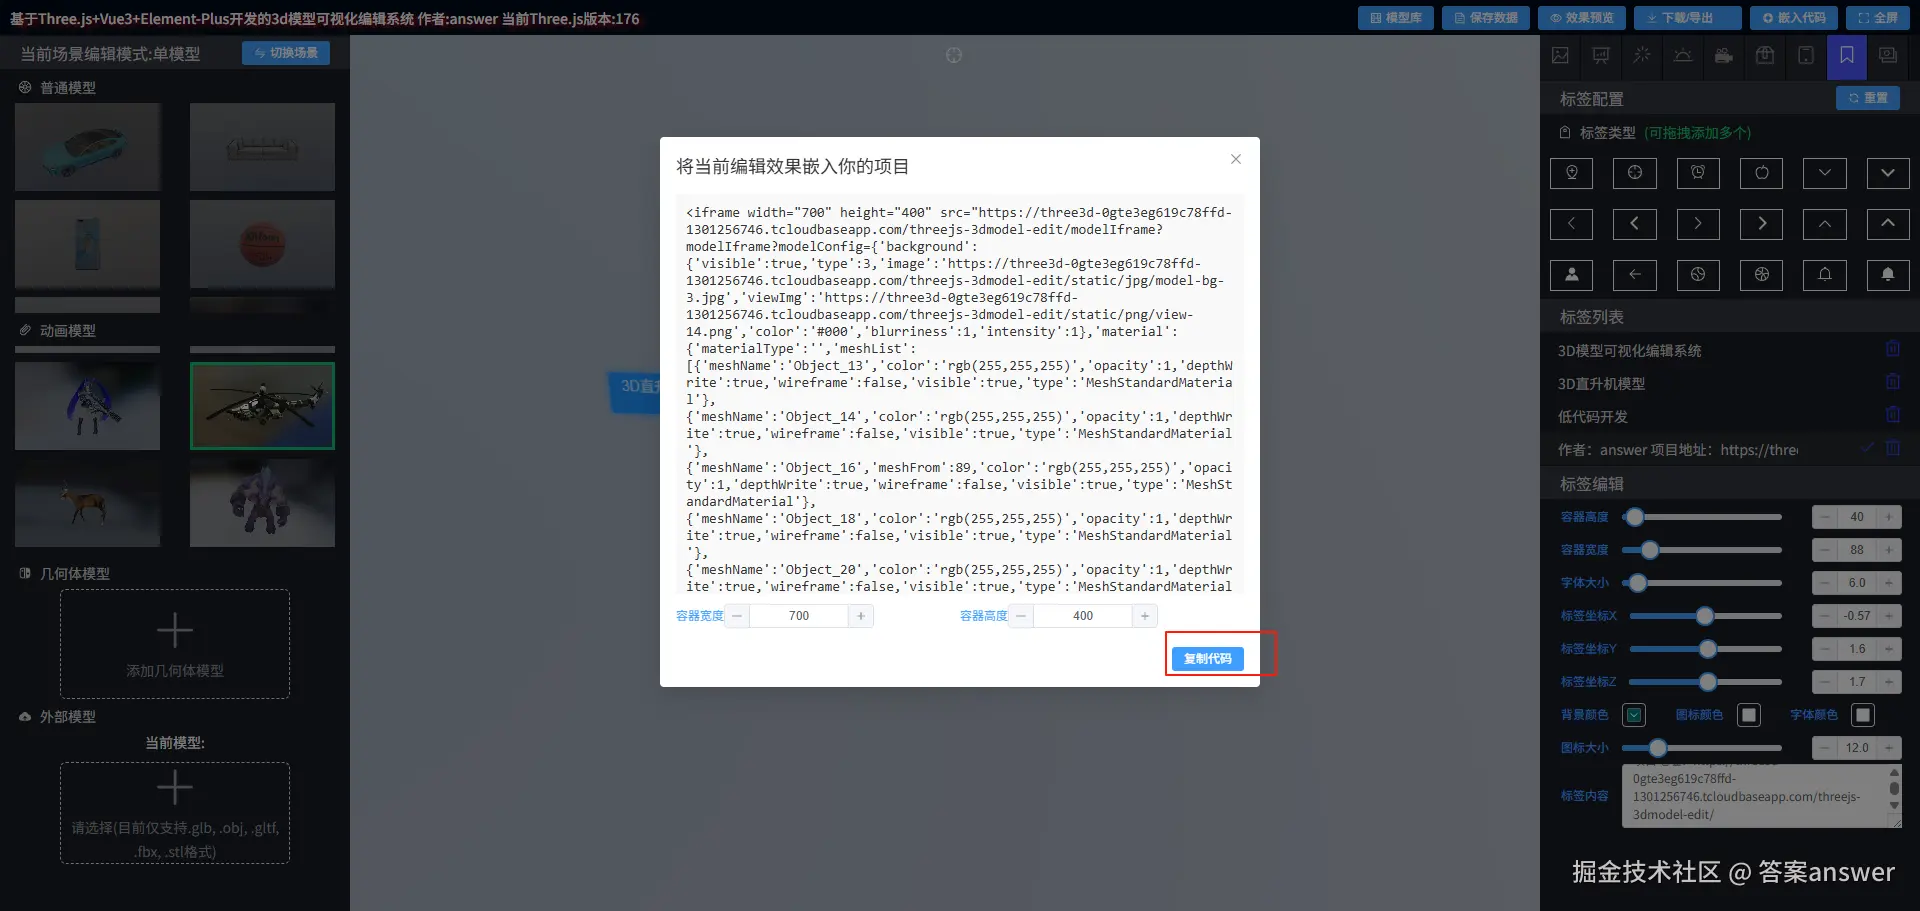
这里我们新建一个 .html文件,然后将复制的内容添加到 body 标签中去

感兴趣的同学也可以直接将这段代码复制到你自己的项目中去,试试预览效果
js
<!DOCTYPE html>
<html lang="en">
  <head>
    <meta charset="UTF-8" />
    <meta name="viewport" content="width=`, initial-scale=1.0" />
    <title>Document</title>
  </head>
  <body>
    <iframe
      width="700"
      height="400"
      src="https://three3d-0gte3eg619c78ffd-1301256746.tcloudbaseapp.com/threejs-3dmodel-edit/modelIframe?modelIframe?modelConfig={'background':{'visible':true,'type':3,'image':'https://three3d-0gte3eg619c78ffd-1301256746.tcloudbaseapp.com/threejs-3dmodel-edit/static/jpg/model-bg-3.jpg','viewImg':'https://three3d-0gte3eg619c78ffd-1301256746.tcloudbaseapp.com/threejs-3dmodel-edit/static/png/view-14.png','color':'#000','blurriness':1,'intensity':1},'material':{'materialType':'','meshList':[{'meshName':'Object_13','color':'rgb(255,255,255)','opacity':1,'depthWrite':true,'wireframe':false,'visible':true,'type':'MeshStandardMaterial'},{'meshName':'Object_14','color':'rgb(255,255,255)','opacity':1,'depthWrite':true,'wireframe':false,'visible':true,'type':'MeshStandardMaterial'},{'meshName':'Object_16','meshFrom':89,'color':'rgb(255,255,255)','opacity':1,'depthWrite':true,'wireframe':false,'visible':true,'type':'MeshStandardMaterial'},{'meshName':'Object_18','color':'rgb(255,255,255)','opacity':1,'depthWrite':true,'wireframe':false,'visible':true,'type':'MeshStandardMaterial'},{'meshName':'Object_20','color':'rgb(255,255,255)','opacity':1,'depthWrite':true,'wireframe':false,'visible':true,'type':'MeshStandardMaterial'},{'meshName':'Object_22','color':'rgb(255,255,255)','opacity':0.066063921416024,'depthWrite':false,'wireframe':false,'visible':true,'type':'MeshPhysicalMaterial'}]},'animation':{'visible':true,'animationName':'Armature|ON Gun Move','loop':'LoopRepeat','timeScale':1,'weight':1,'rotationVisible':true,'rotationType':'y','rotationSpeed':1.44},'attribute':{'visible':true,'gridHelper':false,'x':0,'y':-0.59,'z':-0.1,'positionX':0,'positionY':-1,'positionZ':0,'divisions':18,'size':6,'color':'#FFFFFF','axesHelper':false,'axesSize':1.8,'rotationX':0,'rotationY':401.7855999999079,'rotationZ':0},'light':{'ambientLight':true,'ambientLightColor':'#fff','ambientLightIntensity':0.8,'directionalLight':false,'directionalLightHelper':true,'directionalLightColor':'#fff','directionalLightIntensity':5,'directionalHorizontal':-1.26,'directionalVertical':-3.85,'directionalSistine':2.98,'directionShadow':true,'pointLight':false,'pointLightHelper':true,'pointLightColor':'#1E90FF','pointLightIntensity':10,'pointHorizontal':-4.21,'pointVertical':-4.1,'pointDistance':2.53,'spotLight':false,'spotLightColor':'#00BABD','spotLightIntensity':900,'spotHorizontal':-3.49,'spotVertical':-4.37,'spotSistine':4.09,'spotAngle':0.5,'spotPenumbra':1,'spotFocus':1,'spotCastShadow':true,'spotLightHelper':true,'spotDistance':20},'stage':{'meshPositionList':[{'name':'Object_13','rotation':{'x':0,'y':0,'z':0},'scale':{'x':1,'y':1,'z':1},'position':{'x':0,'y':0,'z':0}},{'name':'Object_14','rotation':{'x':0,'y':0,'z':0},'scale':{'x':1,'y':1,'z':1},'position':{'x':0,'y':0,'z':0}},{'name':'Object_16','rotation':{'x':0,'y':0,'z':0},'scale':{'x':1,'y':1,'z':1},'position':{'x':0,'y':0,'z':0}},{'name':'Object_18','rotation':{'x':0,'y':0,'z':0},'scale':{'x':1,'y':1,'z':1},'position':{'x':0,'y':0,'z':0}},{'name':'Object_20','rotation':{'x':0,'y':0,'z':0},'scale':{'x':1,'y':1,'z':1},'position':{'x':0,'y':0,'z':0}},{'name':'Object_22','rotation':{'x':0,'y':0,'z':0},'scale':{'x':1,'y':1,'z':1},'position':{'x':0,'y':0,'z':0}}],'glow':false,'threshold':0.05,'strength':0.6,'radius':1,'decompose':0,'transformType':'translate','manageFlag':false,'toneMappingExposure':2,'color':''},'tags':{'dragTagList':[{'uuid':'003d8b55-05bf-48bc-8338-bb889b310afa','positionX':1.5823441552419992,'positionY':0.7765179838633216,'positionZ':0.8692105695891963,'innerText':'3D模型可视化编辑系统','width':60,'height':40,'fontSize':6,'backgroundColor':'rgba(0,127,127,0.45787380294404106)','color':'#ffffffbf','iconColor':'#fff','iconSize':12,'iconName':'AlarmClock','hover':false},{'uuid':'794bd956-c849-44fa-b21f-7f15ac69d639','positionX':-1,'positionY':0.9,'positionZ':2.1,'innerText':'3D直升机模型','width':60,'height':20,'fontSize':7.5,'backgroundColor':'#1F93FF','color':'#ffffffbf','iconColor':'#fff','iconSize':12,'iconName':'AlarmClock','hover':false},{'uuid':'576a8d9c-a751-44fb-854b-6984a64755ac','positionX':0.9562807420406231,'positionY':1.7154177438803084,'positionZ':0.9978499692275414,'innerText':'低代码开发','width':60,'height':18,'fontSize':10,'backgroundColor':'#90EE90','color':'#ffffffbf','iconColor':'#fff','iconSize':5.3,'iconName':'Basketball','hover':false},{'uuid':'71df0bc3-1b4d-4810-b47b-d309cca5aeff','positionX':-0.57,'positionY':1.6,'positionZ':1.7,'innerText':'作者:answer             \n项目地址:https://three3d-0gte3eg619c78ffd-1301256746.tcloudbaseapp.com/threejs-3dmodel-edit/','width':88,'height':40,'fontSize':6,'backgroundColor':'rgba(0,127,127,0.43406815604267823)','color':'#FFFFFF','iconColor':'#fff','iconSize':12,'iconName':'Bell','hover':false}]},'camera':{'x':1.089360064112835,'y':1.9688846519393688,'z':6.265629858039992},'fileInfo':{'name':'直升机','key':'aircraft','fileType':'glb','id':17,'animation':true,'scale':0.2,'filePath':'threeFile/glb/glb-17.glb','icon':'https://three3d-0gte3eg619c78ffd-1301256746.tcloudbaseapp.com/threejs-3dmodel-edit/static/png/15.png'}}"
      allowfullscreen
    ></iframe>
  </body>
</html>
预览效果

ok,这样一个3D模型的编辑内容效果就可以直接展示在你的项目中去了
模式二:使用three.js 场景编辑器
模式一 主要是通过将 three.js 的编辑参数以json对象这样的数据格式存储起来,然后在three.js内容加载完成后在通过调用一个特定的方法将这些编辑参数手动设置回显的方式来实现的
但是如果我们要在一个场景中加载多个模型时,如果使用模式一这种方式的话整个页面的初始化加载的渲染性能就会变得十分的差
在 three.js 场景编辑器项目中为了解决这一问题,也是对three.js编辑数据的存储方案做了另一种方法的实现
这里主要是通过将three.js scene 数据内容通过 .toJSON 方法转换为 json 数据格式,然后在将数据内容存储在 indexedDB 中(ps:这种方案也同样适用于将数据存储在后端服务中)
three.js场景编辑器项目在线链接:
three3d-0gte3eg619c78ffd-1301256746.tcloudbaseapp.com/threejs-mod...
这里我们添加多个模型和多个灯光等内容,并且对其内容进行在线编辑调整

点击"场景"按钮下的"保存场景"按钮
这里保存作者是保存在浏览器的 indexedDB 中的(懒得写服务端接口了),同样也适用于将数据内容通过接口保存到后端
保存成功后我们就可以通过在预览页面查看完整编辑的内容了

当然如果你不想直接将编辑的数据存储在indexedDB 或者服务端 中,也可以通过 "场景"按钮下的"导出场景(.json)" 按钮和 "导入场景(.json)"按钮 来实现


结语
以上就是作者在开发three.js 中实践和总结出的两种基于3D模型的低代码开发模式,减少我们在three.js开发过程中针对3D模型操作的复杂度
如果你有更好的实现方案,欢迎留言交流沟通