文章目录
- Mysql开启binlog
- 配置并启动canal-deployer
- [Rabbit MQ配置](#Rabbit MQ配置)
- 验证
Mysql开启binlog
sql
#查看mysql启动配置所在目录,windows下文件名为 my.ini
SHOW VARIABLES LIKE '%basedir%'

# 添加binlog配置
[mysqld]
log-bin=mysql-bin # 开启 binlog
binlog-format=ROW # 选择 ROW 模式
server_id=1000

# 重启mysql

# 添加canal用户
# 创建用户
CREATE USER canal IDENTIFIED WITH mysql_native_password BY 'canal';
# 授予权限
GRANT SELECT, REPLICATION SLAVE, REPLICATION CLIENT ON *.* TO 'canal'@'%';
# 刷新权限
FLUSH PRIVILEGES;
配置并启动canal-deployer
- 编辑conf/canal.properties
修改canal.serverMode = rabbitMQ, 补充 RabbitMQ 的连接信息:
properties
#################################################
######### 		common argument		#############
#################################################
# tcp bind ip
canal.ip =
# register ip to zookeeper
canal.register.ip =
canal.port = 11111
canal.metrics.pull.port = 11112

canal.zkServers =
# flush data to zk
canal.zookeeper.flush.period = 1000
canal.withoutNetty = false
# tcp, kafka, rocketMQ, rabbitMQ
canal.serverMode = rabbitMQ
# flush meta cursor/parse position to file
canal.file.data.dir = ${canal.conf.dir}
canal.file.flush.period = 1000
## memory store RingBuffer size, should be Math.pow(2,n)
canal.instance.memory.buffer.size = 16384
## memory store RingBuffer used memory unit size , default 1kb
canal.instance.memory.buffer.memunit = 1024
## meory store gets mode used MEMSIZE or ITEMSIZE
canal.instance.memory.batch.mode = MEMSIZE
canal.instance.memory.rawEntry = true

## detecing config
canal.instance.detecting.enable = false
#canal.instance.detecting.sql = insert into retl.xdual values(1,now()) on duplicate key update x=now()
canal.instance.detecting.sql = select 1
canal.instance.detecting.interval.time = 3
canal.instance.detecting.retry.threshold = 3
canal.instance.detecting.heartbeatHaEnable = false

# support maximum transaction size, more than the size of the transaction will be cut into multiple transactions delivery
canal.instance.transaction.size =  1024
# mysql fallback connected to new master should fallback times
canal.instance.fallbackIntervalInSeconds = 60

# network config
canal.instance.network.receiveBufferSize = 16384
canal.instance.network.sendBufferSize = 16384
canal.instance.network.soTimeout = 30

# binlog filter config
canal.instance.filter.druid.ddl = true
canal.instance.filter.query.dcl = false
canal.instance.filter.query.dml = false
canal.instance.filter.query.ddl = false
canal.instance.filter.table.error = false
canal.instance.filter.rows = false
canal.instance.filter.transaction.entry = false
canal.instance.filter.dml.insert = false
canal.instance.filter.dml.update = false
canal.instance.filter.dml.delete = false

# binlog format/image check
canal.instance.binlog.format = ROW,STATEMENT,MIXED
canal.instance.binlog.image = FULL,MINIMAL,NOBLOB

# binlog ddl isolation
canal.instance.get.ddl.isolation = false

# parallel parser config
canal.instance.parser.parallel = true
## concurrent thread number, default 60% available processors, suggest not to exceed Runtime.getRuntime().availableProcessors()
#canal.instance.parser.parallelThreadSize = 16
## disruptor ringbuffer size, must be power of 2
canal.instance.parser.parallelBufferSize = 256

# table meta tsdb info
canal.instance.tsdb.enable = true
canal.instance.tsdb.dir = ${canal.file.data.dir:../conf}/${canal.instance.destination:}
canal.instance.tsdb.url = jdbc:h2:${canal.instance.tsdb.dir}/h2;CACHE_SIZE=1000;MODE=MYSQL;
canal.instance.tsdb.dbUsername = canal
canal.instance.tsdb.dbPassword = canal
# dump snapshot interval, default 24 hour
canal.instance.tsdb.snapshot.interval = 24
# purge snapshot expire , default 360 hour(15 days)
canal.instance.tsdb.snapshot.expire = 360

#################################################
######### 		destinations		#############
#################################################
canal.destinations = example
# conf root dir
canal.conf.dir = ../conf
# auto scan instance dir add/remove and start/stop instance
canal.auto.scan = true
canal.auto.scan.interval = 5
# set this value to 'true' means that when binlog pos not found, skip to latest.
# WARN: pls keep 'false' in production env, or if you know what you want.
canal.auto.reset.latest.pos.mode = false

canal.instance.tsdb.spring.xml = classpath:spring/tsdb/h2-tsdb.xml
#canal.instance.tsdb.spring.xml = classpath:spring/tsdb/mysql-tsdb.xml

canal.instance.global.mode = spring
canal.instance.global.lazy = false
canal.instance.global.manager.address = ${canal.admin.manager}
#canal.instance.global.spring.xml = classpath:spring/memory-instance.xml
canal.instance.global.spring.xml = classpath:spring/file-instance.xml
#canal.instance.global.spring.xml = classpath:spring/default-instance.xml

##################################################
######### 	      MQ Properties      #############
##################################################
# aliyun ak/sk , support rds/mq
canal.aliyun.accessKey =
canal.aliyun.secretKey =
canal.aliyun.uid=

canal.mq.flatMessage = true
canal.mq.canalBatchSize = 50
canal.mq.canalGetTimeout = 100
# Set this value to "cloud", if you want open message trace feature in aliyun.
canal.mq.accessChannel = local

canal.mq.database.hash = true
canal.mq.send.thread.size = 30
canal.mq.build.thread.size = 8


##################################################
######### 		    RabbitMQ	     #############
##################################################
rabbitmq.host = 127.0.0.1:5672
rabbitmq.virtual.host = /
rabbitmq.exchange = canal.exchange
rabbitmq.username = guest
rabbitmq.password = guest
rabbitmq.deliveryMode =- 编辑conf/example/instance.properties
修改canal.mq.topic=canal.routing.key:
properties
#################################################
## mysql serverId , v1.0.26+ will autoGen
# canal.instance.mysql.slaveId=0

# enable gtid use true/false
canal.instance.gtidon=false

# position info
canal.instance.master.address=127.0.0.1:3306
canal.instance.master.journal.name=
canal.instance.master.position=
canal.instance.master.timestamp=
canal.instance.master.gtid=

# rds oss binlog
canal.instance.rds.accesskey=
canal.instance.rds.secretkey=
canal.instance.rds.instanceId=

# table meta tsdb info
canal.instance.tsdb.enable=true

# username/password
canal.instance.dbUsername=canal
canal.instance.dbPassword=canal
canal.instance.connectionCharset = UTF-8
canal.instance.enableDruid=false

# table regex
canal.instance.filter.regex=.*\\..*
# table black regex
canal.instance.filter.black.regex=mysql\\.slave_.*

# mq config
canal.mq.topic=canal.routing.key
canal.mq.partition=0- 启动
双击 bin/startup.bat 运行
Rabbit MQ配置
- 使用已有的Virtual Host :/。
- 创建一个新的交换机,命名为 canal.exchange。
- 创建一个新的队列,命名为 canal.queue。
- 队列 canal.queue 绑定到交换机 canal.exchange,路由键为 canal.routing.key。
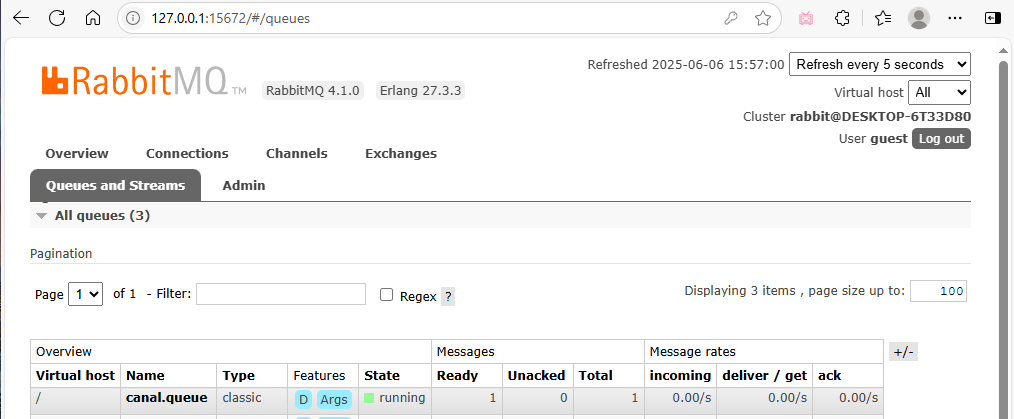
验证
修改表记录,Rabbit MQ控制台,队列 canal.queue 出现一条新消息