学了很久的SLAM,决定做一个最简单的虚拟项目(假装我有个项目),3D物体测量,只需要用到最基础的立体匹配,重投影,ICP就可以。
假设两个双目相机固定在物体的俯视位置和平视位置,背景为黑色幕布(后续无需分割)
以下是gpt给我的方案,由于立体匹配一般摄像头厂家出厂就自带了(能输出深度信息),我们只需要求得两个摄像头之间的旋转与平移就能将两个局部点云转换到同一个世界坐标系,但是为了学习,我们还是看一下立体匹配和视差图计算部分

第一步 双目相机标定(选做)
假设厂家自带了双目摄像头内参(fx,fy,cx,cyf_x,f_y,c_x,c_yfx,fy,cx,cy),径向畸变与切向畸变k1, k2, p1, p2, k3和外参(R,T)
双目标定结果 (R, T, cameraMatrix, distCoeffs)
↓
cv2.stereoRectify
↓
cv2.initUndistortRectifyMap
↓
cv2.remap(矫正图像)
↓
cv2.StereoSGBM_create + stereo.compute(生成视差图)
↓
cv2.reprojectImageTo3D(生成点云或深度图)
python
# cv2.stereoRectify() --- 图像对齐准备
# ✅ 作用:
# 计算左/右相机的矫正变换矩阵,使得两个图像在水平方向上对齐,方便视差匹配。


R1, R2, P1, P2, Q, roi1, roi2 = cv2.stereoRectify(
     cameraMatrix1, distCoeffs1,
     cameraMatrix2, distCoeffs2,
     imageSize,         # 图像分辨率 (w, h)
     R, T,              # 右相机相对左相机的外参
     flags=...,         # 是否使主点对齐(常用:cv2.CALIB_ZERO_DISPARITY)
     alpha=0            # 视野保留 vs 裁剪程度,常设为0或1 )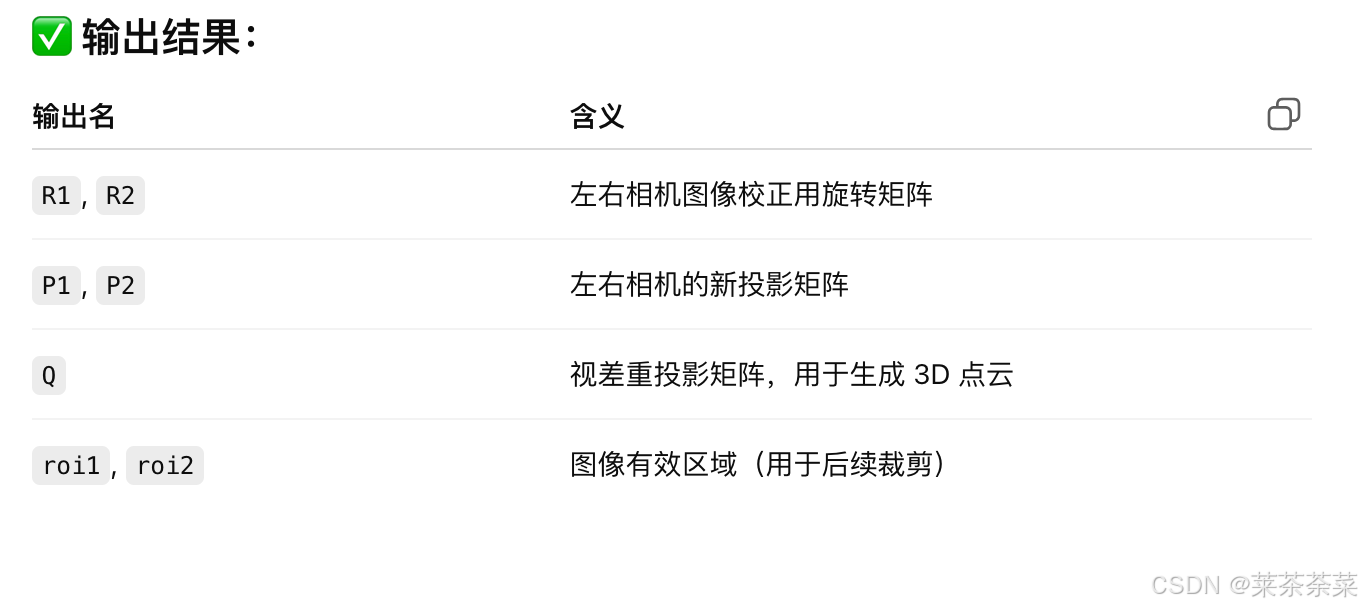
python
# cv2.initUndistortRectifyMap() --- 生成矫正映射
# 利用相机内参、畸变系数和 stereoRectify 计算出的 R1, P1 等,计算出图像像素映射表,供 remap() 使用
# left_map1:类型为CV_16SC2(16位有符号整数,2通道)
# 存储的是(x,y)坐标的整数部分,用于快速查找目标像素的粗略位置
# left_map2:类型为CV_32FC1(32位浮点数,单通道)
# 存储的是子像素级的偏移量或插值权重,用于精确计算目标像素的位置
left_map1, left_map2 = cv2.initUndistortRectifyMap(cameraMatrix1, distCoeffs1, R1, P1, imageSize, cv2.CV_16SC2)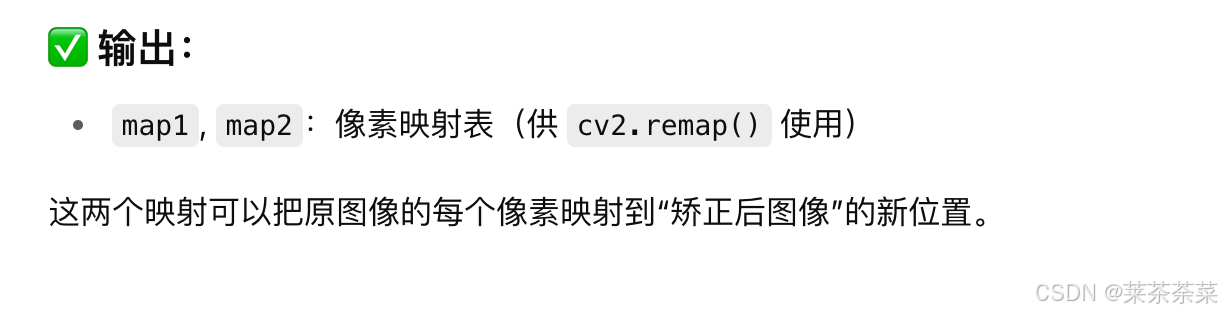
python
# 应用矫正映射
# 将左右图像根据上一步生成的映射表进行校正(畸变矫正 + 图像对齐)
rectifiedL = cv2.remap(left_img, left_map1, left_map2, interpolation=cv2.INTER_LINEAR)
rectifiedR = cv2.remap(right_img, right_map1, right_map2, interpolation=cv2.INTER_LINEAR)
原图中畸变 + 不对齐的问题被修复,图像对准后,视差搜索只需在 水平线上扫描
python
# cv2.StereoSGBM_create() --- 创建立体匹配器
# 创建一个用于左右图像立体匹配(Stereo Matching)的对象,使用 半全局块匹配(Semi-Global Block Matching)算法
stereo = cv2.StereoSGBM_create(
     minDisparity=0,              # 视差起始值,一般为0
     numDisparities=64,           # 视差搜索范围,必须为16的倍数
     blockSize=9,                 # 块匹配窗口大小(奇数)
     P1=8*3*blockSize**2,         # 平滑惩罚项1(小差异惩罚)
     P2=32*3*blockSize**2,        # 平滑惩罚项2(大差异惩罚)
     disp12MaxDiff=1,
     uniquenessRatio=10,
     speckleWindowSize=100,
     speckleRange=2 )
## 你可以根据图像纹理复杂度调整 blockSize、P1、P2、uniquenessRatio 等参数来优化精度和速度。
python
# stereo.compute() --- 计算视差图
# 对矫正后的左右图像进行块匹配,返回视差图(每个像素的左右视角差异)
disparity = stereo.compute(rectifiedL, rectifiedR).astype(np.float32) / 16.0
⚠️ 注意: OpenCV 默认输出是 乘了 16 的整数视差,需要除以 16 得到真实值
视差越大 → 物体离相机越近
python
#  利用 Q 矩阵(来自 stereoRectify),将视差图重投影为三维空间中的坐标点云 (X, Y, Z)
points_3D = cv2.reprojectImageTo3D(disparity, Q)
## 返回大小为 (h, w, 3)的三维数组,每个像素的 (X, Y, Z) 坐标(单位:与基线一致,如米), Z 就是该像素的深度(距离相机)
完整代码:
python
# Step 1: 校正参数
# R1 和 R2 是 将左右相机图像"矫正"到对齐状态所需的旋转矩阵,它们不是相机之间的相对位姿,而是 每个相机自身在图像校正时的"旋转变换"矩阵。
R1, R2, P1, P2, Q, _, _ = cv2.stereoRectify(
    cameraMatrix1, distCoeffs1,
    cameraMatrix2, distCoeffs2,
    imageSize, R, T,
    flags=cv2.CALIB_ZERO_DISPARITY,  # 让矫正后图像的主点在同一水平位置
    alpha=0   # 裁剪最大黑边,视野小但图像填满(常用于计算)
)

# Step 2: 获取映射
left_map1, left_map2 = cv2.initUndistortRectifyMap(cameraMatrix1, distCoeffs1, R1, P1, imageSize, cv2.CV_16SC2)
right_map1, right_map2 = cv2.initUndistortRectifyMap(cameraMatrix2, distCoeffs2, R2, P2, imageSize, cv2.CV_16SC2)

# Step 3: 图像矫正
rectifiedL = cv2.remap(imgL, left_map1, left_map2, cv2.INTER_LINEAR)
rectifiedR = cv2.remap(imgR, right_map1, right_map2, cv2.INTER_LINEAR)

# P1 和 P2 这两个参数是 立体匹配的"平滑代价"控制项
# 用于控制视差图中平滑程度,避免剧烈跳变。
# P1 = 8 * num_channels * block_size^2,
# P2 = 32 * num_channels * block_size^2
# Step 4: 创建 SGBM 匹配器
stereo = cv2.StereoSGBM_create(minDisparity=0, numDisparities=64, blockSize=9, P1=8*3*9**2, P2=32*3*9**2)

# Step 5: 计算视差图
disparity = stereo.compute(rectifiedL, rectifiedR).astype(np.float32) / 16.0

# Step 6: 计算点云
points_3D = cv2.reprojectImageTo3D(disparity, Q)

# Step 7: 获取深度图(Z通道)
depth_map = points_3D[:, :, 2]
点云配准与合并
目录
bbox_from_rgbd/
├── CMakeLists.txt
├── main.cpp
├── data/
│ ├── top_rgb.png
│ ├── top_depth.png
│ ├── front_rgb.png
│ ├── front_depth.png
🧱 CMakeLists.txt
cpp
cmake_minimum_required(VERSION 3.10)
project(RGBDToBBox)

find_package(PCL REQUIRED)
find_package(OpenCV REQUIRED)

include_directories(${PCL_INCLUDE_DIRS} ${OpenCV_INCLUDE_DIRS})
link_directories(${PCL_LIBRARY_DIRS})
add_definitions(${PCL_DEFINITIONS})

add_executable(main main.cpp)
target_link_libraries(main ${PCL_LIBRARIES} ${OpenCV_LIBS})
🧠 main.cpp
cpp
#include <iostream>
#include <pcl/point_types.h>
#include <pcl/io/pcd_io.h>
#include <pcl/common/common.h>
#include <pcl/common/transforms.h>
#include <pcl/filters/extract_indices.h>
#include <pcl/visualization/pcl_visualizer.h>

#include <opencv2/opencv.hpp>
#include <Eigen/Dense>

using namespace std;
using namespace cv;
using PointT = pcl::PointXYZ;
using PointCloudT = pcl::PointCloud<PointT>;

/// 相机内参
struct CameraIntrinsics {
    float fx, fy, cx, cy;
};

/// 深度图 + RGB 转点云(带黑色背景剔除)
PointCloudT::Ptr imageToPointCloud(const Mat& rgb, const Mat& depth, const CameraIntrinsics& cam) {
    PointCloudT::Ptr cloud(new PointCloudT);

    for (int v = 0; v < rgb.rows; ++v) {
        for (int u = 0; u < rgb.cols; ++u) {
            Vec3b color = rgb.at<Vec3b>(v, u);
            float d = depth.at<unsigned short>(v, u) * 0.001f; // 假设单位 mm 转 m
            if (d <= 0.01 || (color[0] < 5 && color[1] < 5 && color[2] < 5)) continue; // 黑色背景

            float x = (u - cam.cx) * d / cam.fx;
            float y = (v - cam.cy) * d / cam.fy;
            float z = d;

            cloud->points.emplace_back(x, y, z);
        }
    }

    return cloud;
}

int main() {
    // 加载图像
    Mat rgb_top = imread("data/top_rgb.png");
    Mat depth_top = imread("data/top_depth.png", IMREAD_UNCHANGED);
    Mat rgb_front = imread("data/front_rgb.png");
    Mat depth_front = imread("data/front_depth.png", IMREAD_UNCHANGED);

    if (rgb_top.empty() || depth_top.empty() || rgb_front.empty() || depth_front.empty()) {
        cerr << "图像加载失败,请检查路径。" << endl;
        return -1;
    }

    // 相机内参(示例值)
    CameraIntrinsics cam = {525.0f, 525.0f, 319.5f, 239.5f};

    // Step 1: RGB-D 转点云
    PointCloudT::Ptr cloud_top = imageToPointCloud(rgb_top, depth_top, cam);
    PointCloudT::Ptr cloud_front = imageToPointCloud(rgb_front, depth_front, cam);

    // Step 2: 点云配准(假设外参已知,理想化状态)
    // 平视相机相对俯视相机的旋转 + 平移
    Eigen::Matrix4f extrinsic = Eigen::Matrix4f::Identity();
    extrinsic.block<3,3>(0,0) = Eigen::AngleAxisf(-M_PI/2, Eigen::Vector3f::UnitX()).toRotationMatrix();
    extrinsic(2,3) = 0.5f; // 举例,Z轴平移0.5m
    pcl::transformPointCloud(*cloud_front, *cloud_front, extrinsic);

    // Step 3: 合并点云
    PointCloudT::Ptr cloud_total(new PointCloudT);
    *cloud_total += *cloud_top;
    *cloud_total += *cloud_front;

    // Step 4: 边界框
    PointT minPt, maxPt;
    pcl::getMinMax3D(*cloud_total, minPt, maxPt);
    float L = maxPt.x - minPt.x;
    float W = maxPt.y - minPt.y;
    float H = maxPt.z - minPt.z;

    cout << "物体尺寸估计结果:" << endl;
    cout << "Length (X): " << L << " m" << endl;
    cout << "Width  (Y): " << W << " m" << endl;
    cout << "Height (Z): " << H << " m" << endl;

    // Step 5: 可视化
    pcl::visualization::PCLVisualizer::Ptr viewer(new pcl::visualization::PCLVisualizer("BBox Viewer"));
    viewer->setBackgroundColor(0, 0, 0);
    viewer->addPointCloud<PointT>(cloud_total, "merged");

    viewer->addCube(minPt.x, maxPt.x, minPt.y, maxPt.y, minPt.z, maxPt.z, 1, 0, 0, "AABB");
    viewer->setShapeRenderingProperties(pcl::visualization::PCL_VISUALIZER_REPRESENTATION,
                                        pcl::visualization::PCL_VISUALIZER_REPRESENTATION_WIREFRAME, "AABB");

    viewer->addCoordinateSystem(0.2);
    while (!viewer->wasStopped()) {
        viewer->spinOnce(100);
    }

    return 0;
}
🚀 构建 & 运行
cpp
mkdir build && cd build
cmake ..
make
./main
使用 ICP 自动估计外参(点云配准)
🧠 目标:
用 ICP(Iterative Closest Point)算法 自动估计两个视角点云之间的刚体变换(外参)。
✅ 替换步骤:
将原代码中的这段:
cpp
pcl::transformPointCloud(*cloud_front, *cloud_front, extrinsic);换成如下 ICP 自动估计:
cpp
#include <pcl/registration/icp.h>

// 配准 cloud_front 到 cloud_top
pcl::IterativeClosestPoint<PointT, PointT> icp;
icp.setInputSource(cloud_front);
icp.setInputTarget(cloud_top);

PointCloudT::Ptr aligned(new PointCloudT);
icp.align(*aligned);

if (icp.hasConverged()) {
    cout << "ICP converged, score = " << icp.getFitnessScore() << endl;
    Eigen::Matrix4f T_icp = icp.getFinalTransformation();
    cout << "Estimated transformation:\n" << T_icp << endl;
    cloud_front = aligned;
} else {
    cerr << "ICP did not converge!" << endl;
}
⚠️ 注意:
ICP 要求初始位姿大致接近才能收敛。
实际建议先用重心对齐/粗配准(FPFH + SAC-IA)后再用 ICP 精配准,尤其点云较稀疏时。
添加粗配准后的点云配准
✅ 替换步骤:
将原代码中的这段:
cpp
pcl::transformPointCloud(*cloud_front, *cloud_front, extrinsic);换成如下 ICP 自动估计:
cpp
void autoAlignPointCloud(pcl::PointCloud<pcl::PointXYZ>::Ptr source,
                         pcl::PointCloud<pcl::PointXYZ>::Ptr target) {
    using PointT = pcl::PointXYZ;
    using PointCloudT = pcl::PointCloud<PointT>;

    // Downsample
    pcl::VoxelGrid<PointT> voxel;
    voxel.setLeafSize(0.01f, 0.01f, 0.01f);

    PointCloudT::Ptr src_ds(new PointCloudT), tgt_ds(new PointCloudT);
    voxel.setInputCloud(source);
    voxel.filter(*src_ds);
    voxel.setInputCloud(target);
    voxel.filter(*tgt_ds);

    // Estimate normals
    pcl::NormalEstimation<PointT, pcl::Normal> ne;
    pcl::search::KdTree<PointT>::Ptr tree(new pcl::search::KdTree<PointT>());
    ne.setSearchMethod(tree);
    ne.setRadiusSearch(0.05);

    pcl::PointCloud<pcl::Normal>::Ptr normals_src(new pcl::PointCloud<pcl::Normal>);
    pcl::PointCloud<pcl::Normal>::Ptr normals_tgt(new pcl::PointCloud<pcl::Normal>);
    ne.setInputCloud(src_ds);
    ne.compute(*normals_src);
    ne.setInputCloud(tgt_ds);
    ne.compute(*normals_tgt);

    // Compute FPFH
    pcl::FPFHEstimation<PointT, pcl::Normal, pcl::FPFHSignature33> fpfh;
    fpfh.setSearchMethod(tree);
    fpfh.setRadiusSearch(0.05);

    pcl::PointCloud<pcl::FPFHSignature33>::Ptr fpfh_src(new pcl::PointCloud<pcl::FPFHSignature33>);
    pcl::PointCloud<pcl::FPFHSignature33>::Ptr fpfh_tgt(new pcl::PointCloud<pcl::FPFHSignature33>);

    fpfh.setInputCloud(src_ds);
    fpfh.setInputNormals(normals_src);
    fpfh.compute(*fpfh_src);

    fpfh.setInputCloud(tgt_ds);
    fpfh.setInputNormals(normals_tgt);
    fpfh.compute(*fpfh_tgt);

    // SAC-IA
    pcl::SampleConsensusPrerejective<PointT, PointT, pcl::FPFHSignature33> sac;
    sac.setInputSource(src_ds);
    sac.setSourceFeatures(fpfh_src);
    sac.setInputTarget(tgt_ds);
    sac.setTargetFeatures(fpfh_tgt);
    sac.setMaximumIterations(5000);
    sac.setNumberOfSamples(3);
    sac.setCorrespondenceRandomness(5);
    sac.setSimilarityThreshold(0.9f);
    sac.setMaxCorrespondenceDistance(0.05f);
    sac.setInlierFraction(0.25f);

    PointCloudT::Ptr sac_aligned(new PointCloudT);
    std::cout << "[INFO] Running SAC-IA..." << std::endl;
    sac.align(*sac_aligned);

    if (!sac.hasConverged()) {
        std::cerr << "[ERROR] SAC-IA failed!" << std::endl;
        return;
    }

    // ICP refinement
    pcl::IterativeClosestPoint<PointT, PointT> icp;
    icp.setInputSource(sac_aligned);
    icp.setInputTarget(tgt_ds);
    icp.setMaximumIterations(50);
    icp.setMaxCorrespondenceDistance(0.02);

    PointCloudT::Ptr icp_aligned(new PointCloudT);
    std::cout << "[INFO] Refining with ICP..." << std::endl;
    icp.align(*icp_aligned);

    if (!icp.hasConverged()) {
        std::cerr << "[ERROR] ICP failed!" << std::endl;
        return;
    }

    // 将变换应用于原始(高分辨率)source 点云
    Eigen::Matrix4f final_transform = icp.getFinalTransformation() * sac.getFinalTransformation();
    pcl::transformPointCloud(*source, *source, final_transform);

    std::cout << "[OK] Auto-alignment complete." << std::endl;
}
使用 pcl::MomentOfInertiaEstimation 获取姿态角(OBB)
如你处理的物体是长方体 + 固定视角,不需 OBB;若拍摄真实物体或无法保证放置姿态,使用 OBB 可以得到更准确的"主方向尺寸"。
🧠 功能:
该模块用于估计点云的:
主方向(基于 PCA)
有向包围盒(Oriented Bounding Box,OBB)
转动惯量、主轴方向等
cpp
#include <pcl/features/moment_of_inertia_estimation.h>

pcl::MomentOfInertiaEstimation<PointT> feature_extractor;
feature_extractor.setInputCloud(cloud_total);
feature_extractor.compute();

PointT min_point_OBB, max_point_OBB, position_OBB;
Eigen::Matrix3f rotational_matrix_OBB;

feature_extractor.getOBB(min_point_OBB, max_point_OBB, position_OBB, rotational_matrix_OBB);

// 得到旋转矩阵和中心,可以用于显示或校正旋转角
还没更新完,累了,下次再写