1、问题概述?
DeepSeek炙手可热,可为工作中多个场景提供深度思考。
本文主要介绍springboot工程如何接入官方的api使用DeepSeek。
使用环境介绍:springboot3.3.3+DeepSeek-V3版本。
1.1、DeepSeek版本介绍
1、DeepSeek-R1
专注提升高级推理能力,采用强化学习技术,在数学推导、代码生成、逻辑推理等复杂任务中表现卓越。
支持动态调整推理路径,可生成完整解题步骤,2025年5月升级后实现与OpenAI o3的代码生成对标。
2、DeepSeek-V3
基于混合专家架构(MoE)的通用大模型,擅长多模态处理和长文本理解。
在文本生成、多语言翻译、日常对话等场景表现优异,工程创新性强
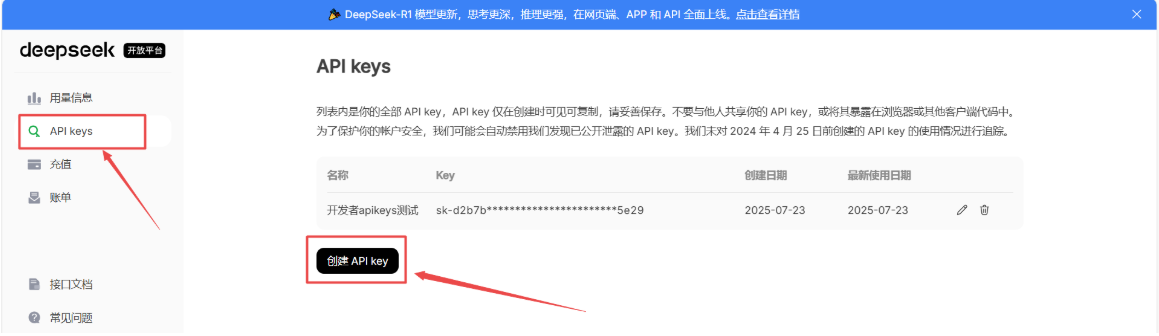
1.2、注册deepseek并生成apikeys
注册deepseek开放平台,并创建API key
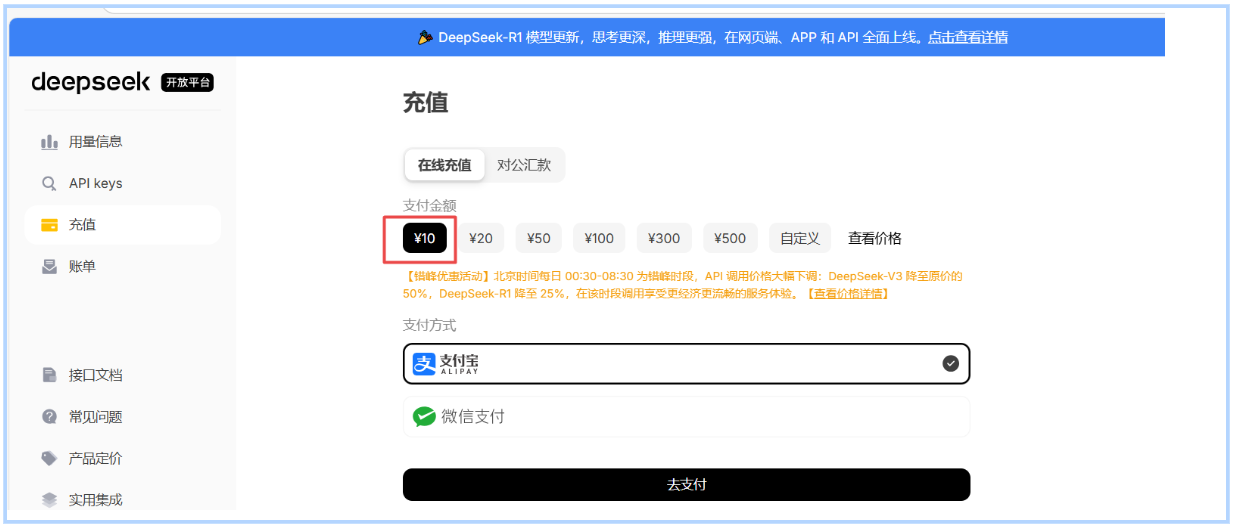
1.3、进行费用充值
充10块钱就够用了。
DeepSeek虽然是开源的,但是你如果使用官方提供的服务,是需要收费的,我测试了一下。
大概一个问题:0.005元。
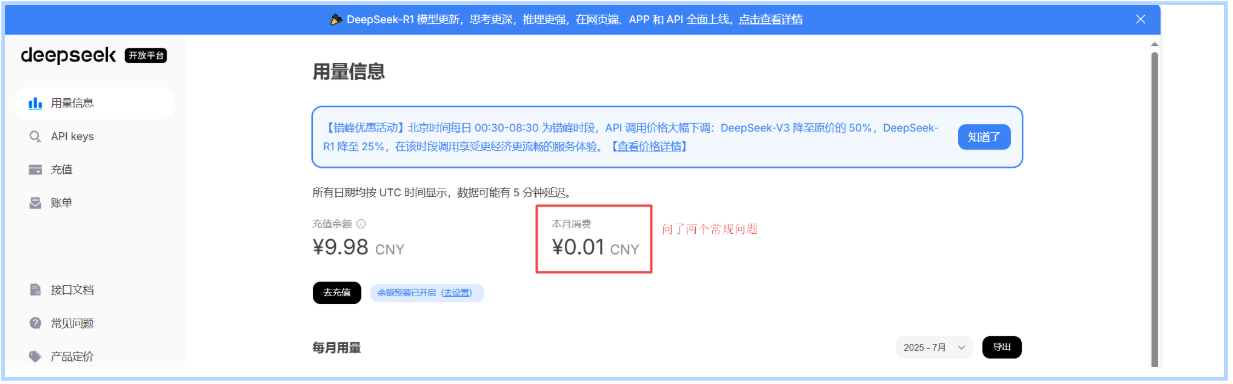
我的充值,问了两个问题,总费用和已用费用
2、创建springboot工程并导入相关配置
2.1、在pom.xml中导入包
重点包:spring-ai-openai-spring-boot-starter
<?xml version="1.0" encoding="UTF-8"?>
<project xmlns="http://maven.apache.org/POM/4.0.0" xmlns:xsi="http://www.w3.org/2001/XMLSchema-instance"
         xsi:schemaLocation="http://maven.apache.org/POM/4.0.0 https://maven.apache.org/xsd/maven-4.0.0.xsd">
    <modelVersion>4.0.0</modelVersion>
    <parent>
        <groupId>org.springframework.boot</groupId>
        <artifactId>spring-boot-starter-parent</artifactId>
        <version>3.3.3</version>
        <relativePath/> <!-- lookup parent from repository -->
    </parent>
    <groupId>com.deepseek</groupId>
    <artifactId>springbootdeepseek</artifactId>
    <version>0.0.1-SNAPSHOT</version>
    <packaging>war</packaging>
    <name>springbootdeepseek</name>
    <description>springbootdeepseek</description>
    <properties>
        <java.version>17</java.version>
        <spring-ai.version>1.0.0</spring-ai.version>
    </properties>
    <dependencies>
        <dependency>
            <groupId>org.springframework.boot</groupId>
            <artifactId>spring-boot-starter-web</artifactId>
        </dependency>
        <dependency>
            <groupId>cn.hutool</groupId>
            <artifactId>hutool-all</artifactId>
            <version>5.8.32</version>
        </dependency>
        <dependency>
            <groupId>group.springframework.ai</groupId>
            <artifactId>spring-ai-openai-spring-boot-starter</artifactId>
            <version>1.1.0</version>
        </dependency>

        <dependency>
            <groupId>org.projectlombok</groupId>
            <artifactId>lombok</artifactId>
            <optional>true</optional>
        </dependency>
        <dependency>
            <groupId>org.springframework.boot</groupId>
            <artifactId>spring-boot-starter-tomcat</artifactId>
            <scope>provided</scope>
        </dependency>
        <dependency>
            <groupId>org.springframework.boot</groupId>
            <artifactId>spring-boot-starter-test</artifactId>
            <scope>test</scope>
        </dependency>
    </dependencies>

    <build>
        <plugins>
            <plugin>
                <groupId>org.apache.maven.plugins</groupId>
                <artifactId>maven-compiler-plugin</artifactId>
                <configuration>
                    <annotationProcessorPaths>
                        <path>
                            <groupId>org.projectlombok</groupId>
                            <artifactId>lombok</artifactId>
                        </path>
                    </annotationProcessorPaths>
                </configuration>
            </plugin>
            <plugin>
                <groupId>org.springframework.boot</groupId>
                <artifactId>spring-boot-maven-plugin</artifactId>
                <configuration>
                    <excludes>
                        <exclude>
                            <groupId>org.projectlombok</groupId>
                            <artifactId>lombok</artifactId>
                        </exclude>
                    </excludes>
                </configuration>
            </plugin>
        </plugins>
    </build>

</project>
2.2、在application.yml文件中加入deepseek配置信息
* 出于与 OpenAI 兼容考虑,您也可以将 base_url 设置为 https://api.deepseek.com/v1 来使用,但注意,此处 v1 与模型版本无关。
* deepseek-chat 模型指向 DeepSeek-V3-0324, 通过指定 model='deepseek-chat' 调用。
* deepseek-reasoner 模型指向 DeepSeek-R1-0528, 通过指定 model='deepseek-reasoner' 调用。
spring:
  application:
    name: springbootdeepseek
  ai:
    openai:
      api-key: sk-d2b7beb688194a6889073b3ee4745e29
      base-url: https://api.deepseek.com
      chat:
        options:
          model: deepseek-chat
          temperature: 1.5
server:
  port: 80
2.3、创建对话服务层
@Service
public class DeepSeekChatService{

    @Resource
    private OpenAiChatModel chatModel;

    public String chat(String message) {
        return chatModel.call(message);
    }


}
2.4、创建对话控制层
@Controller
@RequestMapping("/dpai")
public class DeepSeekController {
@Resource
private DeepSeekChatService deepSeekChatService;
@ResponseBody
@RequestMapping(value = "/chat", produces = MediaType.APPLICATION_JSON_VALUE)
public String chat(@RequestParam(value = "message") String message) {
String msg=deepSeekChatService.chat(message);
return msg;
}
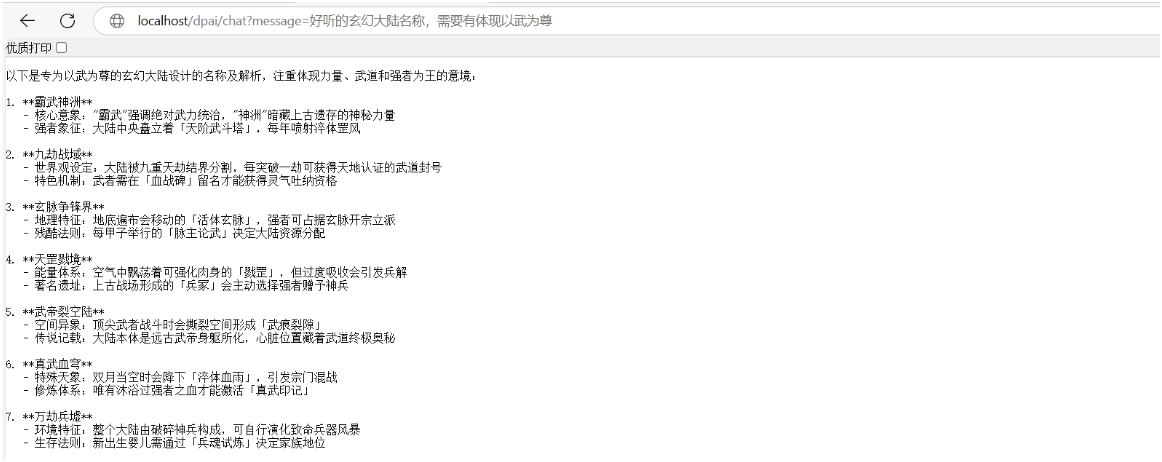
}2.5、程序访问
会话的内容可能会非常的多,建议使用post请求,本文案例方便测试,使用了get请求。
首次编写时间: 2025/7/23 14:54:47